When installing VirtualBox on Mac High Sierra, the ?Installation Failed? error can be quite stubborn. Let?s fix that.
Introduction
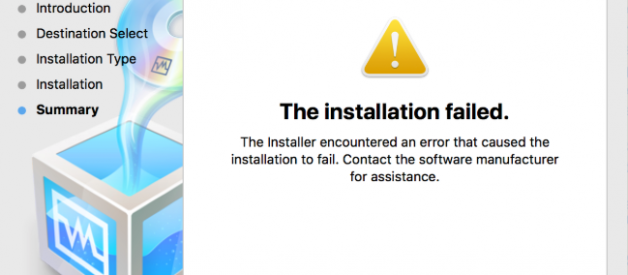
A colleague had some trouble installing VirtualBox on macOS High Sierra v10.13.5. Here?s the error he kept encountering:
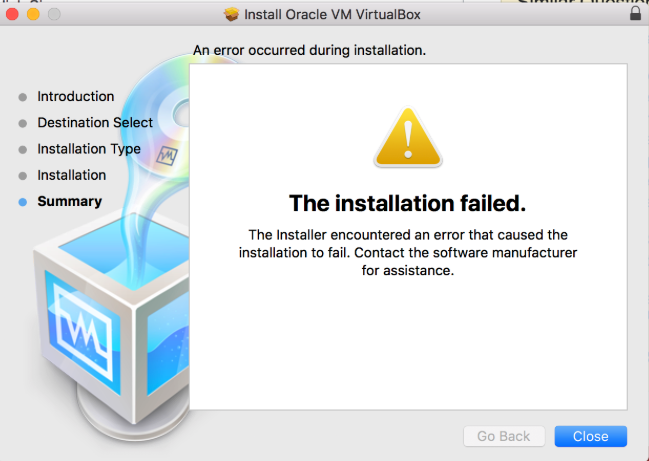 ?The installer encountered an error that caused the installation to fail? ? a very helpful error message
We scoured the web for solutions before finally figuring it out.
Finding a solution wasn?t as easy as we?d hoped, so hopefully our findings below will help out anyone who ran into the same stubborn error that we did.
Check this first
- Open up System Preferences
- Click on theSecurity & Privacy icon
- Make sure Allow apps downloaded from: App store and identified developers is checked.
It should look like this:
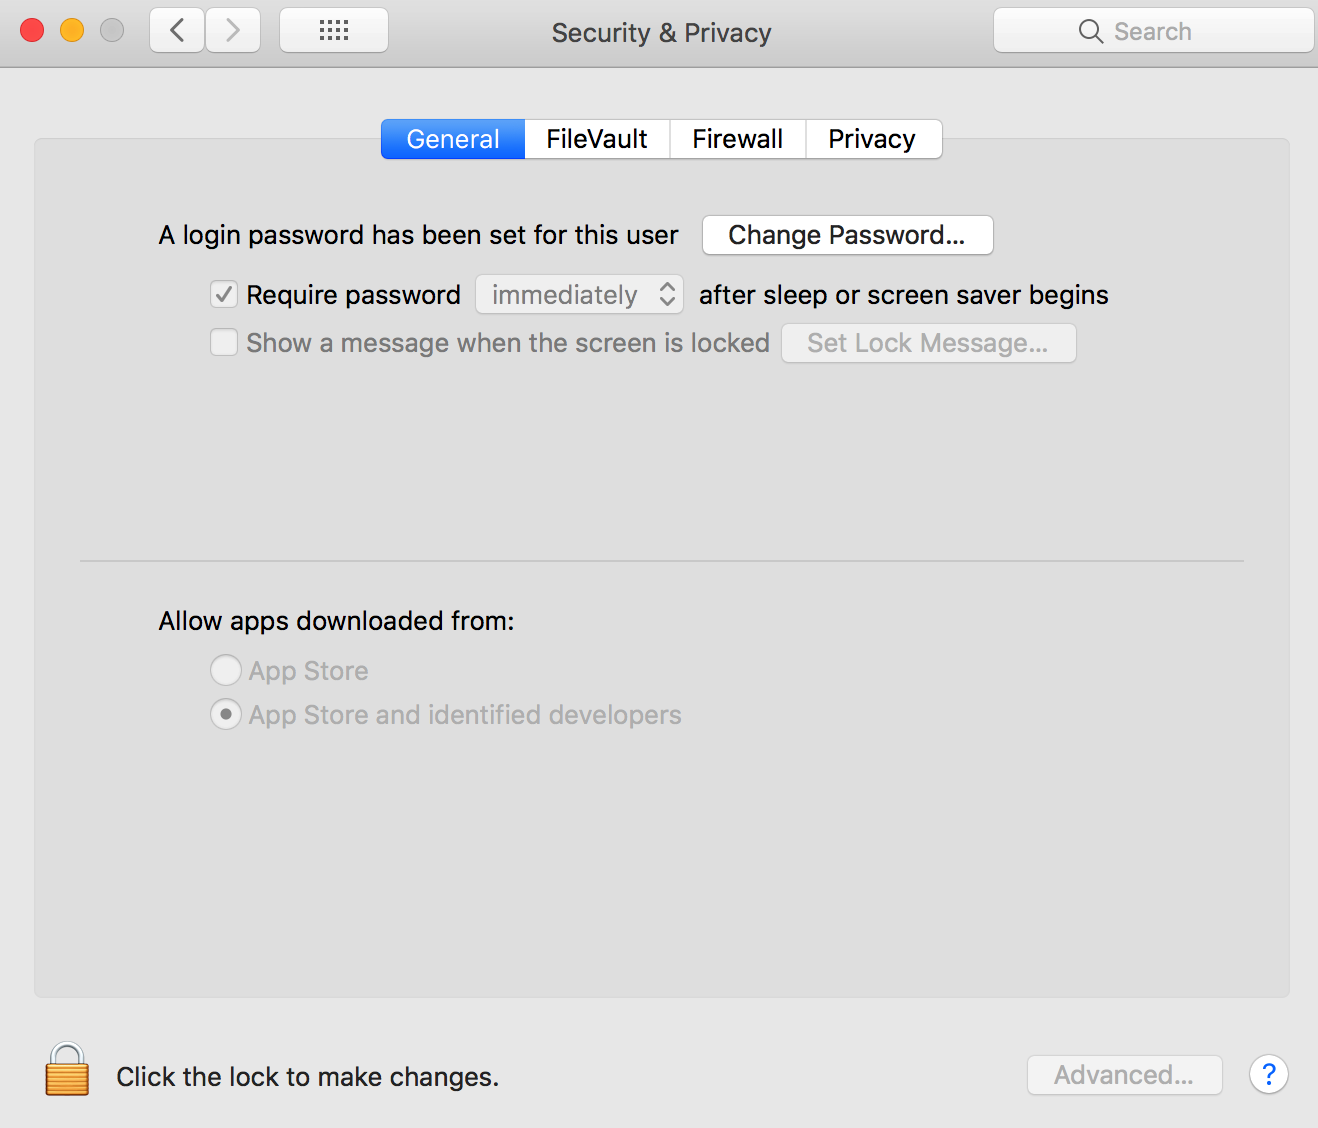 Make sure ?App store and identified developers? is checked
If your screen doesn?t look like that:
- Click the lock icon in the bottom left of the window
- Enter your Mac password
- Click App store and identified developers
- Try to install VirtualBox again
If you get the same error, try solution 1.
Solution #1 ? Quick and easy
If you?re lucky, this solution will work first time.
- Open up System Preferences
- Click on theSecurity & Privacy icon
- Hopefully you?ll see a message saying System software from developer ?Oracle America, Inc.? was blocked from loading.
- If you do see the message, click the lock icon in the bottom left of the window
- Enter your Mac password
- Then click the Allow button
Done! Now open up the VirtualBox installer again and it should work fine.
If only it were always this simple? If the Allow button didn?t come up for you, try out the next one.
Solution #2 ? Back to basics
Sometimes macOS needs a good restart before deciding to show the Allow button. So here?s what we?ll do:
- Restart your Mac
- Open up the VirtualBox installer
- Go through the installer until you get to the screen with the Change Install Location? and Install buttons. Do not click install (yet)
- Open up System Preferences
- Click on theSecurity & Privacy icon
- Hopefully you?ll see a message saying System software from developer ?Oracle America, Inc.? was blocked from loading.
- If you do see the message, click the lock icon in the bottom left of the window
- Enter your Mac password
- Then click the Allow button
Done! If the message and the Allow button still didn?t appear, we?ll have to resort to drastic measures with solution #3:
Solution #3 ? Force macOS to let us install VirtualBox
To force macOS to let us install VirtualBox, we?ll need to use Terminal to open up our security preferences temporarily:
- Do CMD + SPACE to open up Spotlight
- Type inTerminal and press ENTER to open up Terminal
- Now let?s temporarily disable Mac Gatekeeper. Type the following into Terminal:sudo spctl –master-disable
- Press ENTER
- Now type in the password for your Mac account. Don?t worry if it looks like your password isn?t being typed: Mac hides the input for security
- Press ENTER
Done! Next we need to restart System Preferences:
- Make sure System Preferences is open
- Hold down the Option key ? and right-click System Preferences in the Dock
- Click Force Quit
- Now open up System Preferences again
- Click on theSecurity & Privacy icon
Below Allow apps downloaded from: you should now see a third option which is already selected: Anywhere
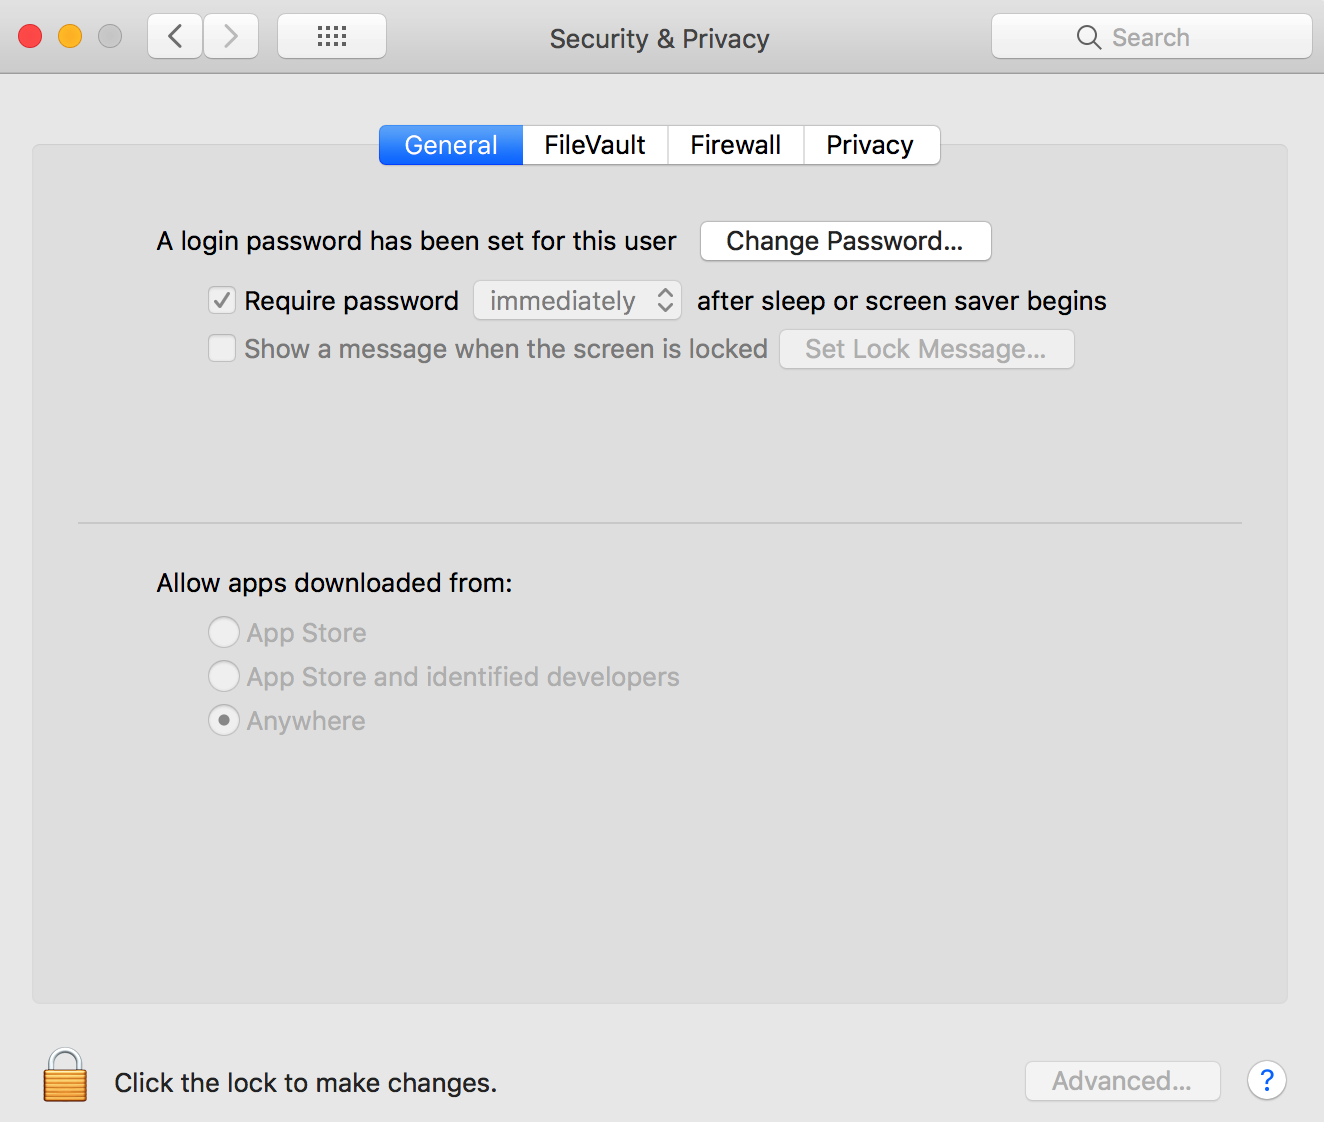 A third option has appeared: Anywhere
Great! Now one of either two things should happen:
- The Allow button has already appeared: just click Allow and install VirtualBox. Everything should work smoothly
- The Allow button has not appeared yet: don?t worry. Try to install VirtualBox. It should just work or you should see the Allow button appear.
Warning: we have not re-enabled app installation security yet. Make sure to complete the app installation security section below so your Mac isn?t left unprotected!
If you don?t see the third option ?Anywhere? appear
You may need to run the sudo spctl ? master-disable command again and then restart System Preferences. One person online said it took 5 attempts to get the command to work for them. Keep trying.
Worst case scenario: restart your Mac and try again.
?? Important: Re-enabling app installation security on your Mac
If you?ve attempted Solution #3, you must follow this section to ensure your Mac is secure:
- Open up Terminal again
- Enter the command below:sudo spctl –master-enable
- Press ENTER
- Now type in the password for your Mac account. Don?t worry if it looks like your password isn?t being typed: Mac hides the input for security
- Press ENTER
Done! Now you should be able to install VirtualBox fine and your Mac is secure!
If you want to check that it worked, you?ll have to restart System Preferences again. Afterwards, you should no longer see the Anywhere option in Security & Privacy.
I hope this has helped! If you have any trouble with this, please post in the comments below. I?ll do my best to help.
? 2019 Update: a couple of things to try if you?re stuck
If you?ve tried all of the above but VirtualBox still refuses to install, the kind commenters Leo Shaw and Elias Politakis have got your back.
They?ve posted a couple of extra fixes in the comments below:
- Have a look here if you can?t click the ?Allow? button
- Read through the information here if you?re using a VNC connection
Good luck (and happy virtualbox-ing)! 🙂
