It doesn?t take much to stream yourself or your desktop game on YouTube Live. Let?s break down the simple steps to get it done using OBS 16.2(Mac). *Finding your stream key on YouTube and plugging it in to OBS will be a similar process on most versions of OBS.
Download OBS (Open Broadcaster Software) (link). Set up your scene in OBS. Choose your source(s) and camera(s). Now let?s dig into the Settings in OBS. Click the Settings button on the lower right.
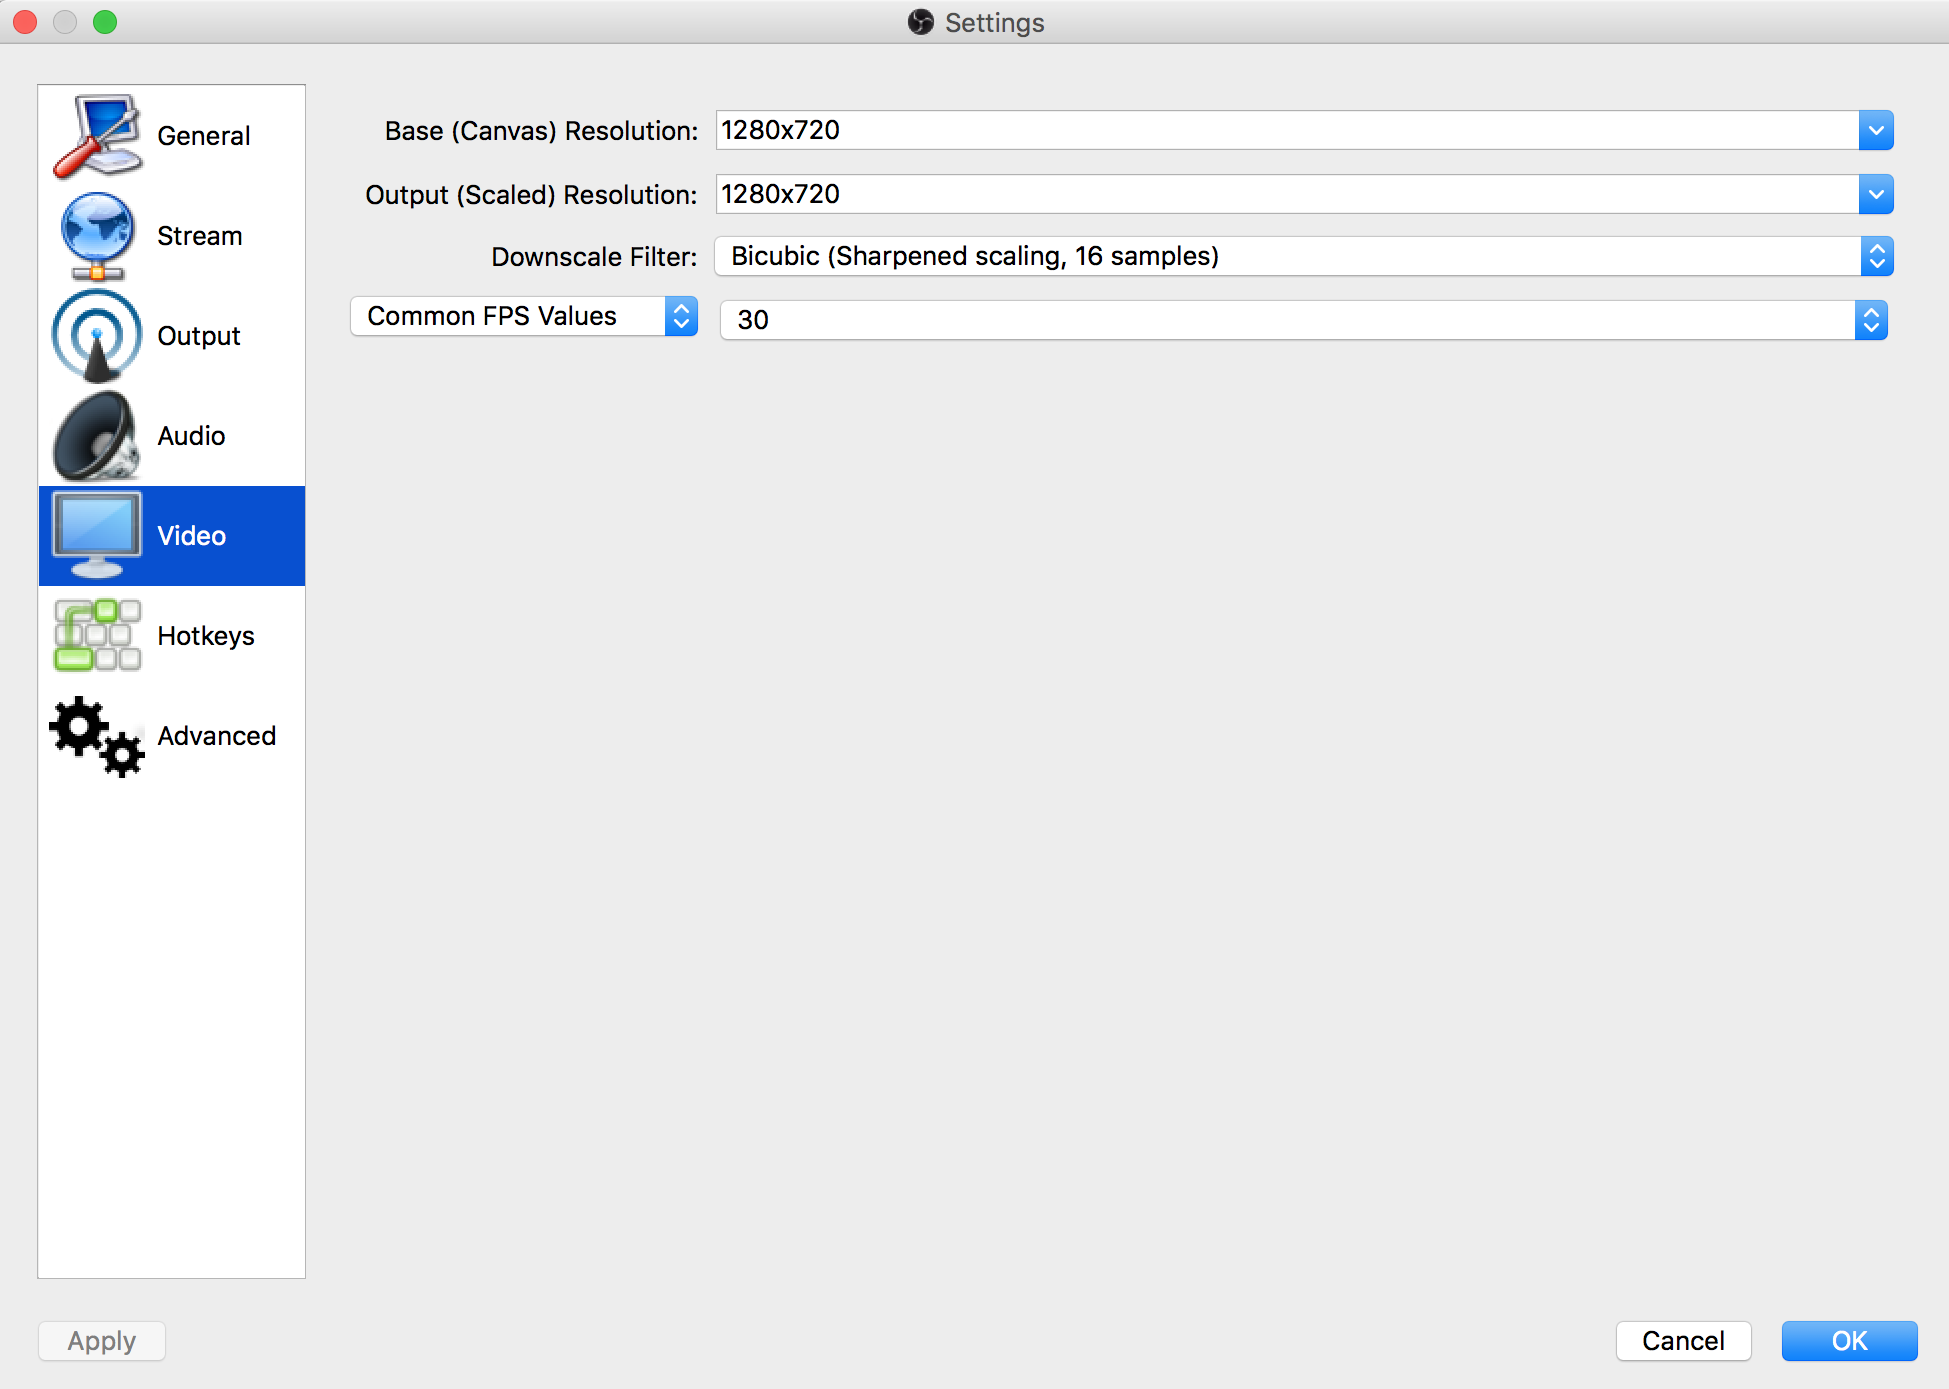
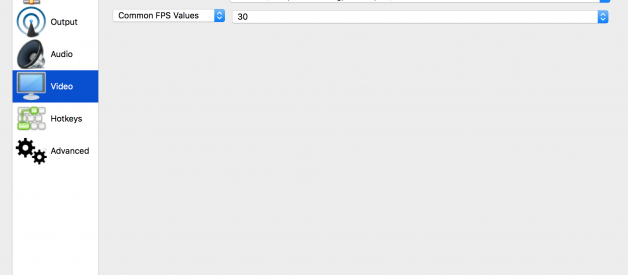
Check your video size in the Video Tab. 1280720 is ideal for smooth streaming on YouTube. 30fps works well if you have a live camera, but feel free to do 20 if you?re doing a screencast.
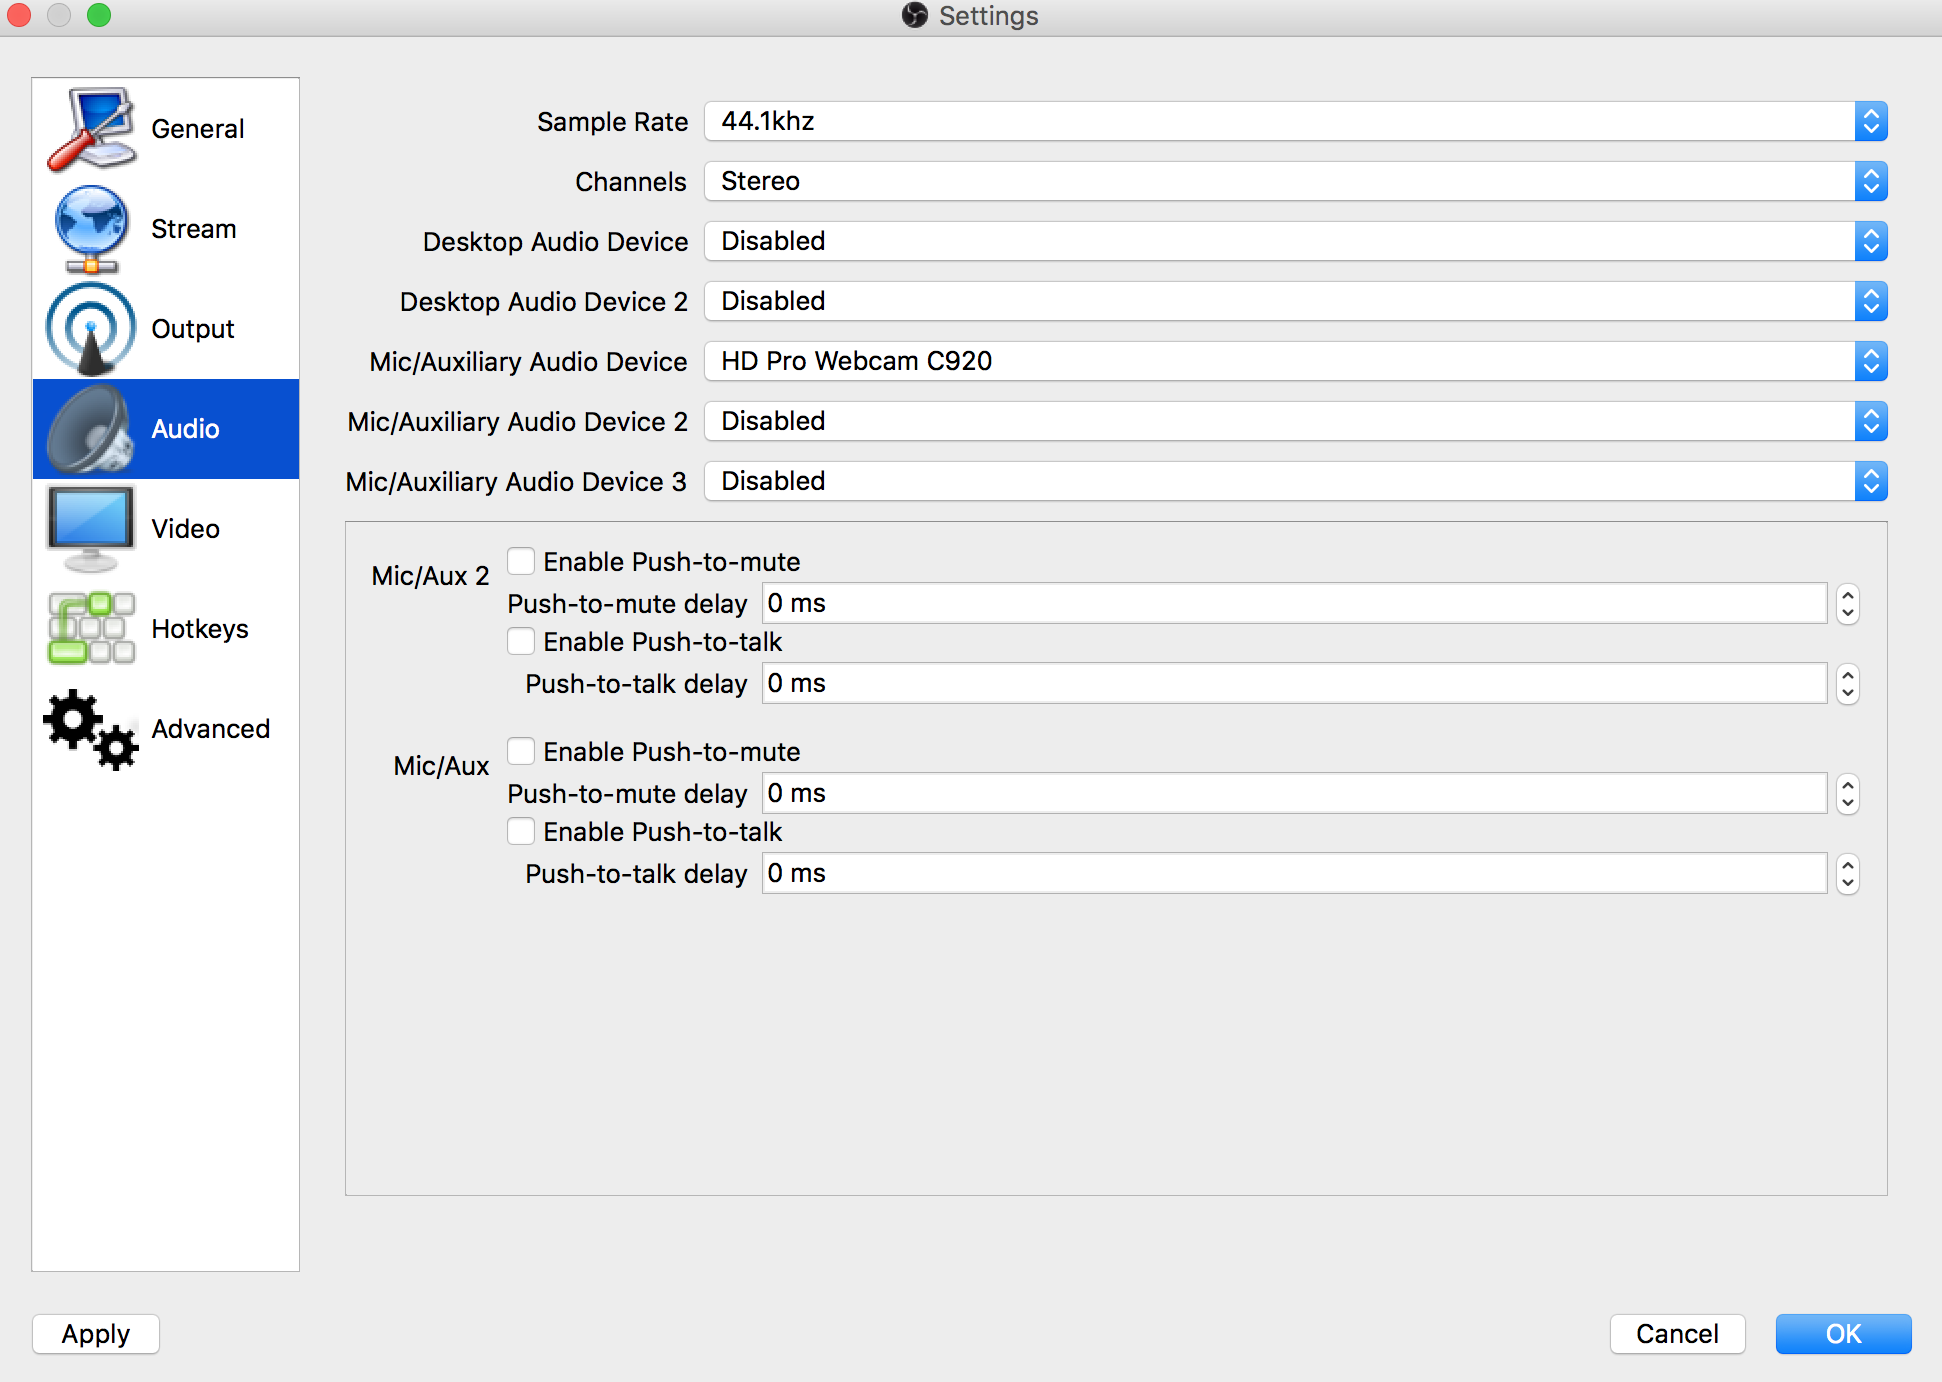
Check your audio setup on the Audio Tab. Set your Mic/Auxiliary Audio Device to your mic.
Now on to the meat ? the Output Tab and the Stream Tab.
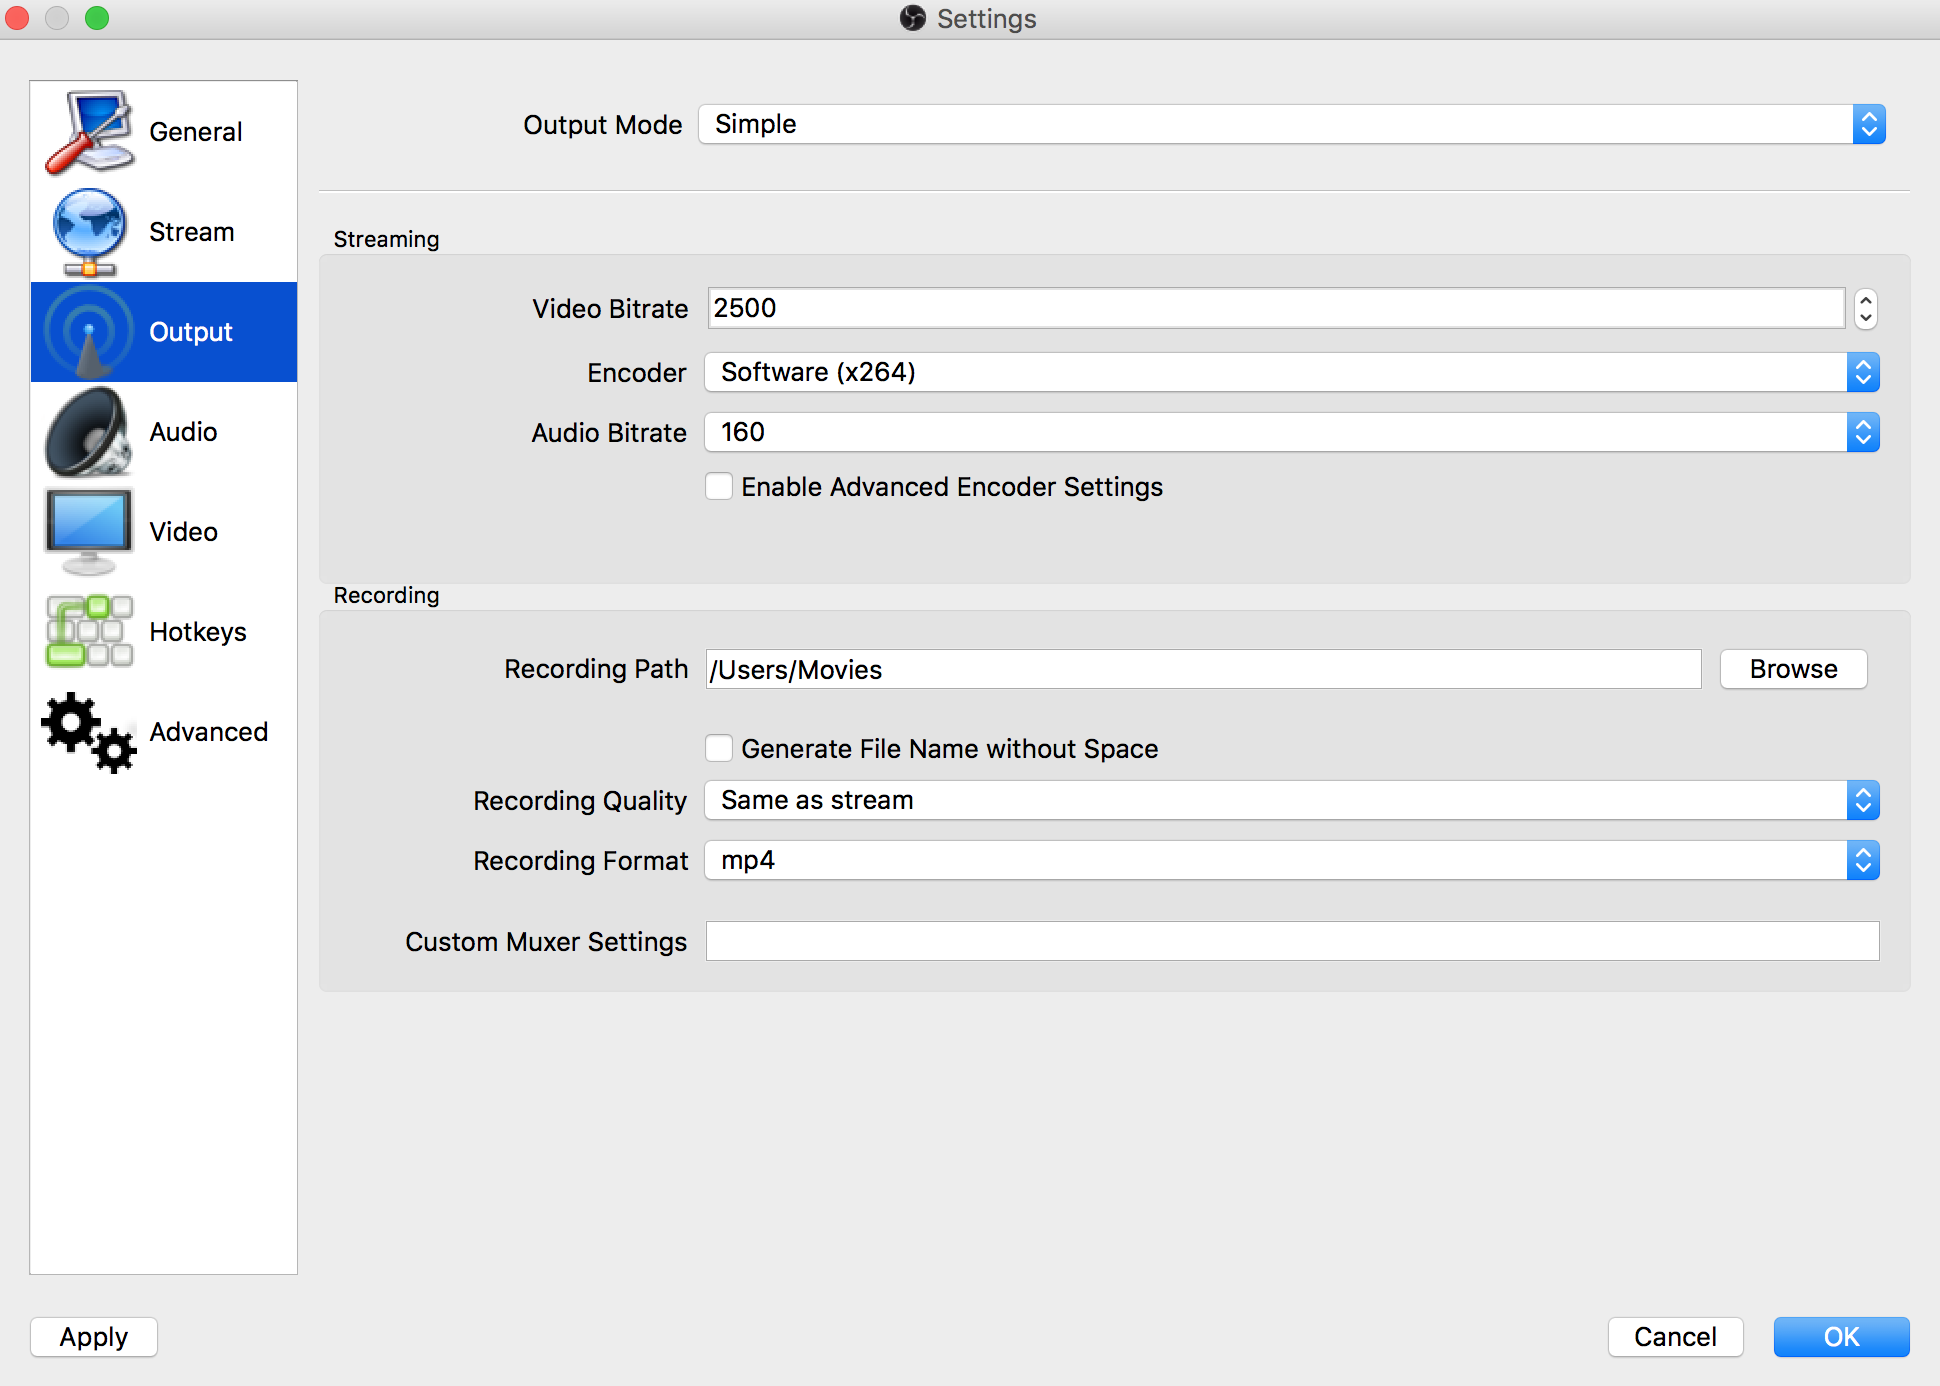
In Output set your Video Bitrate to about 2500 kbps. (YouTube recommends setting your kbps between 1500?4000 kbps if you?re pushing 720p) Set your Audio Bitrate to 160 and choose your Recording Format if you plan on keeping a hardcopy of the stream on your local hard drive.
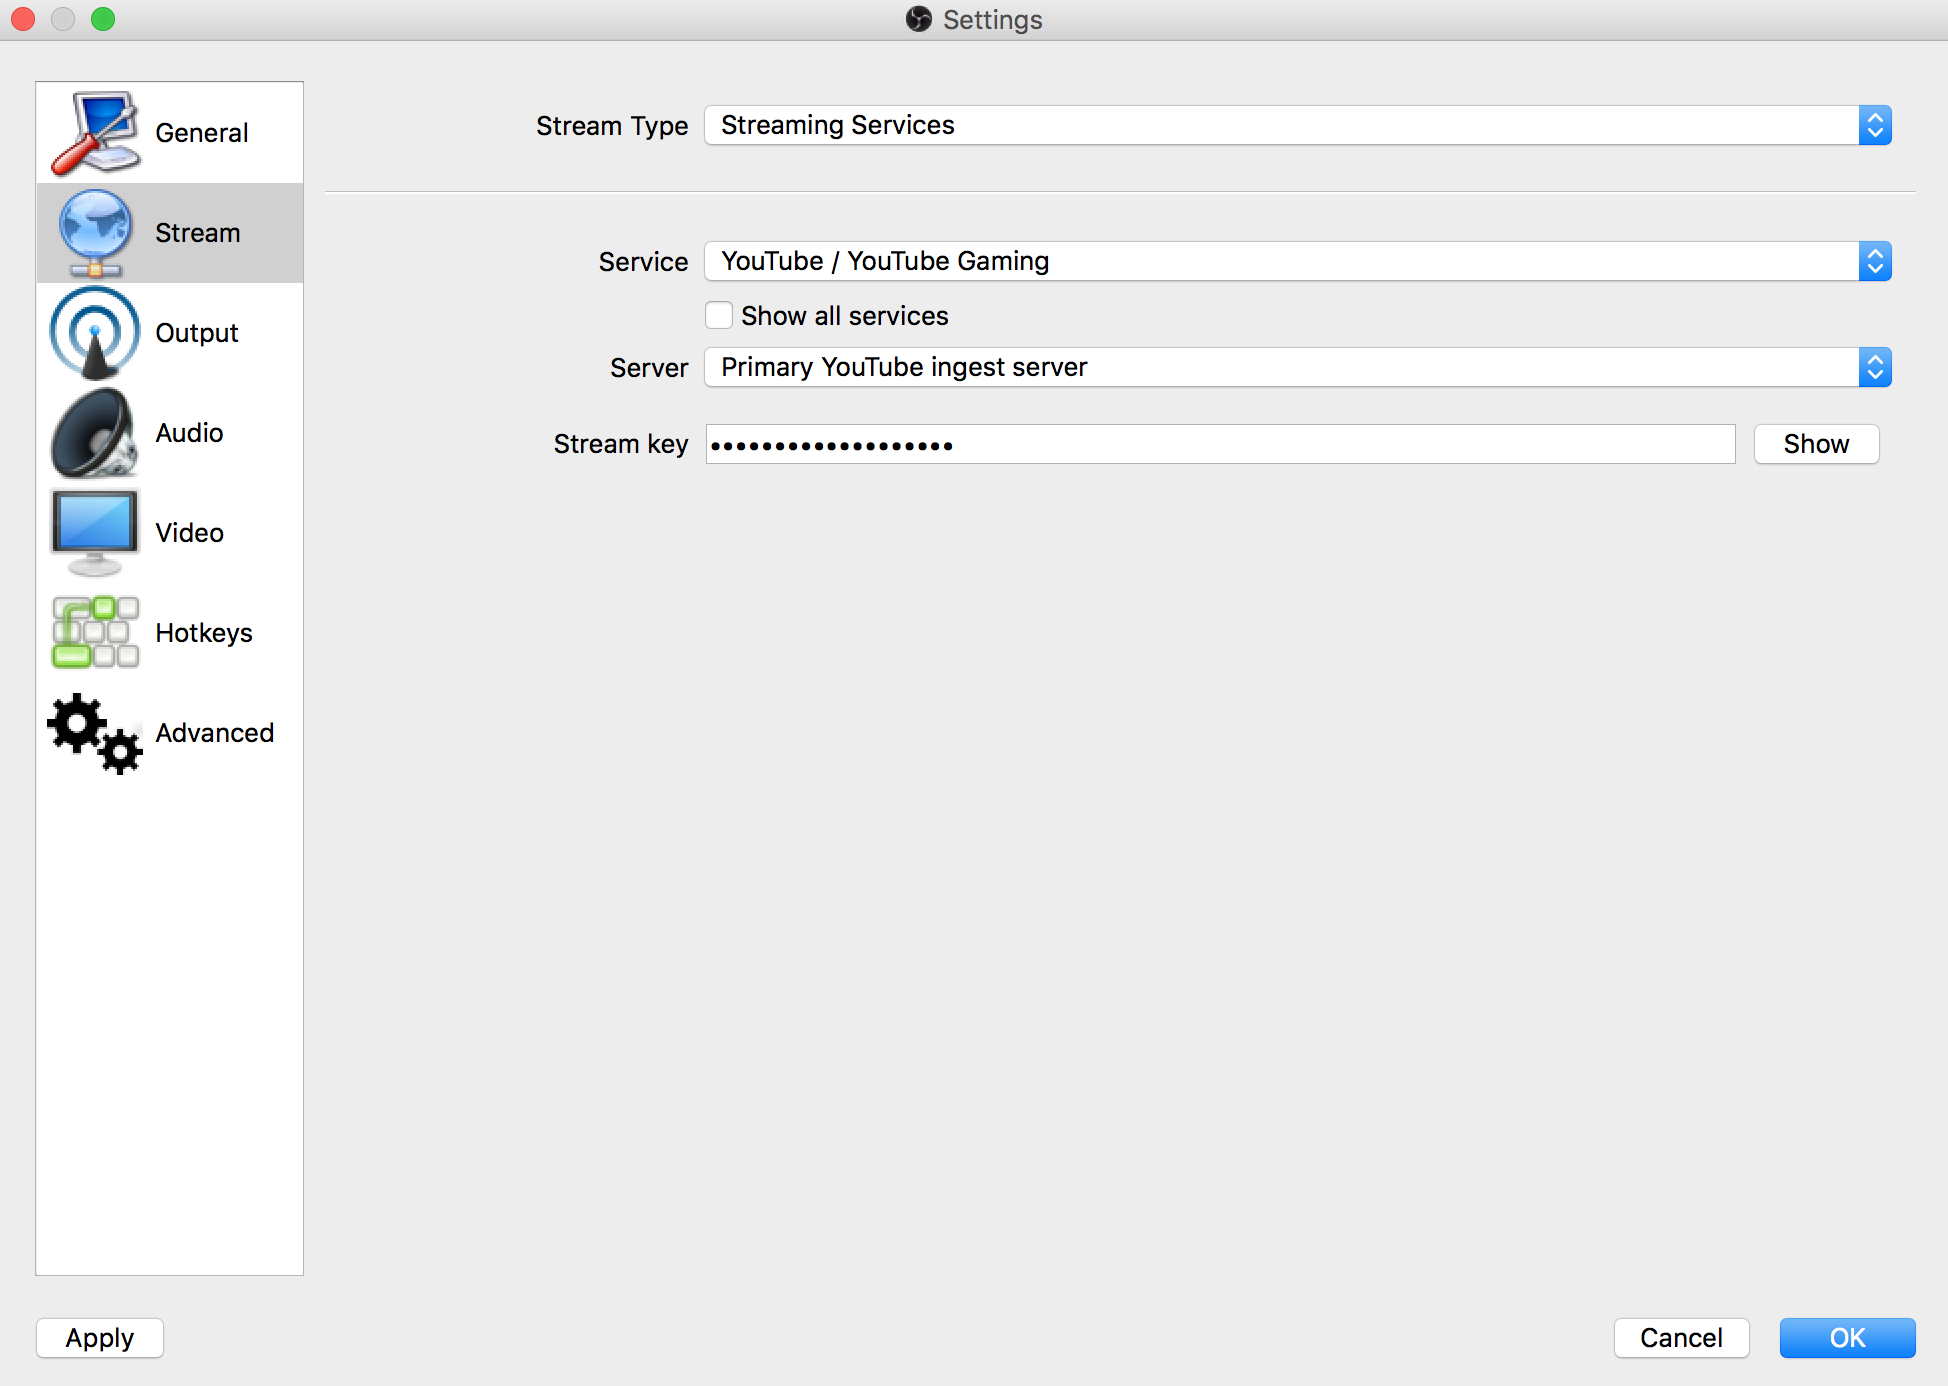
In the Stream Tab set Stream Type to ?Streaming Services?, then set the Service to ?YouTube/ YouTube Gaming?. Next to Server, choose ?Primary YouTube ingest server.??
Find your Stream Key on YouTube. To do this log into your YouTube account.
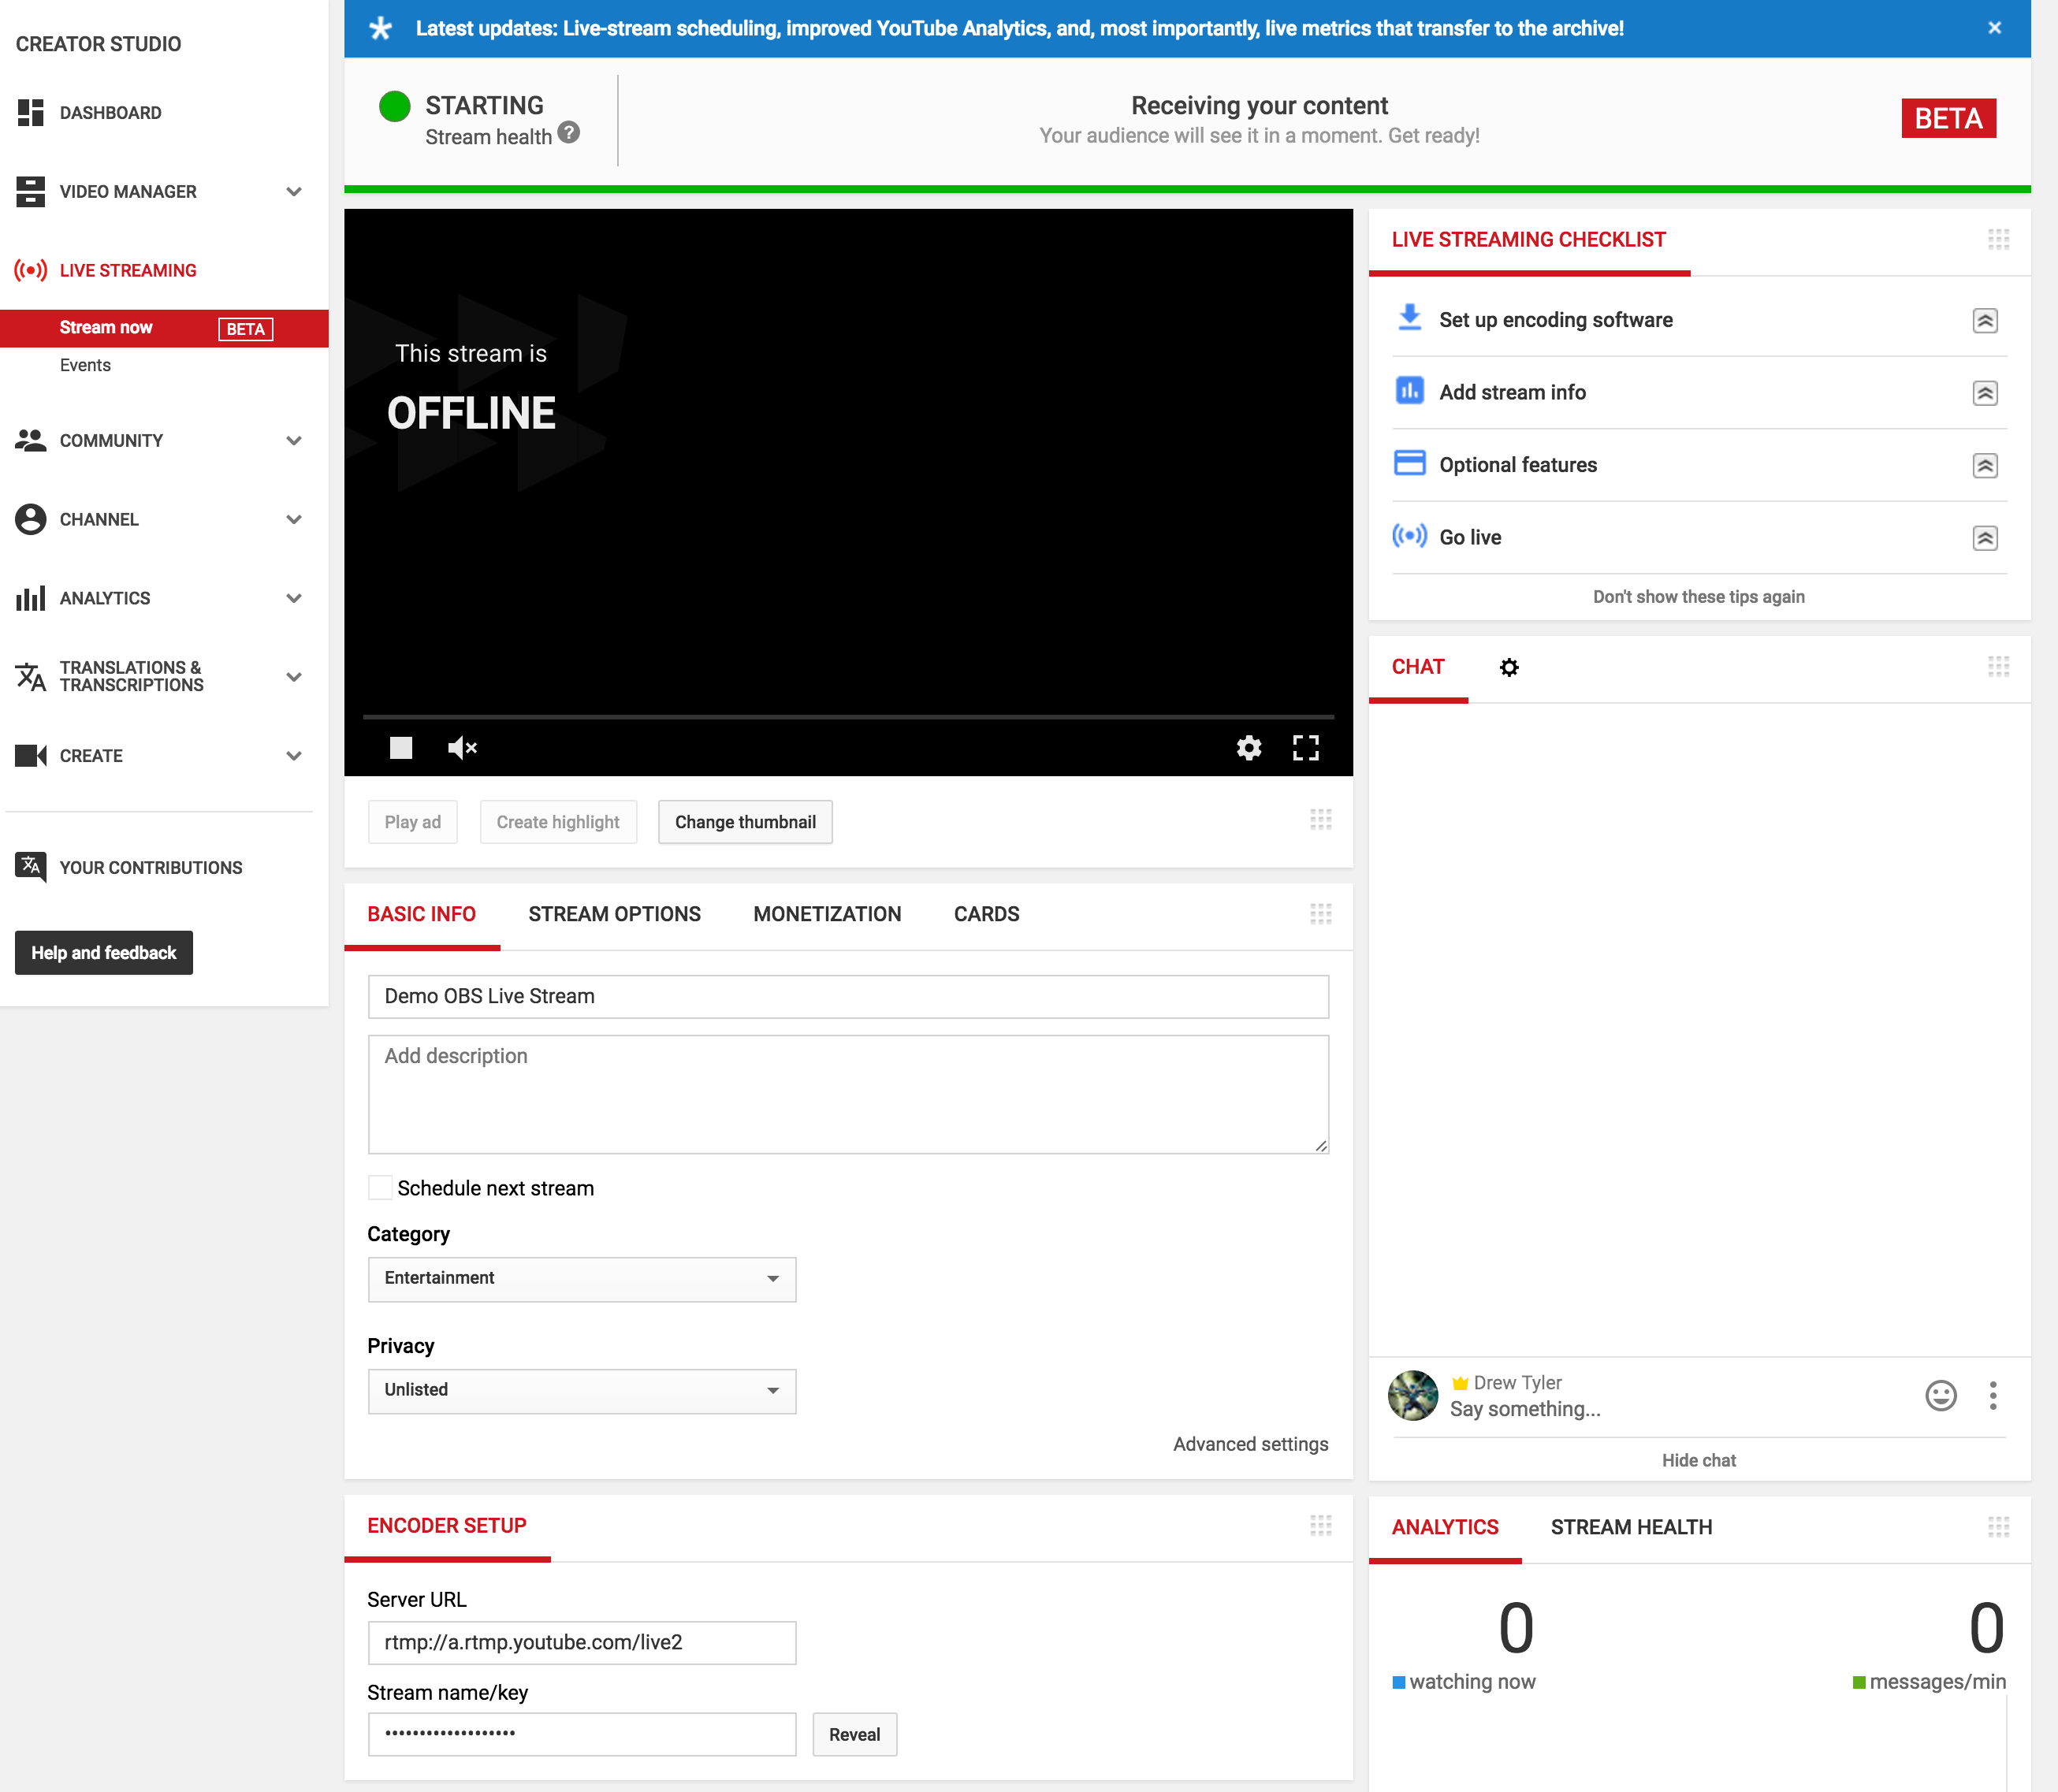
Go to your Creator Studio.
Under the left menu tab click on the Live Streaming section and select Stream Now. Now?s a good time to set your Title and Description.
At the bottom of the page you?ll see Encoder Setup. Copy the characters in the box labeled Stream Name/Key. You?ll need to hit the reveal button first to be able to see the Key. Stream Keys are very powerful, so always keep them secret.
Back in OBS copy that string of characters into the Stream Tab and hit OK. That?s it! Whatever you have in your OBS window will be pushed to YouTube Live when you hit the Start Streaming button on the right.
