Installing a DIY pop-up sprinkler system with Alexa voice control
?Alexa, water the garden for 10 minutes??is now the amount of effort it requires to water the garden. I think the use of artificial intelligence for speech recognition is a great way to help automate many routine domestic tasks, including ensuring your garden remains green all year round. This blogpost may interest you if you are an ambitious gardener and interested in technology, as it explains how to install your own DIY pop-up sprinkler system in order to automate your garden watering using Alexa or Google Home voice control. Below is my 7 step guide on how to install your own DIY pop-up sprinkler system based on my very own DIY project. I hope that you find this blog post both helpful and informative for your own projects 🙂
1. measure your water pressure and flow rate
I recommend that you start your DIY project by measuring the water pressure and volumetric flow rate from the water source you intend to use. These measurements are important pieces of information as they will indicate which sprinklers and system design will best suit your available water source. It is important that you do not skip this step as you will require these measurements to help with future calculations. Too little water pressure or flow and your sprinklers will not pop-up or have poor coverage. Too much water pressure or flow and your sprinklers may mist up and fail to achieve even coverage. Thankfully, both the water pressure and flow rate are easy to measure with limited cost.
Water pressure can be measured in units of BAR, kPA, water column meters, Atmospheres and PSI? where 1 BAR = 100 kPA = 10m water column = 0,987 Atmospheres = 14 PSI
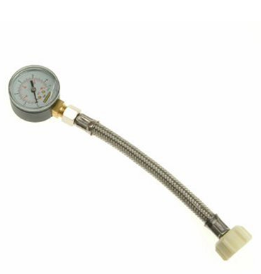
To measure your water pressure, fit a pressure gauge onto your outdoor tap or water supply and then open to achieve maximum water flow. This will measure your static water pressure. Whilst doing this, make sure that all other taps in your home are turned off. It is also helpful to measure pressure at your anticipated watering times i.e. first thing in the morning and late evening, as your water pressure can fluctuate throughout the day. I purchased a basic mains water pressure gauge for 20 which was adequate. Typically, a house is running happily with a 2 bar feed from the mains line, although pressure can vary from 1 bar to 3.5 bar depending on your mains connection and plumbing.
The flow rate is the quantity of water passing through a point during a specific unit of time. It is typically measured in litres per minute (l/m) or meters cubed per hour (m3/h)
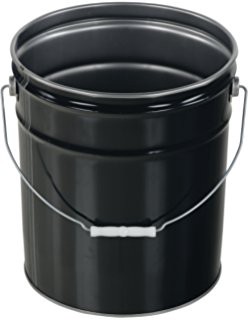
To measure your flow rate, you can use an empty 1 litre Coca-Cola bottle, 10-litre bucket or similar. Simply time how long it takes for your water source to fill up the container and then convert into the unit size you require. For example, if a 10-litre bucket takes 20 seconds to fill up, the flow rate is 30 litres/m. An intensely flowing garden tap could be delivering approximately 17?20 litres/m. Now that you have measured your water pressure and flow rate, you now understand your base-line water source constraints in order to design your sprinkler system. For example, you may need to increase water pressure or be mindful of the type of sprinklers you select based on the flow rate.
2. design your system and estimate it?s water source requirements in terms of pressure and flow-rate
It can be helpful to prepare a scale plan of your garden to help estimate the overall watering area as well as start to plan where you might place your sprinklers and the length of piping you might need to connect your sprinkler system. Sprinkler manufacturers typically indicate the area covered by their sprinklers in metres, therefore having an estimate of the area you are planning to water can be useful. During the design on your system, it?s important to keep in mind the pressure and flow rate you are working with, although these can be increased or decreased using pressure pumps and water tanks in order to meet your exact requirements.
2a. choosing a sprinkler
You will obviously need to choose a sprinkler appropriate to your watering needs and budget. The right sprinkler will depend on the overall size and shape of your garden as well as the available water pressure and flow rate from your water source. Prices for sprinklers can range from $3 up to $50 per unit depending on the specification, quality and manufacturer. Companies such as Rainbird, and Claber, Gardena, are specialist manufactures with a solid reputation for delivering high-quality products. These brands are usually a good place to start your search for the right sprinklers.
Four important considerations when choosing sprinklers include the water pressure and flow input requirements, coverage arch (e.g. 360) and coverage radius i.e the watering distance?
For my system, I have chosen sprinklers from the Claber Colibri Micro-sprinkler range, as they operate at a lower water pressure and flow rate as well as offering great value for money. These sprinklers are specifically designed for small to medium domestic DIY systems and overall, I think they are excellent value for money and would recommend them to others. They operate at a minimum pressure of 1.5 bar and a flow rate of 4 litres/m, 2.9 litres/m or 1.7 litres/m depending on the coverage arch ? 360, 180 or 90. These input requirements make them well-suited to the average domestic water source without the need to adjust water pressure using pumps or flow rates using water tanks, reducing the complexity and cost of your DIY system.
360 Degree Claber Colibri Micro-sprinkler
The Claber Colibri pop-up sprinkler is an underground sprinkler for extending the Colibri lawn pop-up irrigation set.
www.amazon.co.uk
180 Degree Claber Colibri Micro-sprinkler
The Claber Colibri pop-up sprinkler is an underground sprinkler for extending the Colibri lawn pop-up irrigation set.
www.amazon.co.uk
Starter DIY Sprinkler Kit ? Claber Colibri System
A starter kit for an underground watering system for 50 m2 garden, complete with Colibri System micro-sprinklers. The?
www.amazon.co.uk
2b. sprinkler placement
For the best results, it is recommended to adopt what is called ?head-to-head? sprinkler placement design. A common design flaw of DIY pop-up sprinkler systems is the lack of this head-to-head design as this can result in dry-spots, under-watering or even over-watering. One of the features of circular or radial sprinklers, which is important to understand, is that the area covered is not watered evenly and less water is typically delivered as you move away from the sprinkler head. Therefore, to achieve even precipitation over an area, consider adding a return sprinkler, which just touches the outer radius of the first. It is recommended that you position 90 sprinklers in the corners, 180 sprinklers along the perimeter and the 360 sprinklers in open spaces.
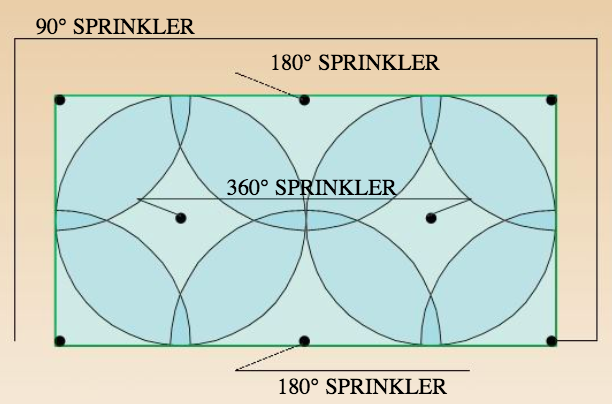 Example of effective sprinkler placement when using circular sprinklers
2c. sprinkler connection
Connecting your sprinklers with the appropriate piping is another important design consideration and a common flaw in DIY home irrigation installations. The use of incorrect pipe sizes, specifically pipes that are too narrow, can negatively impact on the performance of your sprinklers. For example, using narrow pipes (under 20mm diameter) over long distances may result in large pressure losses, resulting in a low watering radius or worse ? the gear drives (rotors) stop rotating due to insufficient pressure. This sort of pressure loss is known as ?friction loss? ? when water flows through a pipe, a certain amount of pressure is lost due to the friction between the water and pipe. Factors affecting the amount of friction loss include the diameter, length and material of the pipe, the water flow rate as well as temperature. The pipes diameter is a factor that you can easily control through your choice of piping. It can be tempting to undersize your pipes in order to save costs, but this could be a ?false economy? if you find that your system is not performing as expected. Calculating your anticipated friction losses can be an important exercise to carry out ? before purchasing components ? to avoid experiencing pressure related problems at a later point.
Generally, the further the distance the water has to travel the larger the pipe size you will require?the pressure loss in a 1/2′ pipe is 5 times higher than that in a 3/4′ pipe. You will loose roughly 10 PSI per 100 meters in a 1/2 inch poly pipe?
Some principles to help here include:
- Use the largest possible pipe diameter for your water feed and connecting sprinkler pipes. Smaller pipe diameters are accompanied by larger and significant pressure loss across the system.
- The greater the number of connections and constrictions, the greater the pressure losses will add up across your system. Where possible, reduce the number of connections and constrictions.
- Constrictions closer toward the start of your water pipes have a greater impact on pressure loss than constrictions closer to the sprinkler heads, therefore, keep constrictions are close to the sprinkler heads as possible.
In terms of the sprinkler connection layout, a common question is how many sprinklers can be connected together in a series? Unfortunately, there is no single answer to this as the number of sprinklers you can connect using a single water source will depend on the available water pressure and flow rate as well as the length and design of your piping. That said, below shows some general principles to piping layouts.
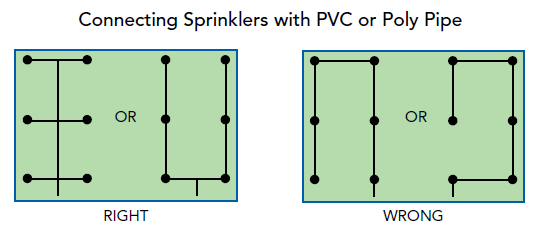 Left: Recommended layout| Right:
3. increasing your water pressure and flow rate
Your initial water pressure and flow rate measurements will indicate whether you will need to adjust these values to support the system you have just designed. Unless you are selecting a low pressure, low flow rate design ? such as the Claber?s Colibri system ? it?s likely that you will need to increase both of these parameters in DIY home installation.
To increase water pressure, a decent water pump is a straightforward way to achieve this. For my installation, I used a pre-owned Stuart Turner Showermate 2.6 bar water pump to increase water pressure. I installed the pump in a water tight brick shed near the mains water source so that the pump would be protected from weather damage and receive adequate ventilation.
To increase the flow rate, you will need to ether 1) increase the flow from your mains supply or 2) increase the availability of water during a watering cycle, relative to what is available from your mains source. In other words, you will need to invest into a water tank large enough to supply one watering cycle. This tank would then need to be re-filled at the end of each watering cycle, ready for the next one. Thankfully, for my system I already had a sufficient flow rate to my sprinklers.
4. build the plumbing
When is comes to the piping and connections I have used polyethylene pipe or ?poly pope? which is also branded as PEX or PE-X. This piping is lightweight, extremely durable, easy to manipulate and install as well as being ?freeze resistant? for the colder winter months. Brands such as Floplast, Plumbsure, John Guest and Polyplumb all offer push fit ?plug and play? type connections which makes installation very quick and easy. You simply have to cut your PEX pipe to your desired length, apply the pipe insert and push into your connection or valve.
In terms of connecting the sprinklers to the main water supply line, a swing-joint riser or flex-pipe is a favourable way to connect your sprinklers. The benefits of using these swing-joints include easier sprinkler maintenance and replacement as well as protection from impact or earth movement. If you have the budget, they are a great component to add into your sprinkler system. The cheapest swing joint I could find online is manufactured by Hunter Industries and costs only 3.50 per connection from Amazon. Because I am on a limited budget for my design, I have decided to use standard poly pipe with a 1/2″ threaded connecter to connect my sprinklers to the water supply line.
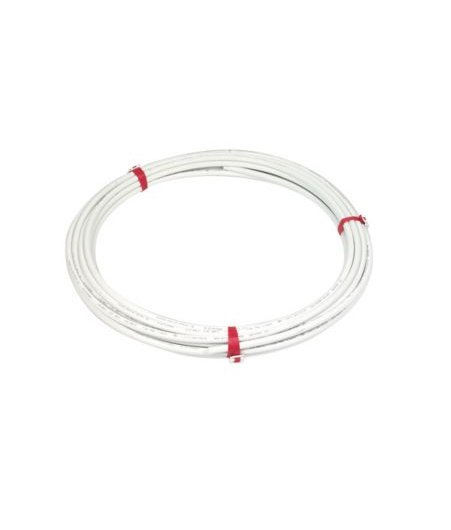
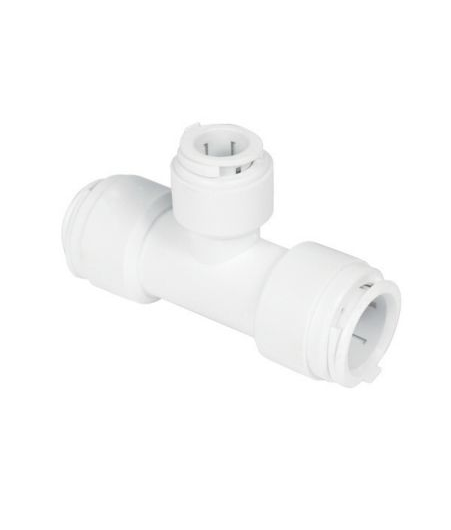
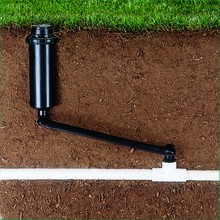 Left: Floplast Push Fit Polyethylene (PE-X) piping | Middle: Floplast Push Fit Tee Connection | Right: Swing Joint by Hunter Industries
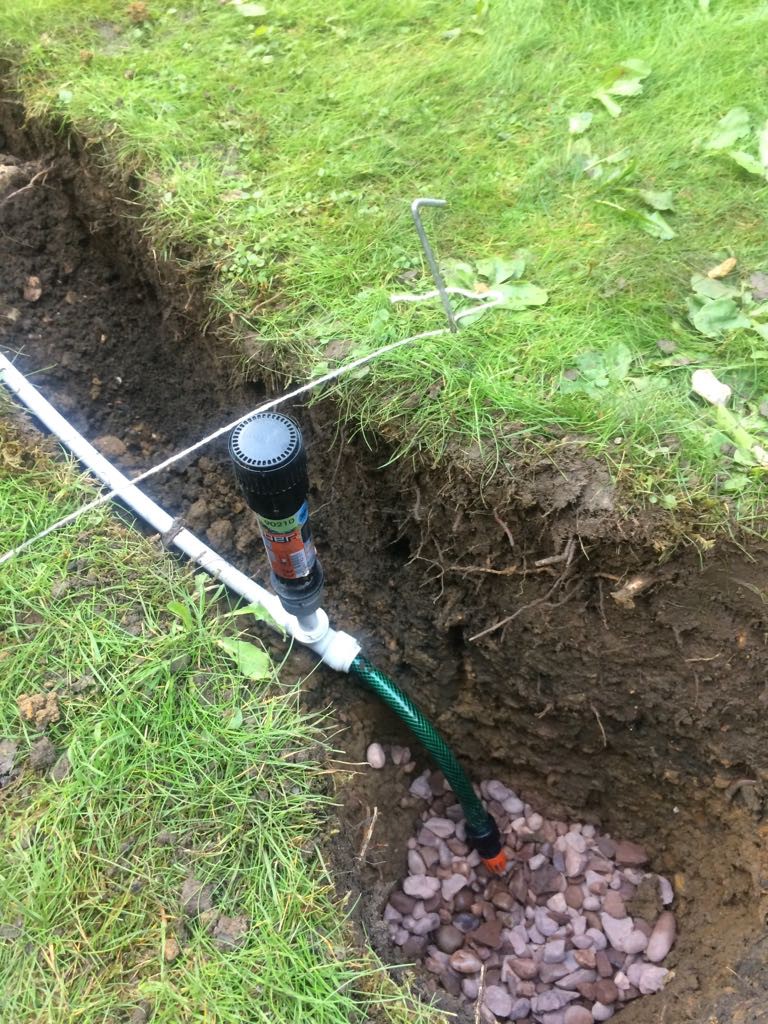
5. test the system (above ground)
Many of the sprinkler system manufacturers and installation experts suggest that it is advisable to test your system above ground before burying your system. This will make it easy for you to easily identify and troubleshoot any problems that might come up against. A common problem includes too much to too little pressure which is something you would want to discover before your pipework and sprinklers are buried.
6. bury the system underground
Trenching water lines is definitely the most labour intensive part and it?s hard work! The ideal tools for the job are a lawn edger, small spade, hand trowel, gloves and something to store your soil in temporarily. According to the irrigations expert, Grounded Landscaping, the most common problem they encounter in home irrigation systems is inadequate trenching. Because it is labour intensive they say that it is often neglected. They advise that pipes should be trenched to a minimum of 400mm (15.8 inches) below the surface. This is to help avoid accidental punctures of the pipe and therefore lower maintenance costs in the future.
take time with your trenching to get it right first time. Frost protection may add additional cost to your system, however, it is your insurance policy against burst pipes?
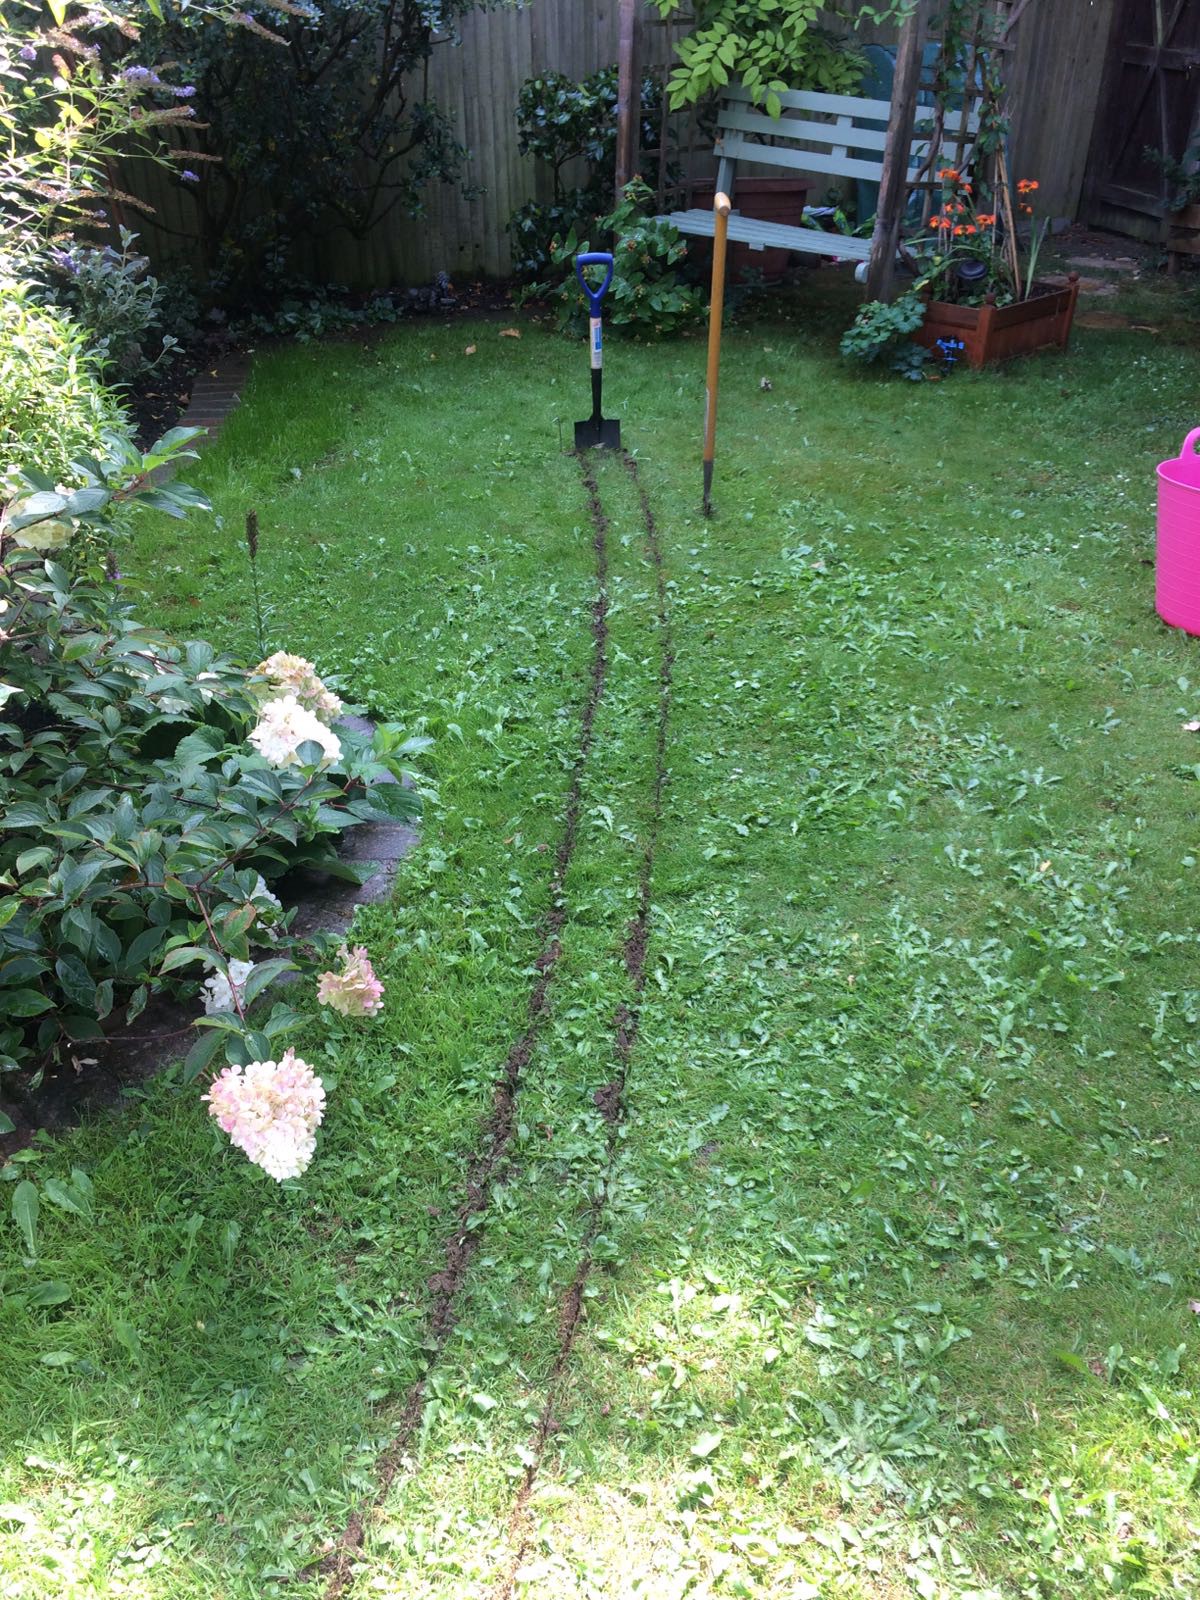
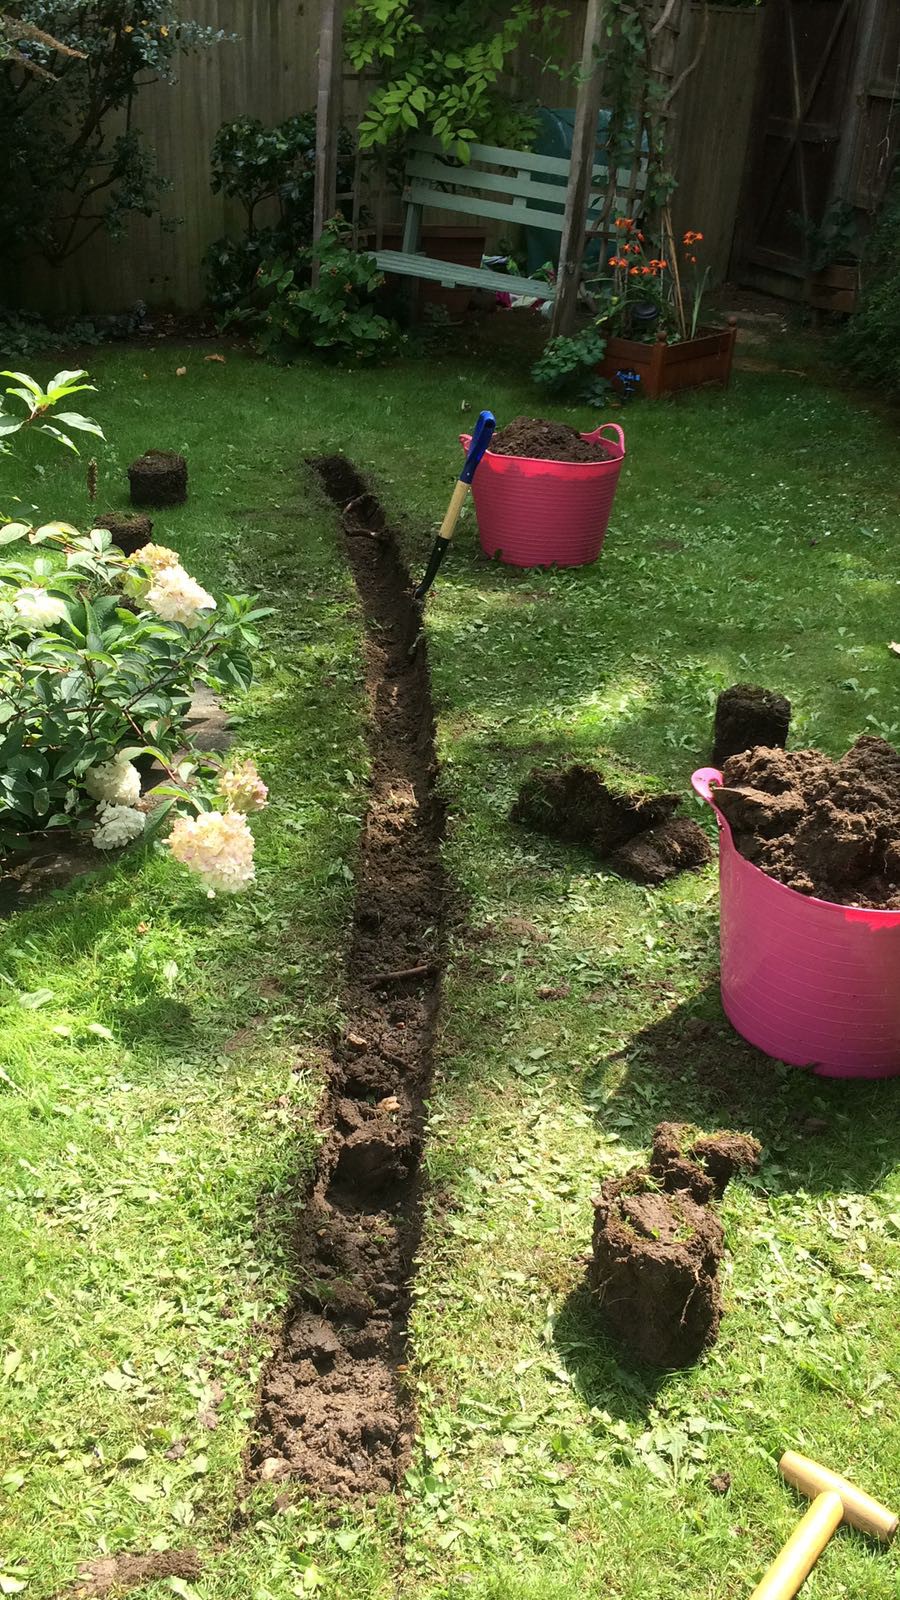
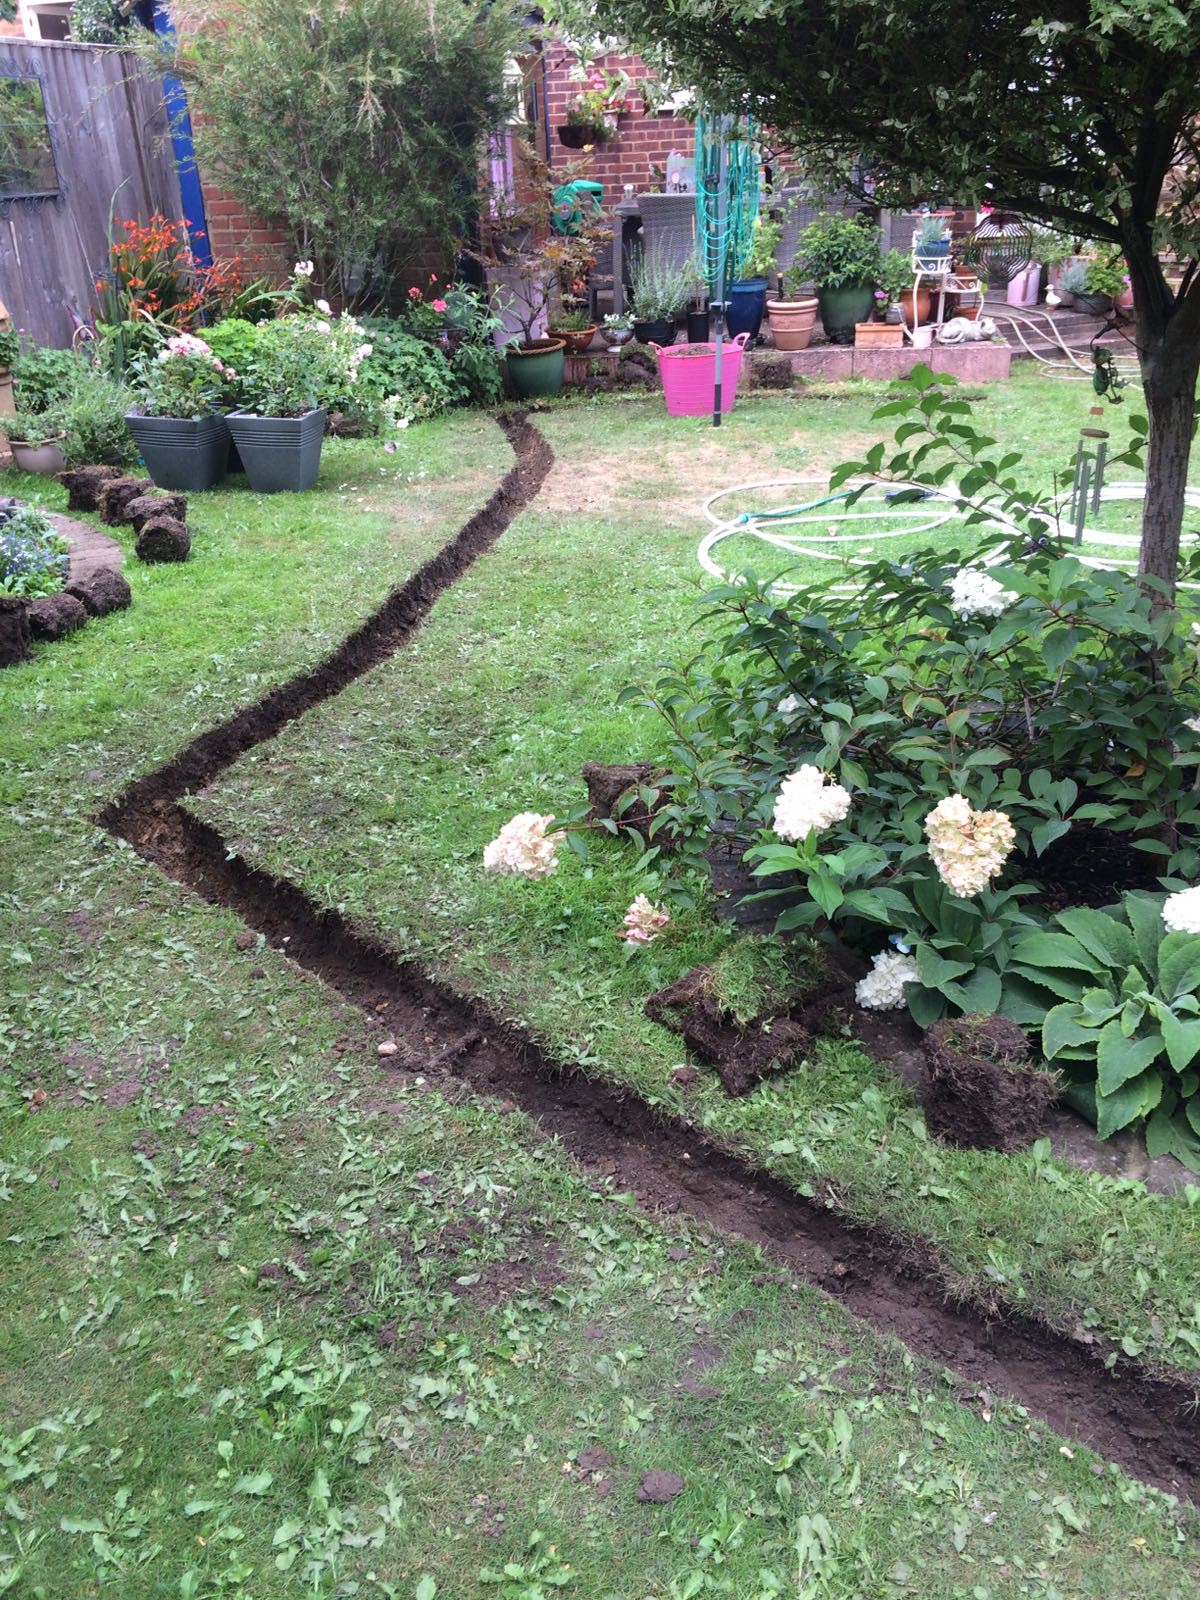 Left: marking out trench using an edger tool | Middle: trenching in progress | Right: main water feed line trench in progress
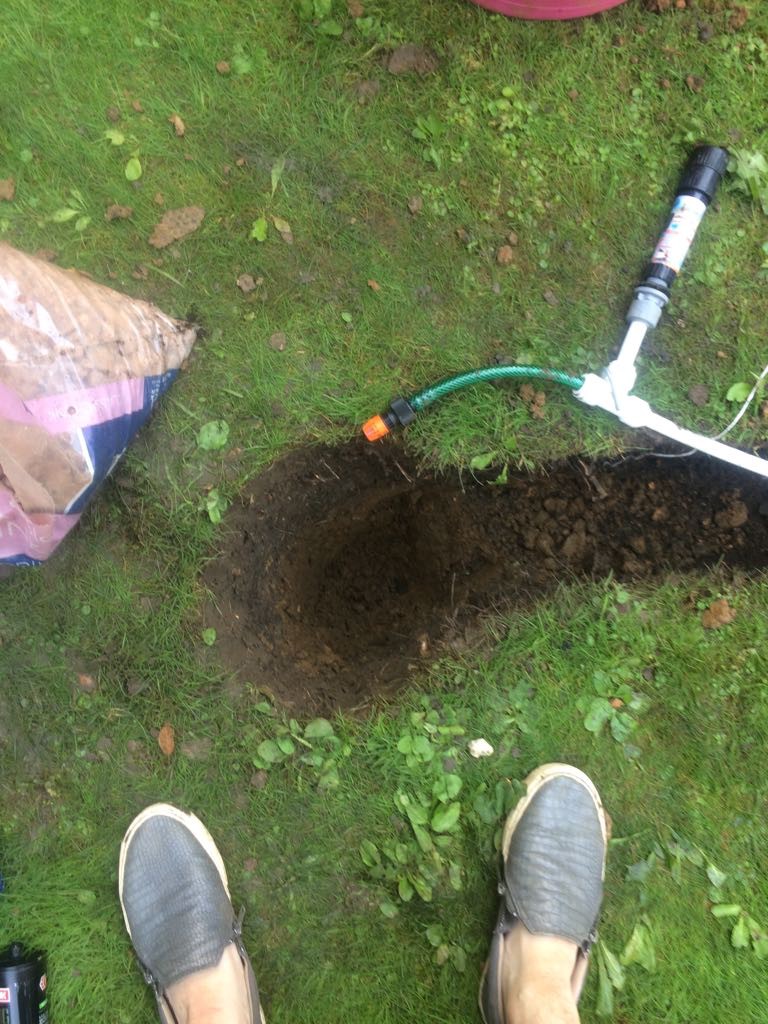
Not only does trenching your lines to a 400mm depth protect the pipes from accidental damage, it also ensures that they are buried below the frost line ? the point at which the ground freezes. That said, installing further anti-freeze protection may also be worthwhile considering. Adding a drainage valve at the lowest point of each irrigation line is a good way to add frost protection. Doing this would mean that when the circuit is closed and no water is circulating, the valve automatically opens to release residual water, which otherwise may freeze and potentially damage the hose. When water flows through the hose, the drainage valve automatic locks.
Claber Drainage Valve M1/2 ?-M3/4? 90910
The Claber Drain Valve is designed for automatic underground circuit draining. The valve is connected to an underground?
www.amazon.co.uk
7. install a watering timer
This is the final step in the process, and most enjoyable, as you are close to tasting the success of your hard work and labour. When choosing a timing device, there are a large number of products available on market ranging in quality and functionality. The simplest and cheapest are the manual mechanical timers which you can buy for c. 10-20. They are basic but do the job.
If you are looking for something with more
The more sophisticated products are the digital timers which range from around 30 up to 150. The premium units tend to include rain and moisture sensors, the ability to programme sprinklers or water lines individually and even WiFi access for remote control and integration with other smart home systems. If you would like to link your sprinkler system to Alexa or Google Home, you are going to have to consider a more premium unit. Personally, I find it really satisfying to say ?Alexa, water the garden? and then see the sprinklers pop-up out of the ground and do their job automatically. It feels like a proper smart home system with this feature built in.
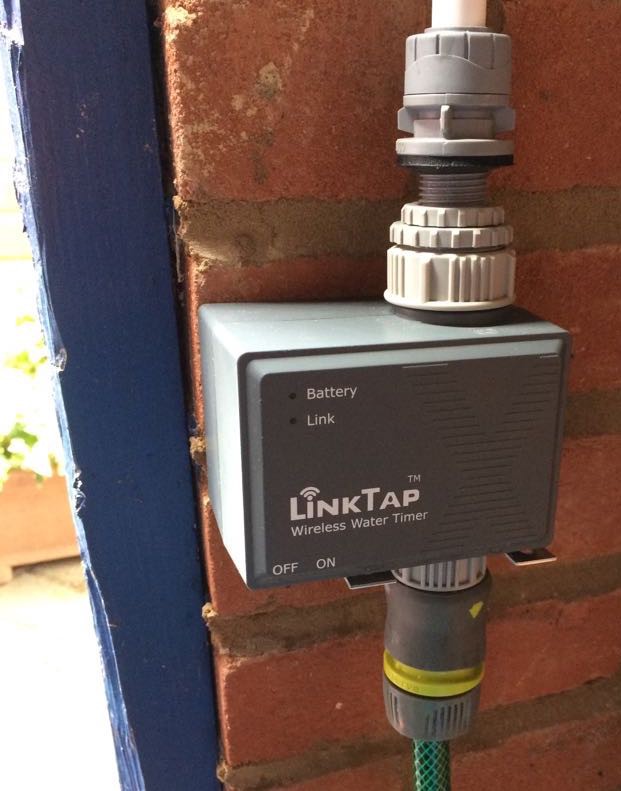
For my system I chose a product from LinkTap, which is effectively a solenoid valve which attaches to your water supply and is Wifi enabled for remote control. The LinkTap connector also comes with a dedicated Smartphone App which enables you to control your watering cycles from anywhere in the world! You can start/stop watering cycles as well as programme customised watering cycles with just a few taps on your smartphone. It is typical for more sophisticated watering timers to enable the use of rain or moisture sensors to help conserve water usage when it is raining and to ensure consistent moisture levels. LinkTap doesn?t have these sensors, although their approach to this problem has been to develop ?Rain Skip?, a programme which is designed to save you water by skipping watering cycles before or after it rains. Rain Skip checks your local weather a few minutes before a watering cycle starts. If the predefined rainfall threshold is met using observed + forecasted rainfall, the watering cycle will be skipped. This is configurable to your preferences and you can still adjust your watering instantly using the App if the weather changes quickly.
LinkTap Wireless Water Timer & Gateway
Designed in Australia, LinkTap low-power wireless water timer & gateway allow you to use your smartphone, tablet or?
www.amazon.co.uk
Other alternatives to consider include:
- The Rainbird WiFi module, which can be added onto Rainbird digital watering timers and computers to add WiFi functionality.
- The Orbit 12-station WiFi sprinkler system controller
- The Eva Aqua Smart Water Controller, which is specifically designed to integrate with Apple HomeKit Technology. Customer reviews indicate that the strength and range of the bluetooth connection can limit the functionality and usefulness of this product.

