By Alexandru Andrei, Alibaba Cloud Community Blog author.
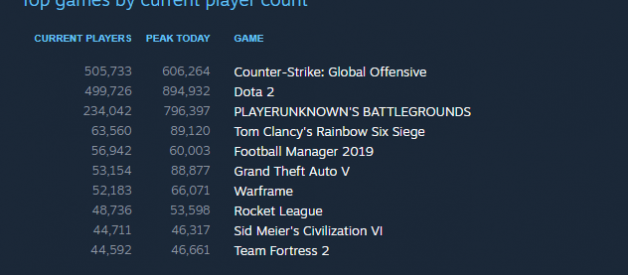
The multiplayer first-person shooter video game Counter-Strike: Global Offensive (abbreviated CS:GO) has exploded in popularity in recent months, and, at the time of writing, it is still soaring in popularity. It?s currently the third most played game on Steam, after the multiplayer online battle games Dota 2 and PlayerUnknown?s Battlegrounds (usually abbreviated as PUBG).
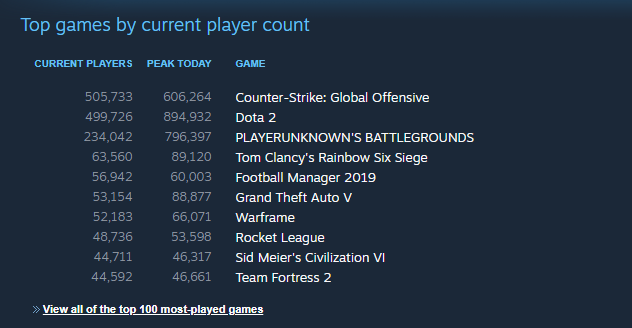
You can visit Steam?s Stat Page and see where the game?s currently standing.
The game has an ?Official Matchmaking? option. This selects a nearby server, owned by Steam, where you can play against other players from around the world. It can be fun, as you get an endless supply of enemy skill levels and play styles. However, you have no control over who joins the server, what the rules and settings there are. This is a problem when you want to organize matches according to your preferences or if you want to host private games where you only play against your friends. The solution to this problem is to create your own dedicated server for Counter Strike: Global Offensive. Besides doing this, getting your own space where you can have fun and relax is also a viable business opportunity. With hundreds of thousands of active players, there are certainly a few gamers that want their own server, which you can create for them and then rent it, or simply host their matches and find another way to monetize it.
It?s worth mentioning that Alibaba Cloud is one of the few cloud service providers that offers free anti-DDoS protection. Game servers are often a target for these types of attacks. However, they mostly come from players that have been upset somehow by something that happened during a game. As a result, large scale attacks can still disrupt your service time to time, so try to administrate your server in such a way that you avoid upsetting people that might want revenge. Consequently, also try to pick moderators (if you need them) that know how to properly manage ?emotional fires? that may come up during matches.
Prerequisites
Before starting, you need to:
1. Create a Steam account at https://store.steampowered.com/join/. Of course, if you already have an account, you can use that.
2. Install Counter Strike: Global Offensive on your computer, so that you can test your server later on. At the moment of writing this tutorial, the game is free to play.
3. Launch a new ECS instance. Select a Region (physical server location) that is as close as possible to the region where the players that want to join are located.
When you select the instance type, avoid Entry-Level (Shared), Burstable Type servers. These give you a limited time when you can use 100% of the performance capacity of the processor. Game servers need to respond fast to events, so you need the full power of the Central Processing Unit (CPU/Processor) available at all times.
4. Pick a Compute Optimized instance, like one in the following picture.
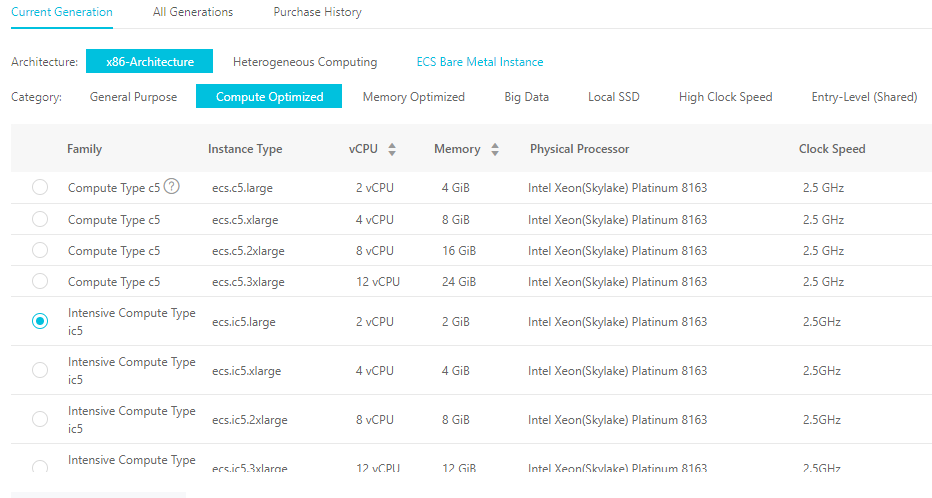
An Intensive Compute Type instance with 2vCPUs and 2GB of RAM should suffice for small servers. While testing, the dedicated server process usually can be fine with even less than 1GB of RAM under very light loads. However, if your server gets popular, and you will need to allocate more CPUs and/or memory, you can shut it down later and upgrade to a better plan, without losing your data or setting up again.
Keep in mind that if the instance runs out of free RAM, the game server process will be force killed and clients will be disconnected as a result. So, keep an eye on resource usage, especially if you intend to run a 128 tick server with lots of players joining.
5. Use the latest Ubuntu image for the operating system
6. Allocate at least 40GB of disk space. The game files will take between 15?20GB and the operating system usually needs between 2?4GB.
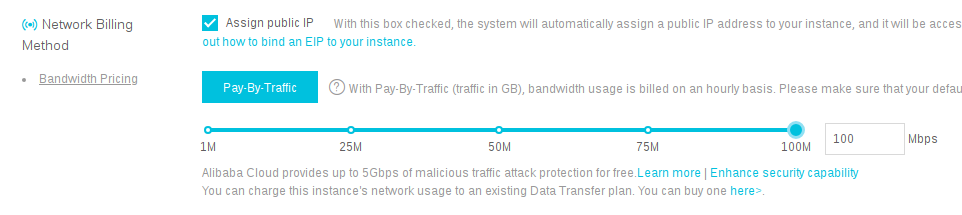
7. In the next step, where you configure networking, move the bandwidth slider to its maximum value.
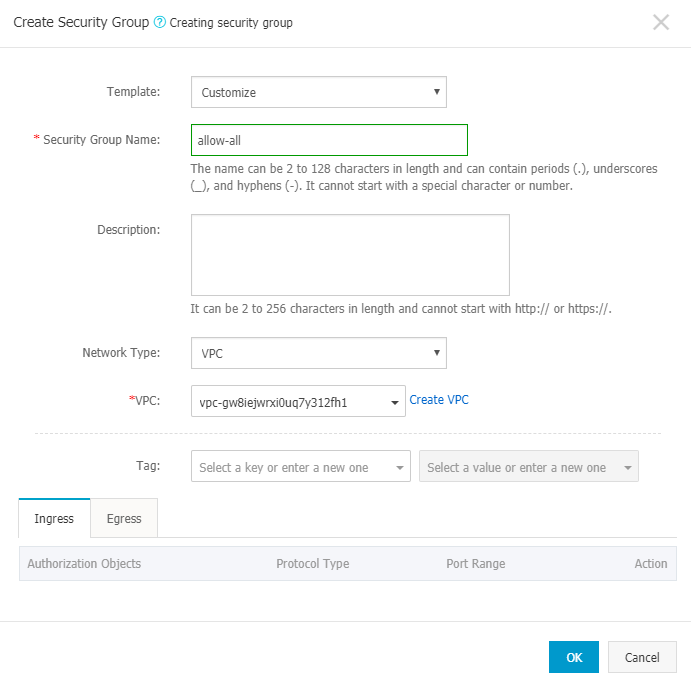
8. Click on Create Security Group.

A new tab will open and you will see this button in the top-right corner:

The interface might change in the future. In that case, you can read the instructions on how to create a security group.
Under Template: select Customize. Name the security group allow-all under Security Group Name:. Click on the VPC: field and select the default VPC you have available. The final result should look like this:
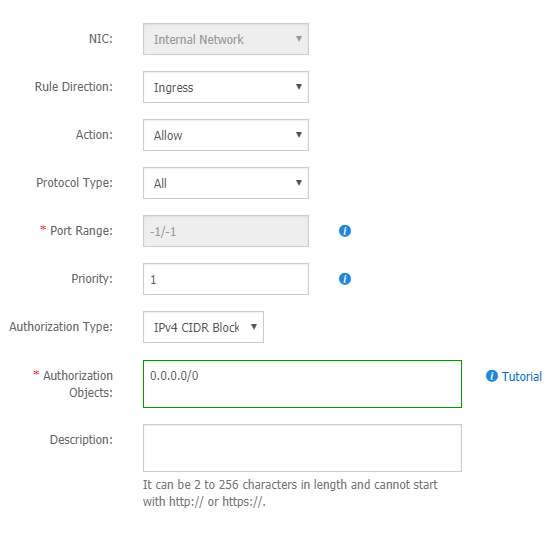
Next, you should be prompted to add new rules to this security group. On the rules page, click the Add Security Group Rule in the top-right corner.

Under Protocol Type: select All. Under Authorization Objects: enter 0.0.0.0/0. The final result should look like in the following picture.
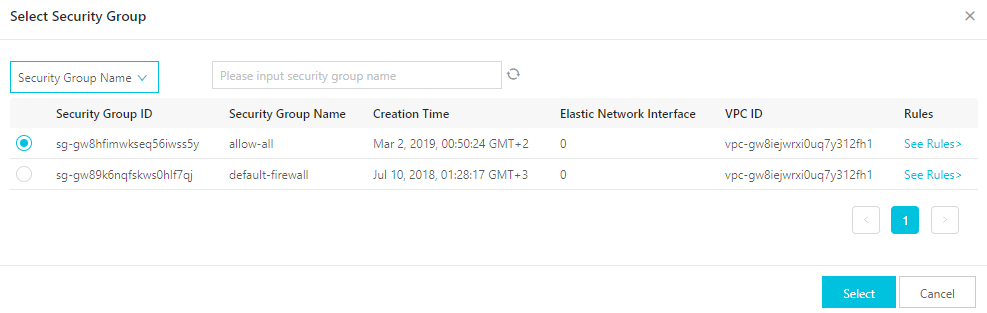
9. Go back to the page where you were configuring the instance you intend to launch. Click on Reselect Security Group.

Choose your previously created ?allow-all? security group.
10. Pick the rest of your desired settings and launch the instance. When you get to the System Configurationsstep, it?s recommended you use SSH keys pairs for logging in instead of the less secure passwords. Reread the tutorial about creating a new instance if you?re unfamiliar with the necessary steps.
Install SteamCMD on Linux
Log in to your instance through SSH, as the root user. Upgrade all packages on your server.
apt update && apt upgrade
Reboot the instance.
systemctl reboot
Wait 10 to 30 seconds and reconnect using SSH, and log in again as root.
SteamCMD, the tool that will download CS:GO game files is not available in the default repositories on Ubuntu. To enable the additional ?multiverse? repositories, first install this package:
apt install software-properties-common
Enable multiverse repository.
add-apt-repository multiverse
You also need to enable 32-bit support since the SteamCMD package is a 32-bit application.
dpkg –add-architecture i386
Update package information.
apt update
And now, you can finally install SteamCMD.
apt install steamcmd
At the legal agreement prompt, you may need to press TAB to select the Ok button.
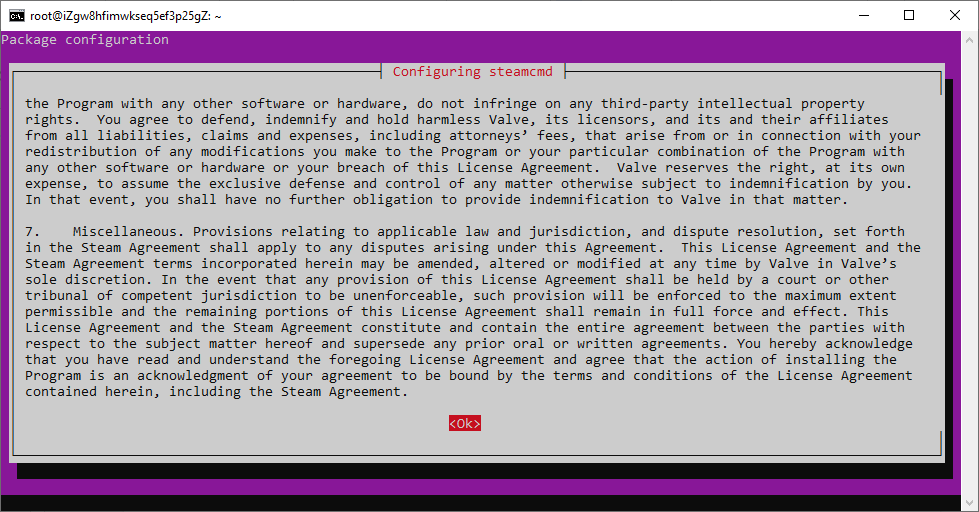
At the next prompt, choose I agree, otherwise the install will abort.
Install CS:GO Dedicated Server on Linux
It?s very bad practice to run the game server process with root privileges. So, create a new, non-privileged user.
adduser –gecos “” –disabled-login csgo
Log in as this new user, named csgo.
su – csgo
Install CS:GO Dedicated Server files.
steamcmd +force_install_dir ~/csgo-ds/ +login anonymous +app_update 740 validate +quit
If this gets interrupted, or you get disconnected from your server, log back in as the csgo user and repeat the same command. The installation should continue from where it left off.
You should see this message (or similar) when the install is complete: Success! App ‘740’ fully installed..
In the future, you may want to update your game server. Instead of steamcmd +force_install_dir ~/csgo-ds/ +login anonymous +app_update 740 validate +quit, use steamcmd +force_install_dir ~/csgo-ds/ +login anonymous +app_update 740 +quit. The validate option should only be used at first install and when you want to verify the integrity of the files and possibly repair damaged/corrupted/missing data.
Register Steam Game Server Login Token
Visit the following page to generate a game server login token (GSLT). This is a smart way to authenticate your server to your Steam account, without using your personal password. It?s also a way to prevent server operators from breaking the community rules. You should read the guidelines, otherwise you might get your account banned. Pay particular attention to this post from the Counter Strike blog.
Use 730 as the App ID. In the steamcmd command the ID was 740, but here it’s 730, probably because the game itself is registered as 740 and the game’s dedicated server as 730. You can freely choose the memo text you want to use.
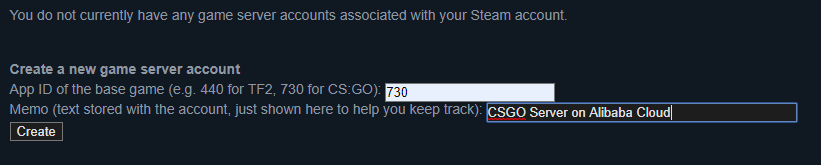
After you generate this token, you will need to use its ID in a subsequent command, when you launch the server process. Here is an example of a login token.

Launch Counter-Strike: Global Offensive Server
Go back to your SSH session, where you should still be logged in as the csgo user. Exit this login session to get back to being the root user.
exit
Install tmux.
apt install tmux
This utility will be used to keep the terminal session alive, even when you log off from the server. Without it, when you would quit your SSH session, the CS:GO server would be aborted. Besides keeping the process alive, even when you log out, tmux will also let you come back and see server output (like log messages) and allow you to issue commands to the game server application, because it reconnects you to the command?s input interface. If you want to learn more, you can read the tutorial on how to use tmux.
Log back in as the csgo user.
su – csgo
Launch tmux.
tmux
You now need your login token from the Steam Game Server Account Management page. In the next command you see, replace the code B38F6E71E4FA3BD74BE08354AF5BE025, offered as an example, with your own login token!
Start the Counter Strike: Global Offensive dedicated server.
~/csgo-ds/srcds_run -game csgo -net_port_try 1 +game_type 0 +game_mode 0 +mapgroup mg_active +map de_dust2 +sv_setsteamaccount B38F6E71E4FA3BD74BE08354AF5BE025
You should always pass the parameters -game csgo -net_port_try 1 to the srcds_run command, and +sv_setsteamaccount. The rest of the parameters, you can change, or even add your own, according to your needs for the server.
Your server?s public IP will be displayed in the output text of the srcds_run command. This is the address you will use to connect to your game server (it’s the same IP you can find in your Alibaba ECS Console). Launch Counter Strike: Global Offensive on your computer. Click on the play button and then select Community Server Browser as the game type.

Go to the Favorites tab.
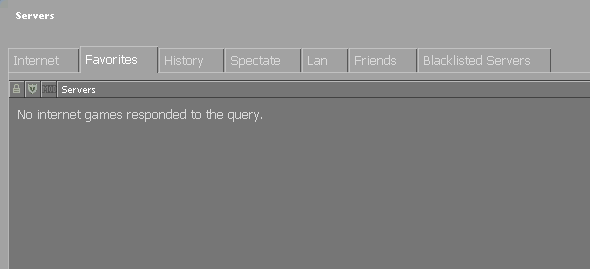
Click on the Add a Server button in the bottom-right corner and paste your server?s IP address. Add it to your favorites list.
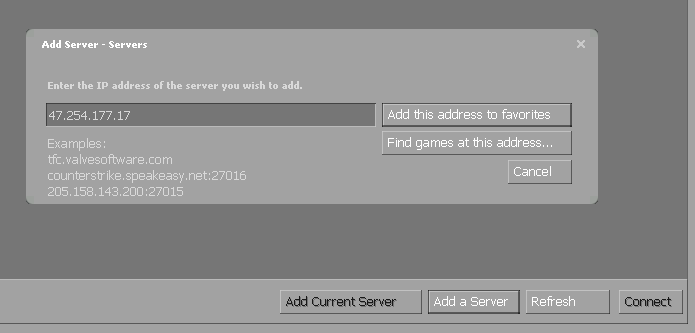
You can now right-click on the entry and join the game. If the option is unavailable, hit Refresh (button in the bottom-right) or close the community browser, open it again and retry (seems to be a bug).
Manage tmux Sessions and Terminate srcds
Quit the game and go back to your SSH session where the game server is currently running.
When you want to exit the SSH session, but leave the server running, press CTRL+b, release the keys and then press d. This is called ?detaching.?
To log out from the csgo user:
exit
To quit the SSH session entirely, type exit again. Even if you don’t quit the tmux session this way, for example, your computer crashes or your Internet connection drops, the game server will continue to run unharmed, wrapped in the tmux session.
To reattach to the game server output/input, hosted in the tmux session, first log in to your server, through SSH, as root. Afterward, log in as the csgo user.
su – csgo
Now reconnect to the tmux session you left running (or detached from).
tmux attach
While attached to the output and input of the srcds (SouRCe Dedicated Server) application, press CTRL+c to terminate it.
Run Dedicated Server Process at Higher Priority
This section is for reference only and you do not need to follow the steps at this point. In fact, only use this tip if you encounter problems.
If you notice that the server has occasional hiccups and you?re sure it?s not a client problem and your instance has enough resources, allowing the srcds application to run at a higher priority may help.
You need to run the next command as root since only this user can increase process priority. If you?re logged in as csgo and running a tmux session, first detach and leave the game server process running in the background. Then, type exit to logout from the csgo user and return to the root user. Now enter:
renice -n -15 -u csgo
This will increase all the processes that the csgo user is currently running, to a priority of -15. A higher priority is actually a smaller number, the smallest being -20. The logic is that a process running at 10 is “nicer” to other applications, letting them have more CPU time. A process running at -10 is not “nice”, stealing more CPU time for itself and making other applications wait for their turn. By default all applications run at a neutral, nice value of 0.
Command Line Options for the CS:GO Dedicated Server
There are five game types in CS:GO. You can find how to start the server in each of these modes, on this Counter Strike: Global Offensive Dedicated Server wiki page. Extract the +game_type and +game_modenumbers you need and then use them in the command presented in this tutorial.
For example, for a Classic Competitive match, this line from the wiki page:
srcds -game csgo -console -usercon +game_type 0 +game_mode 1 +mapgroup mg_active +map de_dust2
Becomes:
~/csgo-ds/srcds_run -game csgo -net_port_try 1 +game_type 0 +game_mode 1 +mapgroup mg_active +map de_dust2 +sv_setsteamaccount PUTYOURGSLTIDHERE
-console command parameter is only used on Windows. Also, it’s recommended to use the srcds_runcommand on Linux, rather than srcds. Since most examples on the wiki page are for the Windows platform, you will need to adapt all commands presented there in a similar fashion. Otherwise put, start from this command line:
~/csgo-ds/srcds_run -game csgo -net_port_try 1 +sv_setsteamaccount YOURGSLTHERE
And add +mapgroup, +map, +game_mode, +game_type and other options you need, as extra parameters to this command.
You can find more options you can pass to the srcds_run command, on Valve’s wiki page for the Source Dedicated Server. For example, -nobots might be interesting if you don’t want bots to autojoin and fill empty slots when there are not enough players.
Configuration Files for the CS:GO Dedicated Server
The main two files you will want to use to configure your server are autoexec.cfg and server.cfg. You can find some quick info about the files on this page.
At the following link, you can find a list of variables you can set in a Counter Strike game. You will usually find that most of the variables you need start with the sv_ and mp_ prefixes, for example, mp_roundtime. You can also visit this page for a condensed list of often-used variables.
To create autoexec.cfg, while logged in as the csgo user, run this command:
nano ~/csgo-ds/csgo/cfg/autoexec.cfg
Write your desired configuration file and then press CTRL+x, followed by y and then ENTER to save it to disk.

To create server.cfg, run:
nano ~/csgo-ds/csgo/cfg/server.cfg
And follow the same instructions to save the file.
How to create 128 Ticks Counter Strike: Global Offensive Server
The benefits of running 128 tick servers are still debated, and for good reason. The ways in which player positions, hits, misses are calculated and estimated is a very complicated process. But you can still run a 128 tick server if you want to and think it will offer a competitive edge. The servers at Alibaba are more than capable.
Besides running the server at 128 snapshots per second, you also have to force these settings on the client side. Otherwise, the clients will just send the default 64 refreshes per second (cl_cmdrate) and receive 64 game world data snaps (cl_updaterate) per second. To make the server force the clients receive and send 128 updates per second, while logged in as the csgo user, create (or edit) autoexec.cfg:
nano ~/csgo-ds/csgo/cfg/autoexec.cfg
Add the following content to the file:
sv_minupdaterate 128sv_mincmdrate 128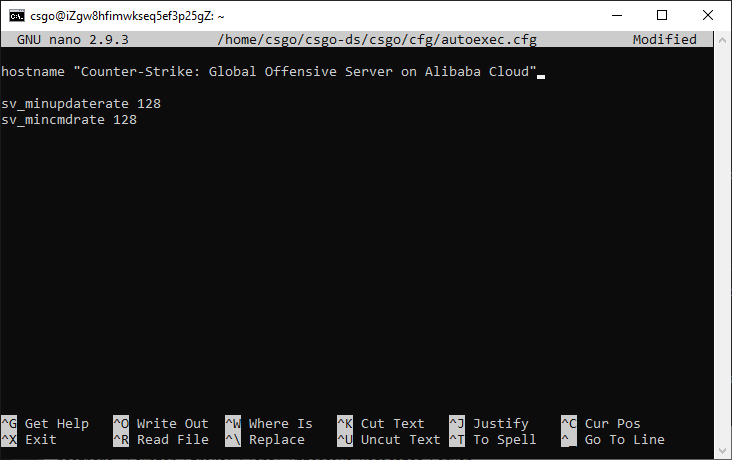
Press CTRL+x, then y and then ENTER to save the file.
Now, when you start the server, add -tickrate 128 to your srcds_run command. For example:
~/csgo-ds/srcds_run -game csgo -tickrate 128 -net_port_try 1 +game_type 0 +game_mode 1 +mapgroup mg_active +map de_dust2 +sv_setsteamaccount PUTYOURGSLTIDHERE
Launch your game and go to Settings->Game Settings and enable the Developer Console.
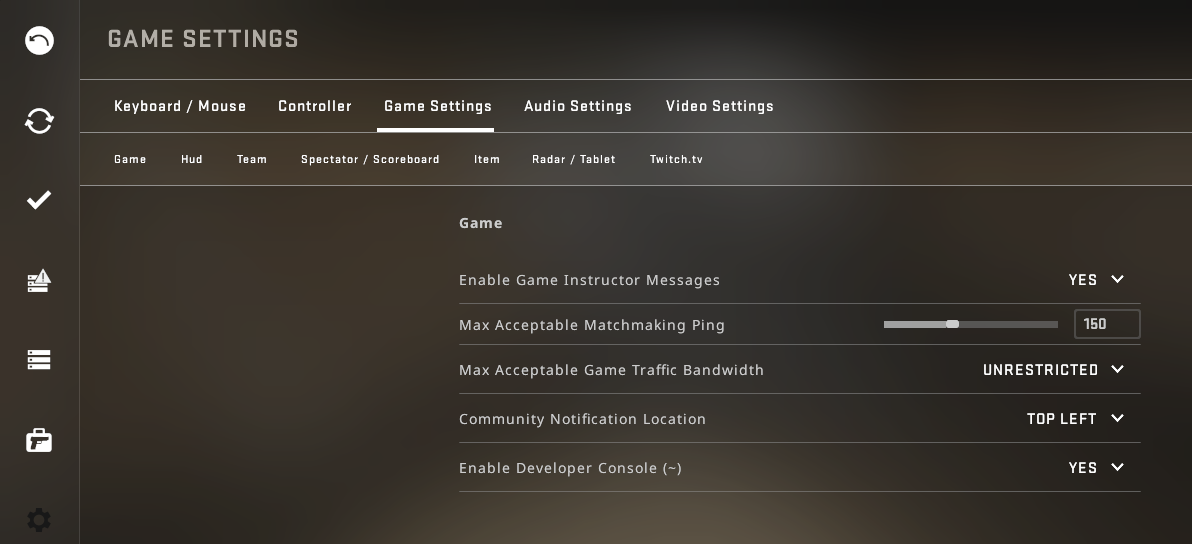
After you join your server, press the ` key (the one that also has the ~ sign on it). In the console that opens up write:
net_graph 1
And press ENTER.
tick, up and cmd should all be set at 128 in the net graph you will see in the bottom-right corner. Here’s an example picture:
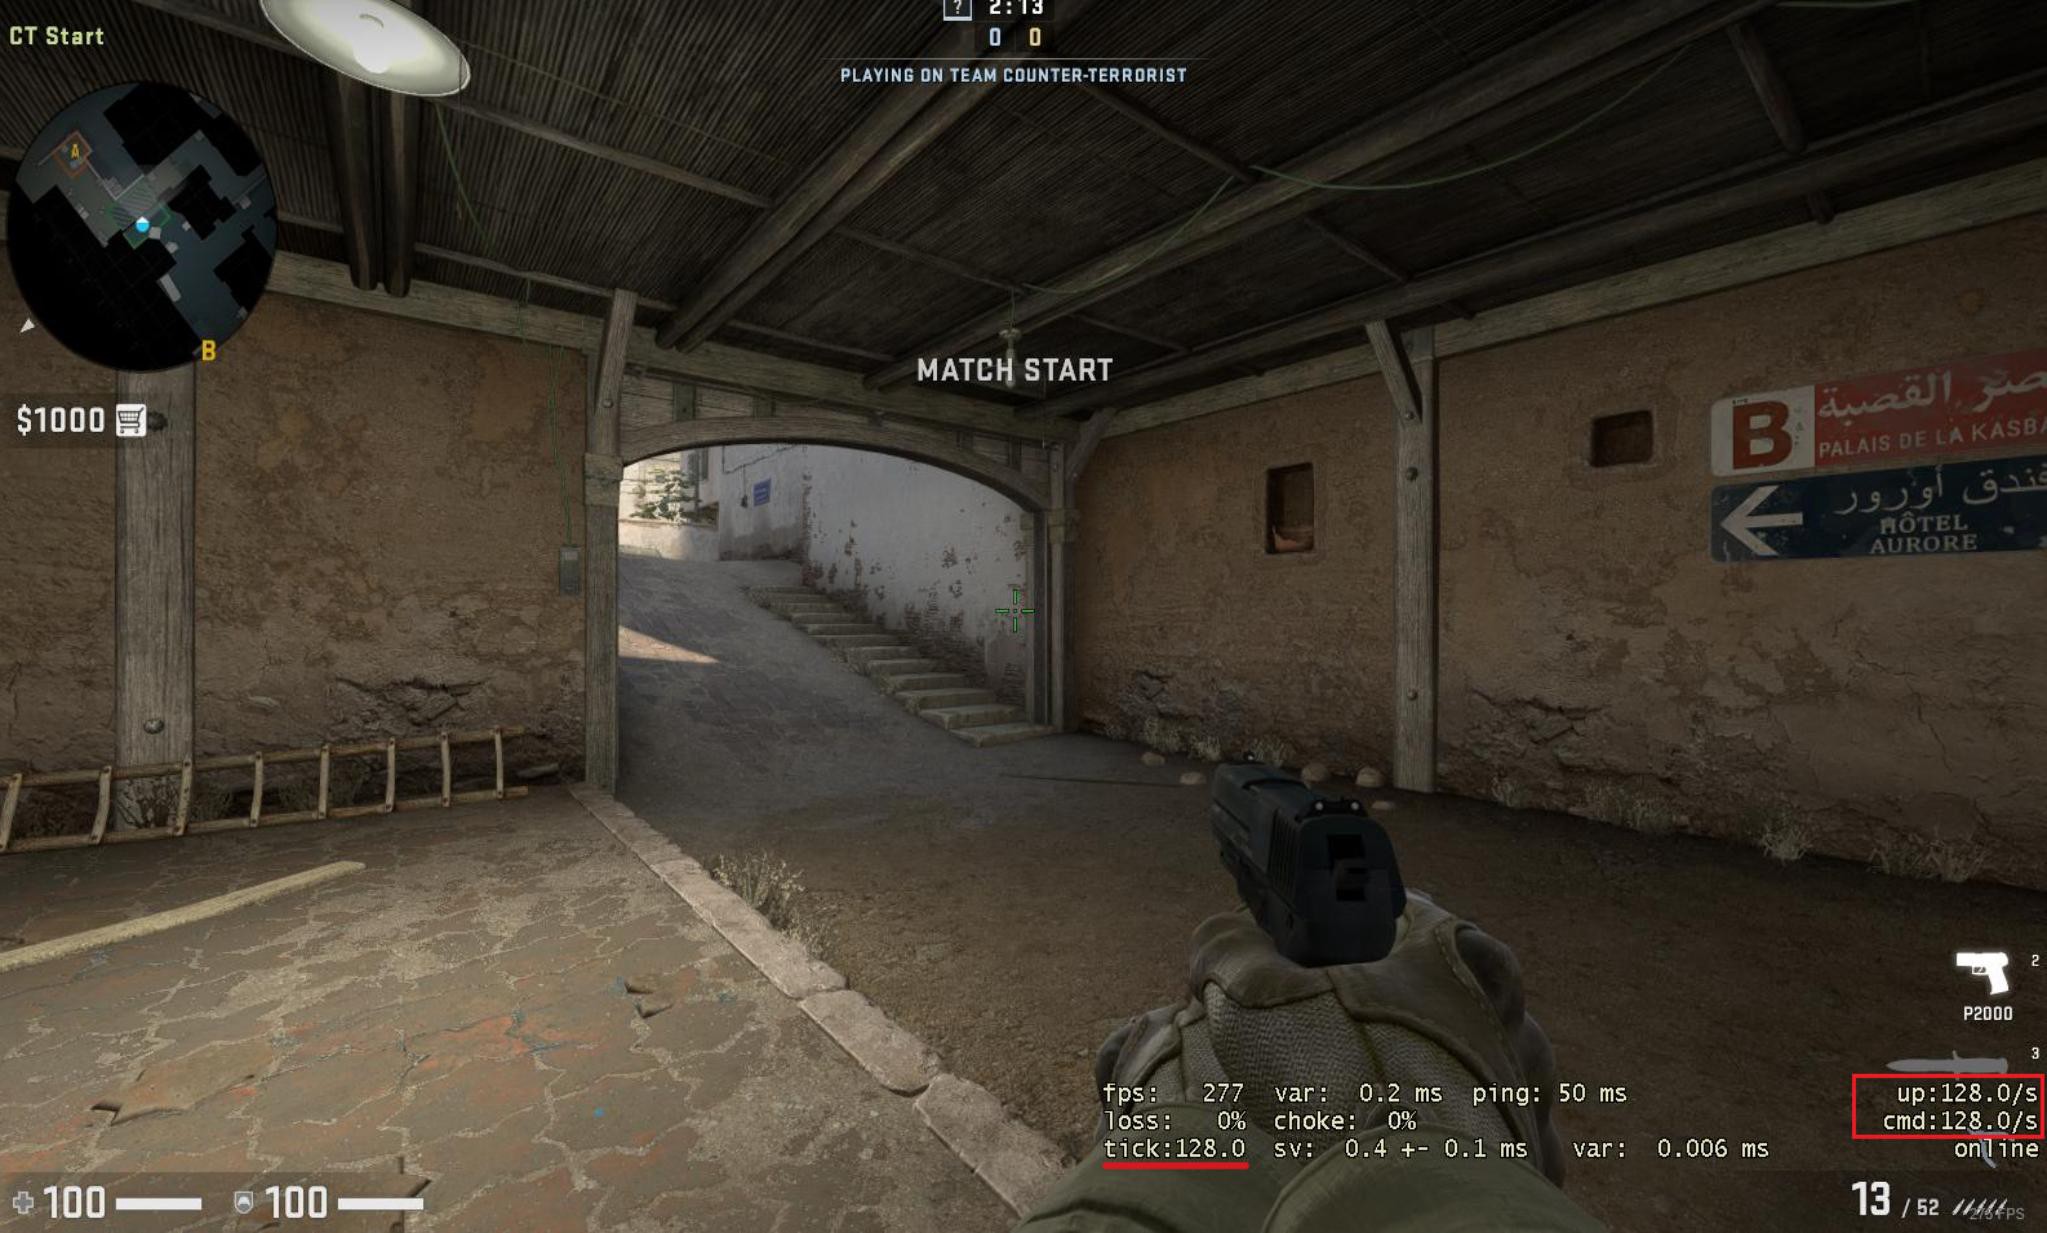
Open up the game console again (` key) and type net_graph 0 to close the network statistics.
Conclusion
Don?t forget to use snapshots to periodically backup your server. This will help you avoid having to reinstall the game files, which can take a relatively long time. In case something goes wrong at some point, you can quickly rollback to a good snapshot. Furthermore, you can also use this to create images and spin up other Counter Strike servers without having to go through the configuration steps again.
From time to time, when you notice the game server is not used, run apt update && apt upgrade as root, to pull in the latest operating system security and bug fixes. After applying important security fixes, reboot. Also, as the csgo user, periodically upgrade your game server files with steamcmd +force_install_dir ~/csgo-ds/ +login anonymous +app_update 740 +quit.


)
)