
A tip from a colleague + the genius of my then 14-year-old led to a simple treatment for carpal tunnel pain without medication or surgery. Seriously.
 Photo by Jonathan Perez on Unsplash
Caveat #1: I am not a doctor, and nothing in this piece should be construed to be medical advice. I?m sharing my personal experience in the hopes that it might help others who spend a great deal of time using their keyboards and mice and deal with wrist pain.
Caveat #2: I have not been officially diagnosed with carpal tunnel syndrome. That would require testing and time and money, none of which I feel the need to invest now that I?ve found a way to get relief on my own.
The Discovery
After several months of right-hand wrist pain, I was desperate for relief that didn?t involve popping ibuprofen like candy. I asked the Facebook hive mind for suggestions.
Eventually, a colleague linked to a product she swore by: stretchy, patch-like things you apply to the back of the hand and wear at night for six weeks. You need a new one for each night, and a six-week treatment for one hand costs somewhere around a hundred dollars.
She said they were the only thing that helped her pain, and after a full six-week treatment, she could go a couple of years before needing to use them again. Sounded good to me! A whole lot cheaper and less painful than surgery? Bring it.
But . . . a hundred bucks was still more than I could spare right then.
Enter my teen daughter. Back when she was a preschooler, she designed and built a collapsible lemonade stand from cardboard. That?s how her brain has always worked.
She?s also a gymnast, so she has experienced injuries and, more importantly for us, has an understanding of how KT Tape, one of the most-used products for athletic injuries, works.
Sitting beside me, she watched a video about the other device, and I could sense her engineer brain crunching data.
Sure enough, she figured out how the other device worked: it applied a gentle pull in specific directions, which then gave extra room to the narrow passage through which inflamed nerves pass (the ?carpal tunnel? in carpal tunnel syndrome). Just a little extra room released the pressure, which let the nerves have room to breathe, as it were.
At first sight, the device seemed to be focused on the wrong part of the hand; it doesn?t touch the wrist at all. But that?s the beauty of it: the tape supports where support is needed, helping the body to heal instead of just immobilizing the wrist with a clunky brace.
Thanks to her gymnastics and injury background, she was pretty sure she could figure out how to create a KT Tape version of the device.
The Experiment
Within half an hour, she?d cut a prototype from KT Tape. She applied it to my hand, and sure enough, after a single night, my wrist felt much better.
The adhesive held up well into the next day. When it finally started coming off, I replaced the tape with a new piece.
After two days of wearing the tape night and day, I had no more pain. I was heading out of town for a retreat, so, remembering the six-week treatment plan for the other device, my daughter pre-cut several strips for me to take along. She then helped me practice putting the tape on by myself.
(It?s easier to apply with a second person, for sure, as you can likely tell in the video below.)
When the tape wore down on my trip, I took it off, fully meaning to replace it. But because I was no longer in pain, I forgot. A day later, when I remembered, I decided to leave it off to see how long the relief lasted.
Those three days of treatment gave me five months of relief. Even when the pain started to return, it was only a bit annoying, not crippling like before. I applied the tape again.
After that treatment period (of about three days/nights), I went seven months before the minor pain returned and I wore the tape for one night.
The Costs ? and the Savings
KT Tape is much cheaper than the other product made for carpal tunnel or wrist support. I?ve never had to wear the tape for anywhere near six weeks, as suggested by the other device?s manufacturer. If I wore the tape for that long, I?d probably be able to go years between treatments, but I haven?t tested the theory.
For about ten dollars for regular KT Tape, or another two or three dollars for the KT Tape Pro, you get one package of 20 strips. The method we developed takes half a strip per application.
That means one pack of KT Tape provides 40 applications for about $10?12.
By comparison, the other product requires the purchase of a full six-week treatment, at minimum, which is 42 applications for about $100.
In the year-plus I?ve used this method, all of my applications add up to maybe a dozen total, if that.
We use KT Tape Pro, which has better adhesive than the standard KT Tape, so it lasts for hours longer than the standard type.
How to Apply KT Tape for Carpal Tunnel Relief
Cut a strip of KT Tape (shown on top) in half and then shape it as shown below so one side has two strips that almost reach the center of the tape (shown below). The image below shows blue tape. Many other colors are available.
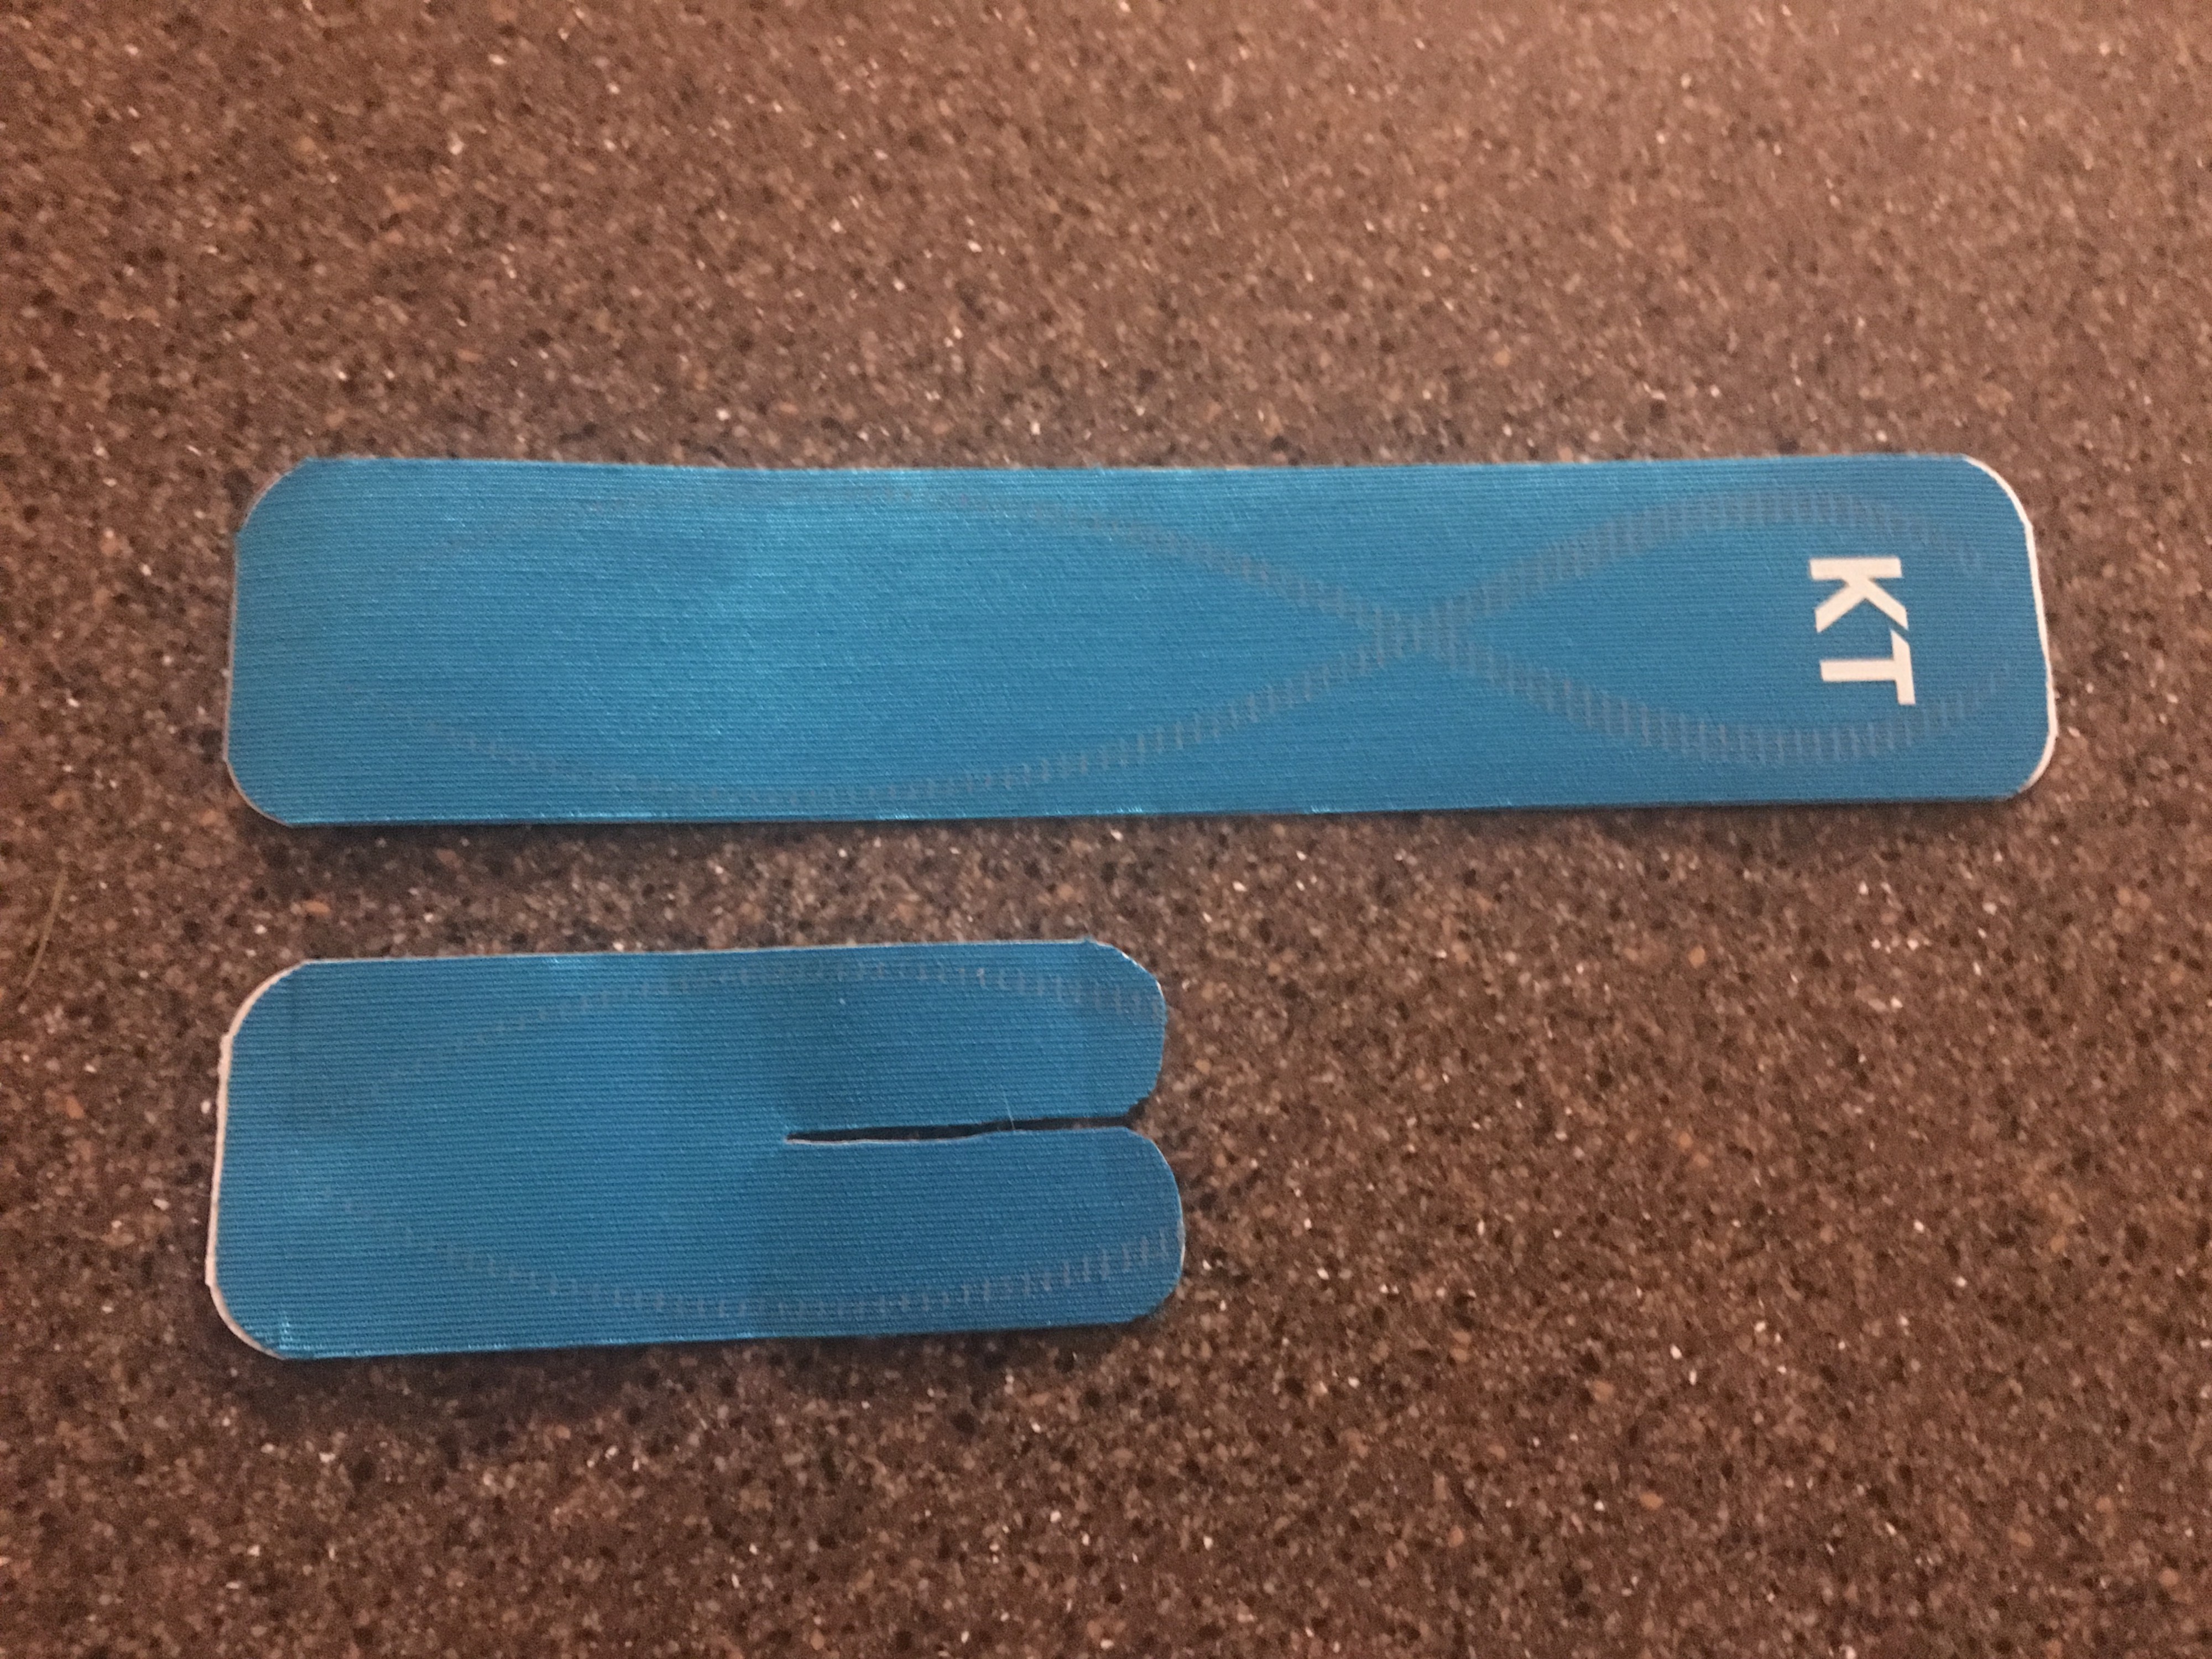 A strip of KT Tape Pro (top) and a half a strip cut to be a carpal tunnel pain relieving device (bottom). Photo by Annette Lyon
How to Apply the KT Tape Device
Watch the video below to see it in action, but I recommend reading the instructions first.
Before you start, wash your hands so the adhesive can bond directly to your skin. Be sure your skin is completely dry.
You?ll create four anchors, which are spots the tape is held down solely by the adhesive and the tape is not actively stretched. Taking a few extra seconds to make solid anchors is worth the effort. The anchors allow parts of the tape you?ll be stretching to do their job.
Anchor #1: This is the primary anchor and goes on the back of the hand, centered. To create it, fold and crease the tape in two lines down the center, about 1/4 inch (~6 mm) apart. At the creases, carefully tear the paper and remove the paper only in that section, exposing the adhesive there.
Holding the tape with the two-strip side facing the thumb and the wide side facing the outer side of the hand, press the exposed adhesive onto the back of the hand. This is your first anchor.
Rub the adhesive against the skin to create a good bond. Friction is good; a little heat helps the tape stick better and last longer.
The Wide Side Strip: Crease and fold the end of the wide outer strip to create an anchor on that end, about the same width as the first anchor. After carefully tearing the paper along the crease, remove the long piece of paper to expose the main length of the tape, keeping the end, which will be the anchor, covered.
Bracing Anchor #1, hold the paper-covered tab of Anchor #2 and stretch the tape between them as far as it will easily give. Now relax the tape to about 80% of that stretch. This creates the gentle pull from one anchor to the other.
Wrap the wide strip around the outer side of the hand, keeping the stretch in the tape at 80%. When you reach the end of the exposed adhesive, remove the remaining paper and attach the end as an anchor. As before, press the tape and rub it to create some heat, bonding it.
Be sure to rub both anchors as well as the middle (stretched) section, to adhere the full length of the tape.
Lower Thumb Strip: Create another anchor section at the end of the lower of the two cut strips. As before, crease the paper and gently tear the paper along that line. Remove the middle (longer) section of the paper. Again bracing Anchor #1, pull the lower strip to 100% of its stretch and then relax it to 80%.
Holding it at that level of stretch, draw the strip below the thumb. When you know where the anchor will lie on the pad of the thumb, remove the last bit of paper from the end and attach the tape as an anchor in the same manner as the first two.
Upper Thumb Strip: Still supporting the original anchor, repeat the same steps to attach the upper thumb strip, drawing it between the thumb and forefinger and attaching that anchor to the upper palm.
Finally, rub each of the four anchors and stretched sections well to ensure that the tape is firmly attached all over.
That?s it!
Watch the video below to see the application in action. (Yes, that?s actually my hand ? I think the the scratch is from my cat ? and my inventor daughter is the one applying the tape.)
Amazon carries KT Tape and KT Tape Pro, though it can be found at sporting goods stores for slightly more.
If you try the KT Tape method for easing wrist pain, comment with your experience!

