Step-by-step guide to capturing the beauty of a wild bird
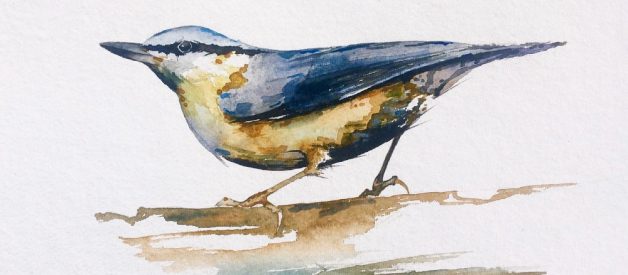
 Nutchatch (2020) by Christopher P Jones
I love this image of a garden bird, known as a nuthatch. The image was from a photo I found in a wildlife book. I like it because it shows the bird in a characteristically alert posture, with its head and tail slightly raised, as if it?s listening out and might fly away at any moment.
I tend to find that painting wildlife is a challenge made easier by careful study. It helps to have watched animals in their real-life surroundings to get a sense of how they move. All animals, and birds especially, have a way of shaping their bodies, sometimes tall and open, sometimes low and crouched.
Even though this painting was made from a photograph, I think it helps to know the shapes that animals make in order to judge if your painting is true to life. It?s also a good to watch animals, just for the pleasure of it.
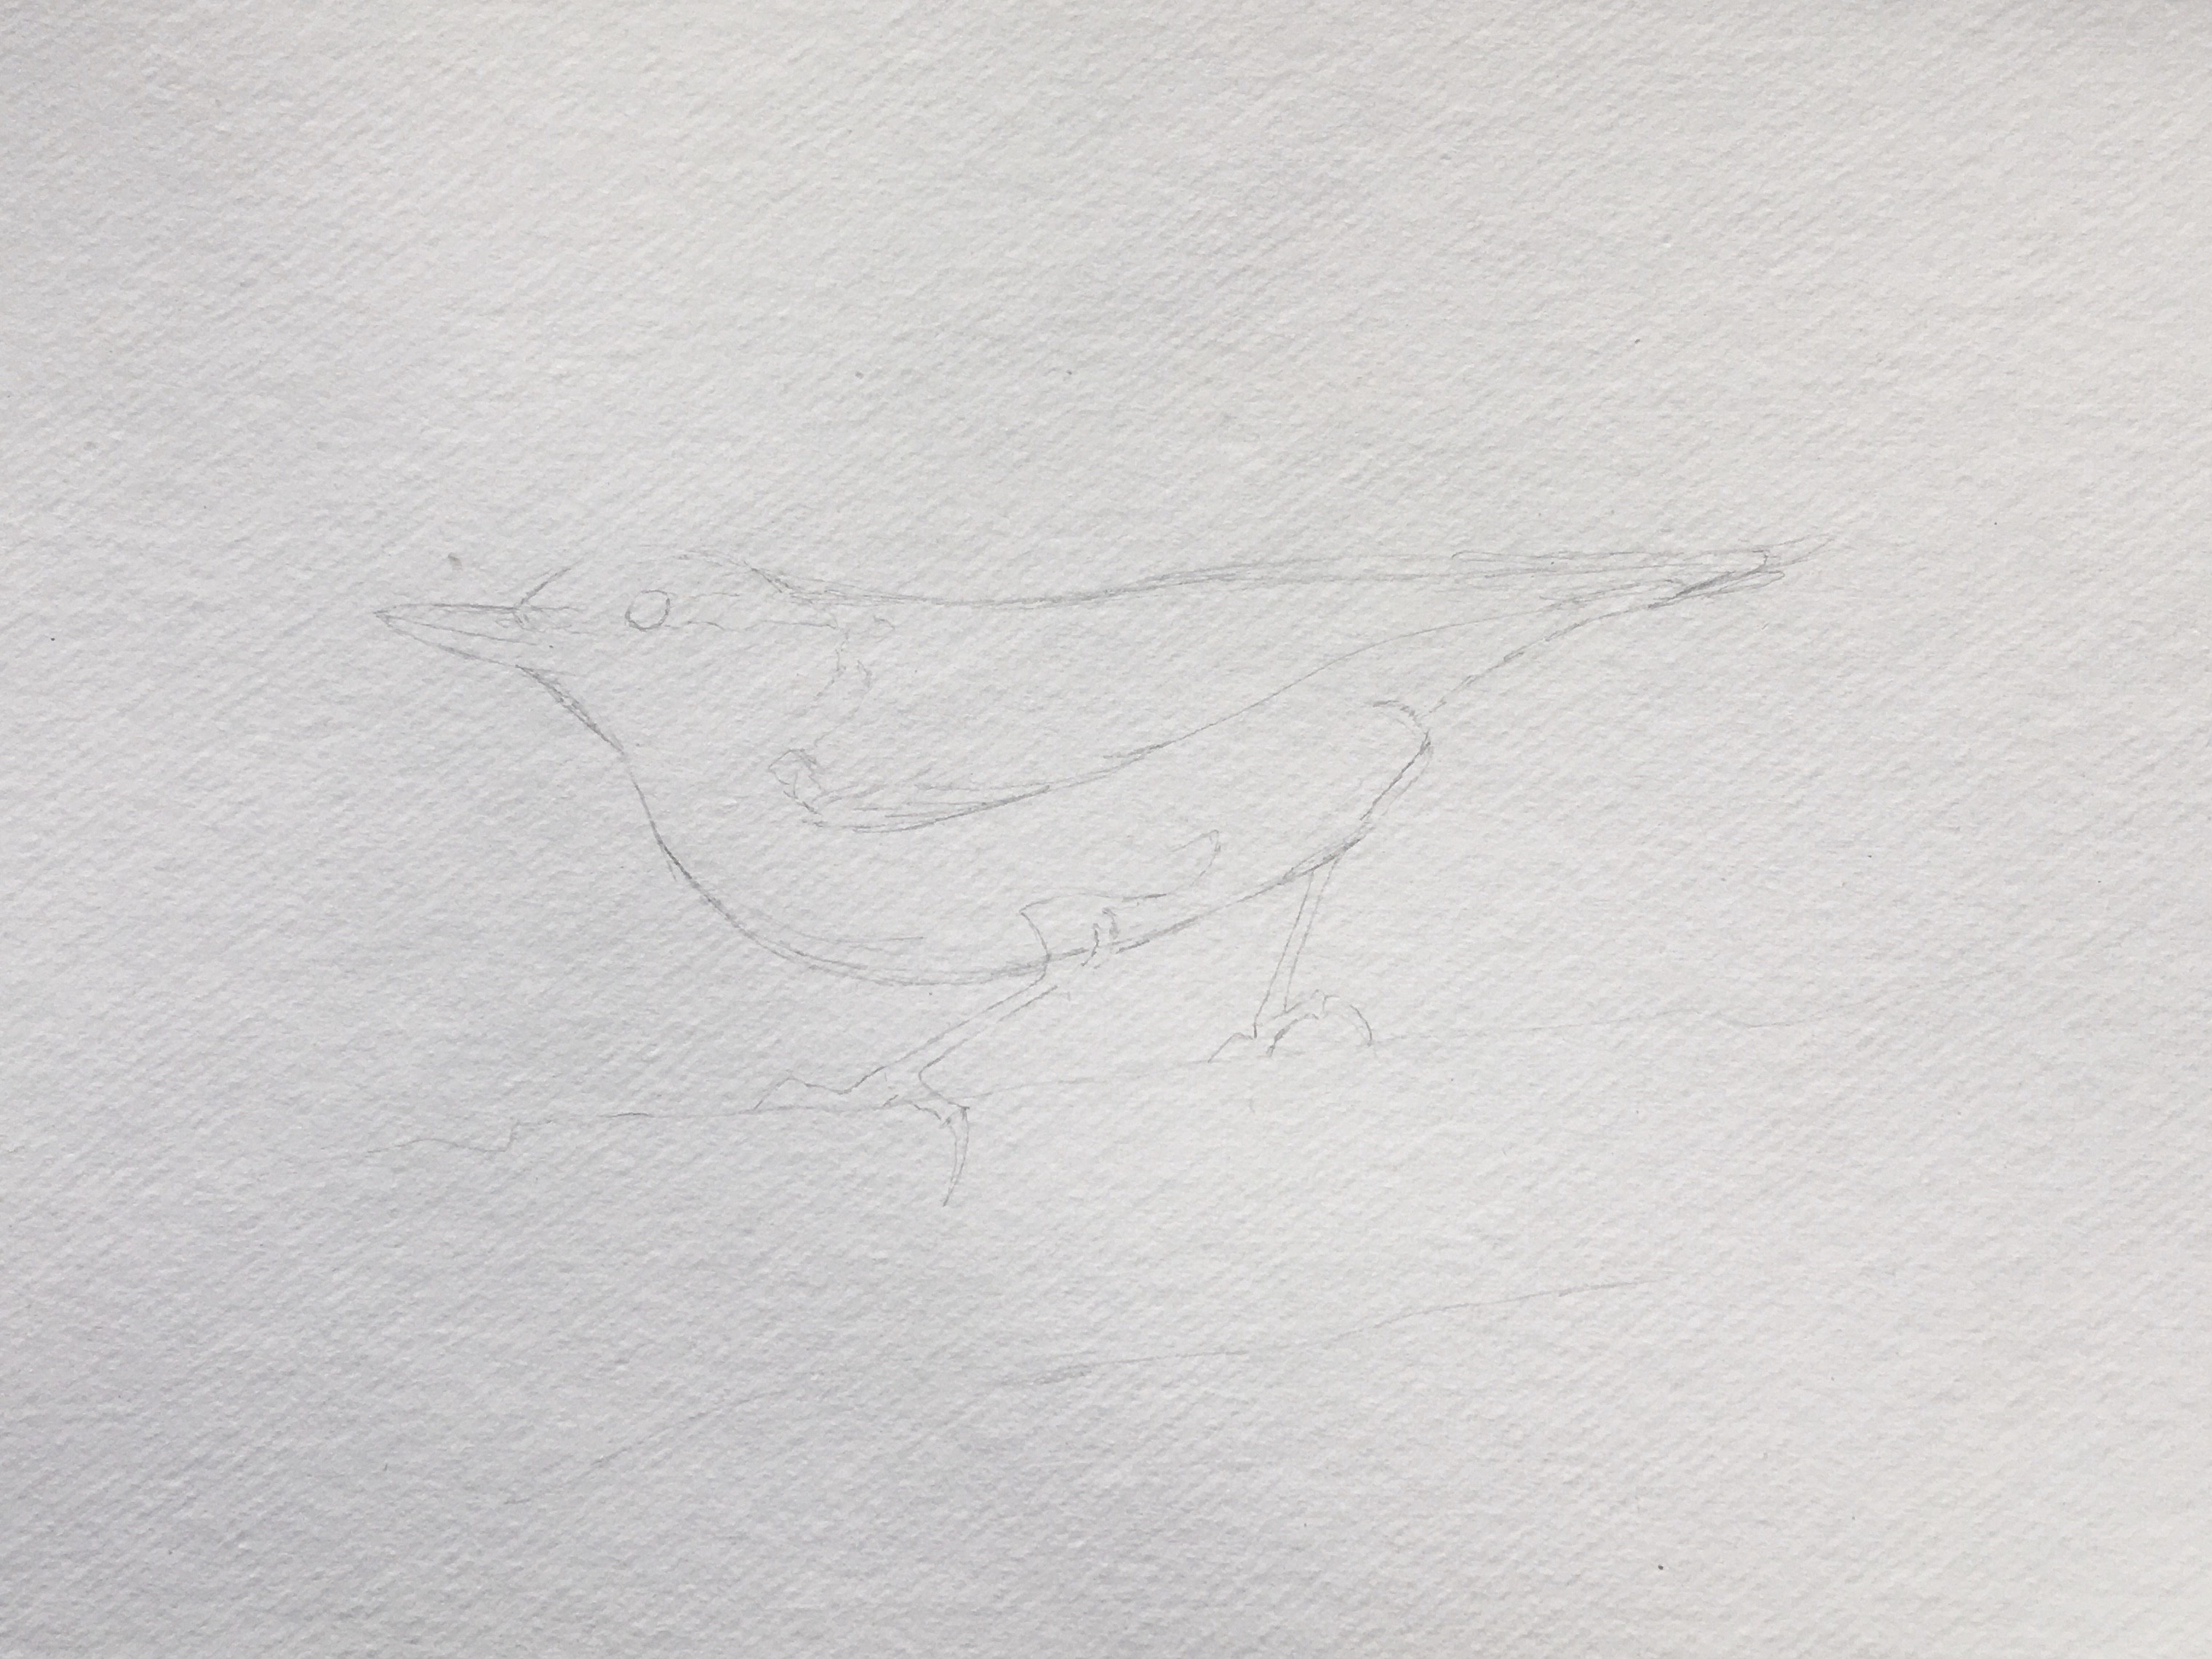 Initial pencil sketch
I began this painting by making a fairly detailed pencil sketch of the bird. I paid particular attention to its outline and the position of its key body parts: the eye, the beak and the legs. From experience, I know that getting these parts in the wrong place can ruin an otherwise strong painting.
When sketching on watercolour paper, it?s worthwhile making the lines strong enough so that you can still see them once a layer or two of paint has been put down. If the lines are too light, your sketch will soon disappear before you?ve had a chance to finish the work.
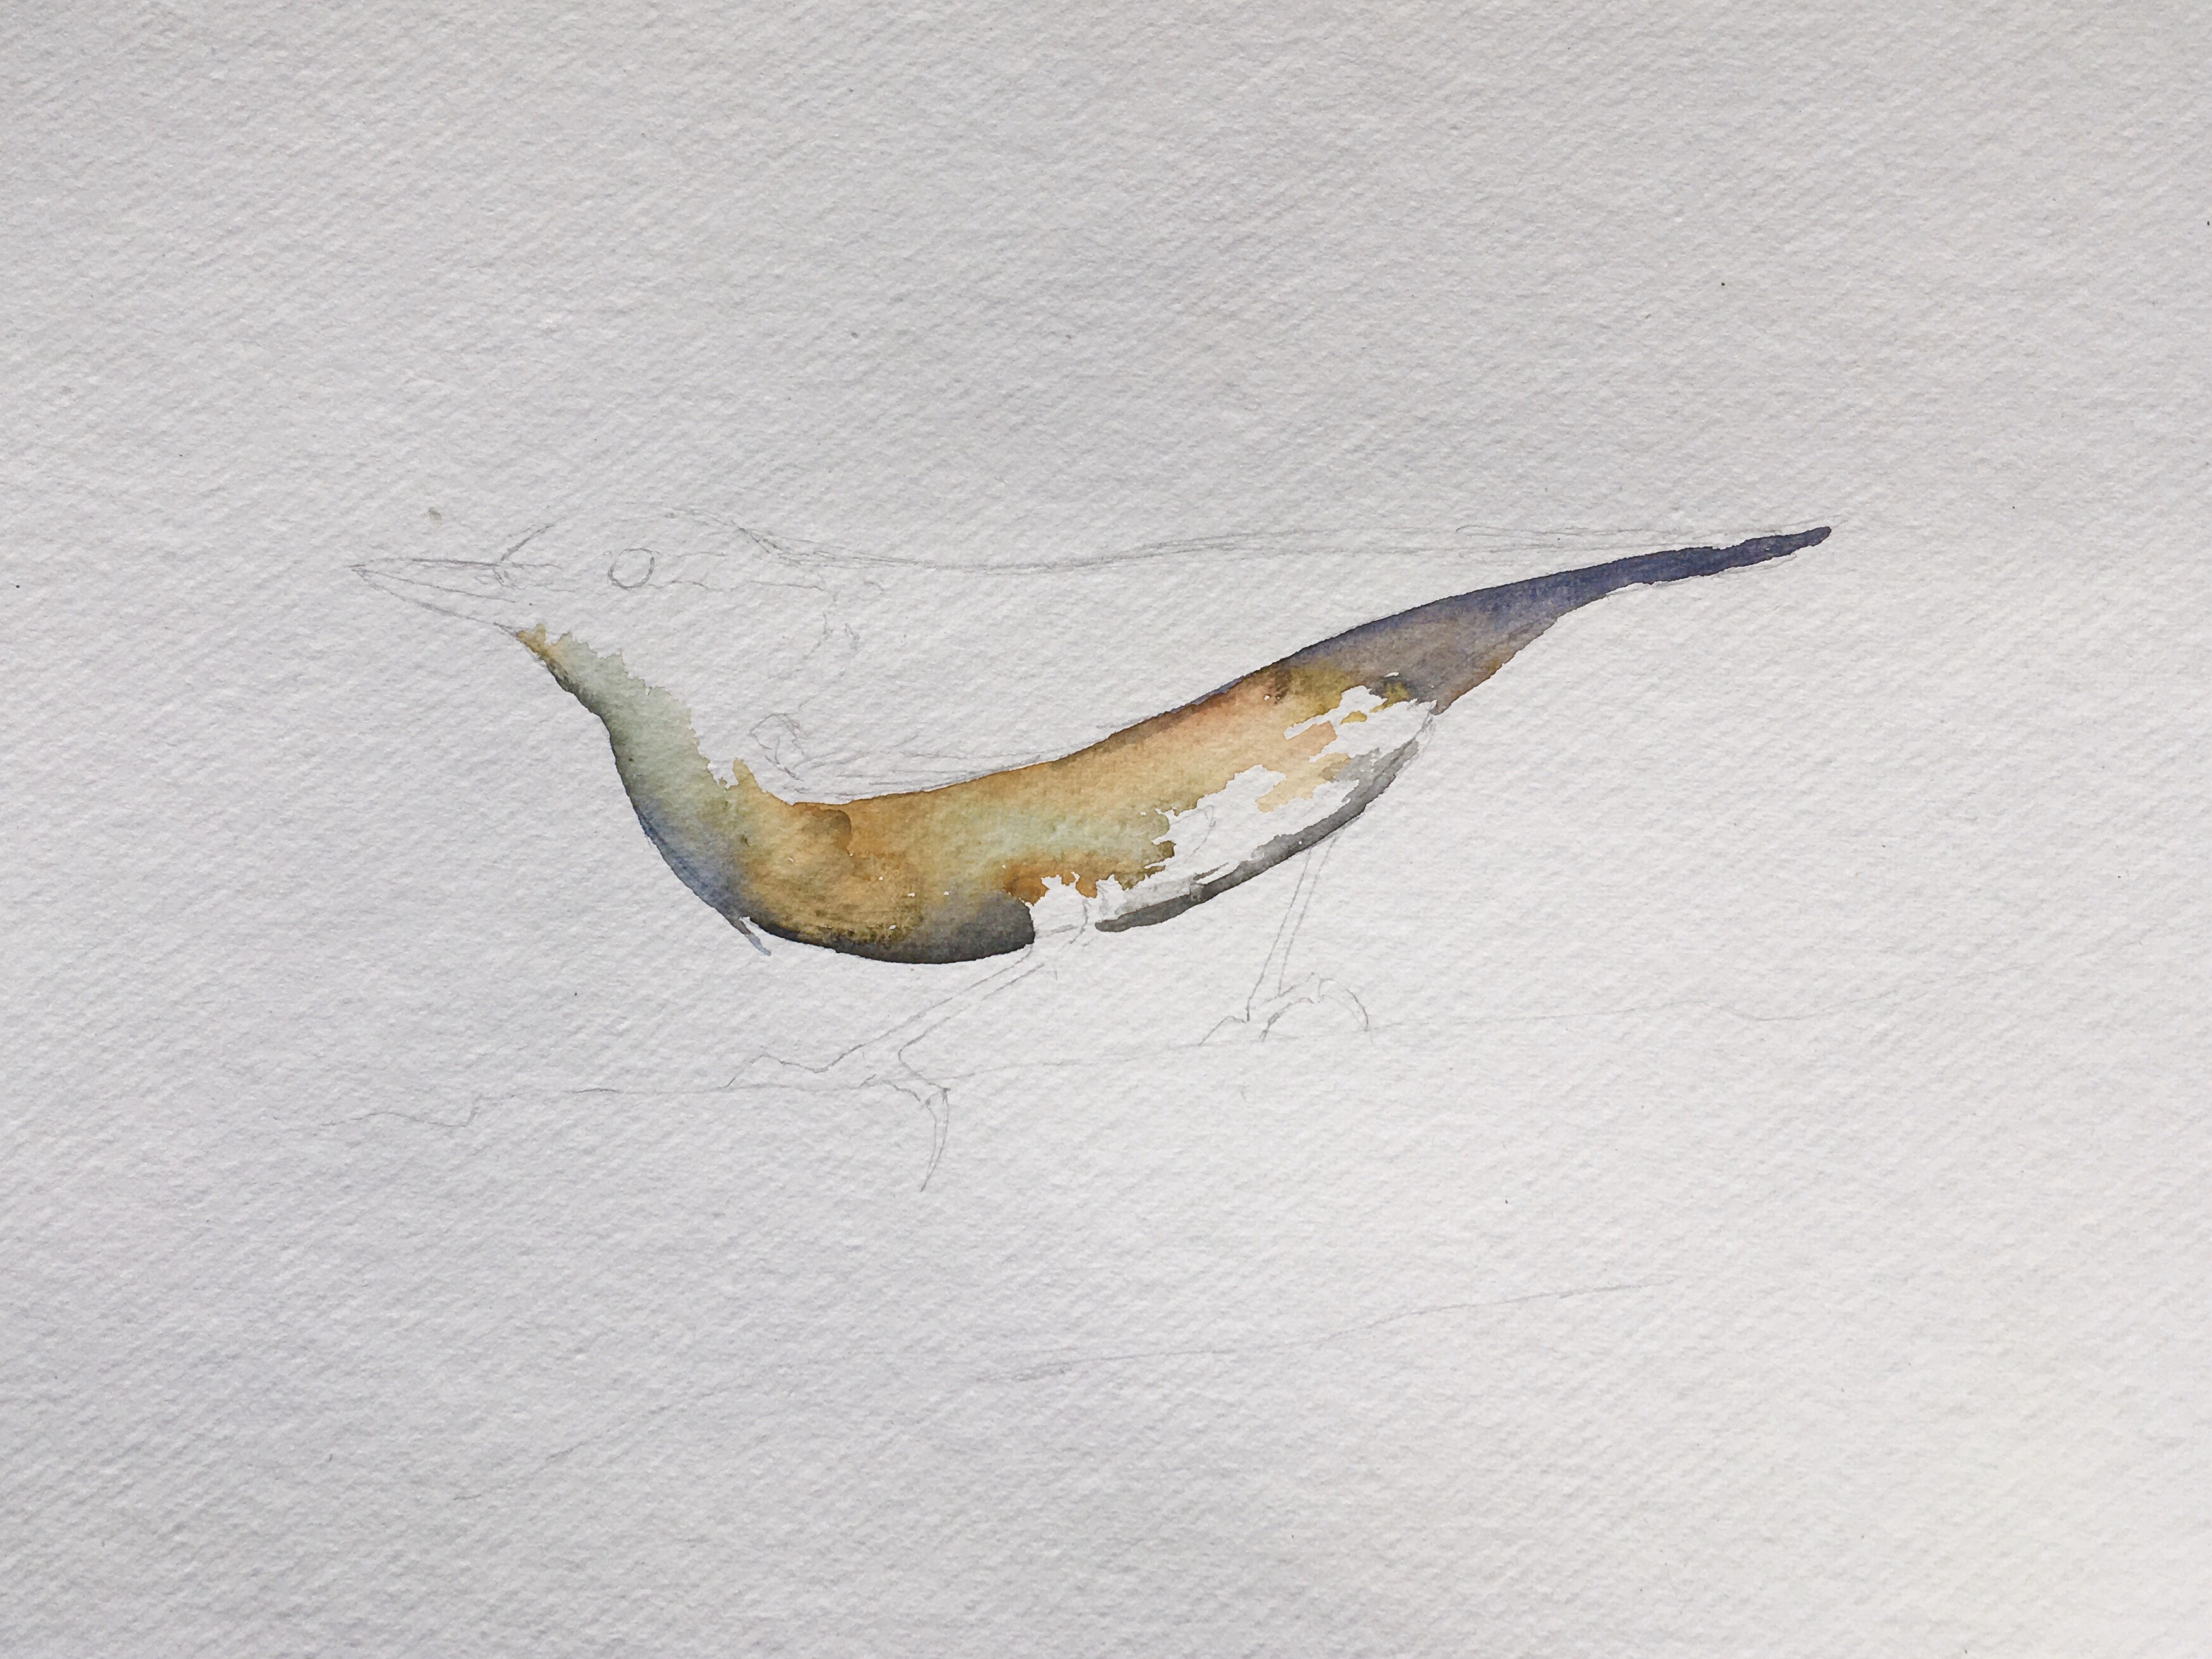
Once the sketch was done, I began by filling in the lower half of the bird?s body. The nuthatch has a beautiful array of colours in its feathers; the more I looked, the more colours I saw, from orange to blue, black to grey to green.
At this stage, detail is not so important, apart from keeping to the shapes of the pencil sketch. My technique was to work quickly so I was always adding into wet paint. This way the different colour-tones easily blended with each other as I worked across the area.
As always with watercolour, the best practice is to paint from light to dark. This means, use lighter tones with more diluted paint in the beginning, and worrying about the darker shades later.
Keep an eye on how the tail and underside of the bird develops through the painting to see how this works in practice.
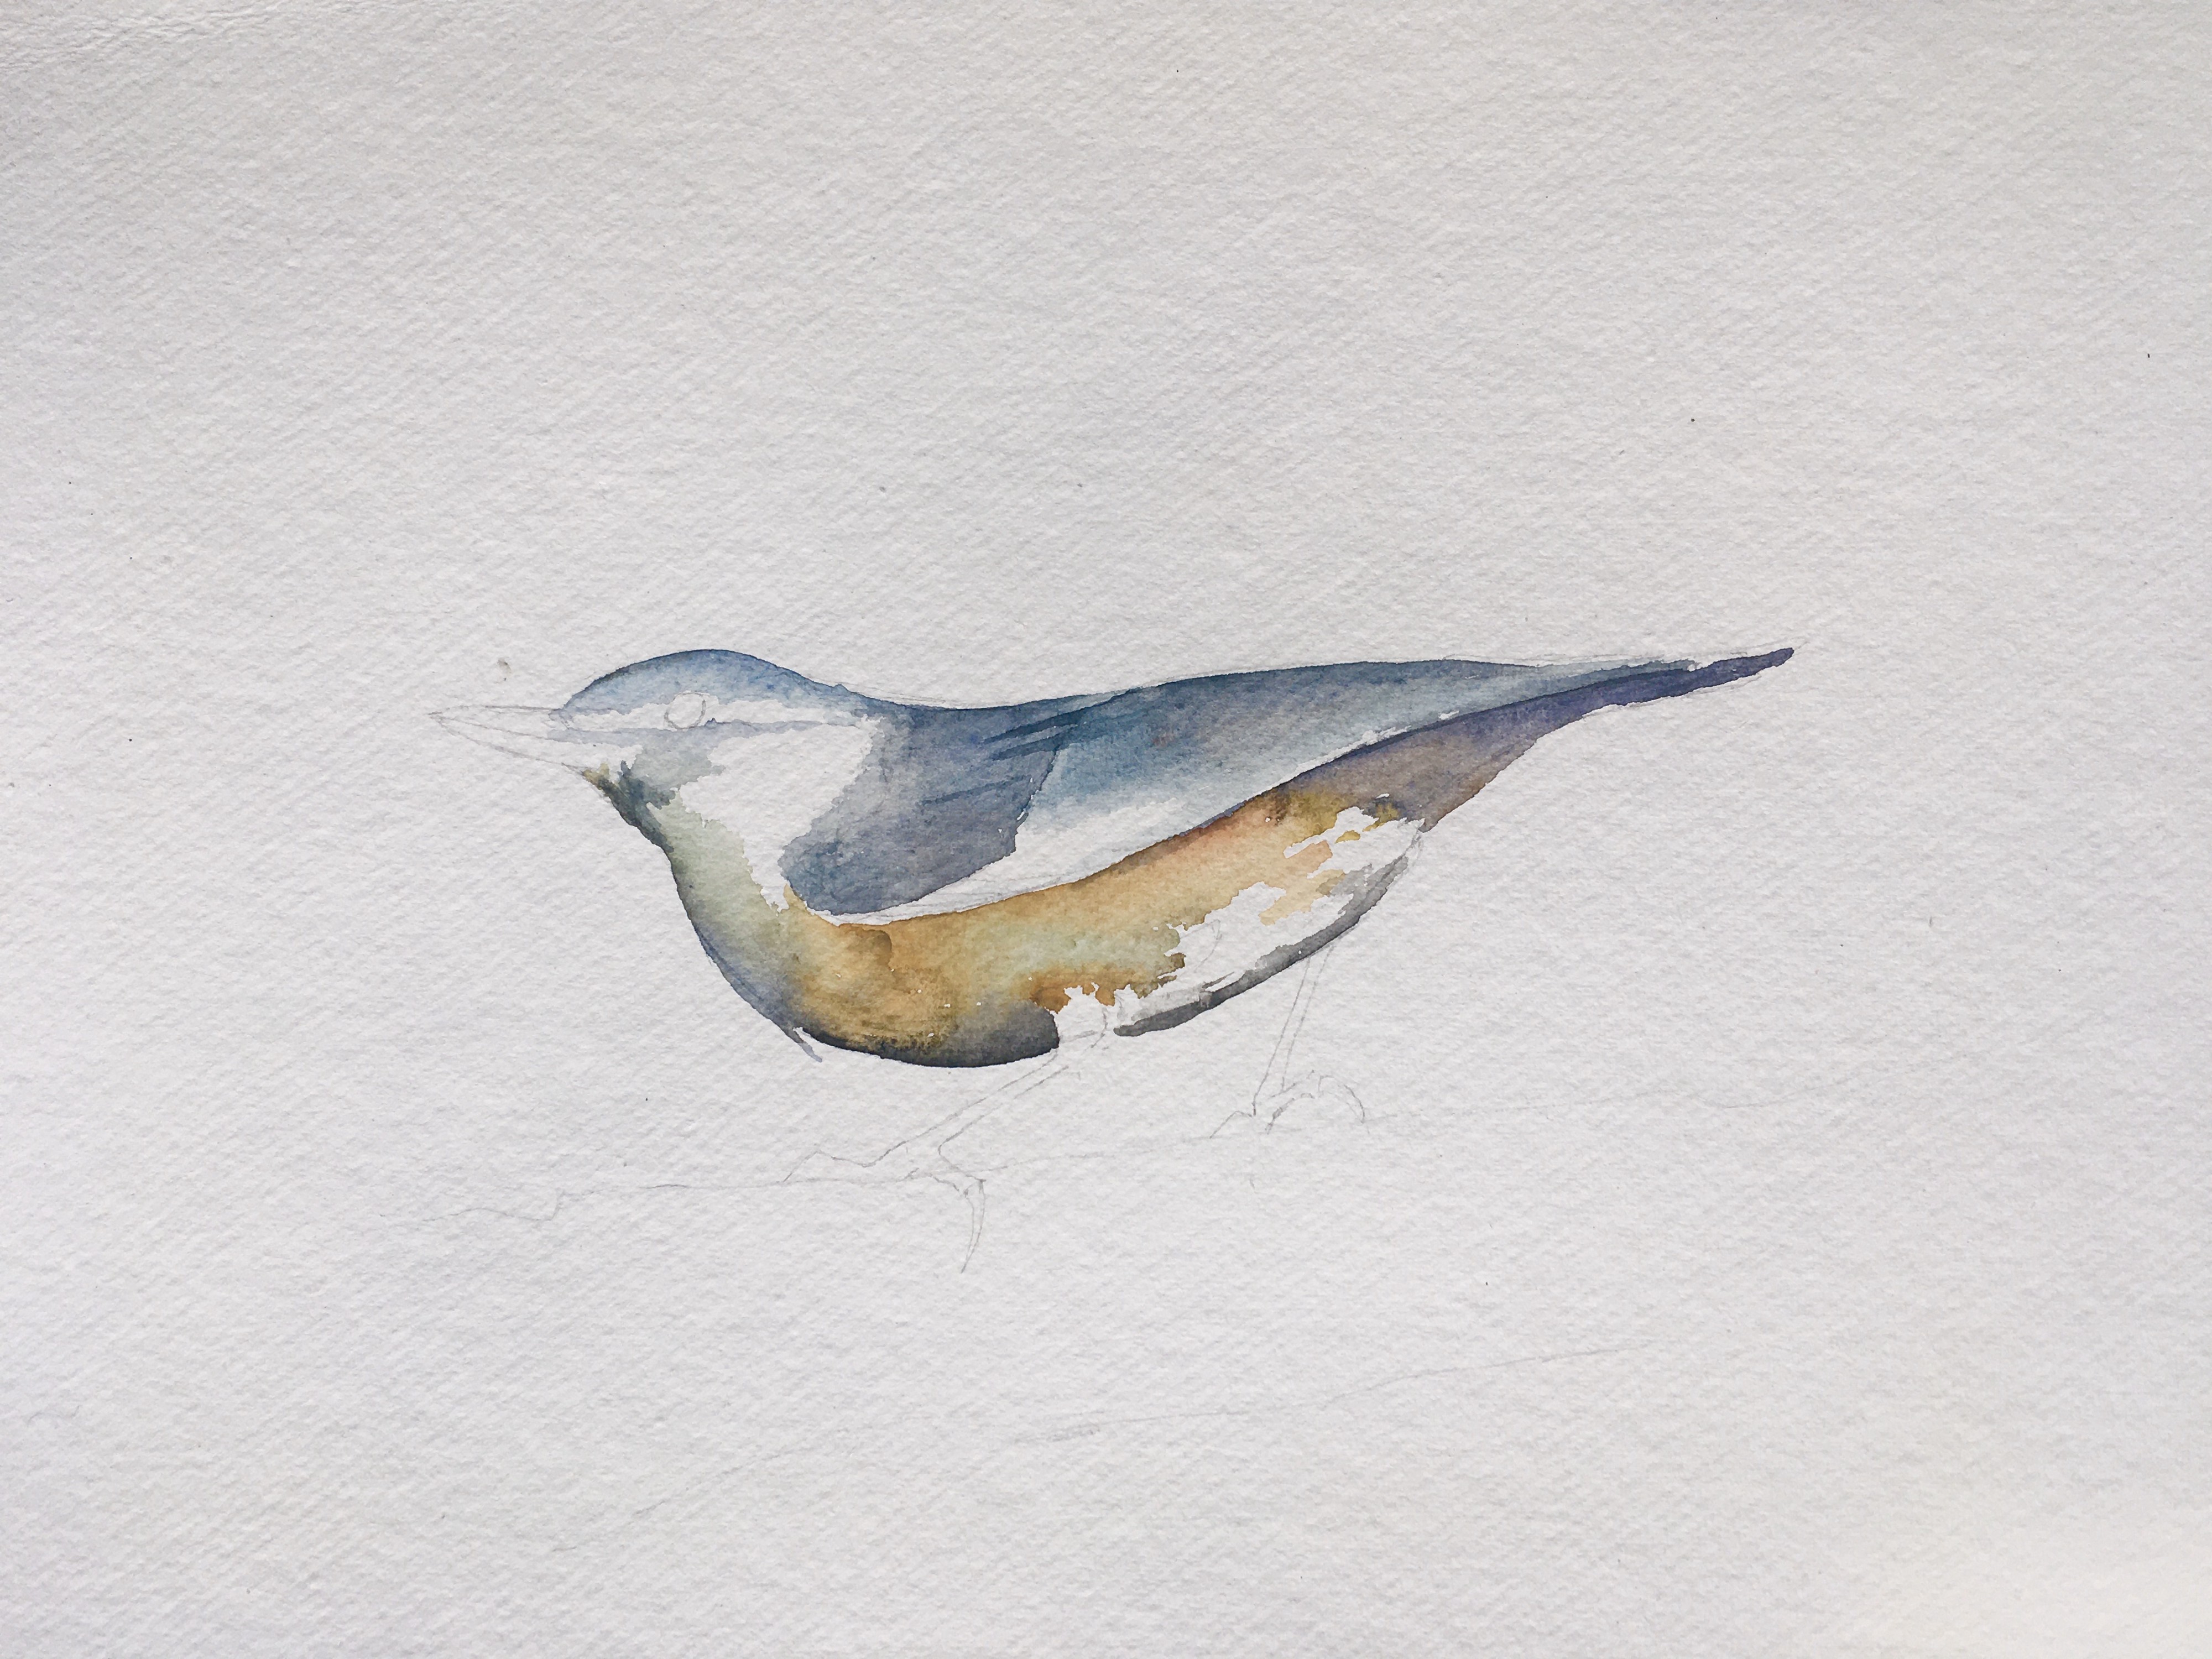
With the lower half of the bird filled in for now, I moved to the upper half. A different selection of colours here, mainly around various shades of blue and grey. I enjoyed adding a tiny touch of scarlet red into the mix here, just to lift the blue-grey tones to a subtle shade of purple.
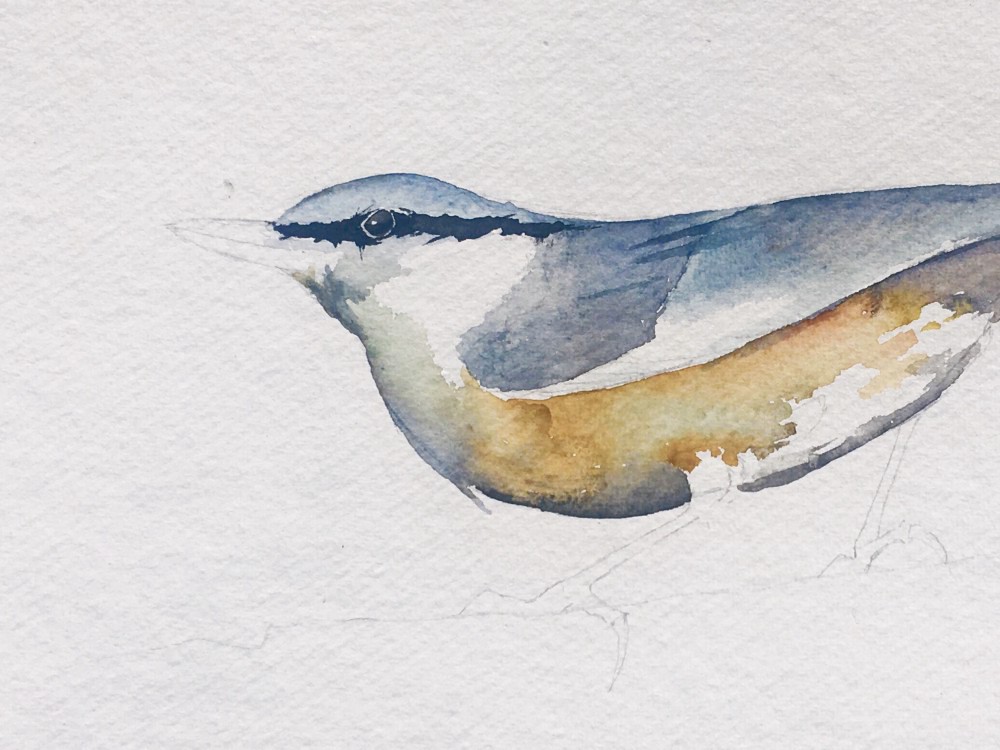
Perhaps the most important section was next: the bird?s head. I took my time with this part and used a smaller brush to capture the details.
First I painted the light-blue tone of the head.
Next I painted the black of the eye, being sure to leave a tiny square of white paper showing for the glint of reflected light. Once dried, I painted over the lower-half of the eye again, to give a deeper shade of black to the lower portion.
Painting around the eye was most delicate, because I wanted to leave a ring of white paper in tact to indicate the outer rim. This is where the pencil sketch became invaluable.
Next I moved onto the beak. I painted the left-most point first, gradually diluting paint so to lighten the tone as I moved right. I made sure I kept to the confines of the pencil sketch, as it?s all to easy to make a mistake with the shape of the beak. I was pleased (and relieved) to find it all worked out well on this occasion.
Next, I painted the legs and feet. These were quite straight forward, and benefited from being painted quickly to keep the forms crisp. The legs of a bird like this are so expressive in themselves that I find keeping them simple is best. Again, working to the details of the pencil sketch was helpful to maintain the correct shape and position.
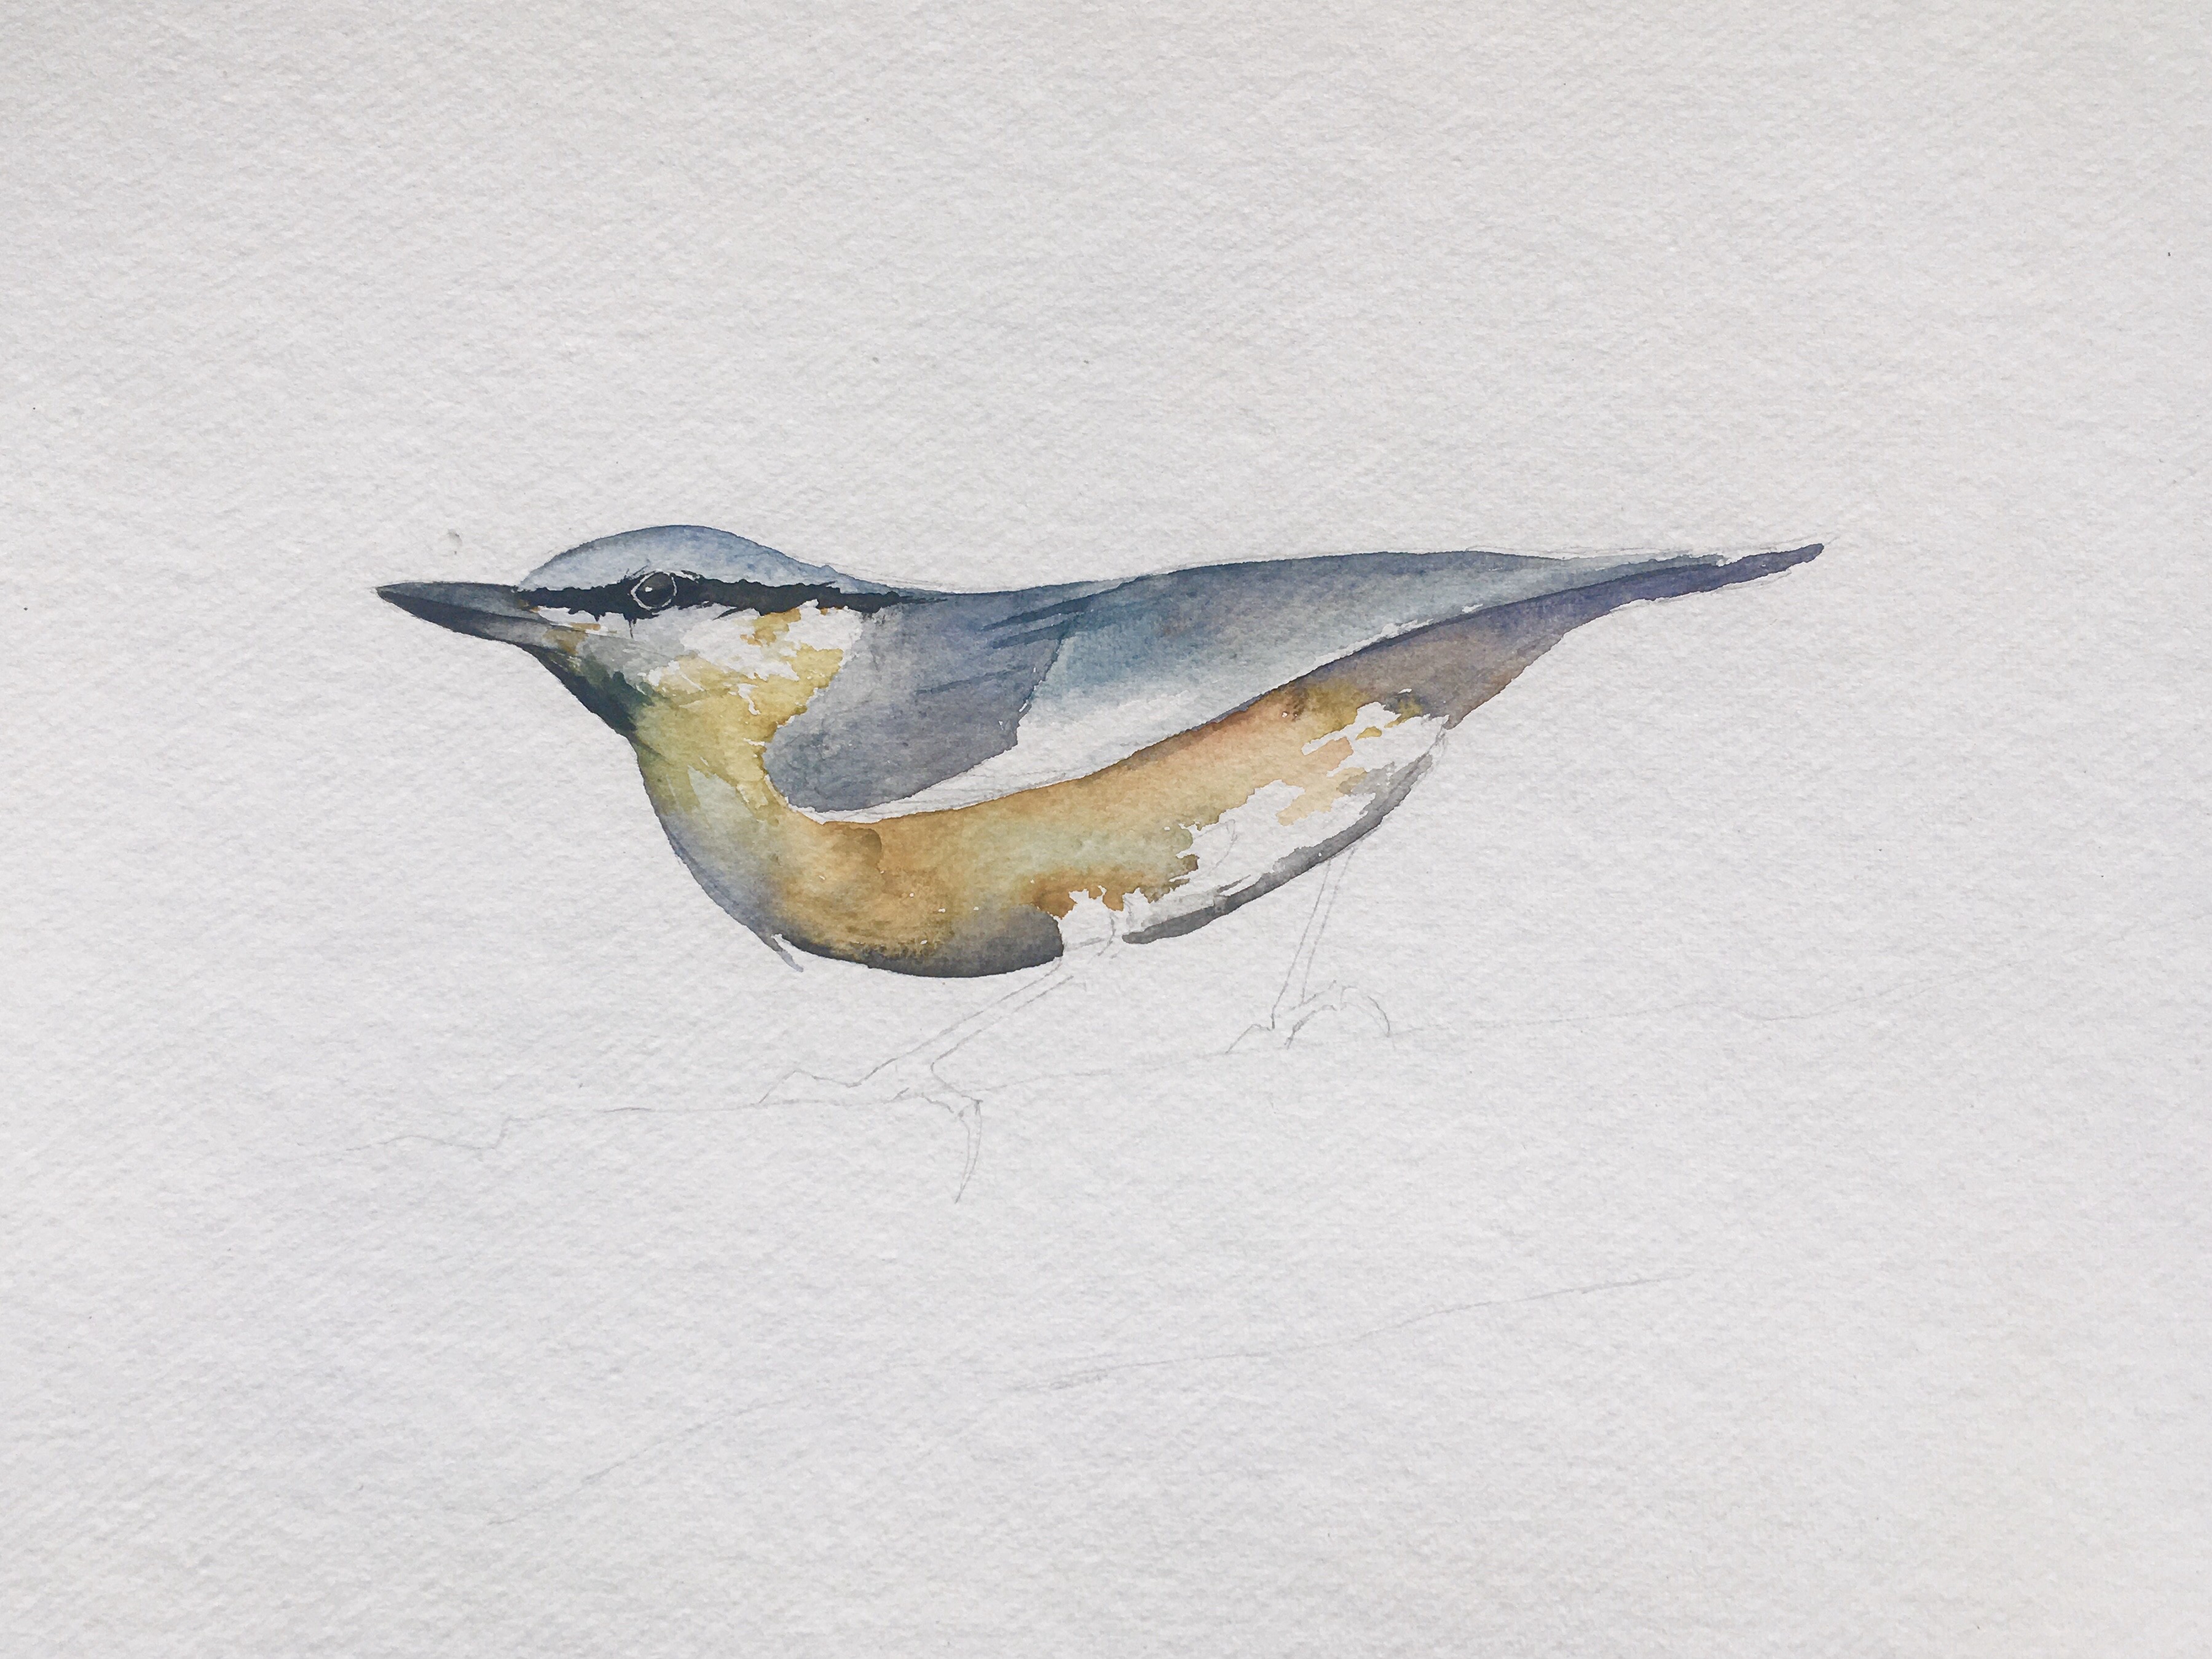
Now I could fill in the rest of the body and begin adding some details to the wing and tail feathers.
The underside of the bird needed more shadows, so I painted these in. And the wing feathers needed some texture, so I painted some quick ?stripes? to suggest layers of feathers. How much detail you give to these parts is up to you.
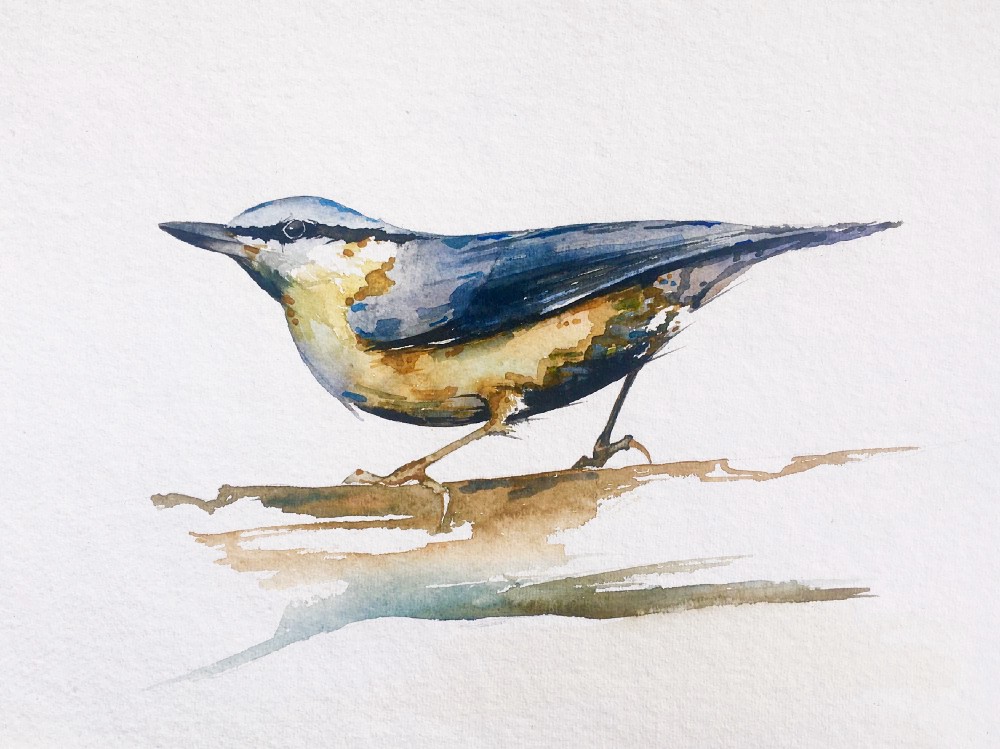
The final painting
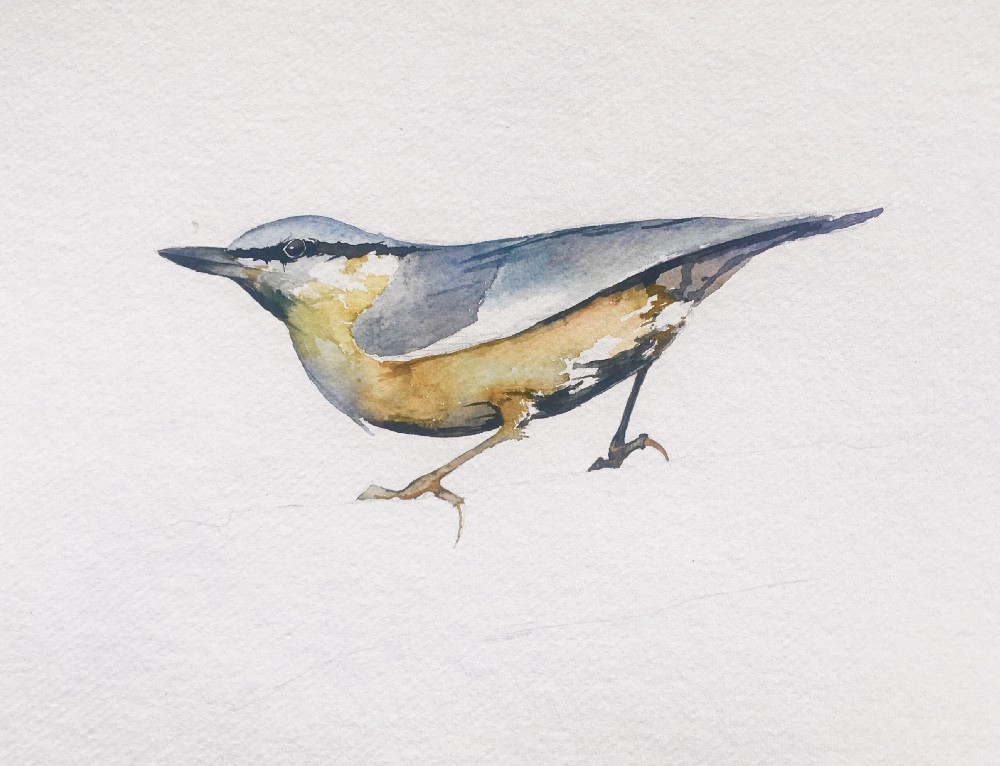
The final stages of the painting were really the most enjoyable, because I could now paint these parts with some spontaneity. I tend to find that if the early stages of a painting are done with care, then the later phases are difficult to get wrong. Which is why it?s always worth being patient in the beginning; artistic improvisation can come later.
I added more shading to the wings and underbelly, which also helped to define the foremost leg.
I also added a few drops of paint ? orange and blue mainly ? around the body to lift the overall colour range of the work. These were just ?blobs? of watercolour left to dry. I like effect they give.
Finally, I painted a tree branch for the bird to stand on. Just a few brushstrokes to suggest a shape was all that was required.
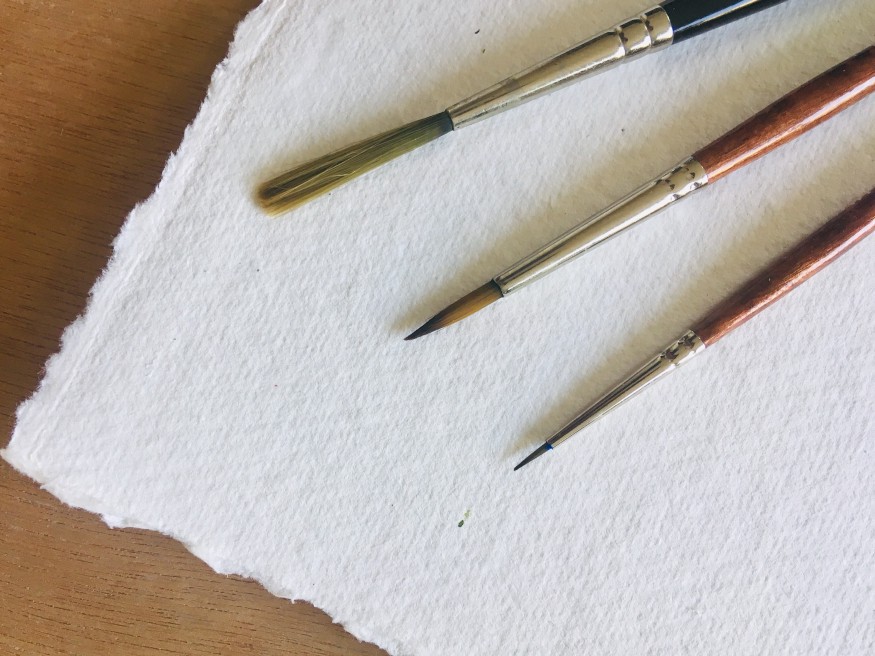
Materials
There are no hard and fast rules with watercolour, and different materials will yield different results. For reference, the materials I used for this painting are as follows:
- 640gsm cotton rag paper: This is a fairly heavy paper that doesn?t crinkle when wet. Good quality paper can make all the difference to a work, so it?s worth buying the better quality stuff. Anything above 300gsm should be good.
- 3 brushes of varying size (see photo below)
Paints:
- Prussian blue
- Ultramarine blue
- Burnt sienna
- Scarlet red
- Yellow ochre
- Black

See more of my artwork here. For more stories like this sign up here and get a free guide to Essential Styles in Art History.
And here are some of my other watercolour guides you may be interested in:
