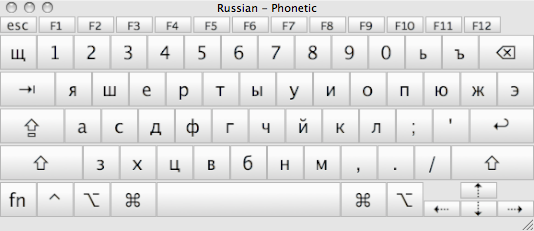
A few days ago I finally built brand new PC for Photoshop and gaming activities. As I used Windows 10 Home and since I am from Russia, Russian keyboard layout was one of my requirement. Since I work on Macbook for about three years, I got used to Russian Phonetic layout in Mac OS X, which is nice, because all Russian letters bind to single keystrokes. Of course, I tried to get the same layout on Win10. Here is the story begins.
Windows Russian Mnemonic Keyboard
First of all, I tried to use build-in Russian Mnemonic Layout, which is nice, but has completely another way of typing Cyrillic letters using English letters.
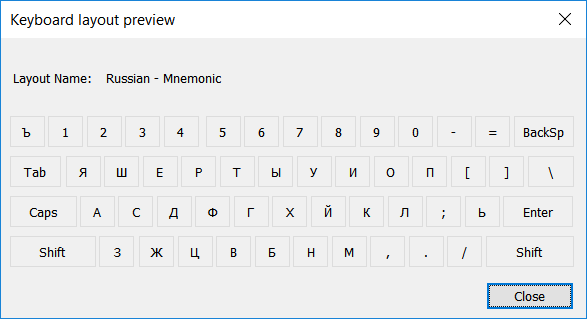
As you can see, there are a few letters that don?t exist on the layout at all and you need to press two keys to get one letter. For example, c + h = ?. Maybe it?s useful for someone, but I want to get OS X layout to have same behavior across all hardware. Let?s try custom layouts.
WinRus Layouts
After hours of search, I made a conclusion that WinRus layouts almost fit all my needs. A site with the same name provides a lot of information about Russian phonetic keyboard layouts and a few predefined layouts available for download and modifications.
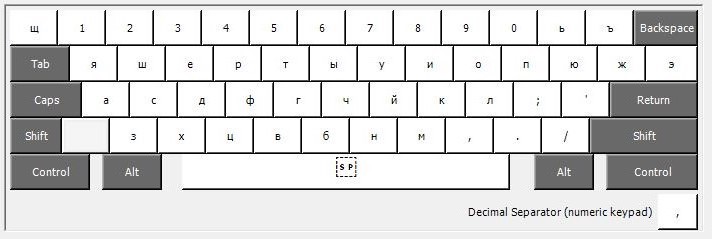
 Russian Phonetic ????? layout
 Russian Phonetic ????? layout
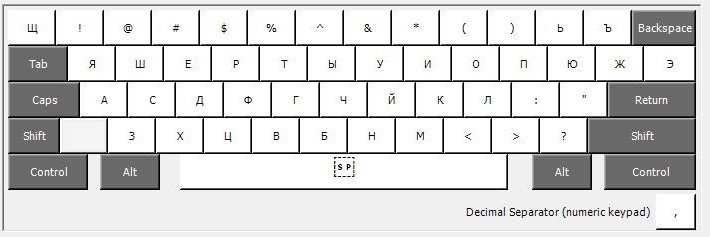
 Russian ?????? layout
????? layout is almost what I need, so I installed it to use as a reference later. All information about installation you can find on WinRus website.
Russian Phonetic MacOSX Layout
If you can?t find something, make it by yourself. Here we go.
First of all, let?s download The Microsoft Keyboard Layout Creator. It simple program for editing existing layouts and creating custom from scratch. In our case, we need to edit existing one, so press File ->Load Existing Layout and select Russian Phonetic Student-WinRus.com layout.
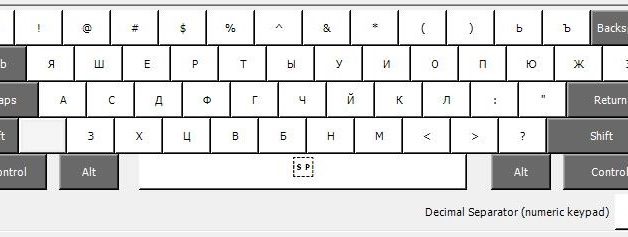
After some manual work, I finally got MacOSX Russian phonetic layout.
Final steps are: validating and saving the layout. Project -> Validate layout to check for errors, Project -> Build DDL and Setup package and you are all set. Run setup.exe from package directory and follow instructions here.
Success! Finally the same way of typing for Mac and PC. To get this layout follow the link below.
Download
Edit: Updated link
