[Update: you no longer need to install Keras separately since it is part of the core TensorFlow API. ?import tensorflow as tf? then use tf.keras in your code. You will notice the strikethrough of any mention of Keras installation in this blog post]
So you want to get started to study deep learning? The first step is to set up the tools. In this post I will share with you how to set up Anaconda and Jupyter Notebook, and then install TensorFlow (including Keras). Check out My Notes on TensorFlow 2.0 if you want to try out the 2.0 Preview.

There are different ways of installing TensorFlow:
- ?native? pip or install from source
- install in a virtual environment with Virtualenv, Anaconda, or Docker. This post will be using Anaconda.
While Jupyter Notebook is not a pre-requisite for using TensorFlow (or Keras), I find that using Jupyter Notebook very helpful for beginners who just started with machine learning or deep learning. I plan to use Jupyter Notebook for all the tutorials that I will be writing in order to share my deep learning knowledge.
There are other deep learning frameworks out there but my future tutorials will be mostly using TensorFlow and tf.keras.
Let?s get started –
Download Anaconda
Anaconda will enable you to create virtual environments and install packages needed for data science and deep learning. With virtual environments you can install specific package versions for a particular project or a tutorial without worrying about version conflicts.
Download Anaconda for your platform and choose the Python 3.6 version: https://www.anaconda.com/download
By downloading Anaconda, you get conda, Python, Jupyter Notebook and hundreds of other open source packages.
Conda is a package manager to manage virtual environment and install packages. Here are some helpful commands using conda:
# update conda in your default environment $ conda upgrade conda$ conda upgrade –all# create a new environment with conda$ conda create -n [my-env-name]$ conda create -n [my-env-name] python=[python-version]# activate the environment you created$ source activate [my-env-name]# take a look at the environment you created$ conda info$ conda list# install a package with conda and verify it’s installed$ conda install numpy$ conda list# take a look at the list of environments you currently have$ conda info -e# remove an environment$ conda env remove –name [my-env-name]
I highly recommend you download and print out the Anaconda cheatsheet here.
Conda vs Pip install
You can use either conda or pip for installation in an virtual environment created with conda. They are both open source package managers. Here are some differences:
- conda install ? installs any software package.
- pip install ? installs python packages only and it?s the defacto python package manager.
Note: pip and conda use different packaging formats so they do not operate interchangeably.
protip: use conda list to see the list of packages installed and whether they are installed with conda or pip.
Install TensorFlow (including Keras)
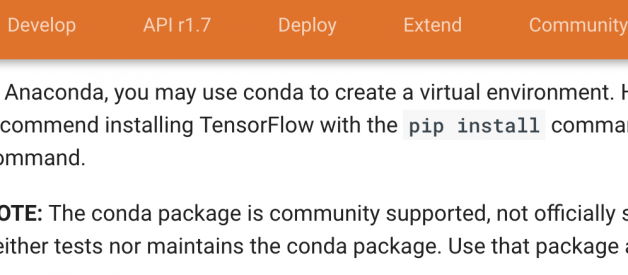
Next we will install TenslowFlow in the virtual environment you created with conda. Note: we will be using pip install instead of conda install per the TensorFlow official installation documentation.
 Source: TensorFlow official install documentation for MacOS
You can either install one package at a time or install several packages at once from a requirements.txt file.
# install pip in the virtual environment$ conda install pip# install Tensorflow CPU version$ pip install –upgrade tensorflow # for python 2.7$ pip3 install –upgrade tensorflow # for python 3.*# install Keras (Note: please install TensorFlow first)$ pip install Keras#? ?i?n?s?t?a?l?l? ?K?e?r?a?s? ?(?N?o?t?e?:? ?p?l?e?a?s?e? ?i?n?s?t?a?l?l? ?T?e?n?s?o?r?F?l?o?w? ?f?i?r?s?t?)?? $? ?p?i?p? ?i?n?s?t?a?l?l? ?K?e?r?a?s?# Alternatively, install multiple packages from a requirements file$ pip install -r requirements.txt
After installing TensorFlow you can verify its installation with python in command line:
Invoke python from your shell as follows:
# invoke python from your shell$ python# create a simple TensorFlow program inside the python interactive shell>>> import tensorflow as tf>>> hello = tf.constant(‘Hello, TensorFlow!’)>>> sess = tf.Session()>>> print(sess.run(hello))# Exit the python shellCtrl+D
If you see Hello, TensorFlow! printed then it confirms that TensorFlow is stalled correctly.
Launch Jupyter Notebook
Jupyter Notebook is a web application that contain both computer code such as Python and rich text elements such as paragraph, equations, figures, links, etc. It?s an essential tool for data analysis and visualization.
As I said earlier, you get Jupyter Notebook already by downloading Anaconda.
Start/Stop Jupyter Notebook
You will start / stop the Jupyter Notebook server from the command line:
# launch the Jupyter Notebook server$ jupyter notebook# stop the Jupter Notebook serverCtrl+C
Alternatively you can shut down individual notebooks from the Notebook server UI.
When opening your notebook, if you get a Kernel not found error, use the drop down (with virtual environments) to select and set a kernel.
Running Jupyter Notebook with GPU
When you just start out with deep learning with some Hello World examples, you can run your training on CPU. As you progress in your learning, most likely you will need to run your training on a GPU. Check out my post on how to set up Jupyter Notebook on Floydhub or Amazon AWS.
Here is an informative Jupyter Notebook blog including a cheat sheet –
Jupyter Notebook Cheat Sheet
You’ll probably know the Jupyter notebooks pretty well – it’s one of the most well-known parts of the Jupyter?
www.datacamp.com
Verify Jupyter Notebook is working
Now that you have a conda virtual environment and installed the required packages, and launch Jupyter Notebook. Let?s verify everything is working.
Create a new Notebook and create a new cell with
import tensorflow as tfprint (“TensorFlow version: ” + tf.__version__)# Note you no longer need to import keras, use tf.keras insteadi?m?p?o?r?t? ?k?e?r?a?s?
E?x?e?c?u?t?e? ?t?h?e? ?c?e?l?l?(?s?)?,? ?a?n?d? ?y?o?u? ?s?h?o?u?l?d? ?s?e?e? ?t?h?e? ?v?e?r?s?i?o?n? ?o?f? ?T?e?n?s?o?r?F?l?o?w? ?a?n?d? ?t?h?a?t? ?K?e?r?a?s? ?i?s? ?u?s?i?n?g? ?T?e?n?s?o?r?F?l?o?w? ?b?a?c?k?e?n?d?.? You will only see ?Using TensorFlow backend? if you explicitly import keras. Please use tf.keras instead.

If you see an error in your notebook complaining about TensorFlow o?r? ?K?e?r?a?s?module not found, even though you already install it in your conda environment, make sure you are setting the right kernel.
Protip: install nb_conda so that you can easily switch kernel in Jupyter Notebook (conda install nb_conda)
Summary
To summarize, here are the steps to take for setting up everything:
- Download Anaconda
- Create a virtual environment and activate it
- Install K?e?r?a?s? ?a?n?d? TensorFlow etc.
- Launch Jupyter Notebook
- Start writing some code!
# create a new environment $ conda create -n fashion-mnist-tutorial# activate the environment you just created$ source activate fashion-mnist-tutorial# install pip $ conda install pip# install latest version of Tensorflow$ pip install –upgrade tensorflow # if you are prompted to upgrade pip$ pip install –upgrade pip#? ?i?n?s?t?a?l?l? ?t?h?e? ?l?a?t?e?s?t? ?v?e?r?s?i?o?n? ?o?f? ?K?e?r?a?s??$? ?p?i?p? ?i?n?s?t?a?l?l? ?-?-?u?p?g?r?a?d?e? ?k?e?r?a?s?# install nb_conda for easily managing/switching notebook kernel$ conda install nb_conda# launch Jupyter Notebook$ jupyter notebook


