If you are familiar with scripting languages, such as Python or Ruby, you will recall types of data known as arrays and dictionaries. Below is a quick example of the ways of accessing data in those data types. The array is characterized by an ordered series of items, while the dictionary is characterized by items with a key-value pair relationship.
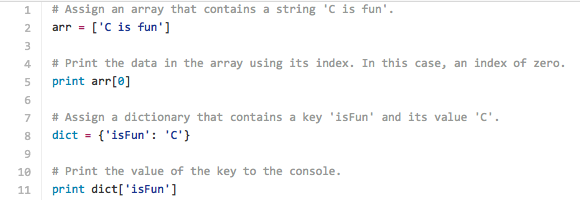
Notice how using a dictionary allows us to retrieve the data using the dictionary?s key-value mapping. In this post we will build a hash table that uses this method of data storage. This data structure allows for the retrieval of data in a more efficient manner than a typical indexed array, as we will come to see. A hash table then, is a data structure with keyed array items.
Unlike Python, with its ability to use a built in dictionary data type, in C we only have indexed arrays to work with. Thus to make a hash table we will need to retrieve data with functions that use indexed arrays. To do so, we will create a simple array of length n where n is the number of items in our hash table. Additionally, each of the array items will need to have two attributes: a key and a value. This way, we will eventually be able to query the hash table based on a key attribute and return the associated value data.
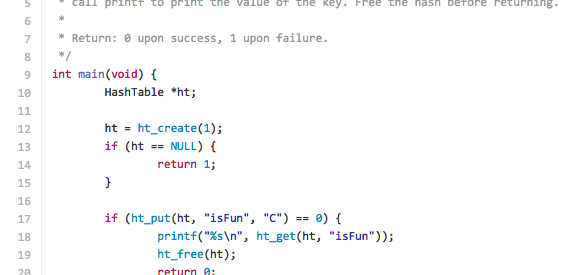
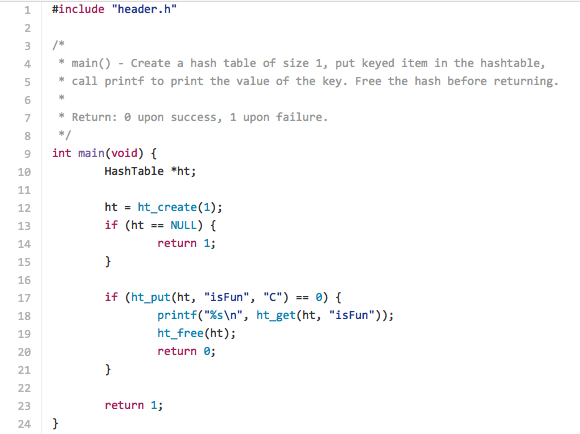
Before going on to explain the details of how we will achieve this, let?s examine the main function that we will use. Here, we see four of the functions that we will write to build our hash table: ht_create(), ht_put(), ht_get(), and ht_free(). All of the code snippets for this hash table can be found here.
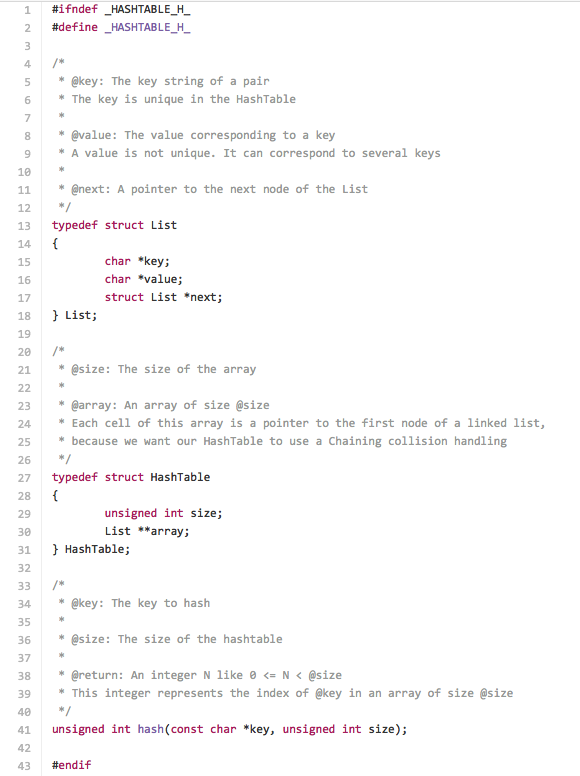
The first things we need to do is define the structures of the two components that we will use to create the hash table. We will call these two structures List and HashTable. List defines an element of the hash table that has two pointers to our string data: key and value. It also has a pointer next to an object of type List (suffice it to say, at this point, that our pointer next will facilitate in retrieving our data). The second structure HashTable defines the hash table itself which has an unsigned int size and an array of List items array.
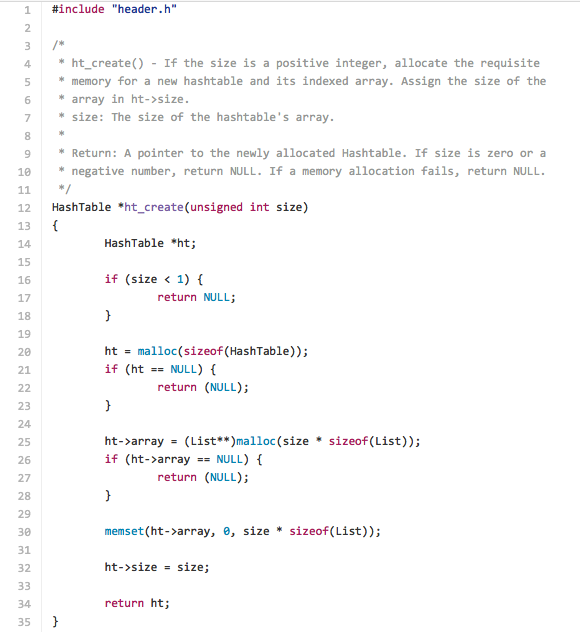
With our structures defined, we will next write a function ht_create() that allocates the memory necessary for a HashTable of length size.
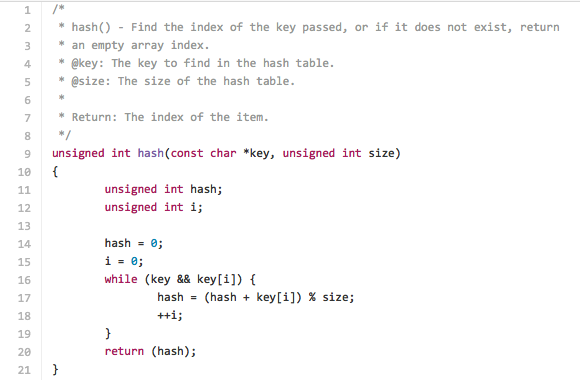
Now that we have created our hash table, we will need a way to fill it with List items. To determine what index any particular key will take will need to be determined by a function. This will serve the twofold purpose of both assigning an index for a new key and retrieving the index of a preexisting key.
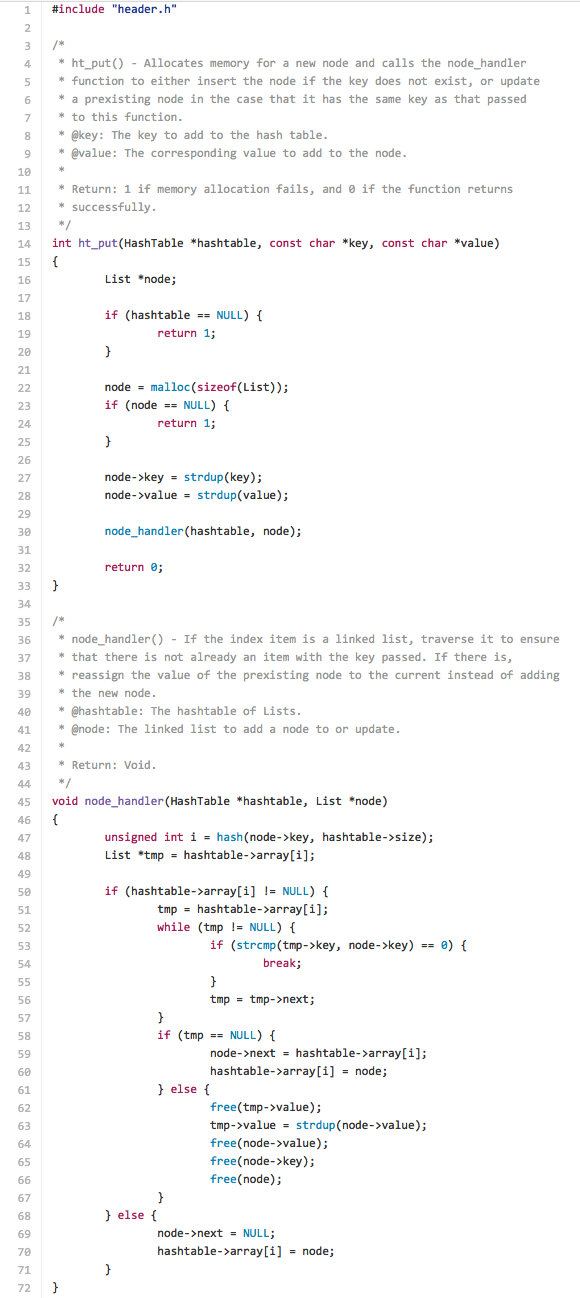
We will write a function ht_put() that creates a new item in our hash table by allocating the memory for a new List item called node and assign the strings passed to the function to key and value, respectively. Now that we have our new node, let?s create a function node_handler() which inserts our items in the list. We want this function primarily to insert an item at the given index of the array, but it also needs to handle a case where the index already has data stored in that location?a case known as a collision. In such an instance, we will create a linked list of the data items so that we can iterate through them and find the appropriate data. Now our List structure?s pointer next comes into play as we set it to point to the preexisting data. We are now able to use that pointer to insert the new List item at the beginning of the linked list. Thus we end up with a chain of List items in that array index, with the last one pointing to NULL.
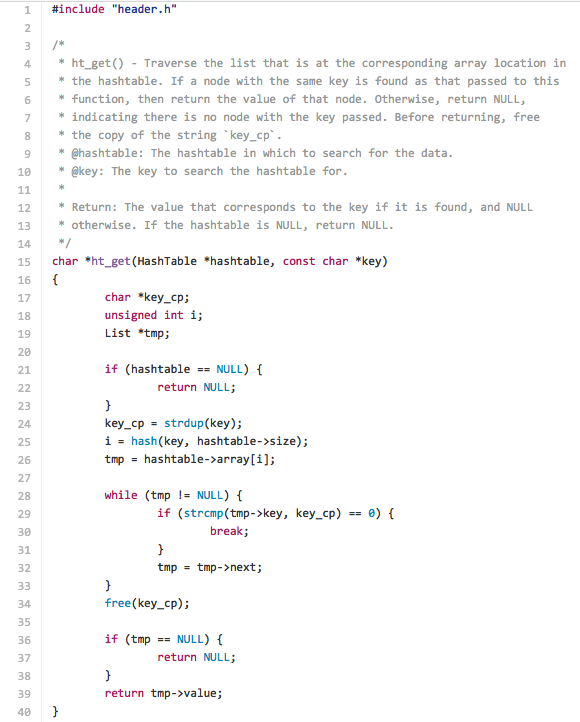
Finally, we can define a function ht_get() that retrieves data from the hash table, as in our Python dictionary. This will take our hash table key as parameter and search within the particular index of the array for a List item with the key. If it is found, then it will kindly return that item?s value.
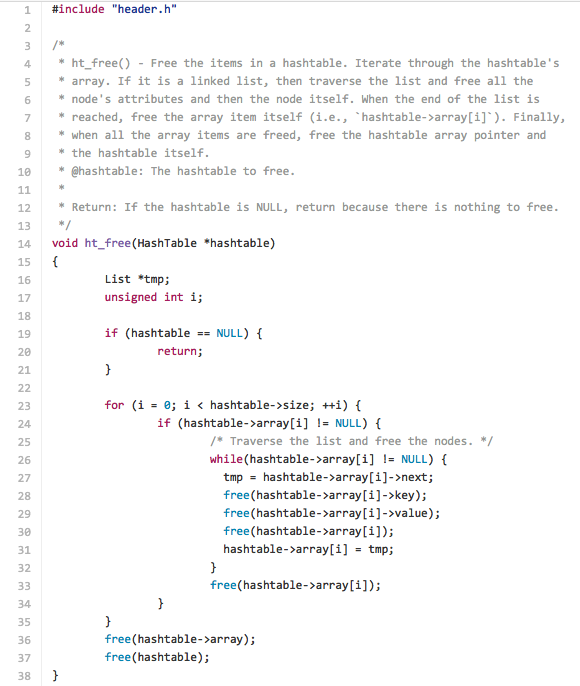
Our initial goal is now met, but our job is not quite done. By now we have allocated 72 bytes of memory for our program, so let?s not forget to free that memory to avoid memory leaks.
If you would like to see the code in action, you can clone the repository that contains the tutorial?s files and change into the directory. Compile the program with the files we have been exploring and run the executable file. A tool that I like to use for tracking my program?s memory usage is called valgrind, so we will use that to learn how the program is using memory. These files were tested using Ubuntu 14.04.
$ git clone https://github.com/bennettbuchanan/holbertonschool-low_level_programming$ cd holbertonschool-low_level_programming/example_hash_table/$ gcc -Wall -Wextra -Werror -pedantic main.c ht_put.c ht_create.c hash.c ht_get.c ht_free.c$ valgrind ./a.out
Our output is the letter C and valgrind informs us that no memory leaks are possible because C is fun. Thank you for following along!

