YEEZY REFF TALK
You can also check out my V1 Legit Check Guide Here.
Hey Yeezy Fam,
I saw a lot of LC on the forums lately, and decided to create a guide towards Legit Checking your V2’s.
If you are starting off and you want to be 100% sure you have an authentic pair, I find that a lot of people will tend to favor sites like StockX and GOAT. Both are great and excellent sites, and I have used them countless times as well. Prices on both sites tend to be higher than what you could find through a local seller. Which makes sense, in a way you are paying a premium for the piece of mind of having an authentic shoe. Now for those on a budget and know how to LC your own V2?s then the Local resale market is a great place to find a price that isn?t as inflated as the V2 aftermarket already is.
In this guide I will do my best to show and describe to you how to Picture Legit Check your V2?s. Now in my opinion there are two forms of LC, picture LC and in person LC. I?ll be releasing a video on my youtube channel (Yeezy Reff) for the in person LC guide in the next week. I believe picture LC can show you a lot but not everything as sellers tend to take very general pictures. In person LC are important because when you have the shoe in hand you can really go into detail and see just how a Legit V2 should look and feel like.
Let?s Get Into It.
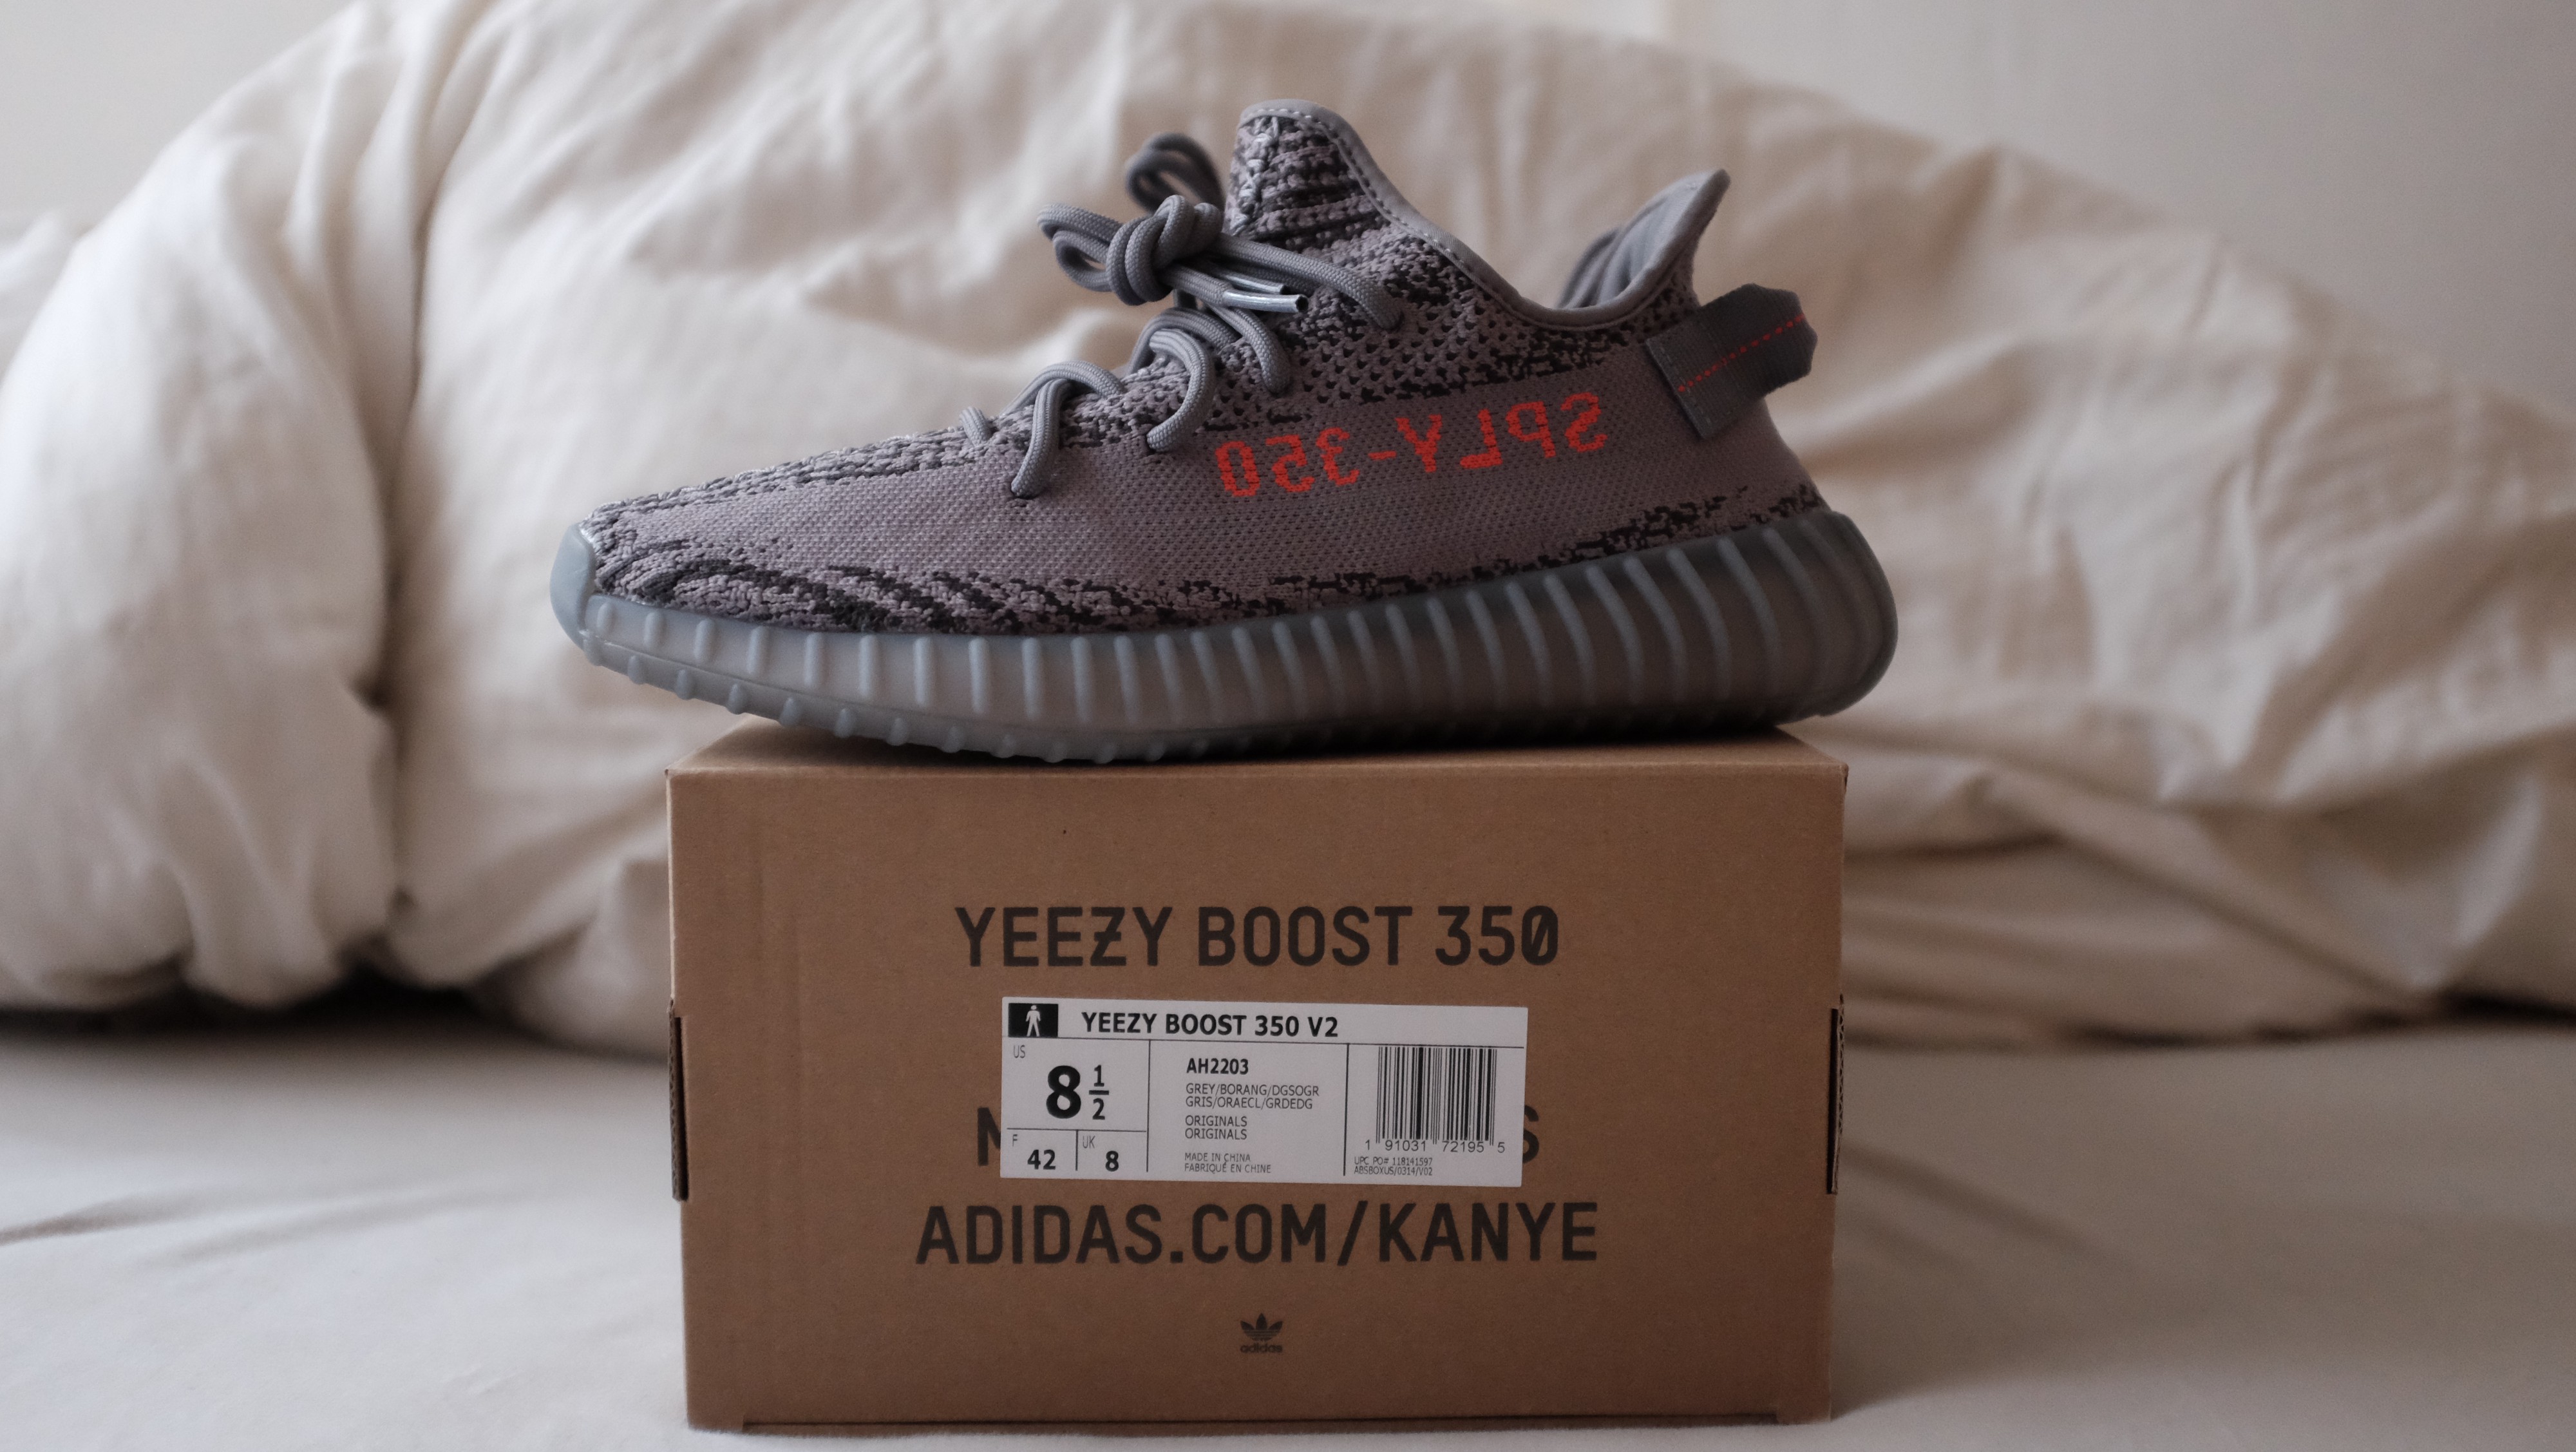
One thing that?s nice to see when purchasing V2?s is that they at one point came from either StockX or GOAT. (Obviously LC on the actual shoe itself is most important). That let?s me know the history behind the shoe. Now of course anyone could have saved the card and tag from StockX or card and box wrapper from StockX or GOAT. But typically speaking it?s a good sign.
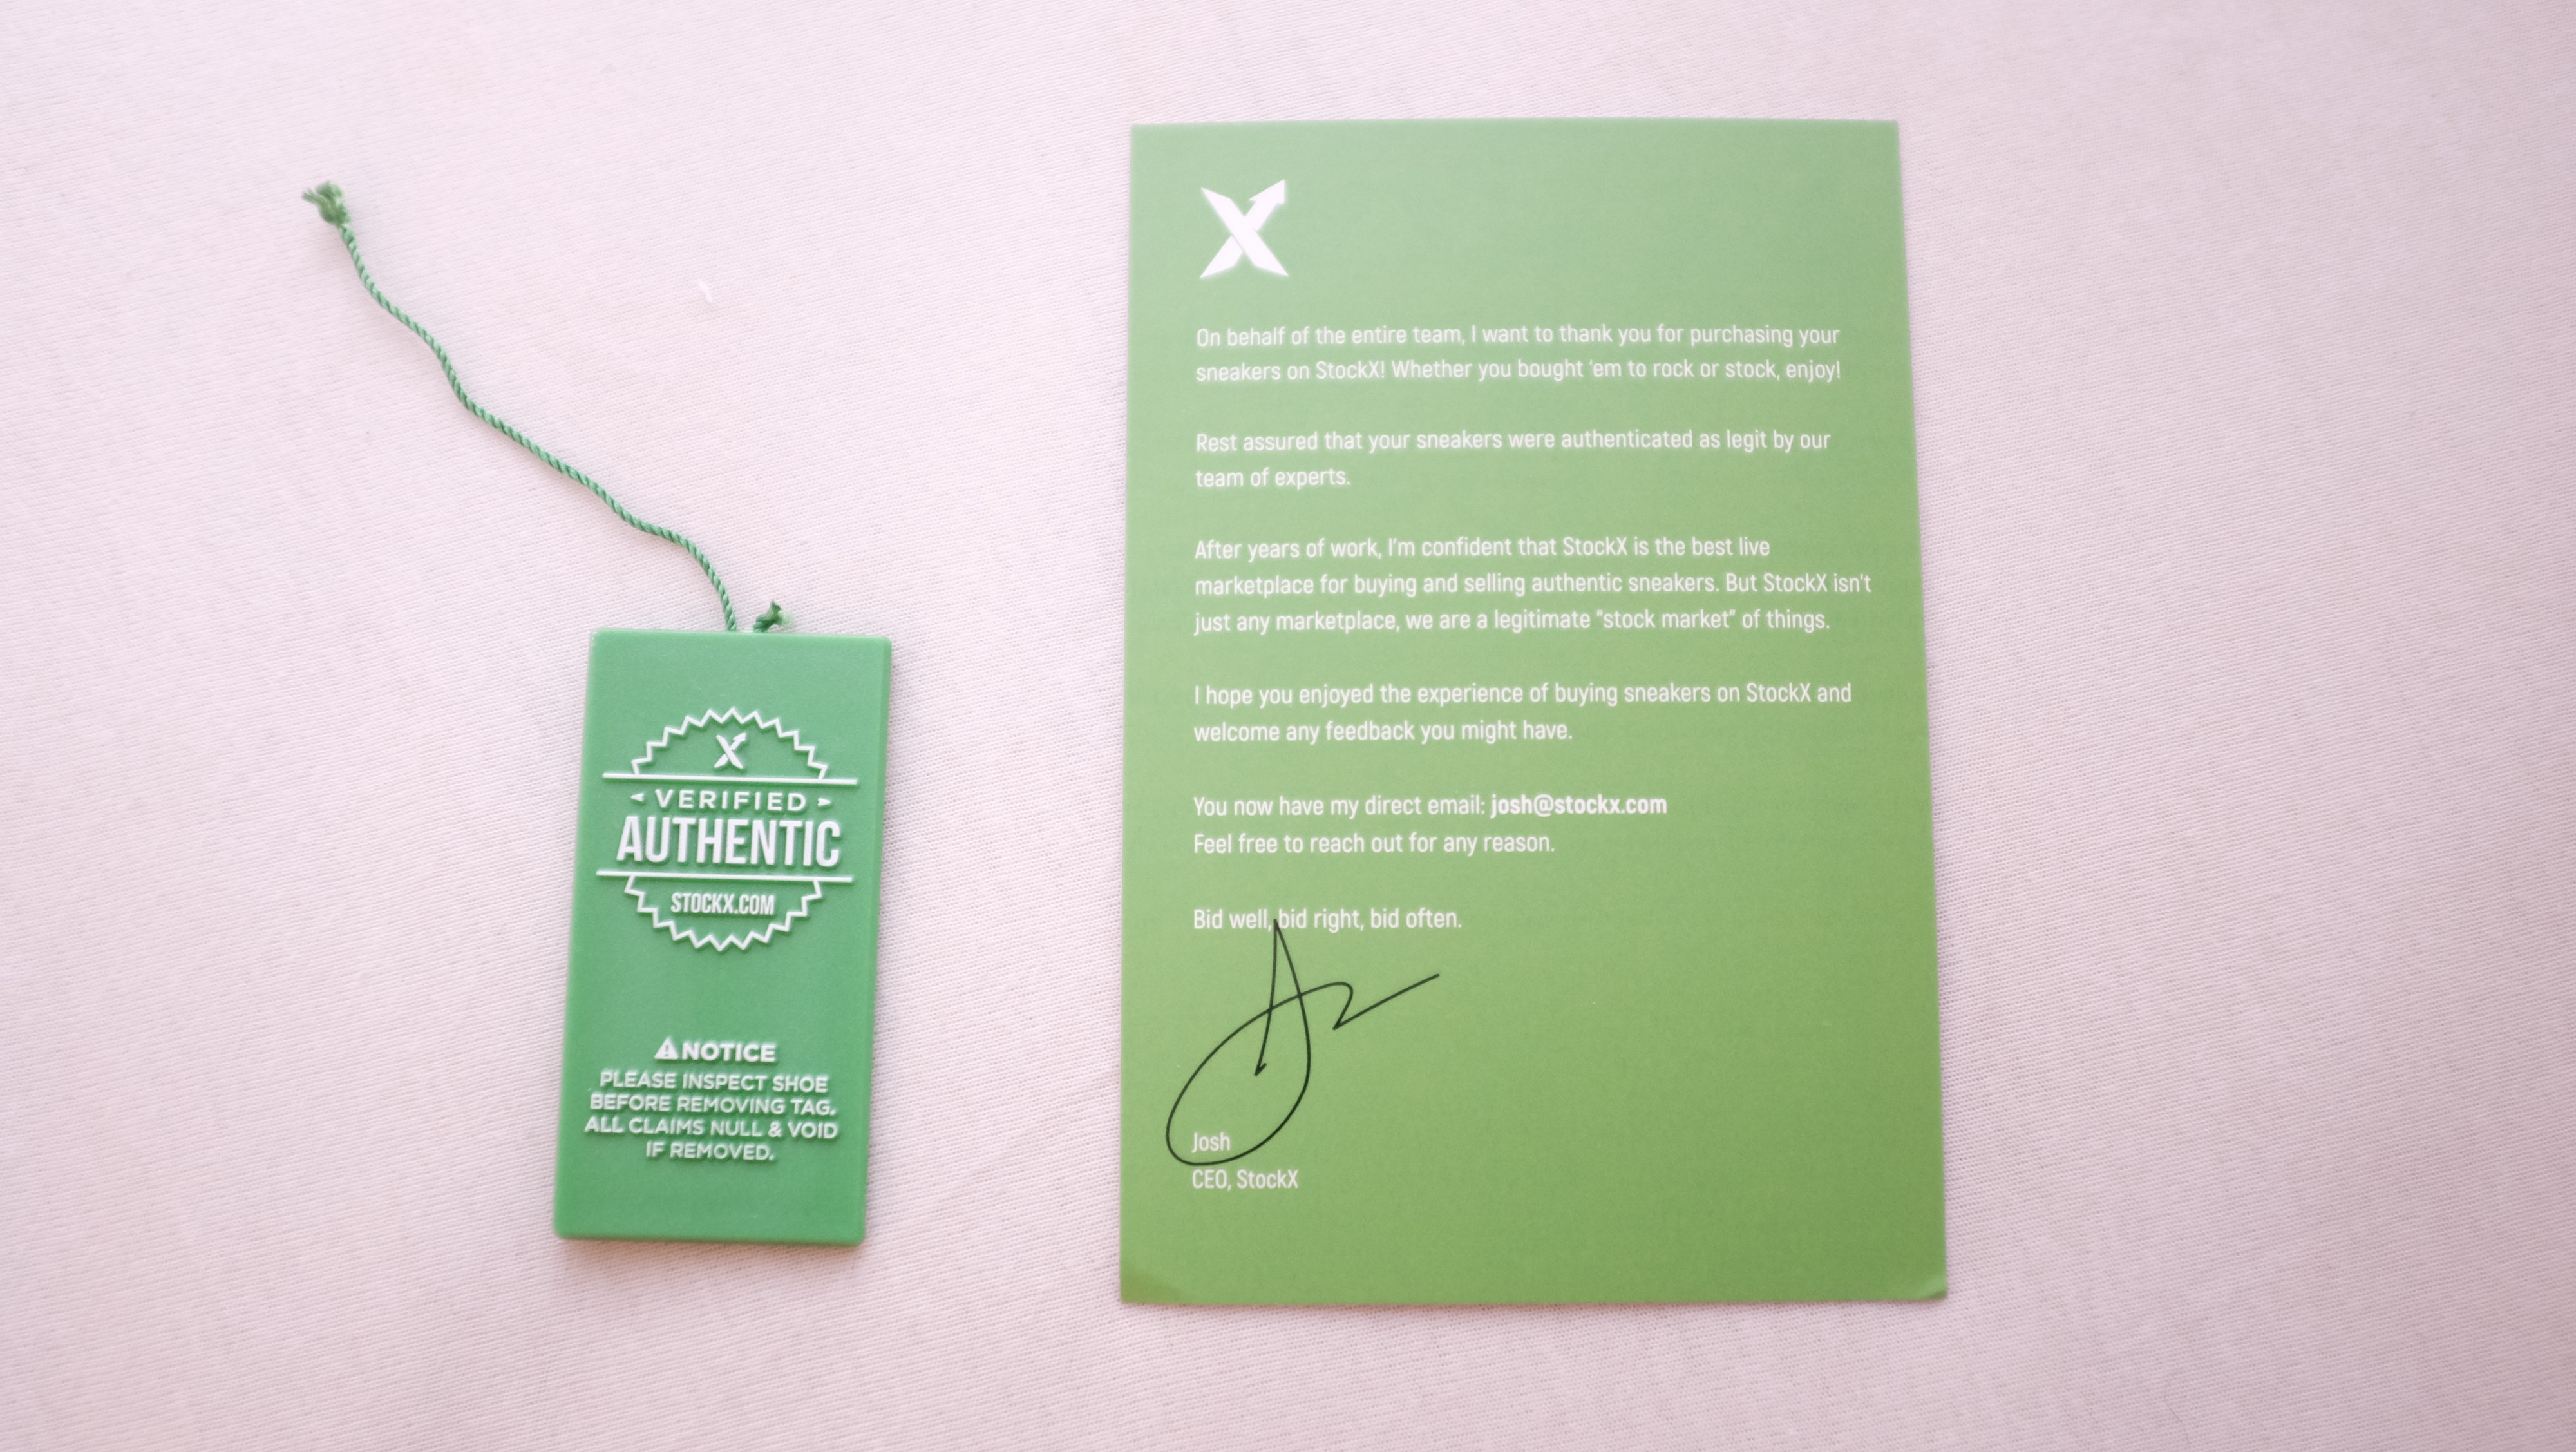
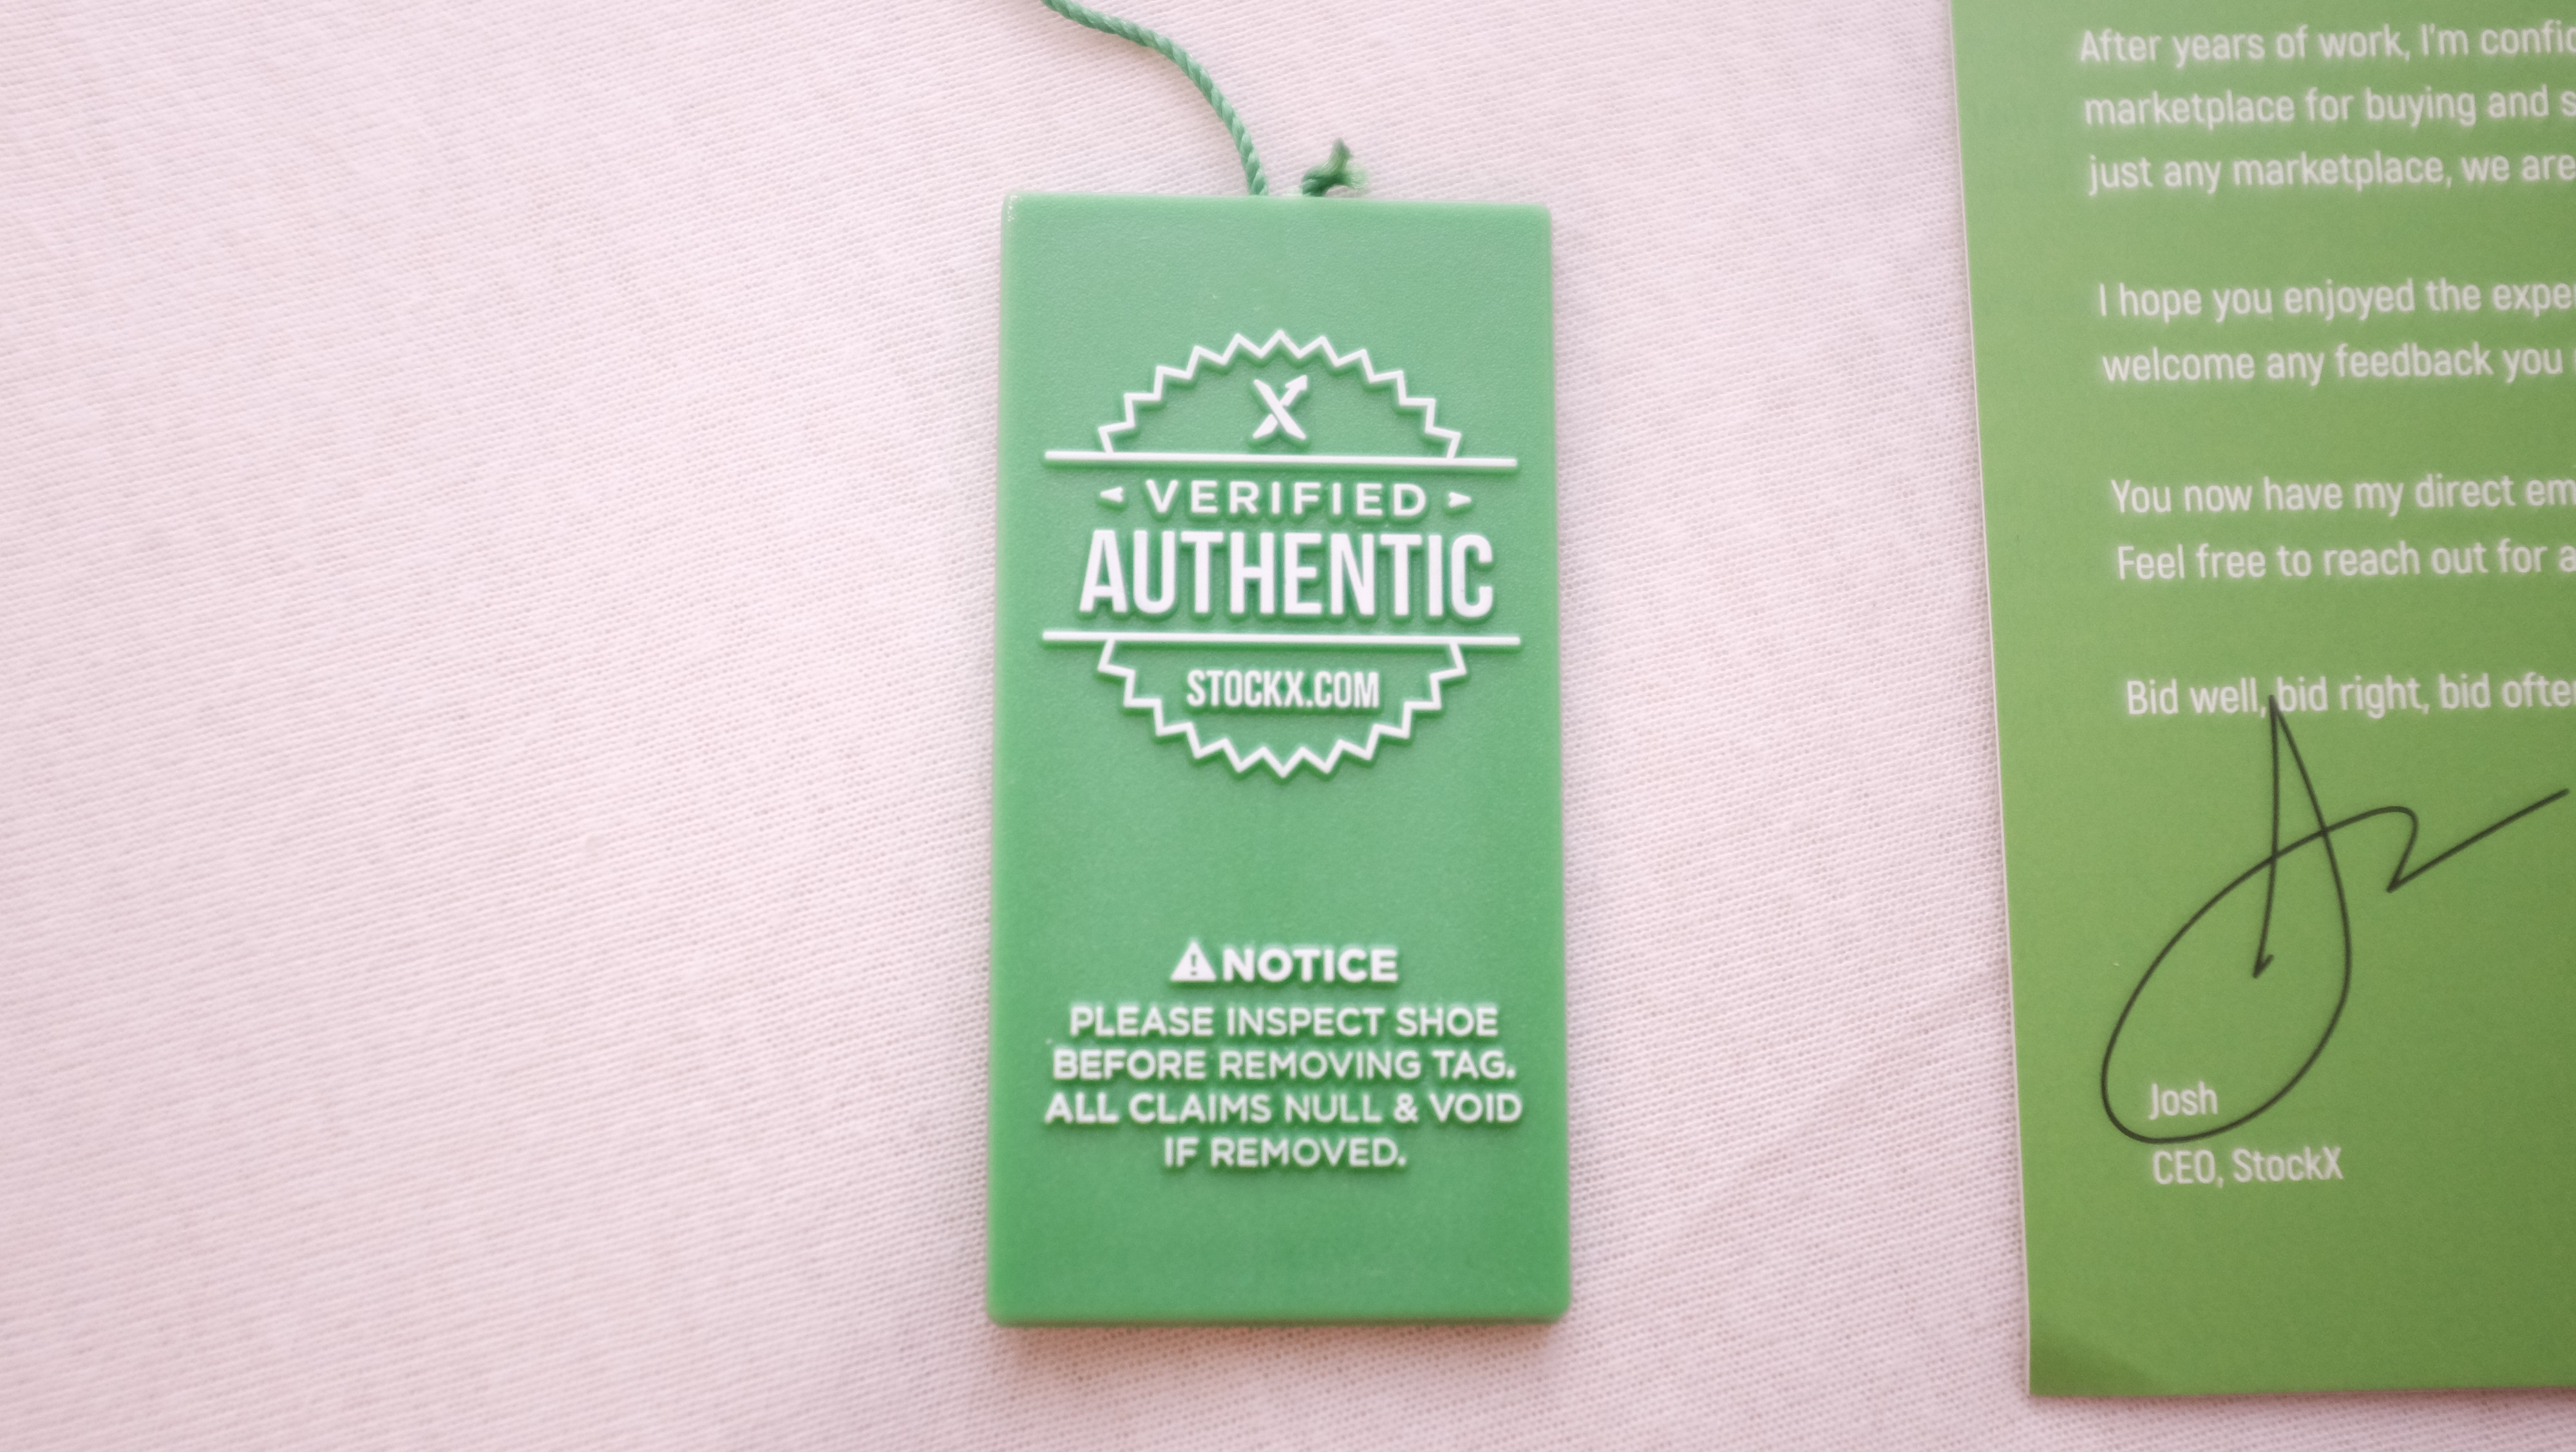 StockX Hang Tag and Verification Card
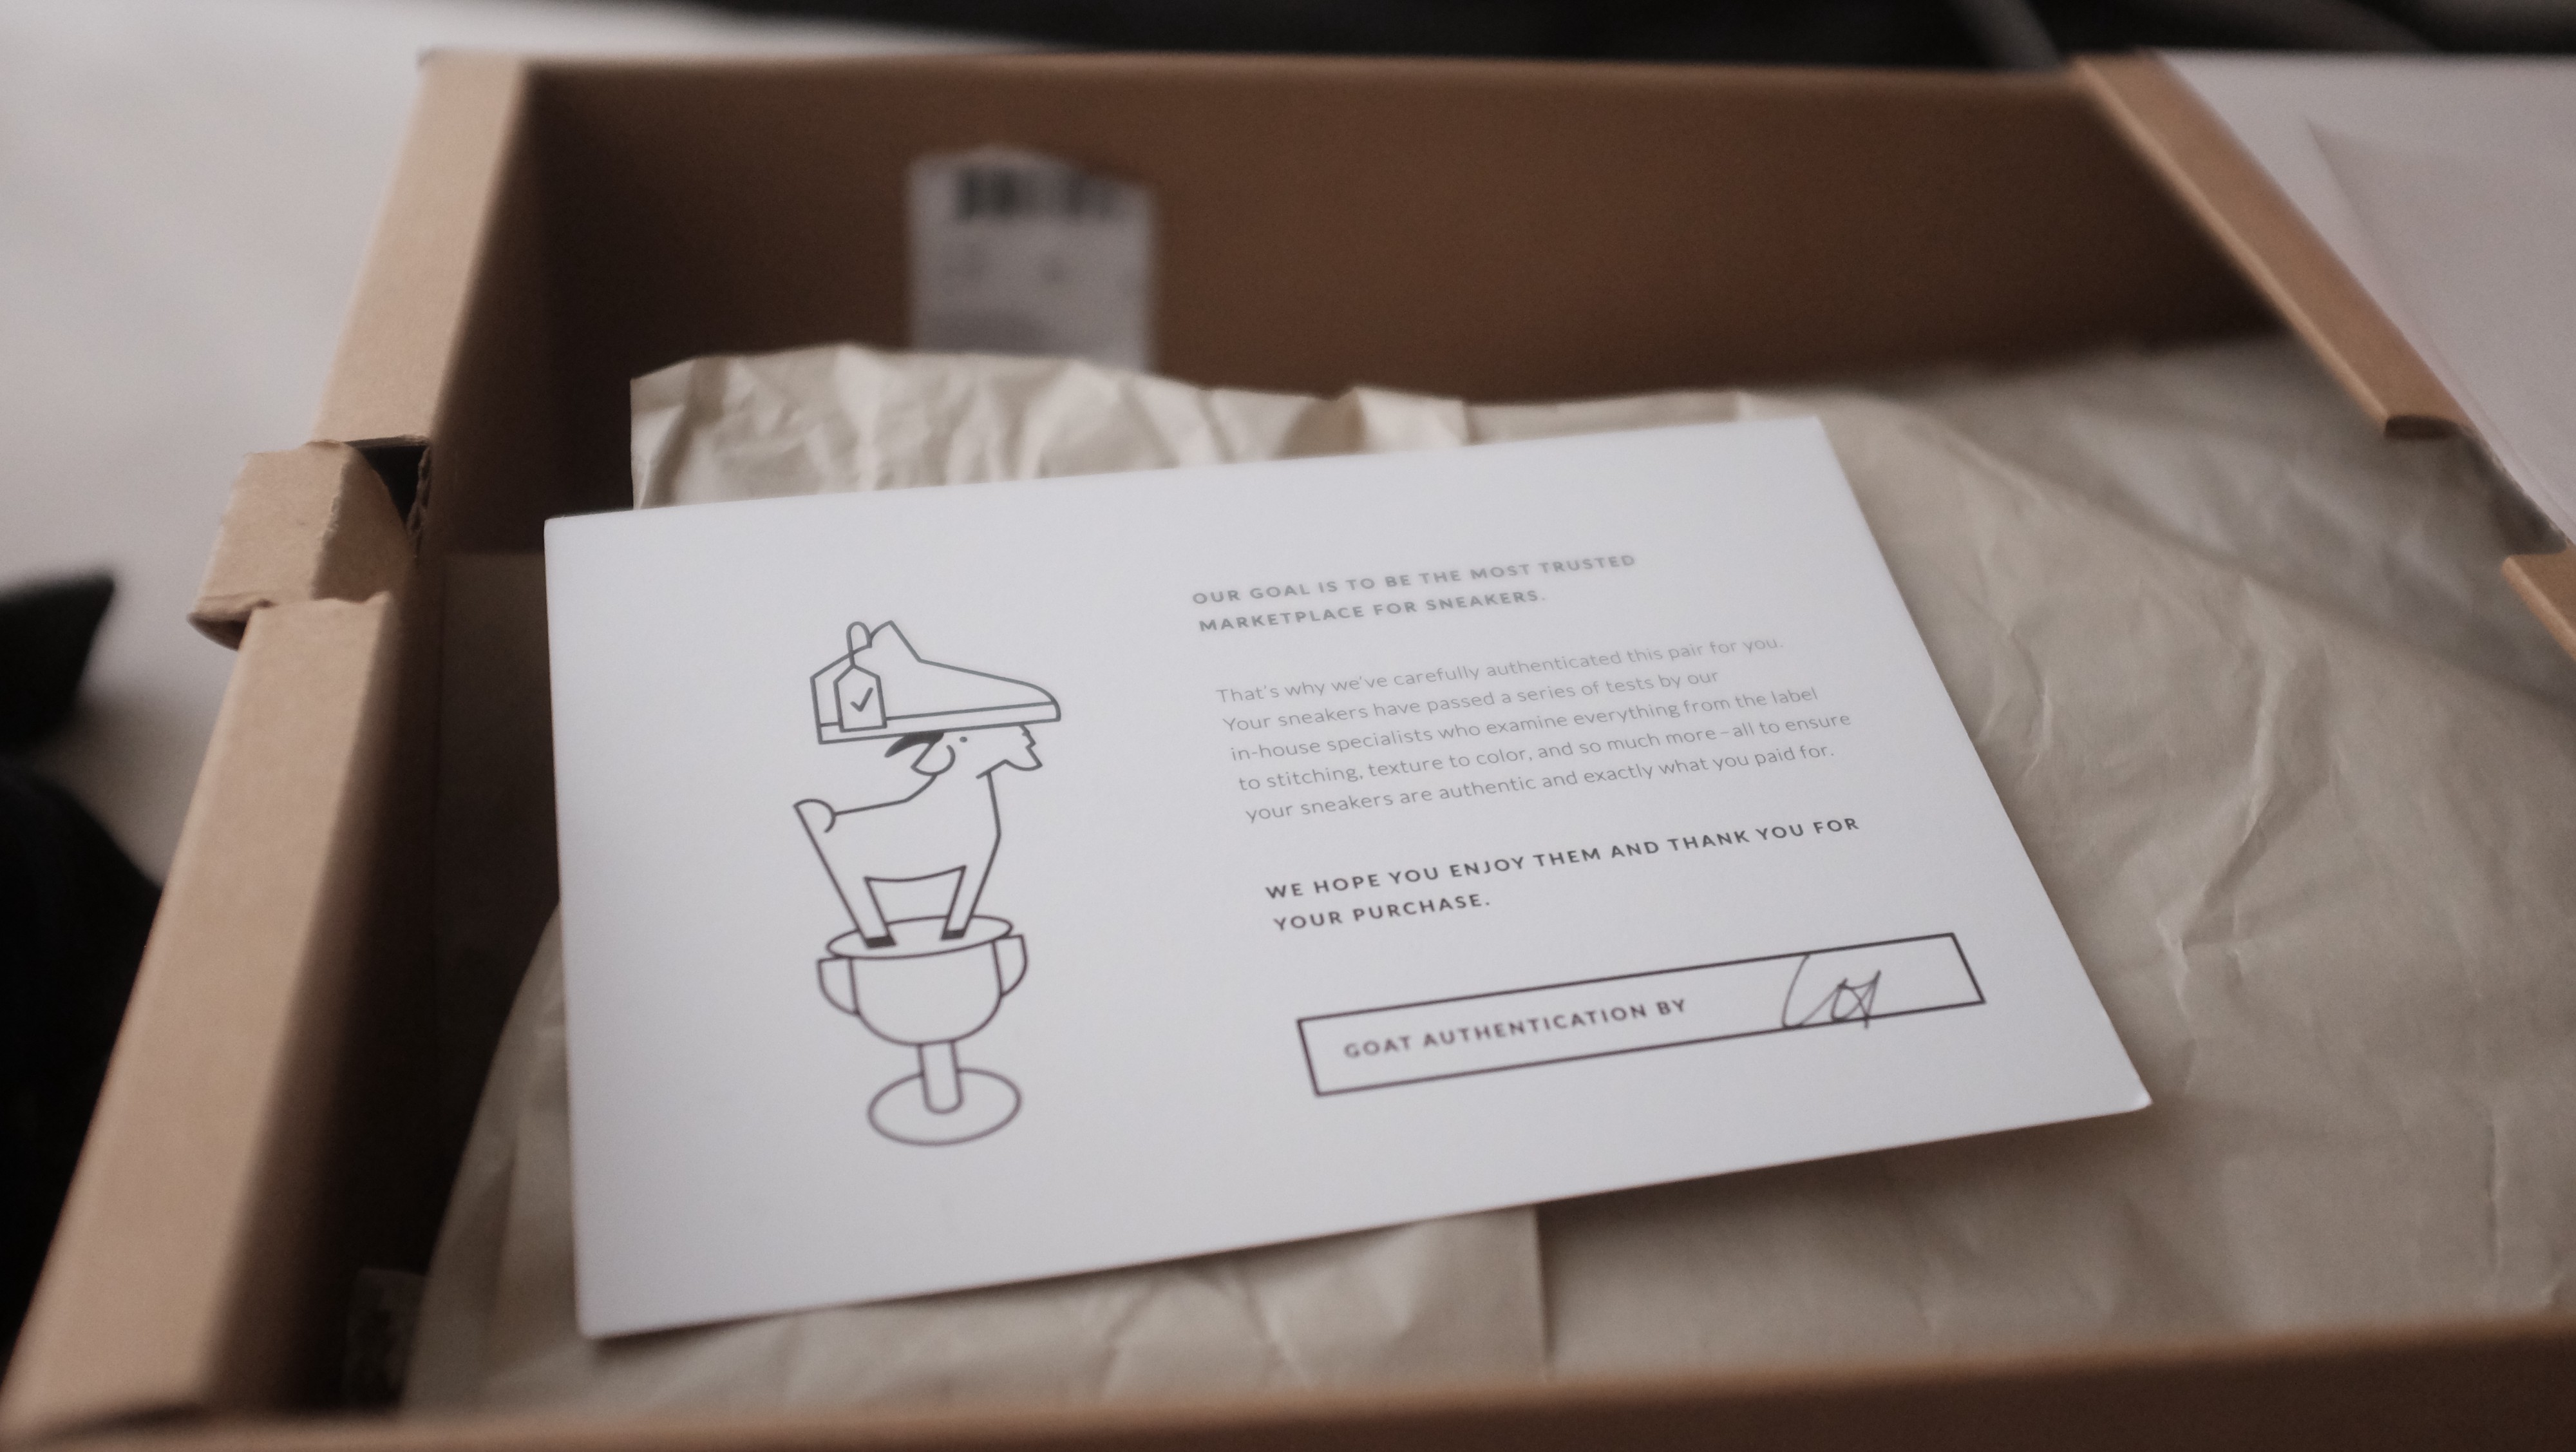
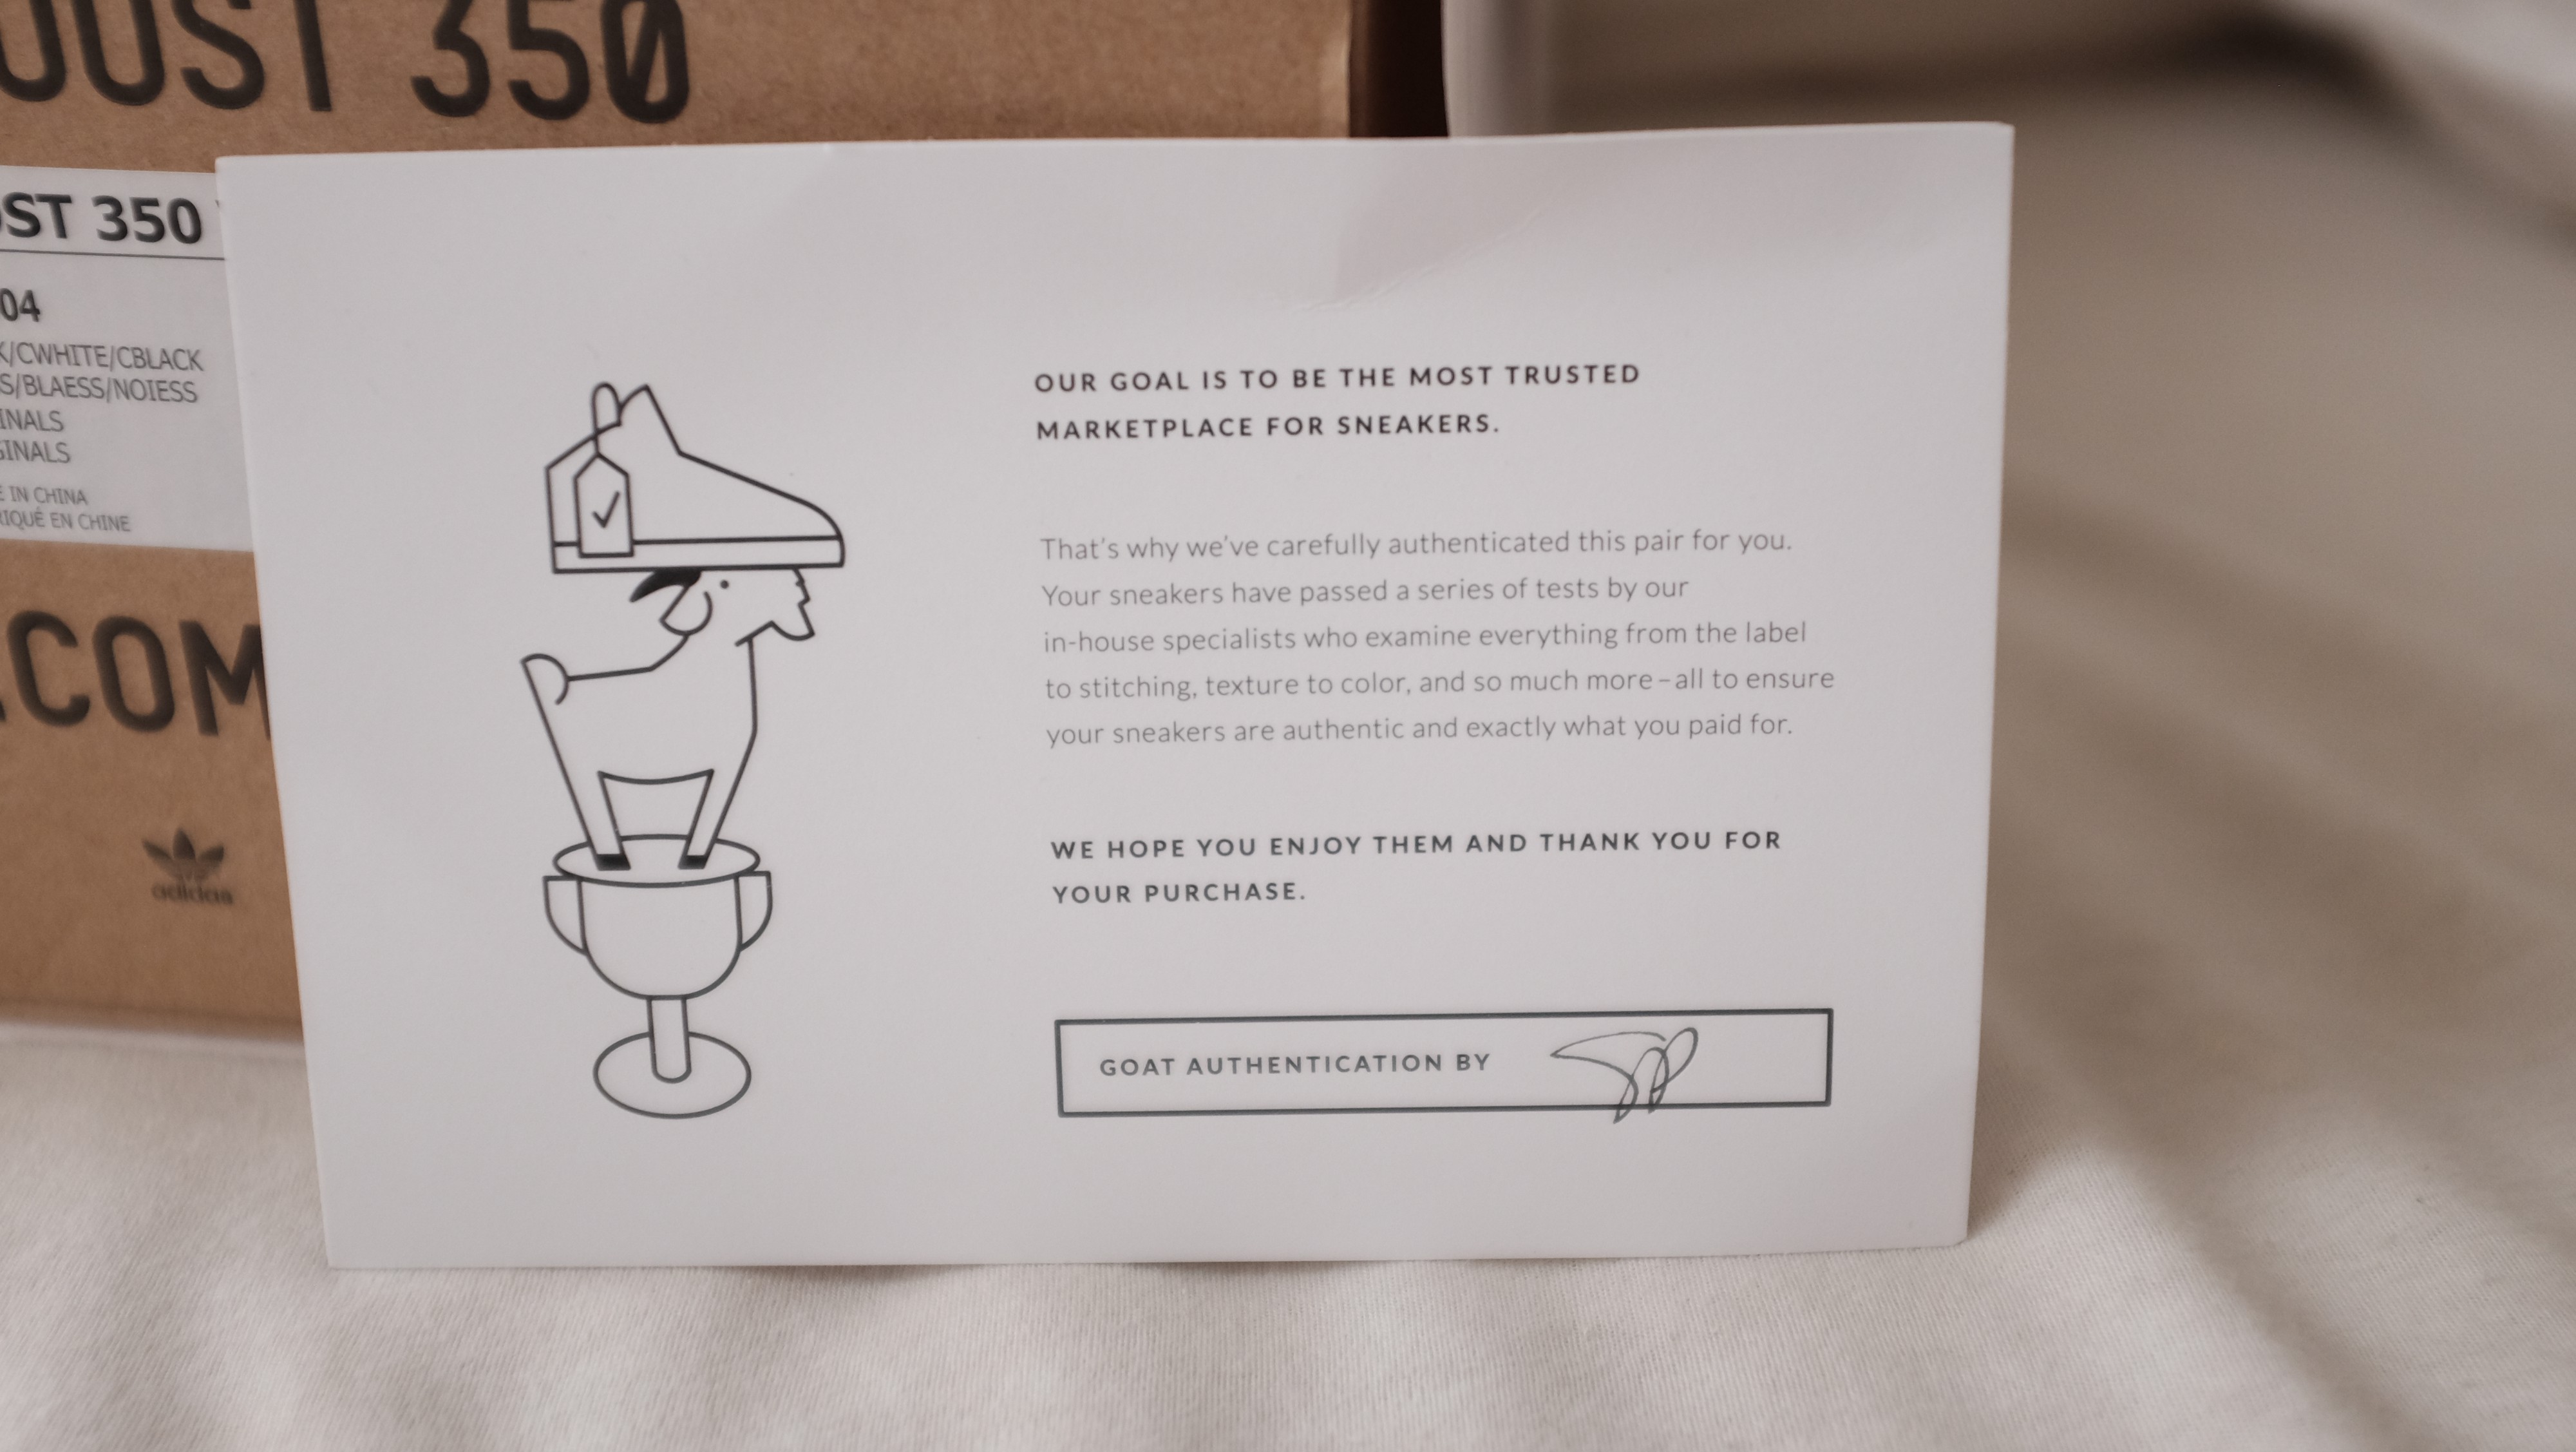 GOAT Box Wrapper & Verification Card
Part of the Puzzle
The way I see it, LC V2?s is like solving a puzzle. Some don?t have the UPC sticker, some are missing the stuffing for the shoe, and so forth. Not everyone is a collector and in that way they might not value small things such as that.
If your V2 is missing things like that, I wouldn?t worry too much about it, though I know myself I would want a pair with everything. I?ve ordered pairs from StockX and GOAT, that didn?t come with UPC sticker for DS pairs, some used pairs didn?t come with the hang tag either.
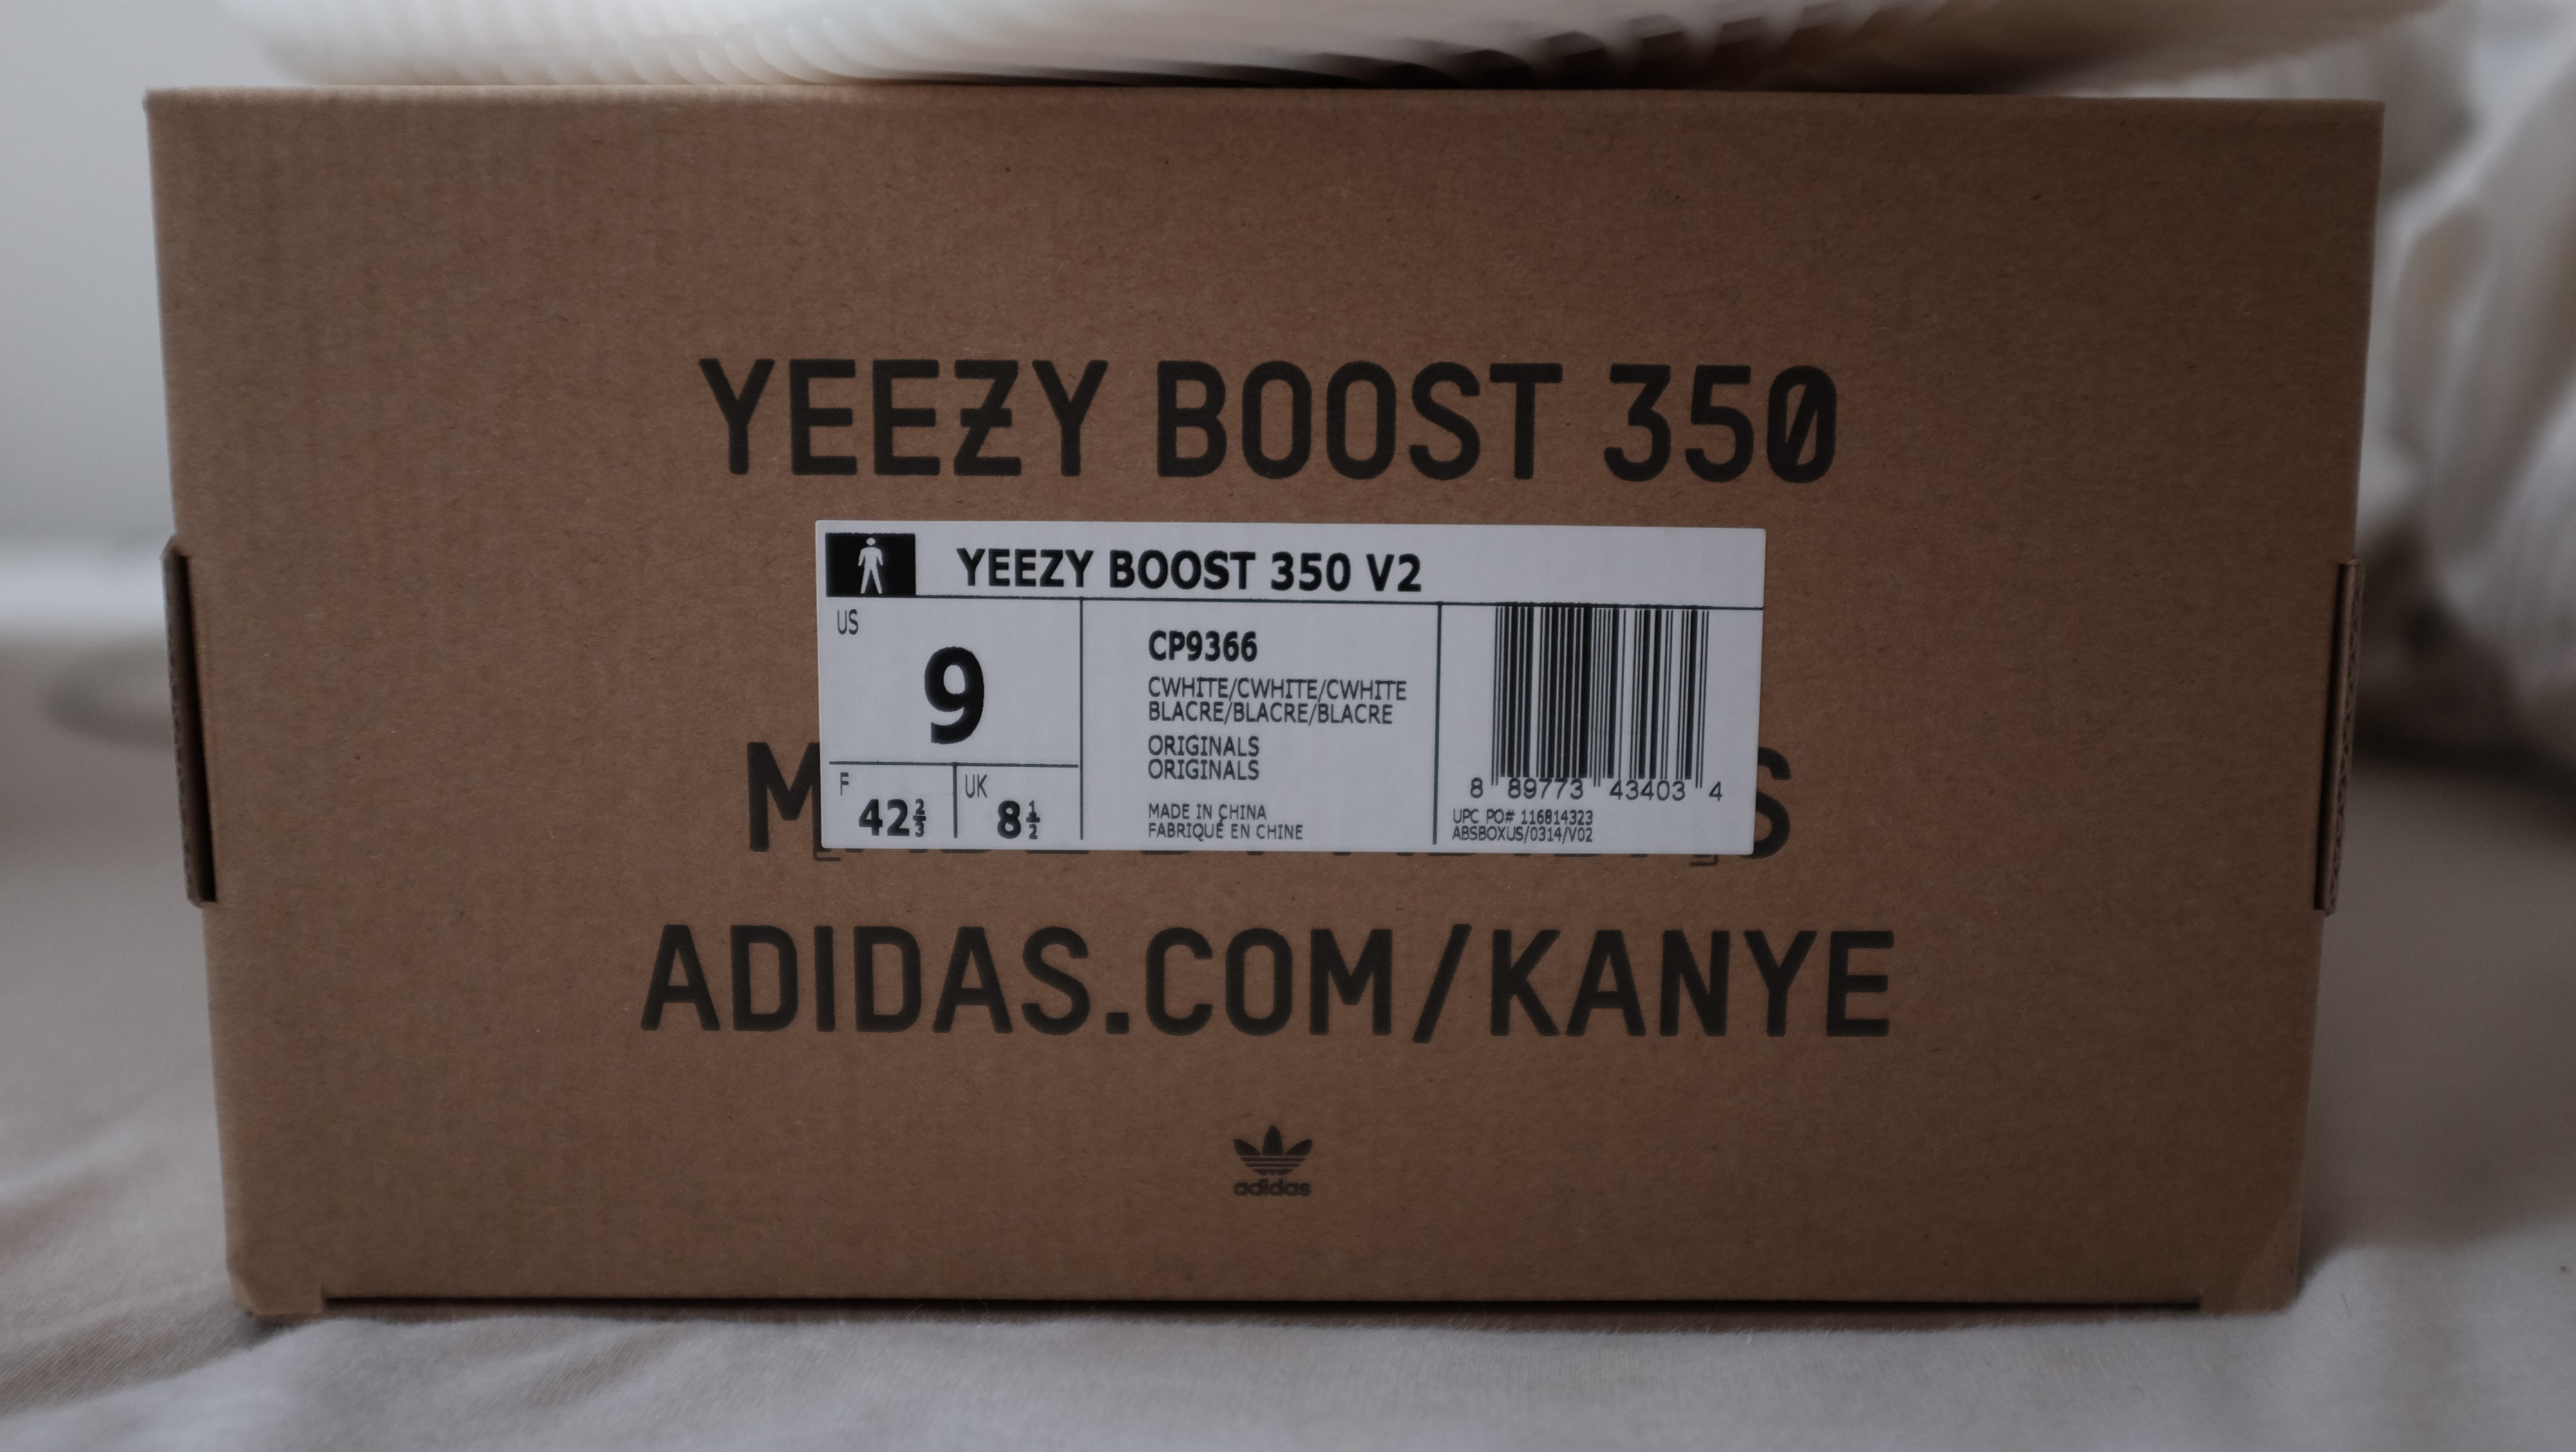
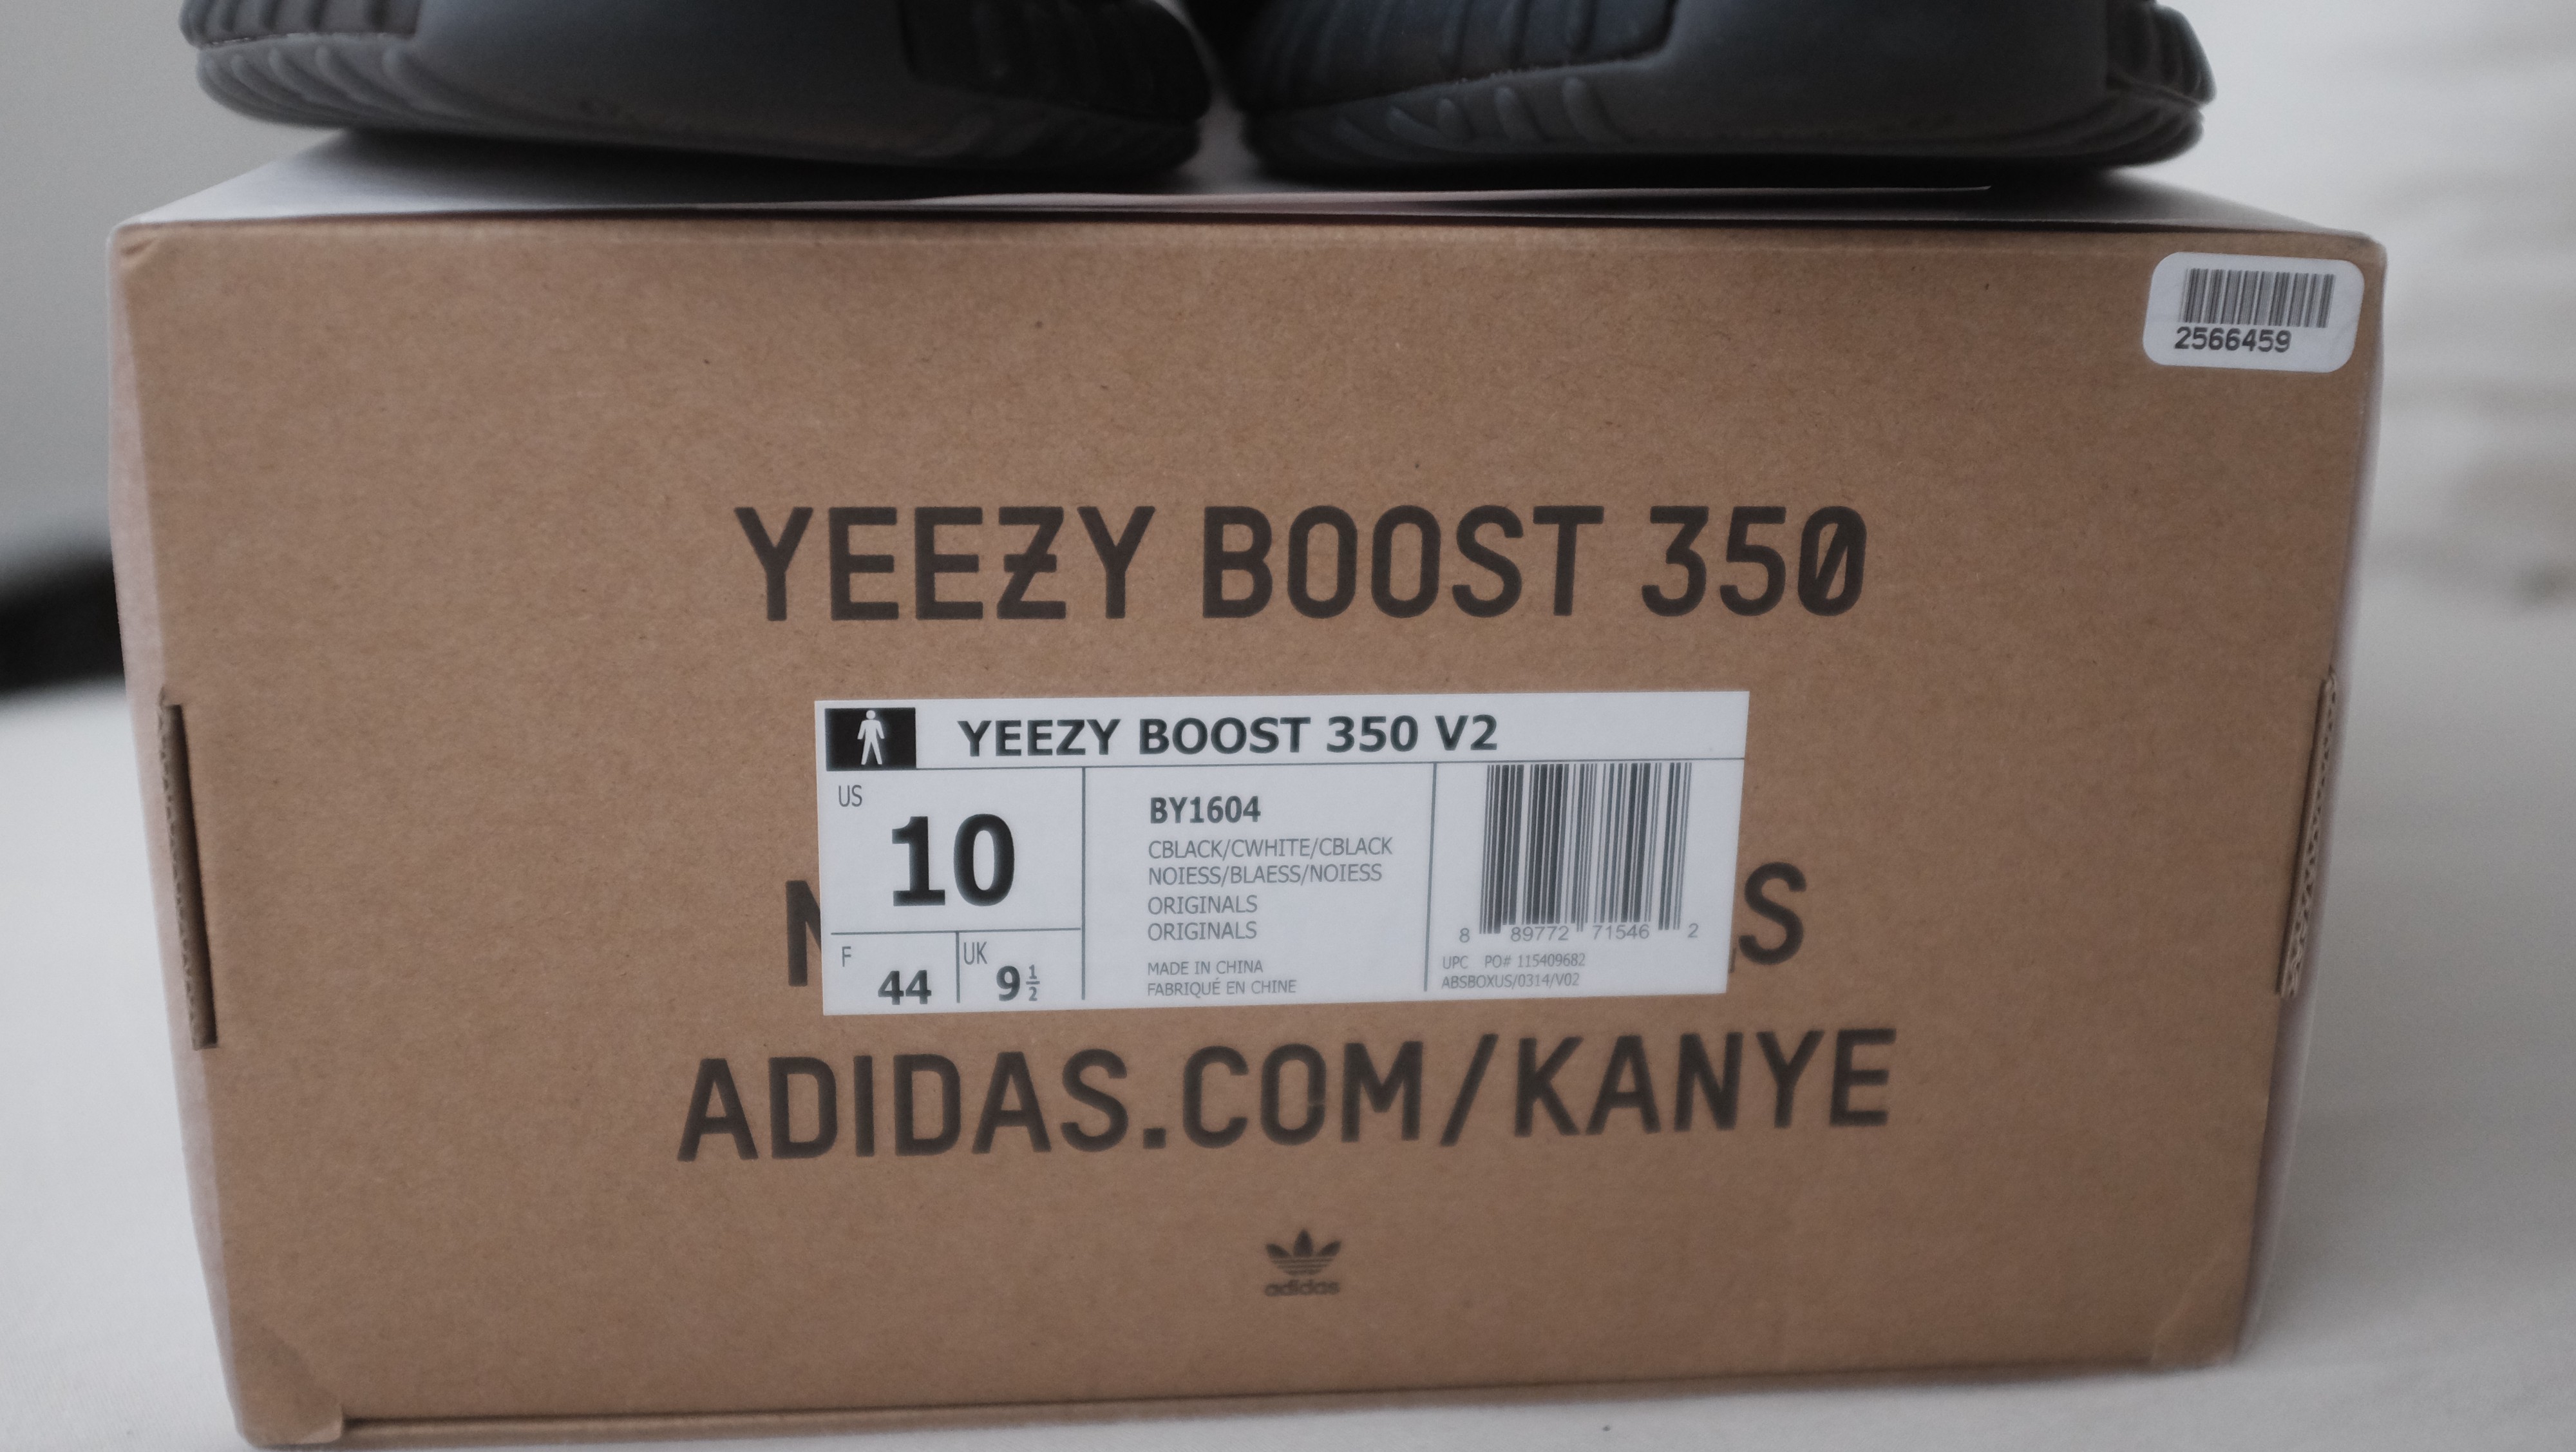
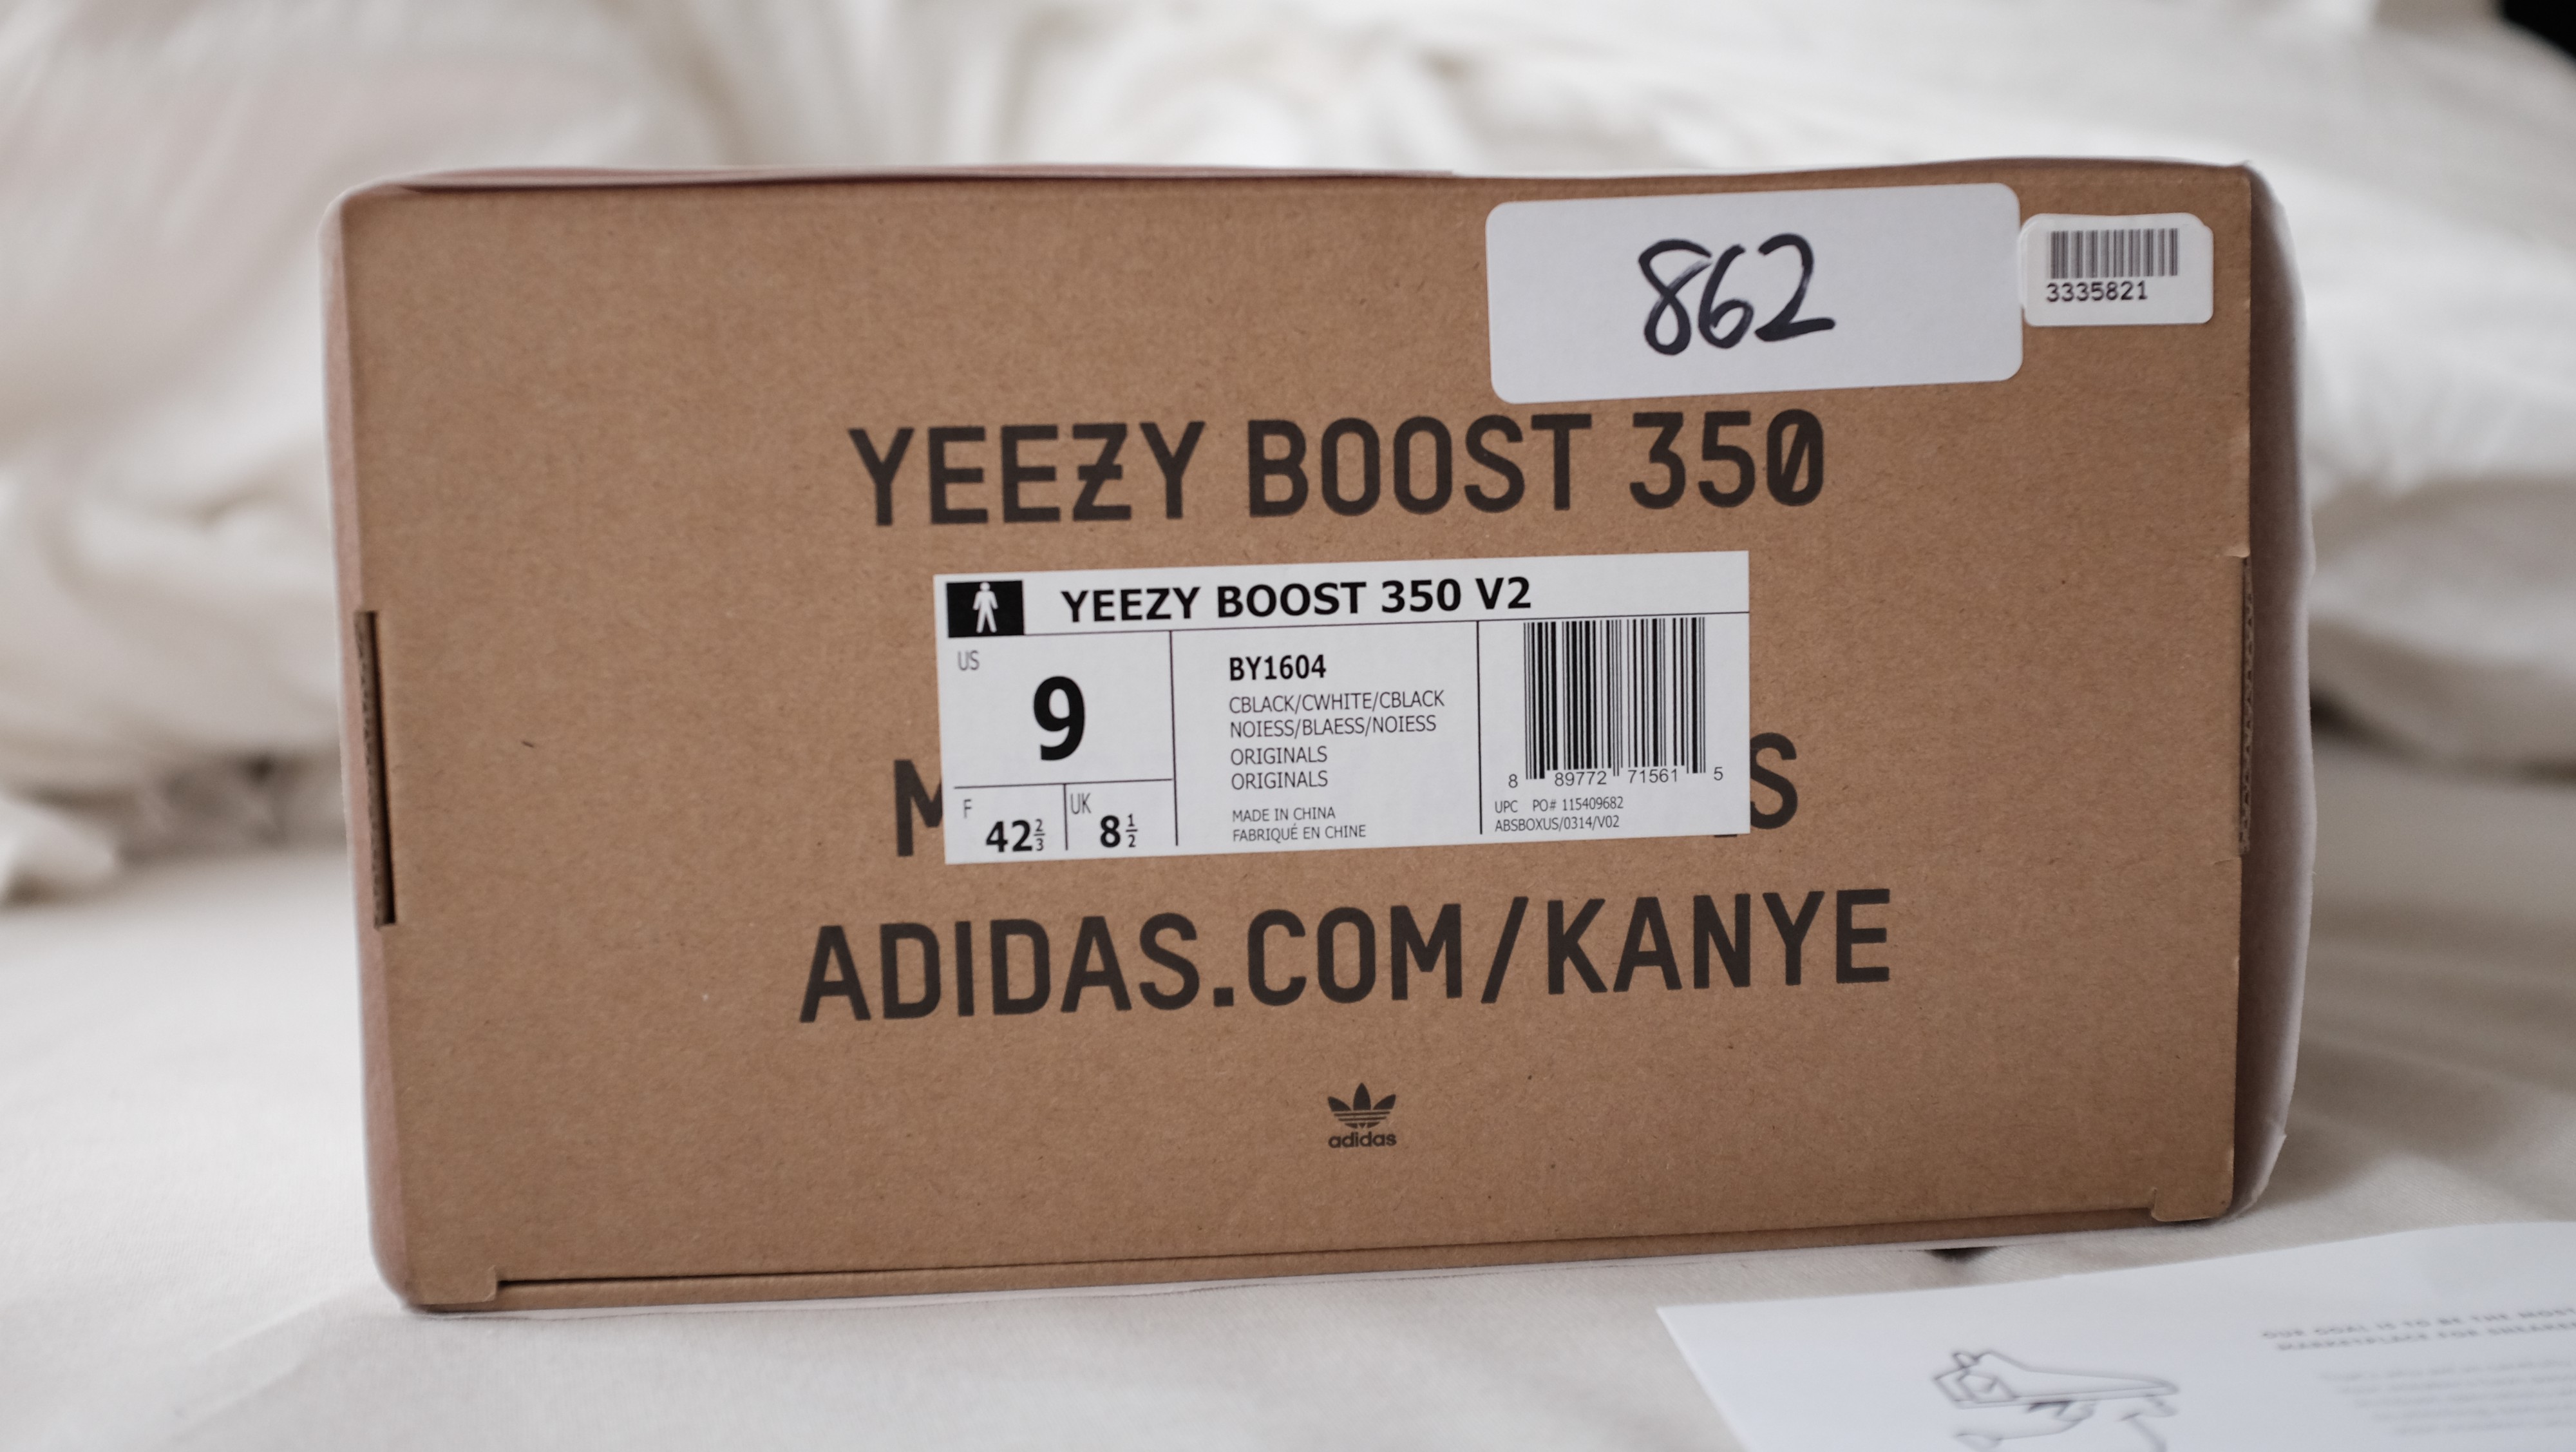 Left Cream V2, Right Oreo V2 Box Label
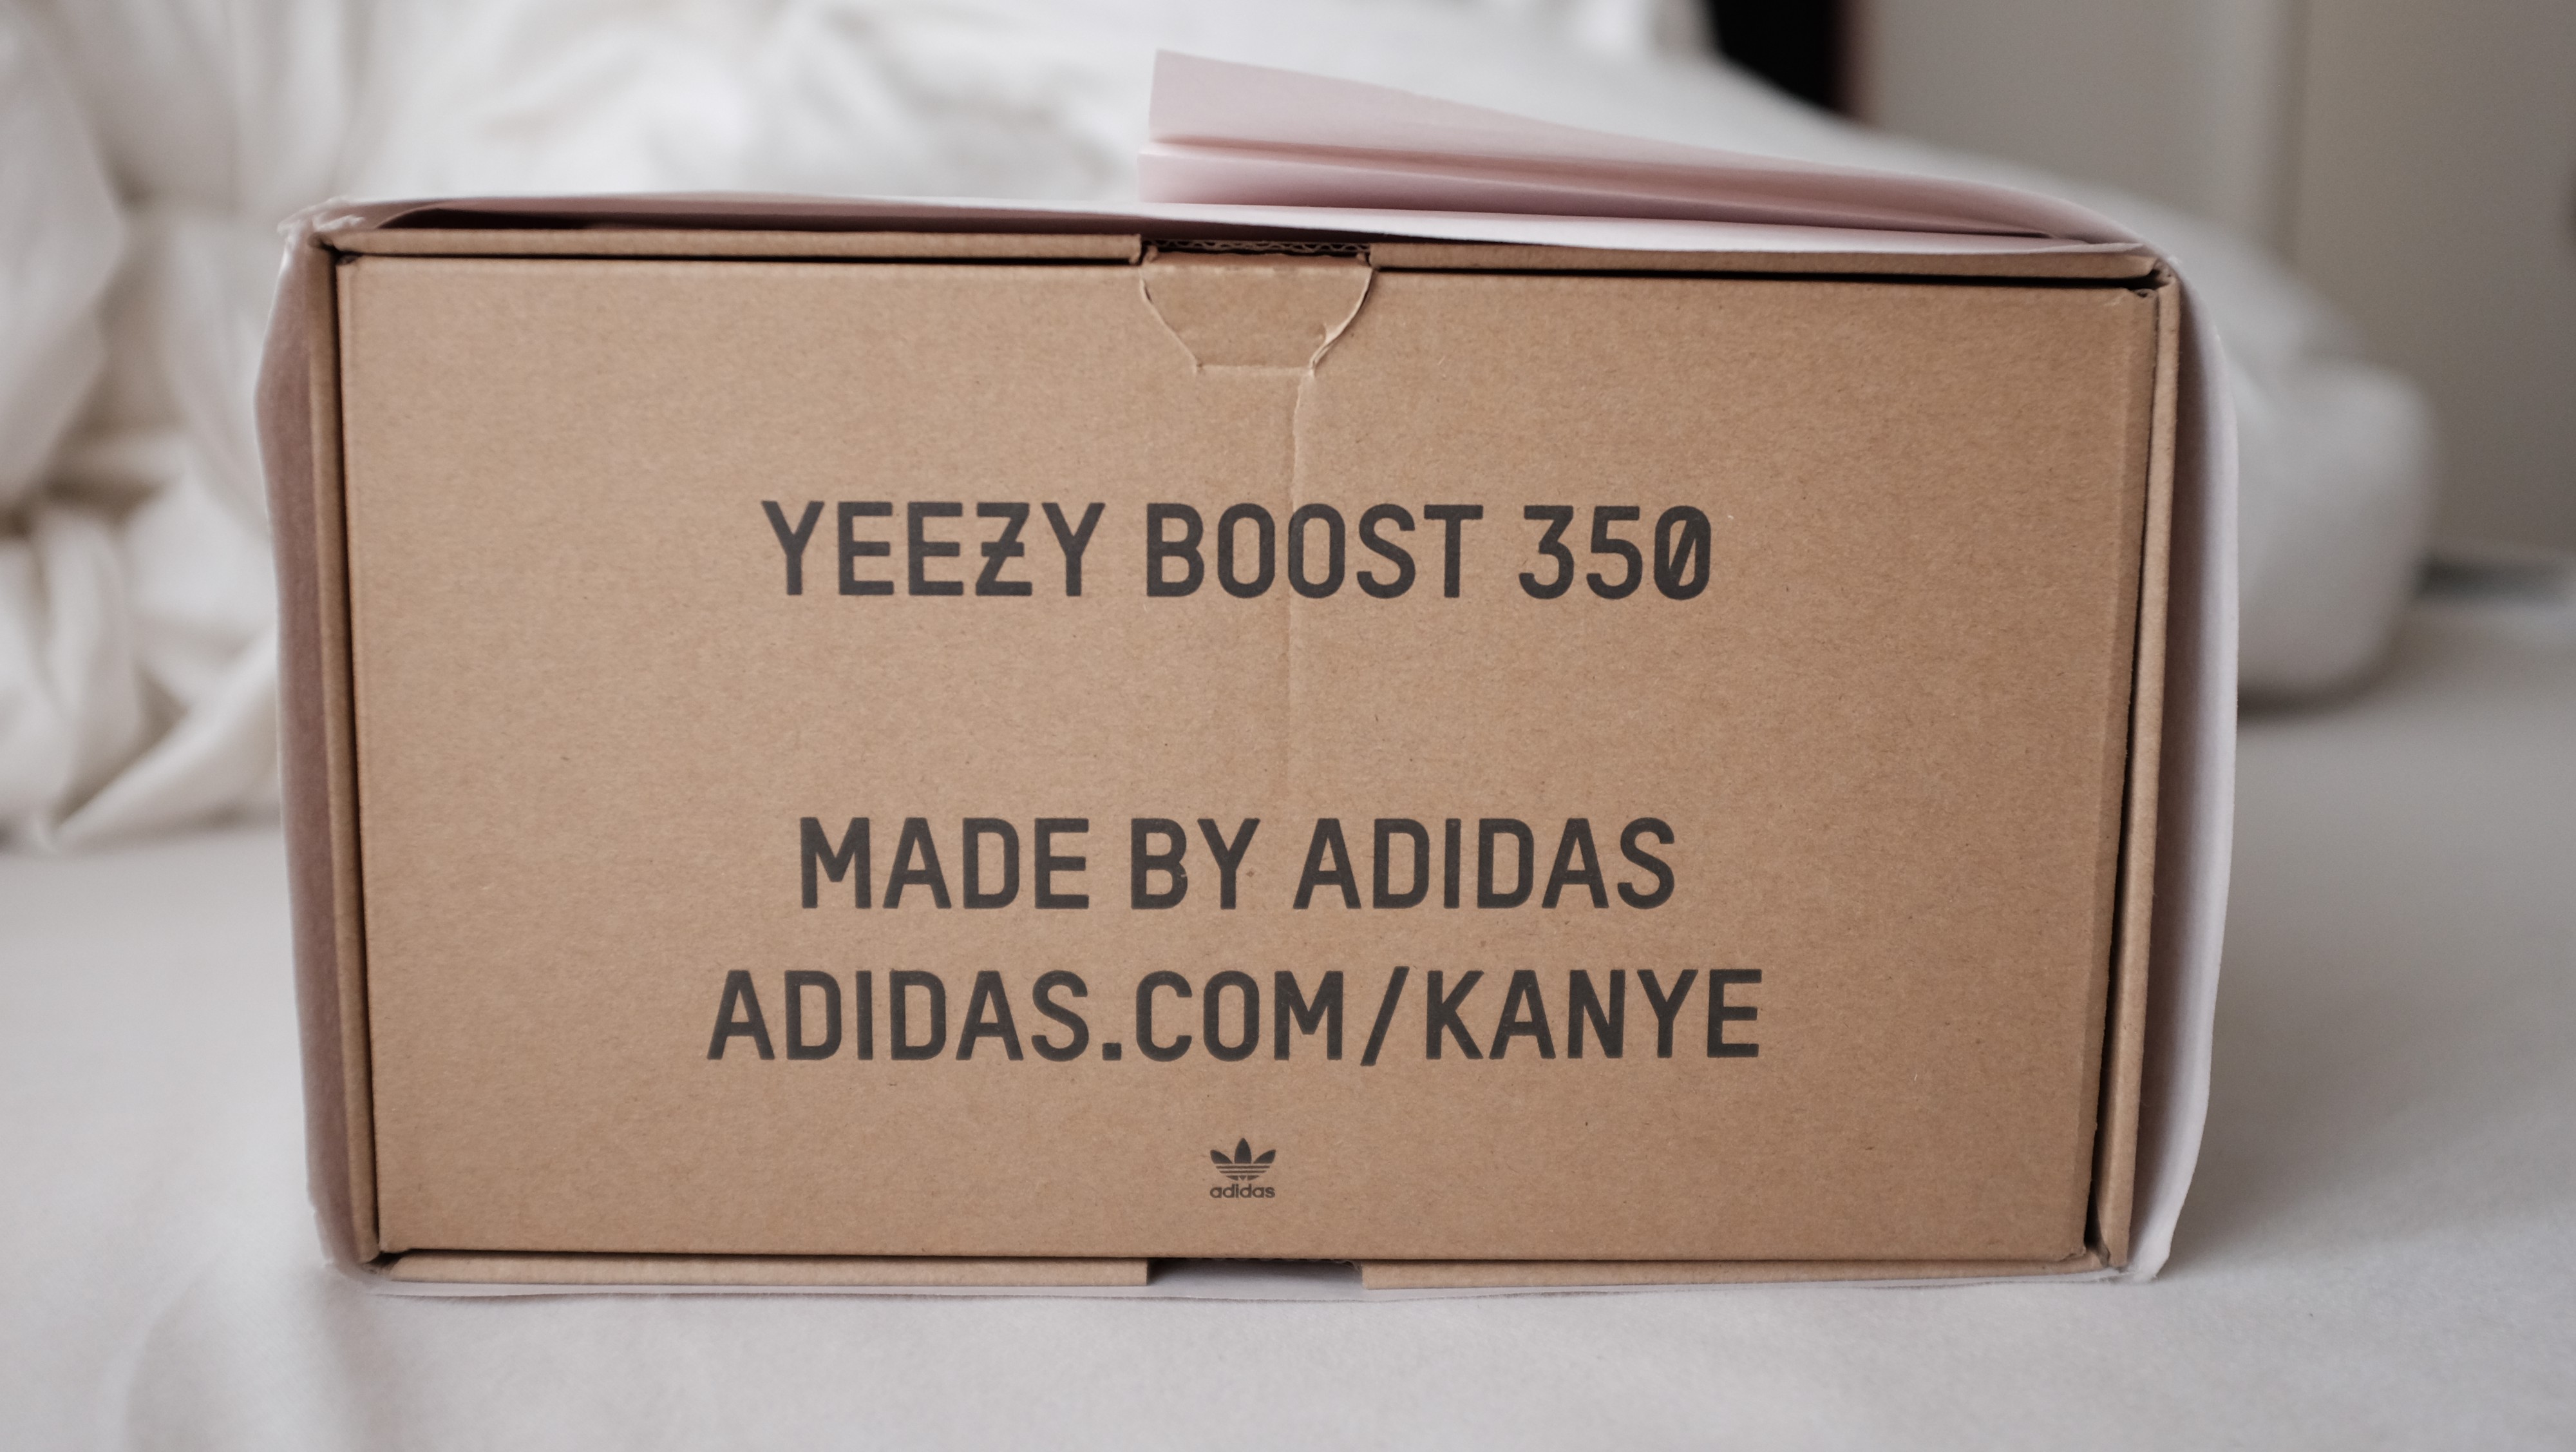 Oreo V2 Box
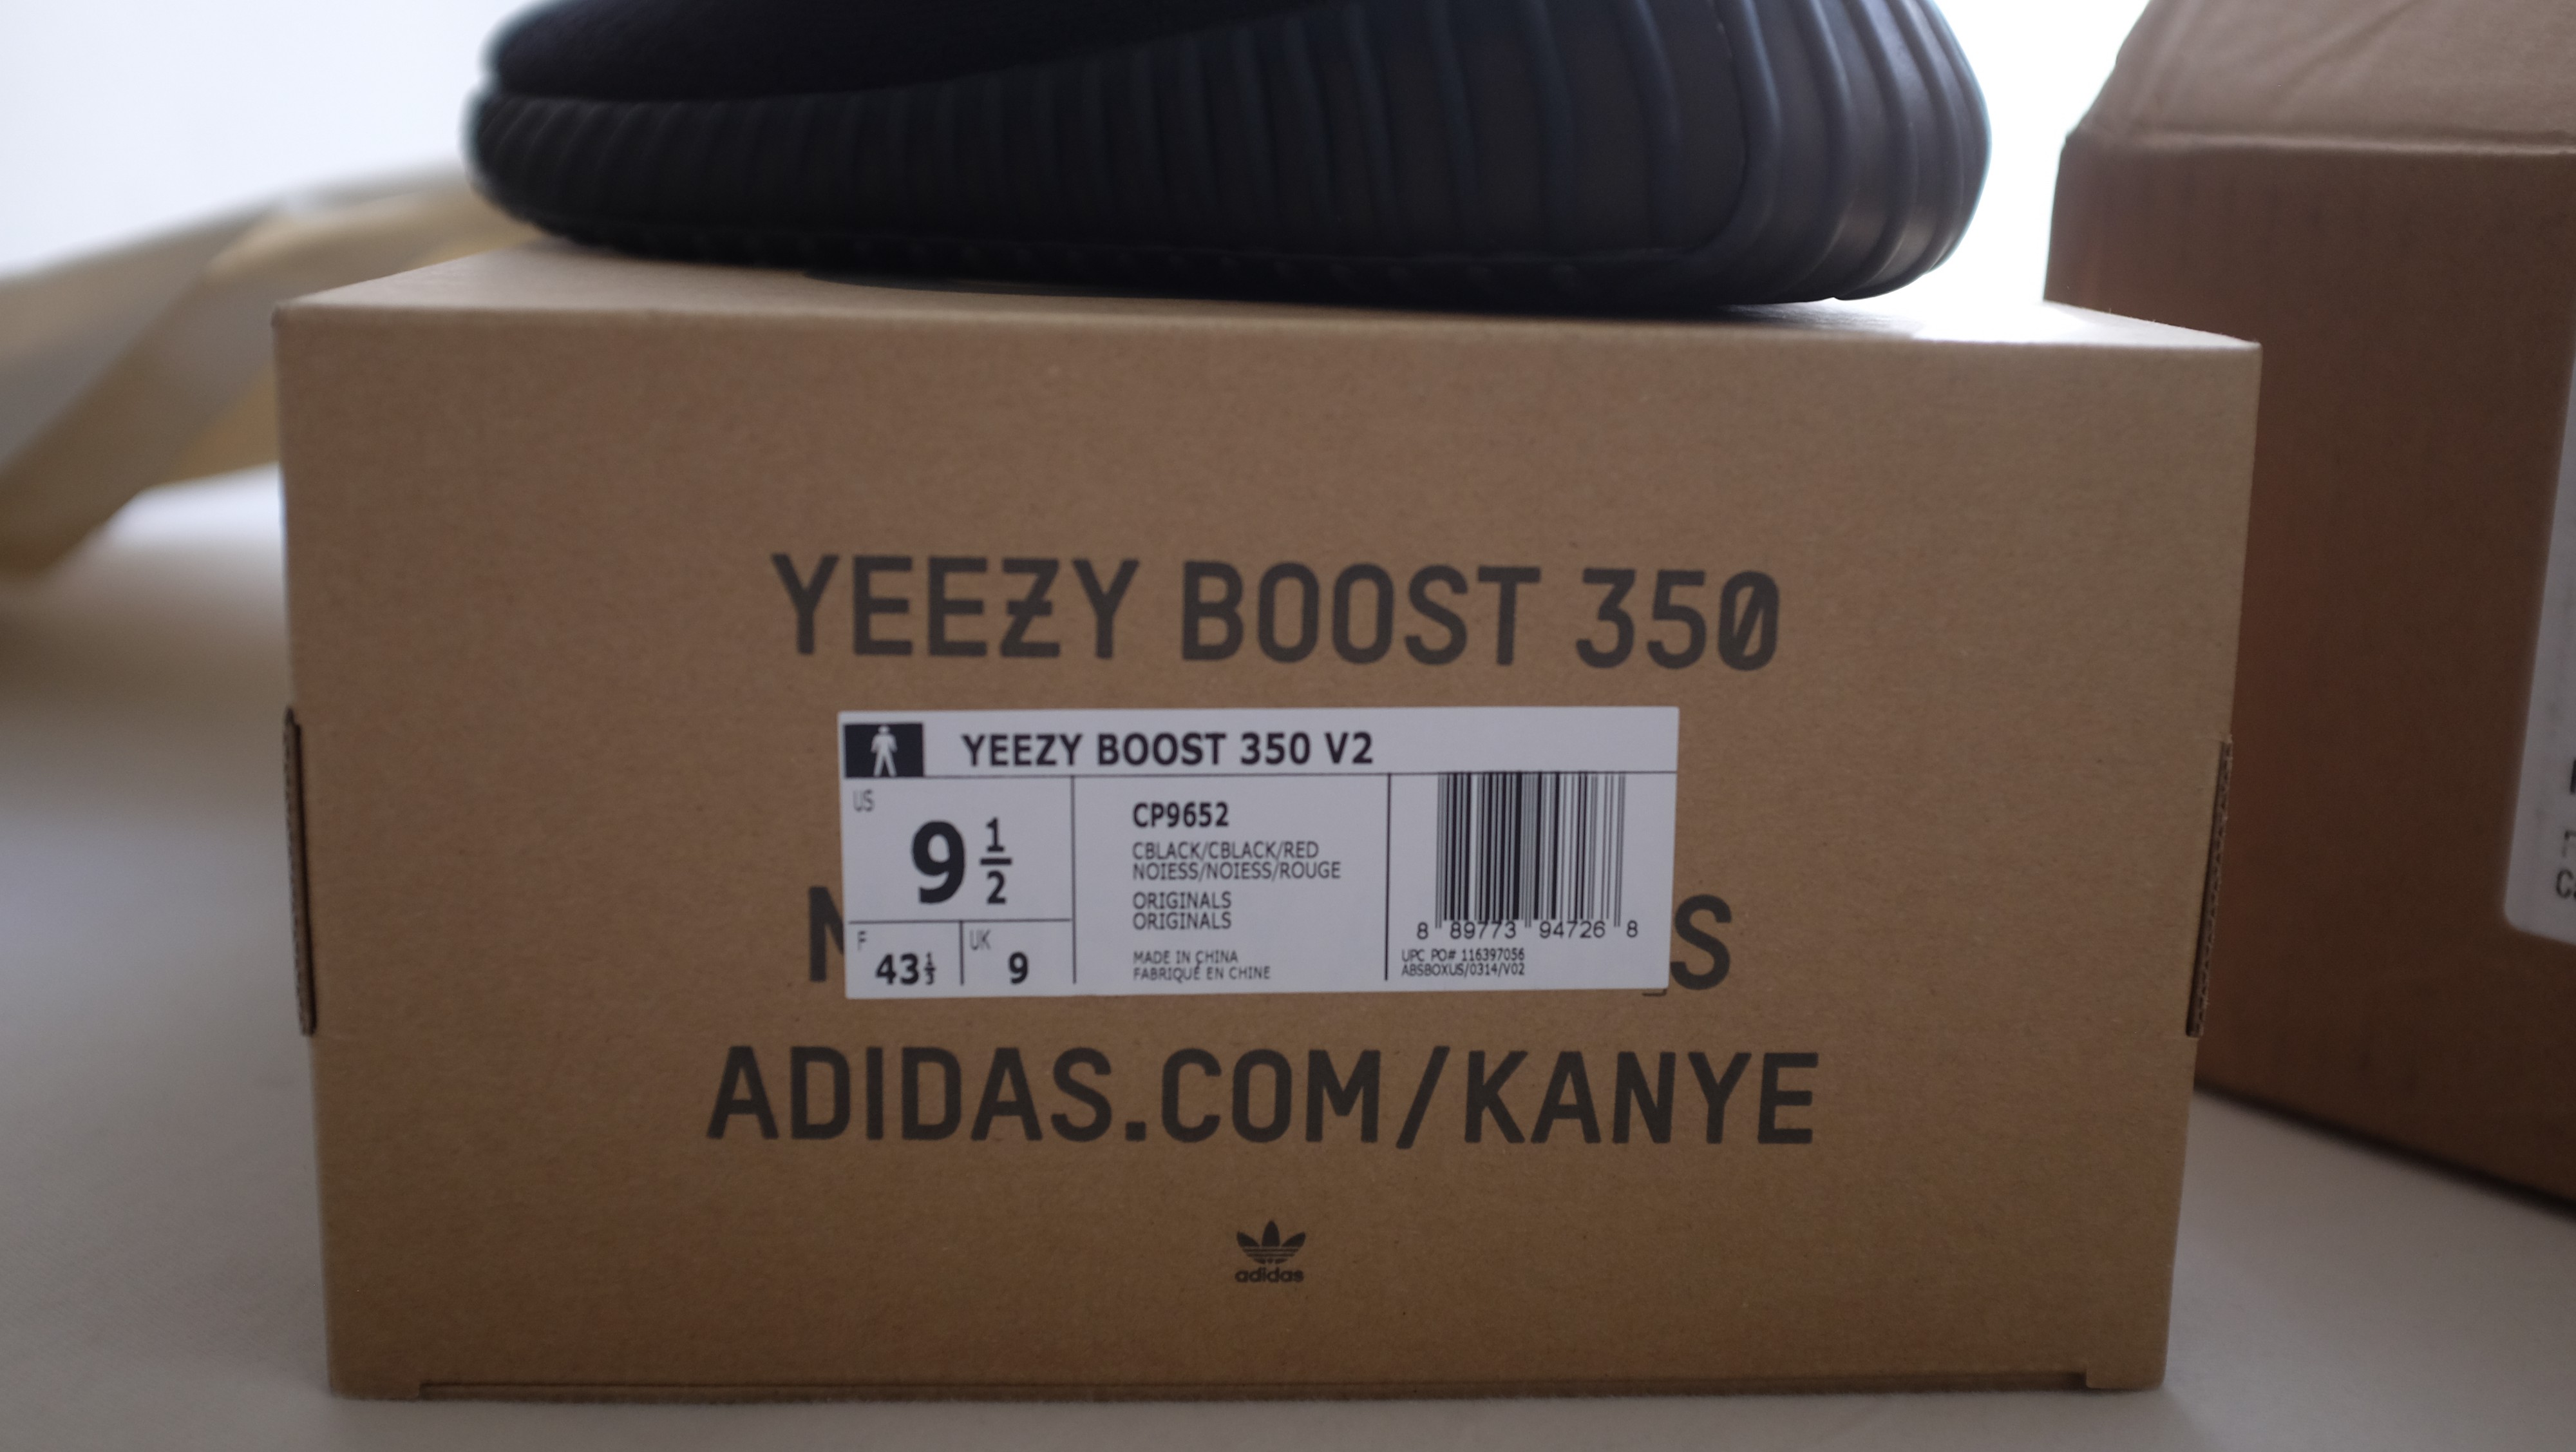
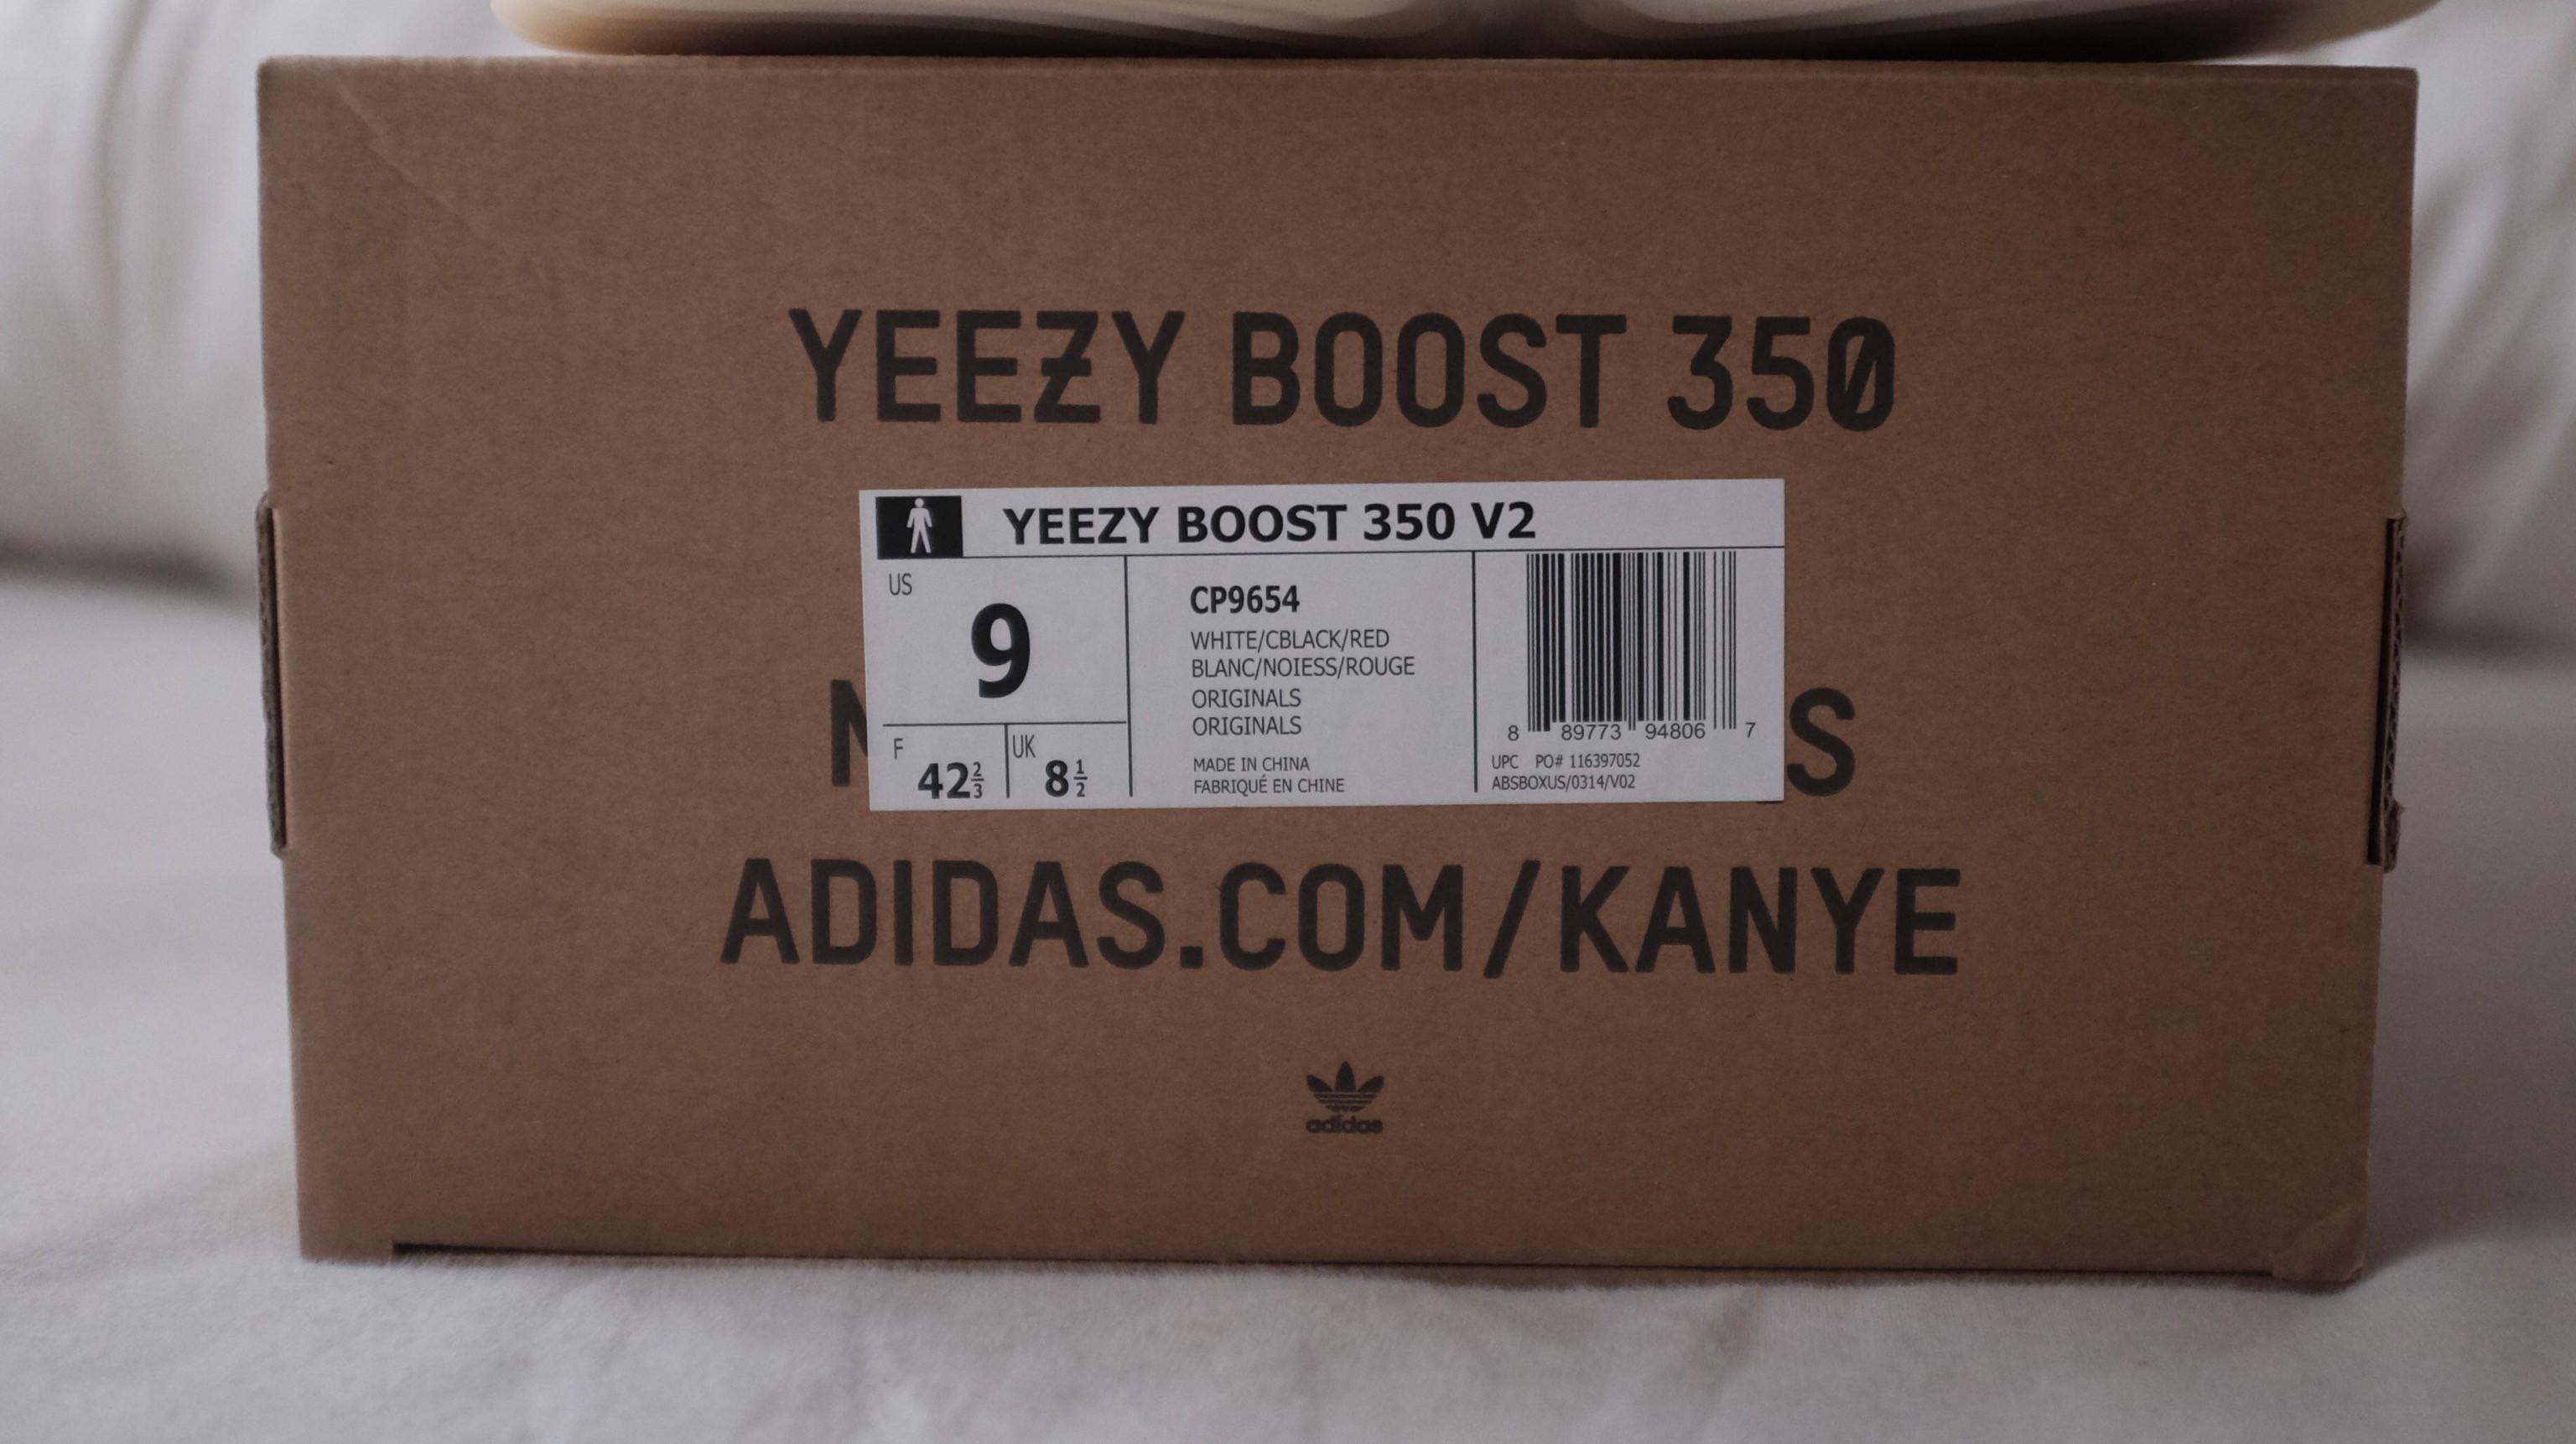
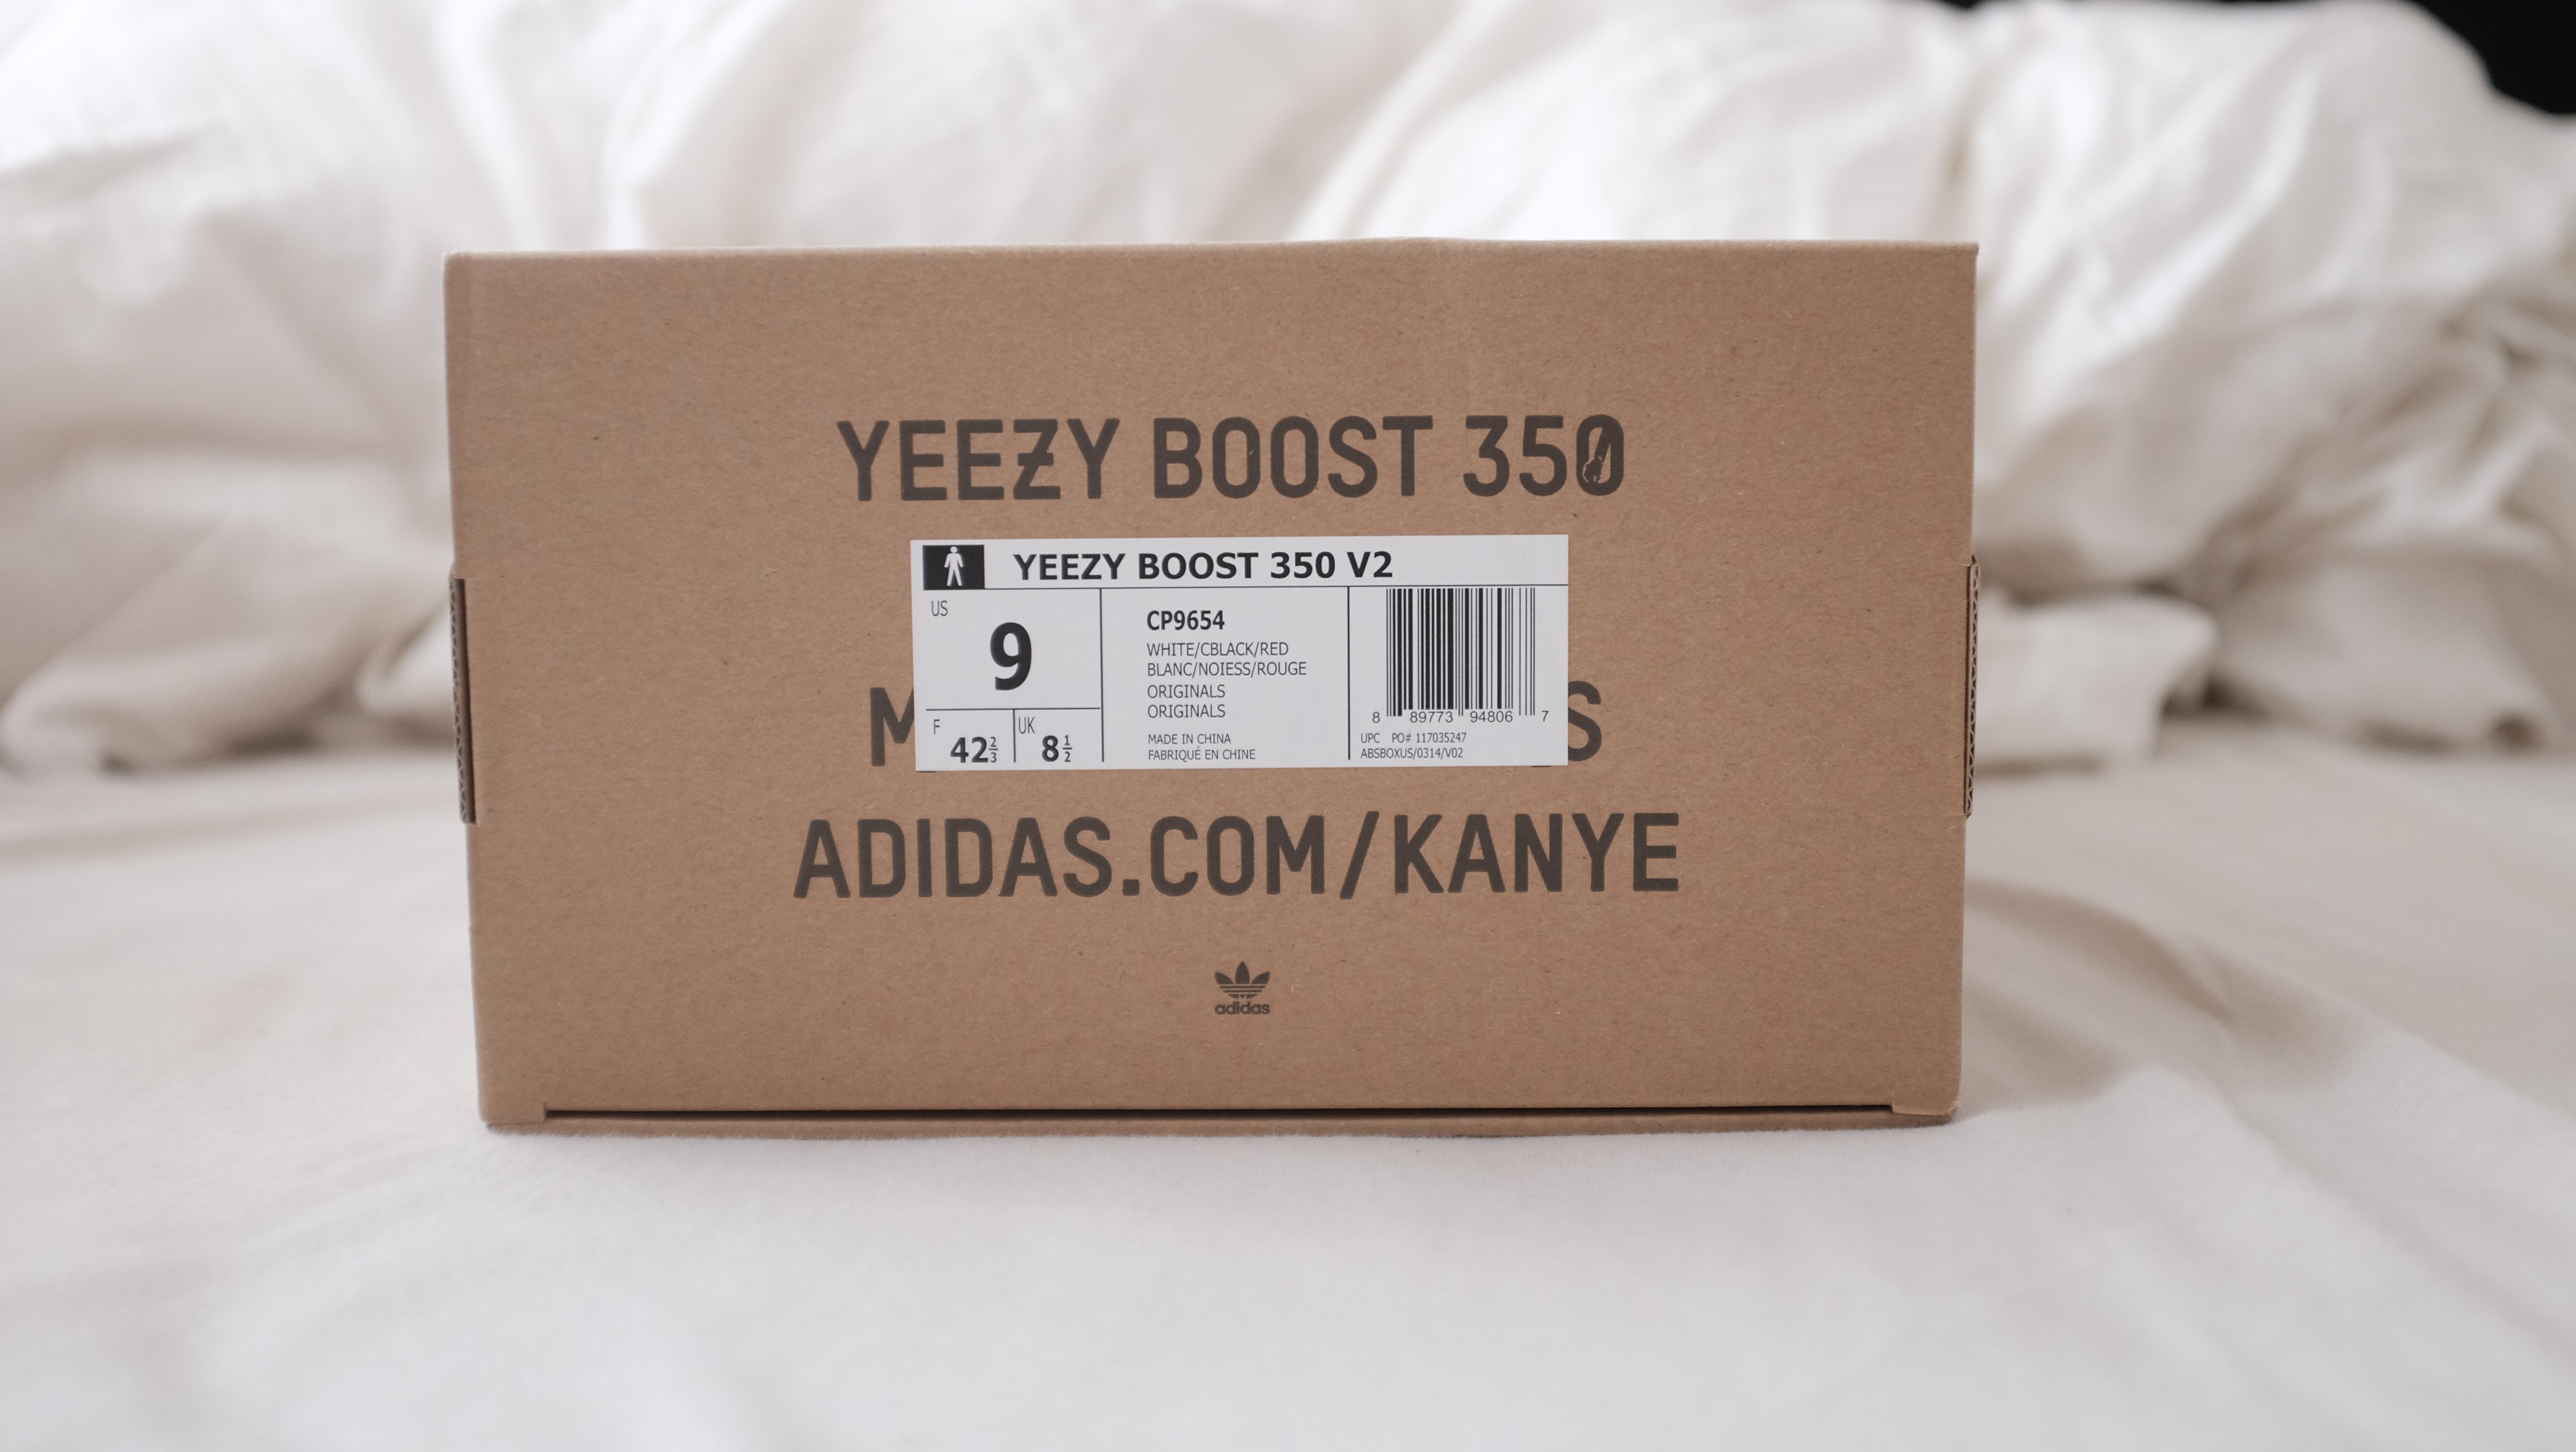
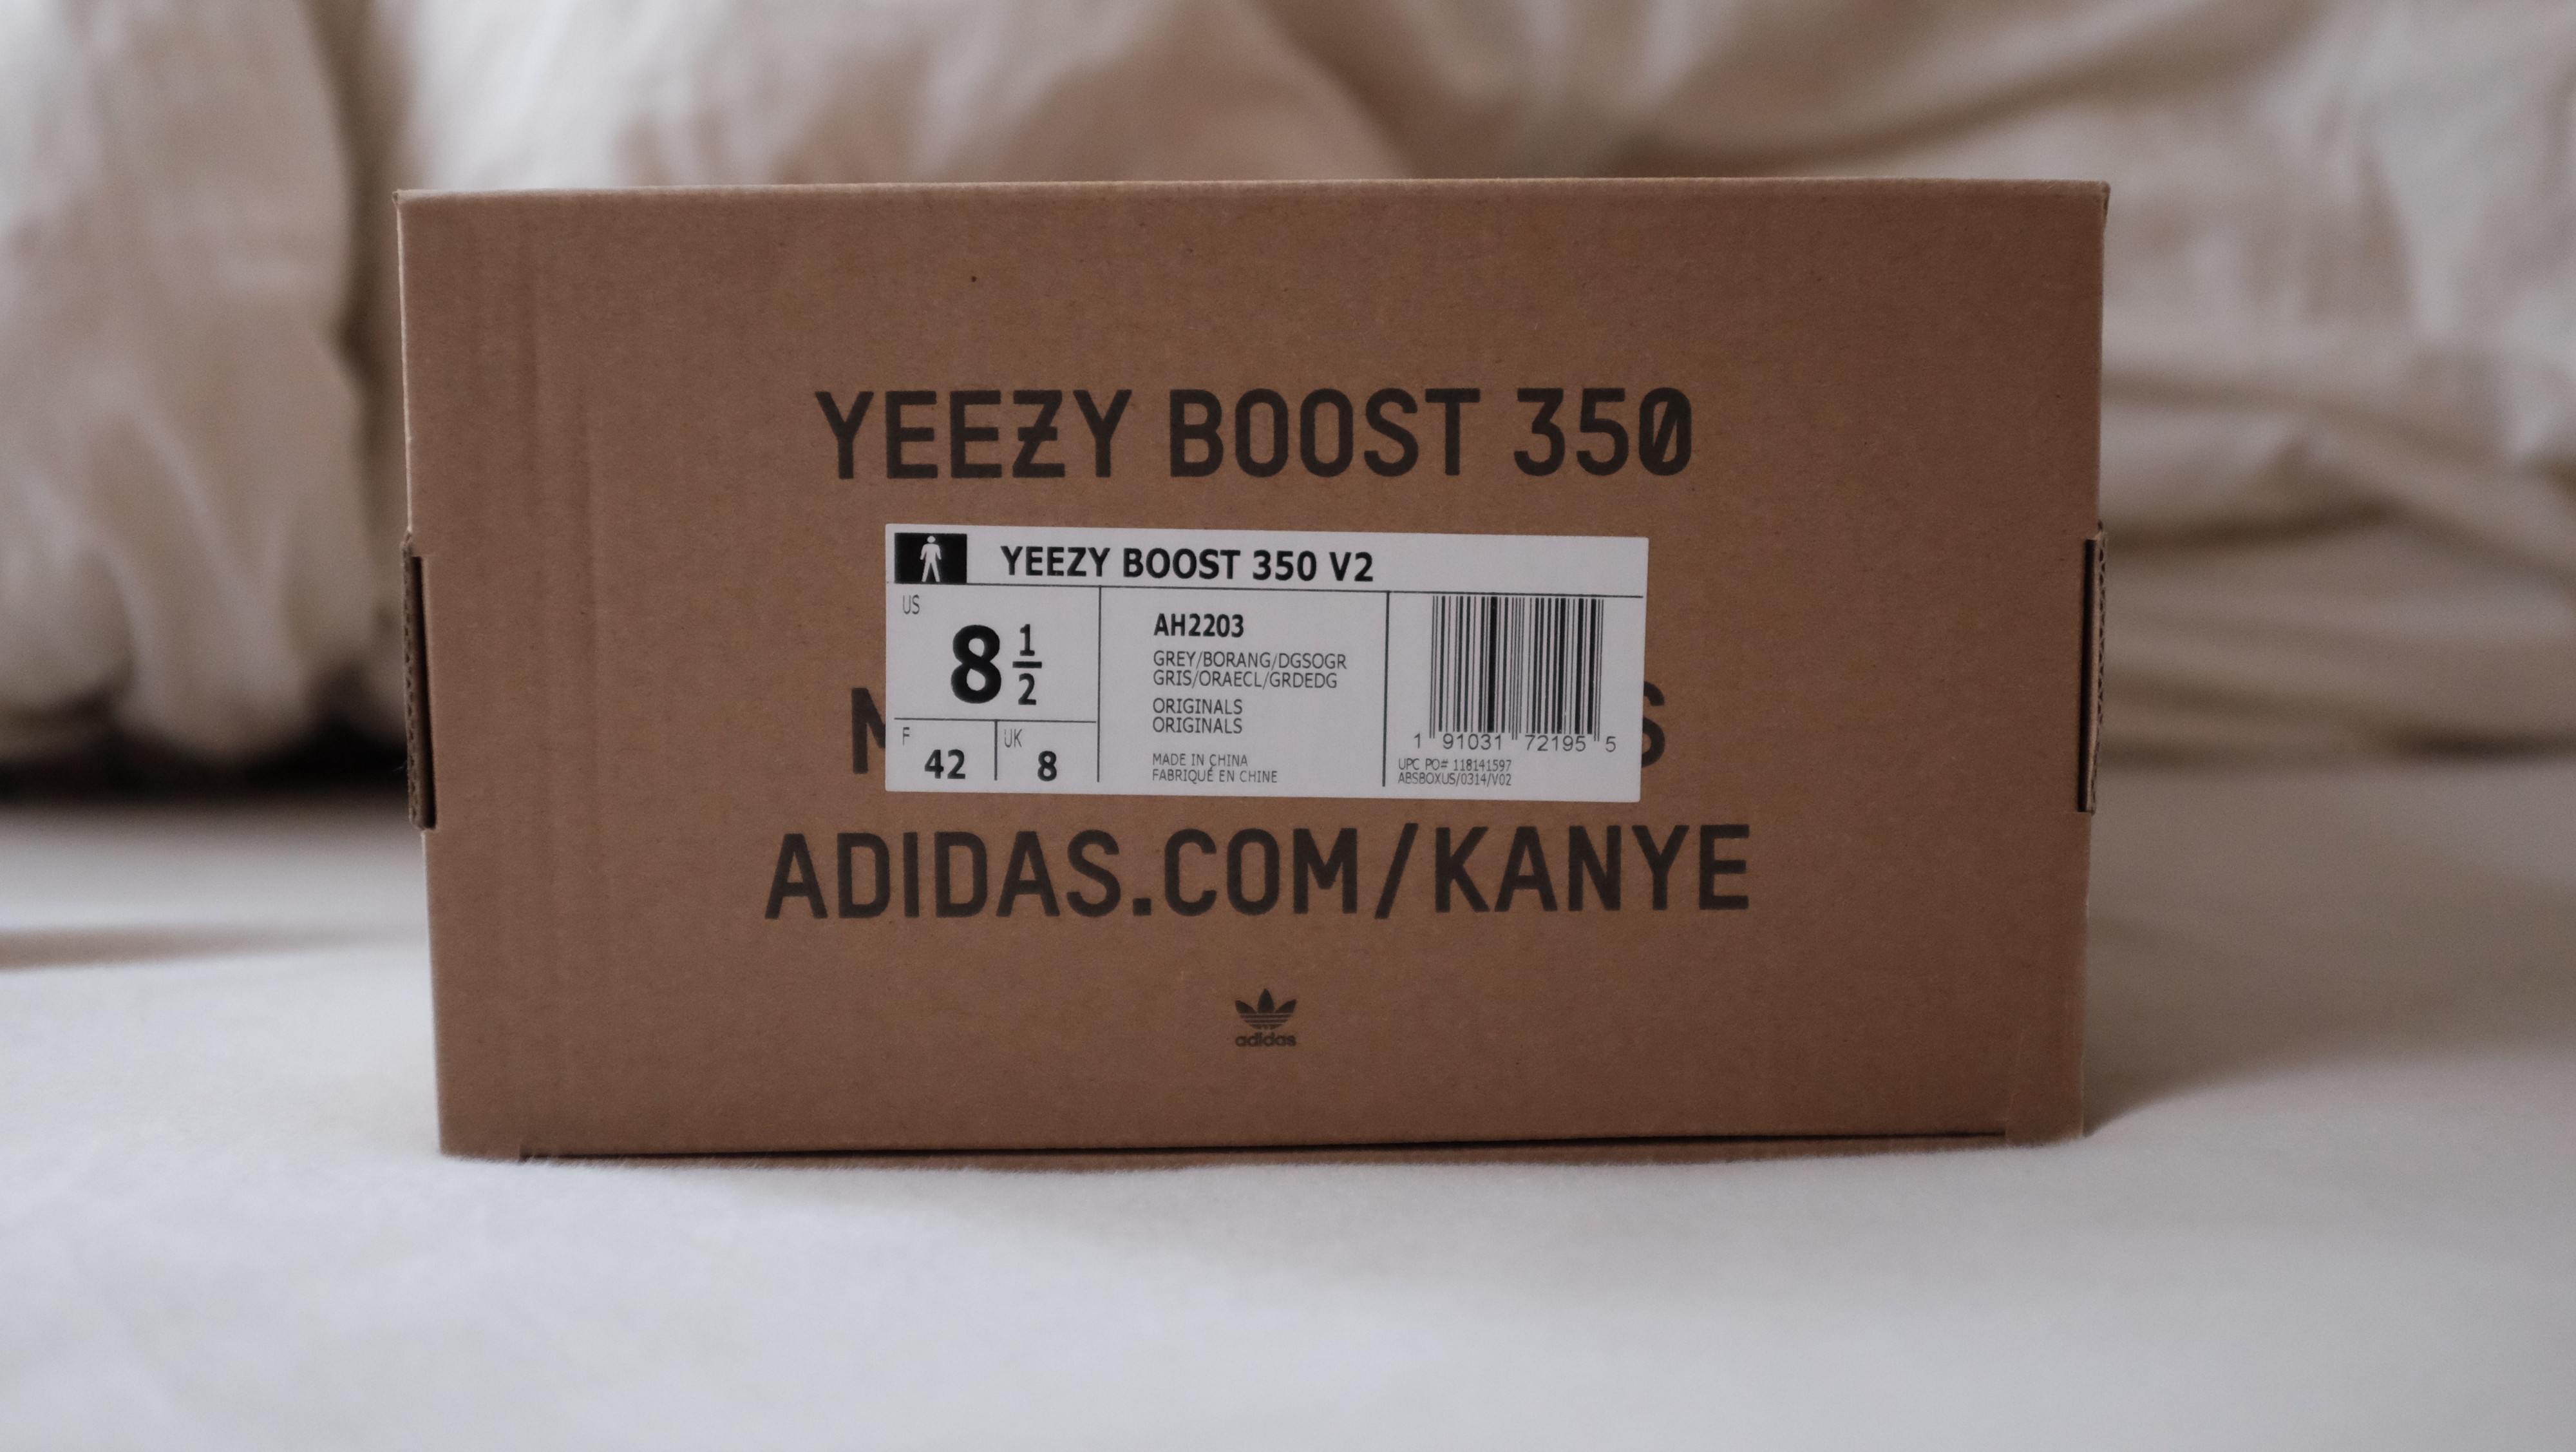
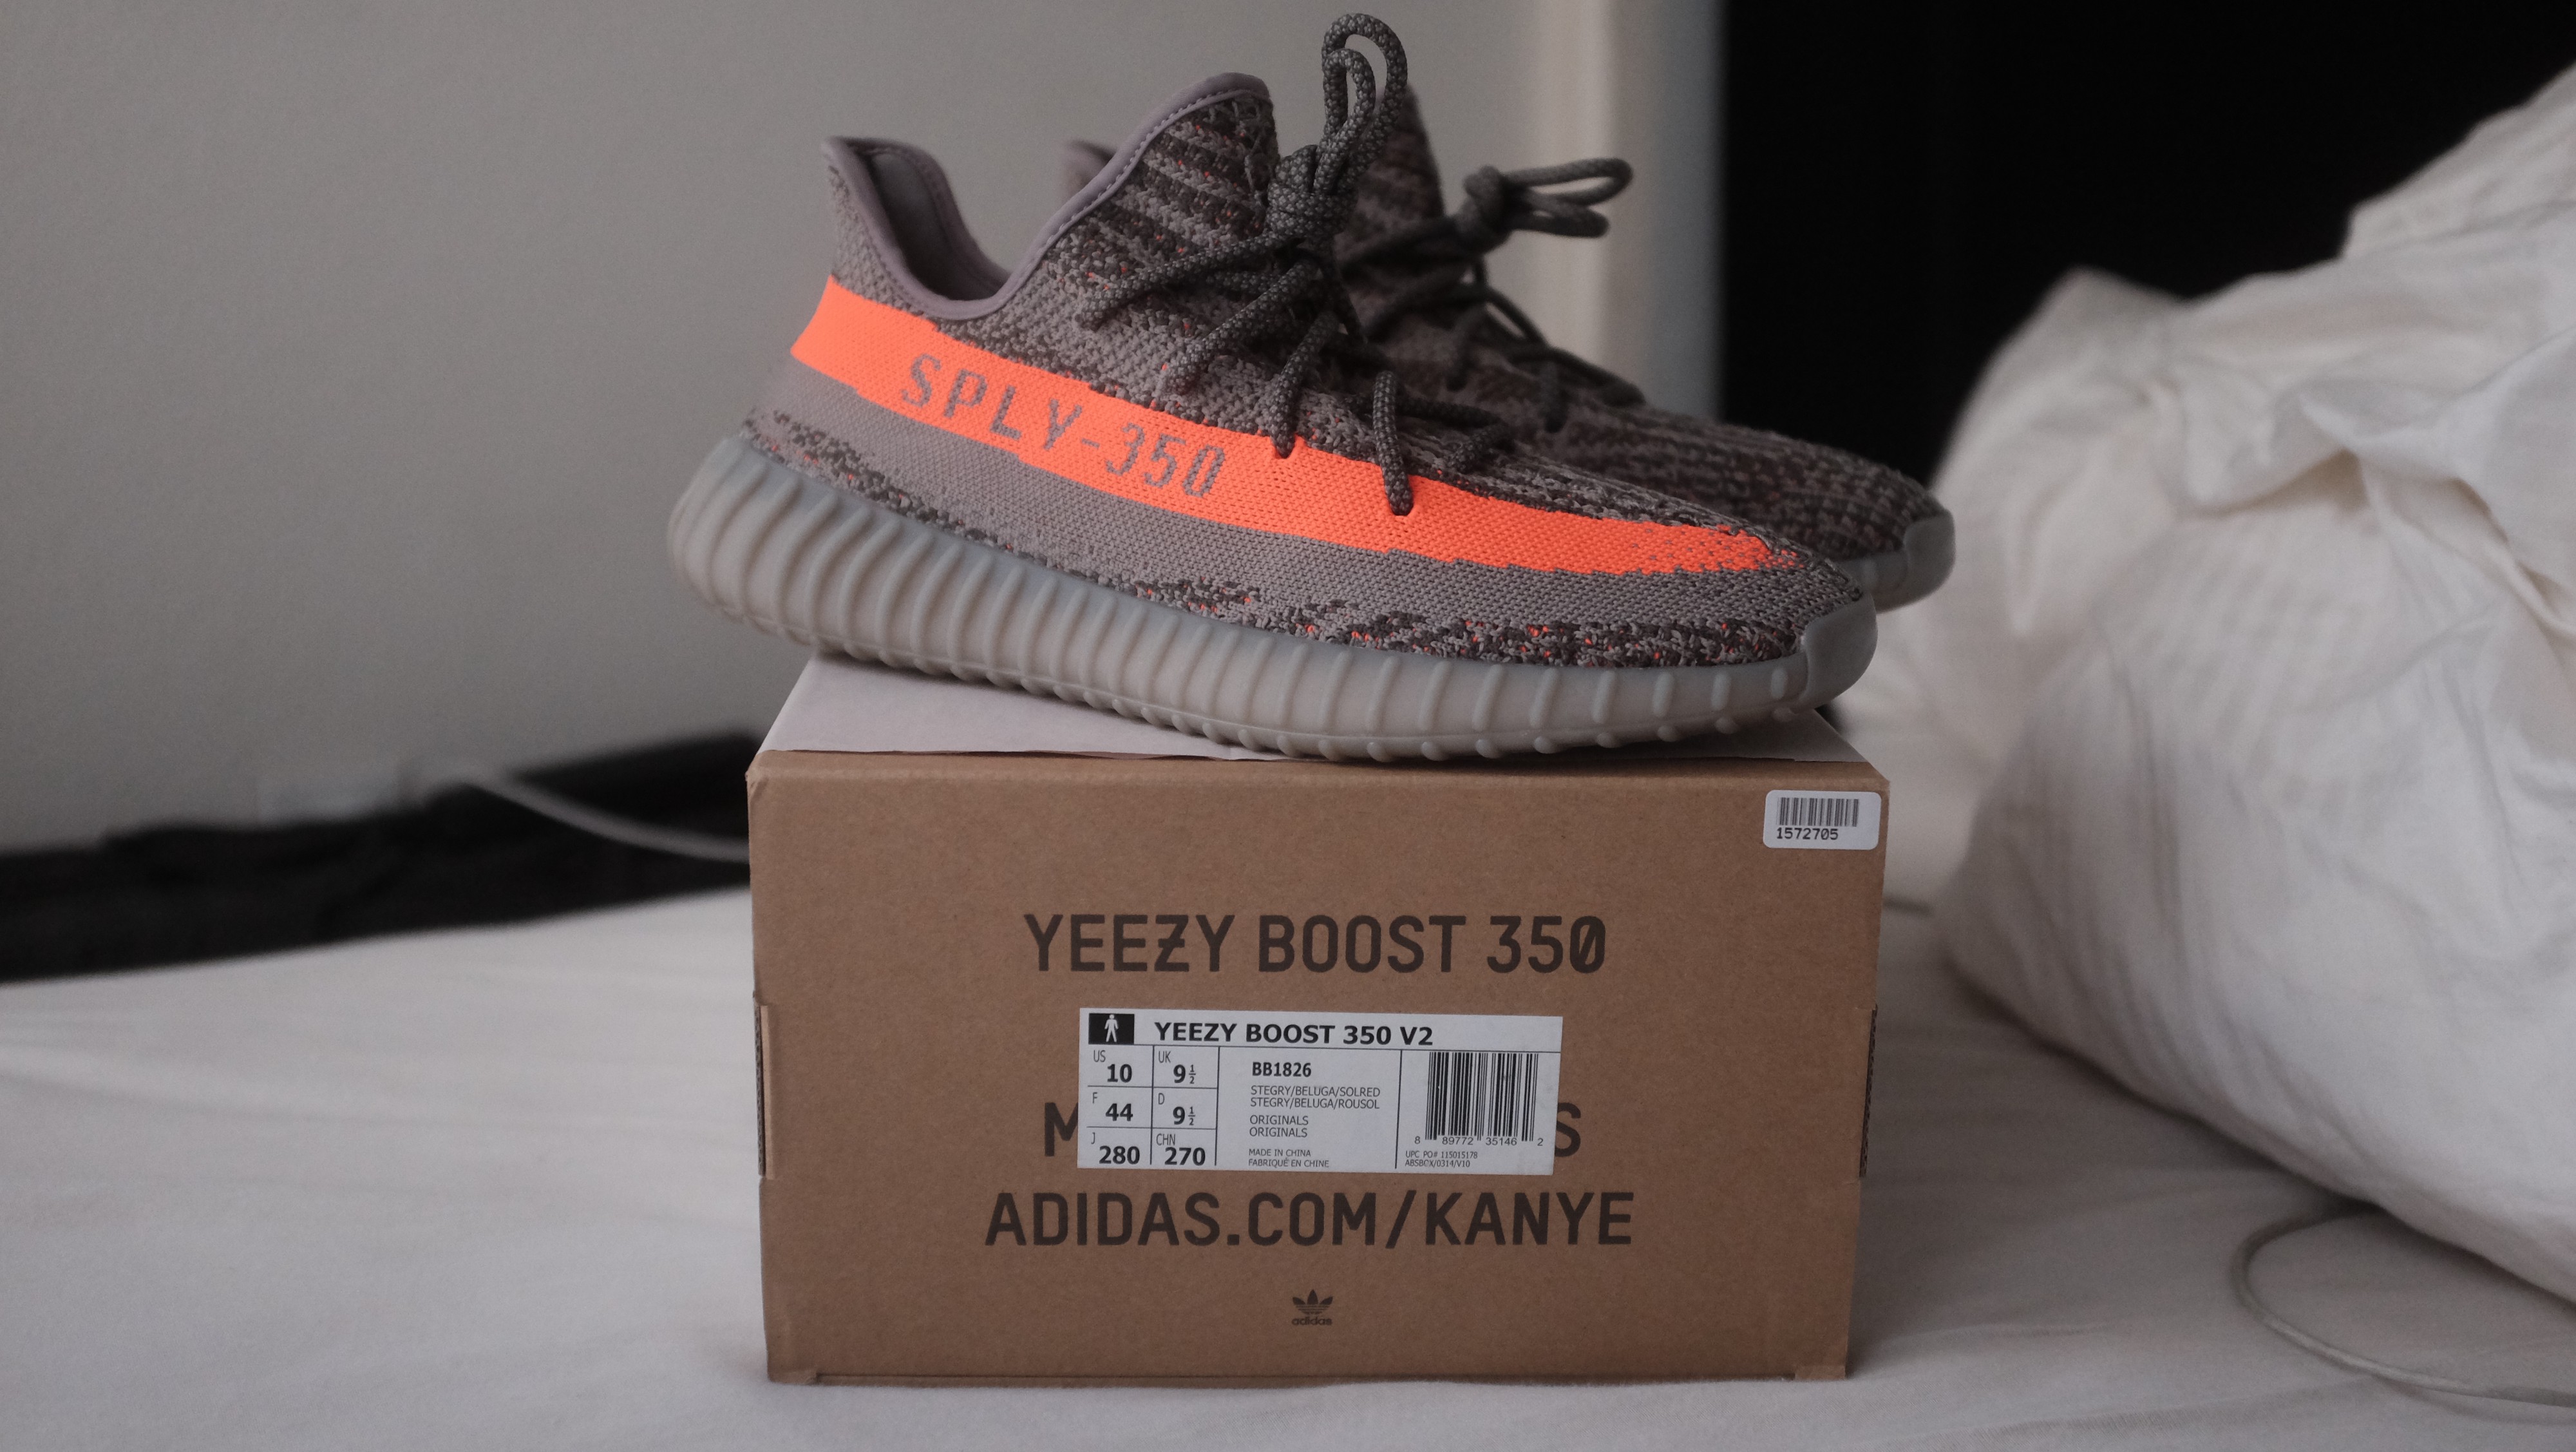
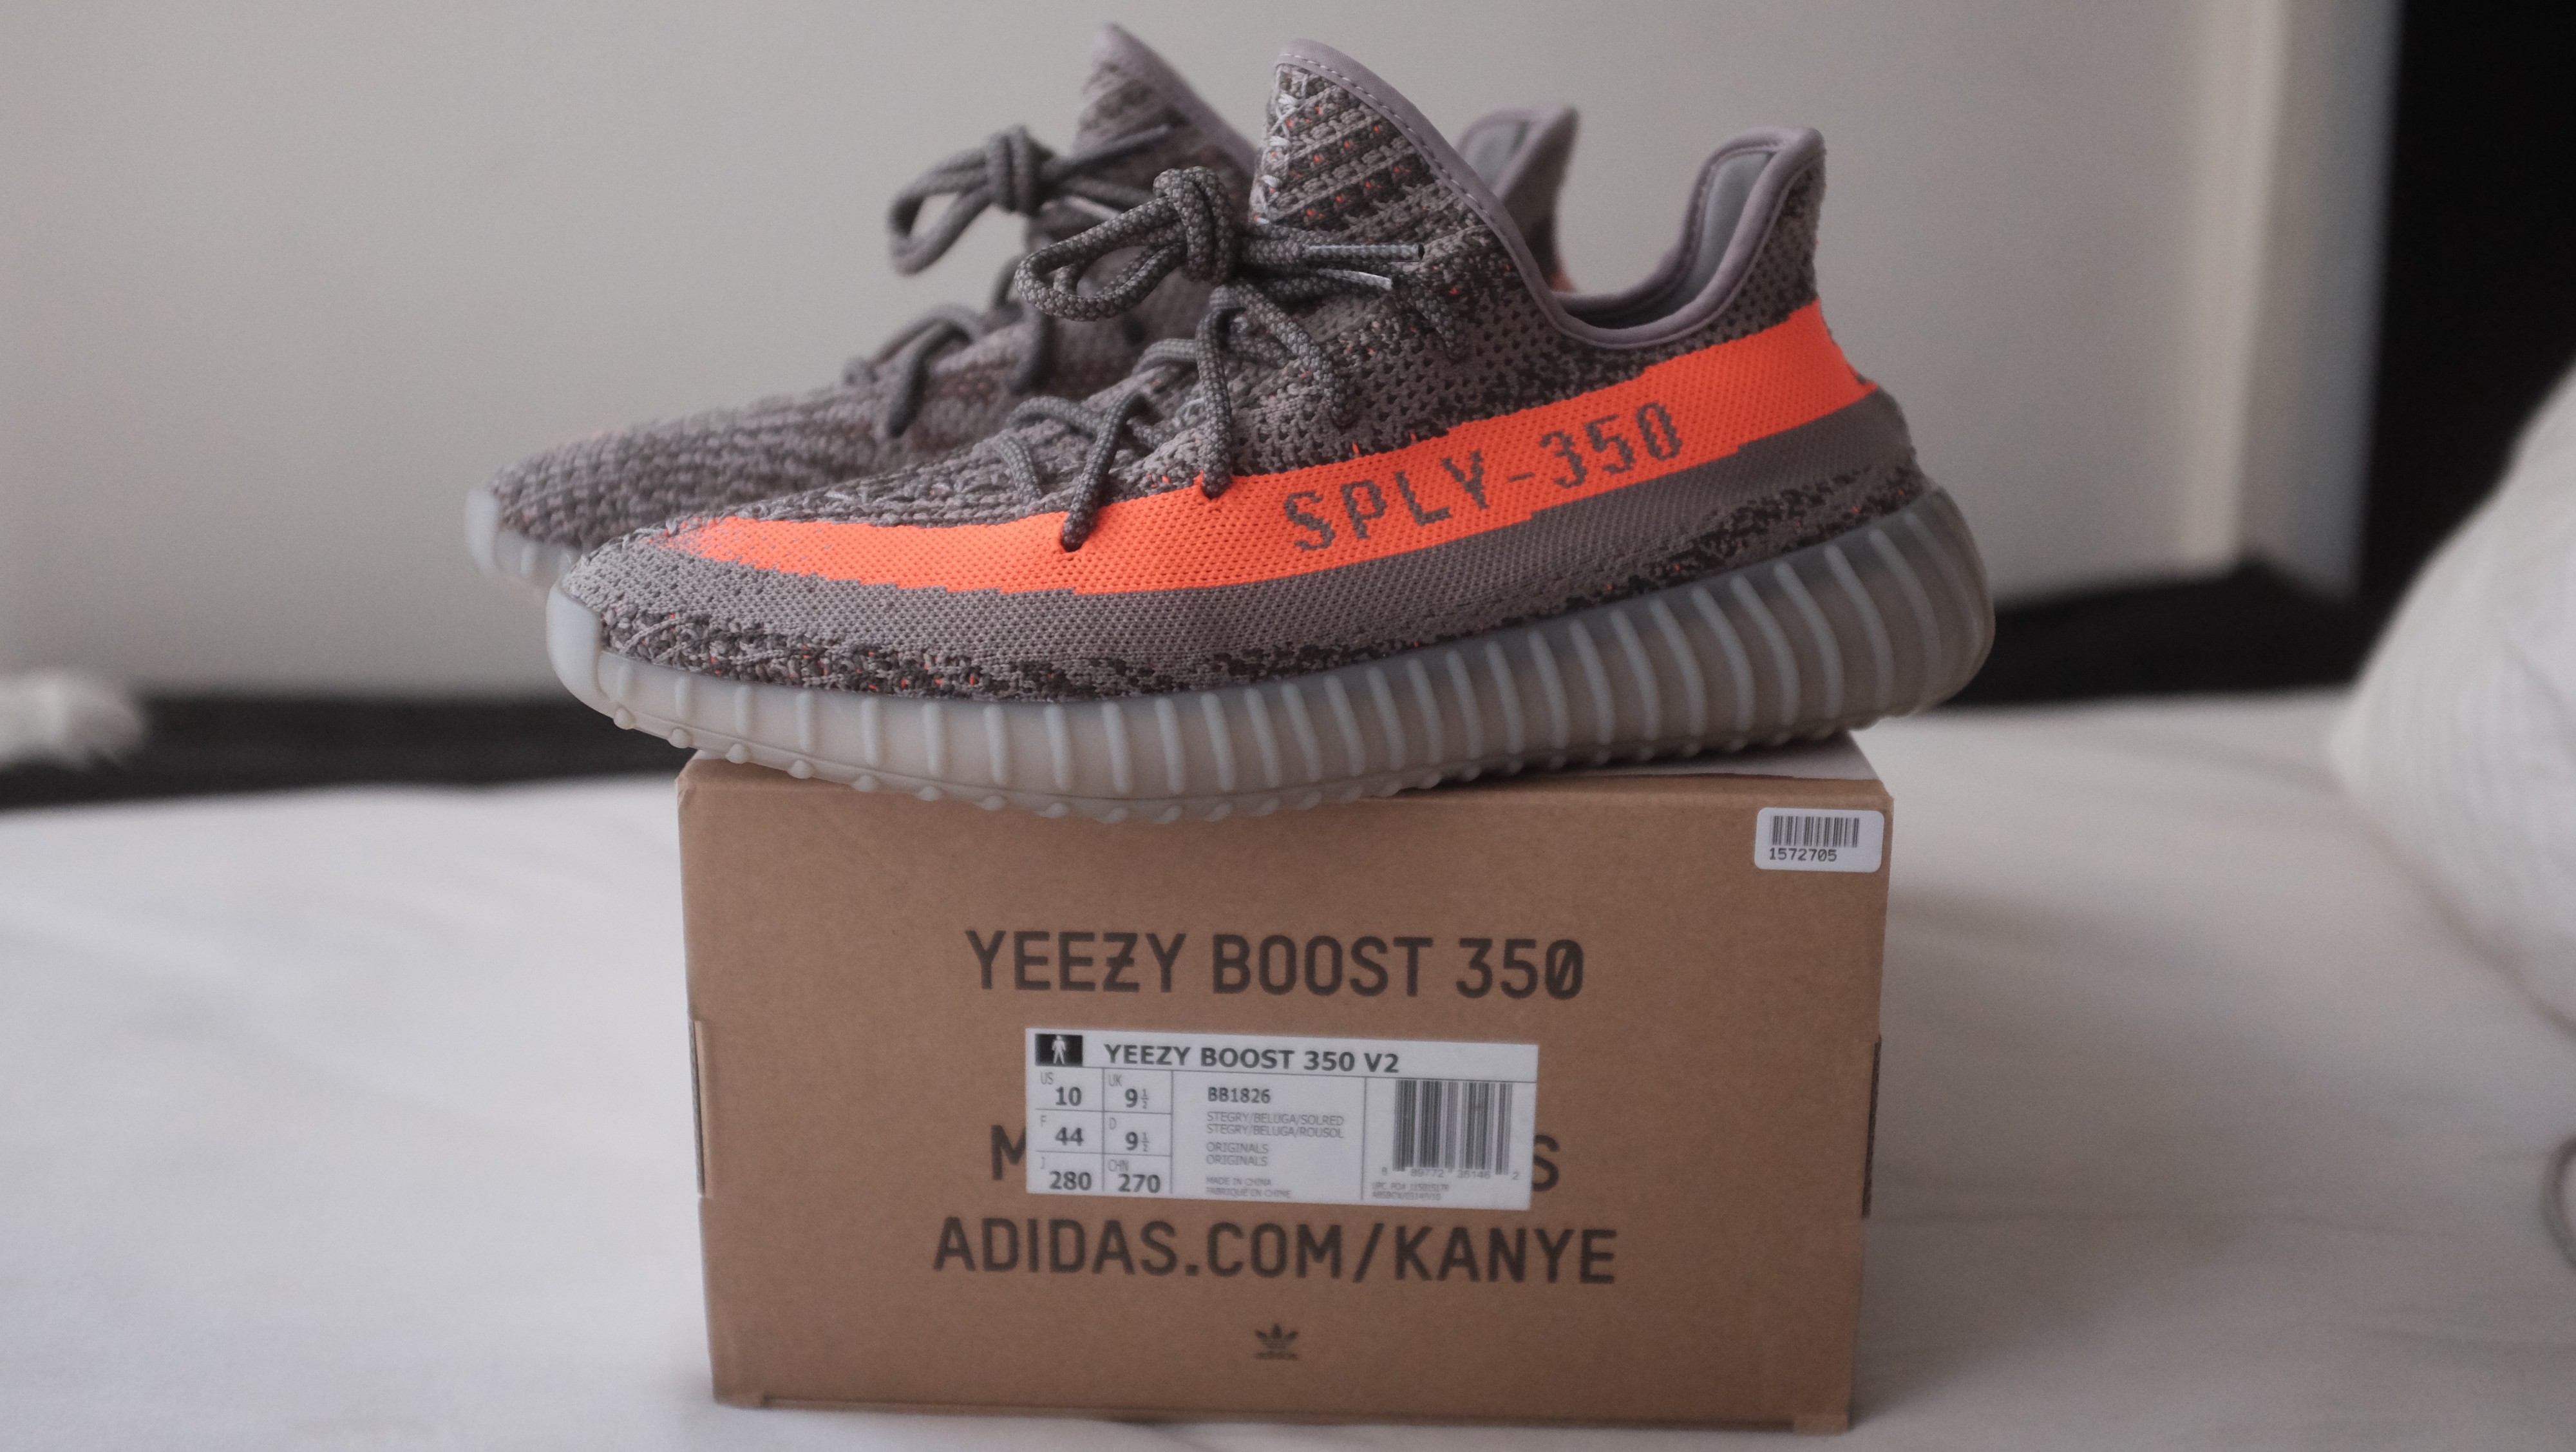
Front of box: I would focus on the man being centered, and Box label starting at the E. Back of box: I would make sure the adidas logo on the bottom is centered.

 Wrapping Papper
Wrapping paper is semi shinny, has a nice texture to it. (Will cover more in video portion)
 Stuffing for the V2
Stuffing for the shoe is closer to white.
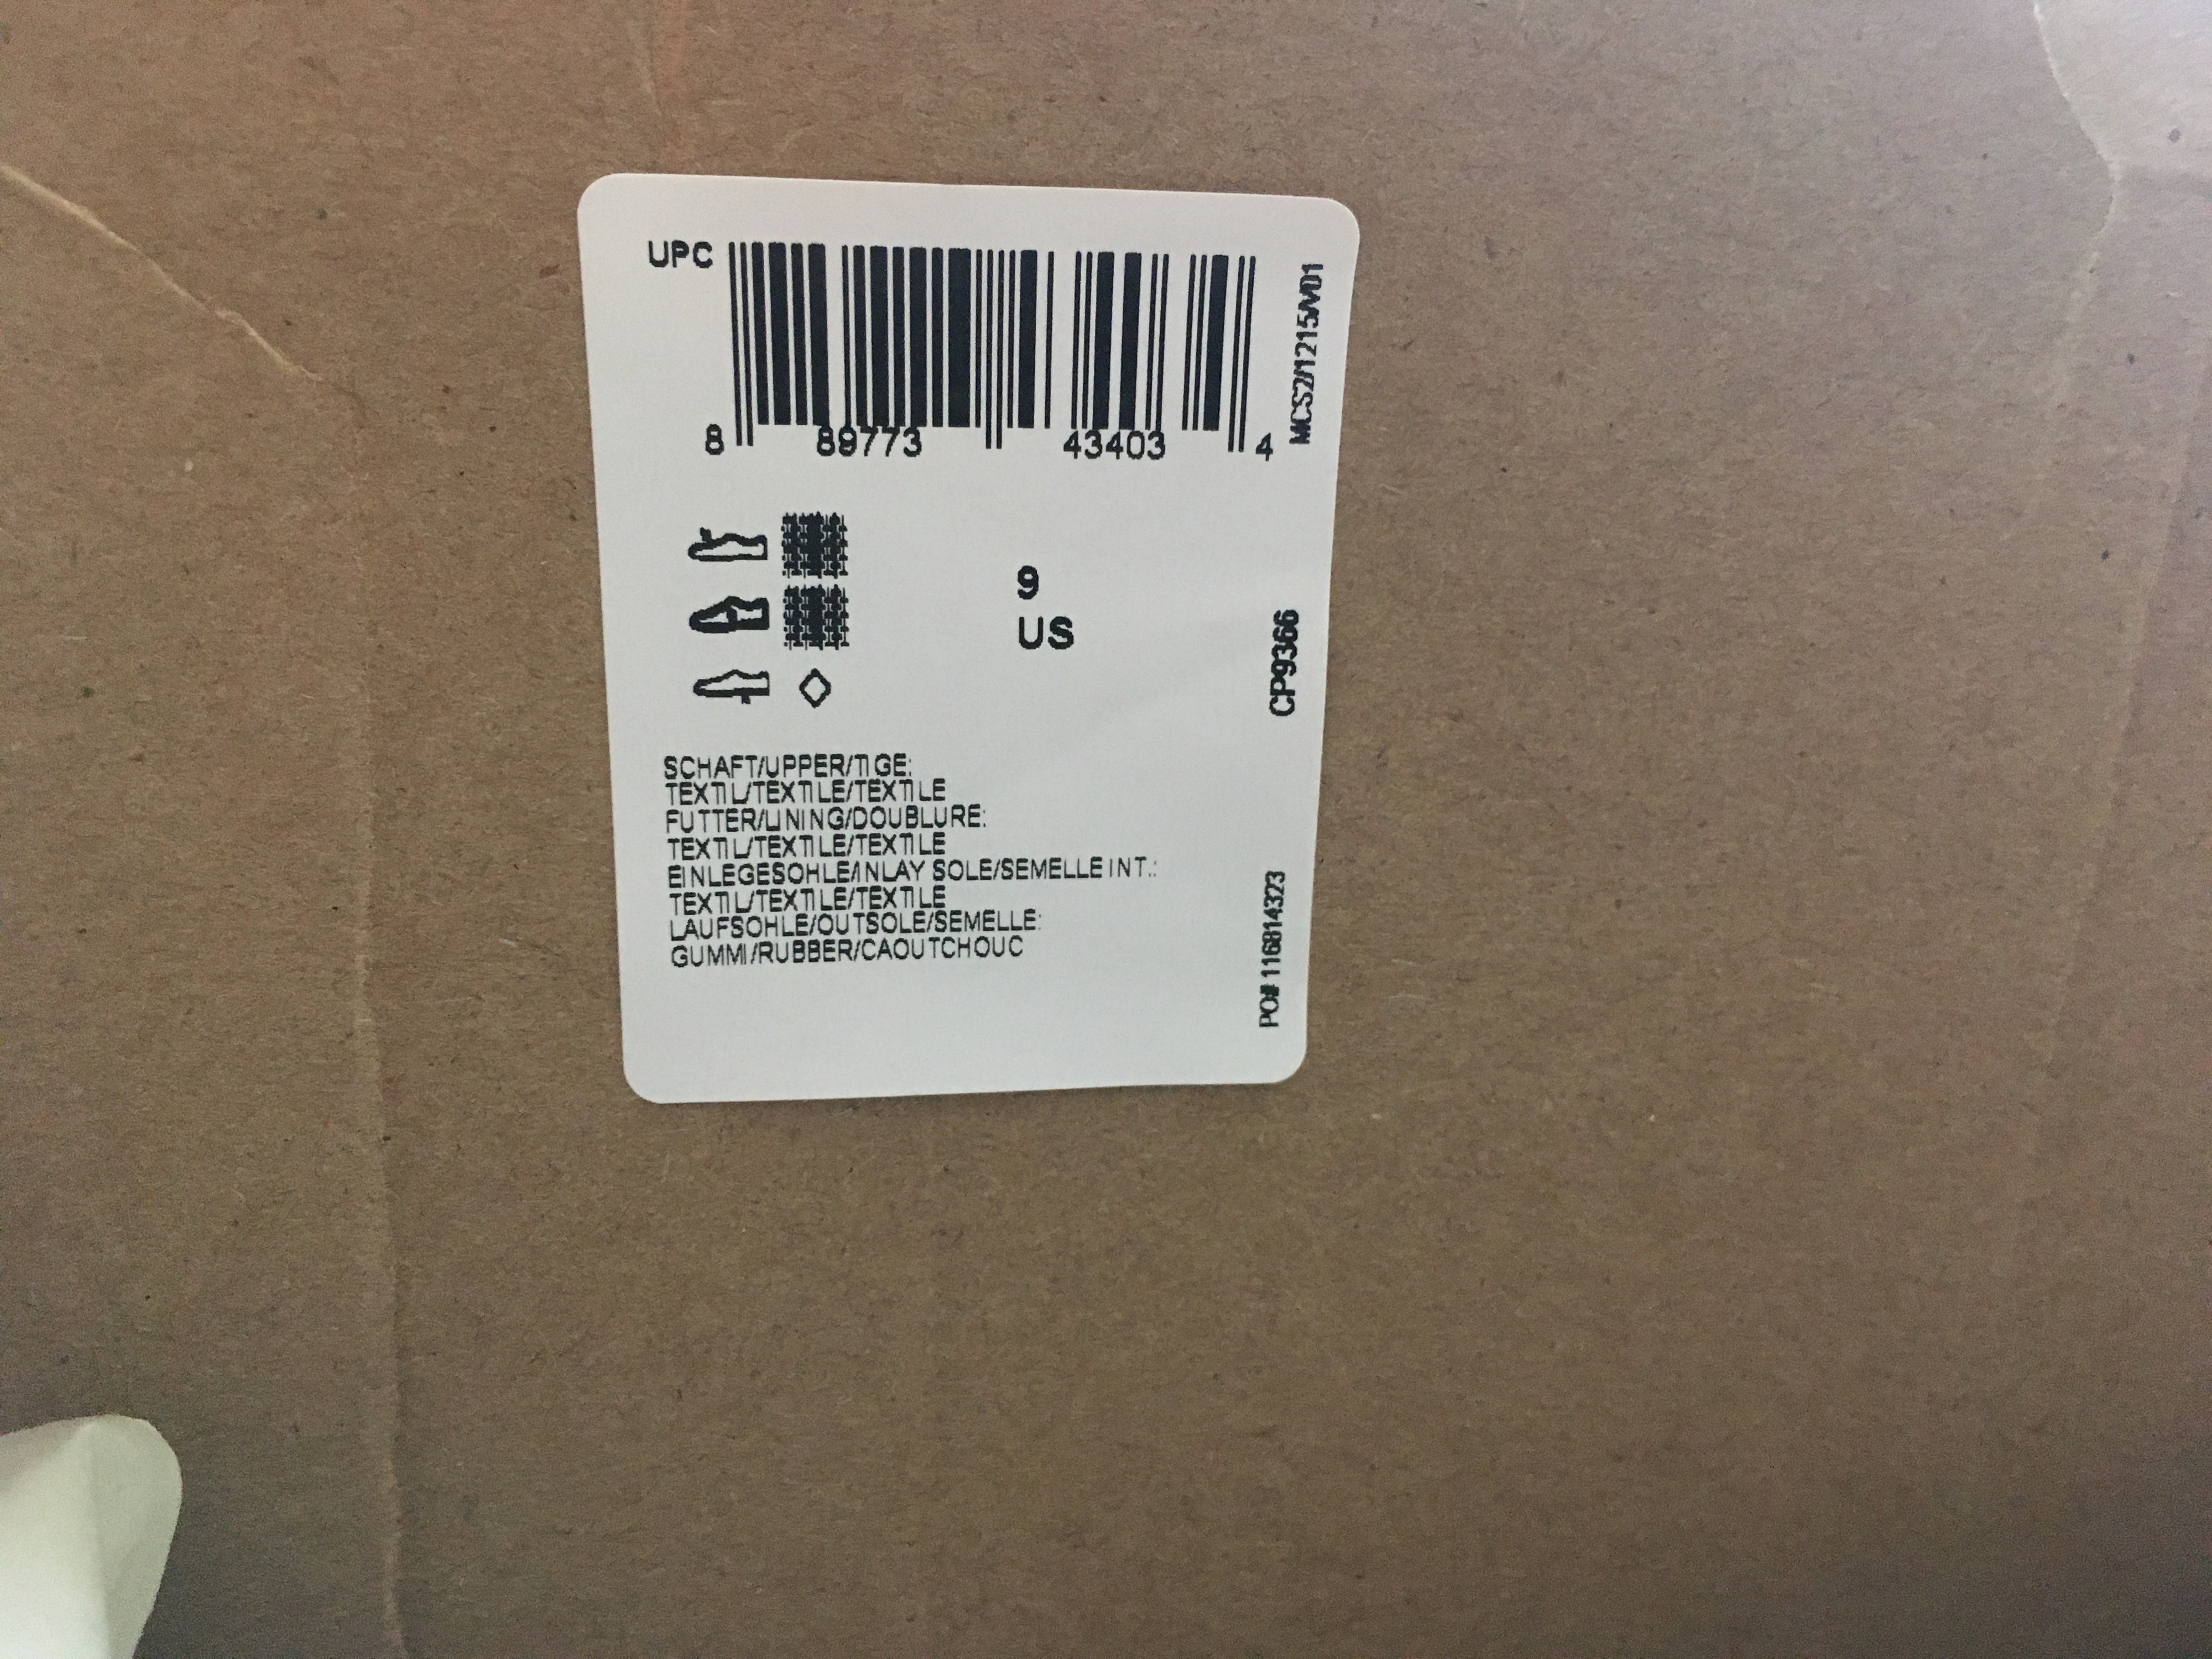 UPC Sticker for Cream V2 sz 9
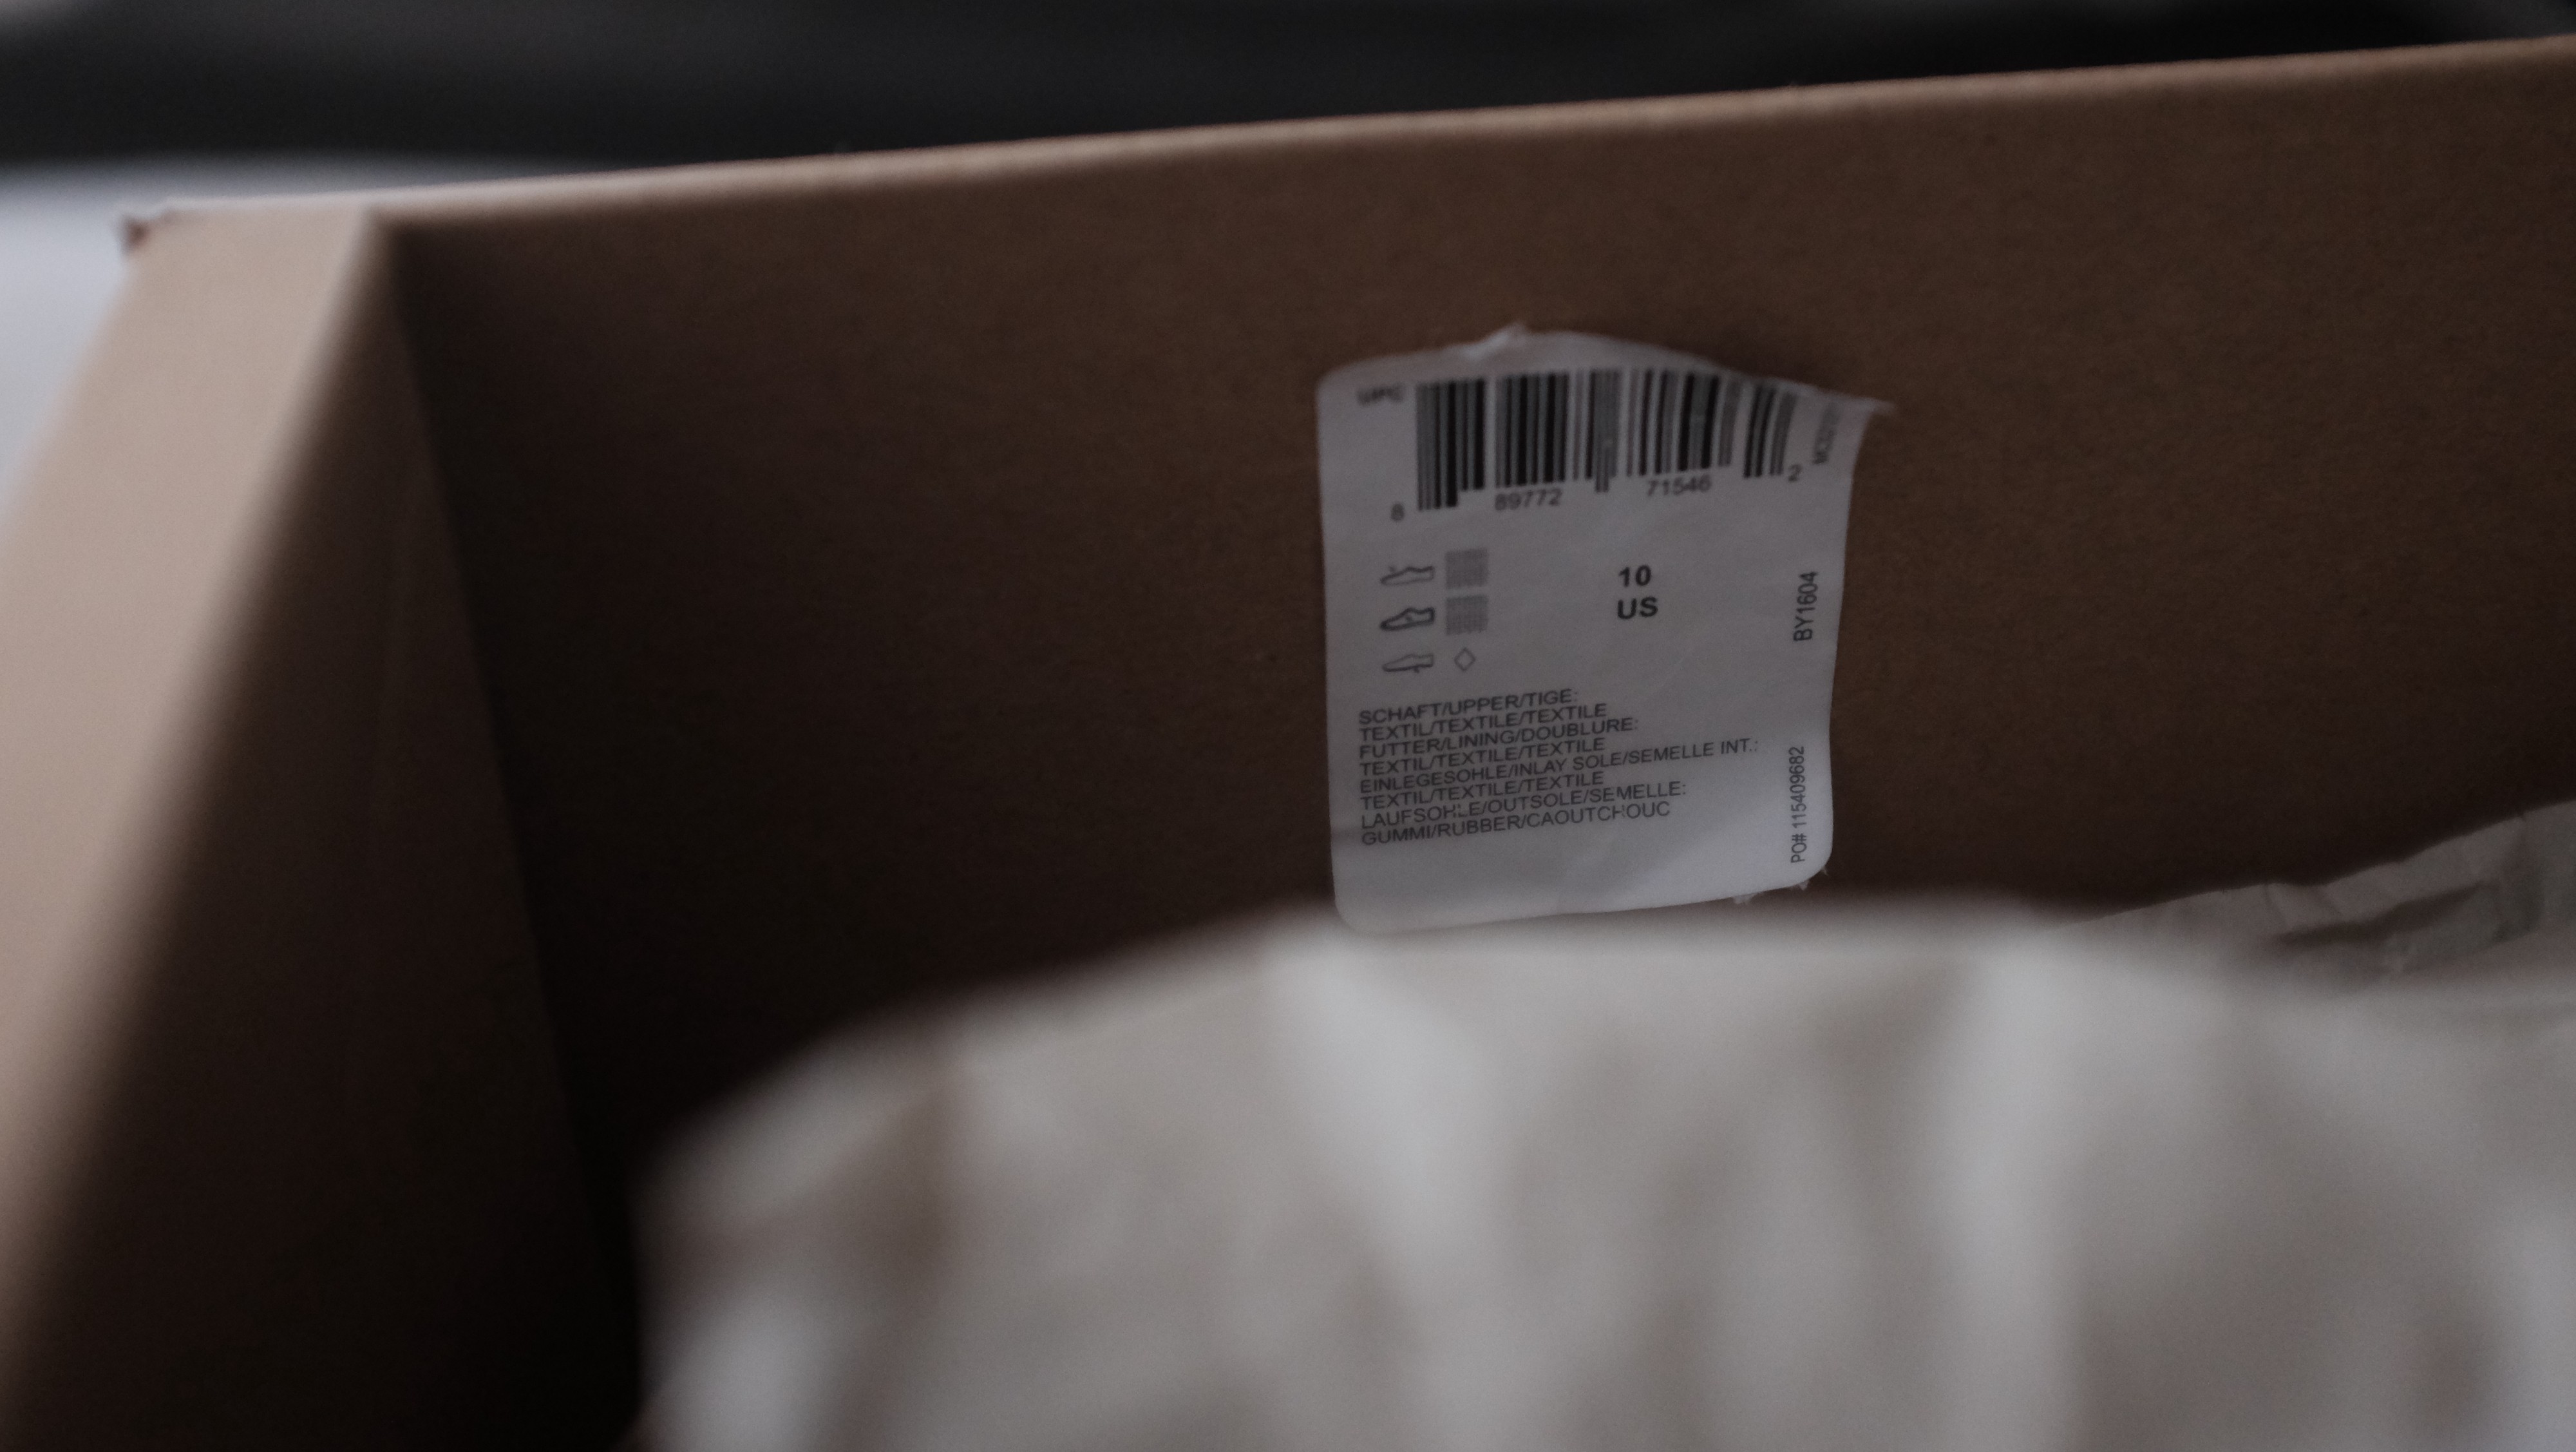
 UPC sticker from my sz 10 Oreo & Bred 7.5
I haven?t seen a pair of fakes with authentic UPC stickers yet, so these are always a good sign.
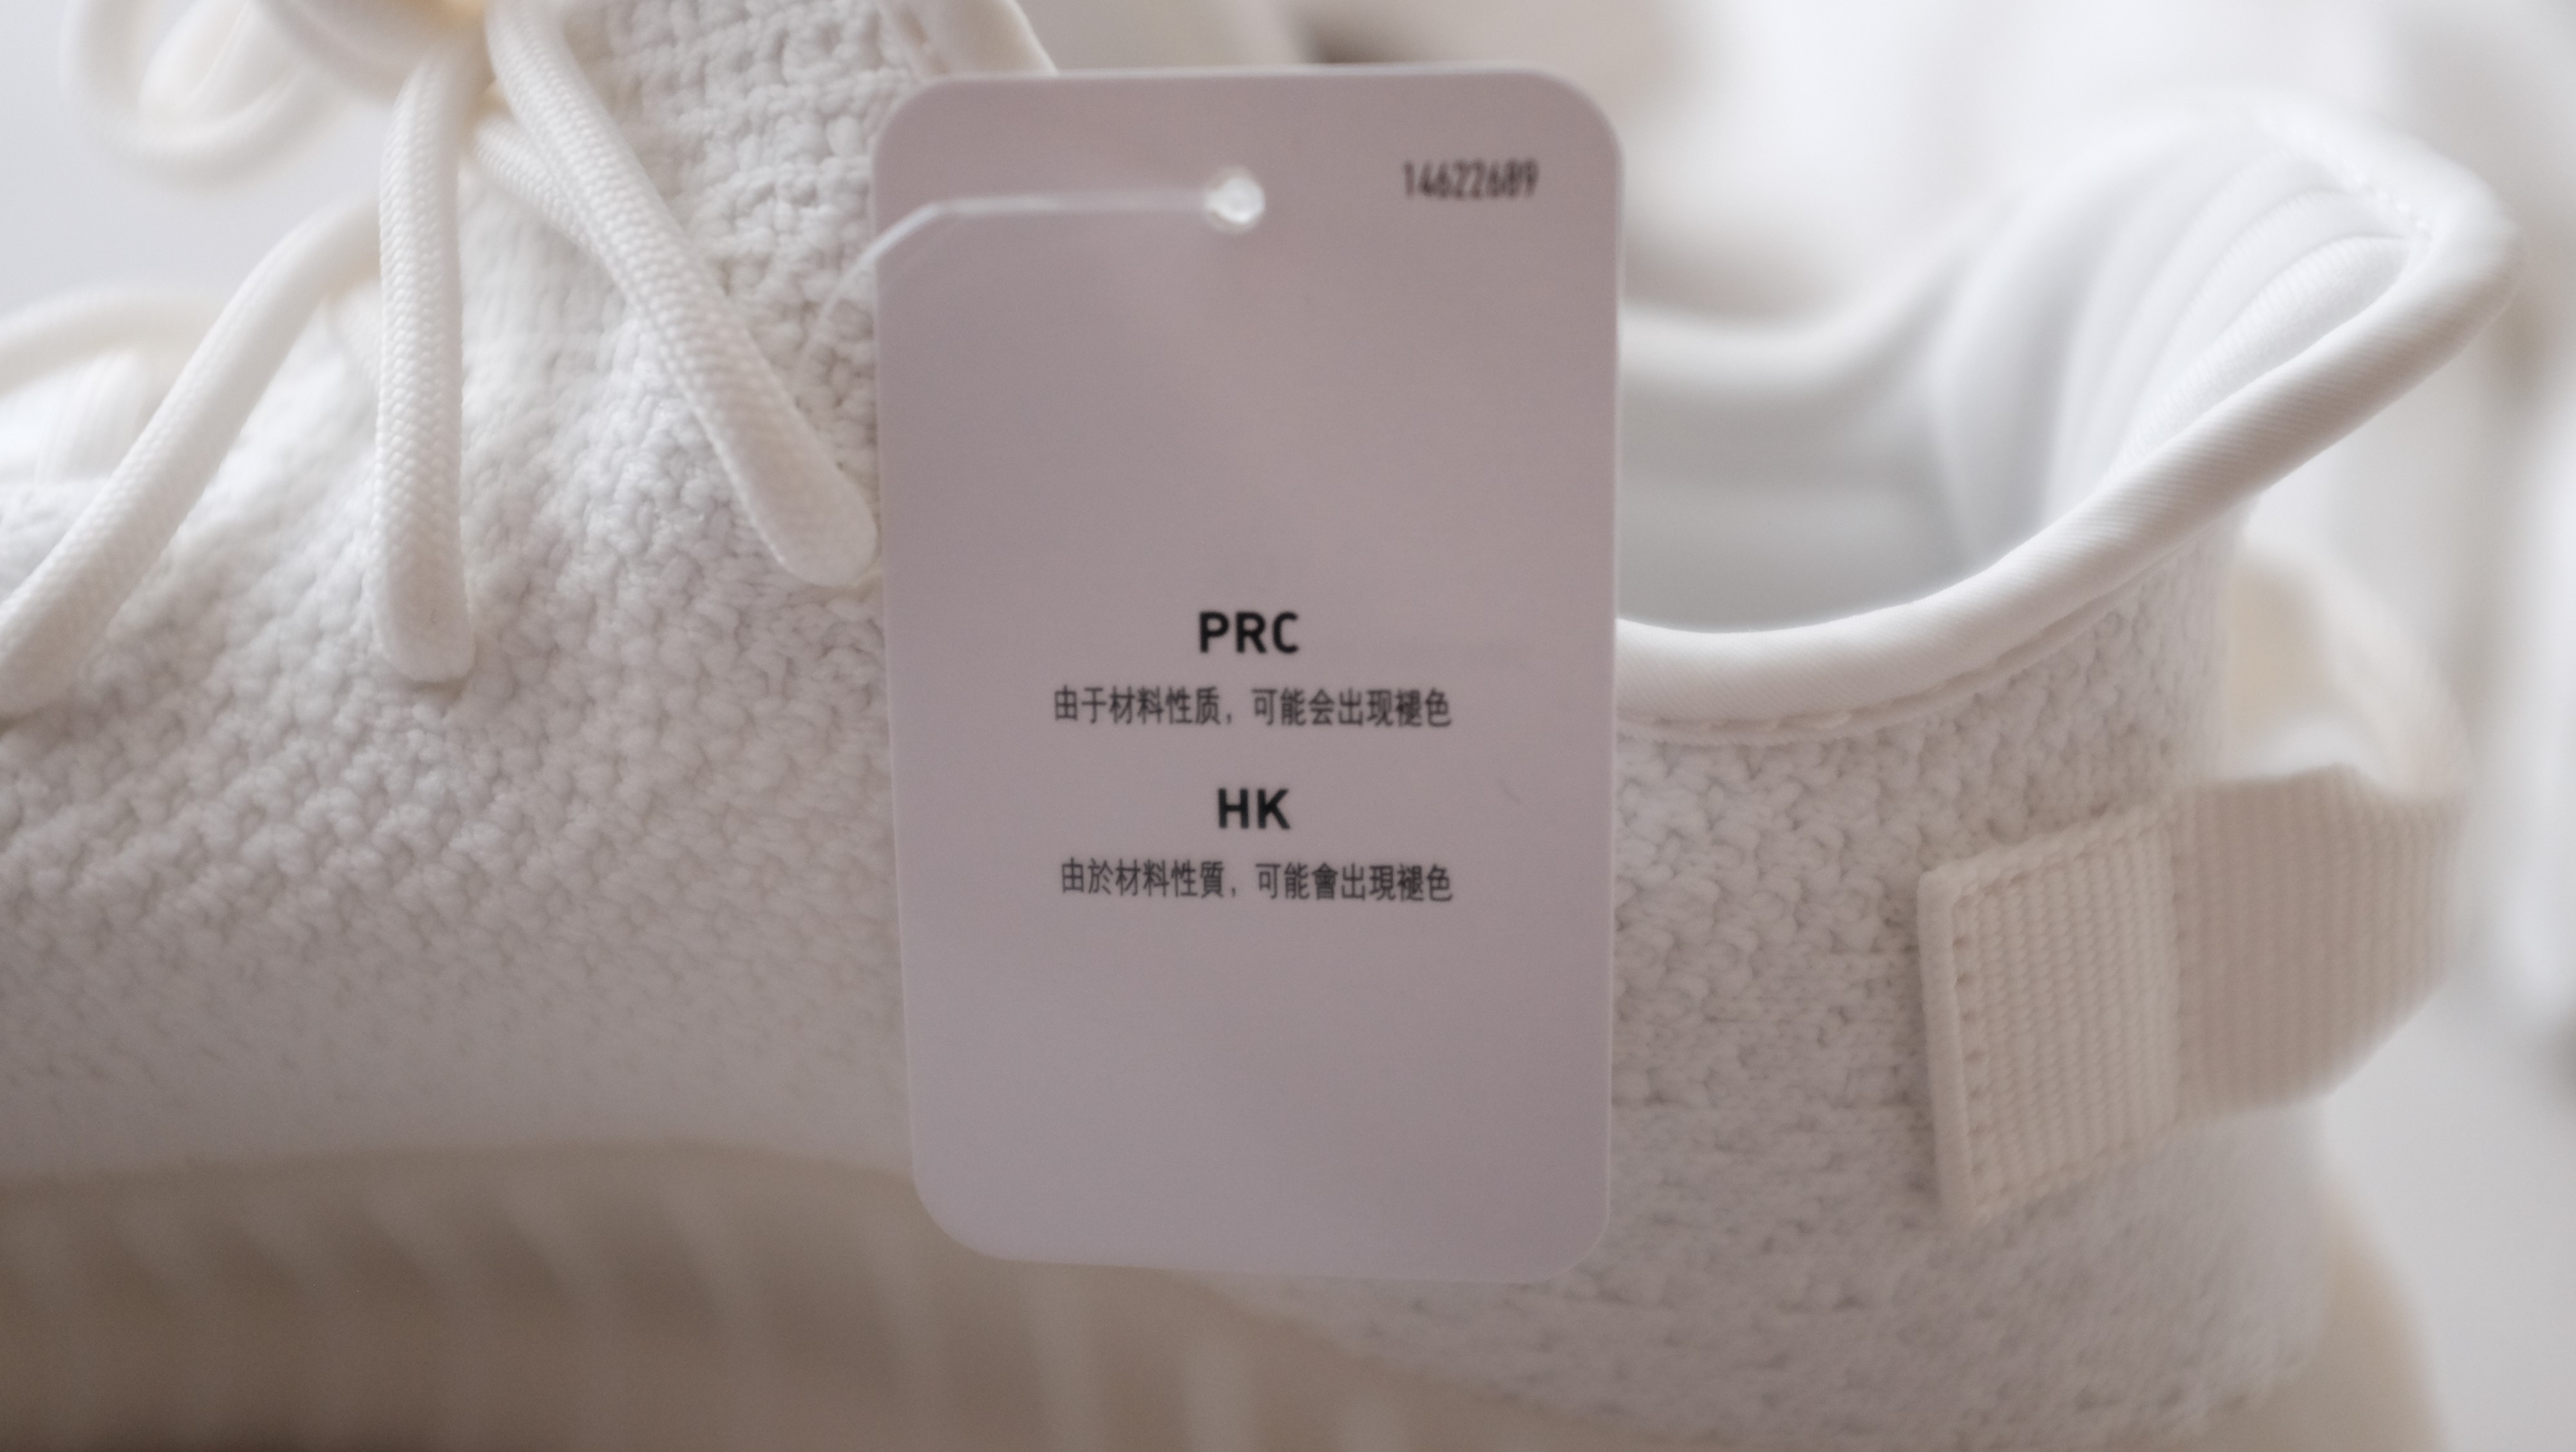
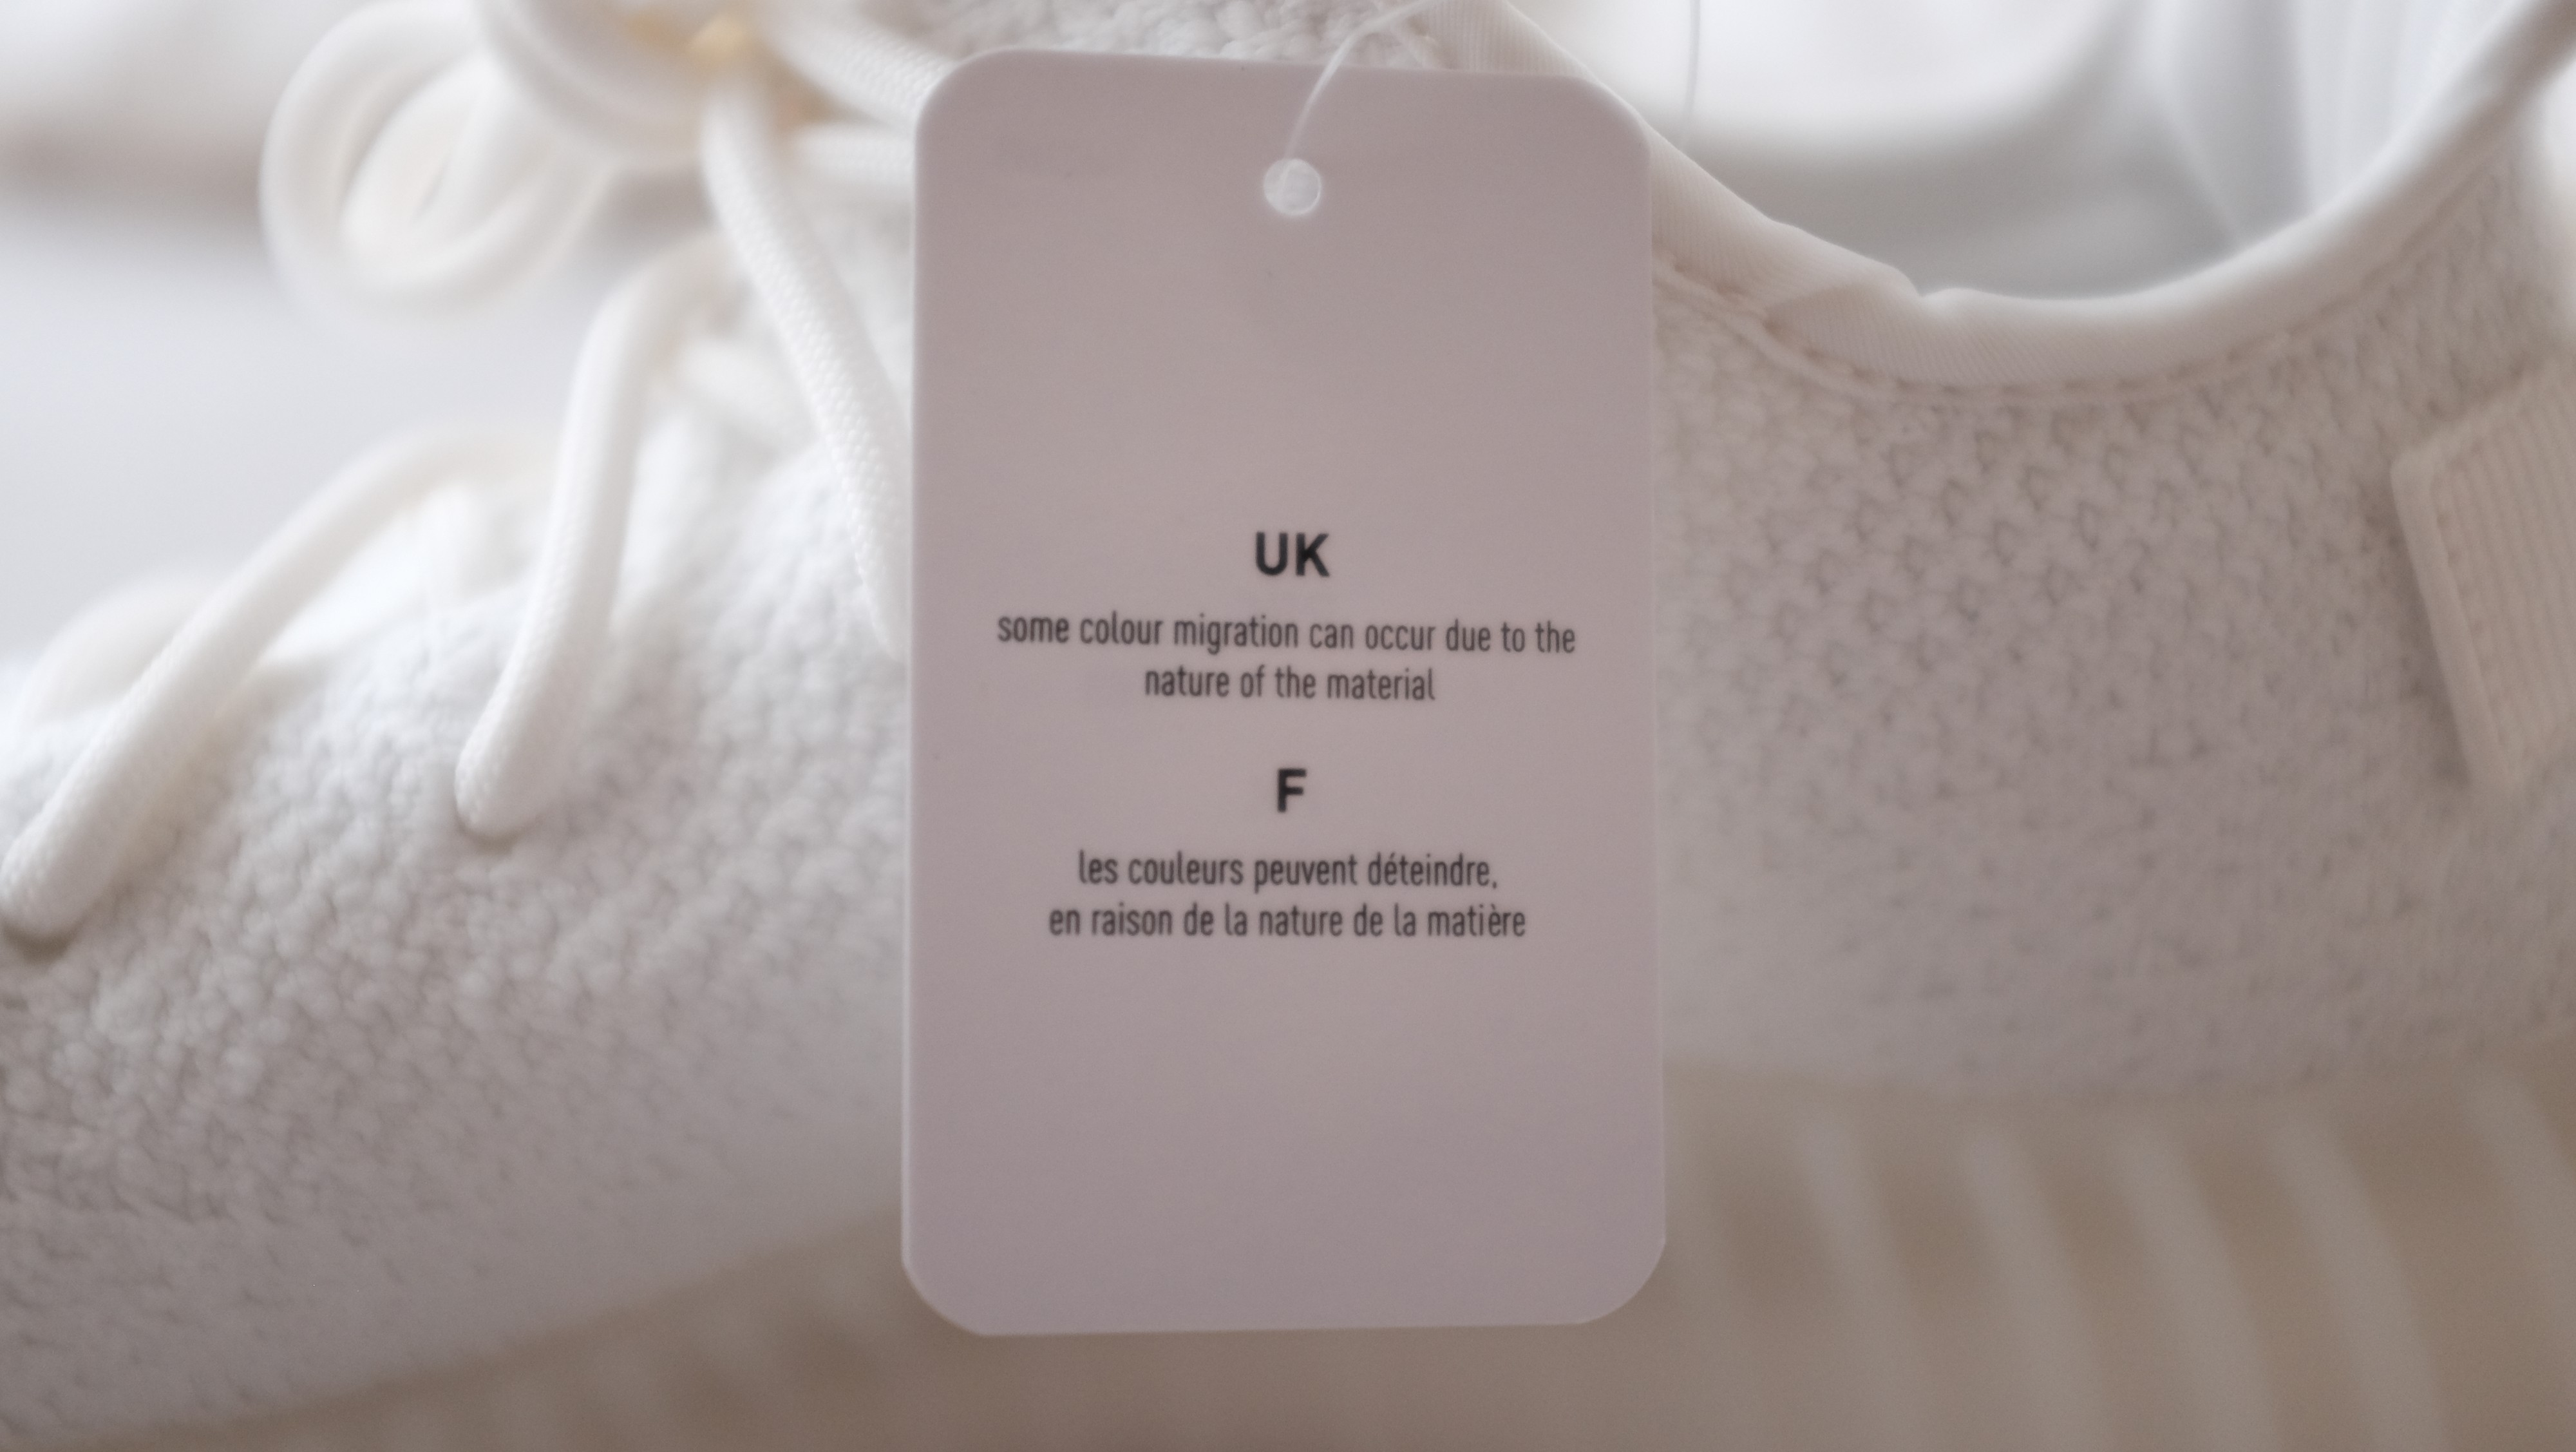 Cream V2 sz 9 Hang Tag
The hang tag is nice to have in the box but does very little in my opinion for a legit check.
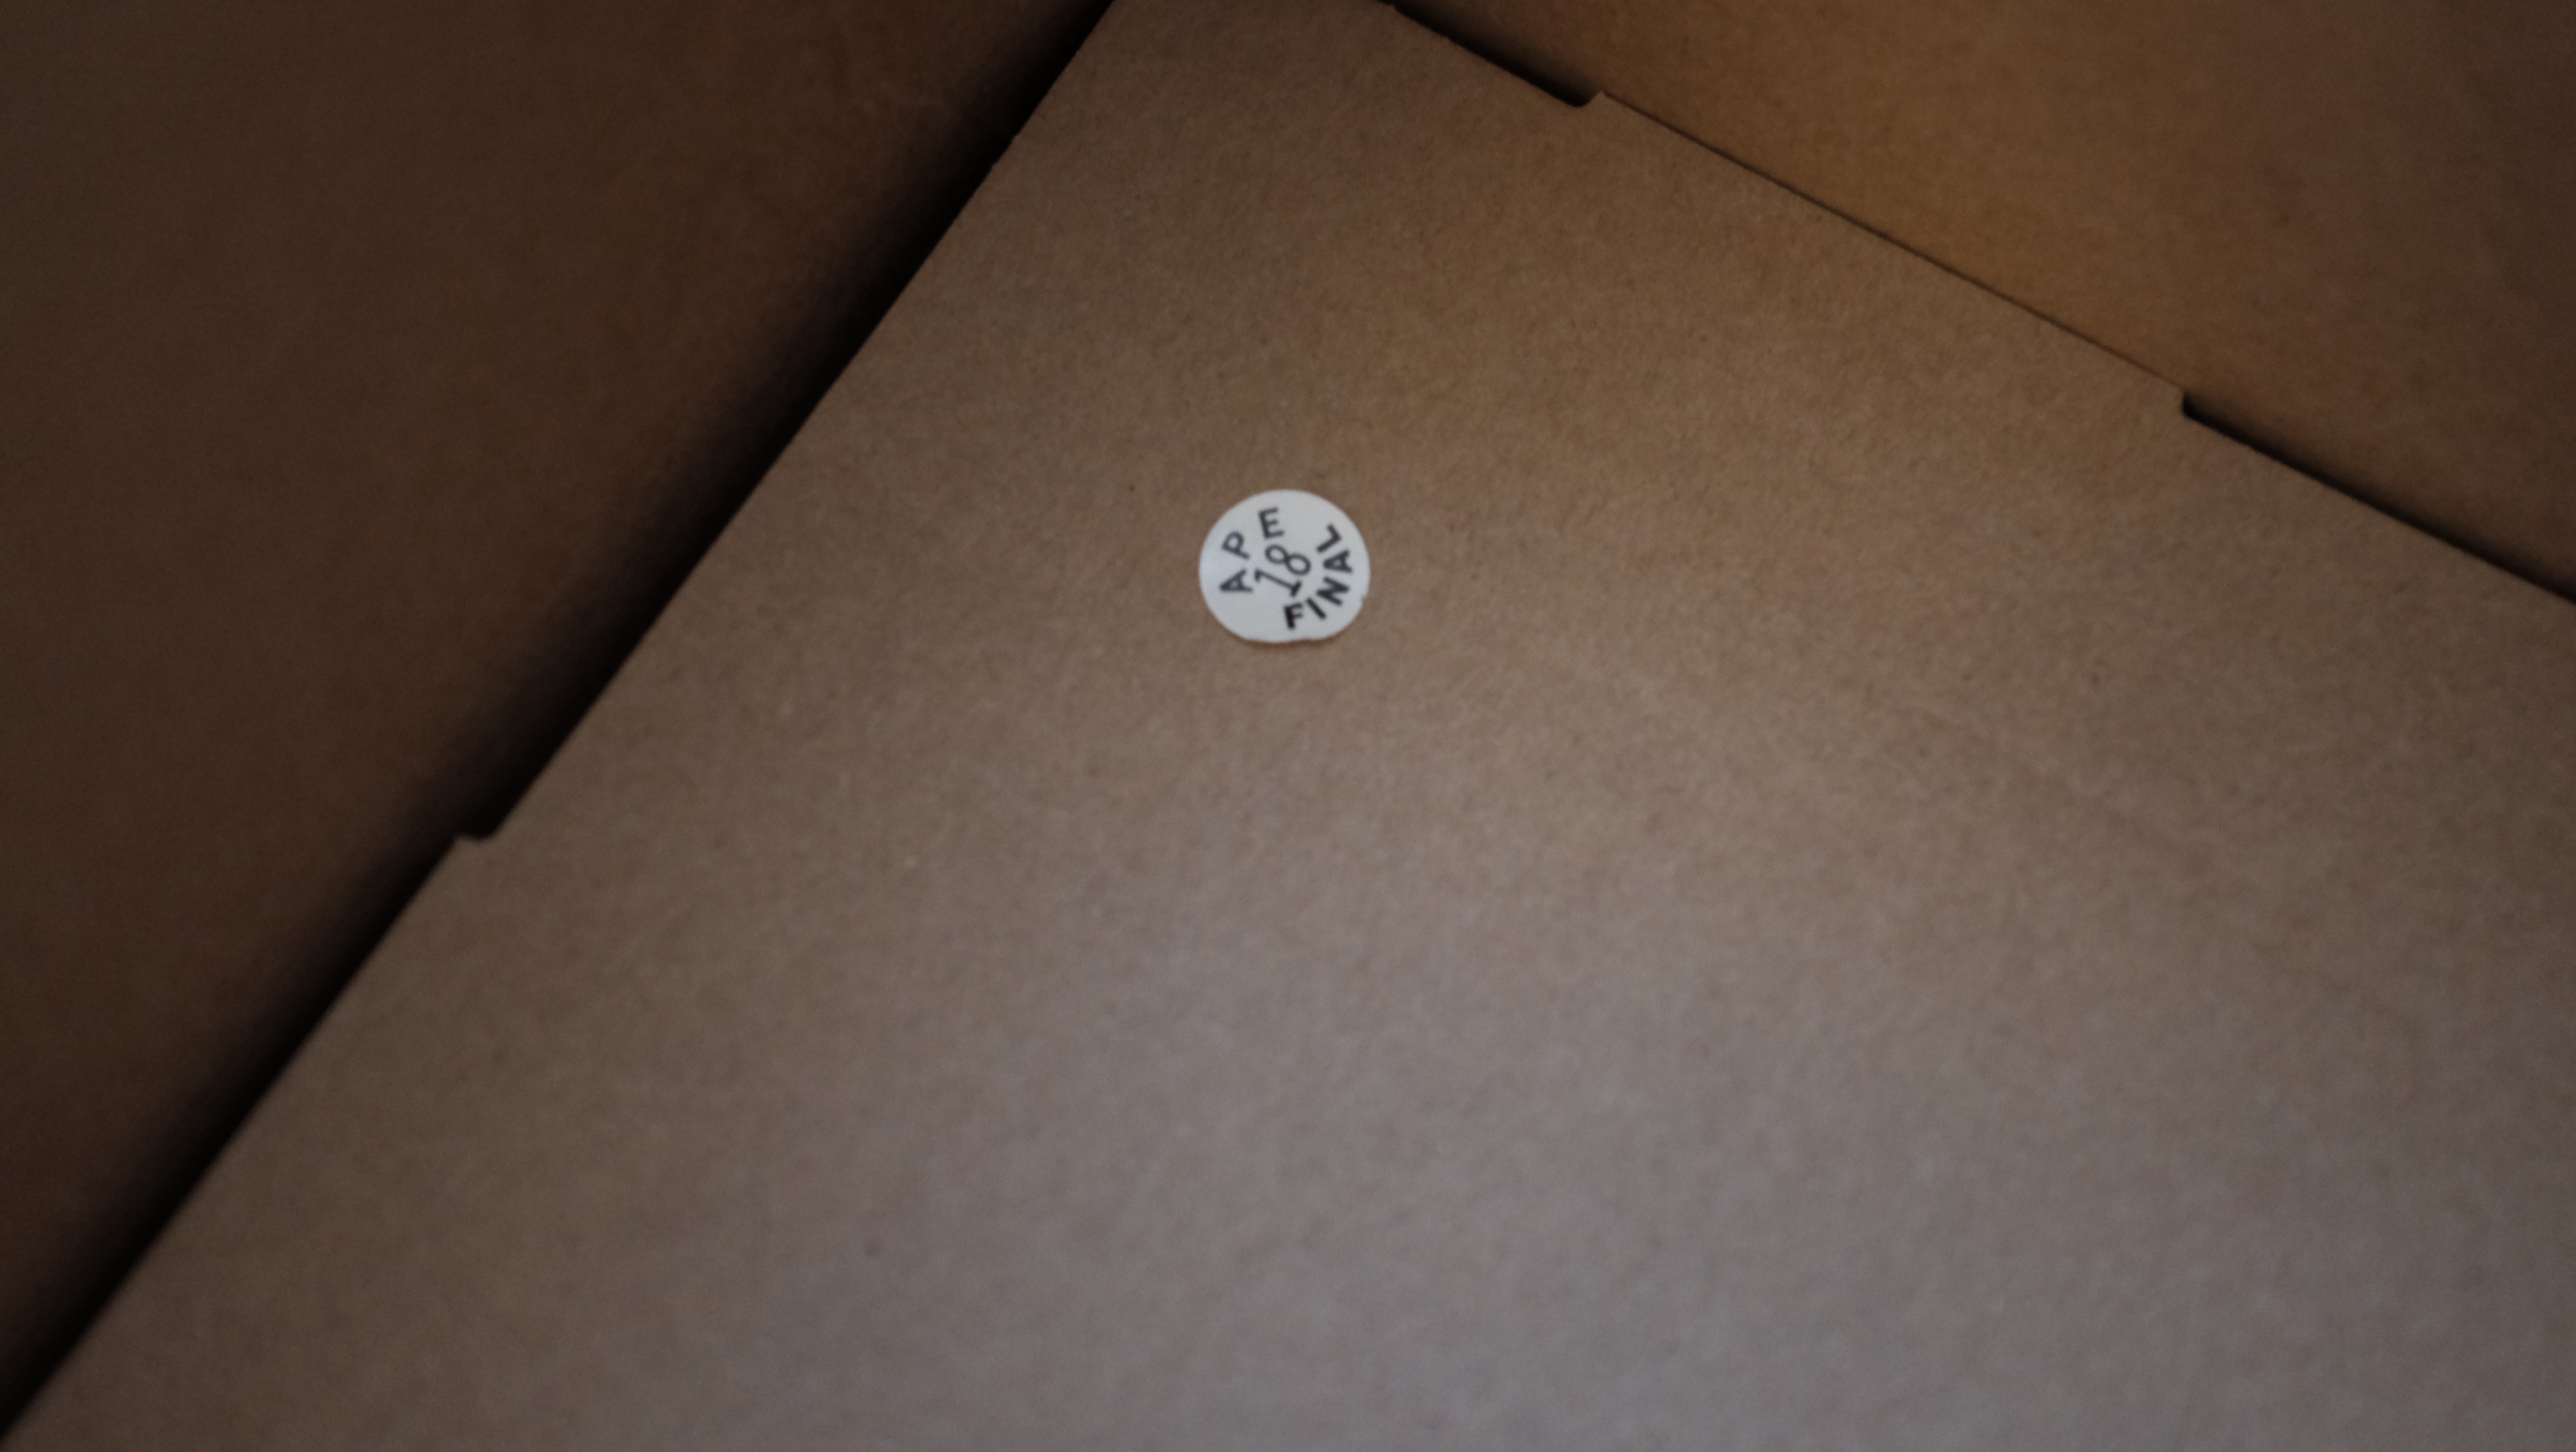 APE Final Sticker inside the Box
Some come with an APE Final sticker inside the Box, I know my sz 10 Belugas and sz 9 Oreos came with them.
Again, these ?accessories? are great pointers that the Box and Accessories are Legit, but we all know someone could easily just slip a pair of feezys in a Legit Box. Hence this part being a piece of the puzzle.
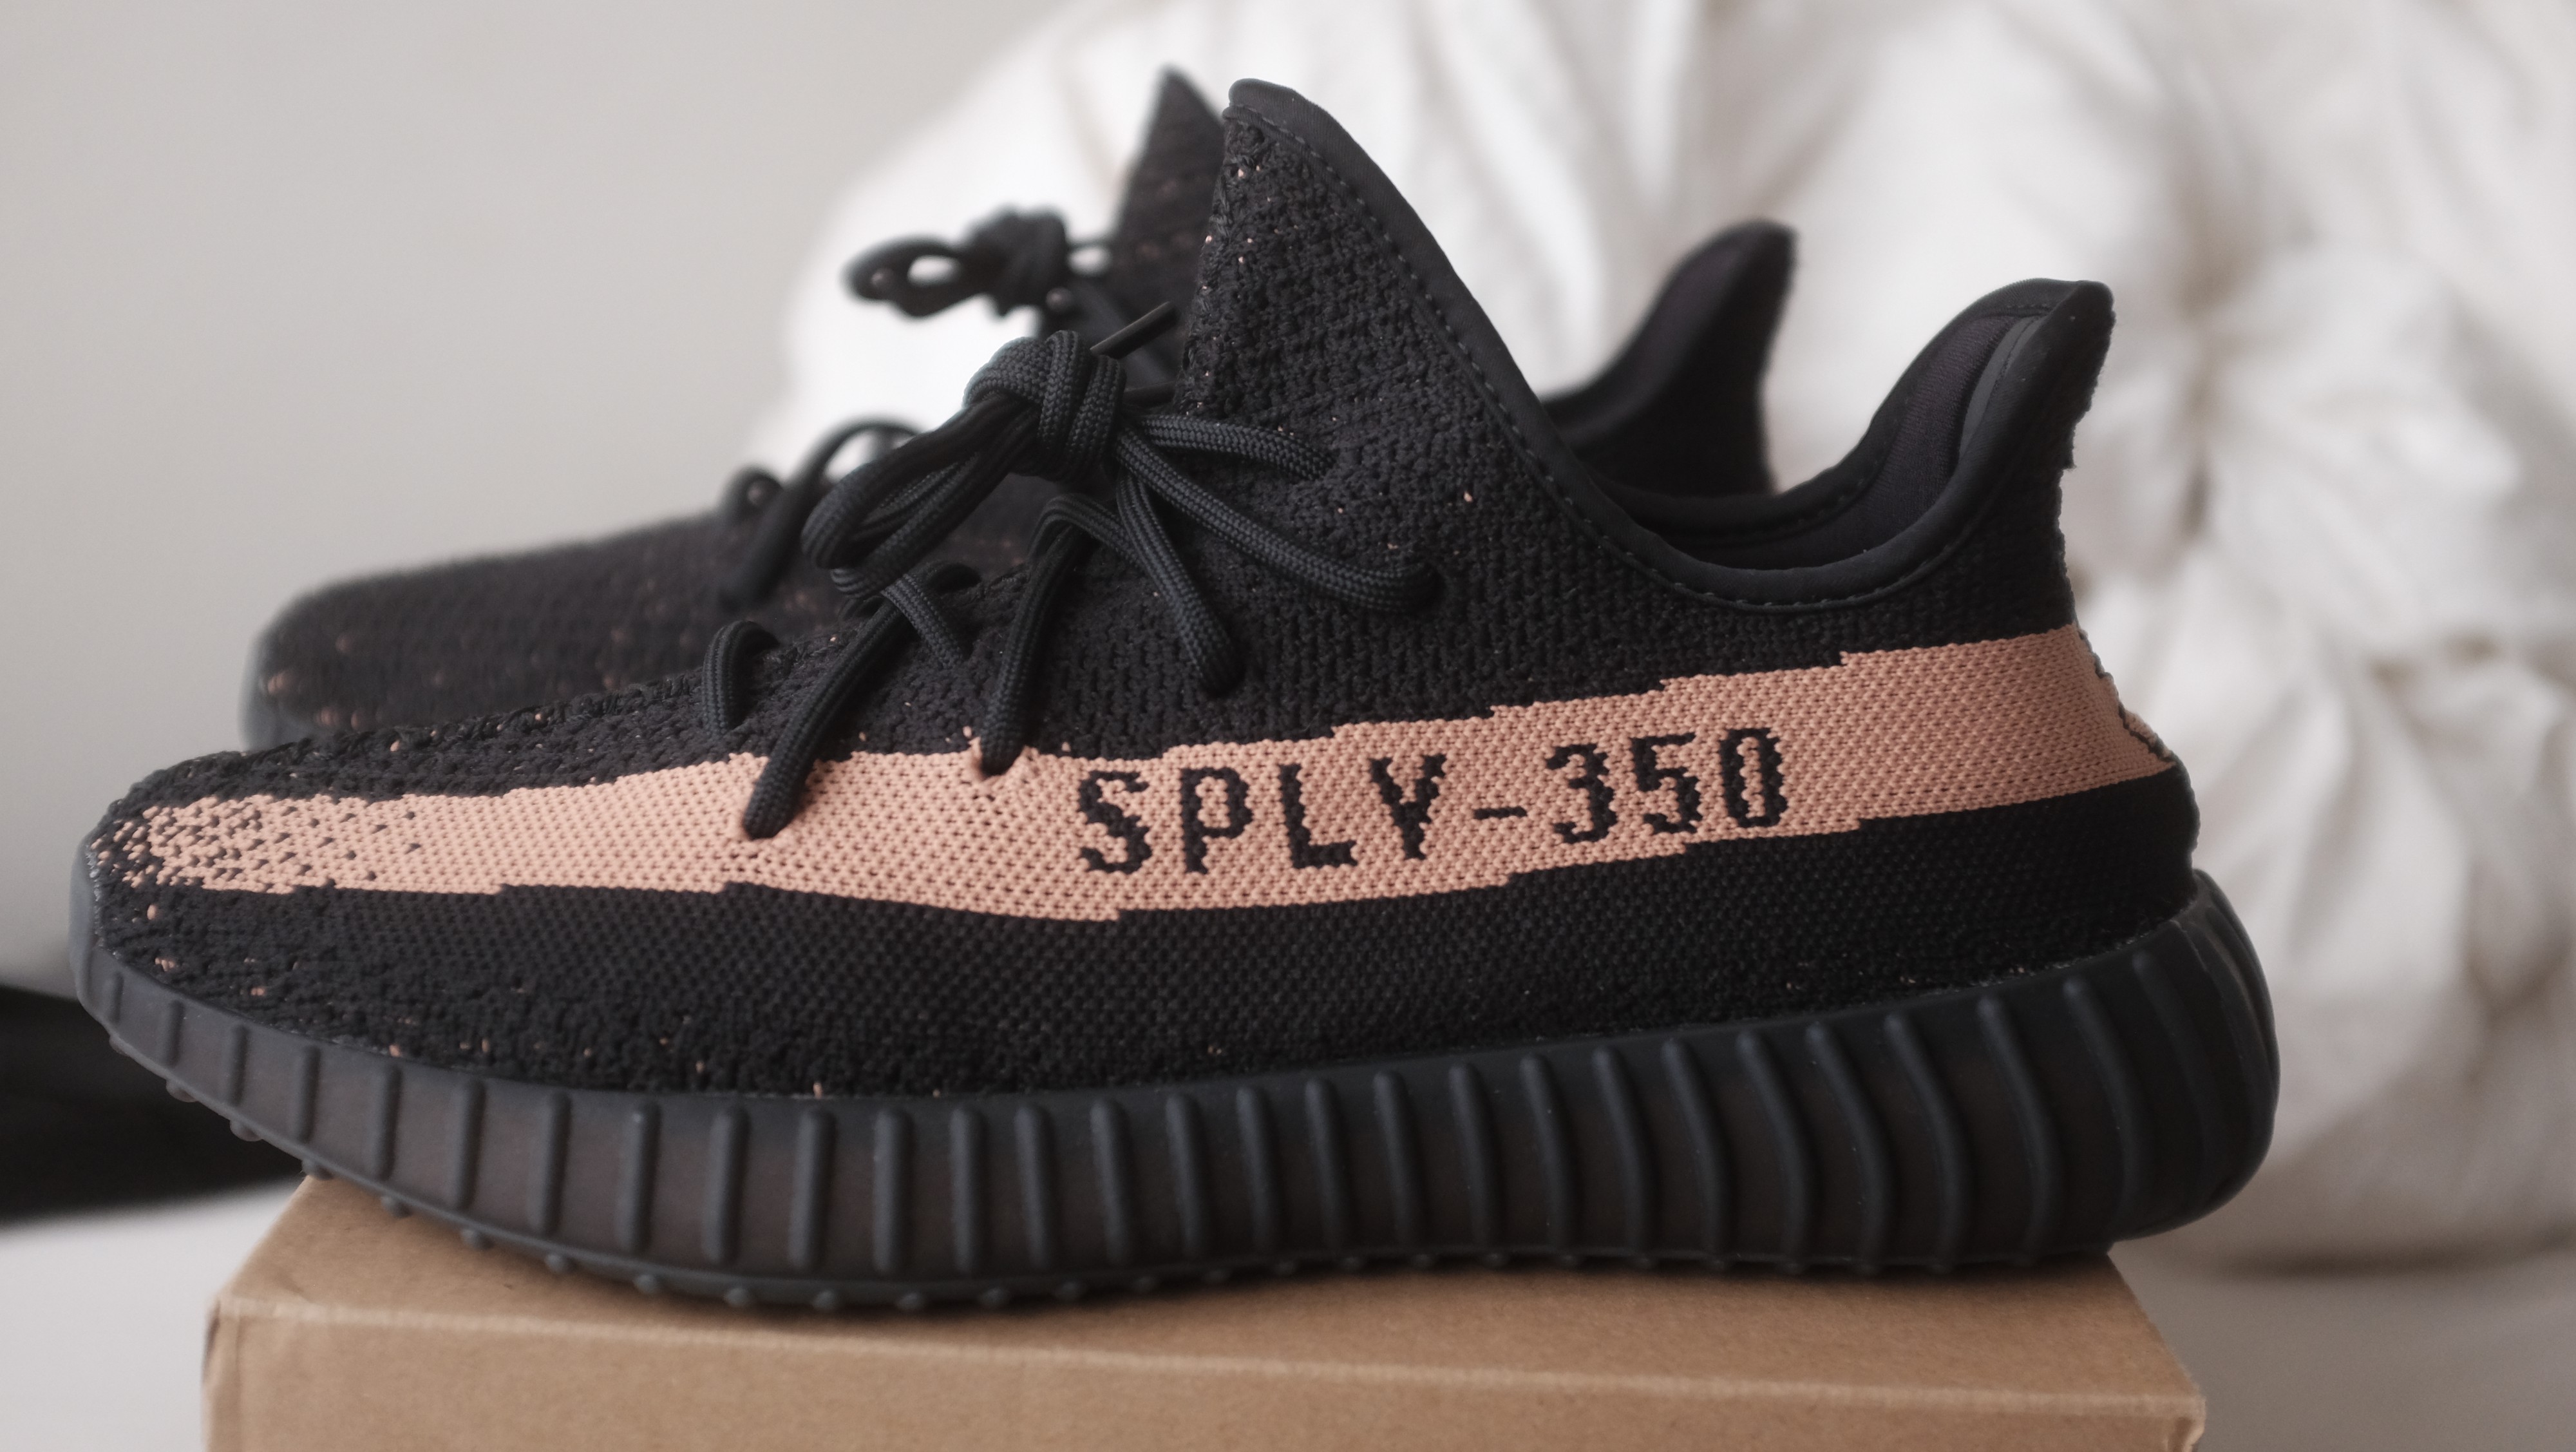
The Goods
Fakes are getting better and better, don?t be fooled though, they are not 100%. There are still ways to tell apart authentic from feezy. Right now I want to focus on the shape of the V2?s which applies to all V2?s. It?s always important to get the seller to send you complete coverage of the shoe. This will help you identify easy call outs.
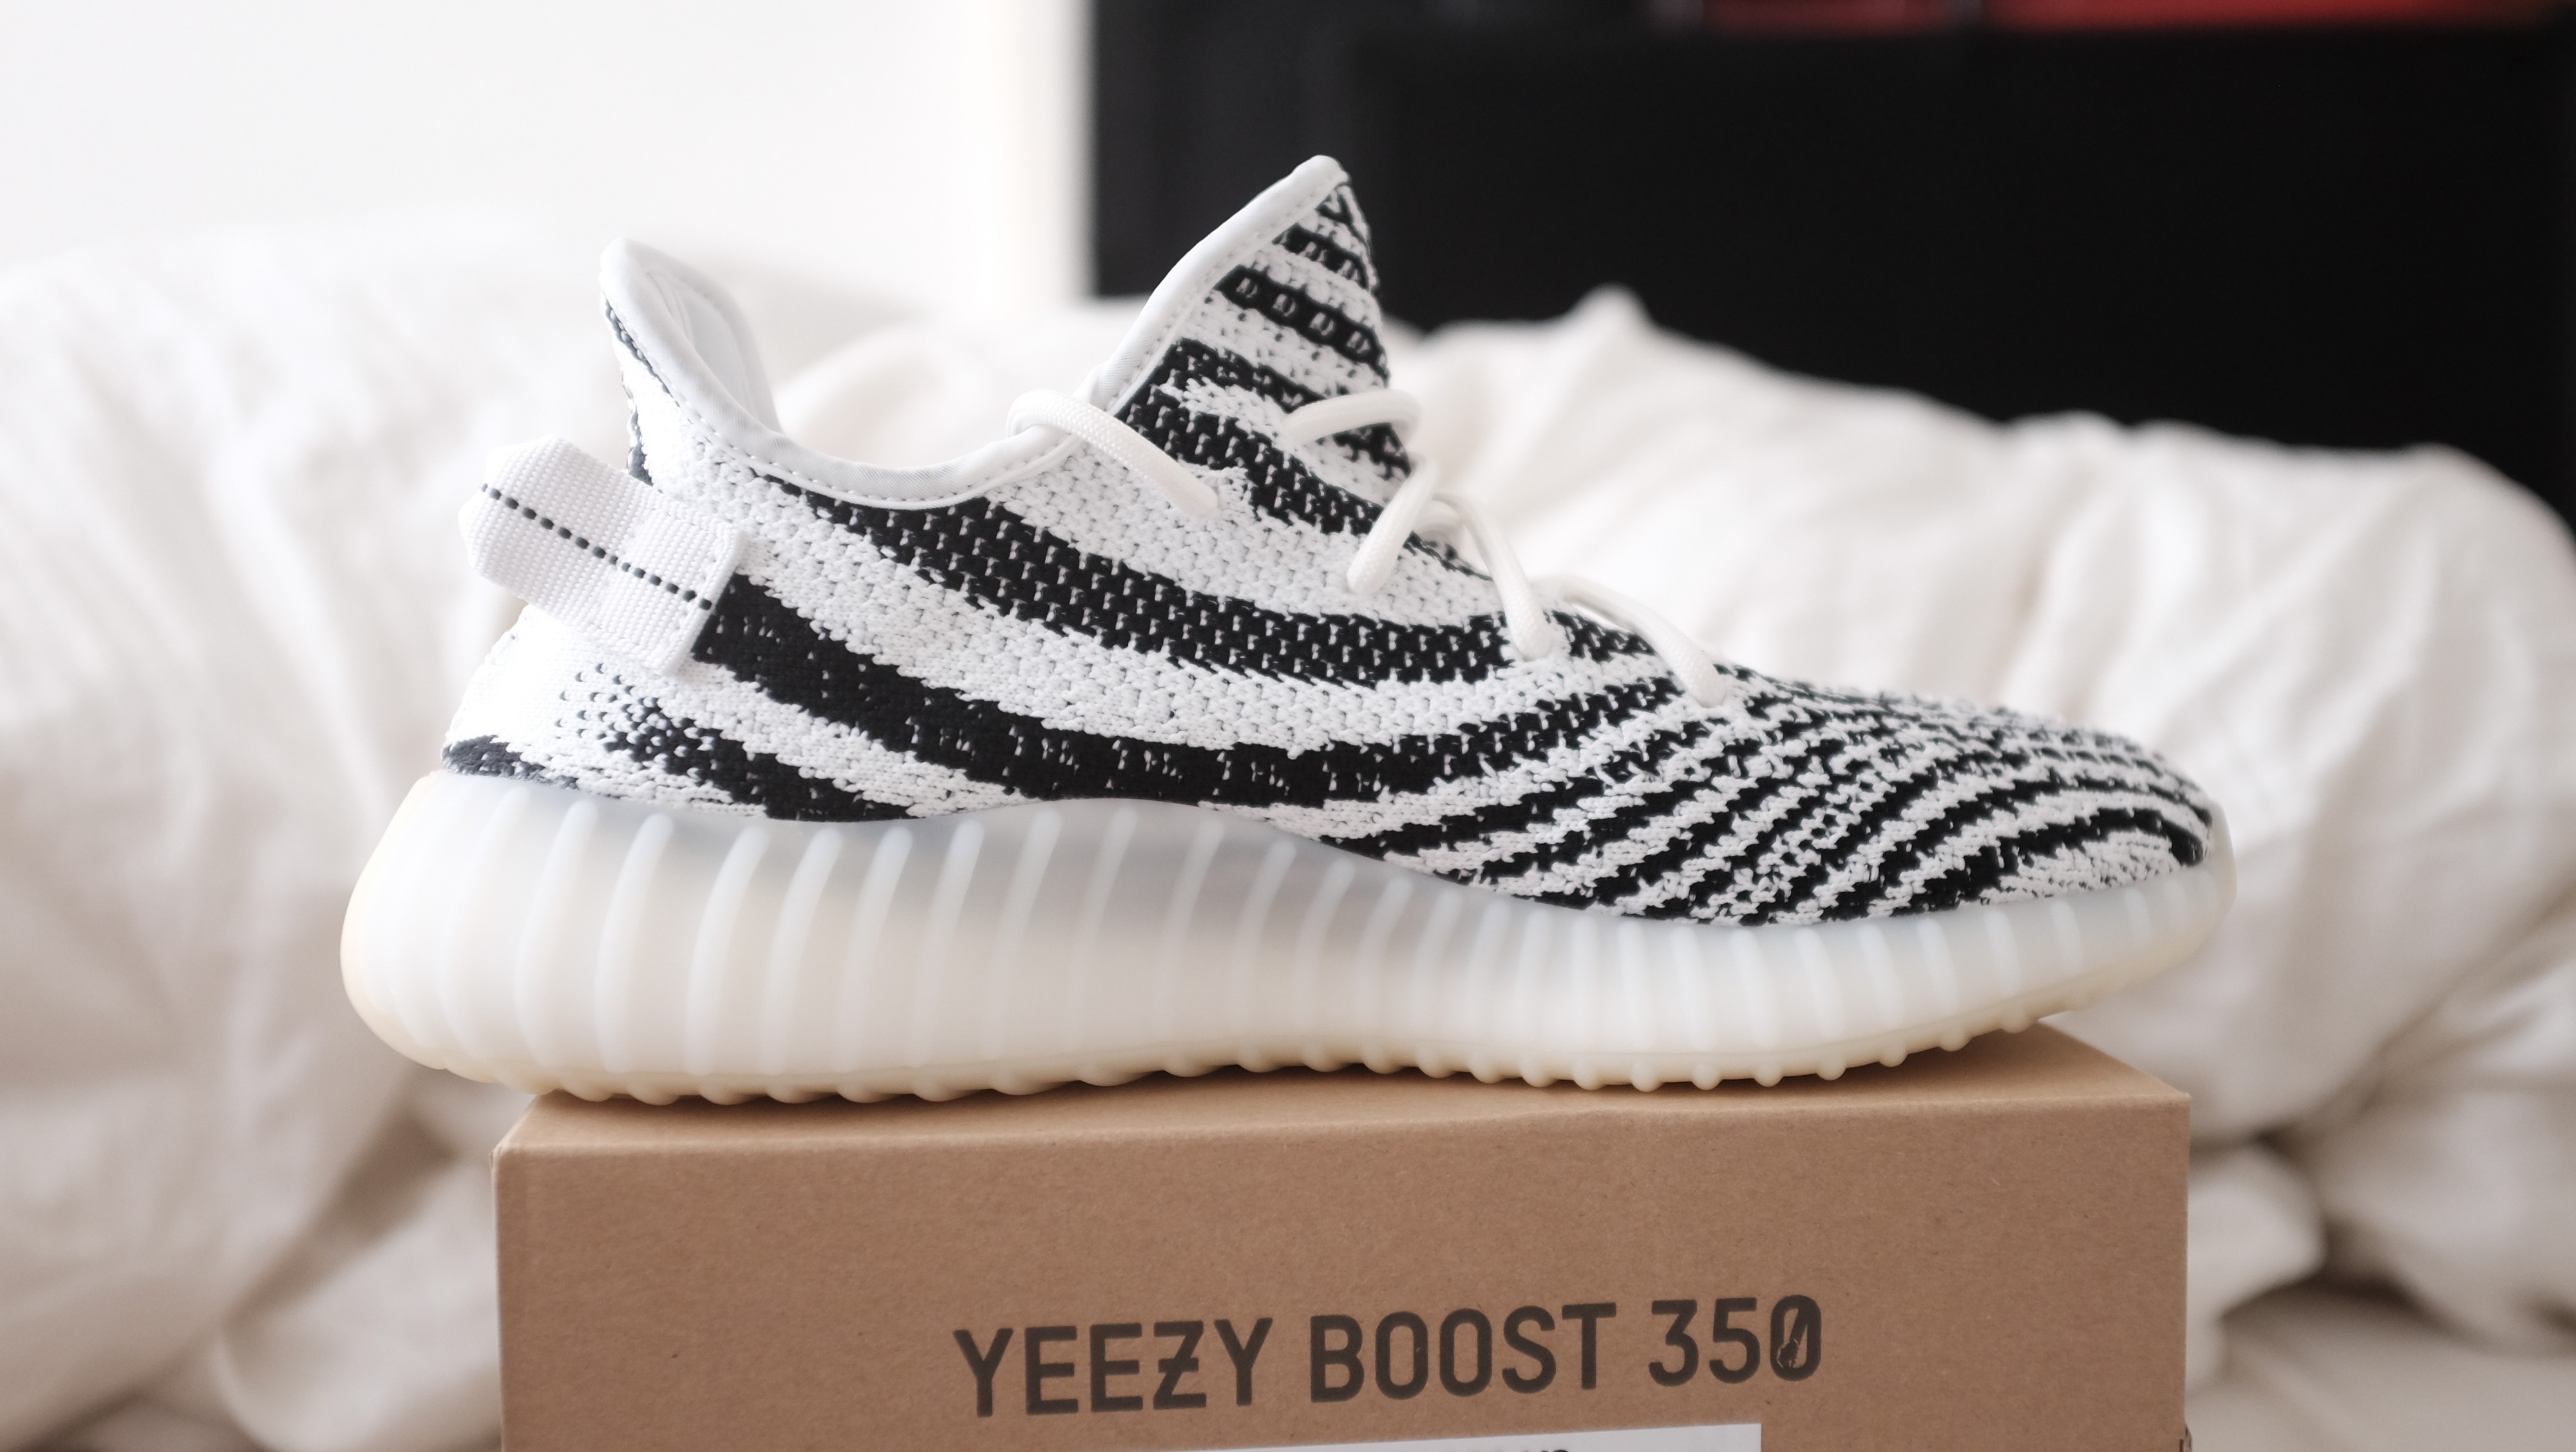
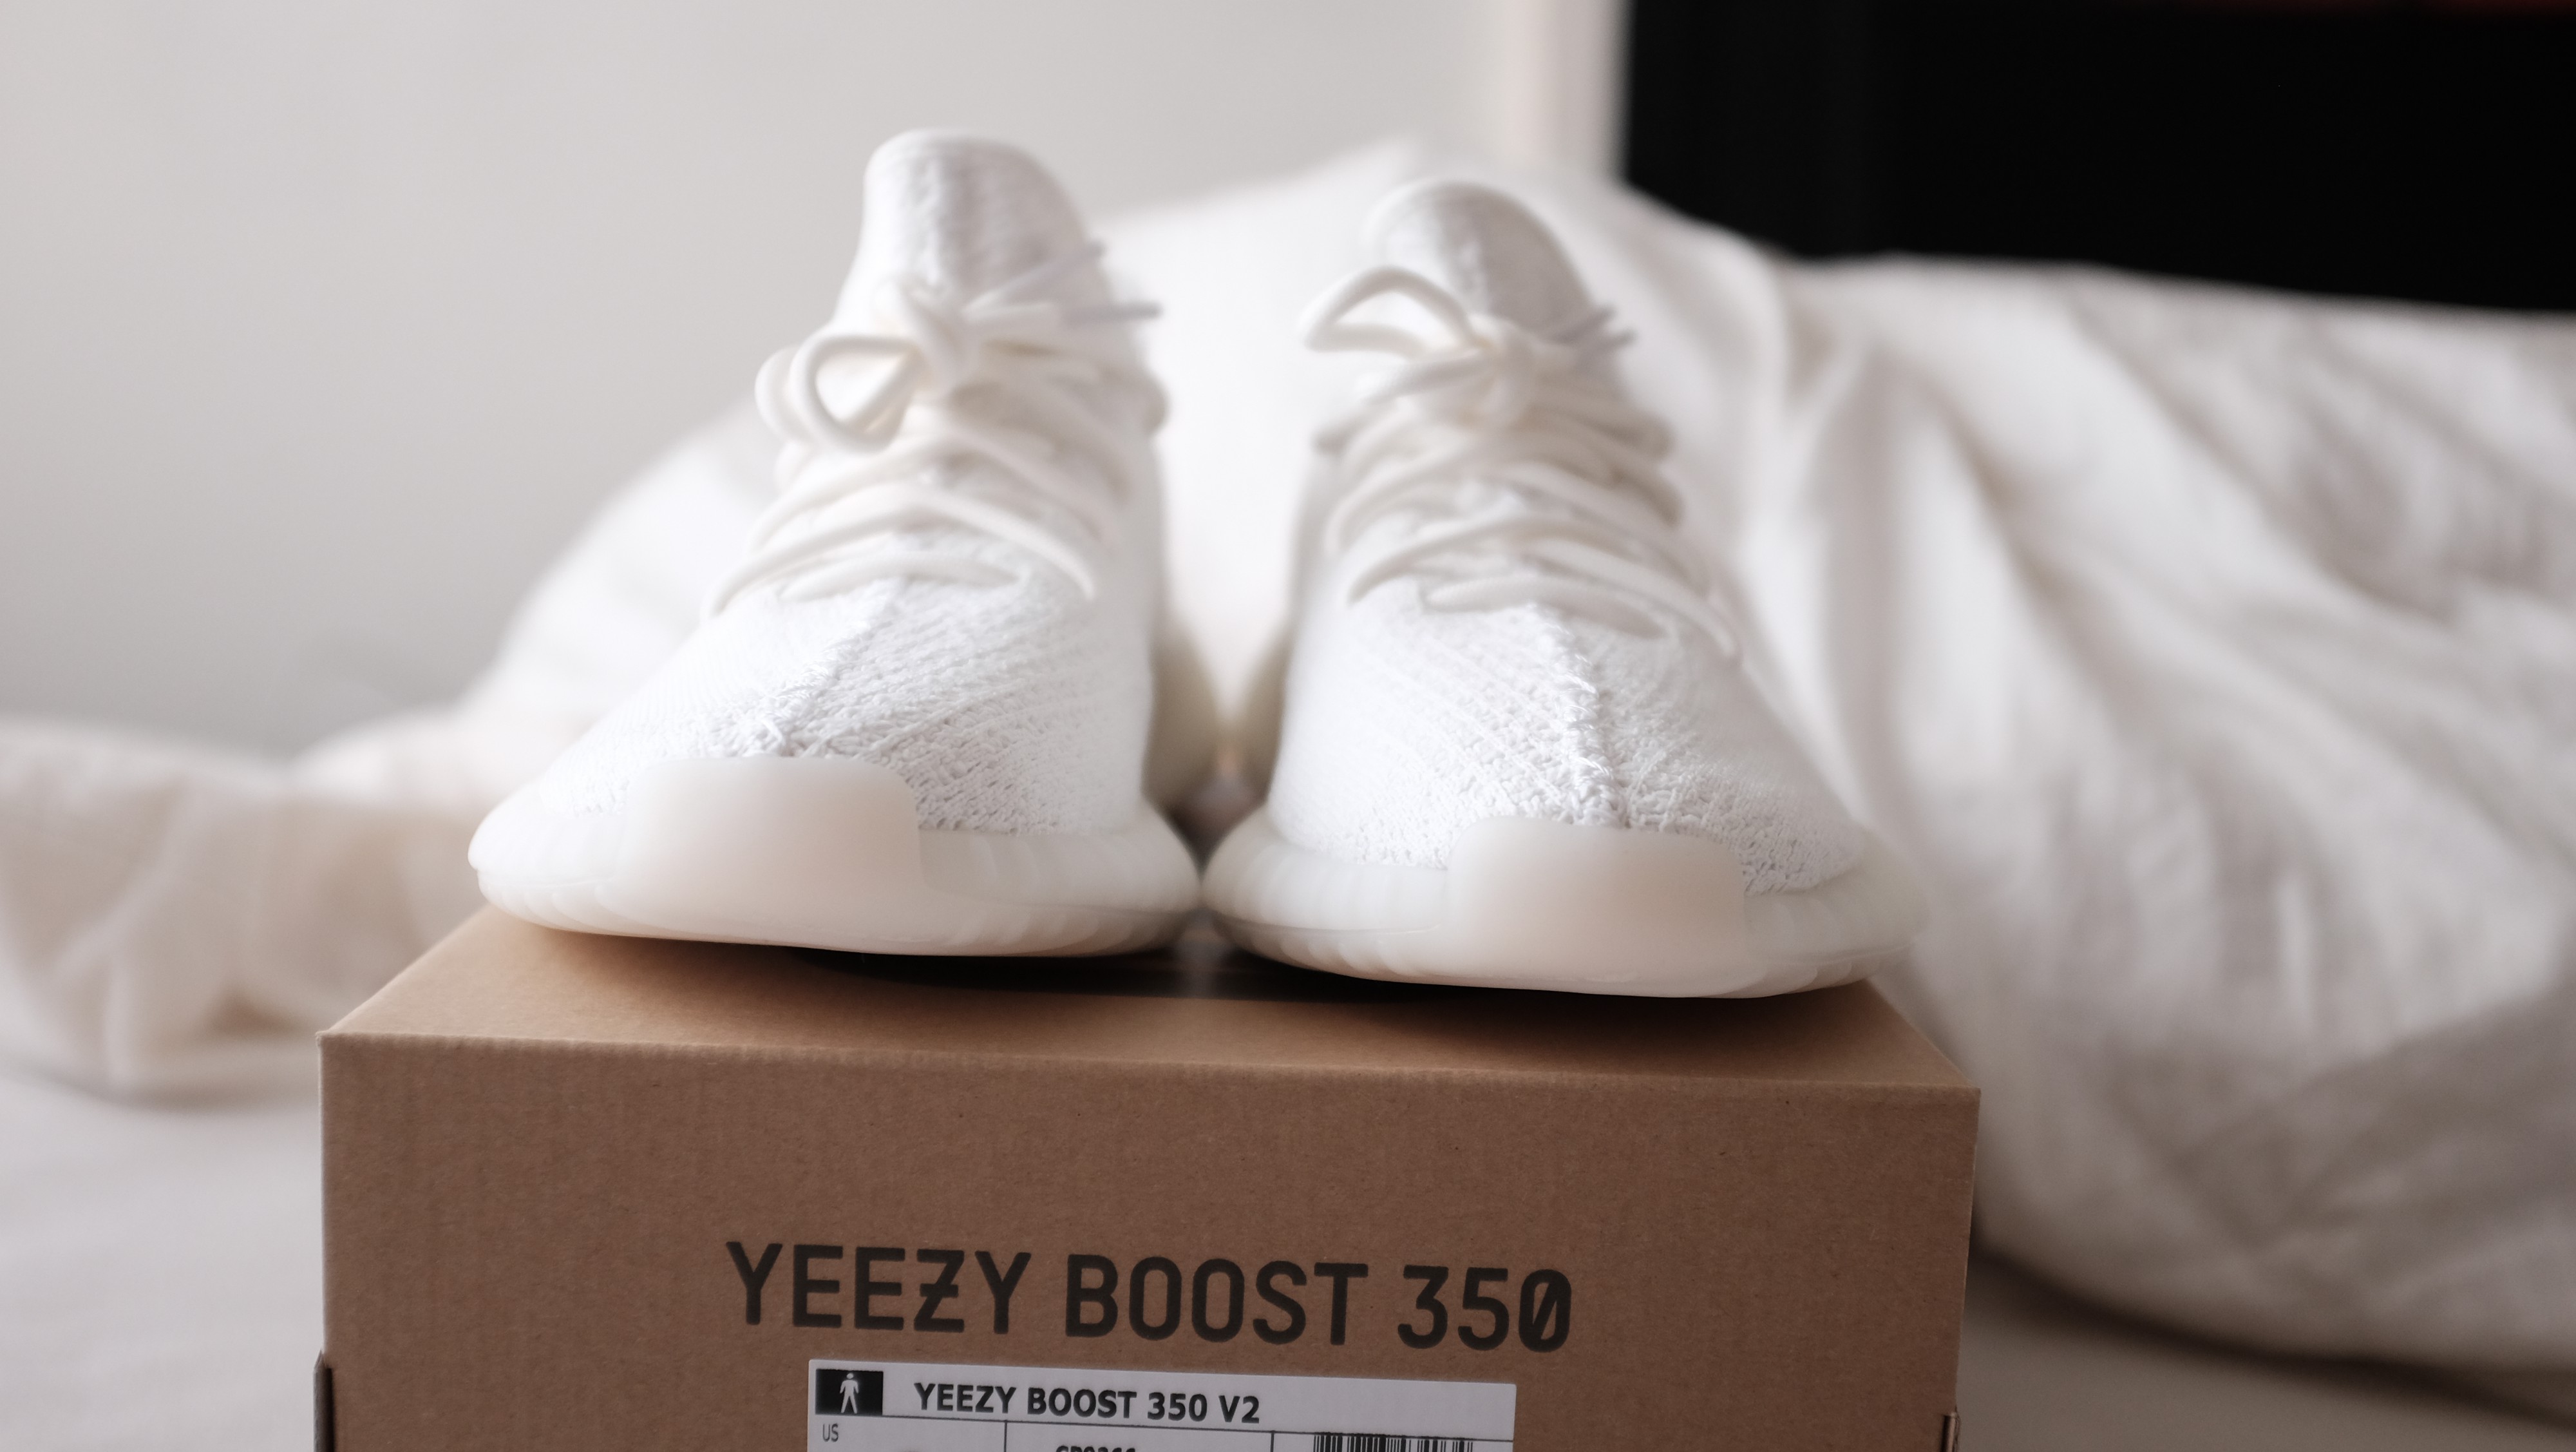
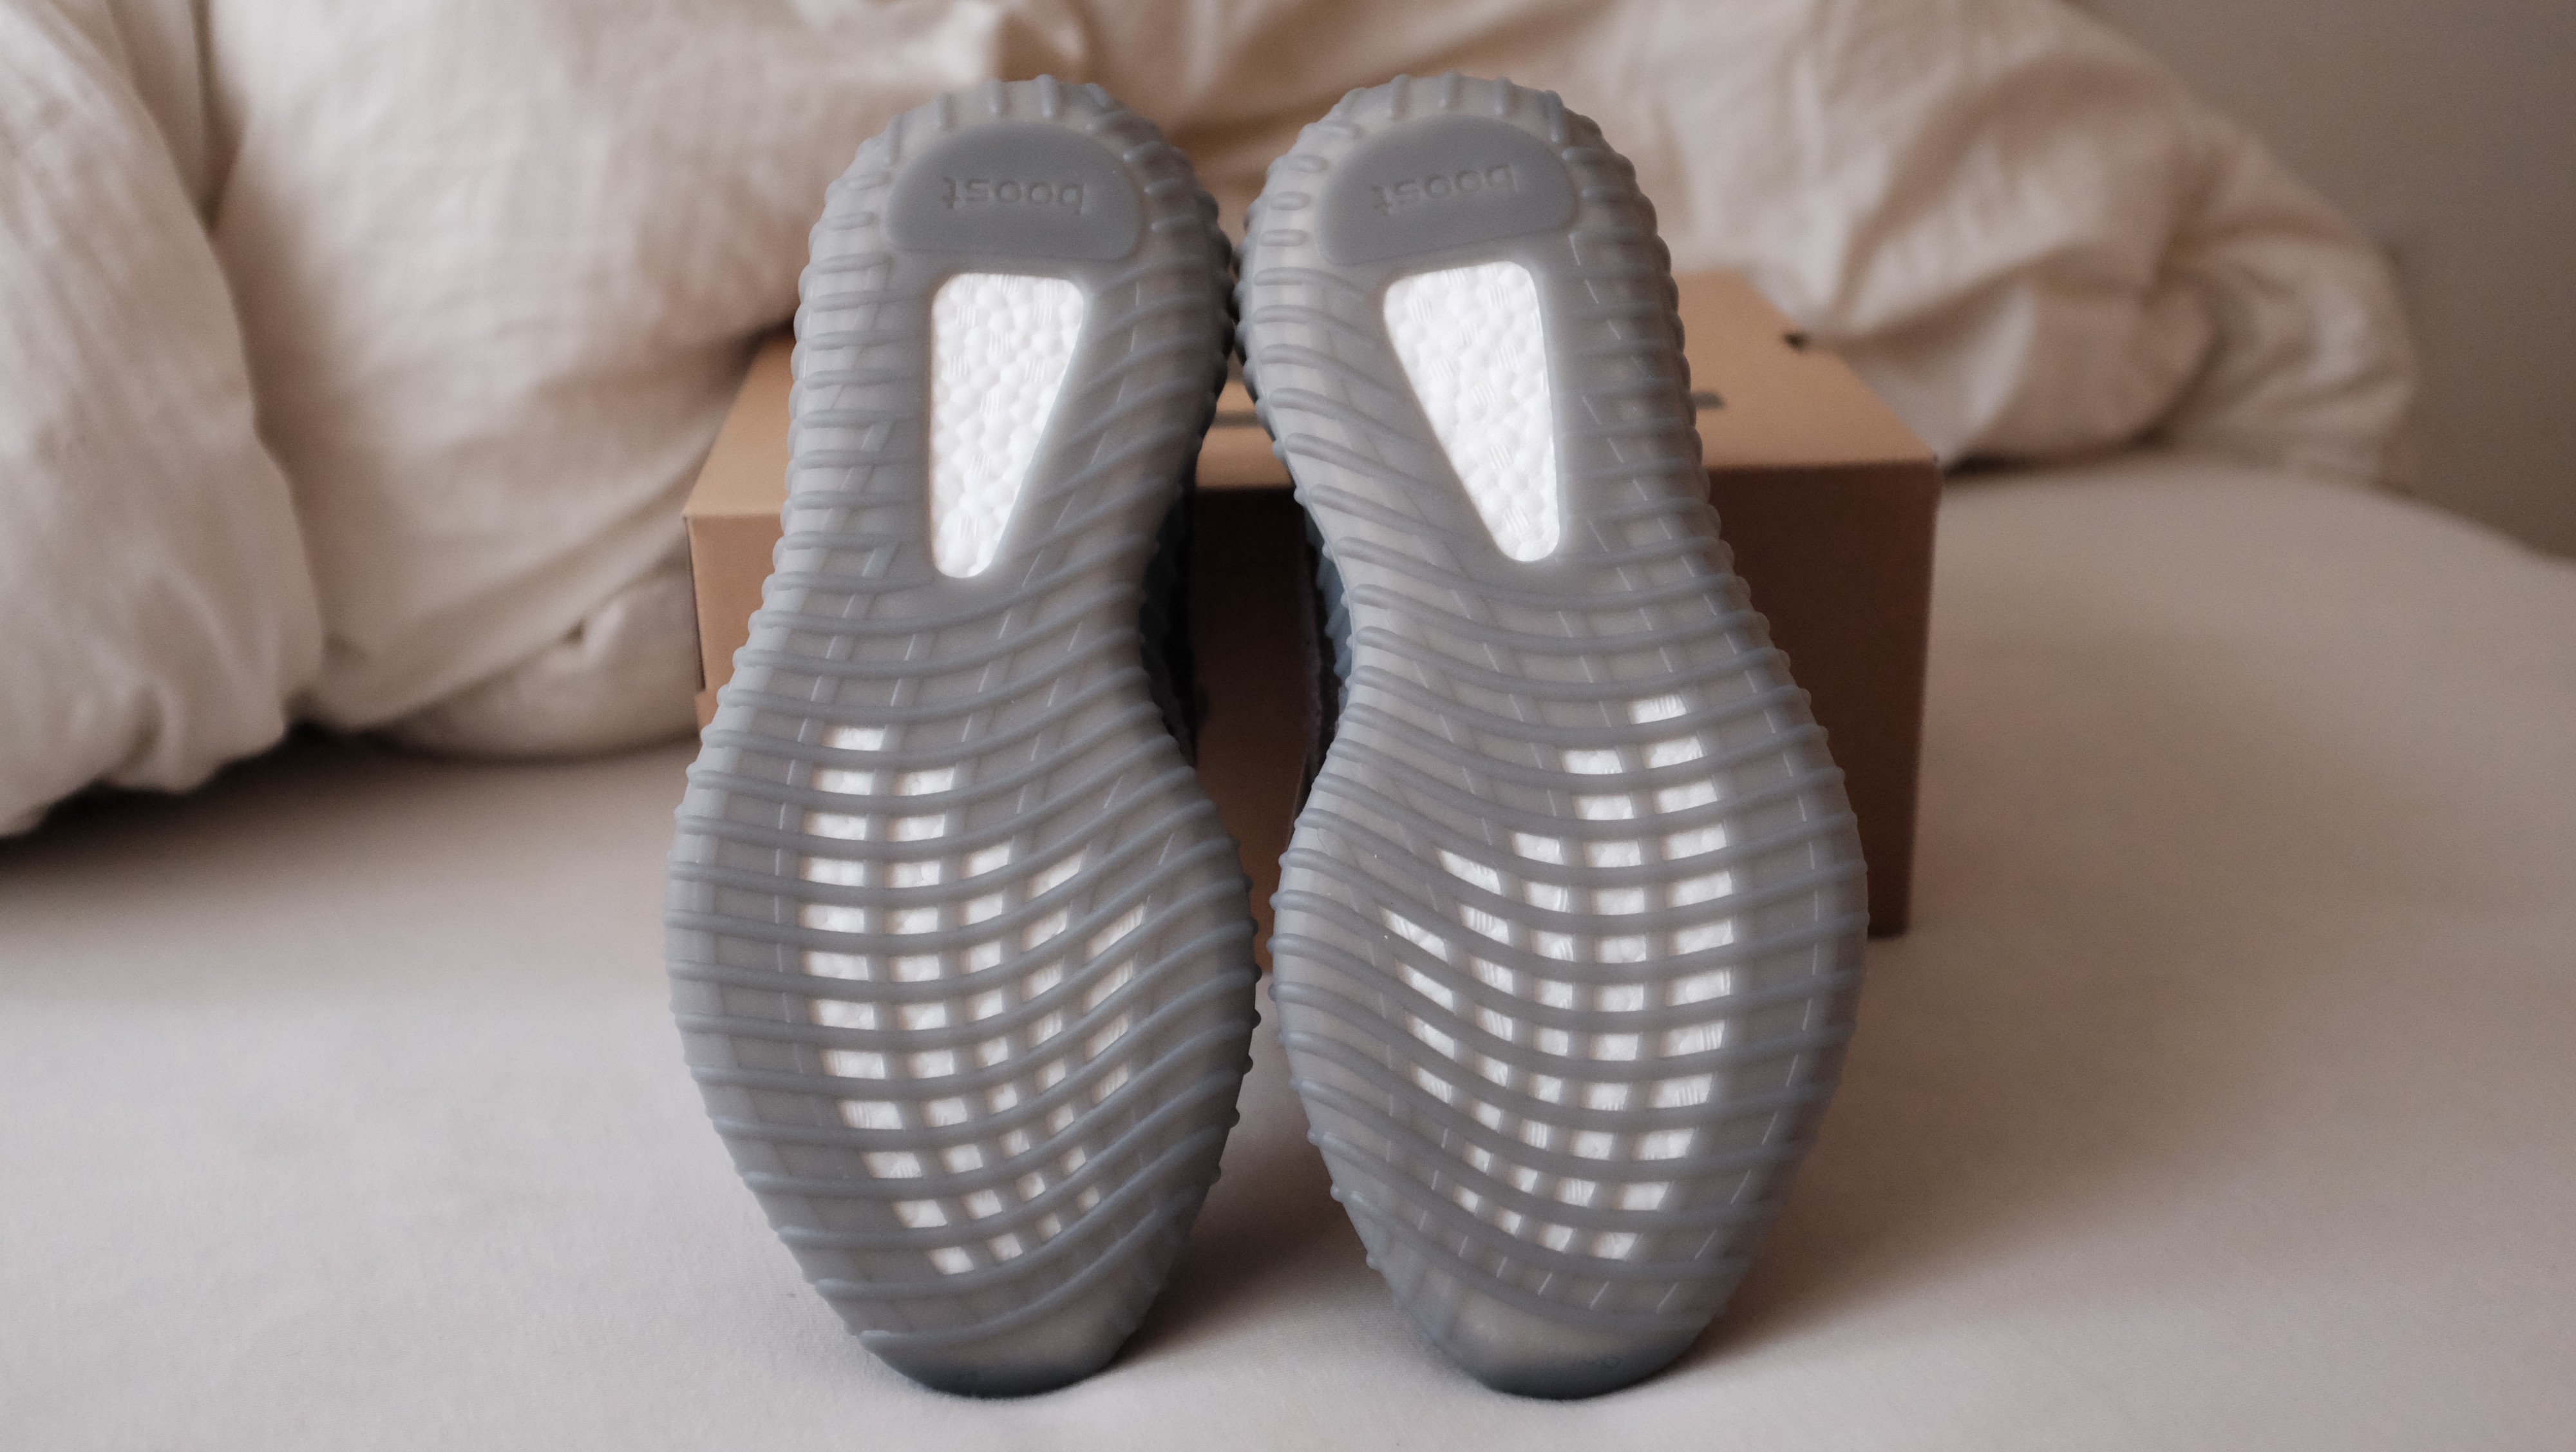
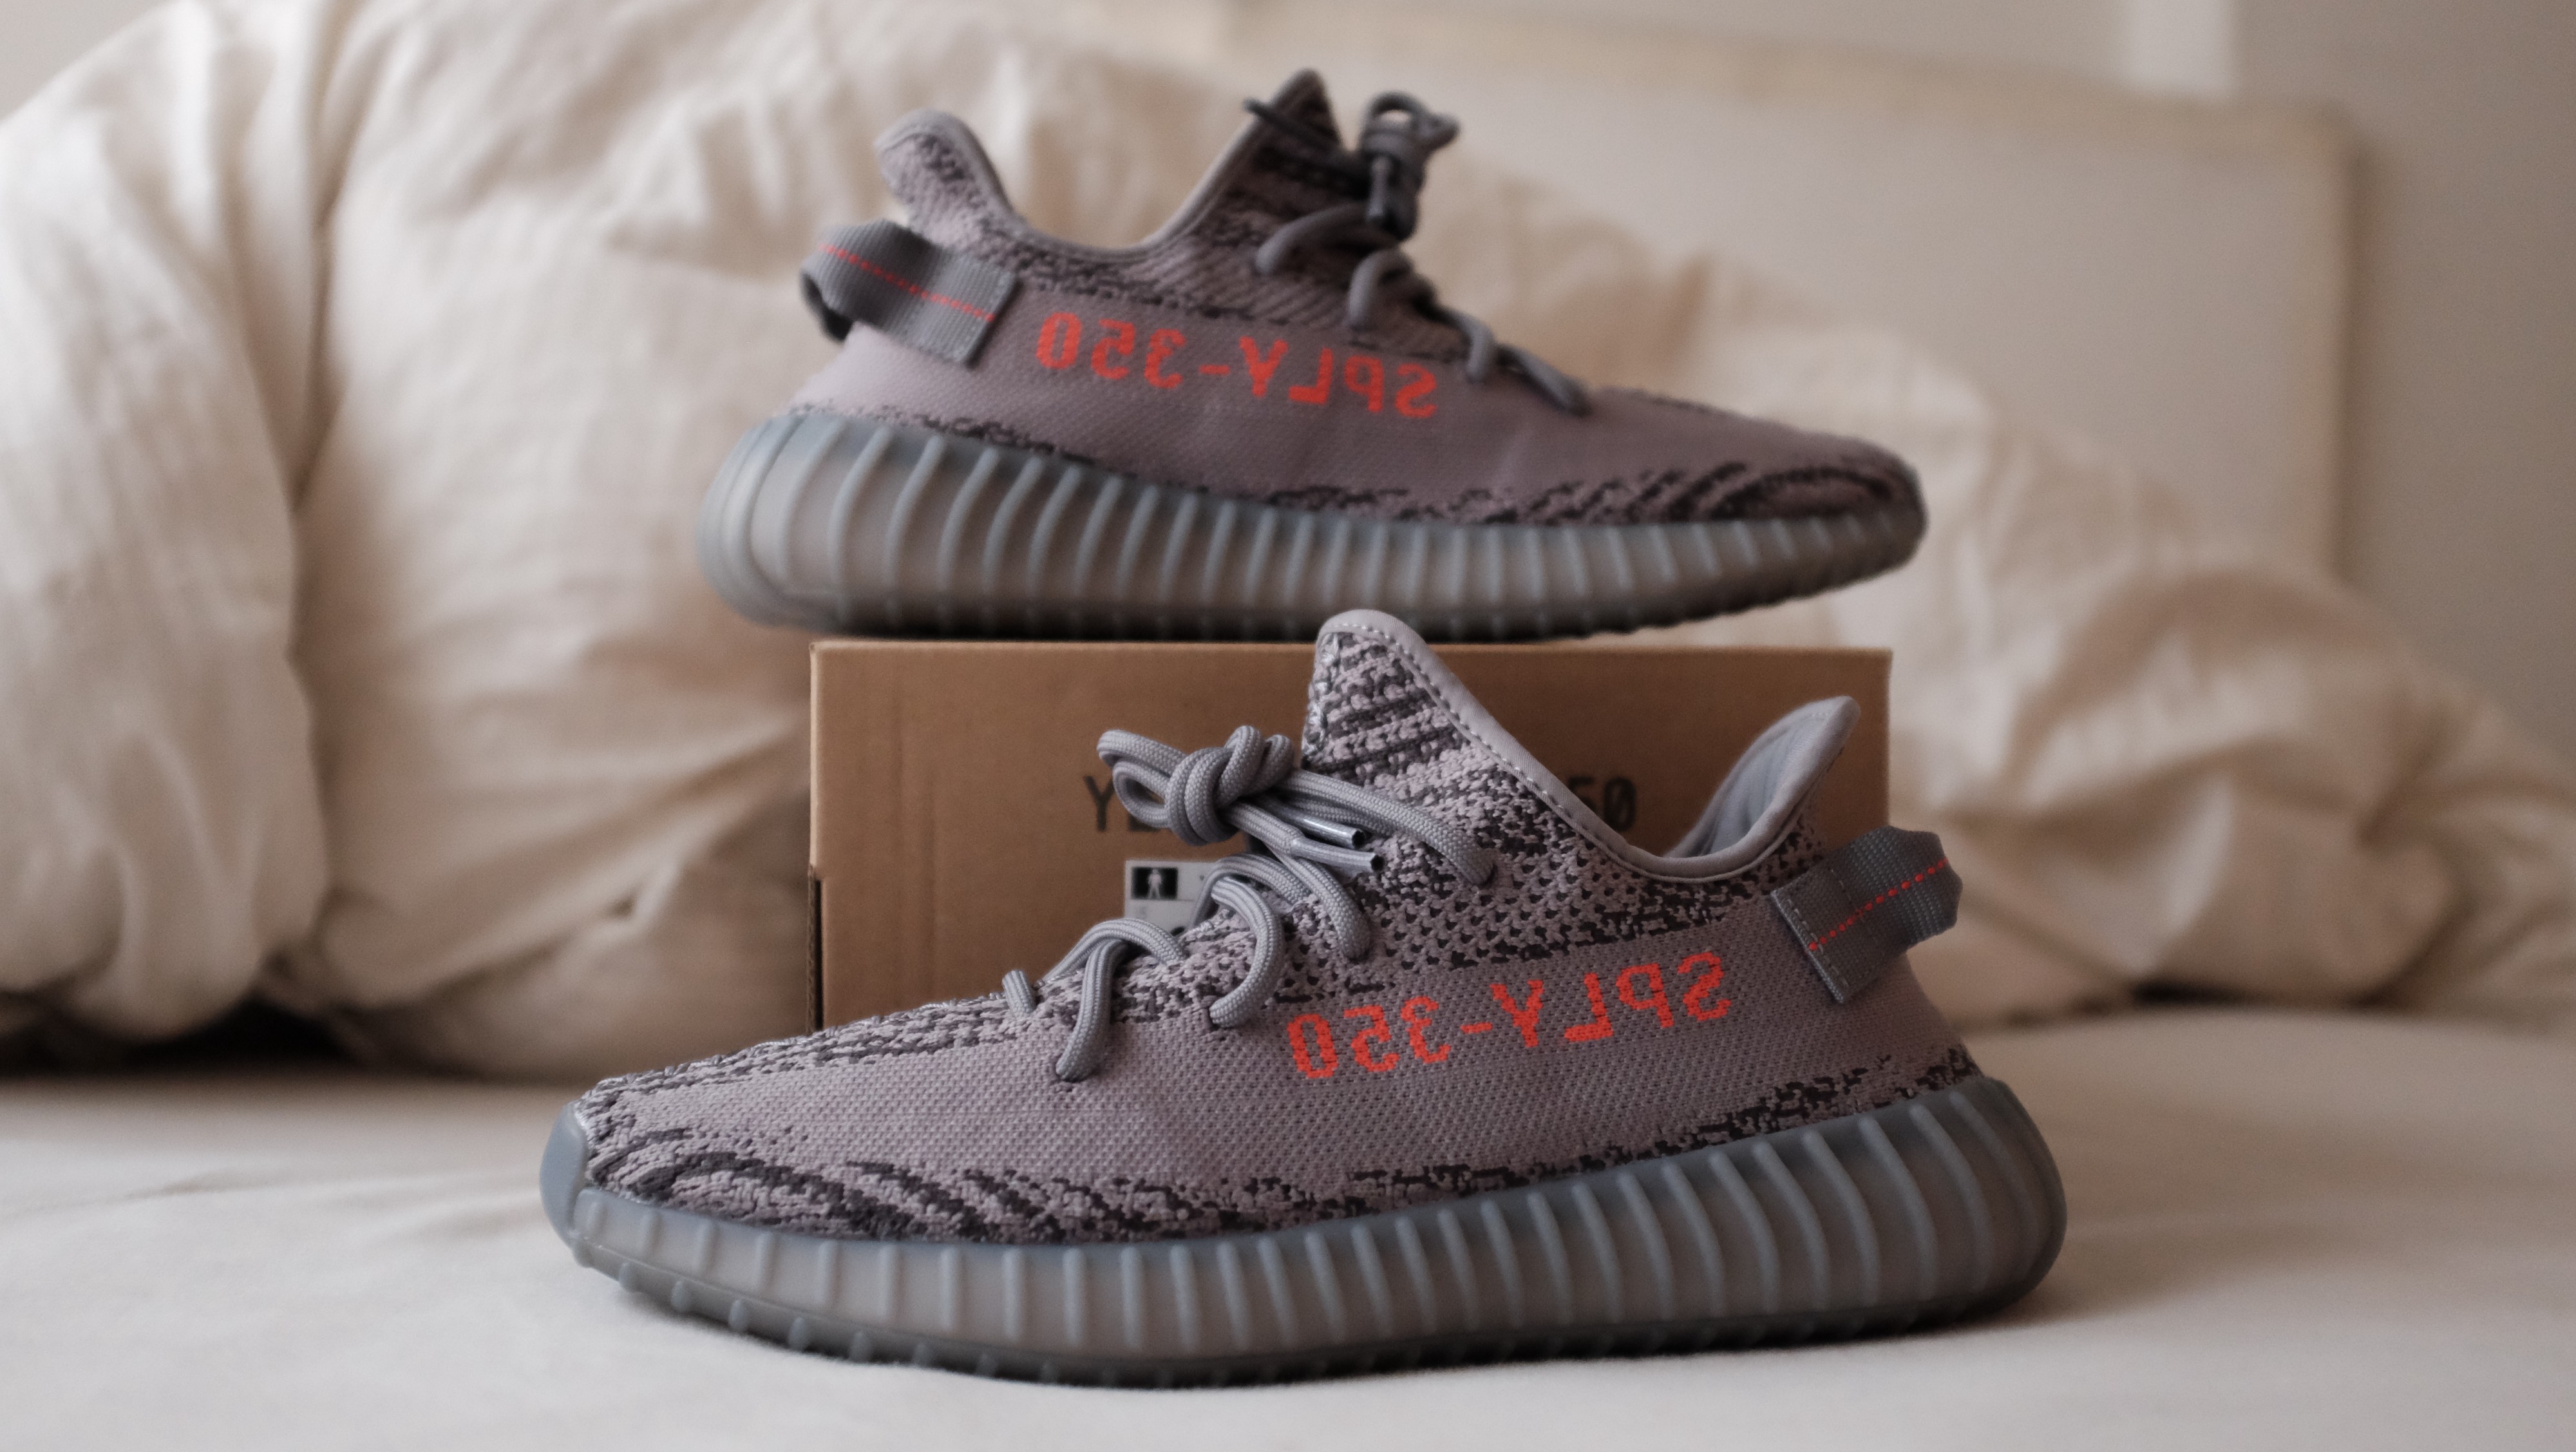
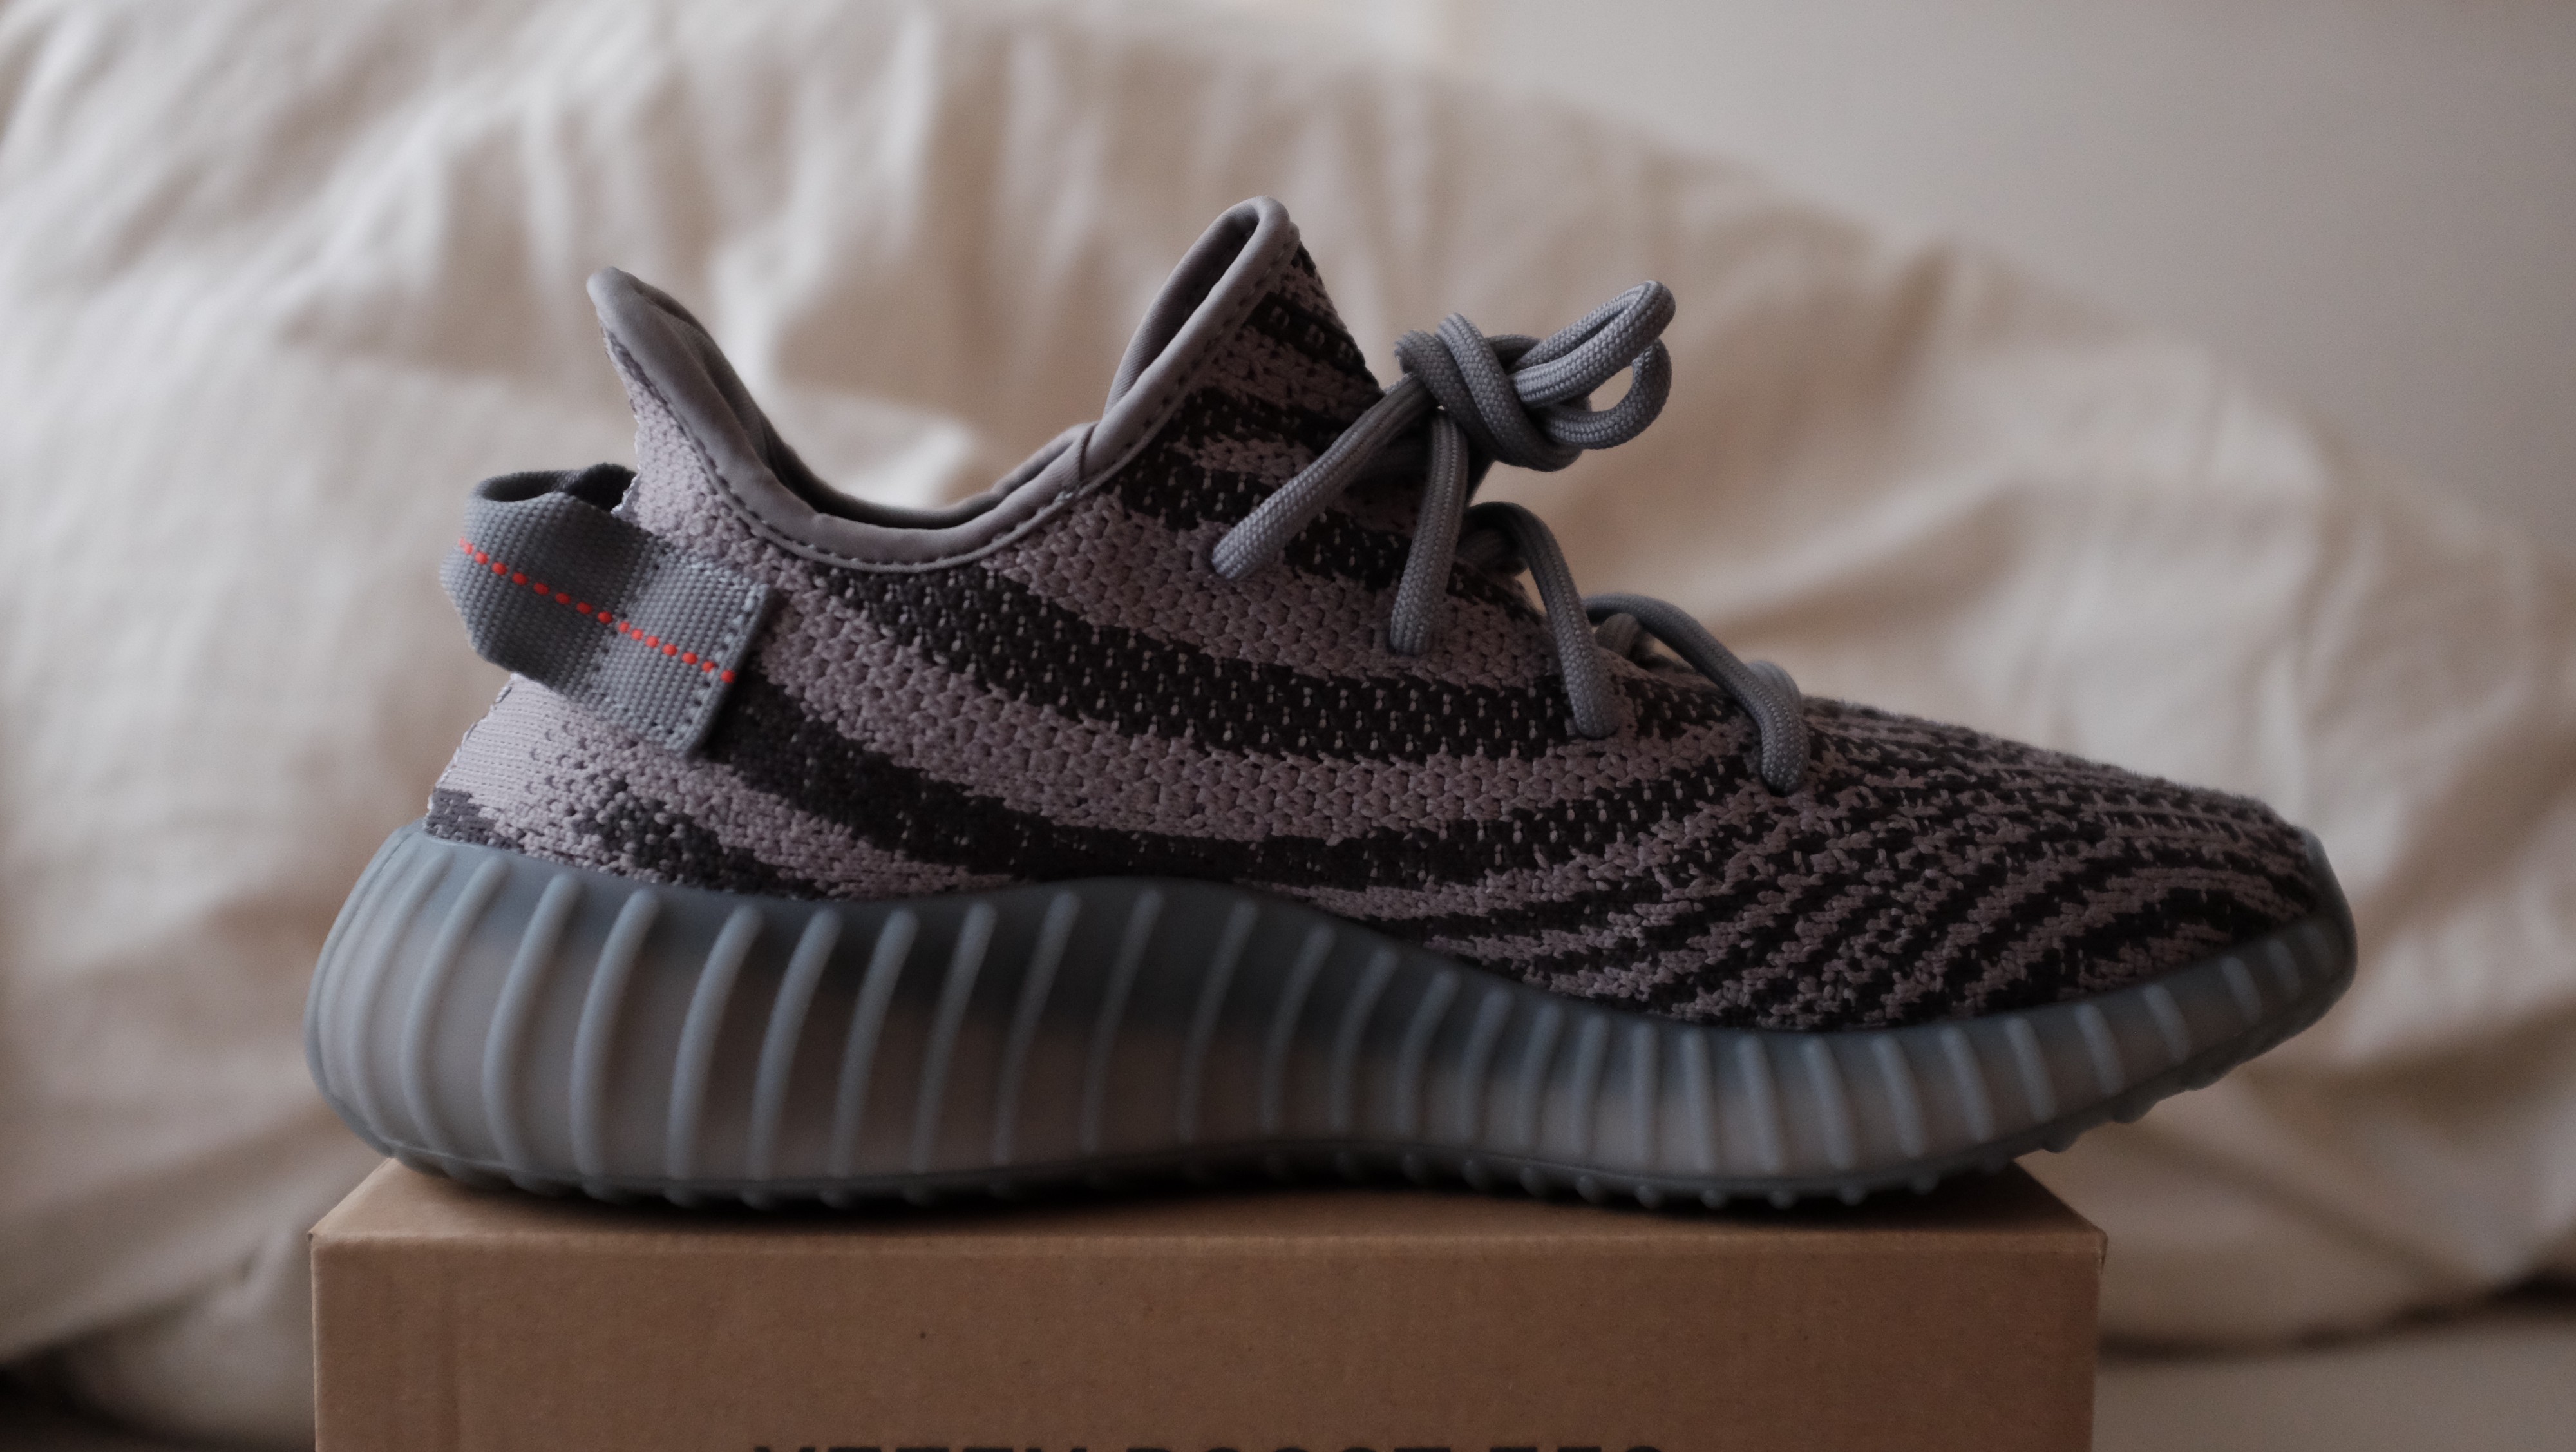
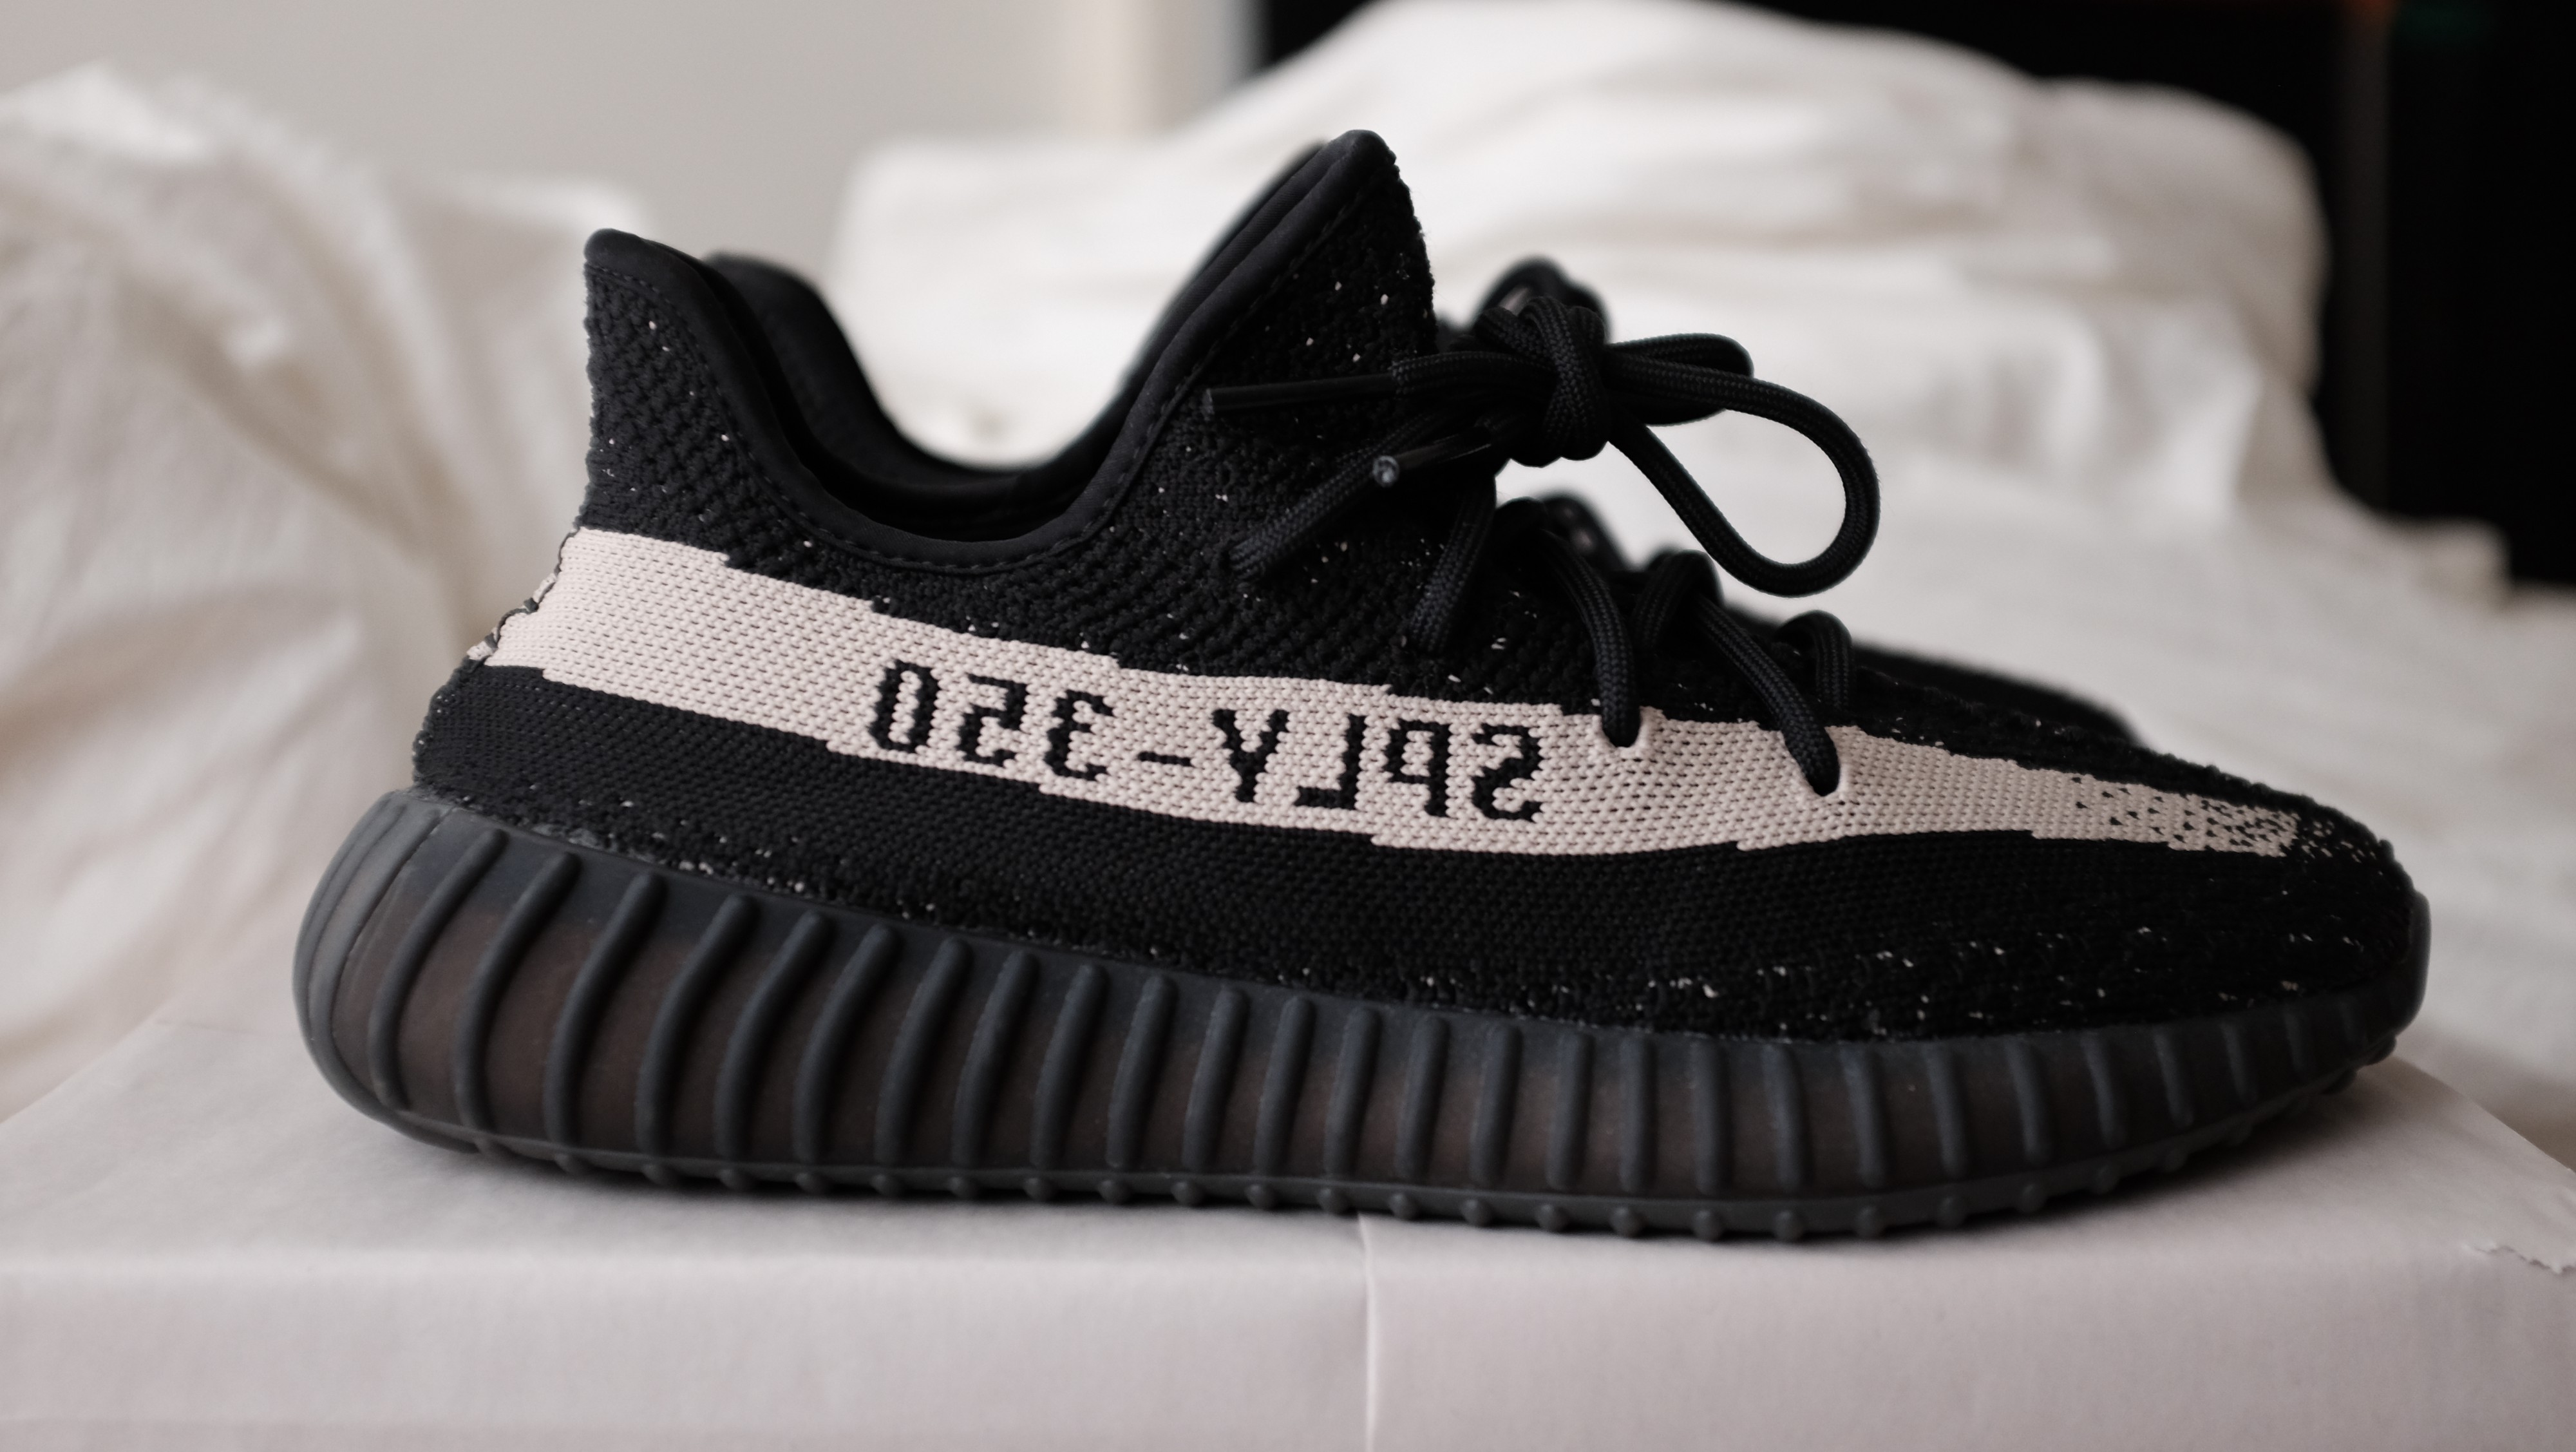
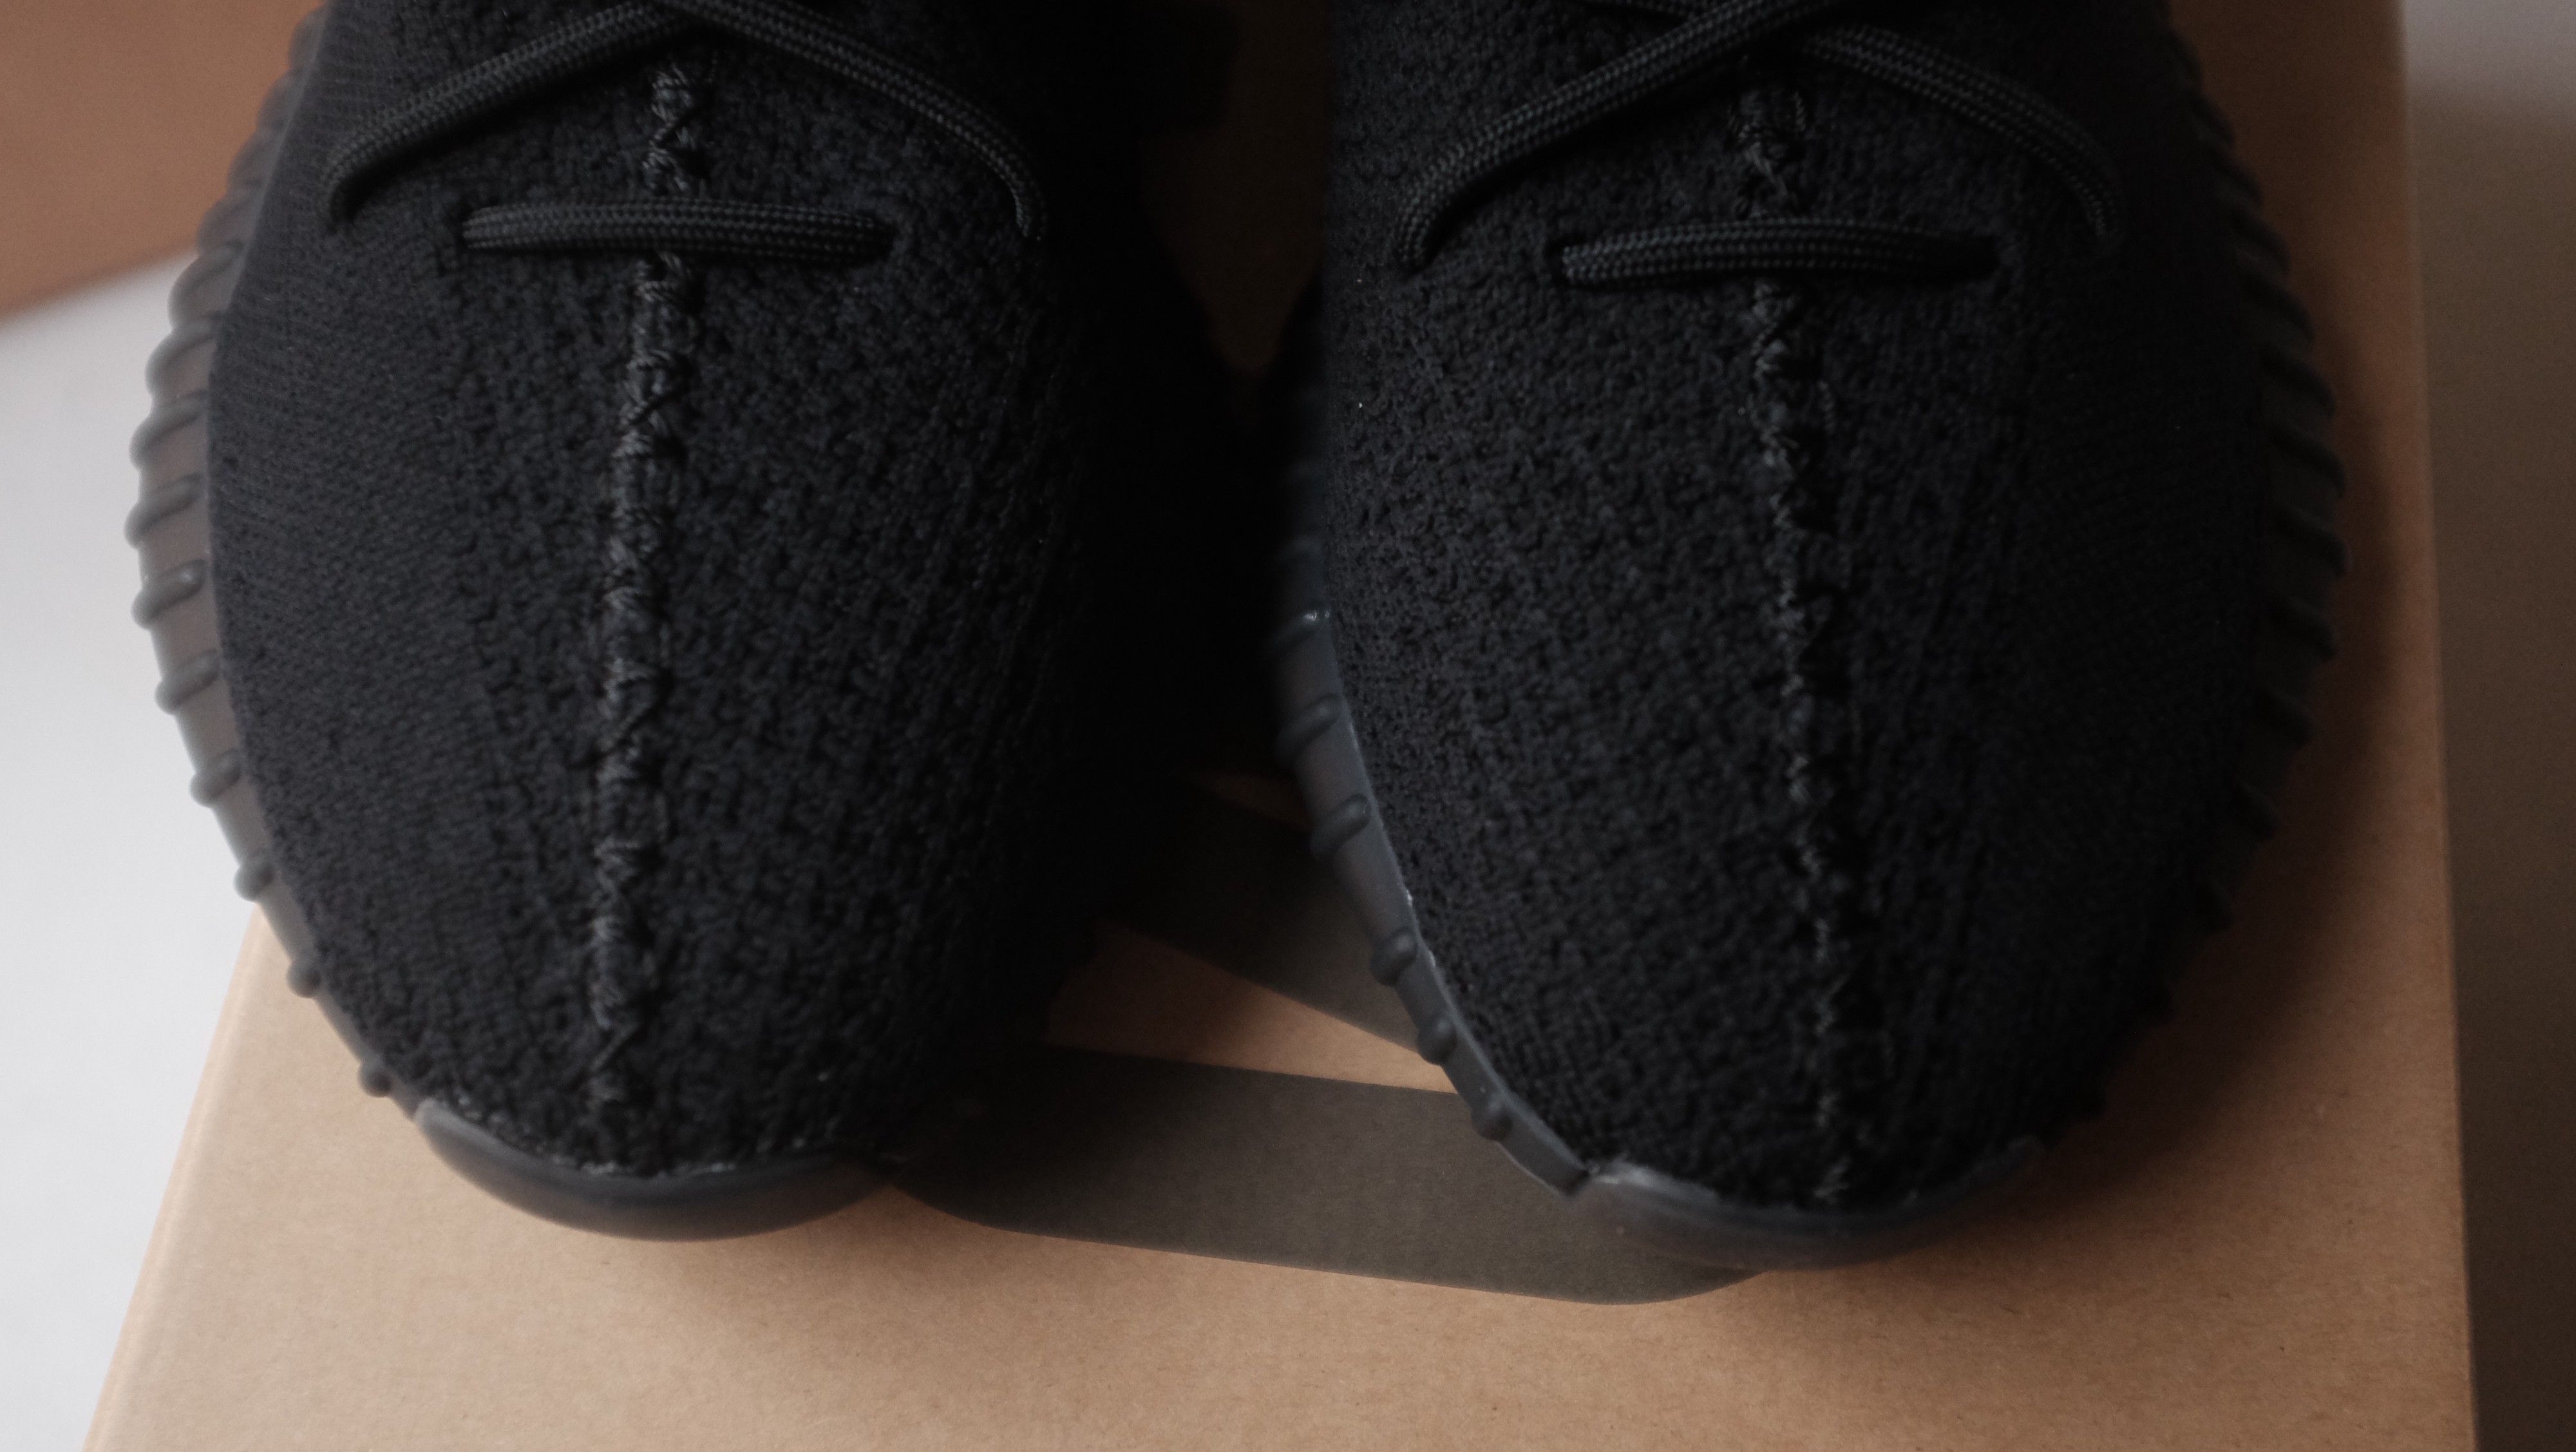
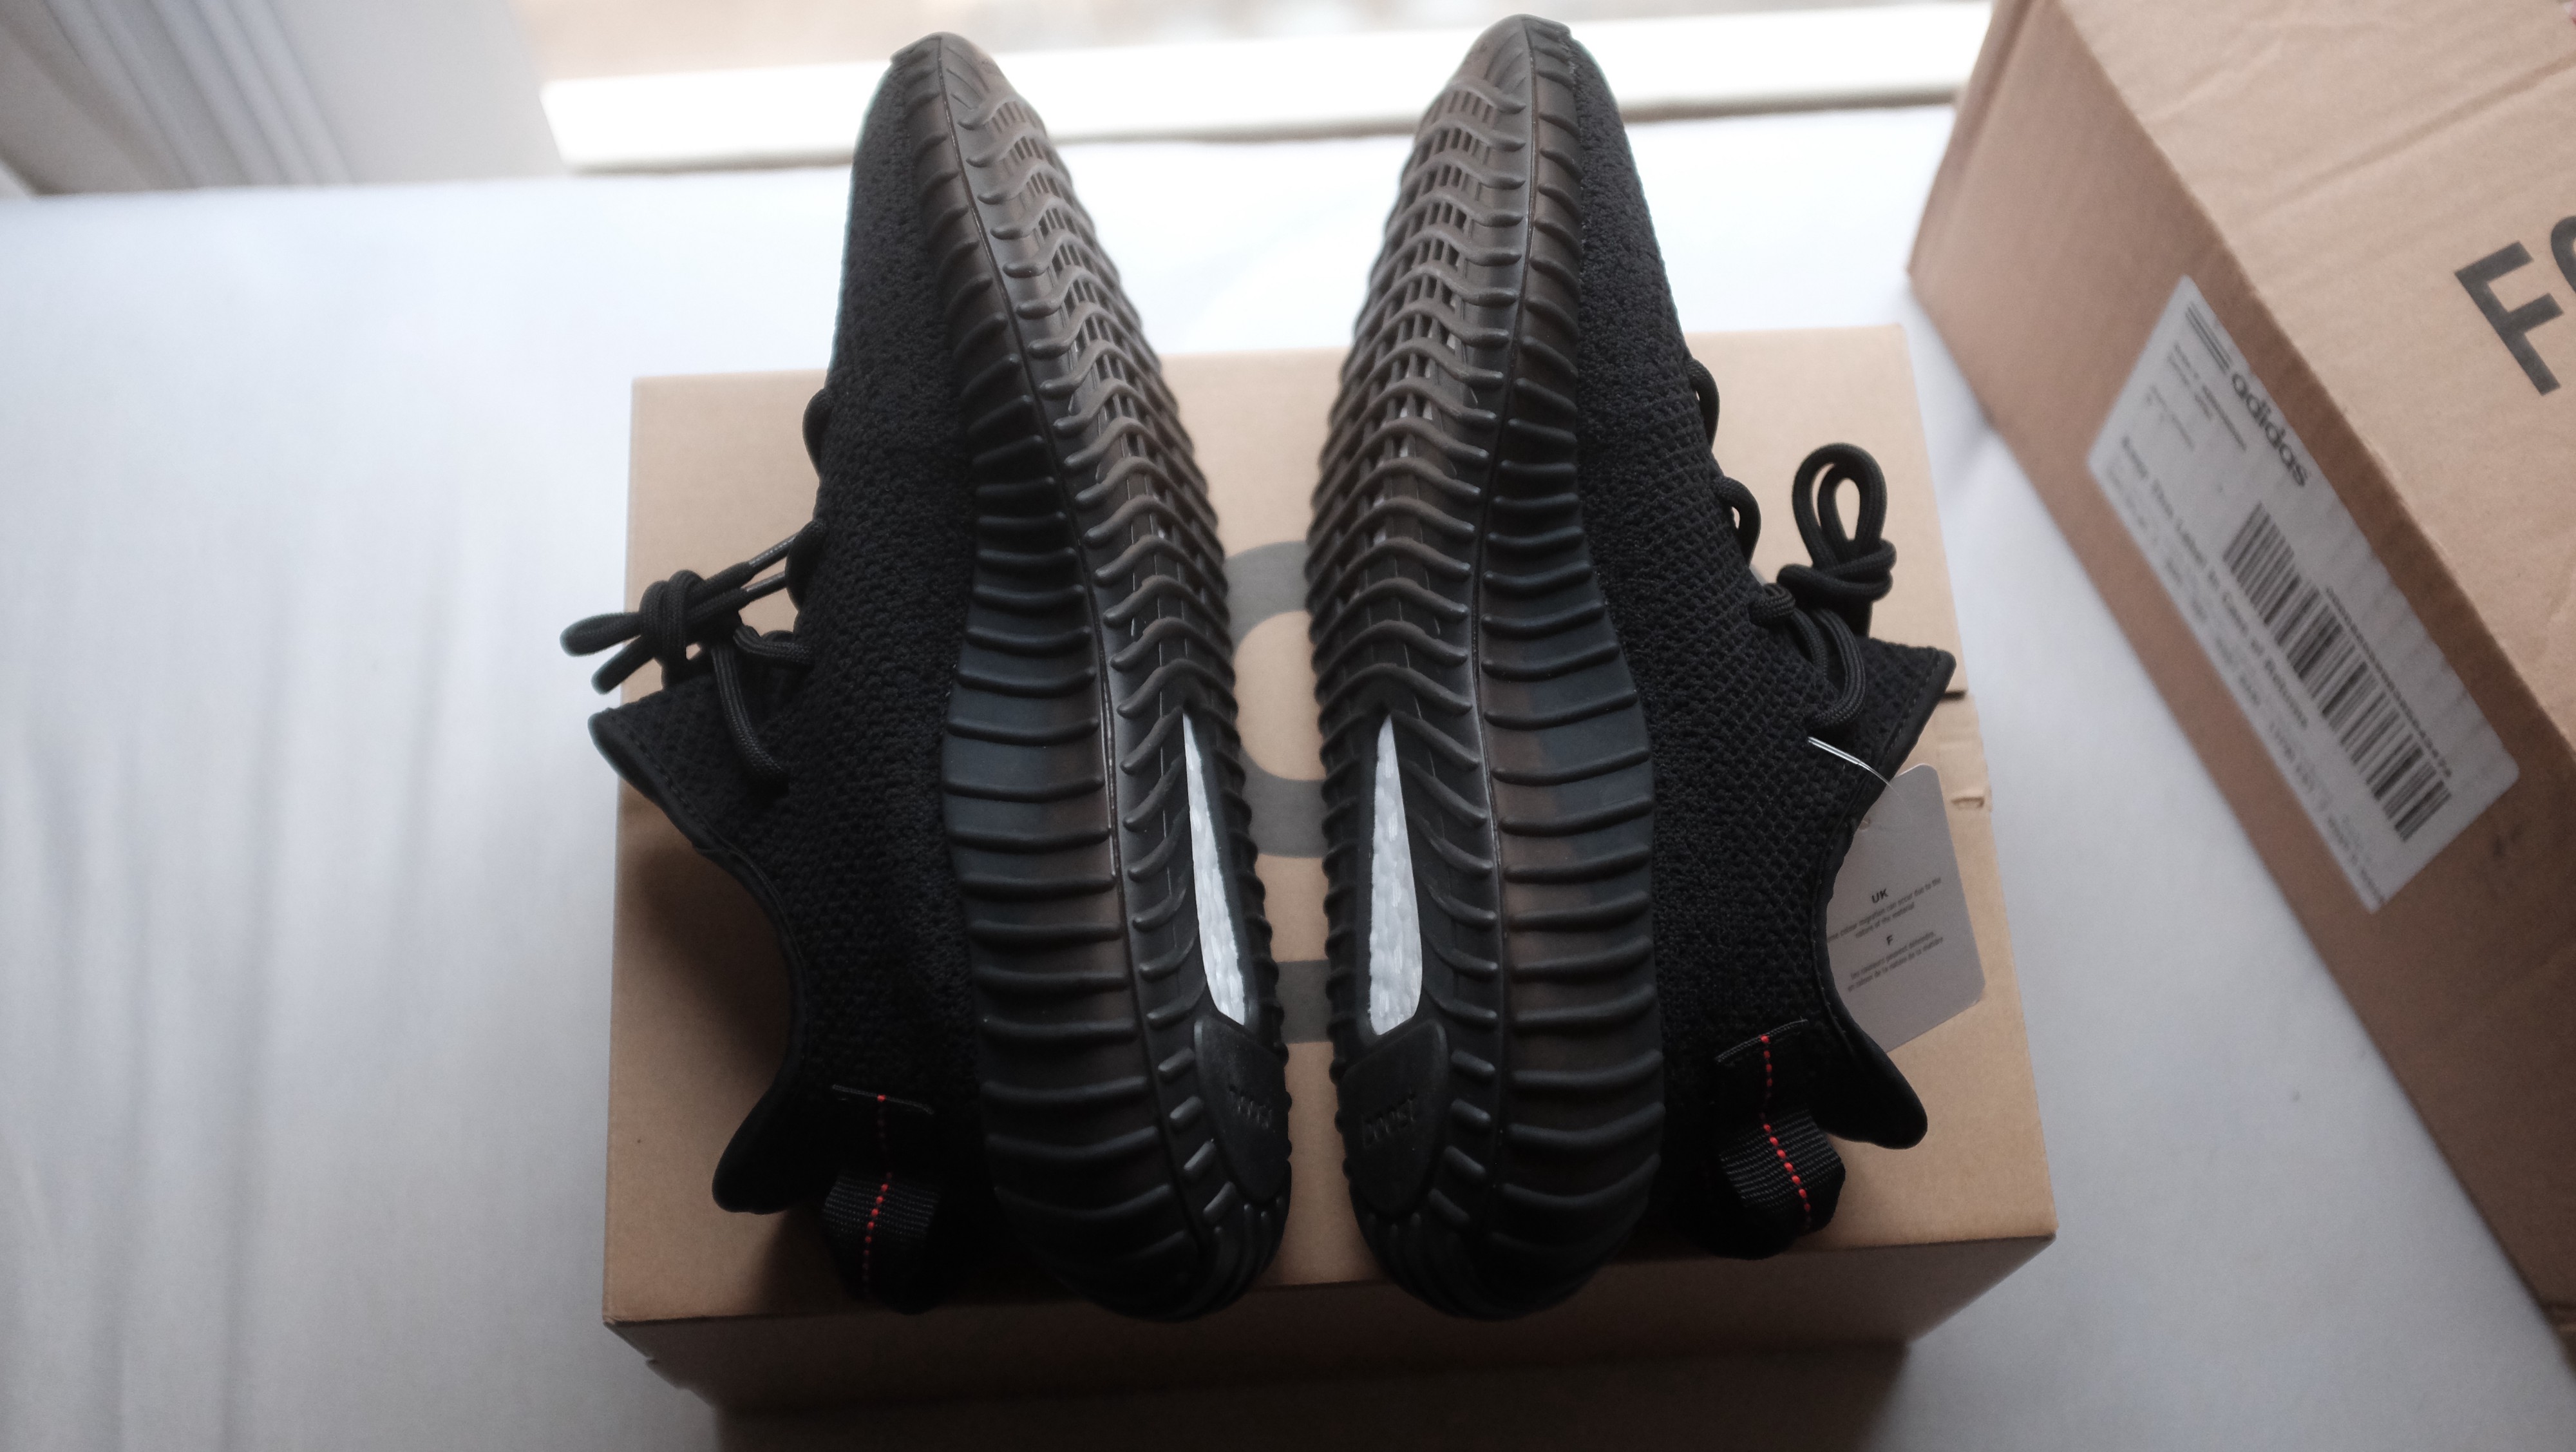
Let?s focus on the shape of the shoe.


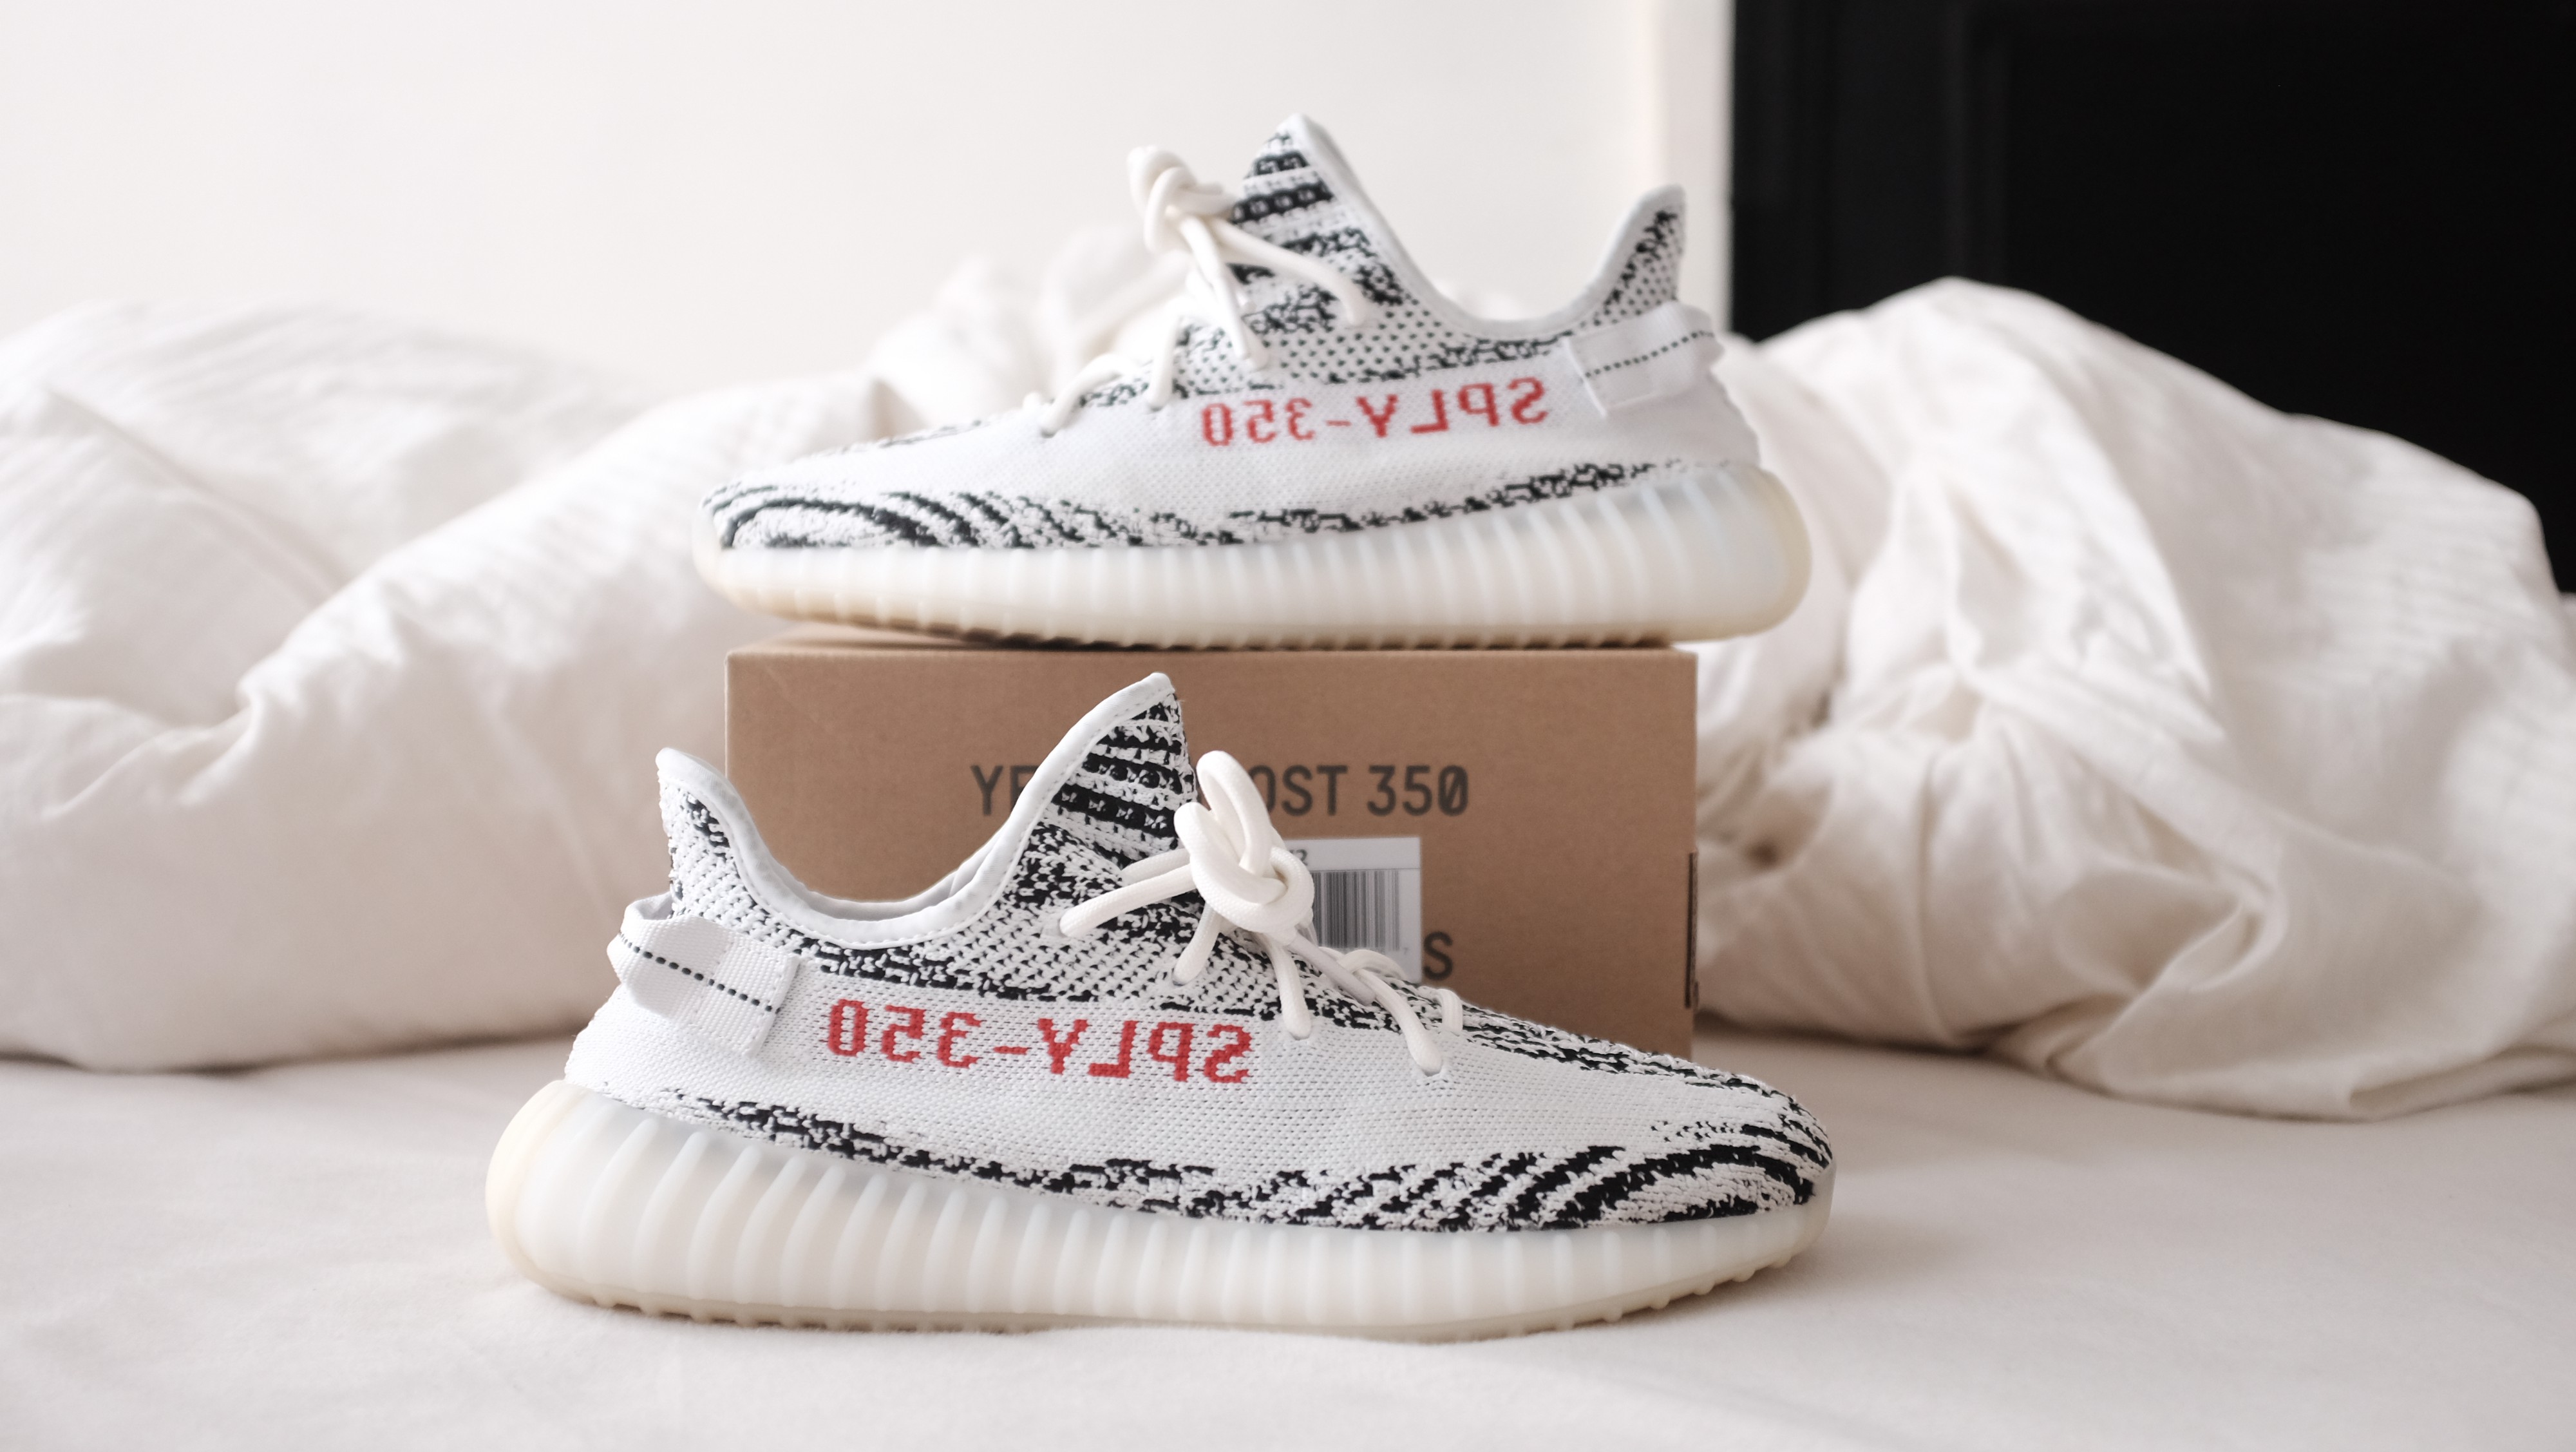
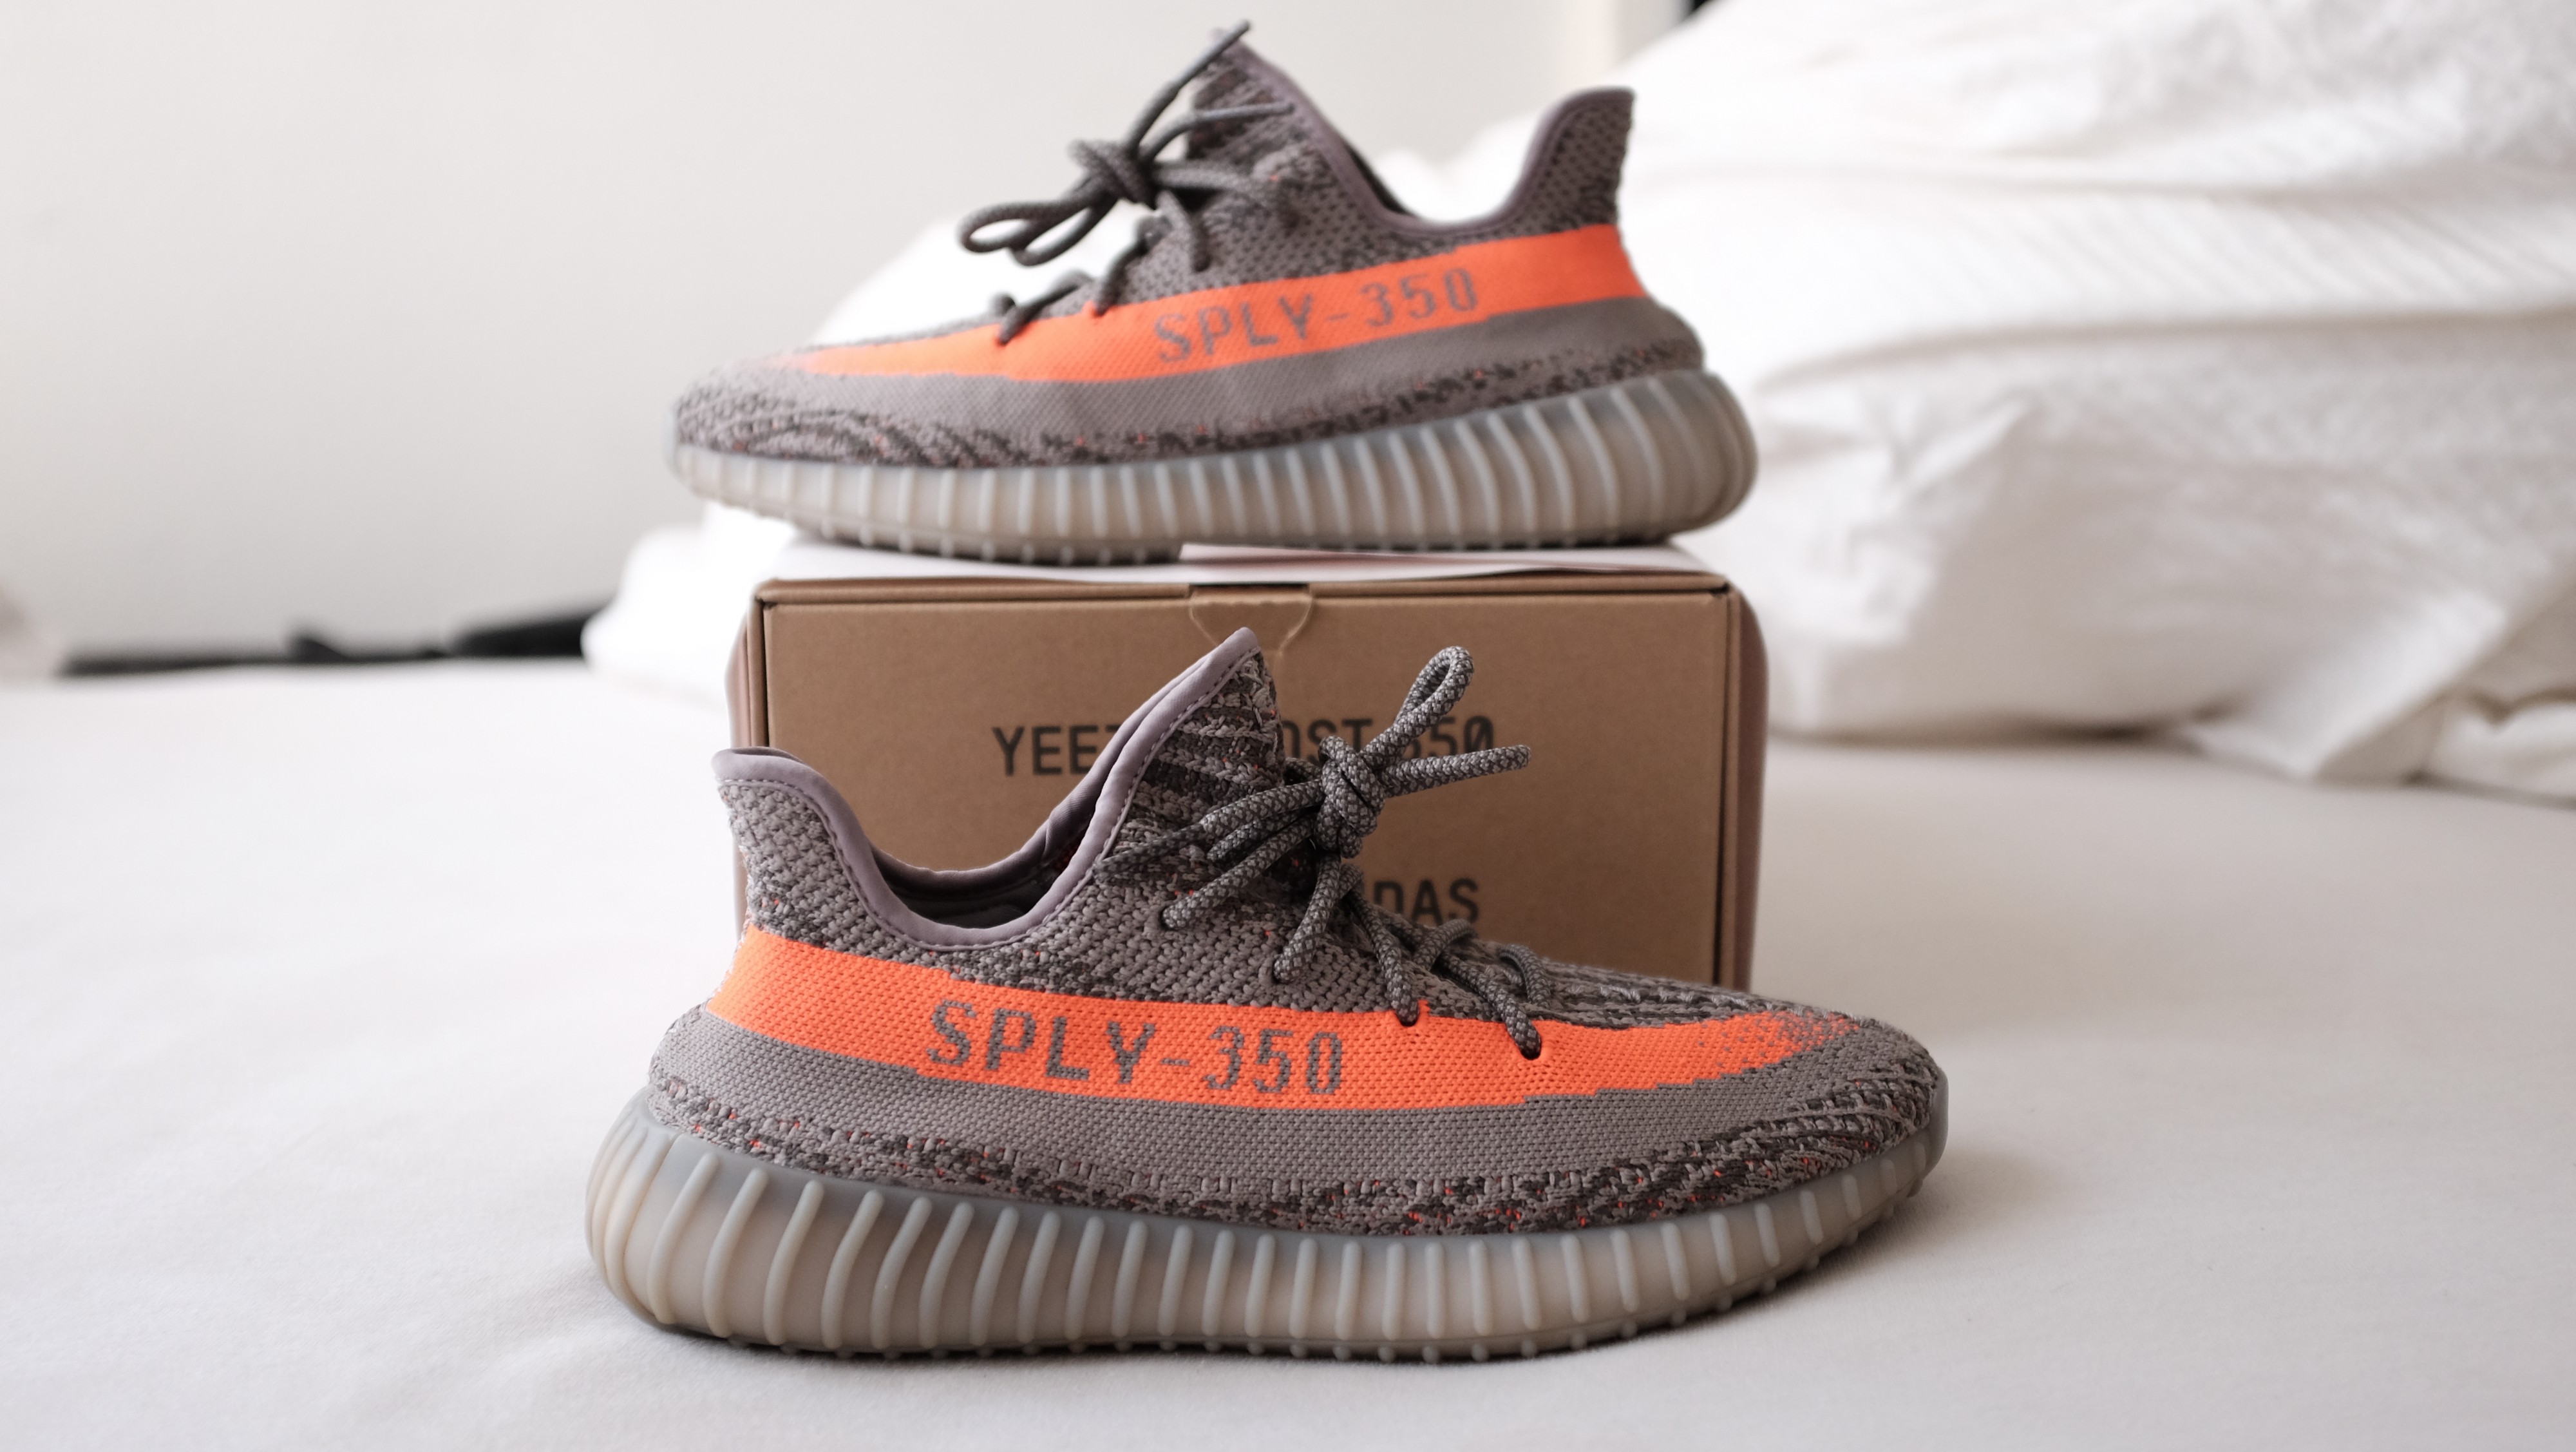
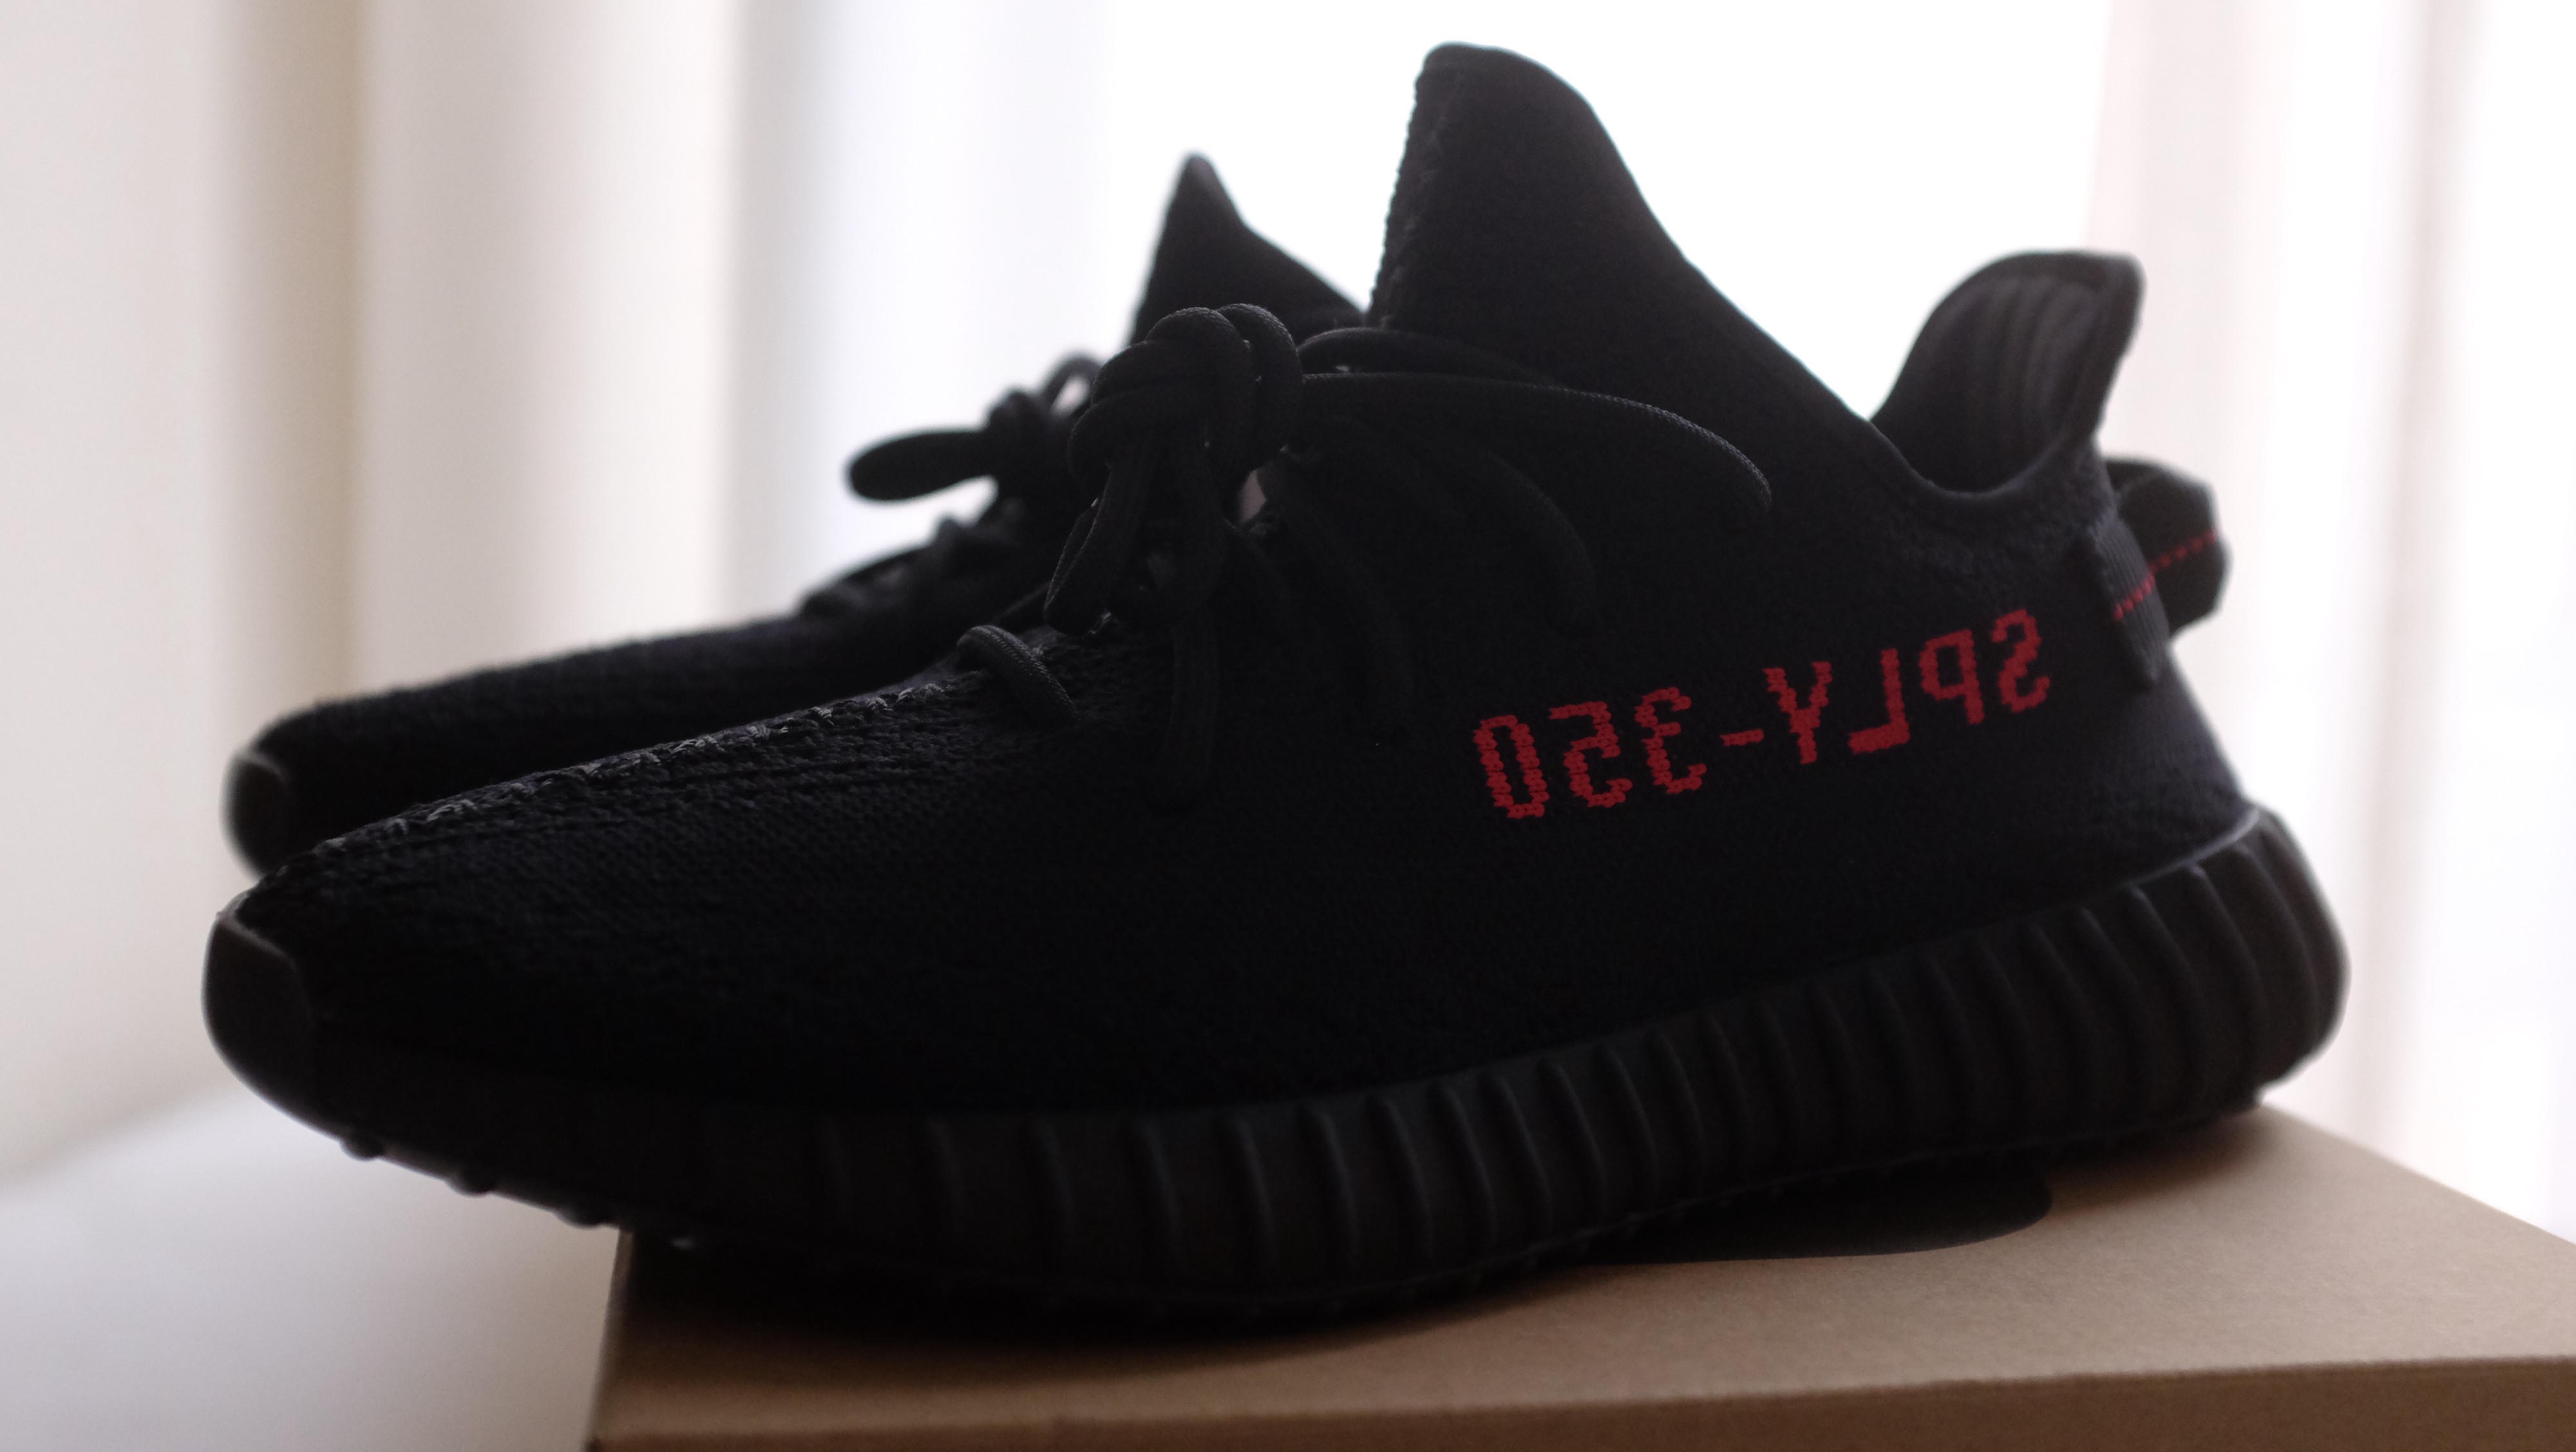
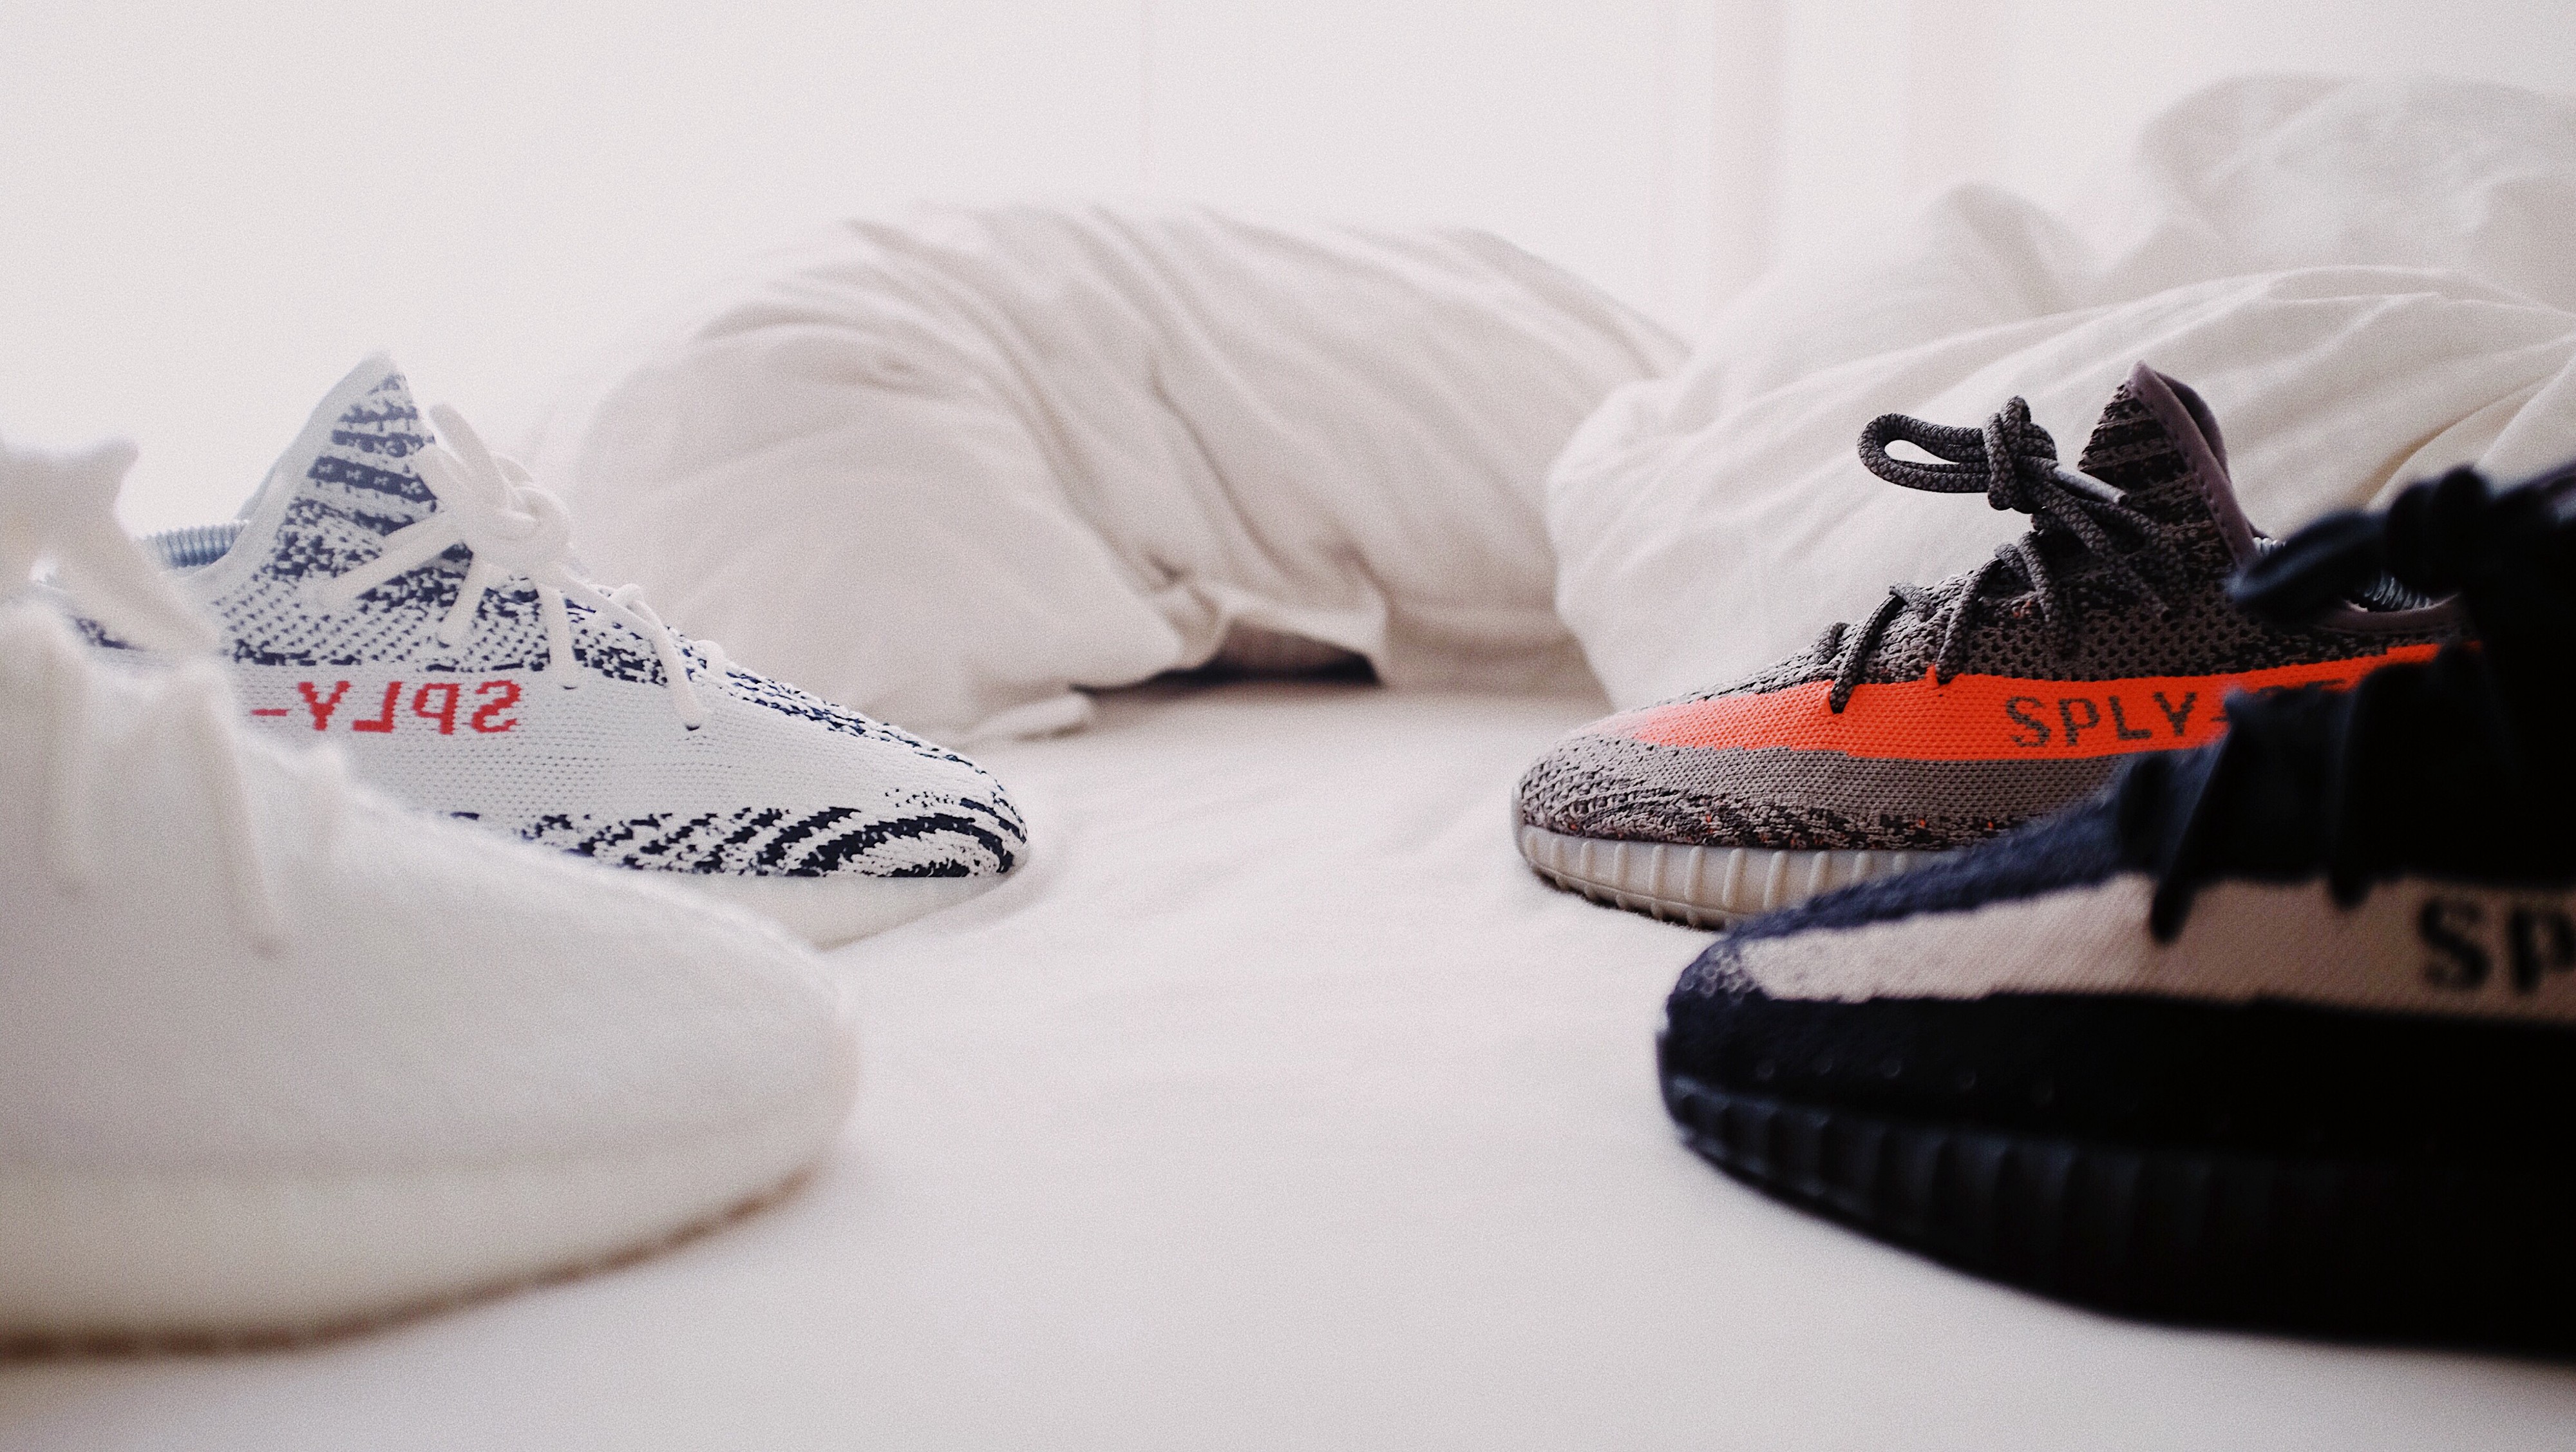
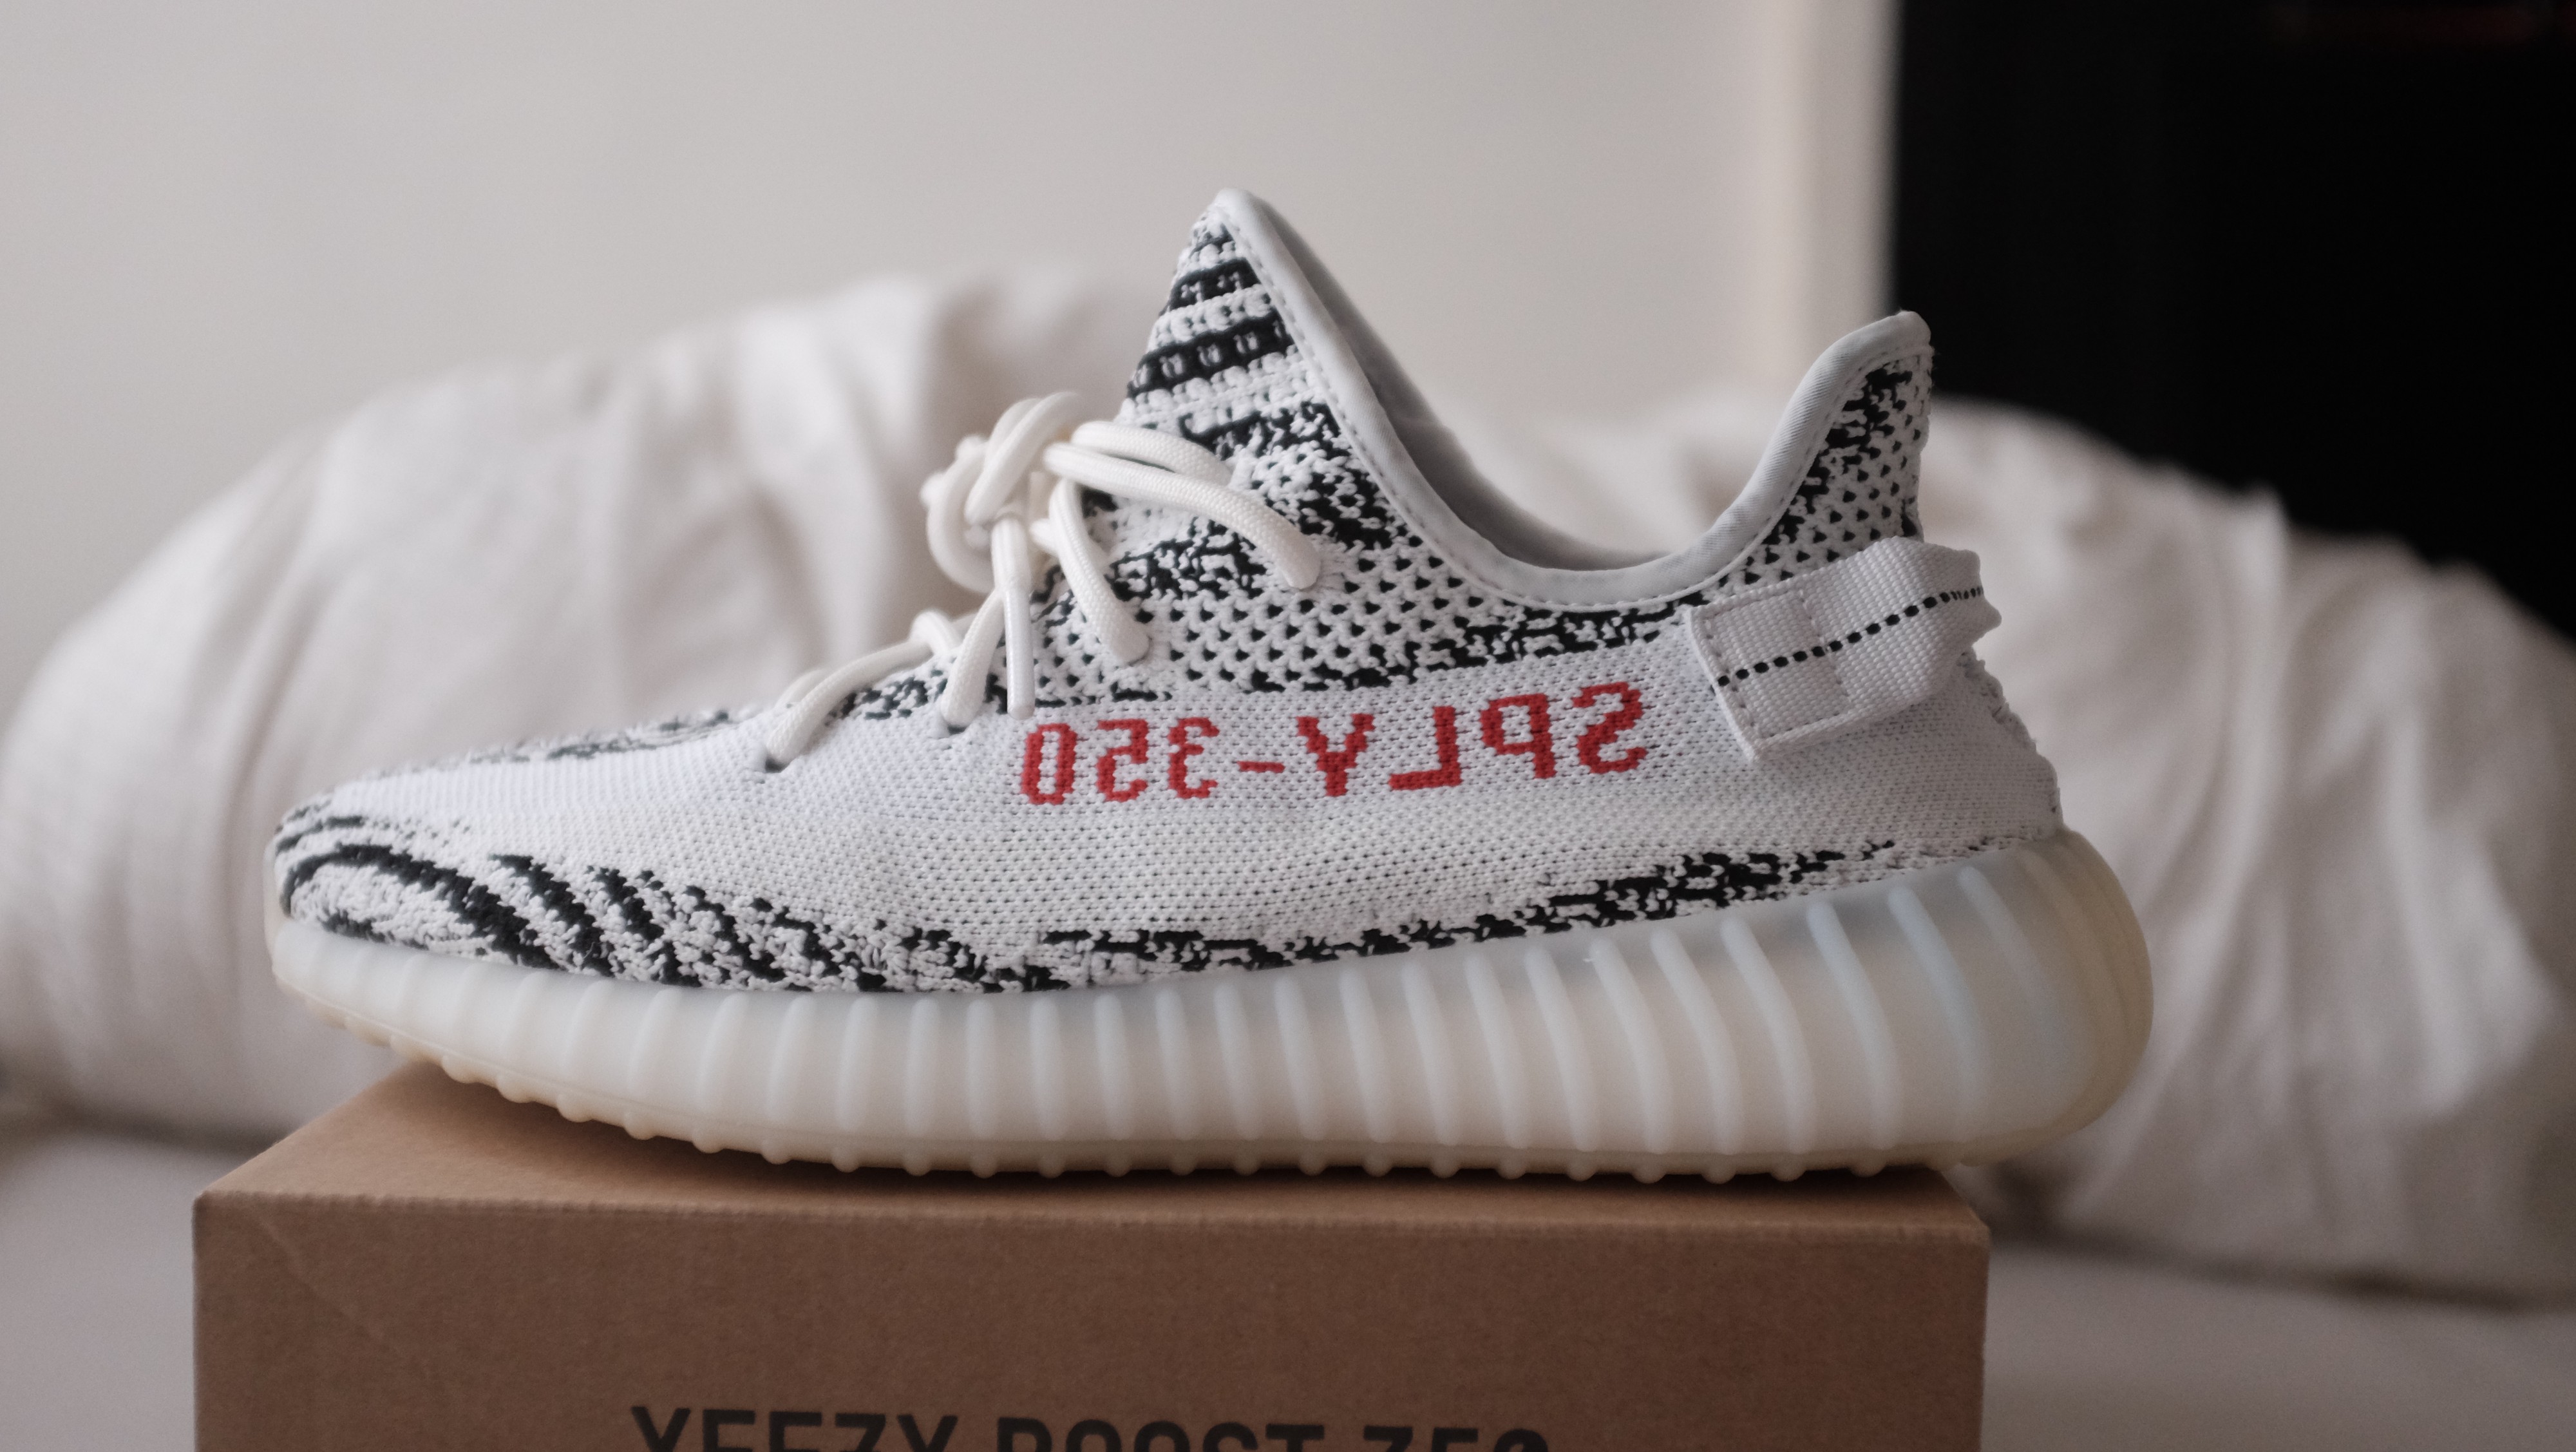
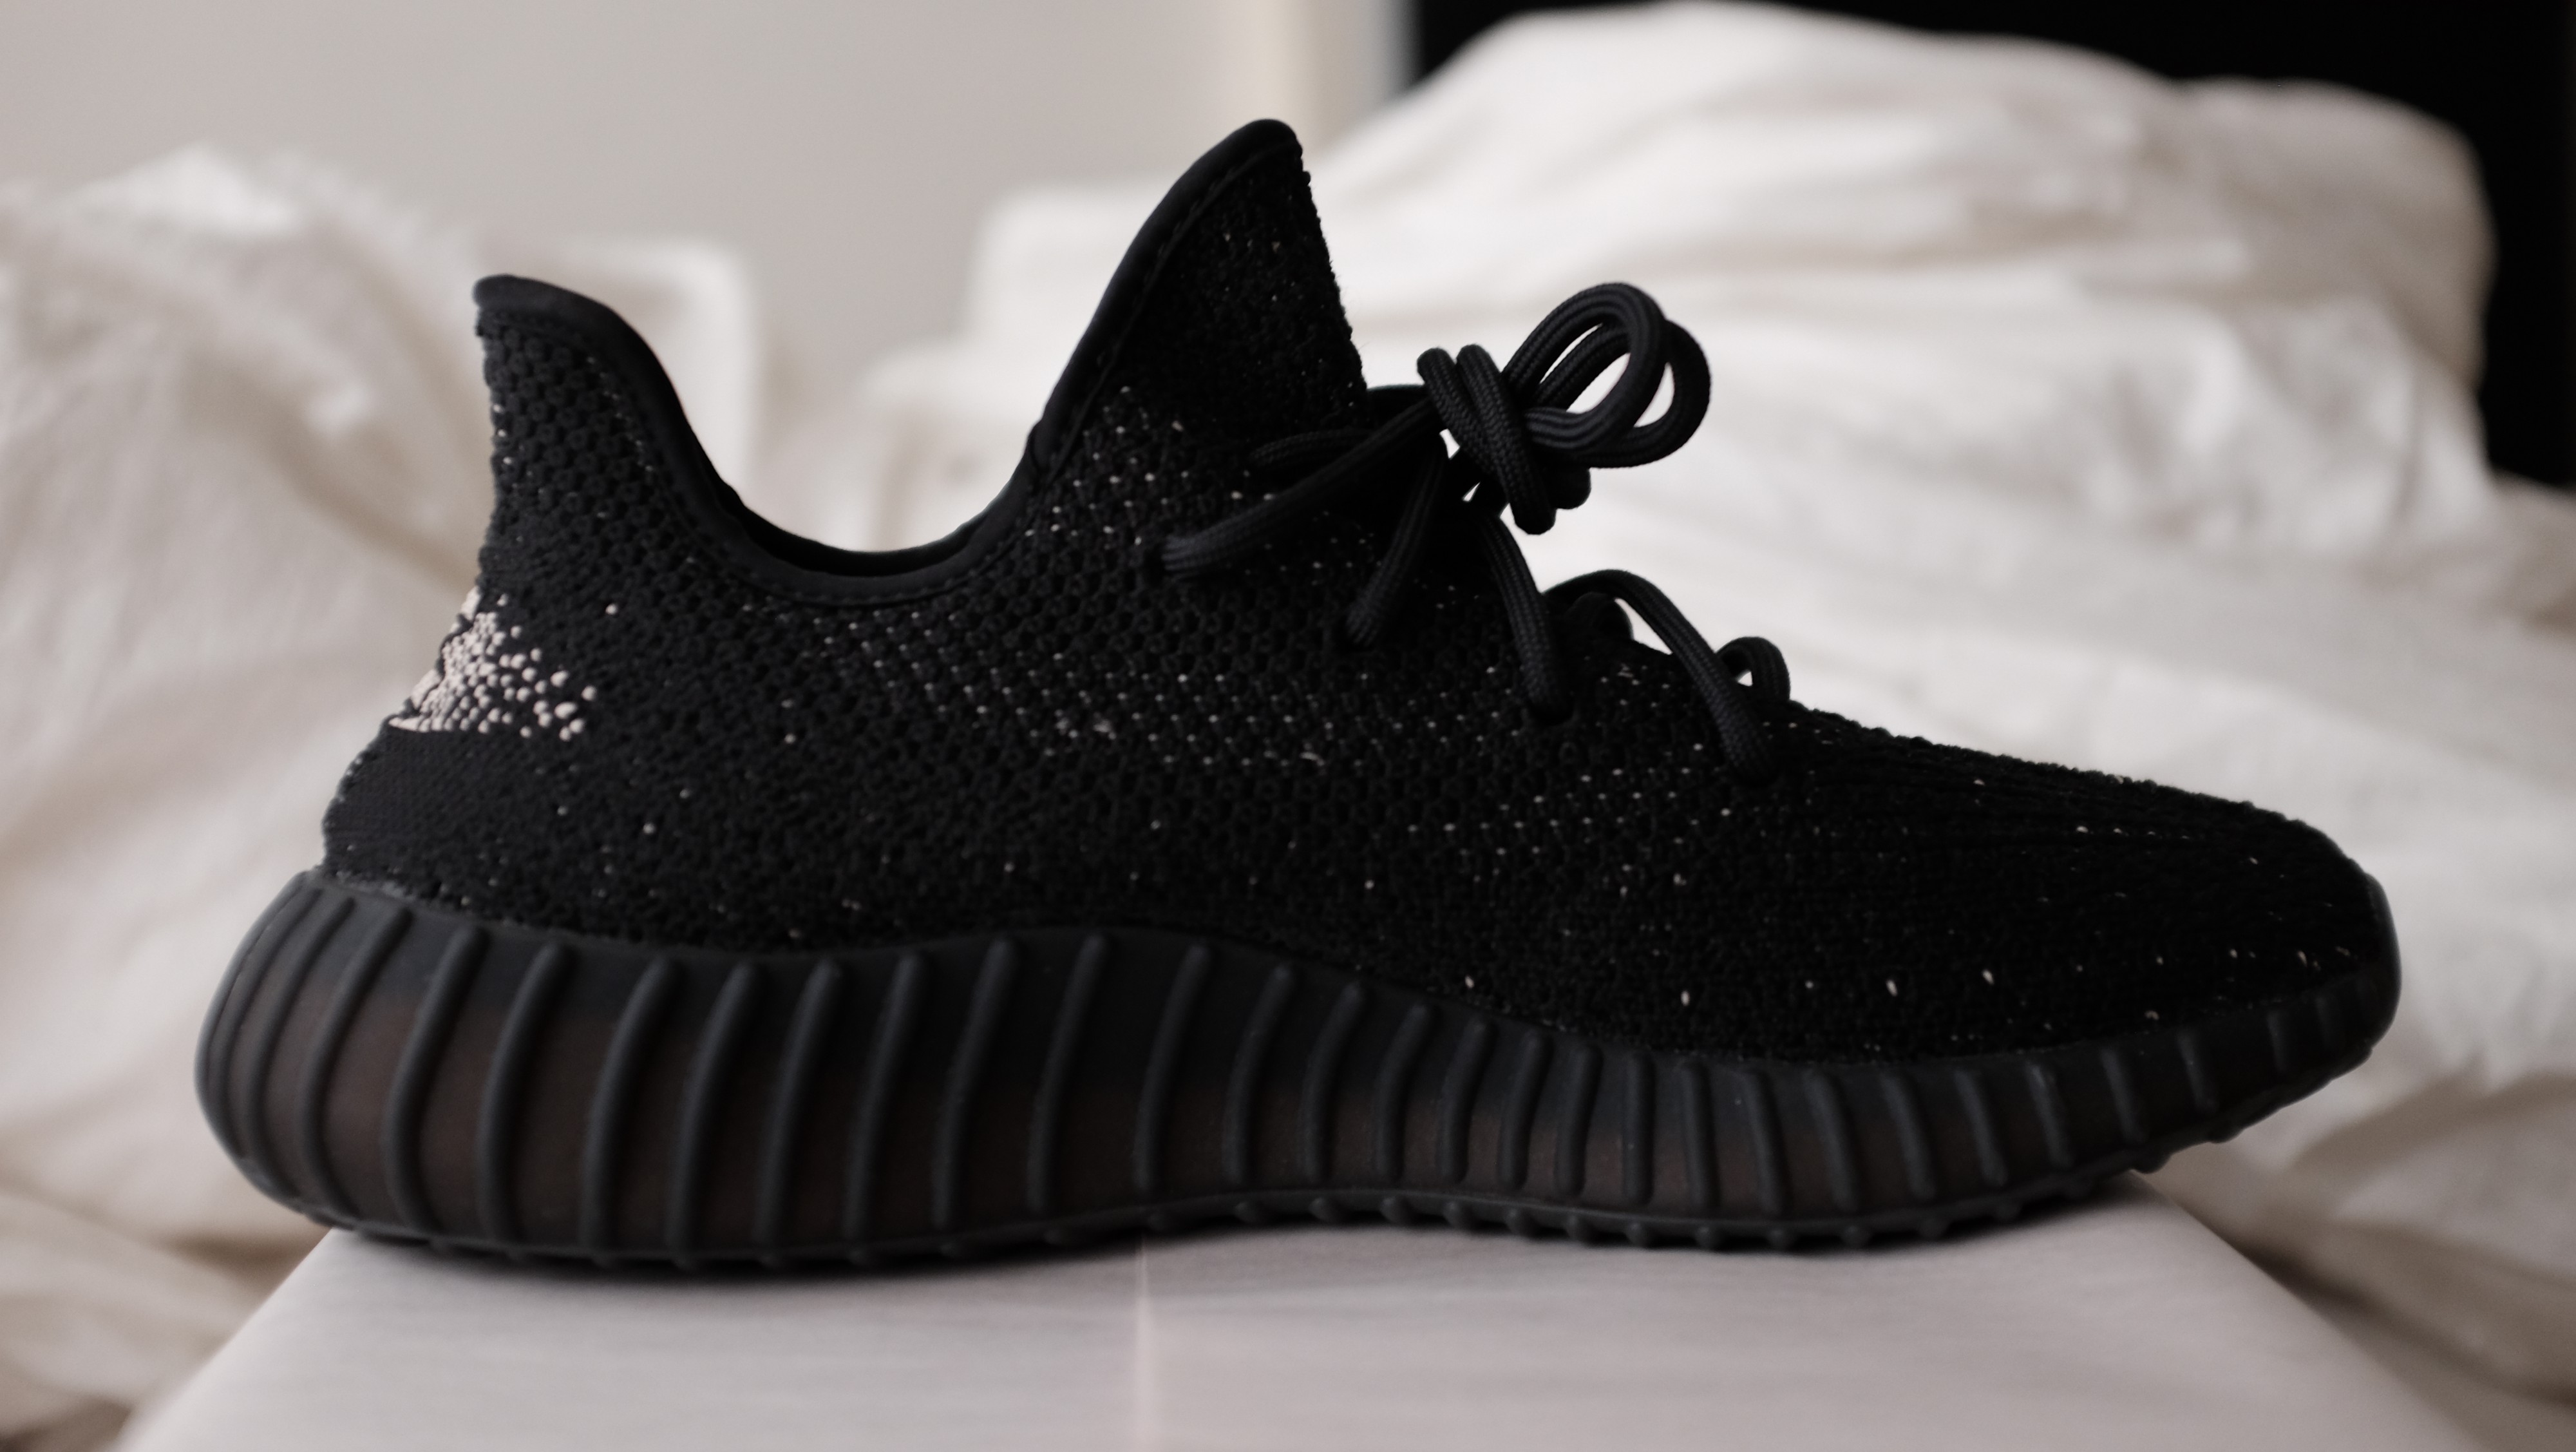
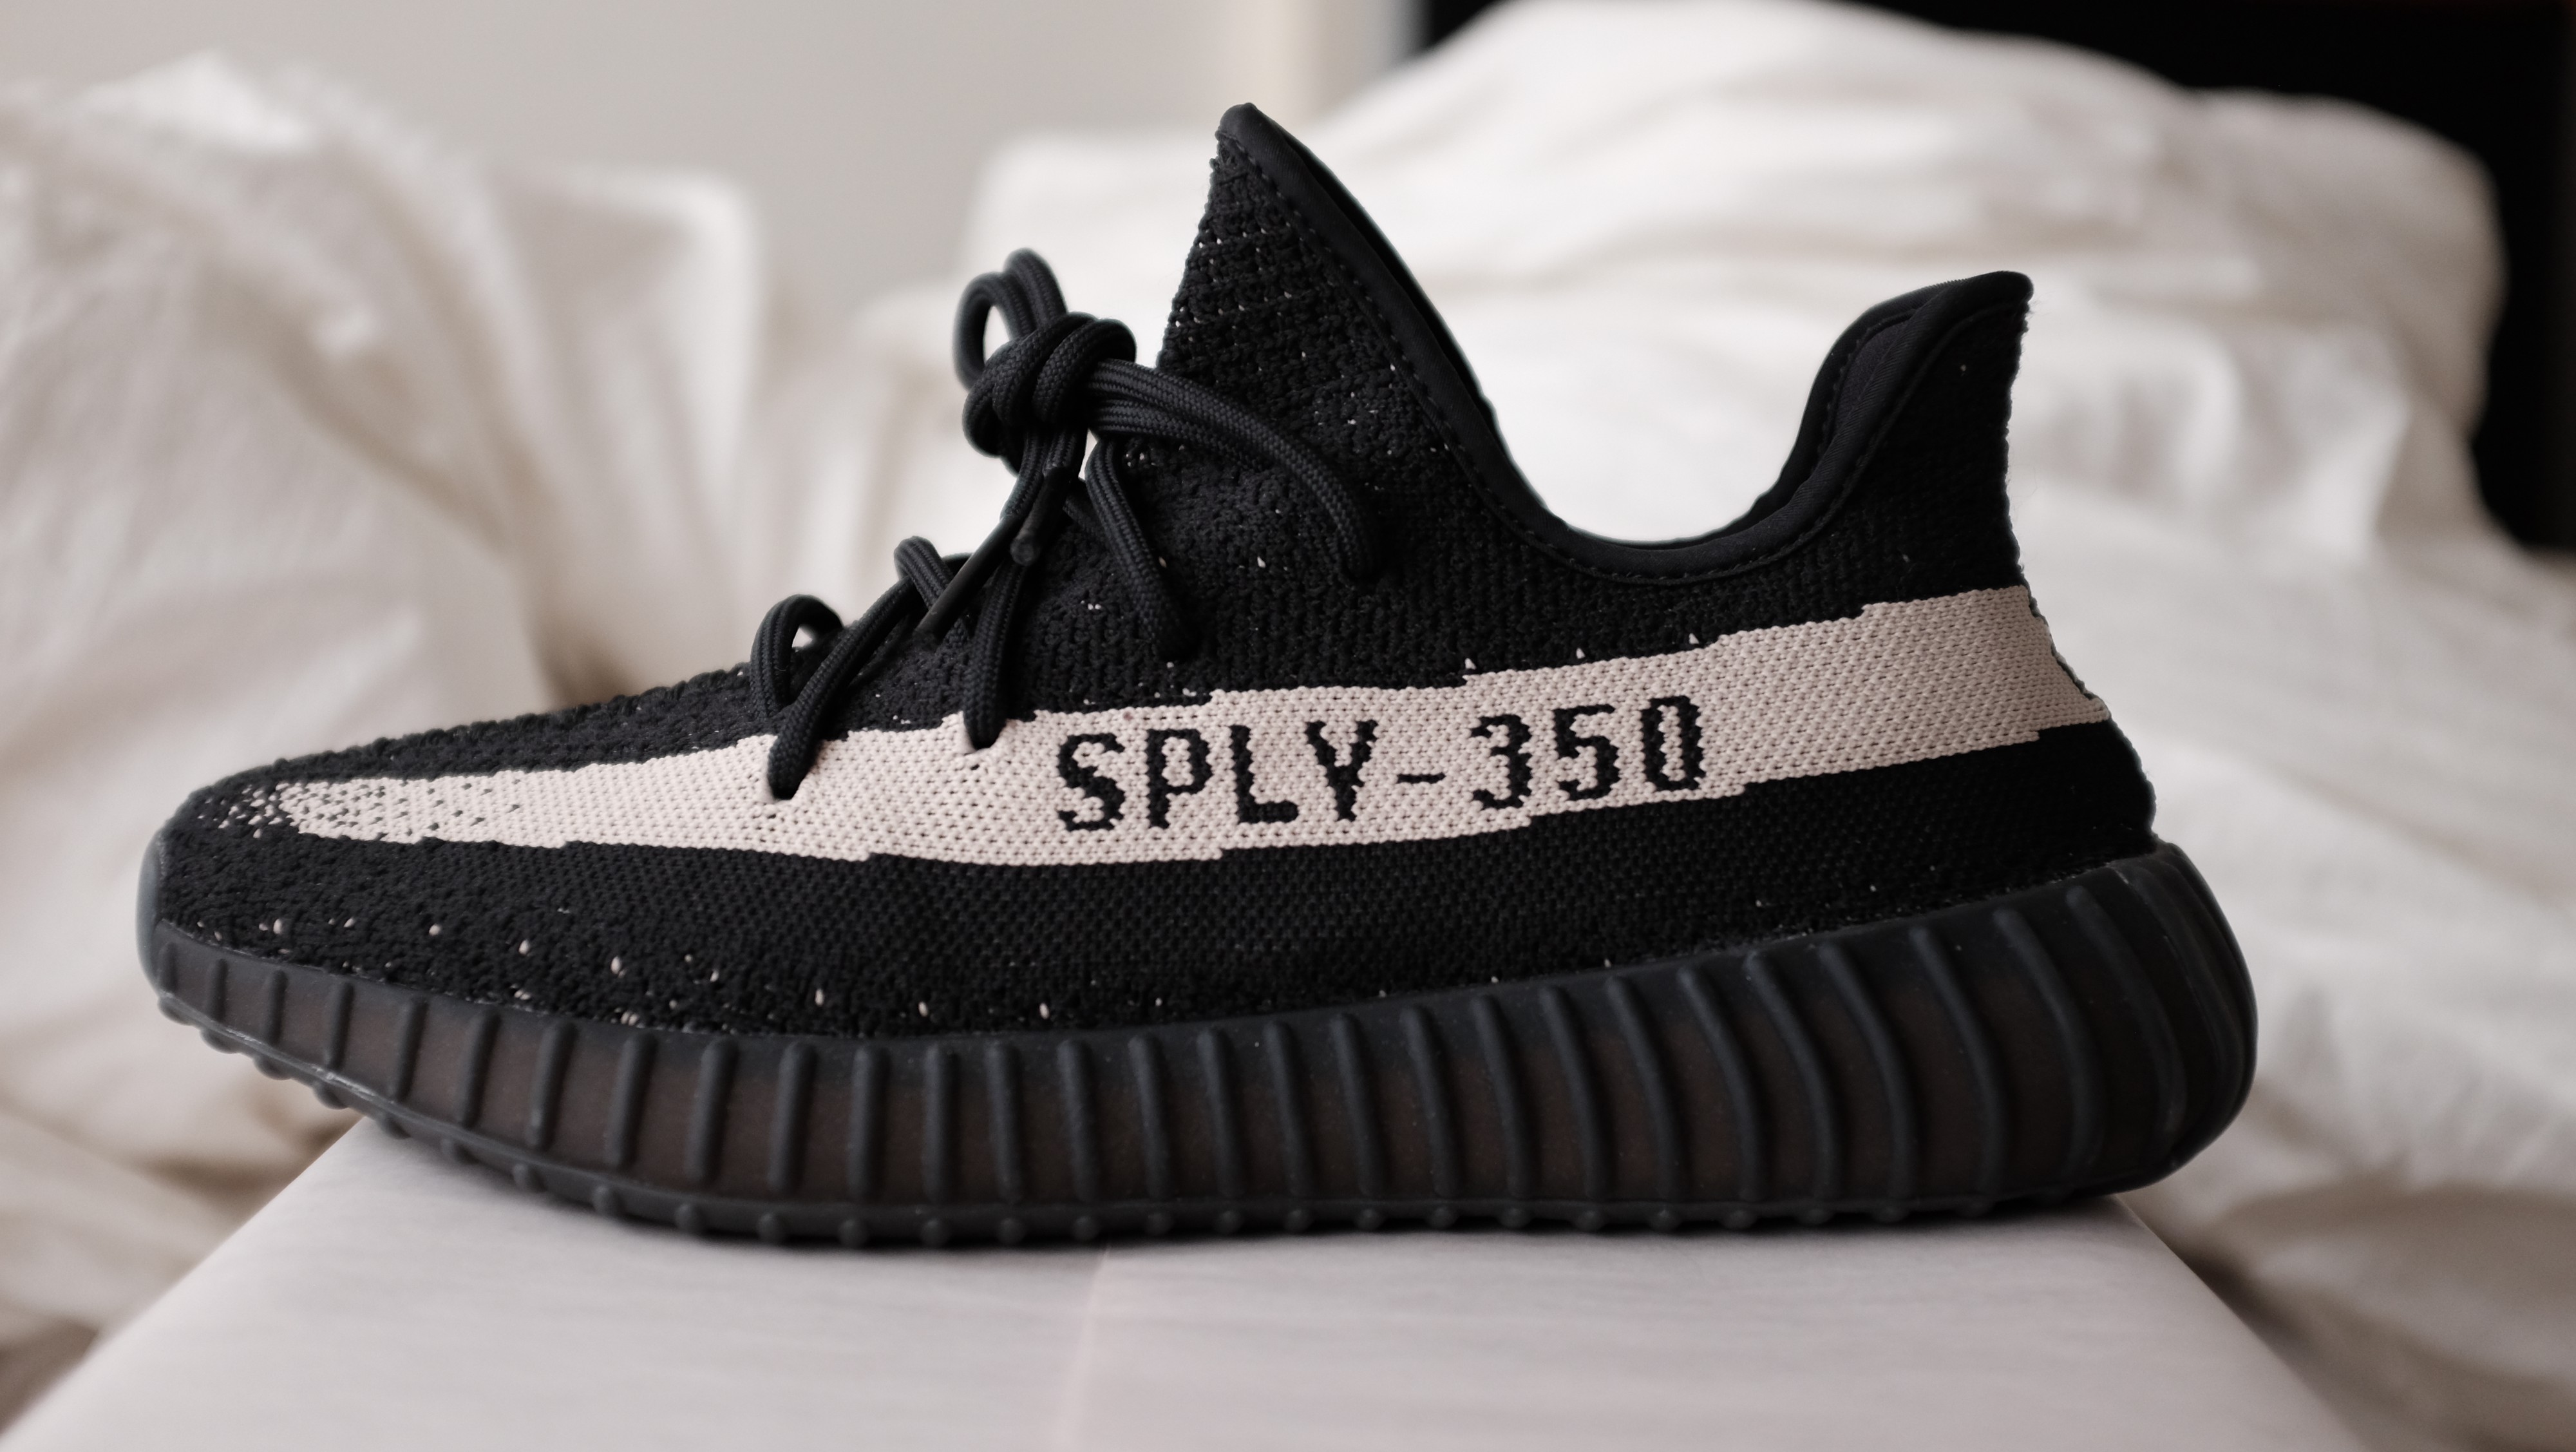
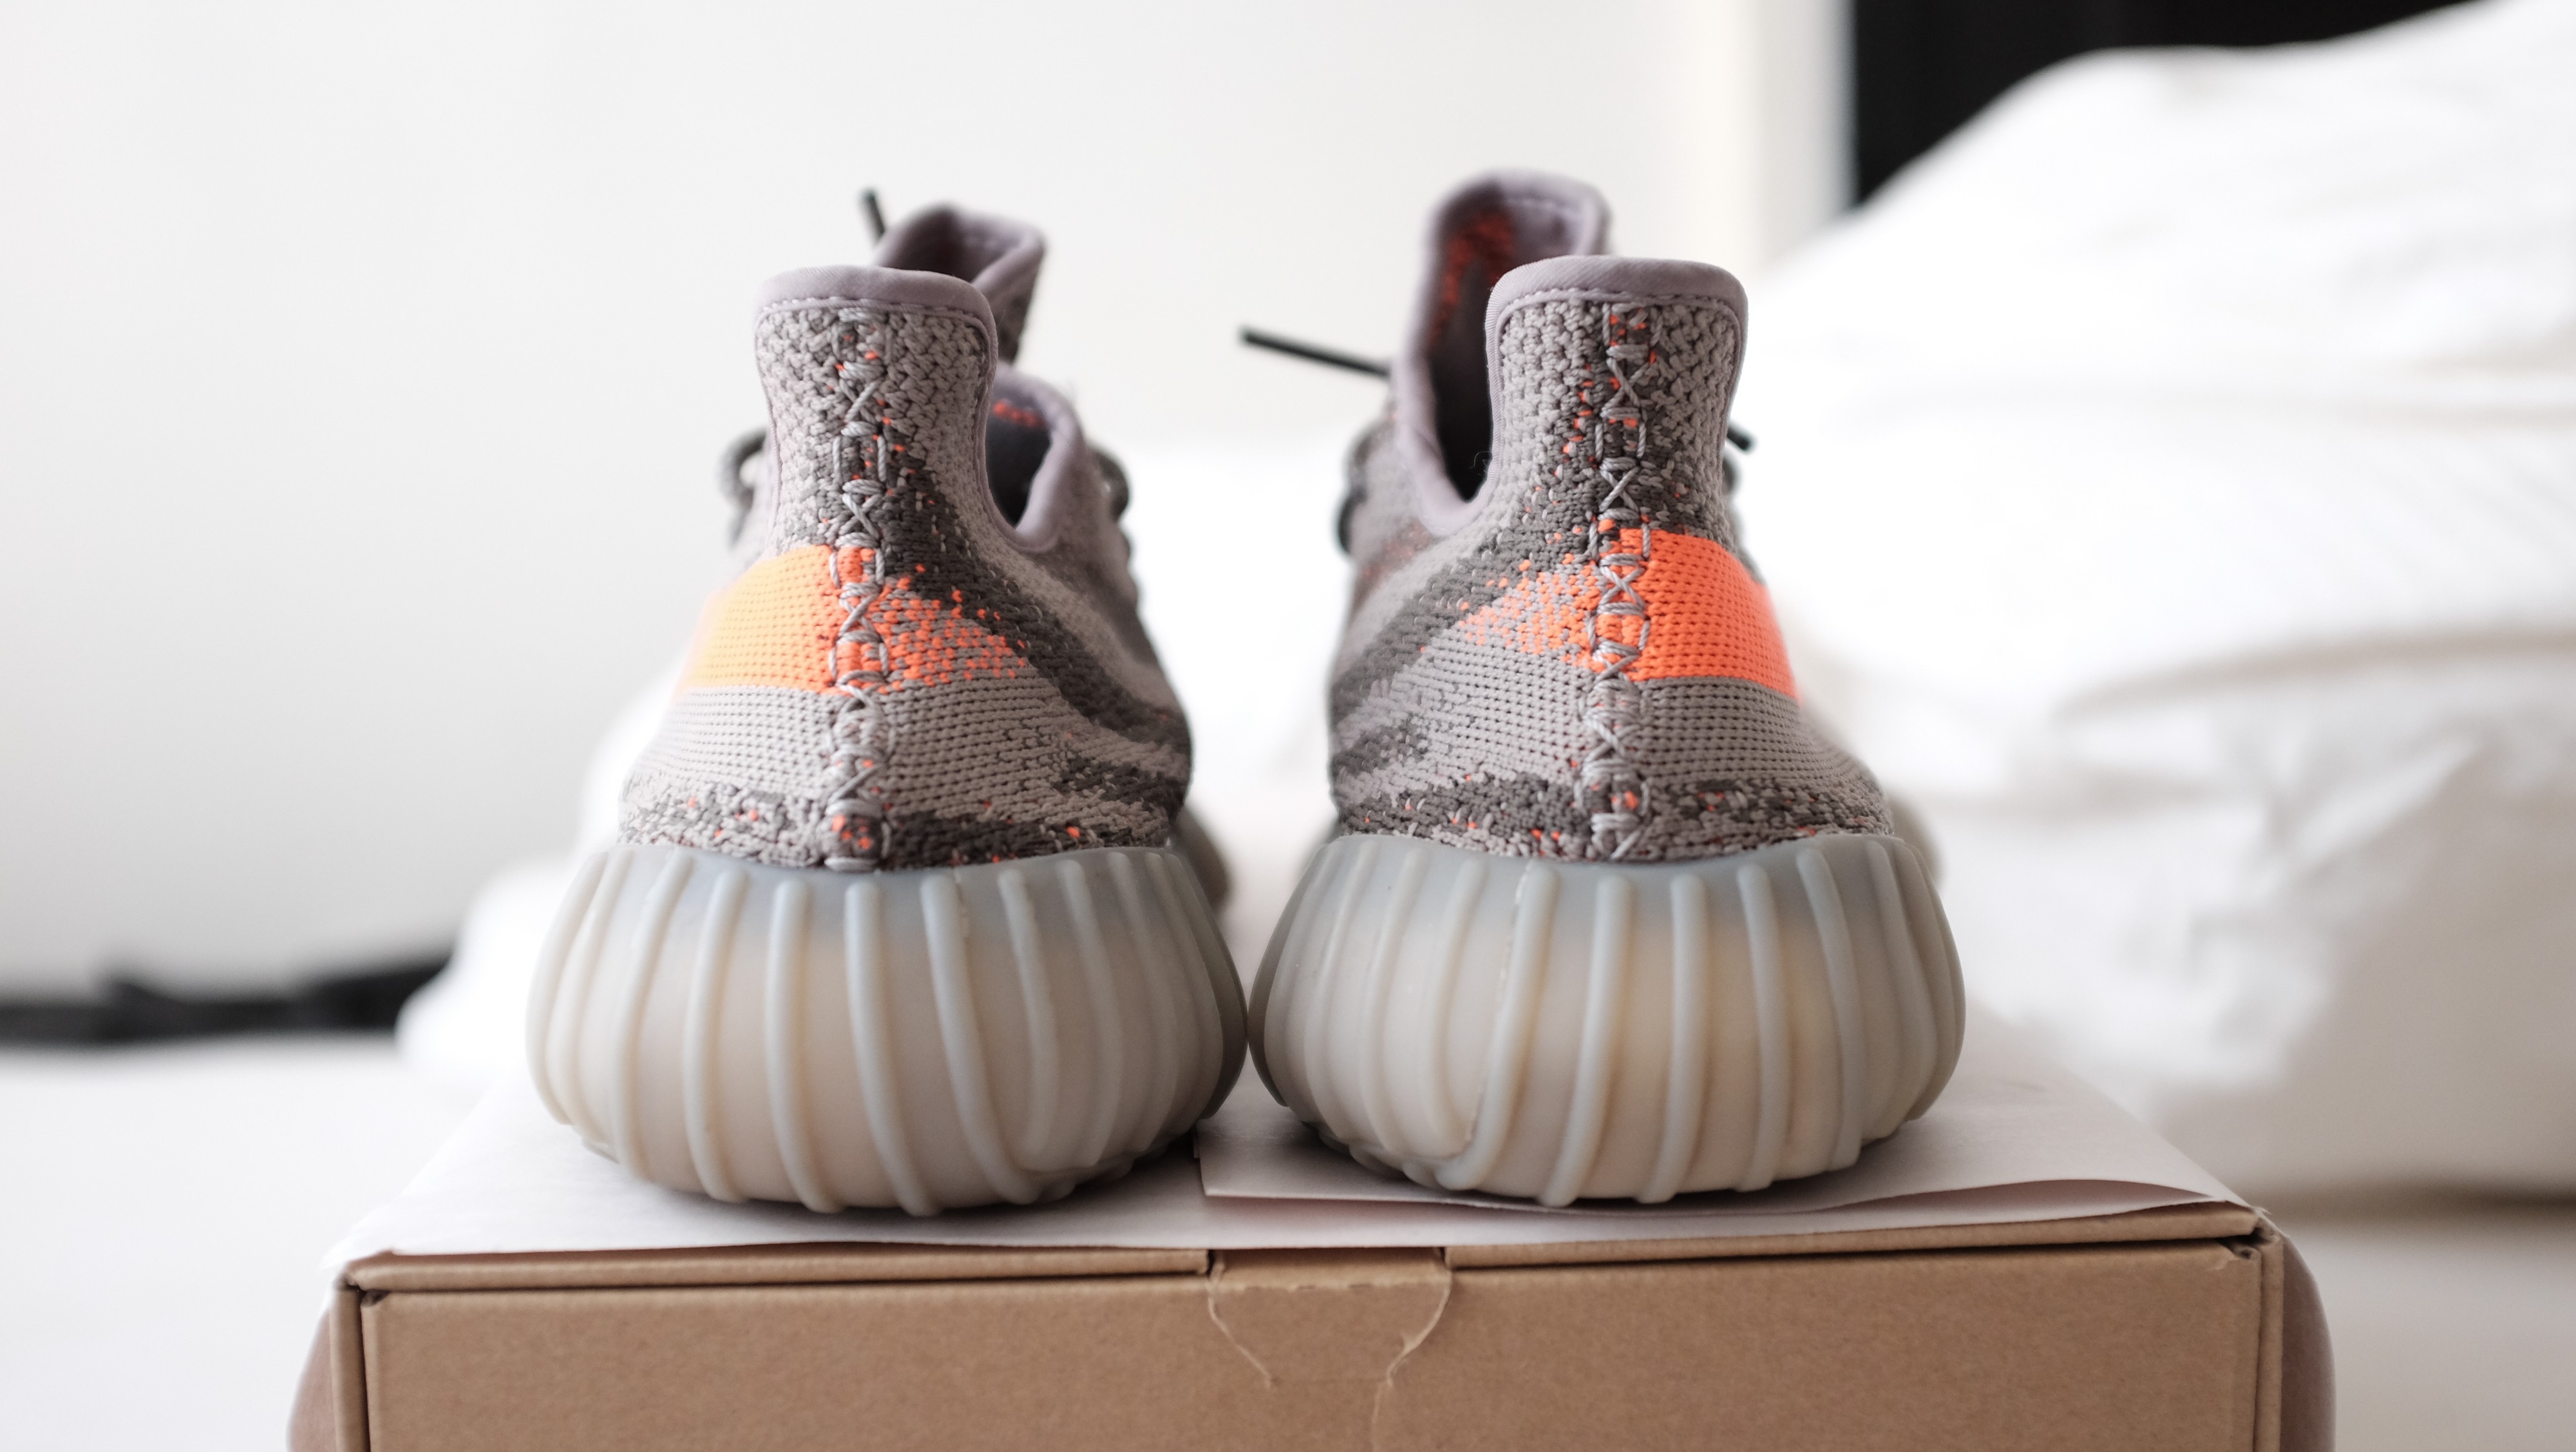
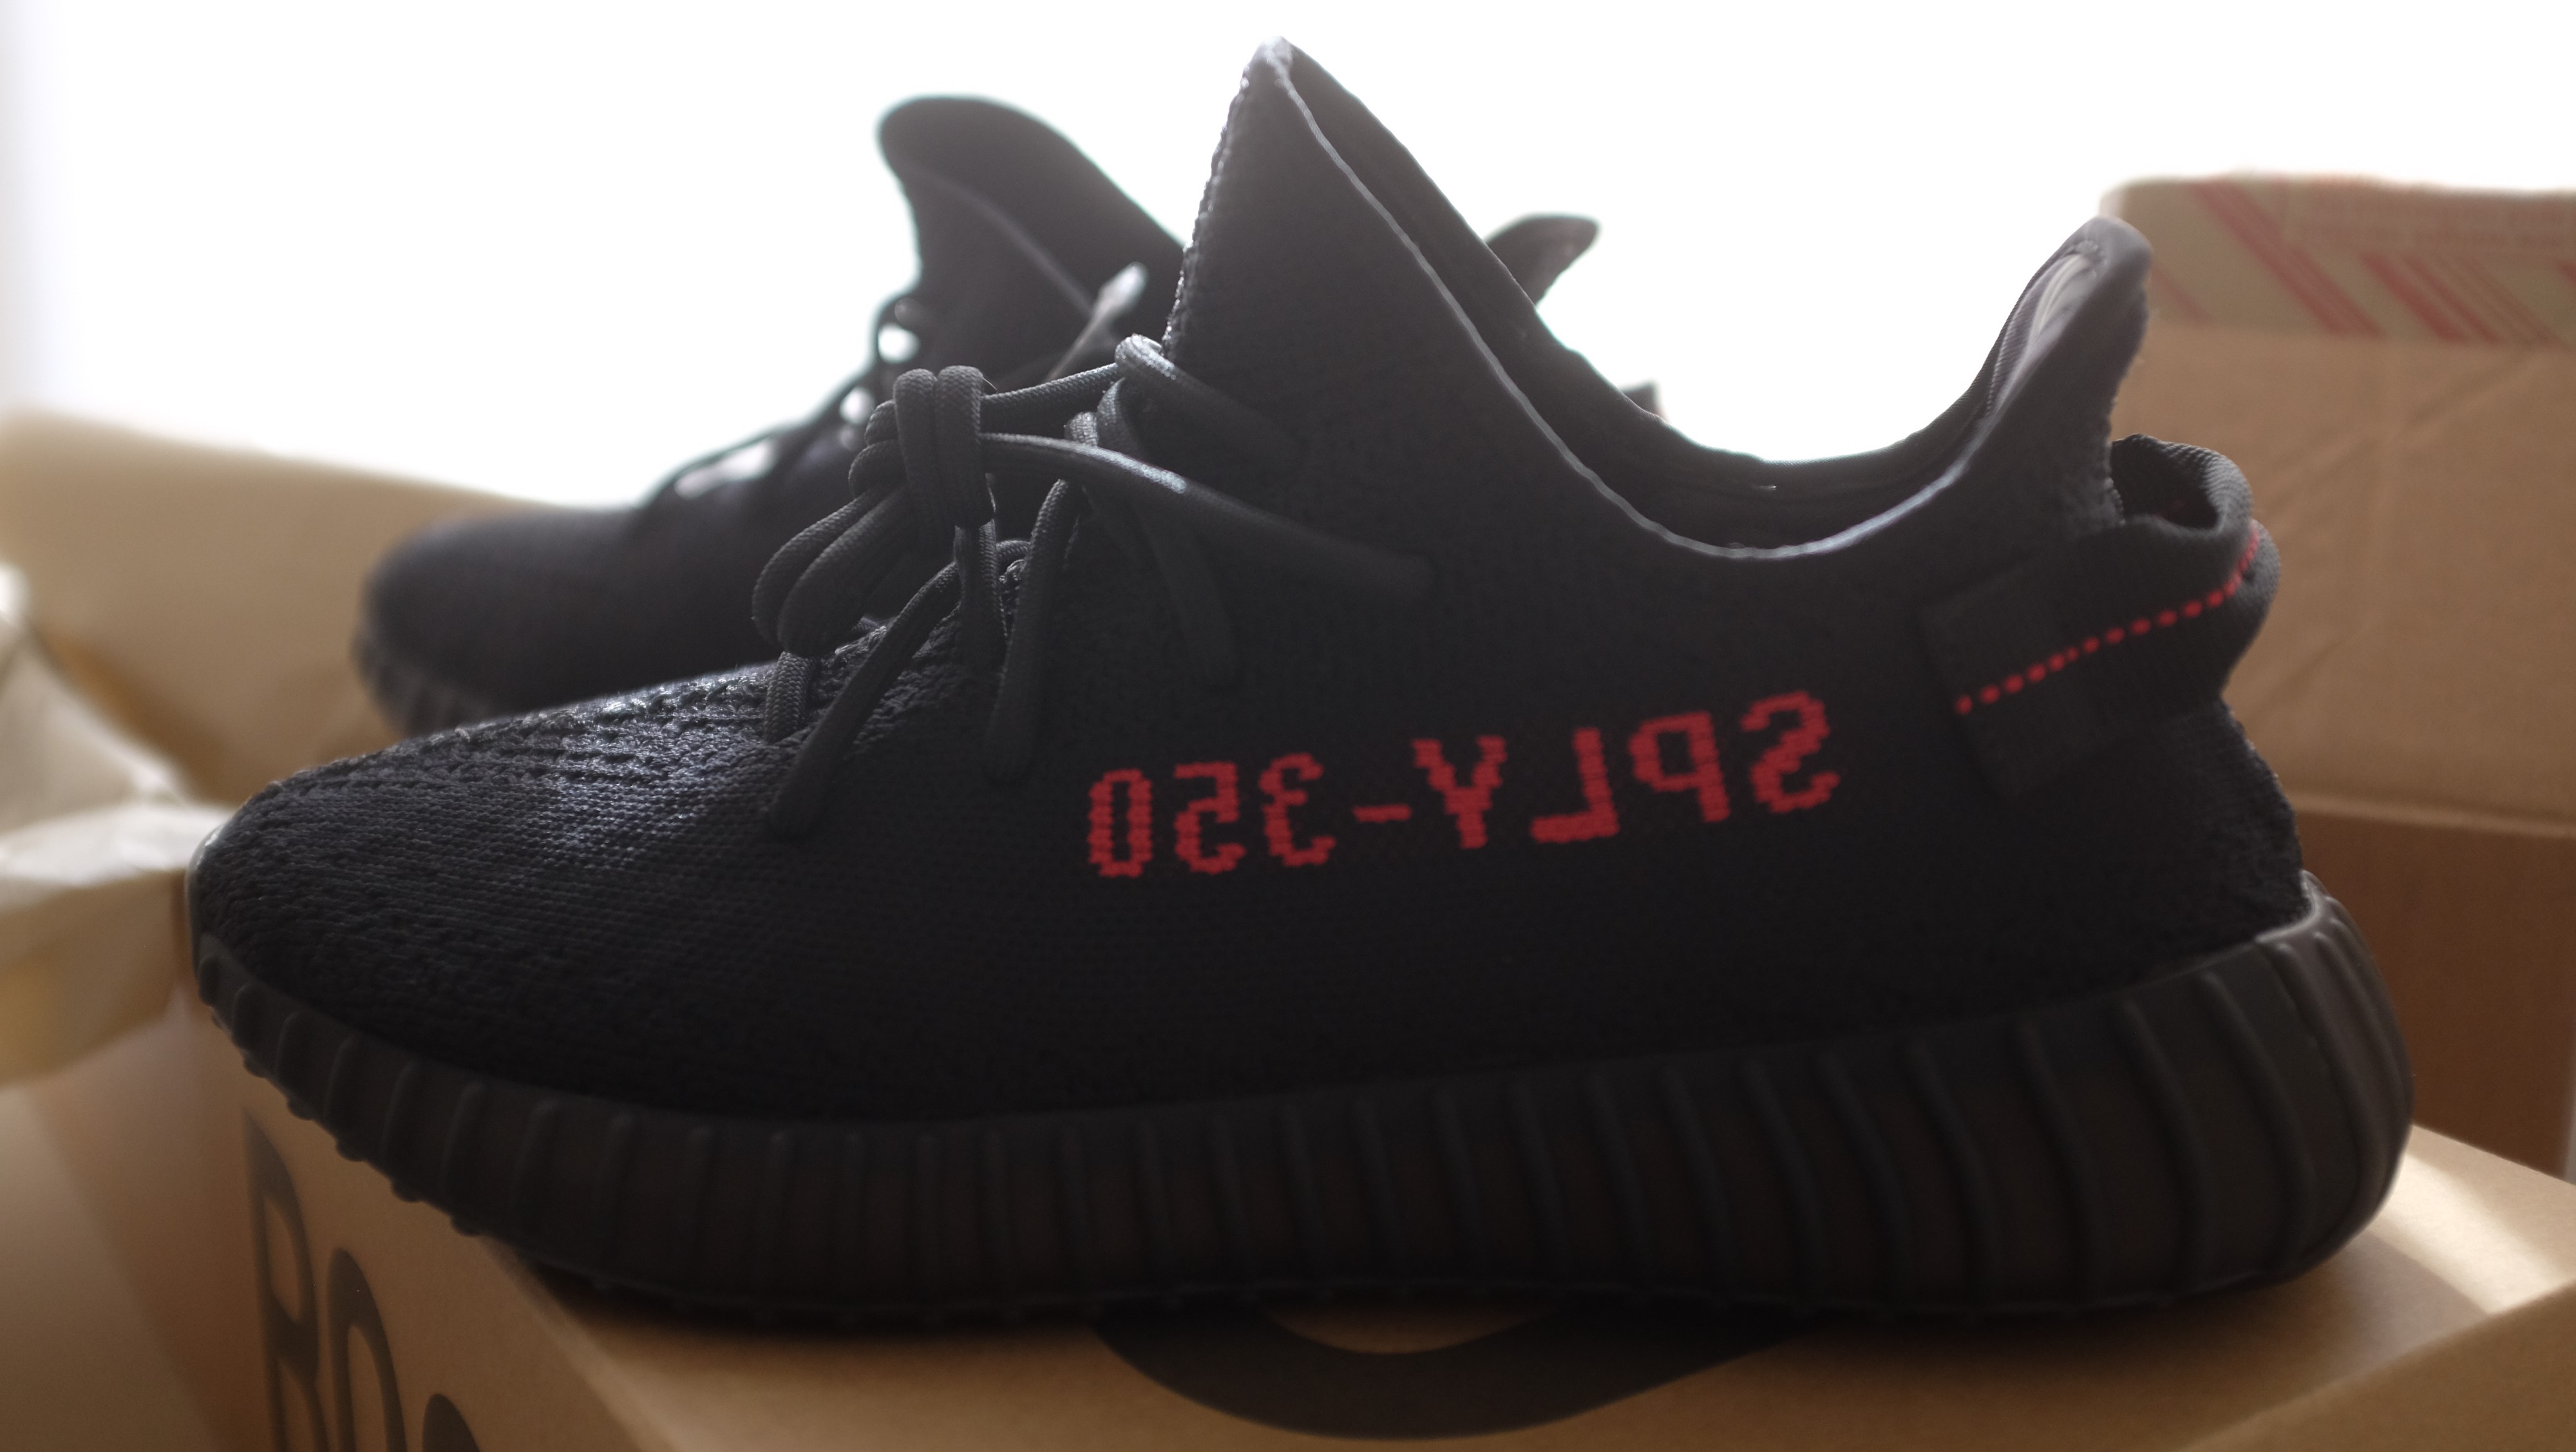
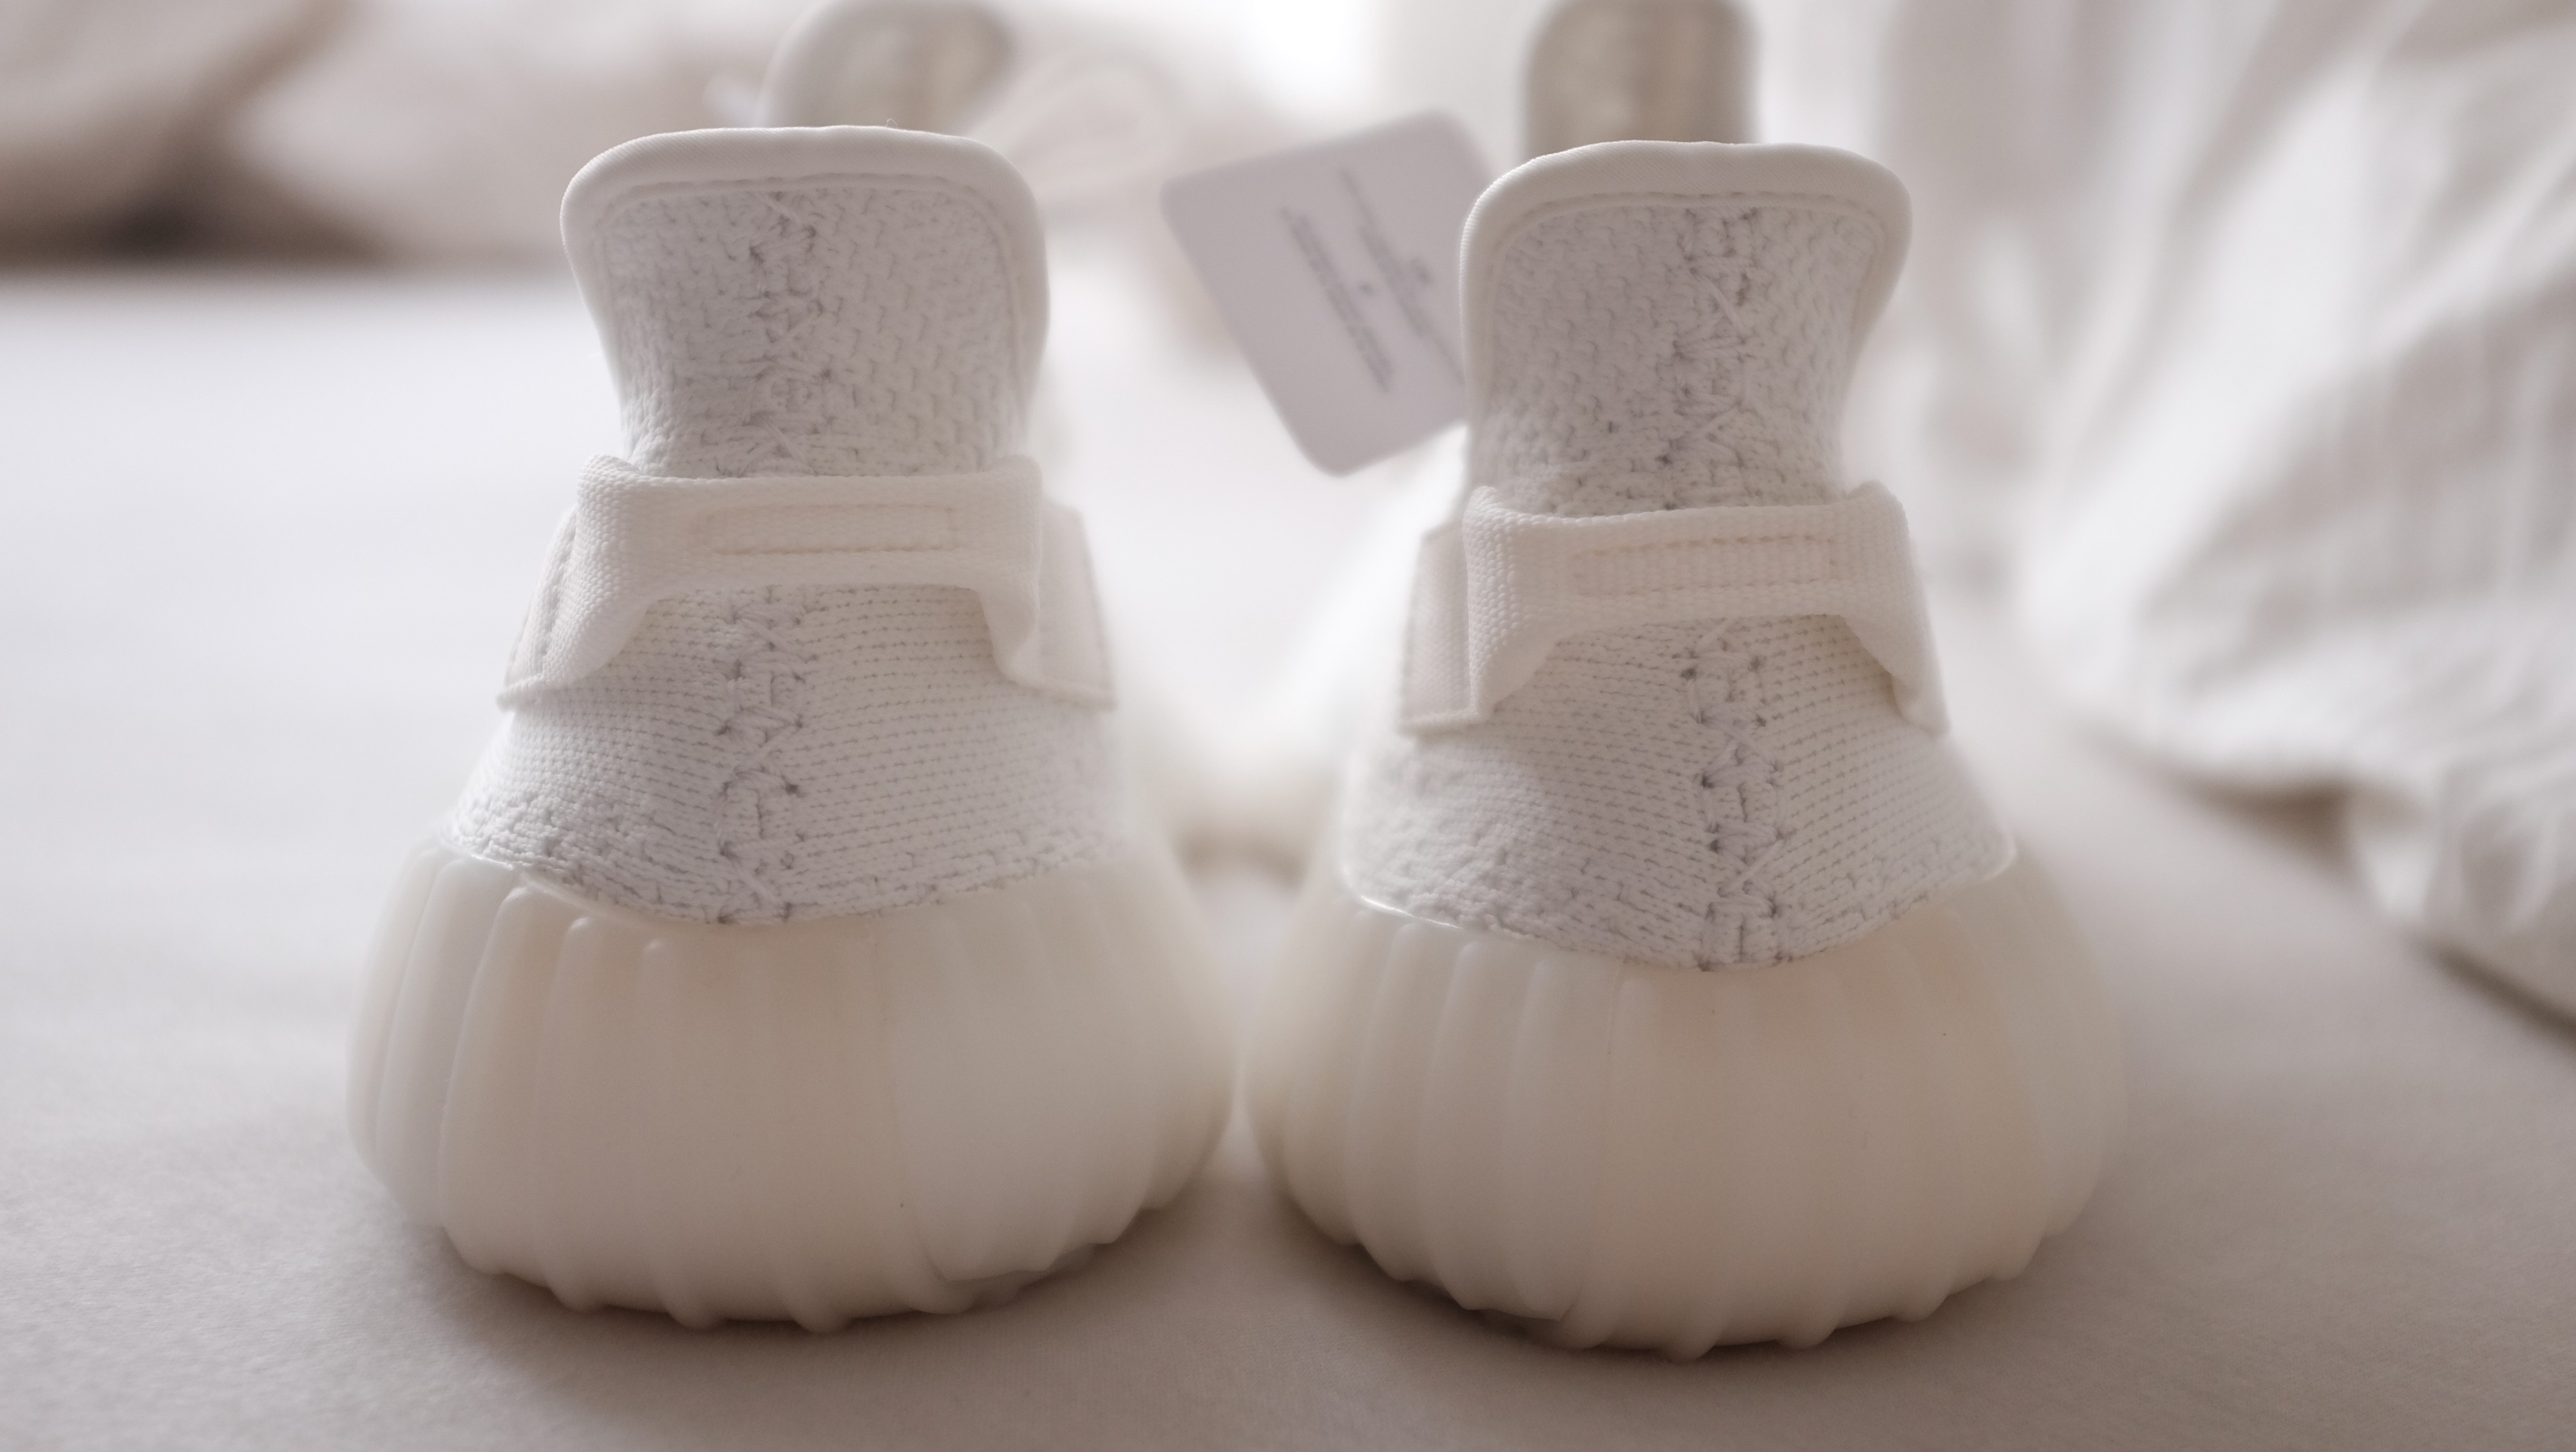
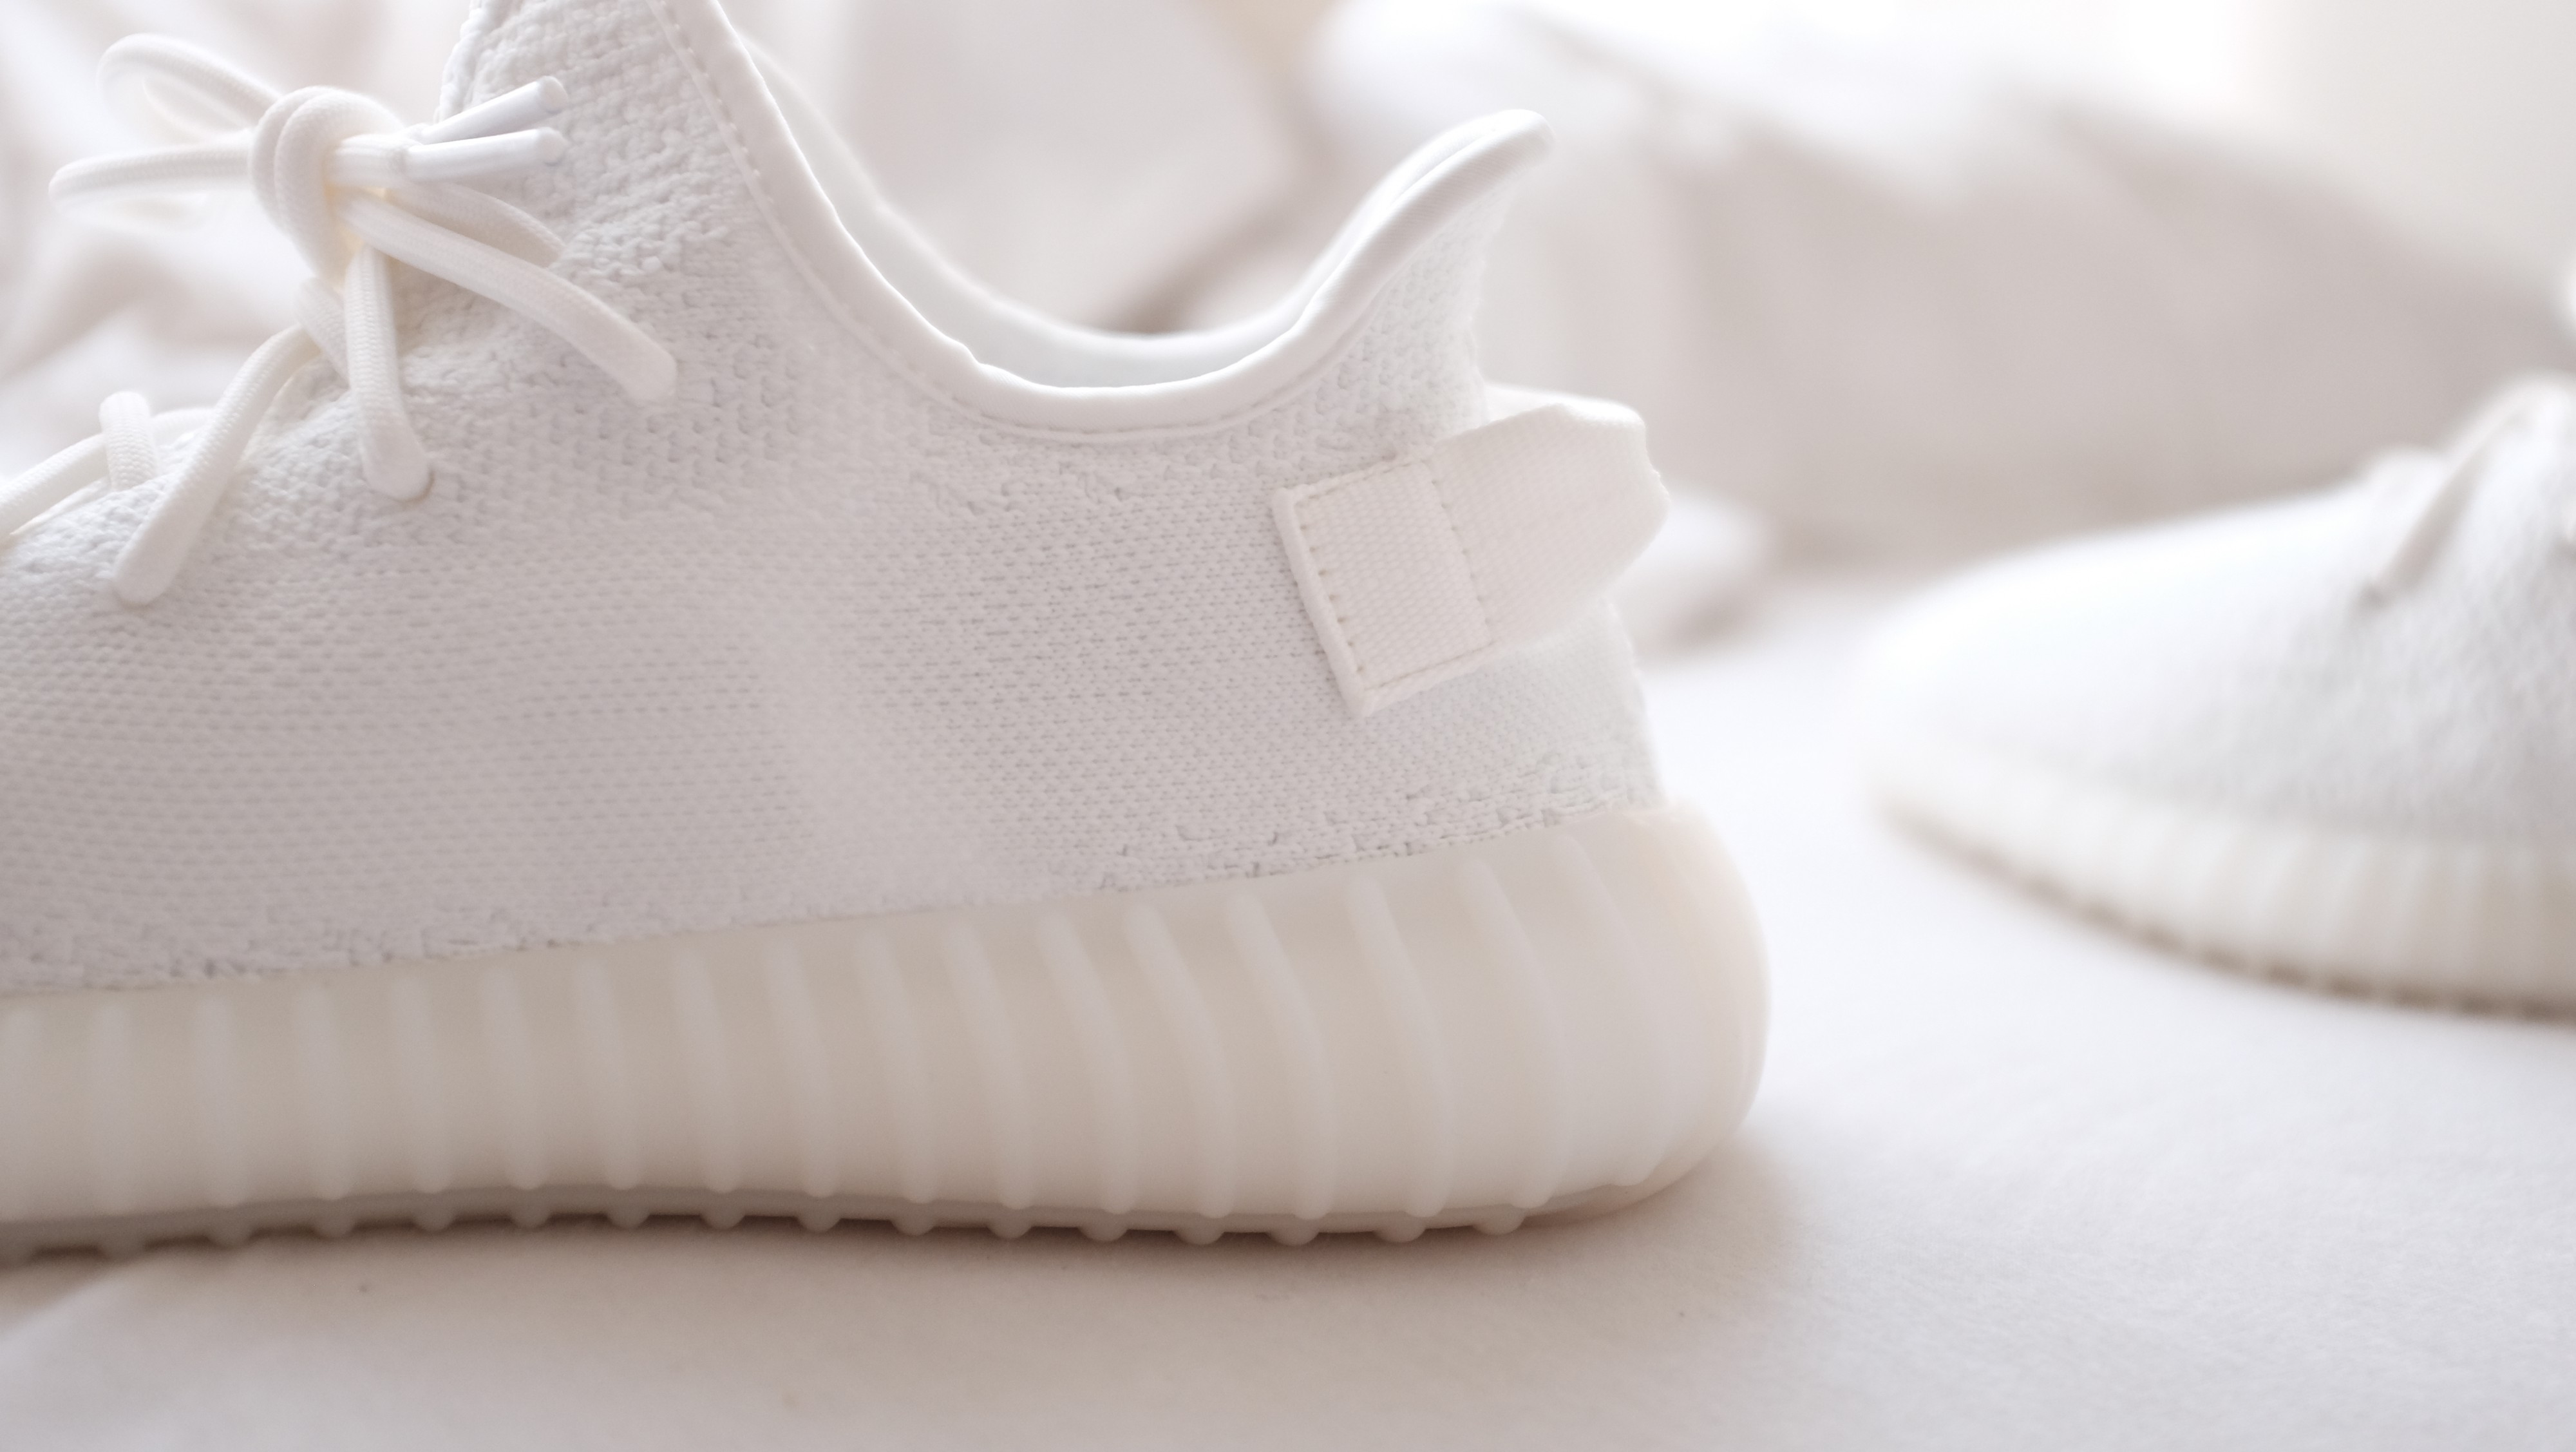
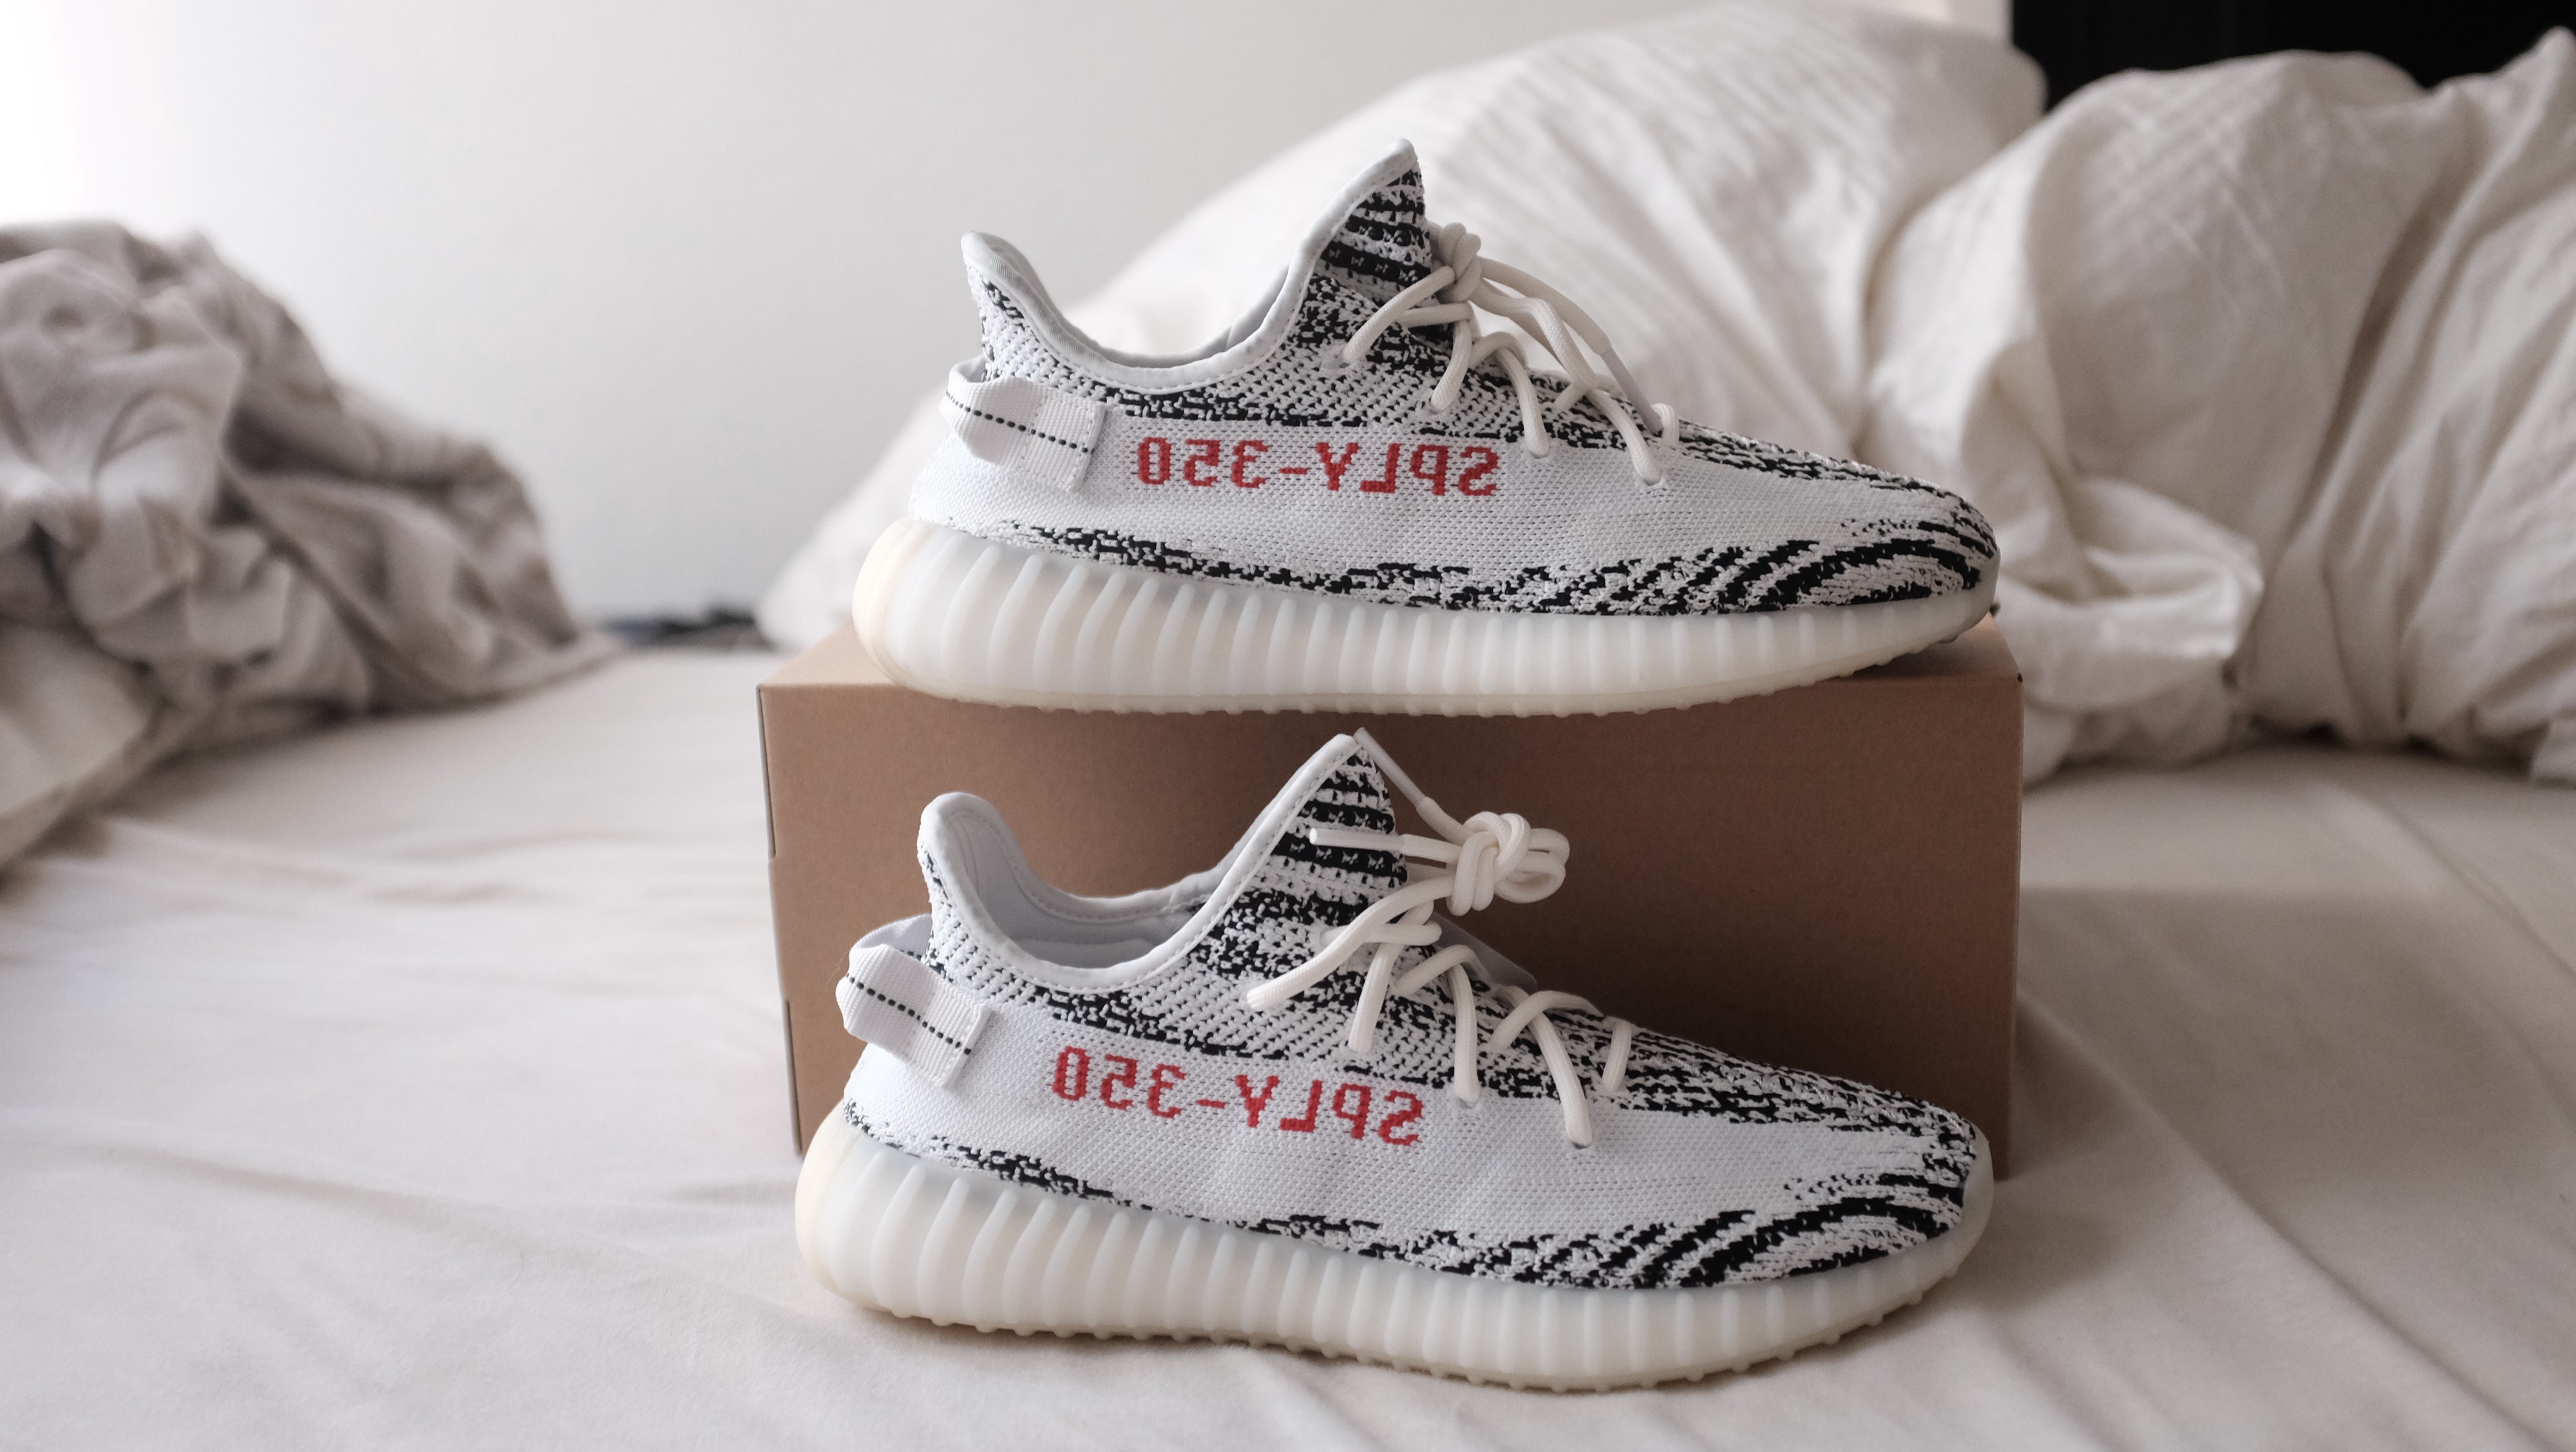
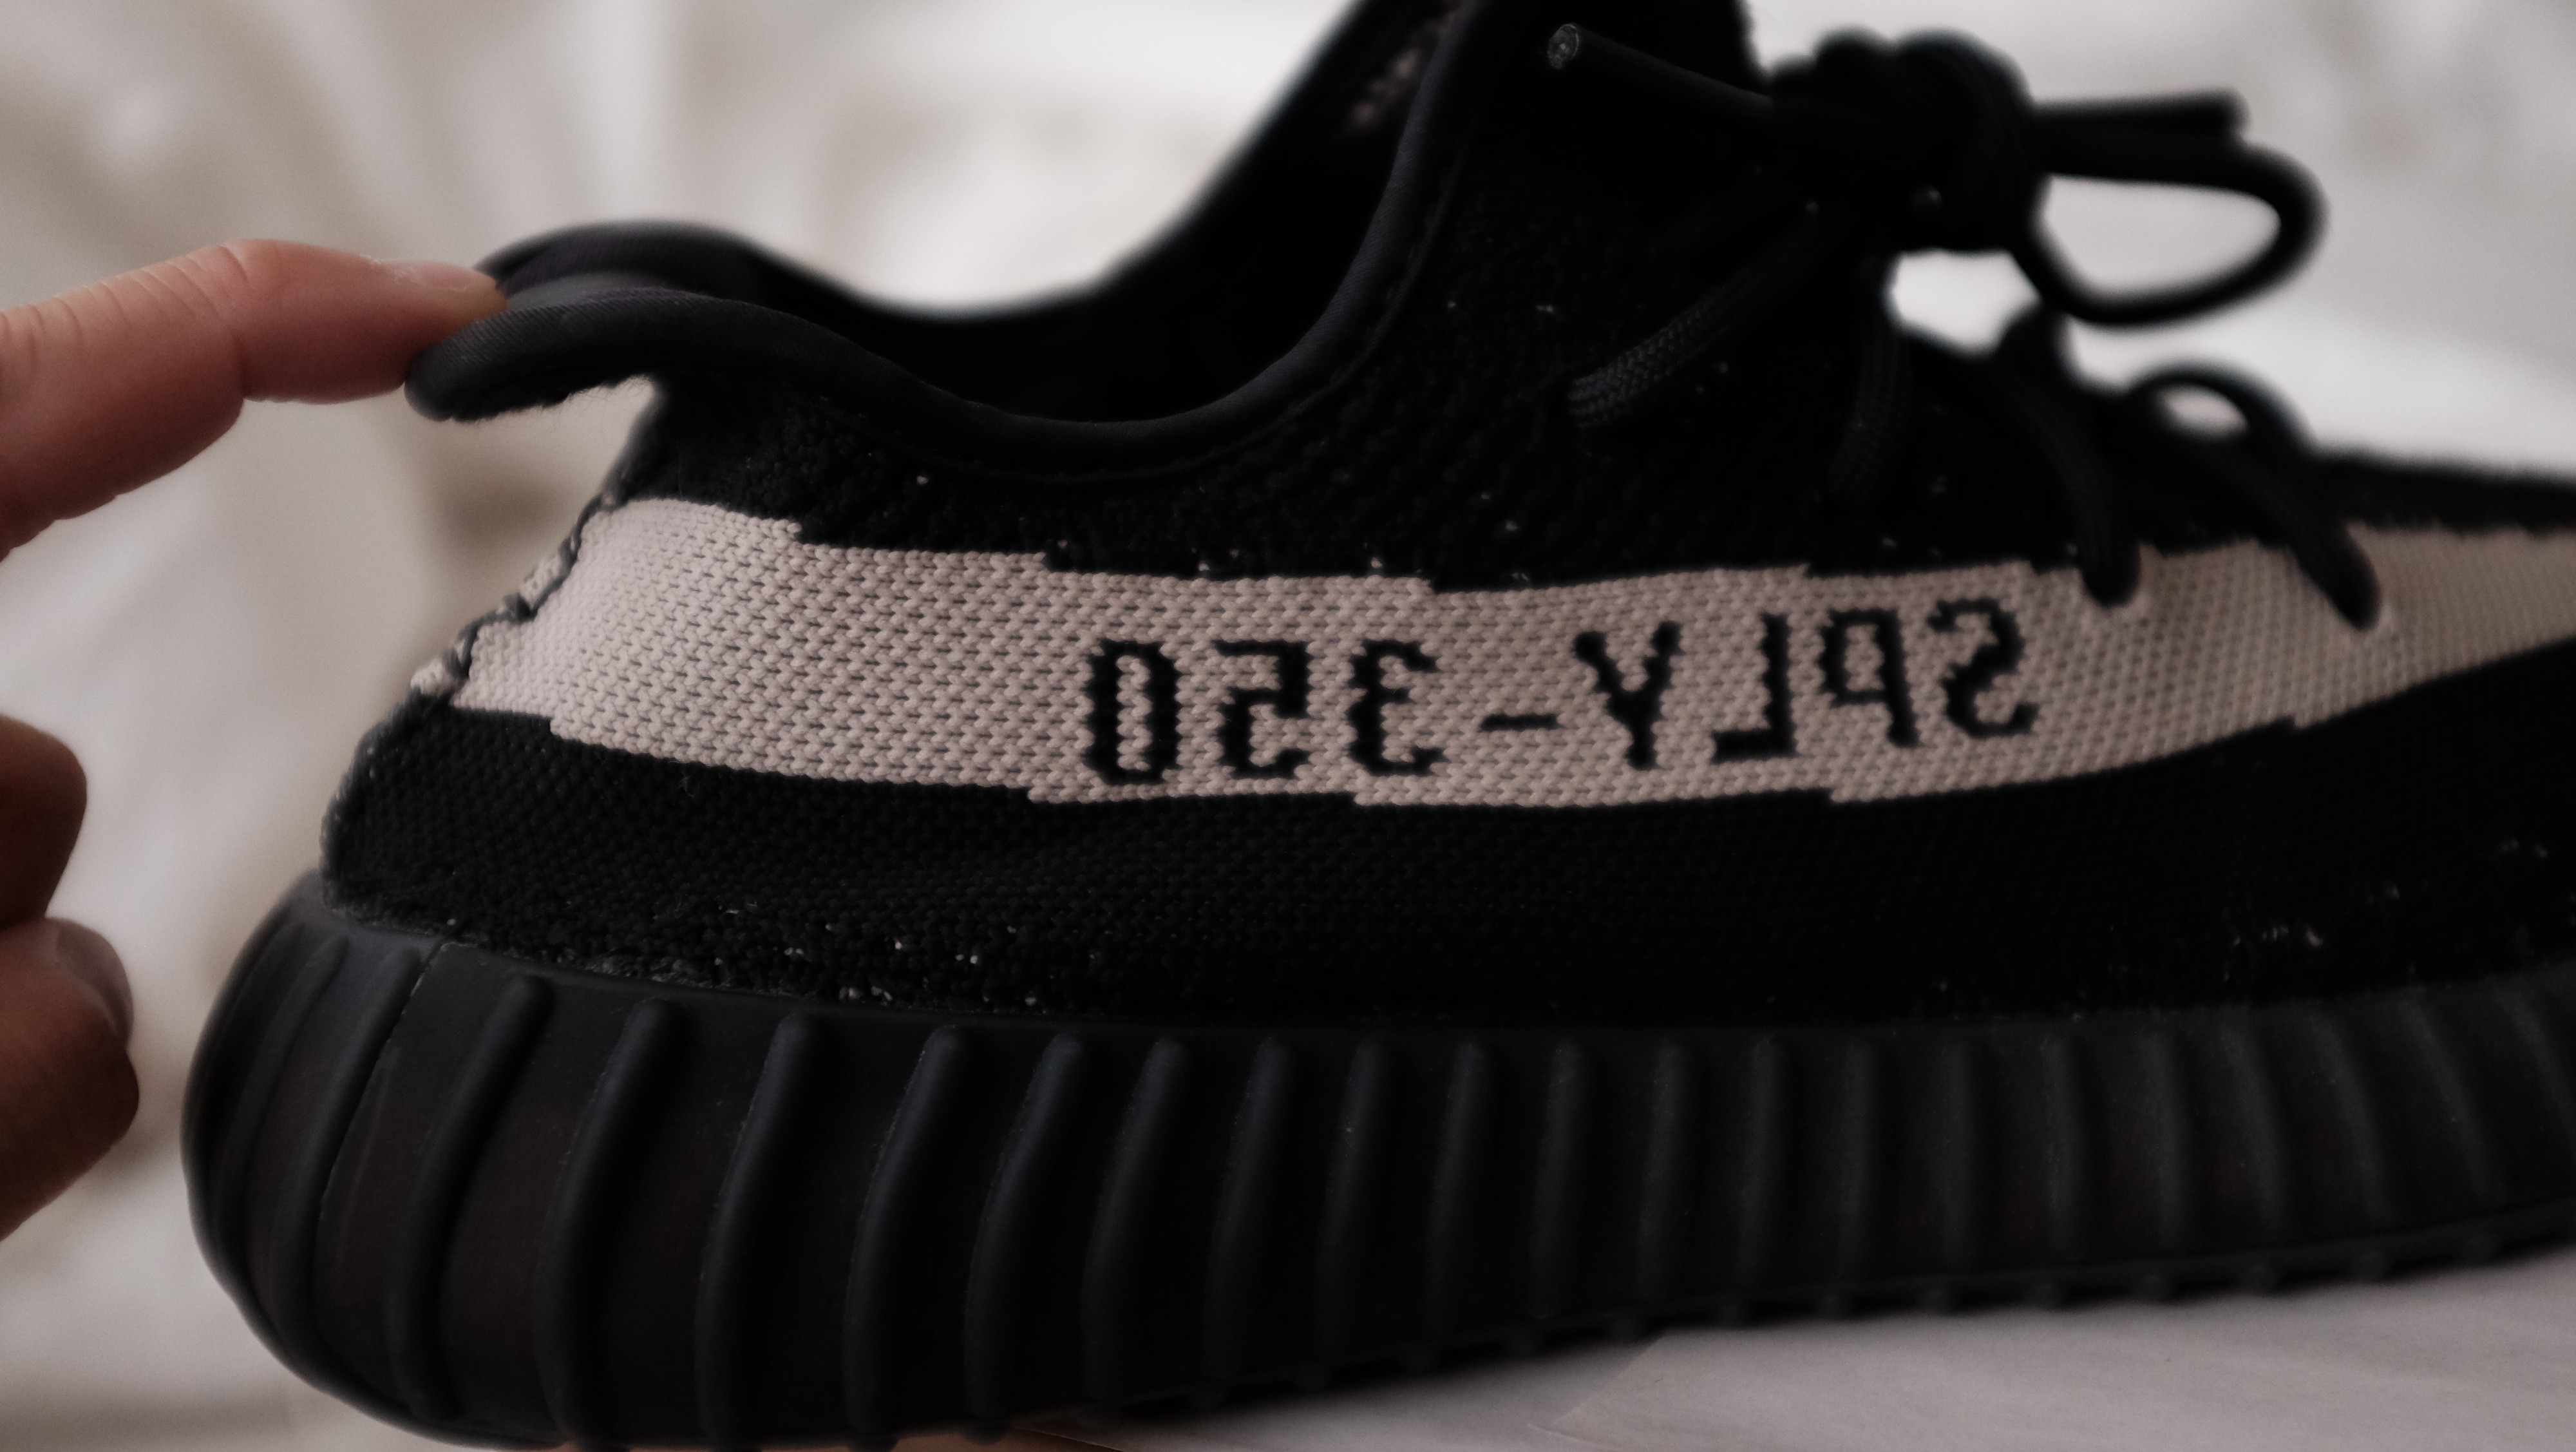
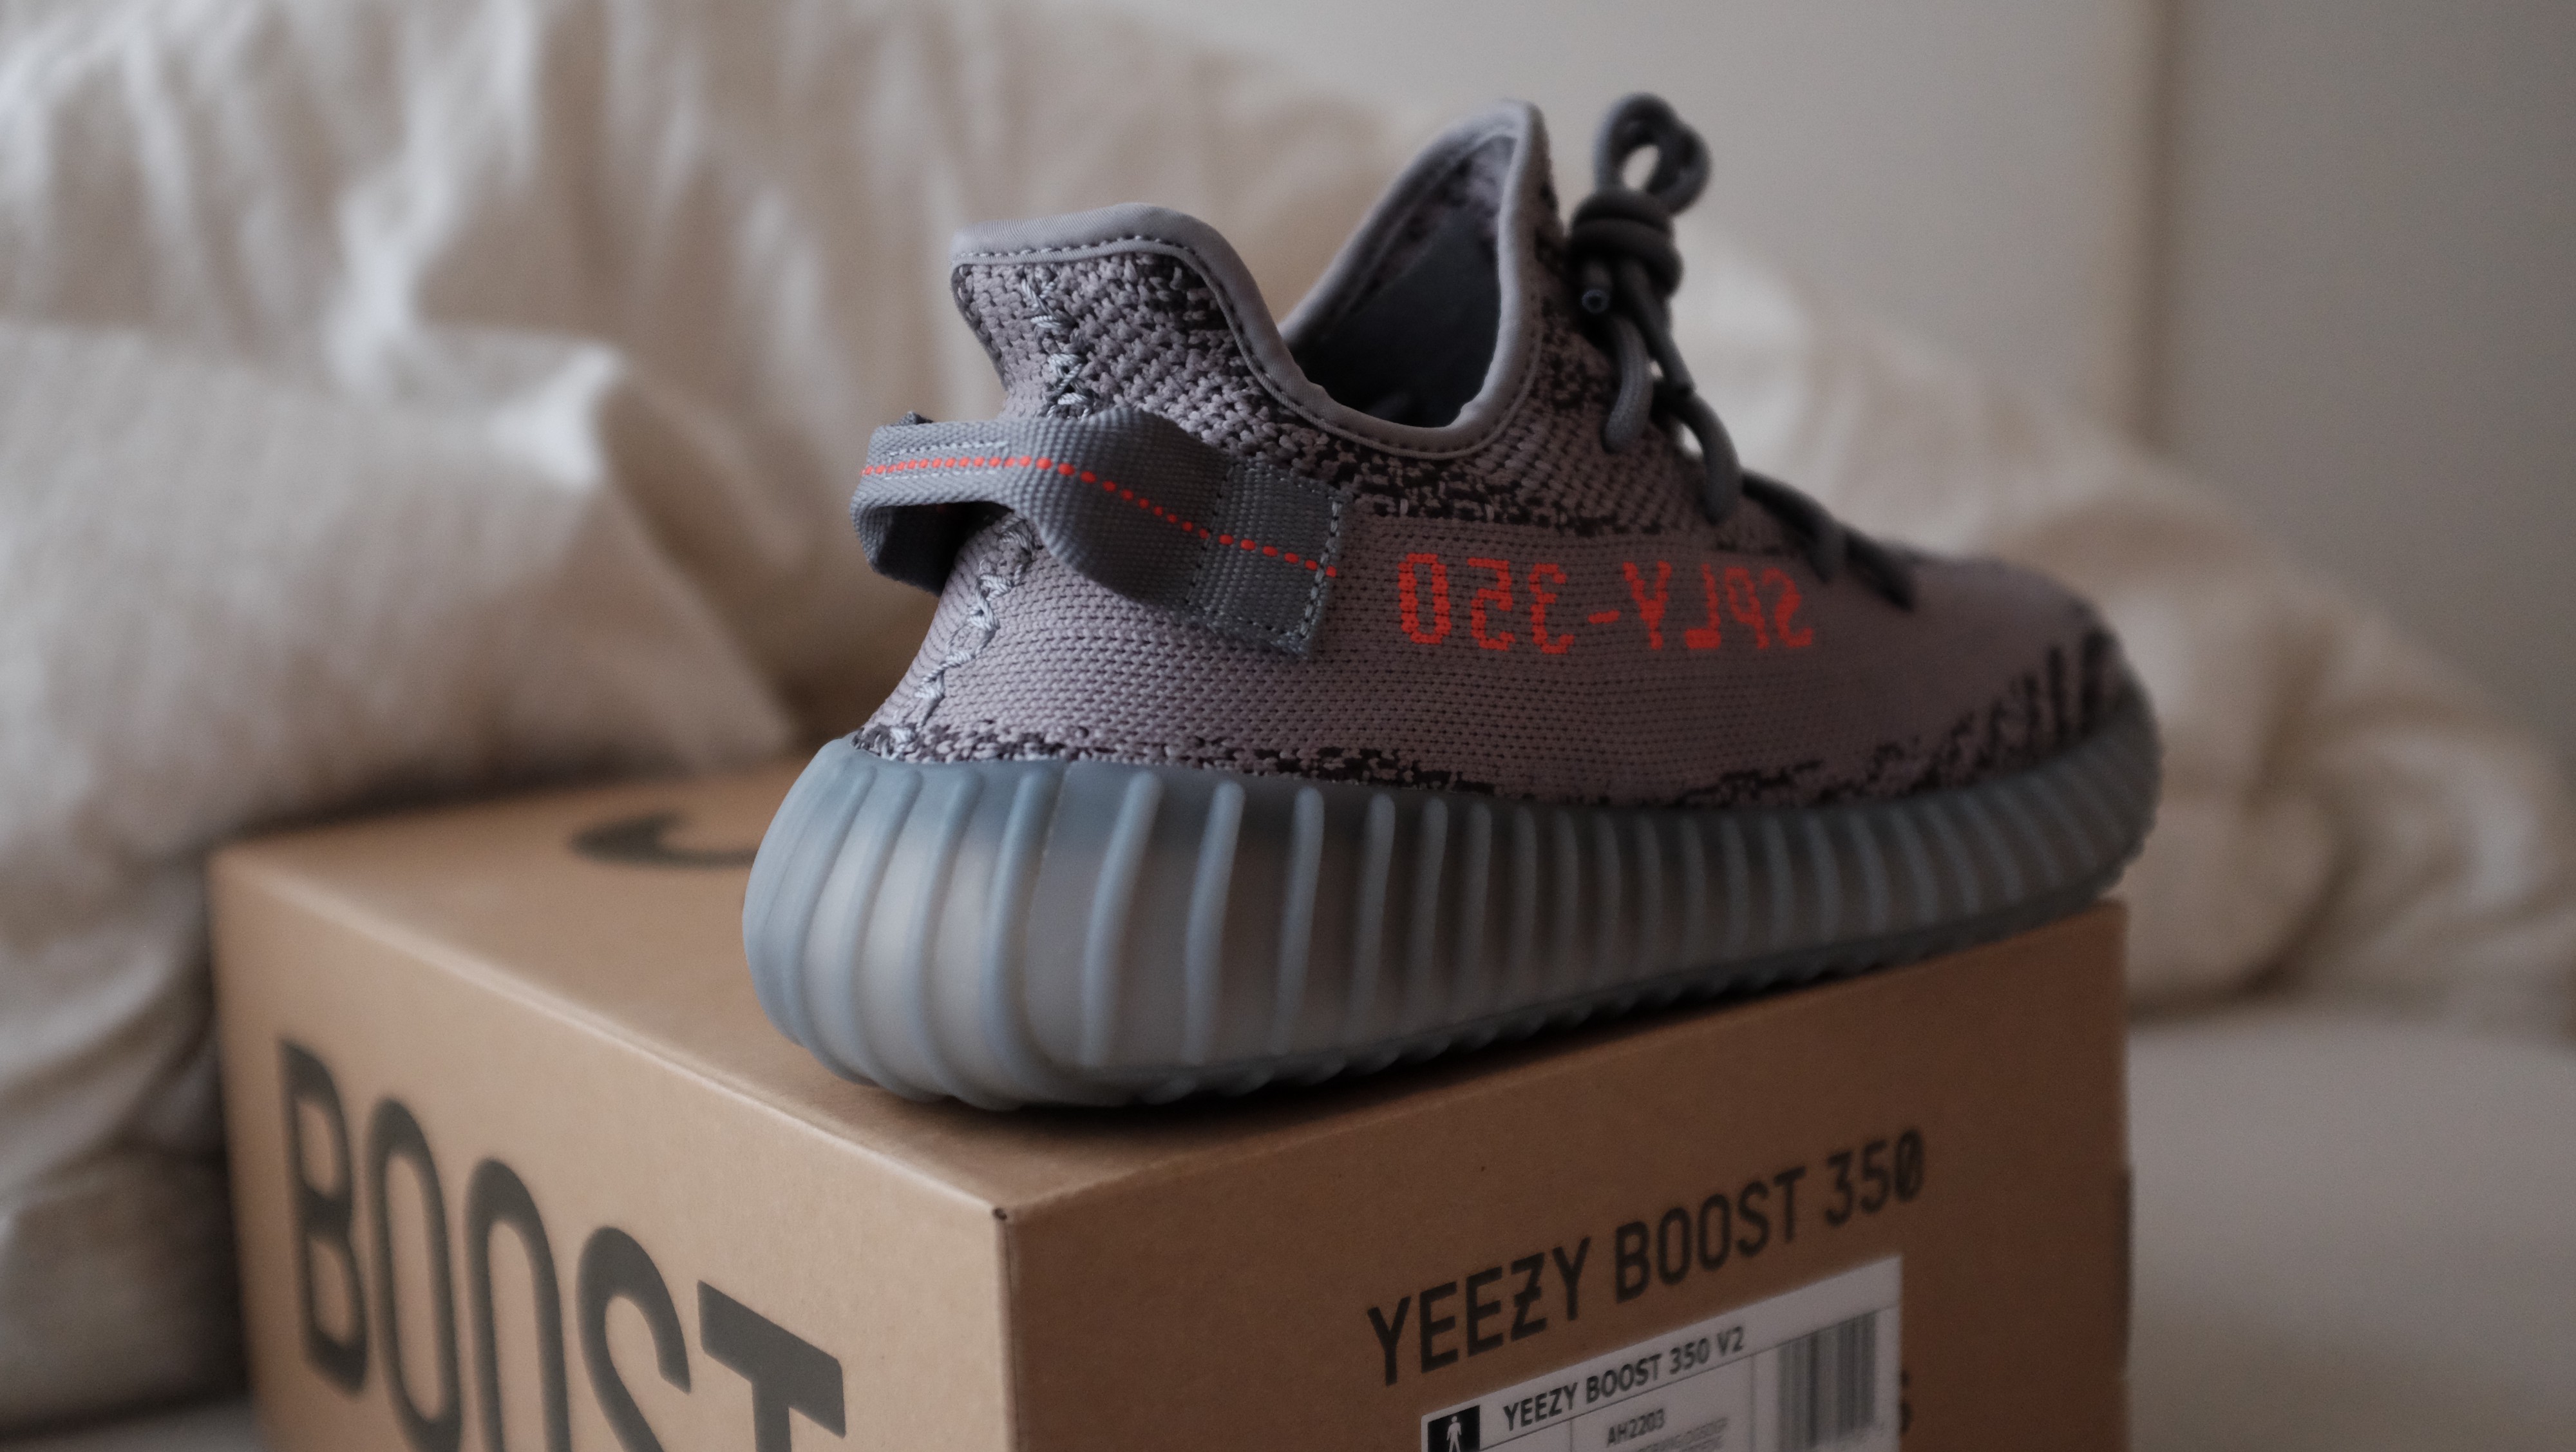
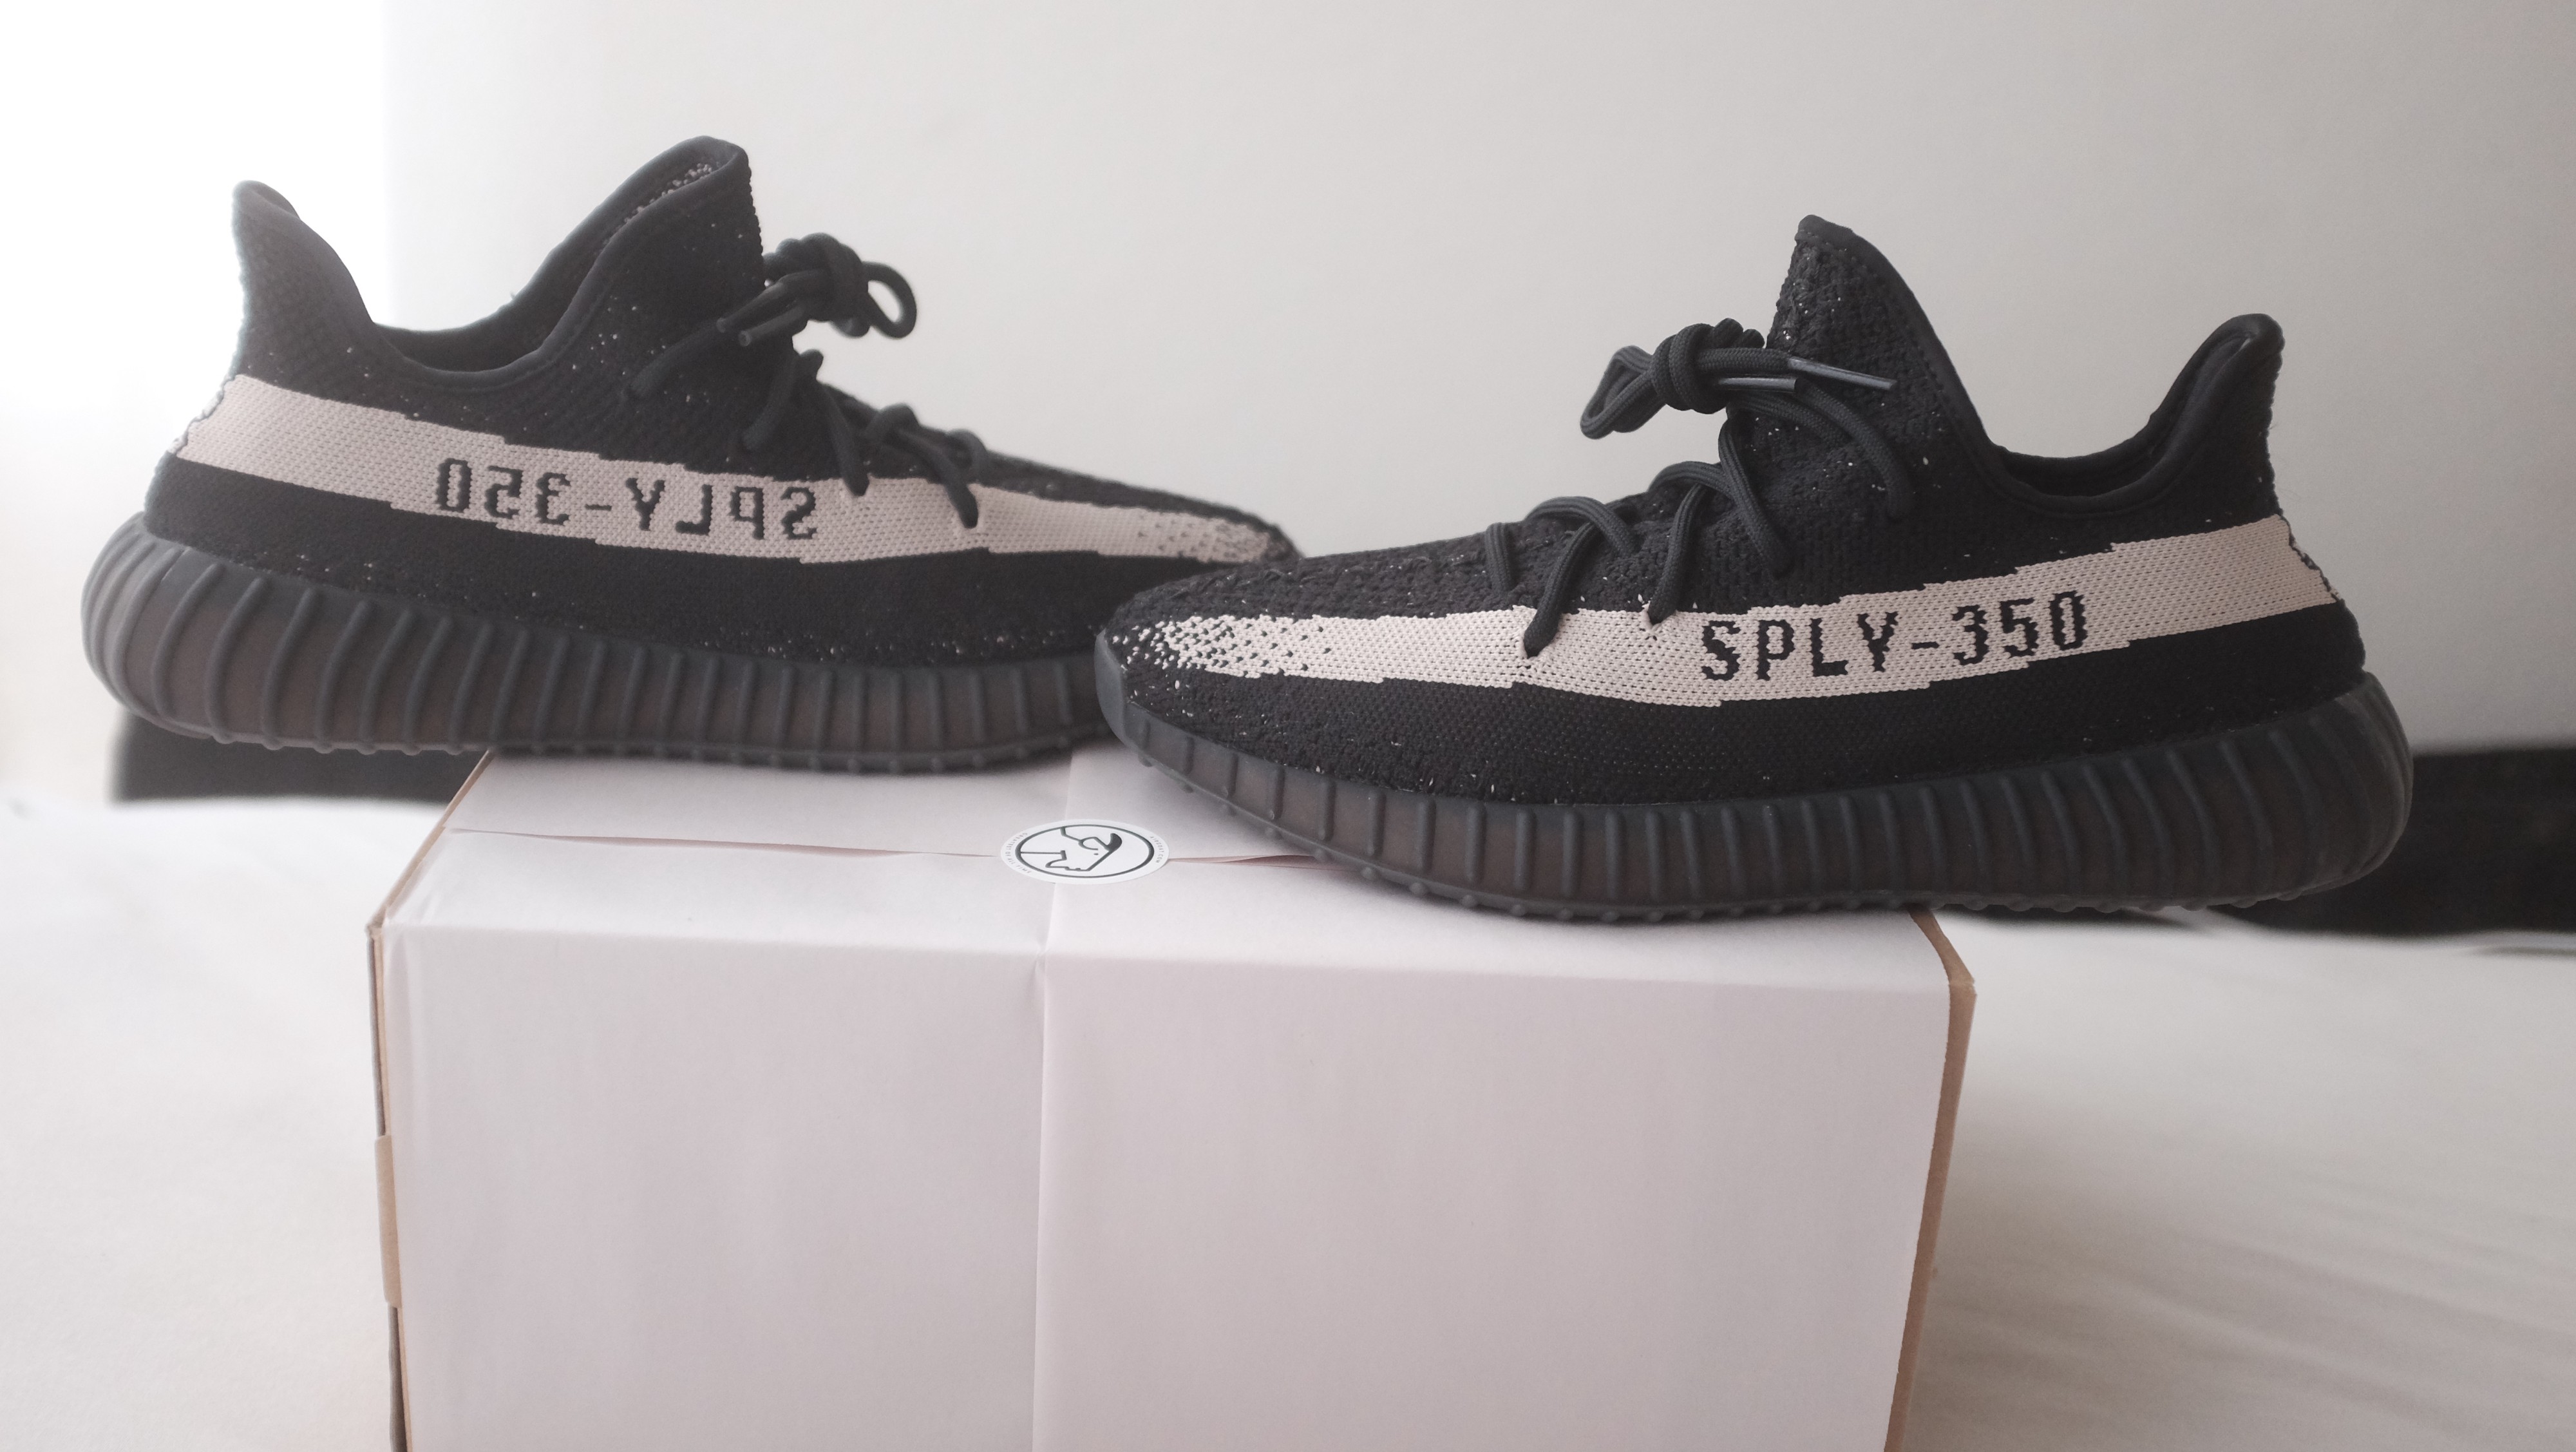
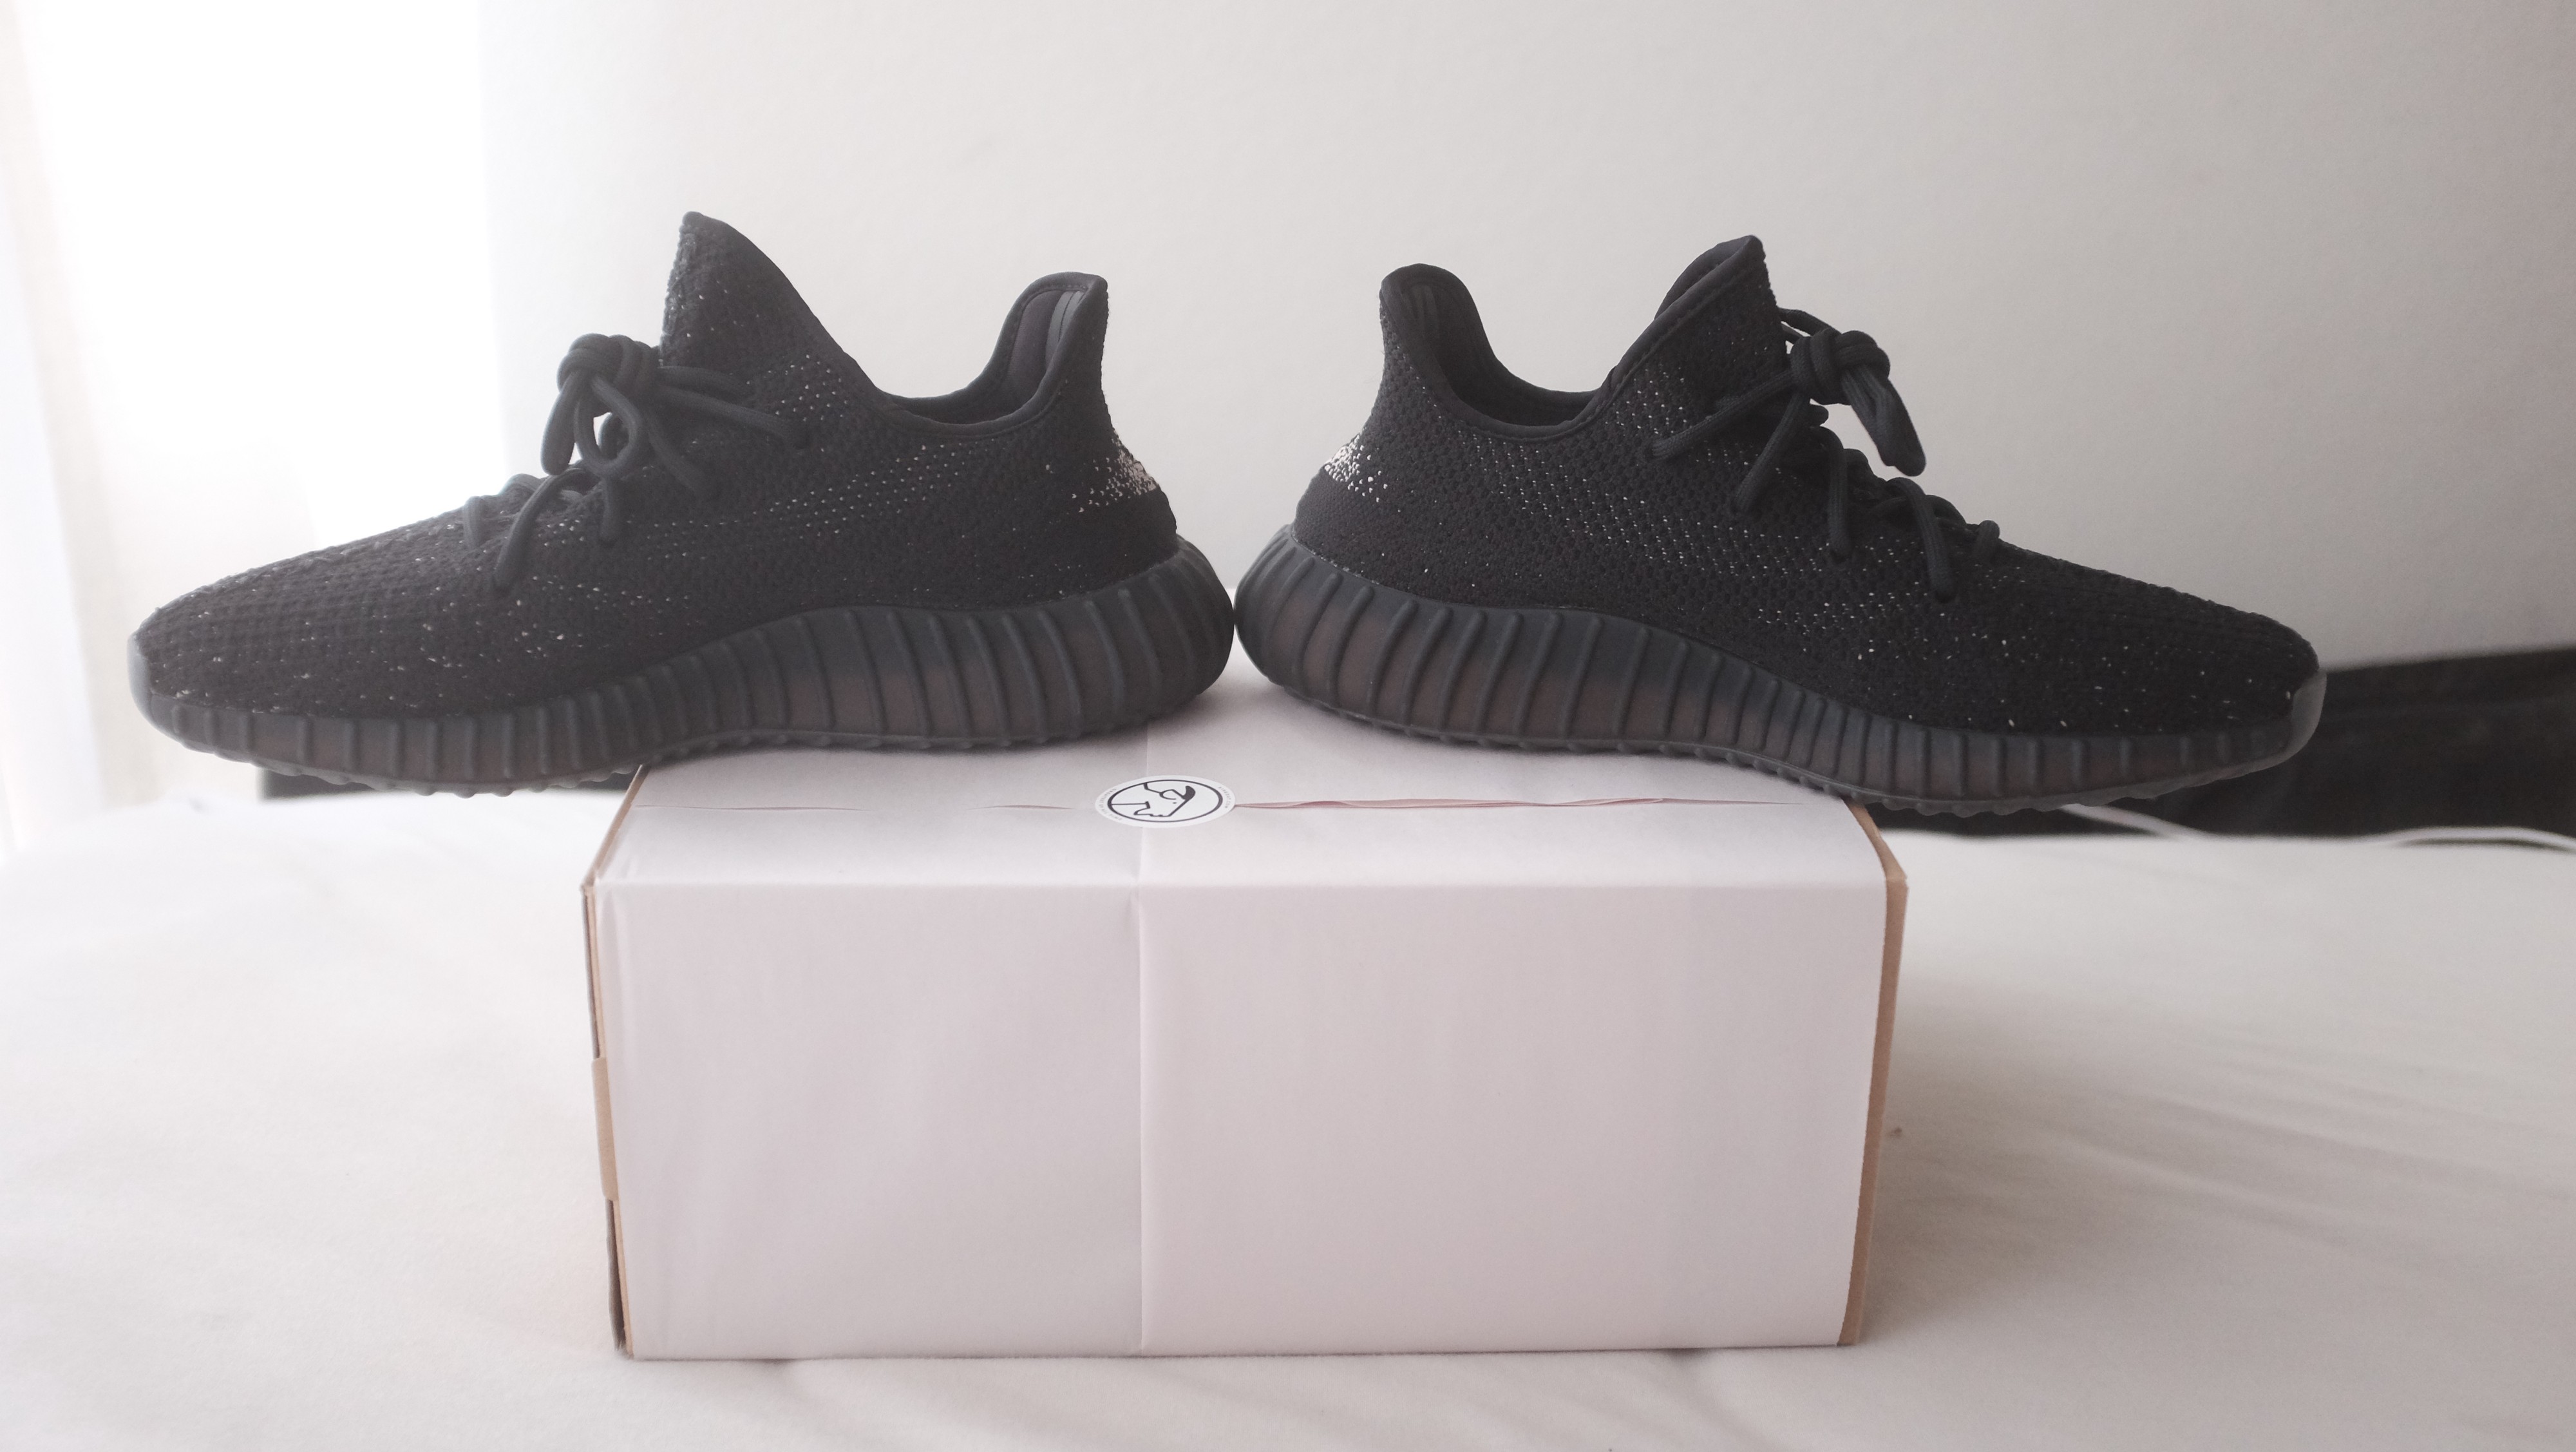
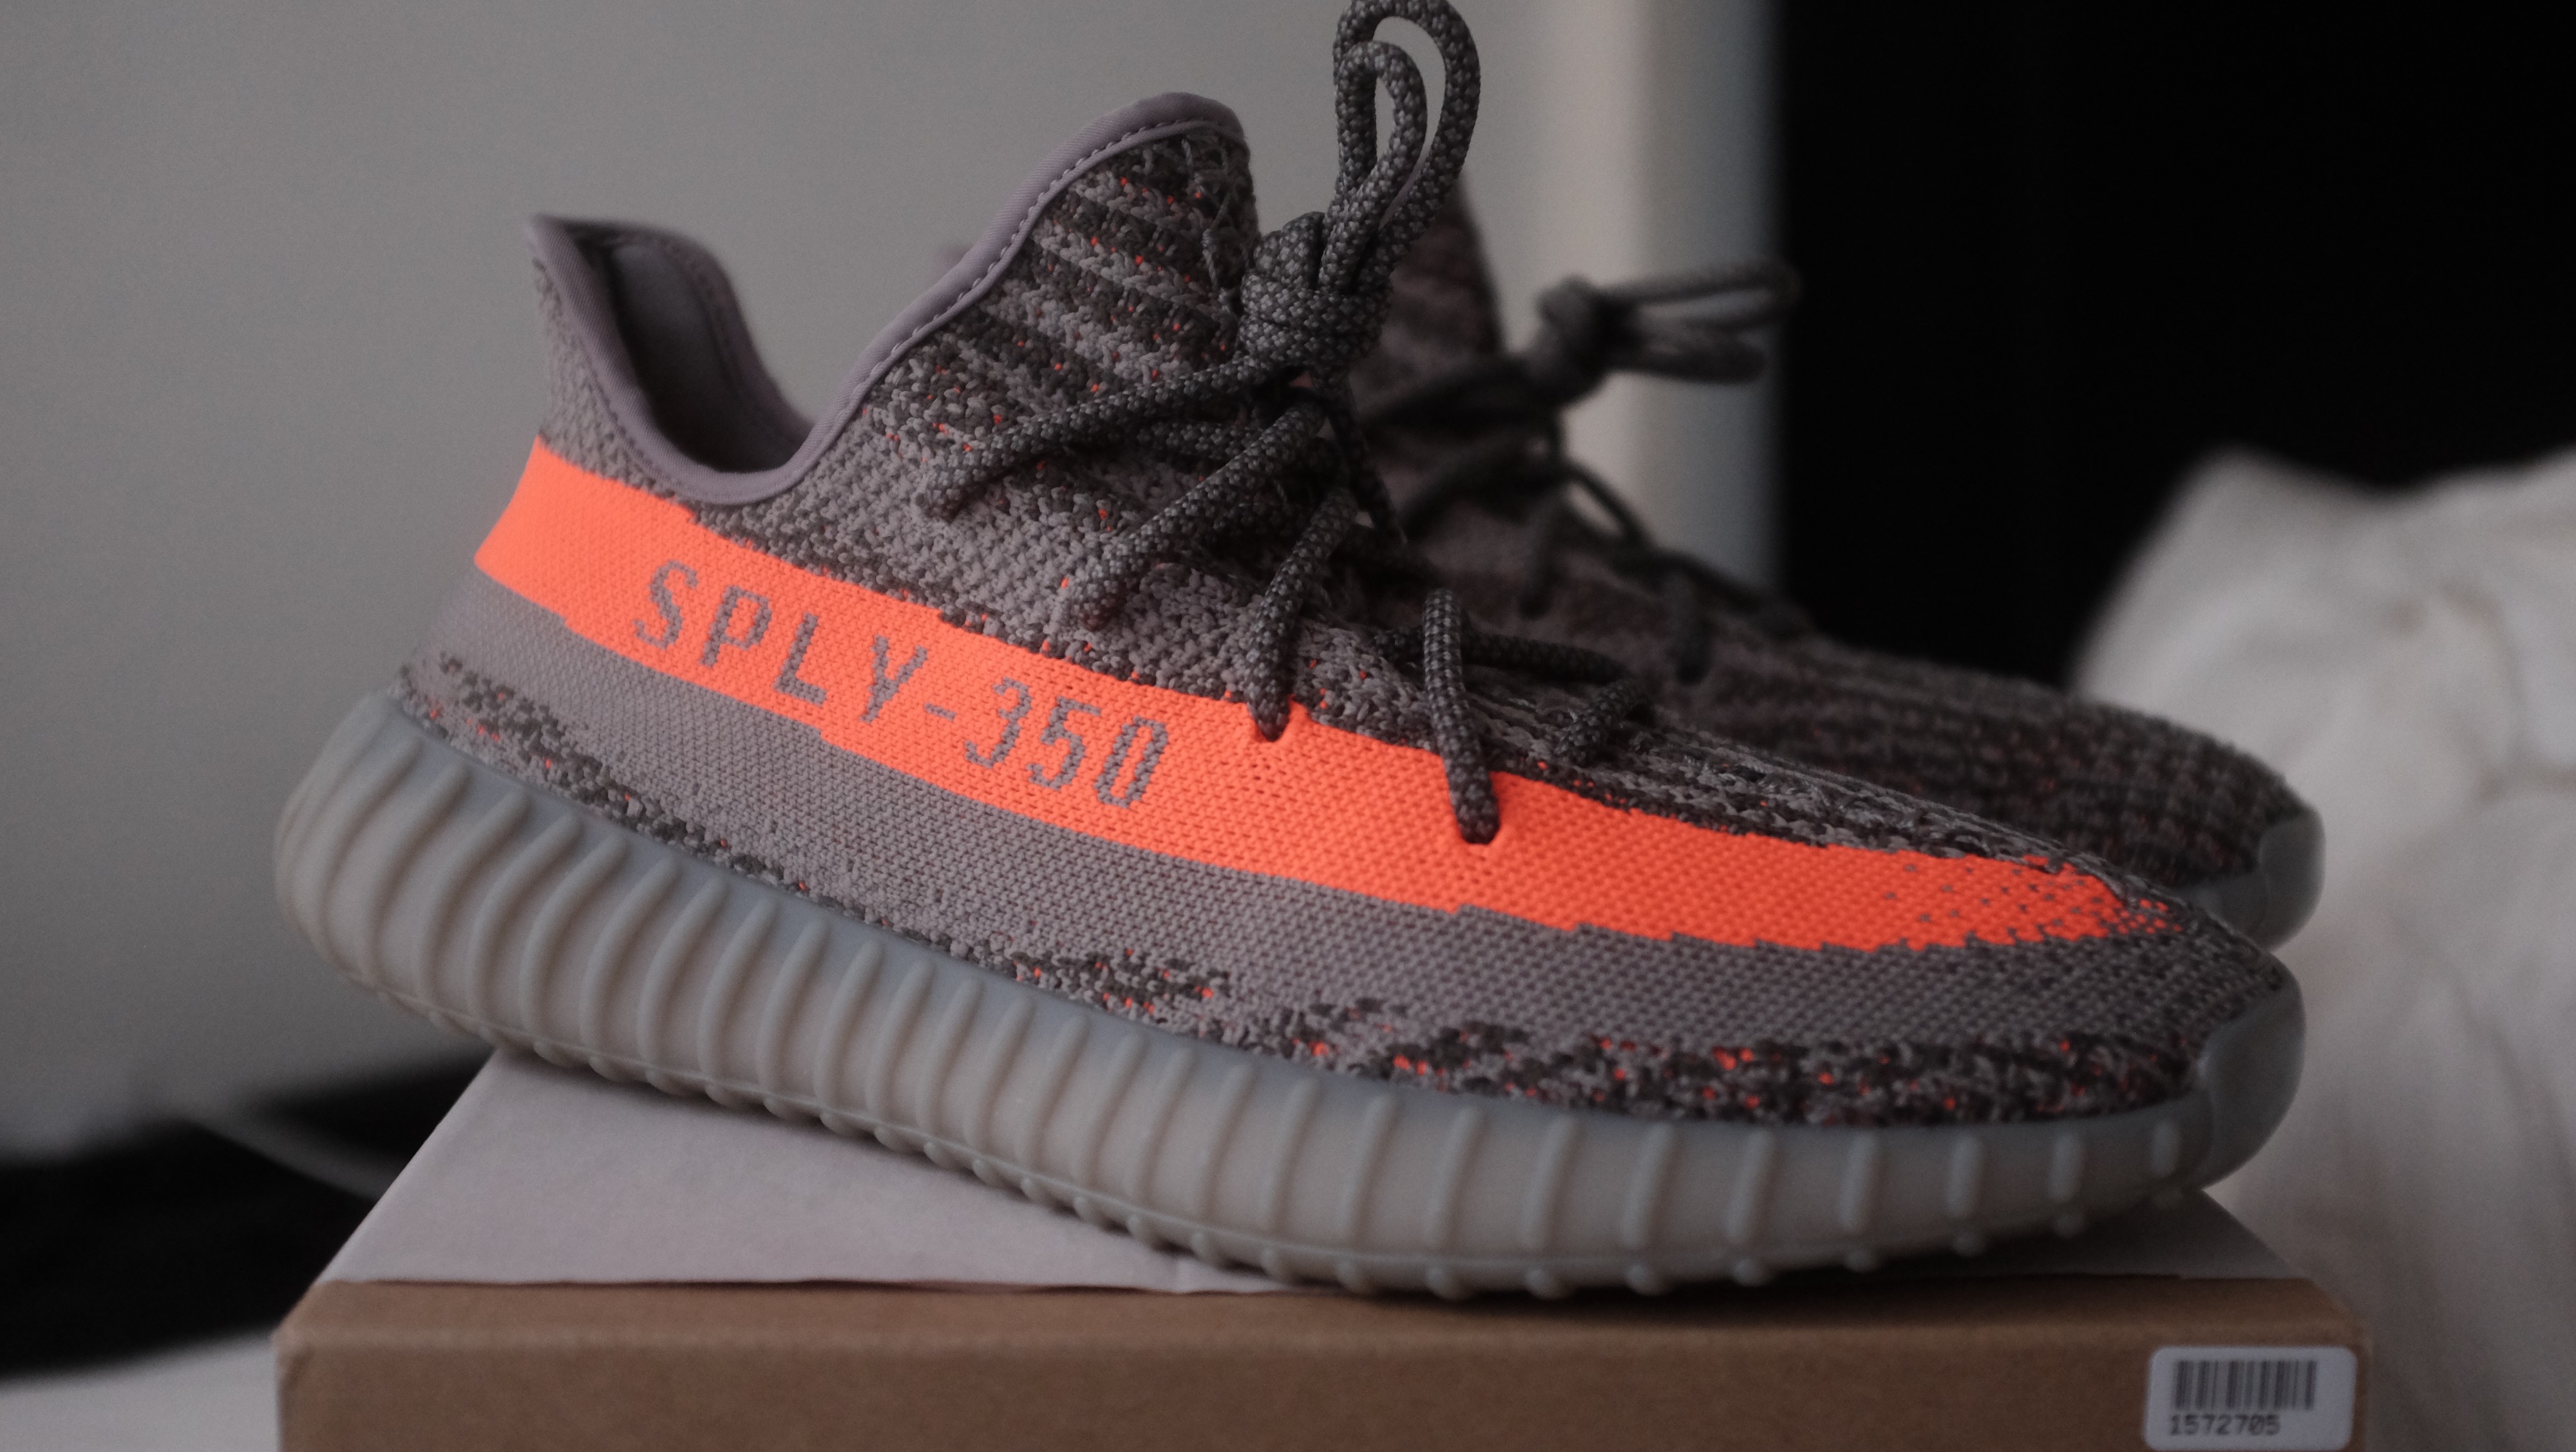
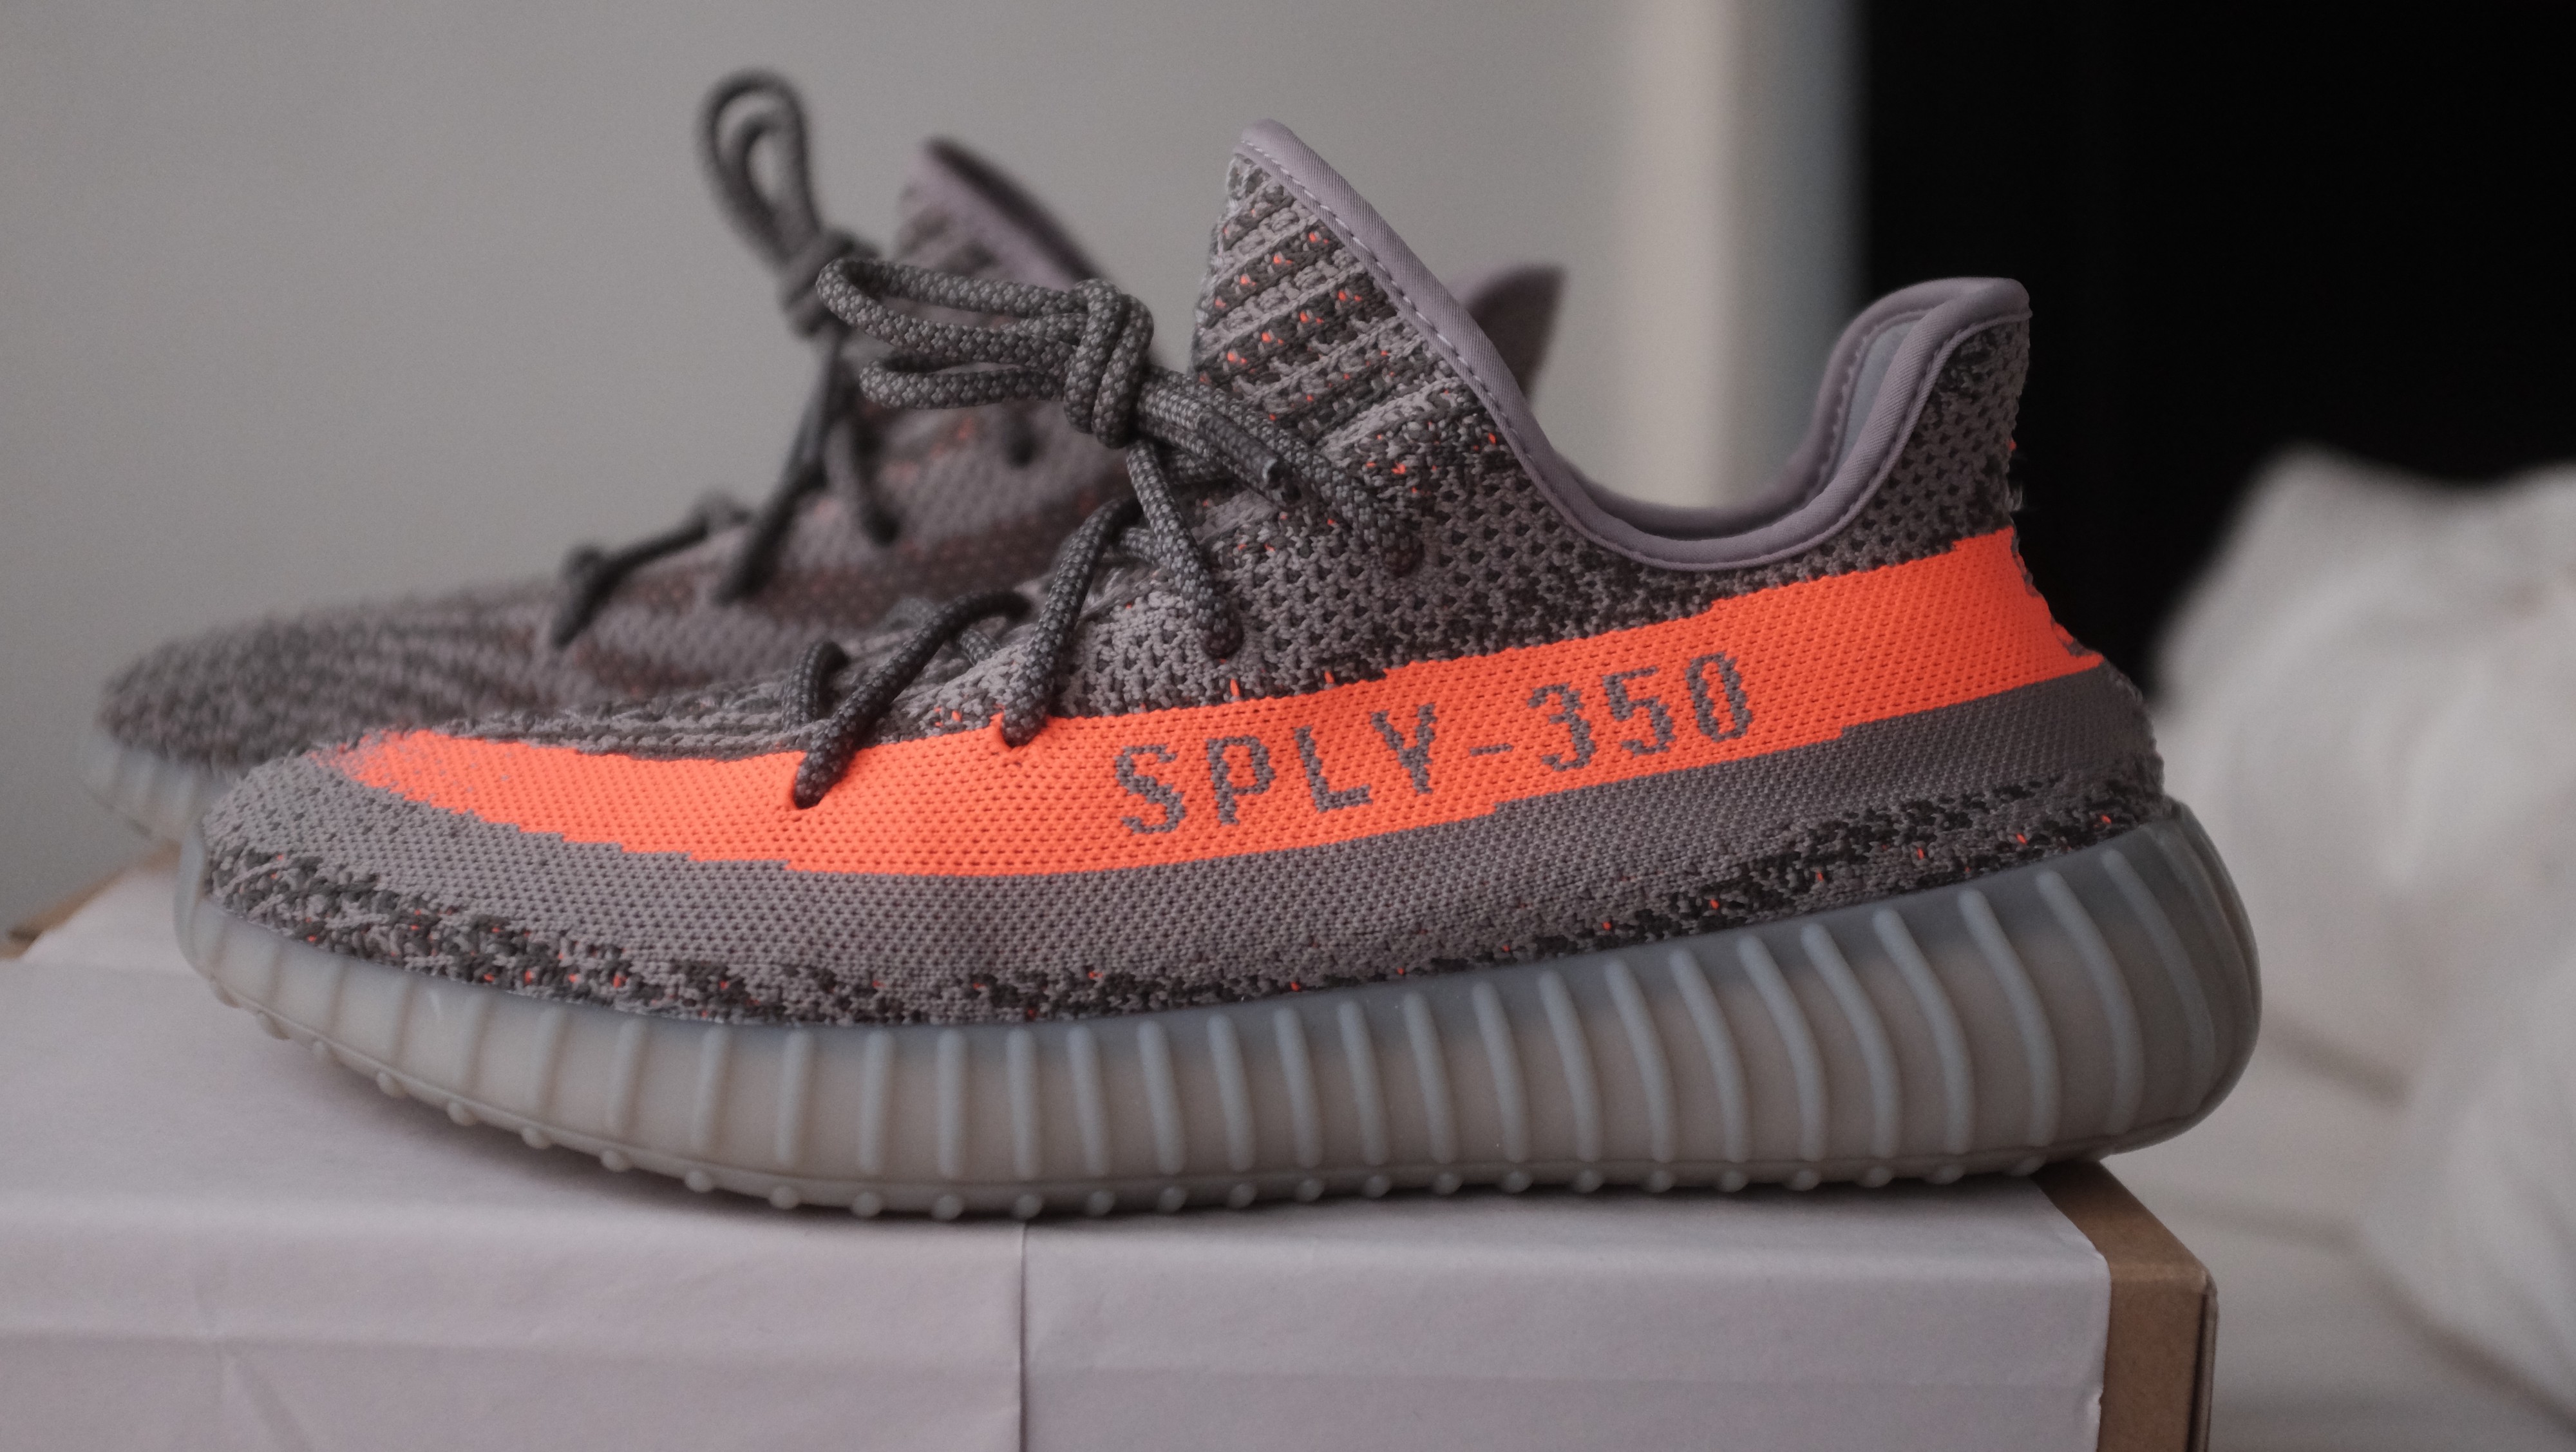
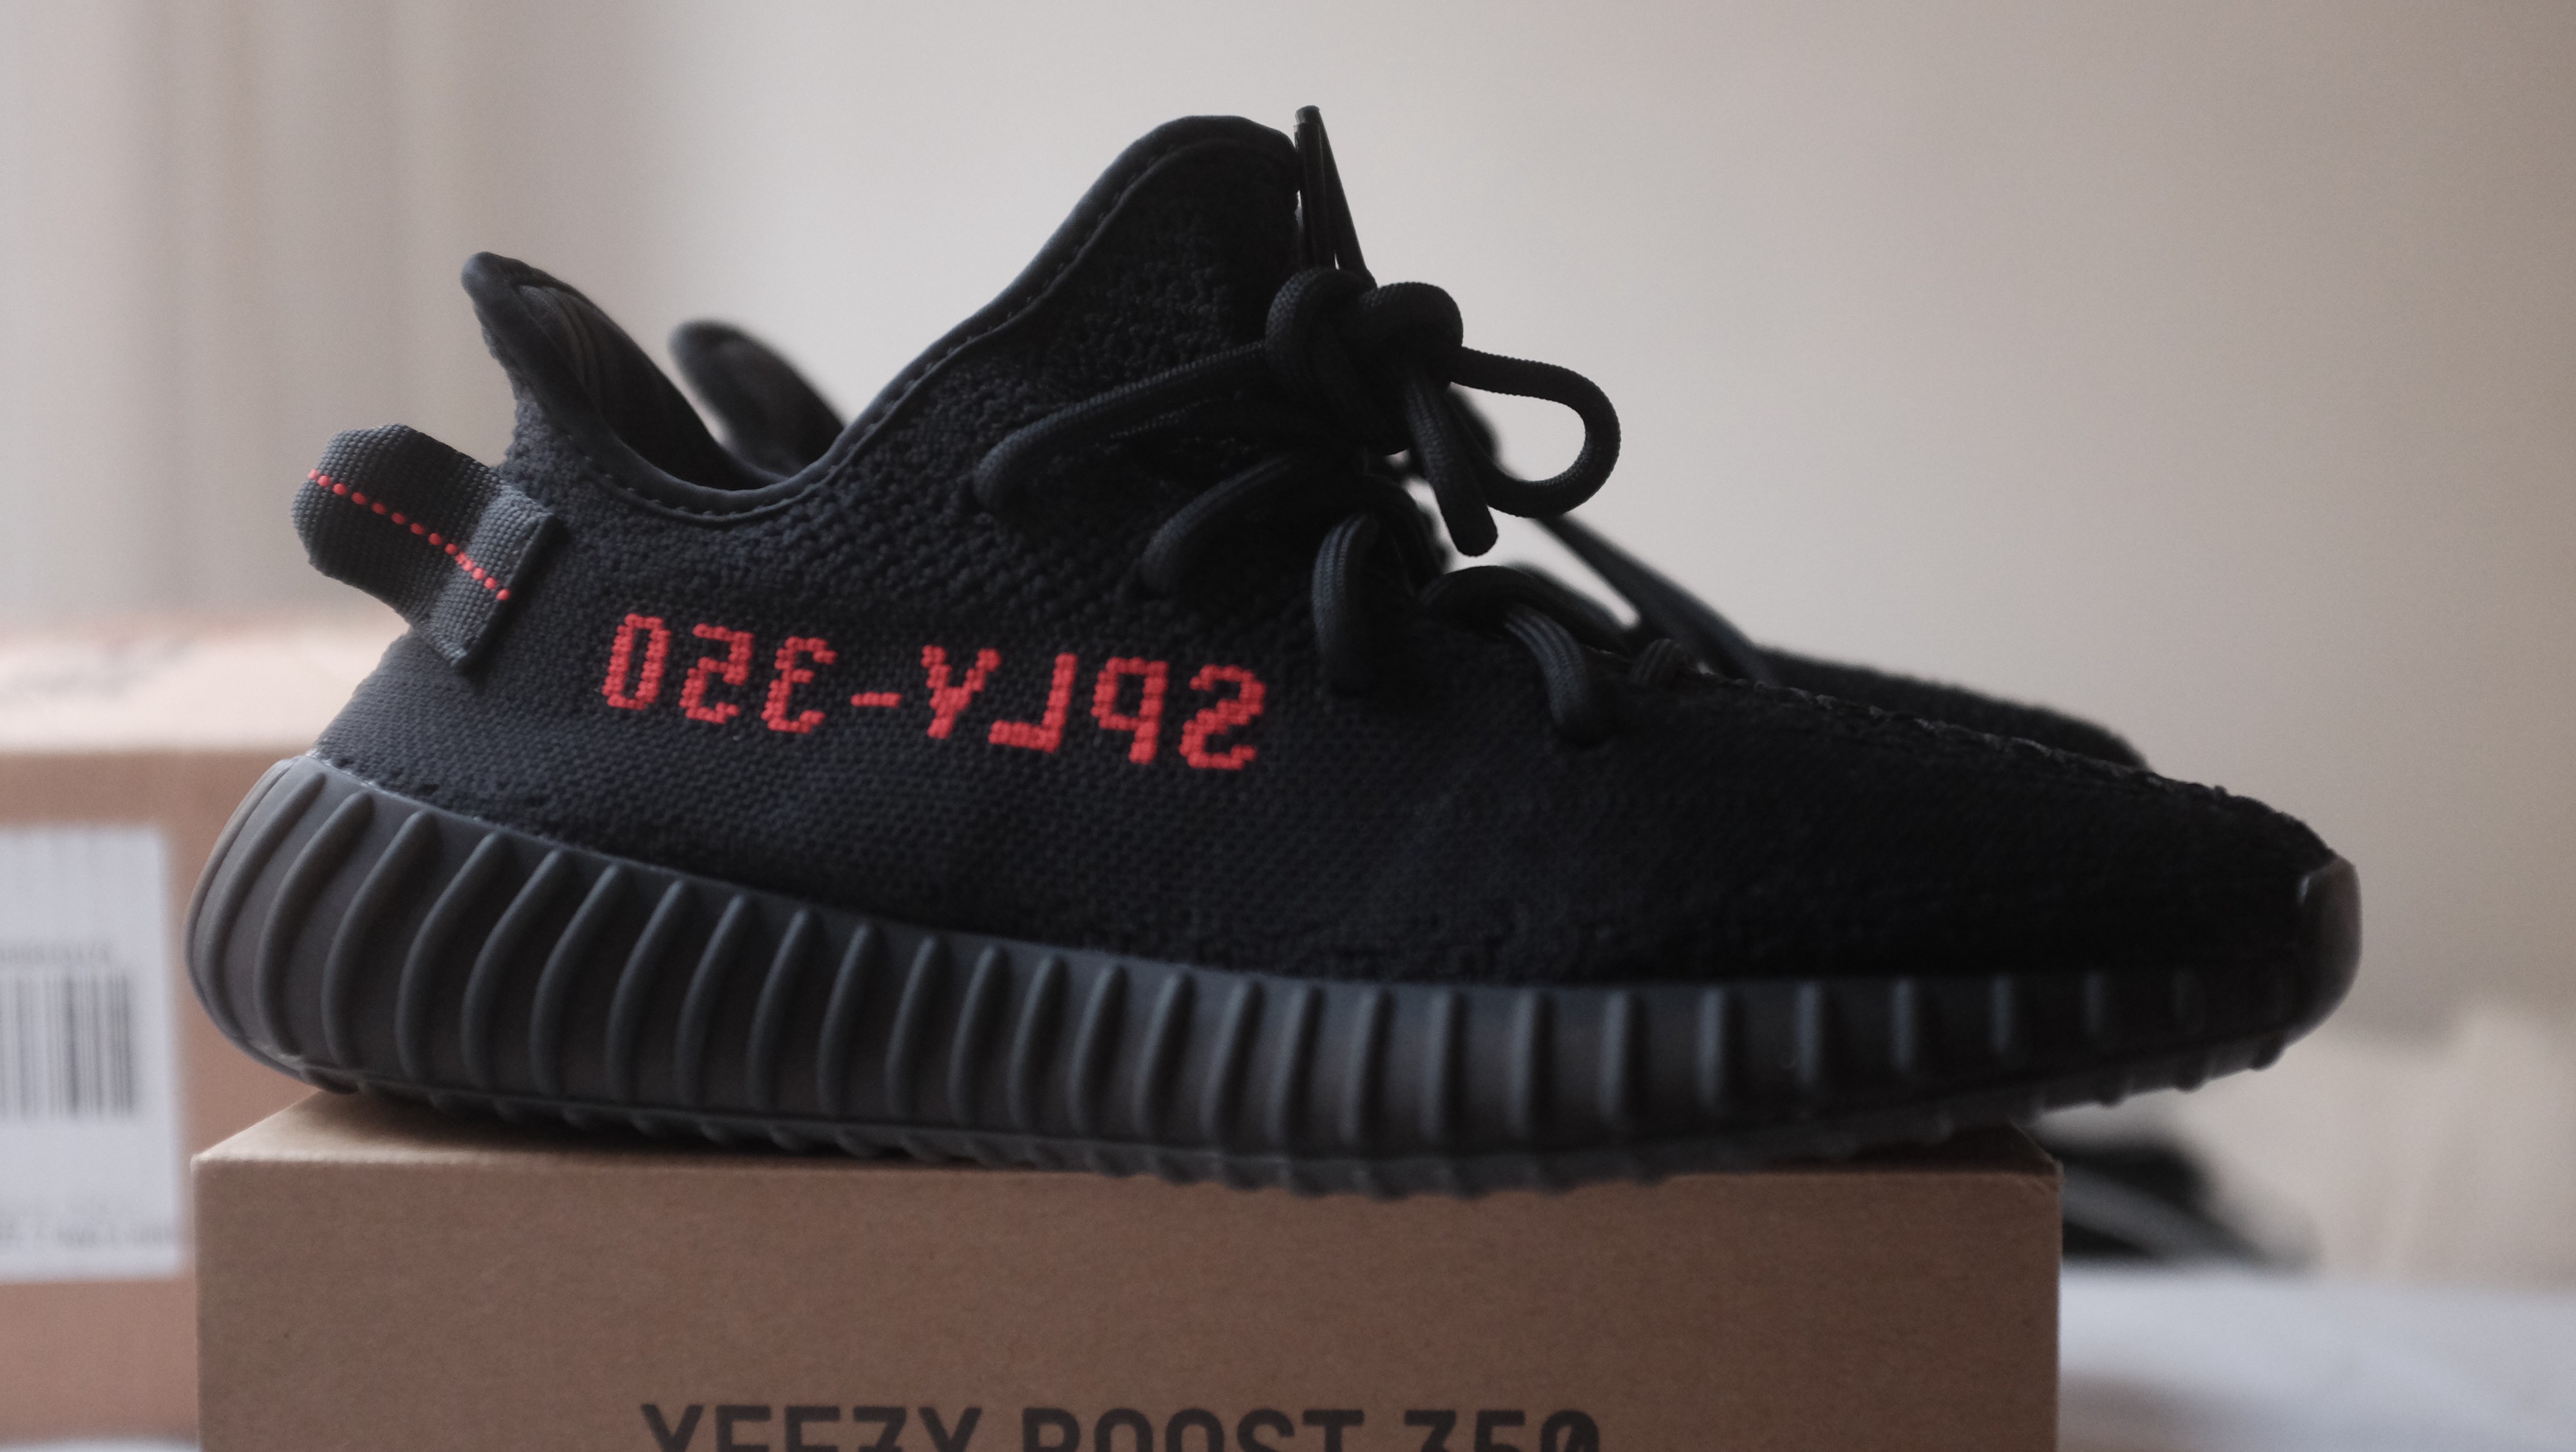
 Notice the sole, the shape is almost increasing as you go back towards the heel, gradually. The curve in the back is more pronounced than front. I see a lot of fakes where the proportion is totally off. Also note that the prime knit is very tight and almost wraps up and inward from the sole. The fit is supposed to be tight and form fitting, so there shouldn?t be much slack. There definitely shouldn?t be any type of ?baggy? or loose prime knit around the bottom sole.
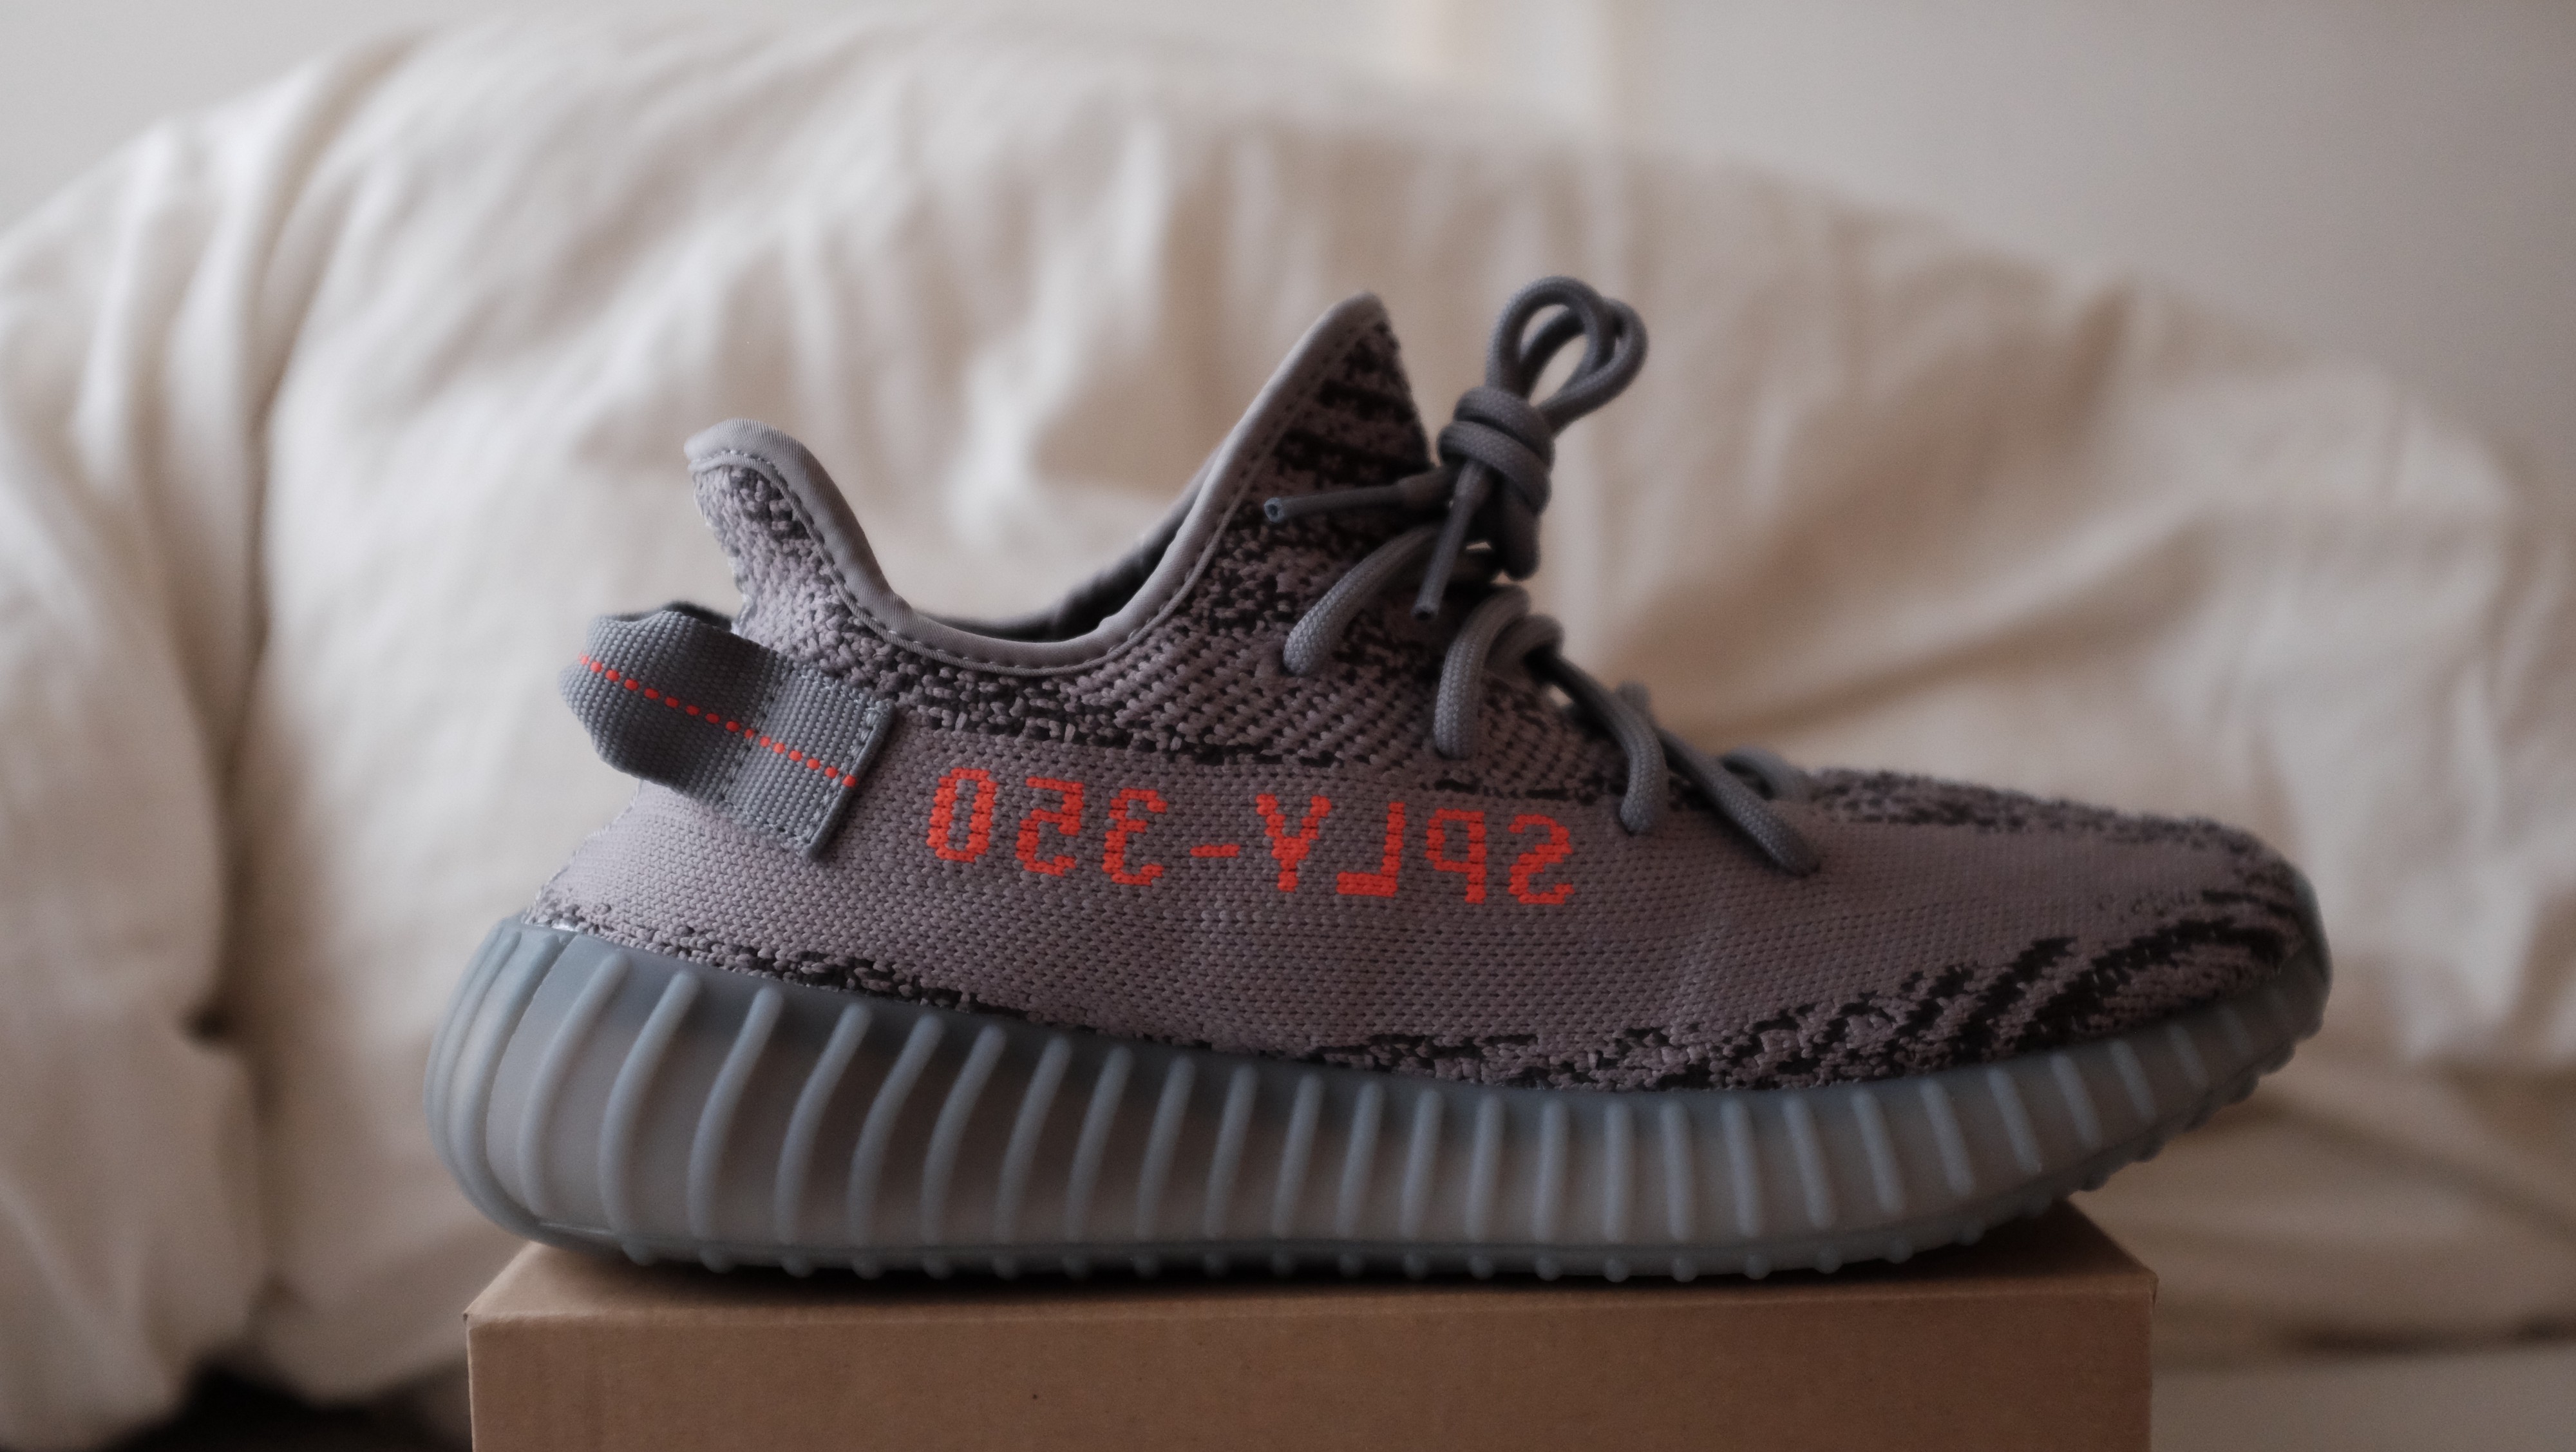
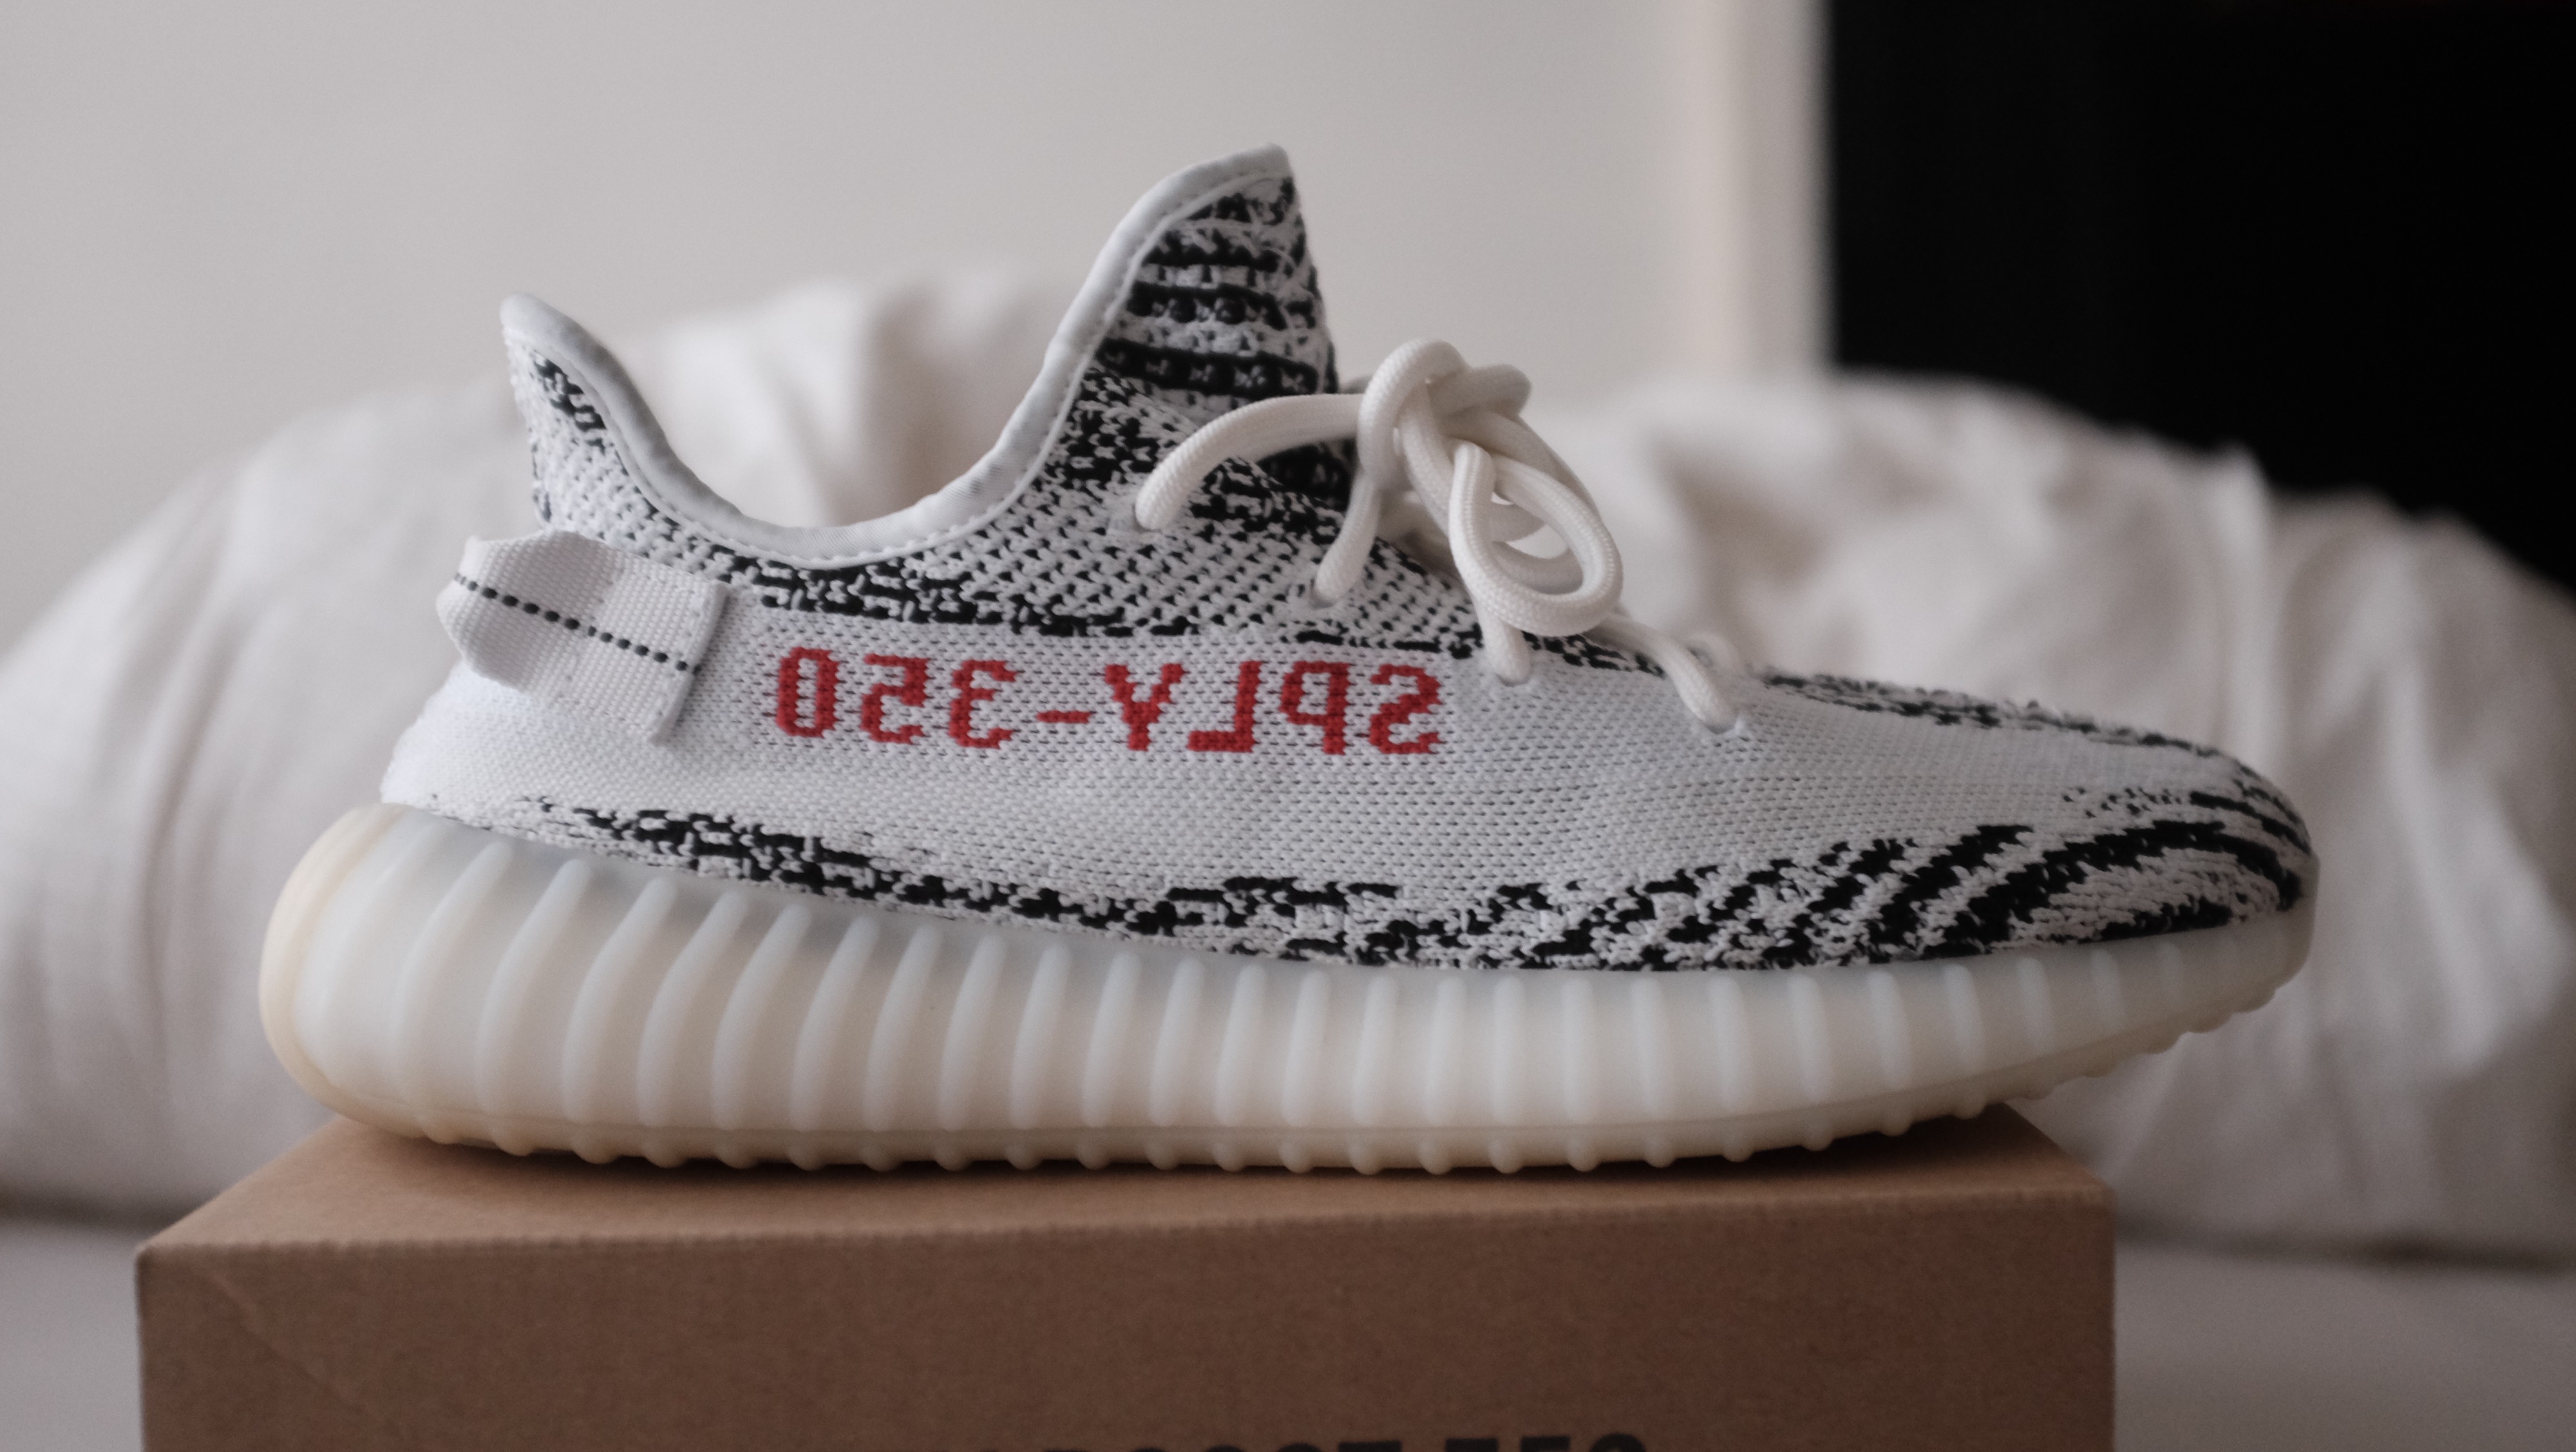
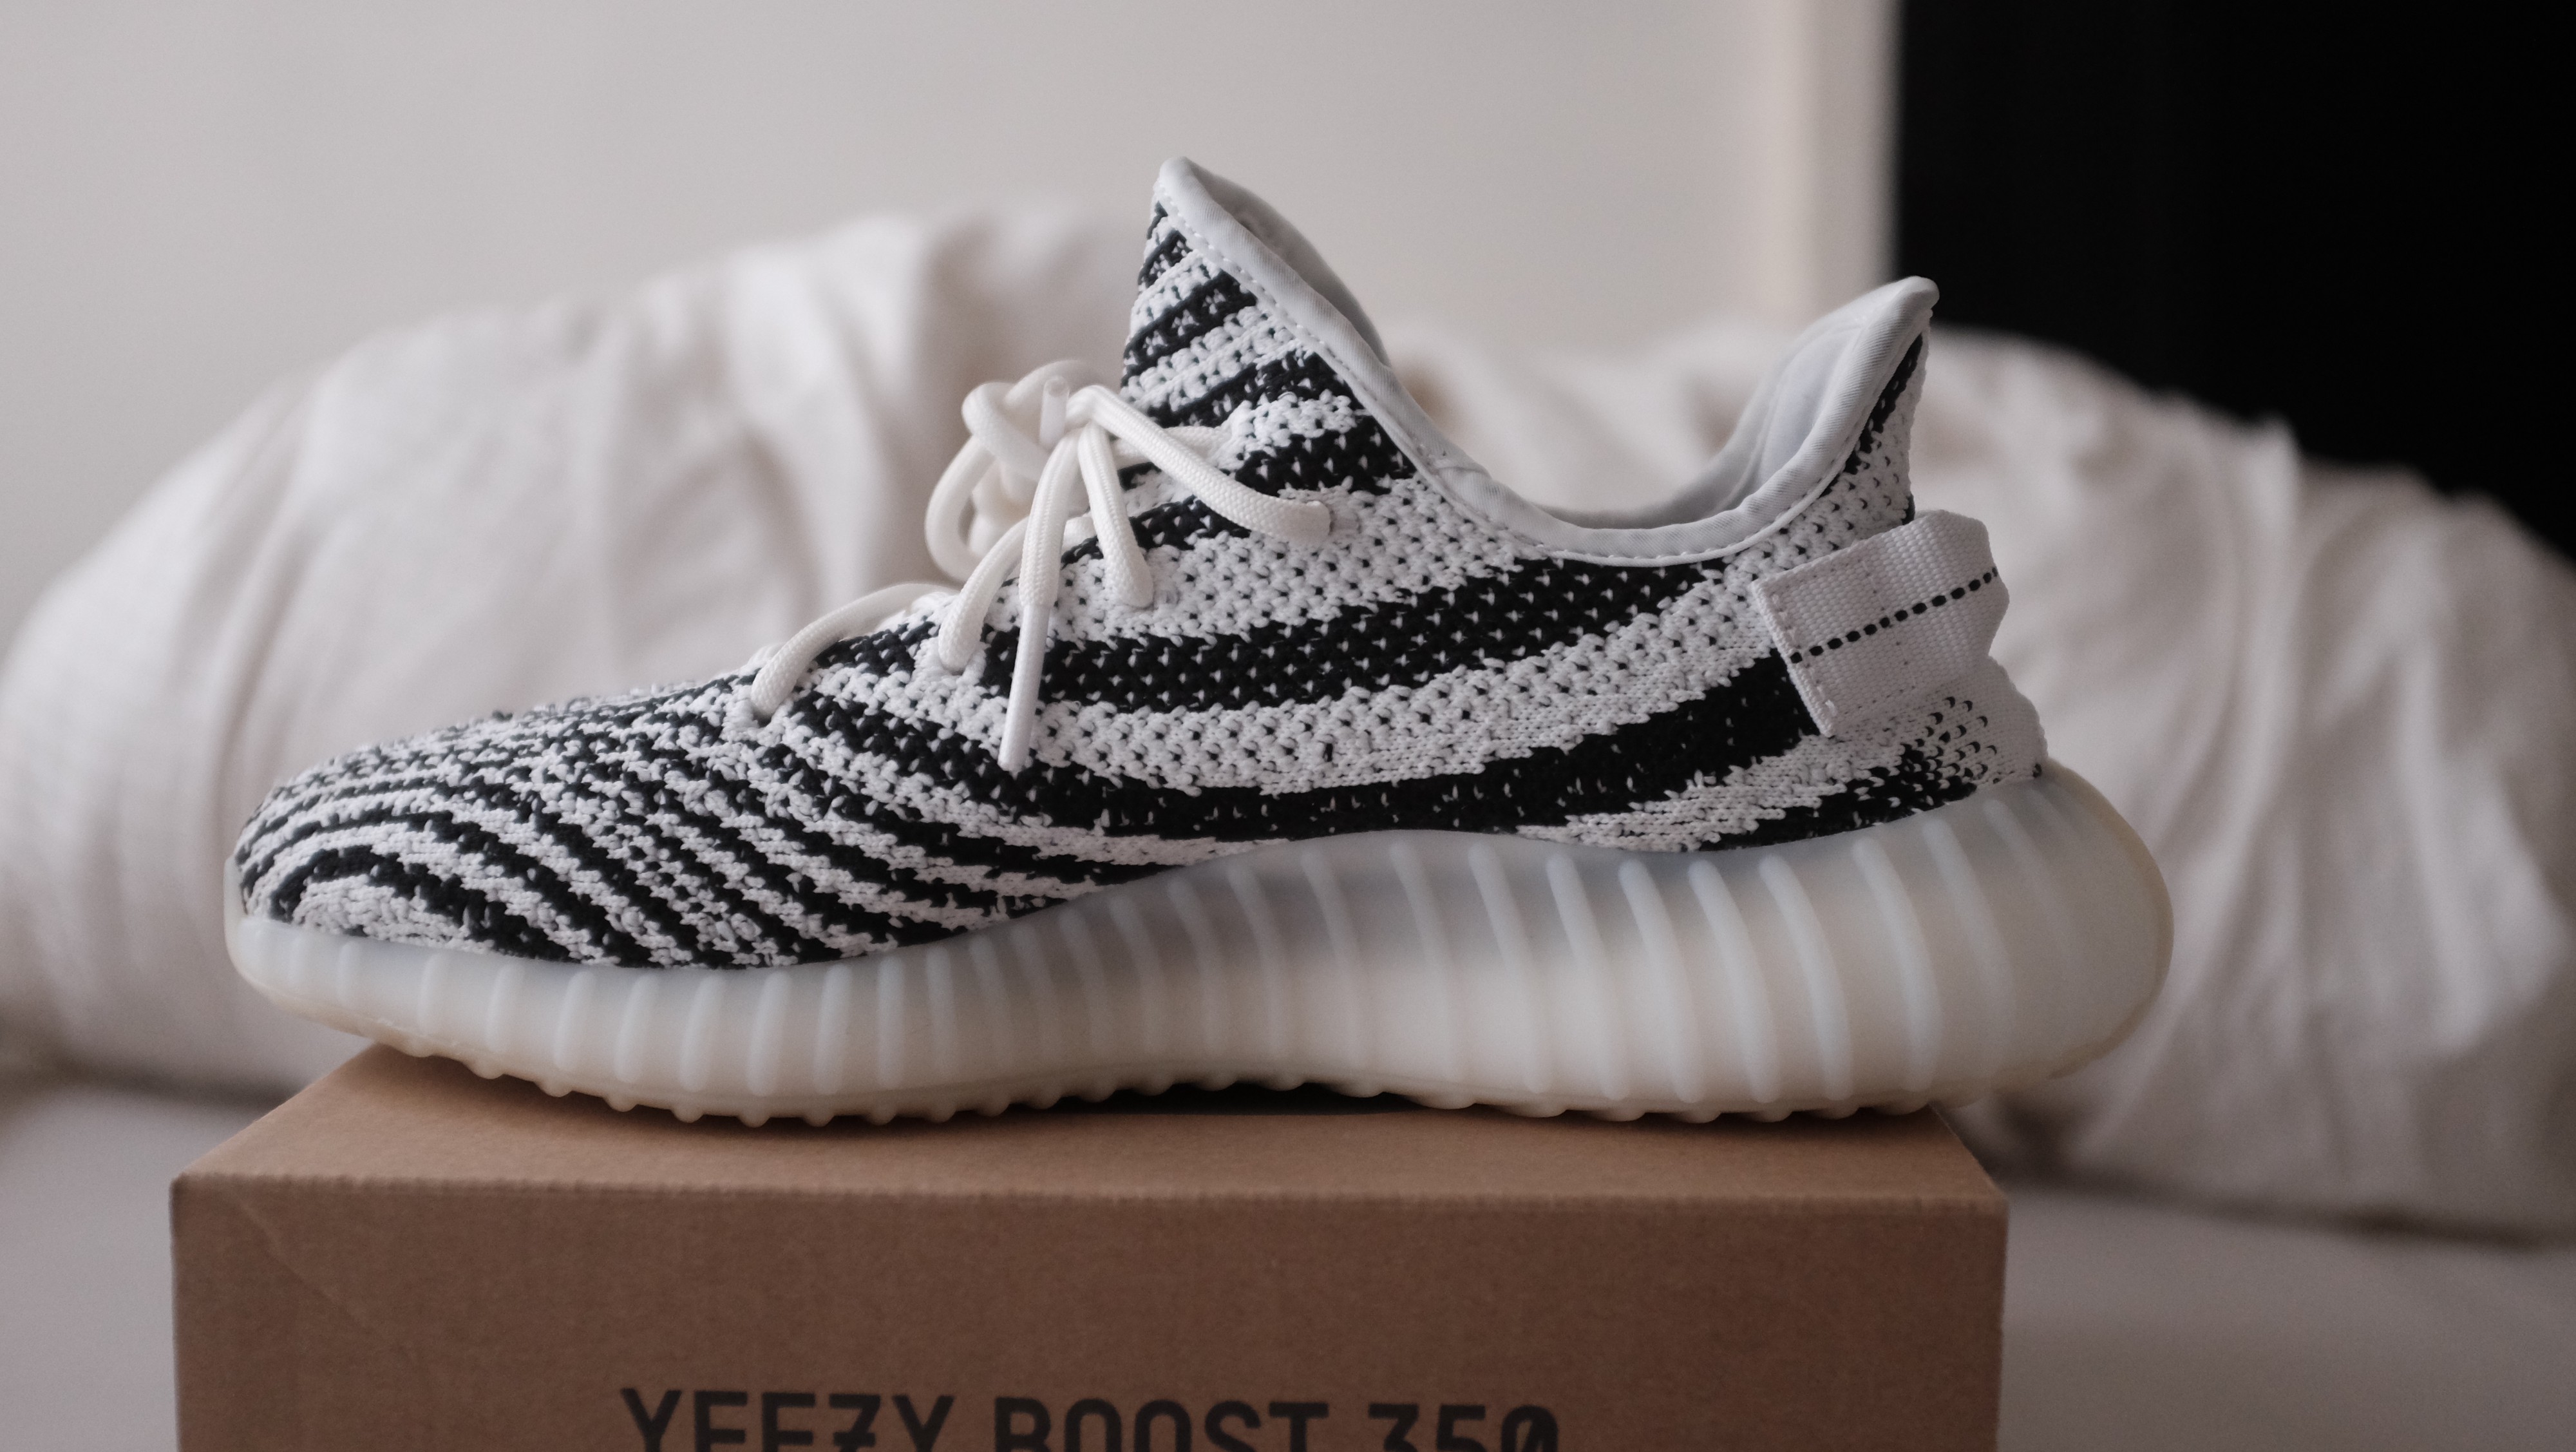

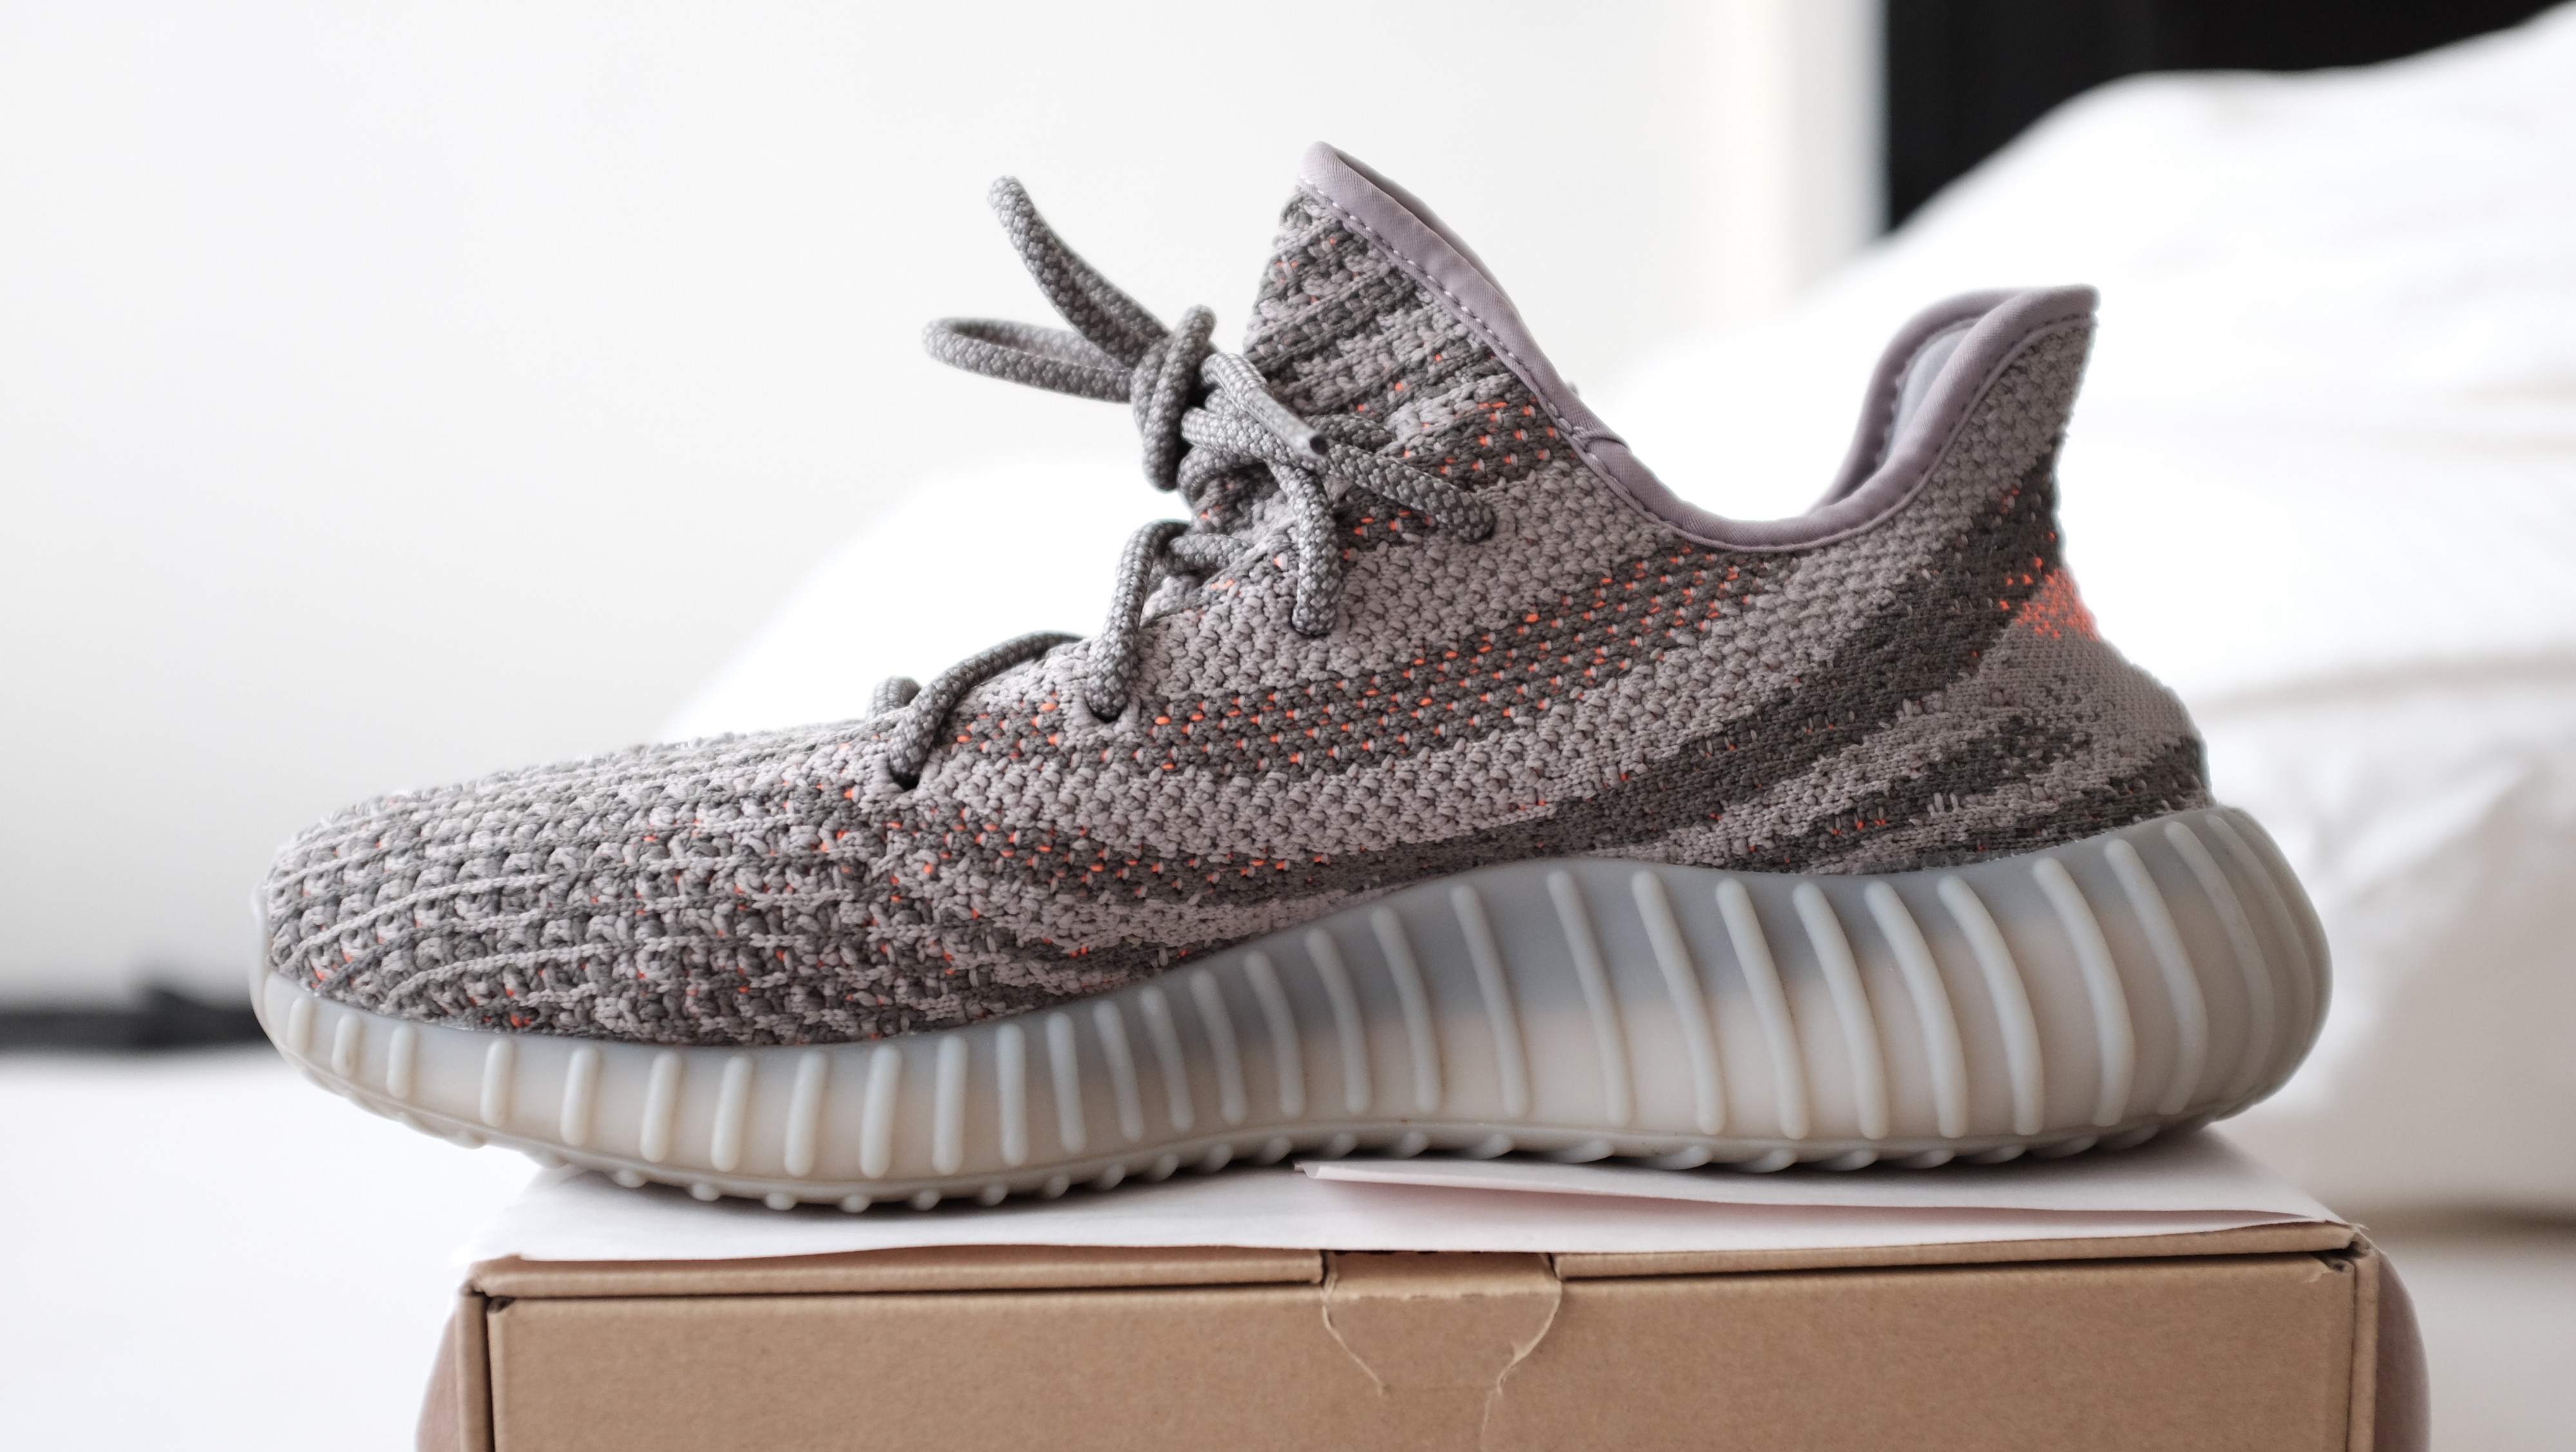
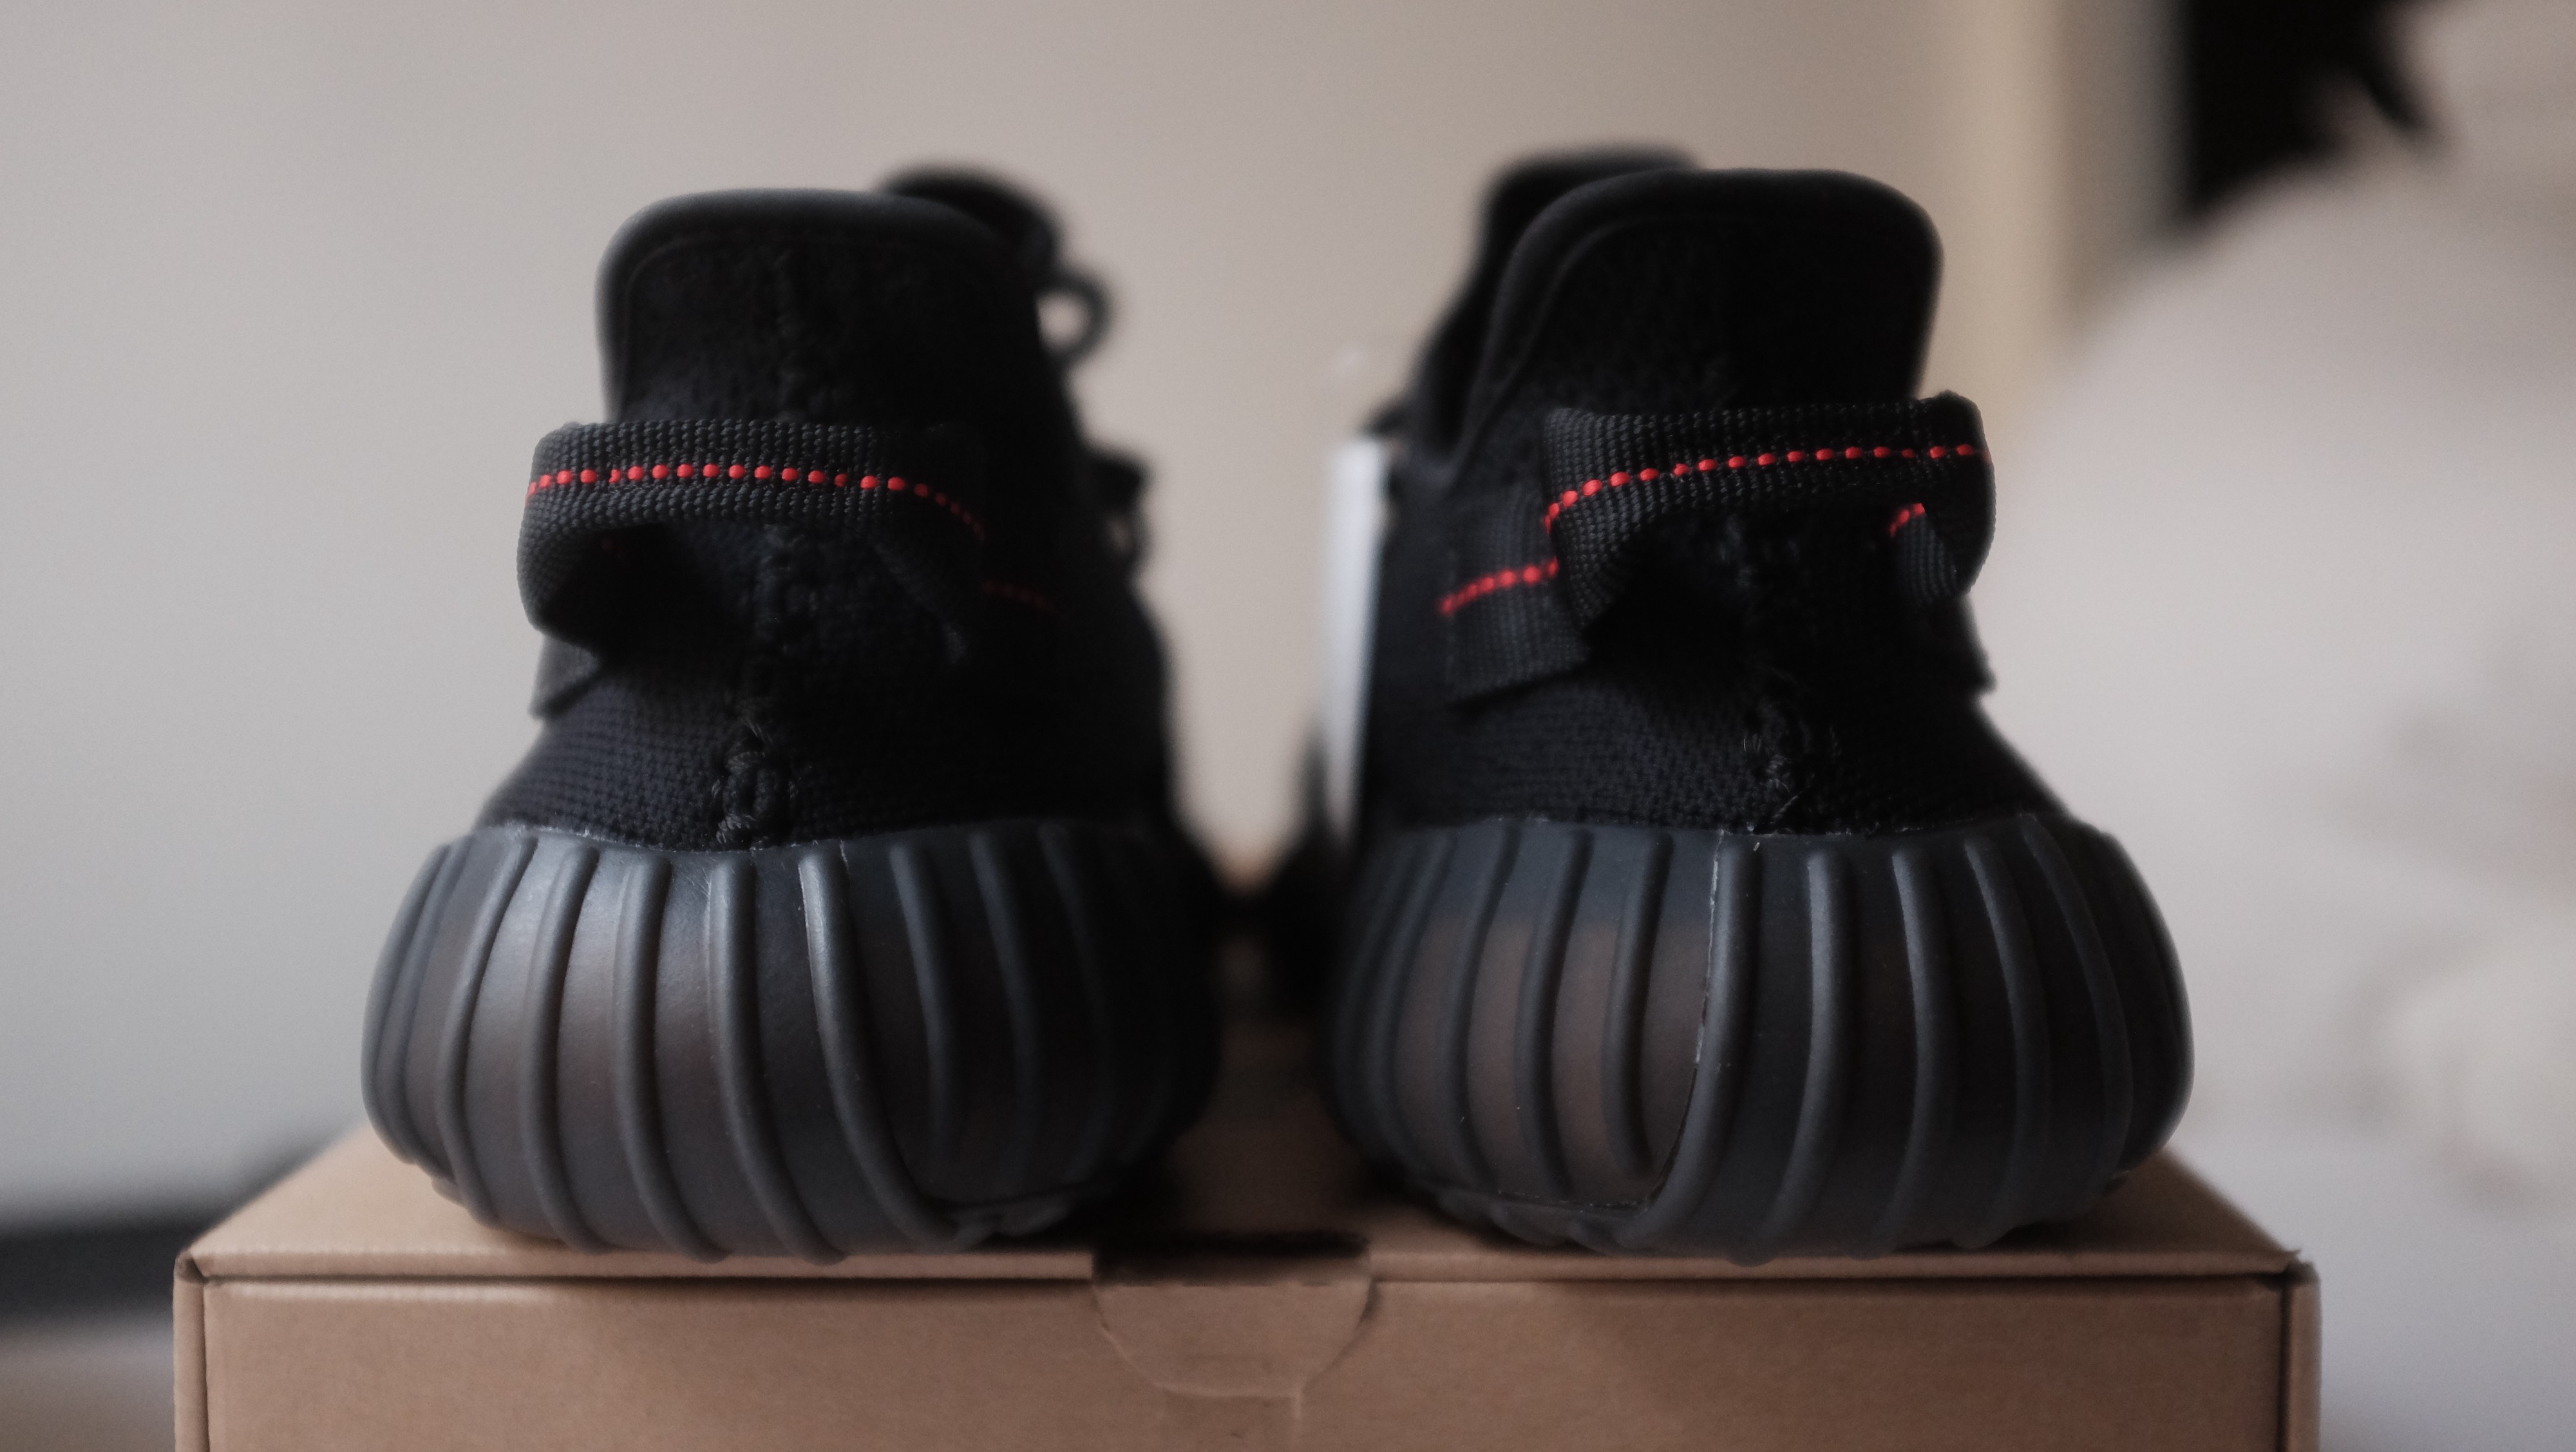
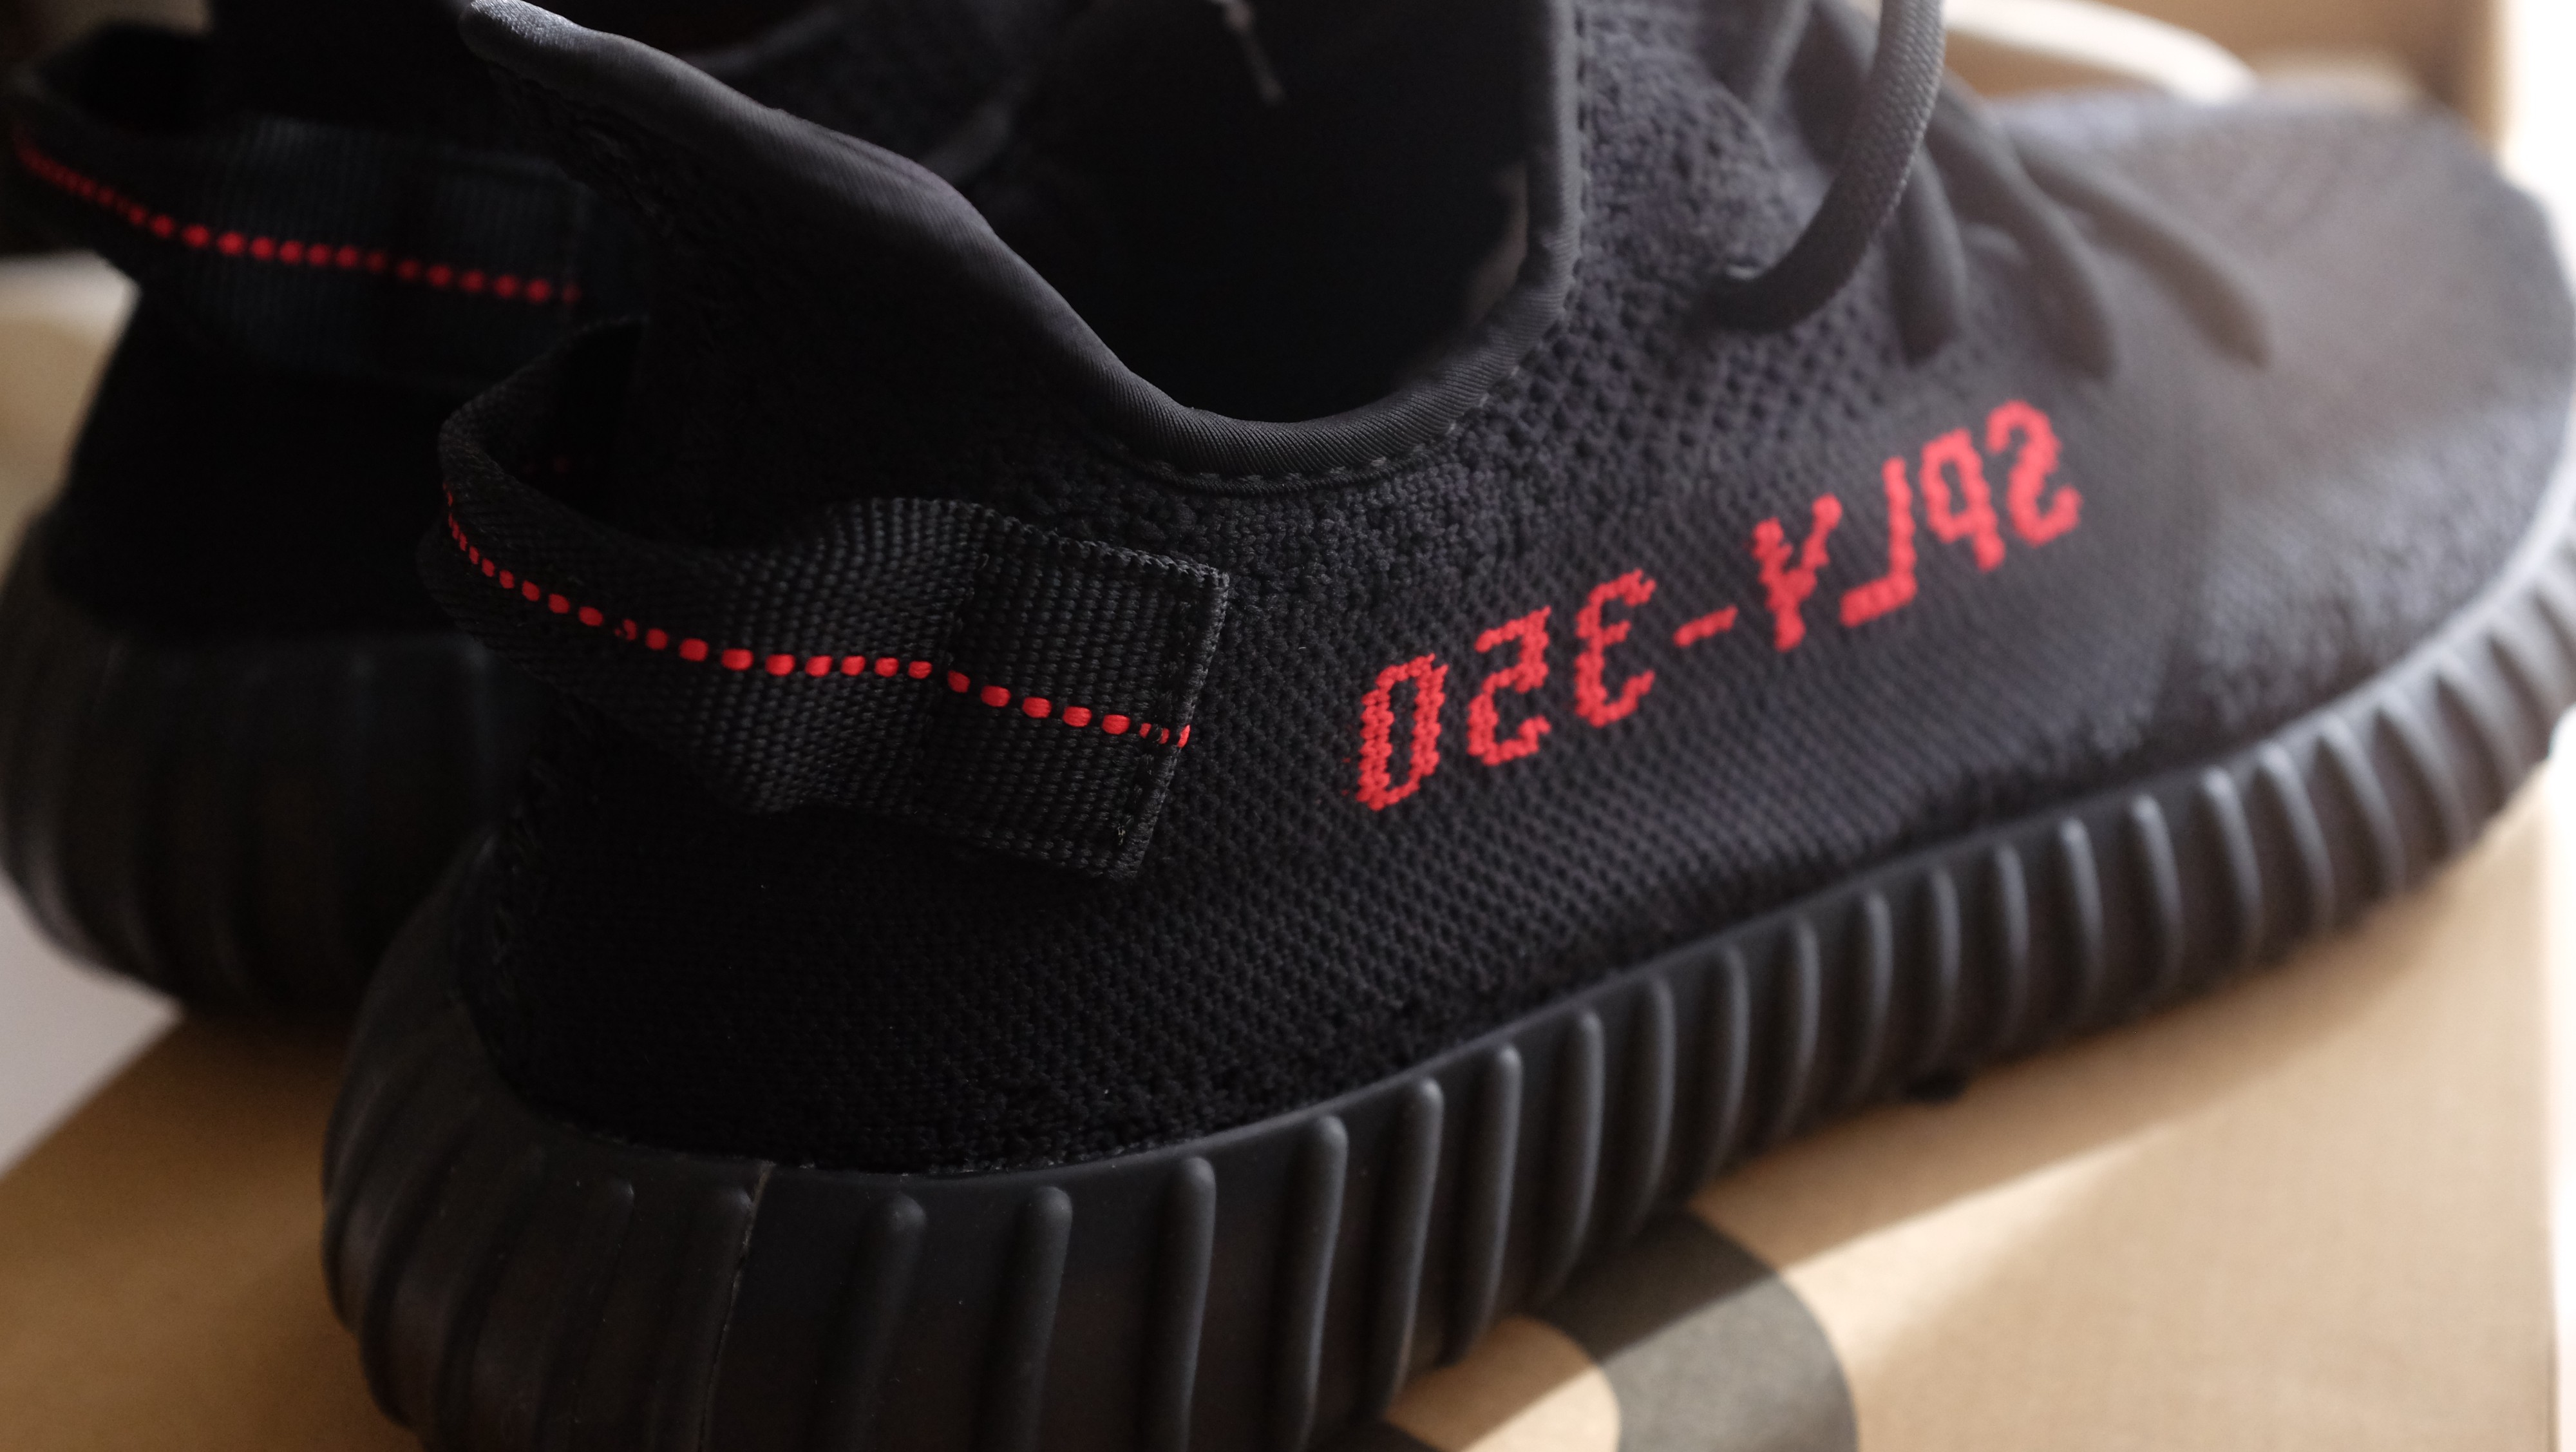
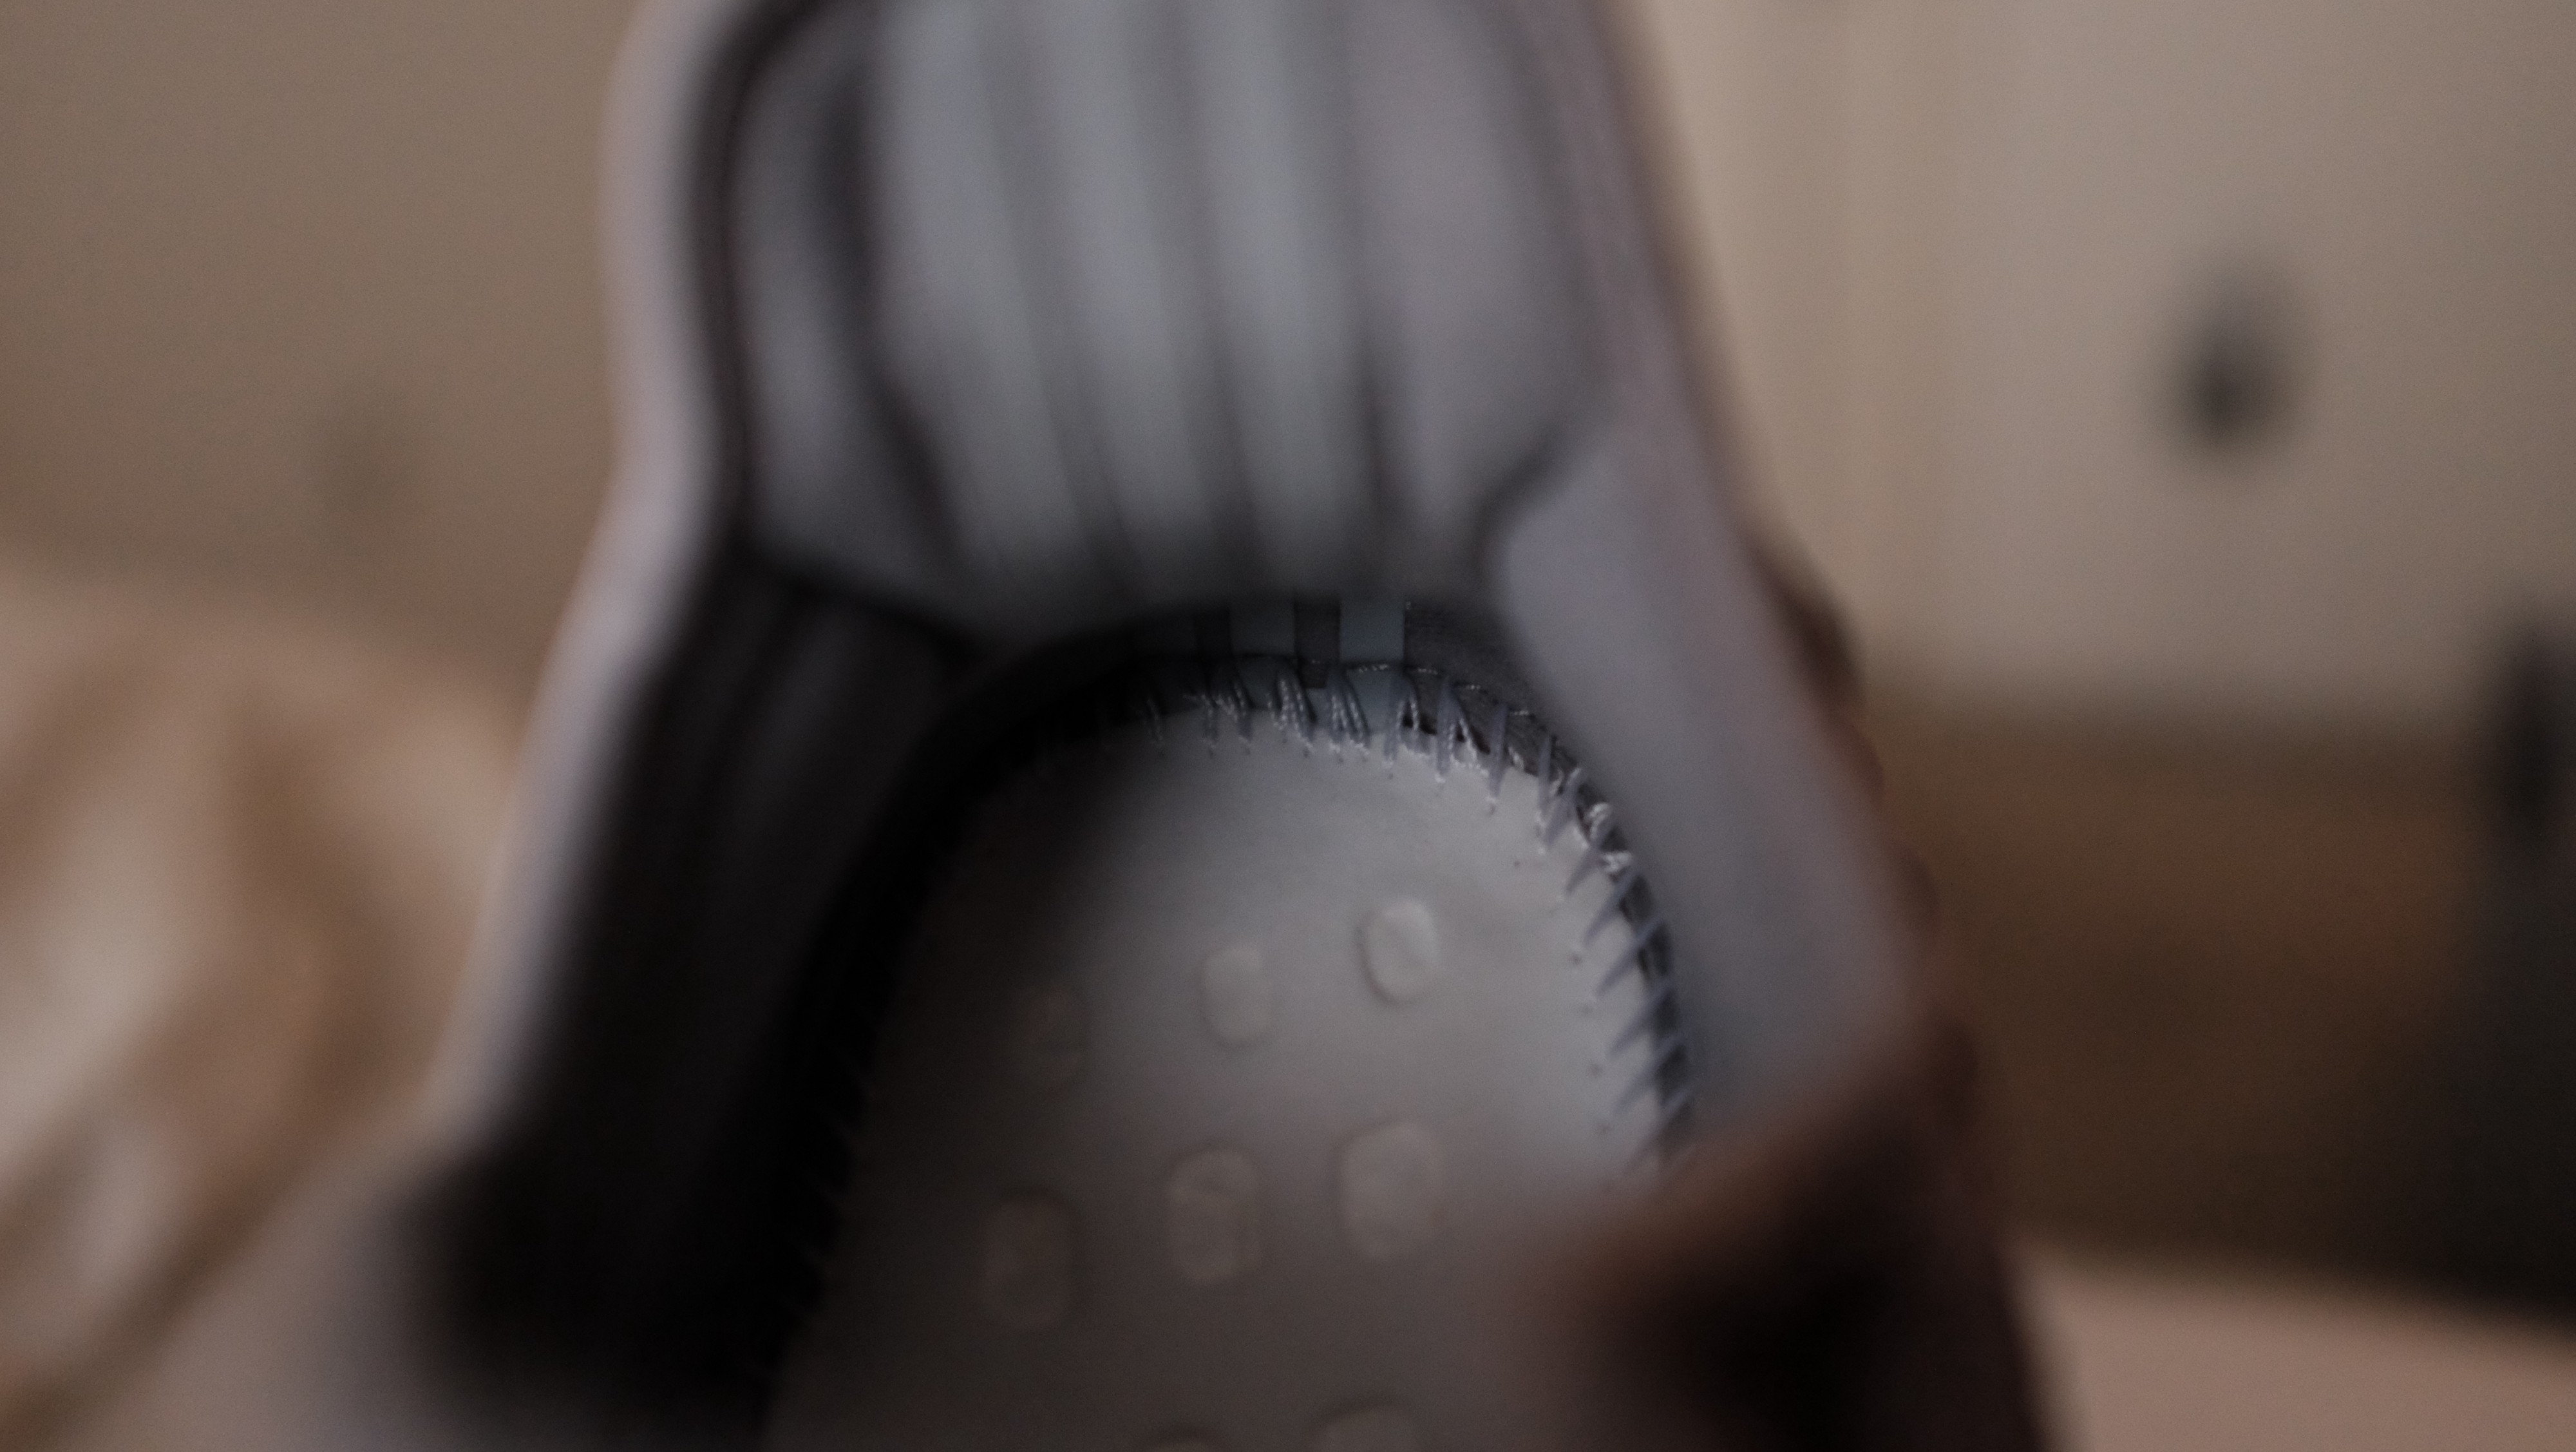
 The iconic Kim-K bump (at the end of the heel where the prime knit and rubber sole meet). If it doesn?t have it, then they aren?t authentic.
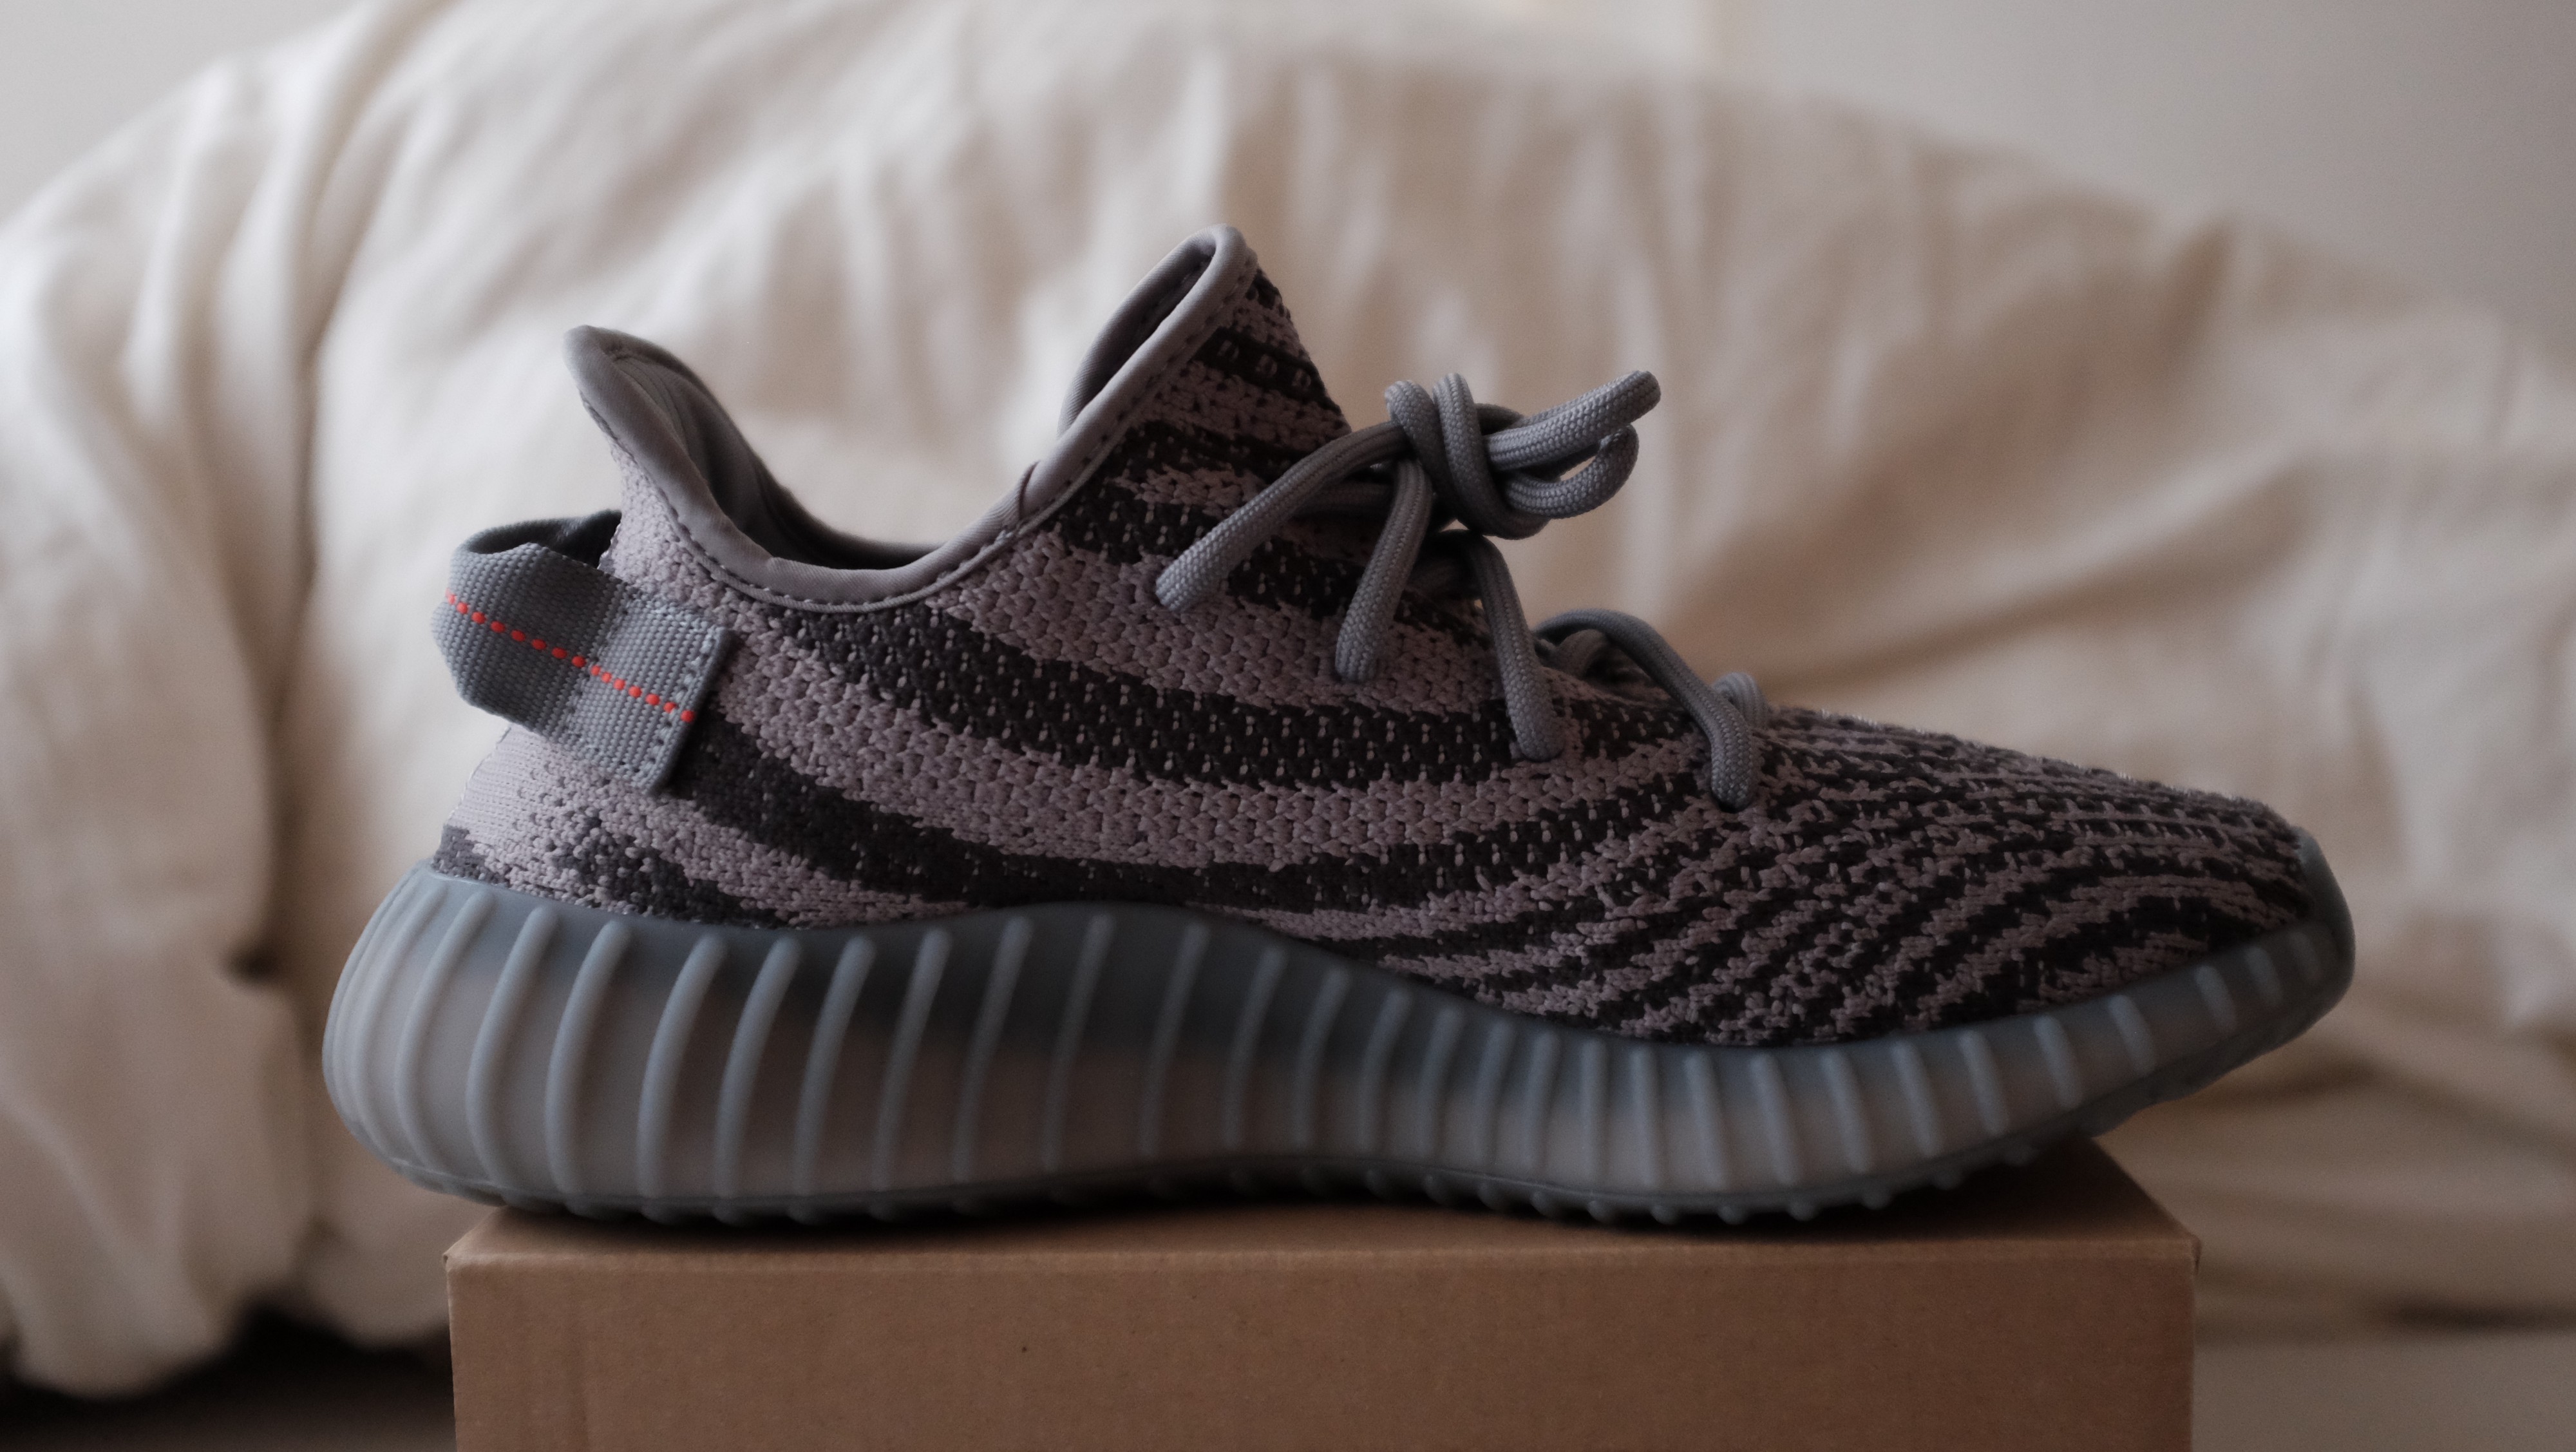

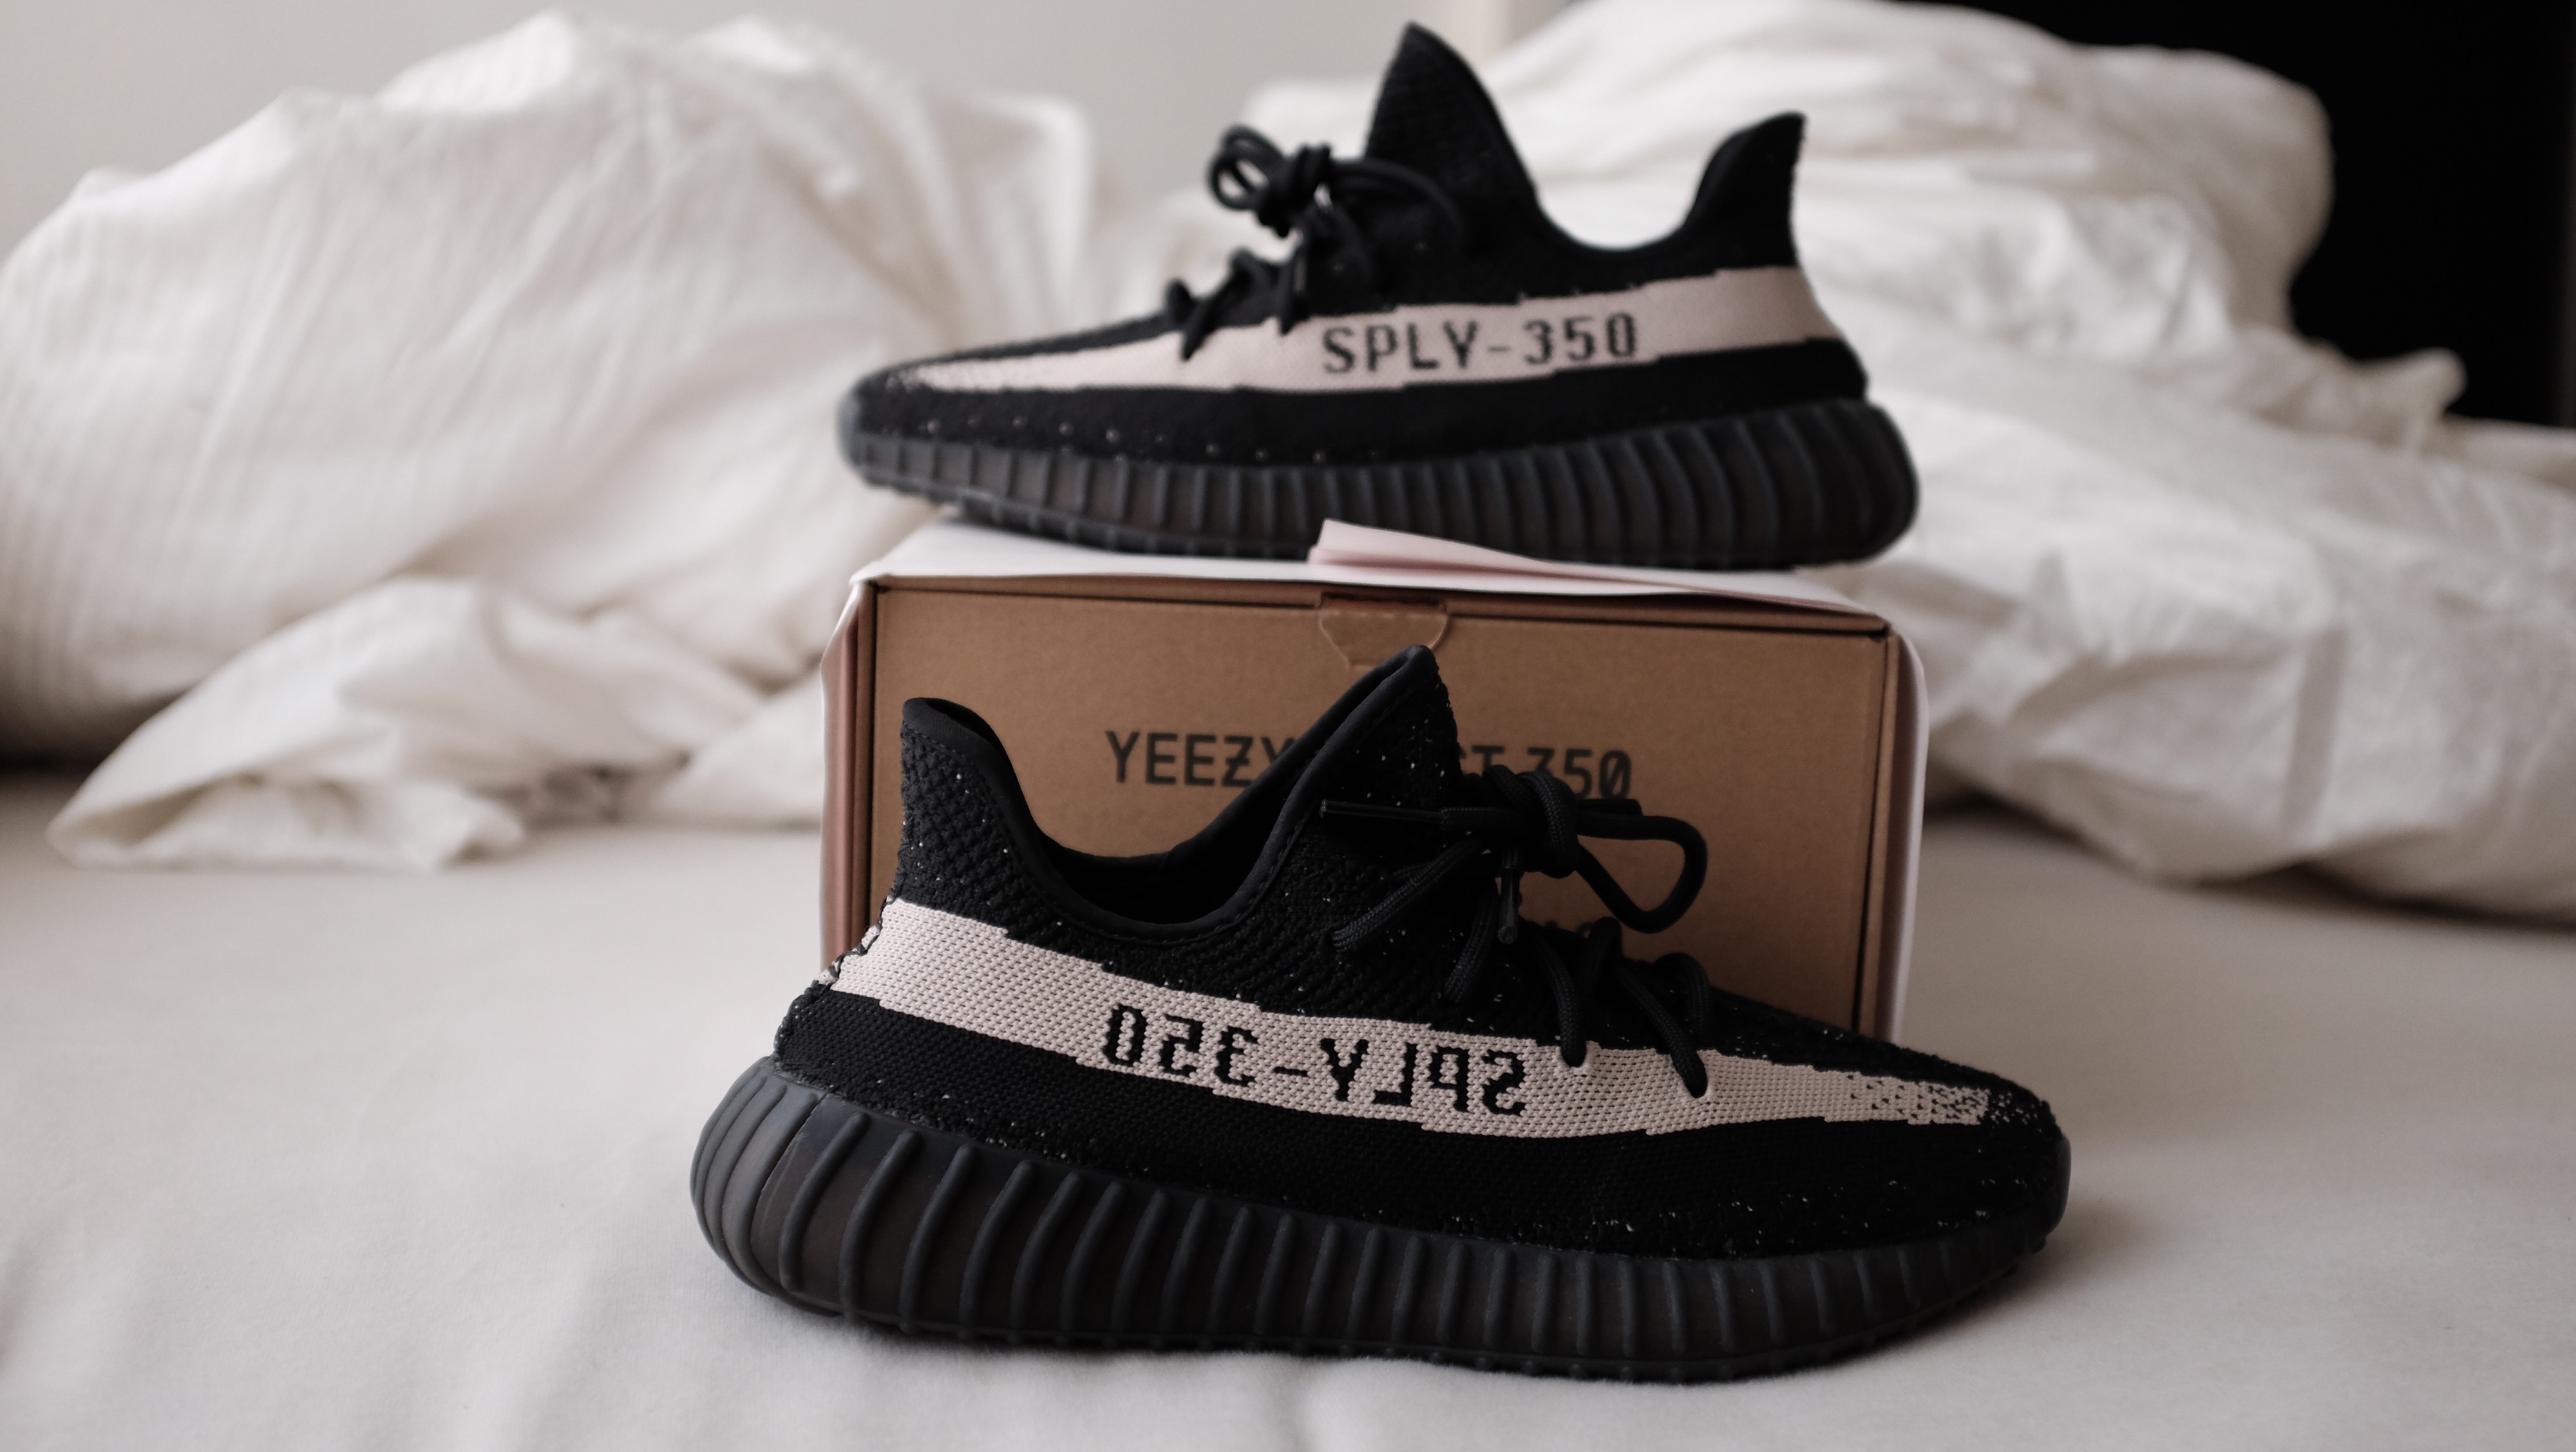
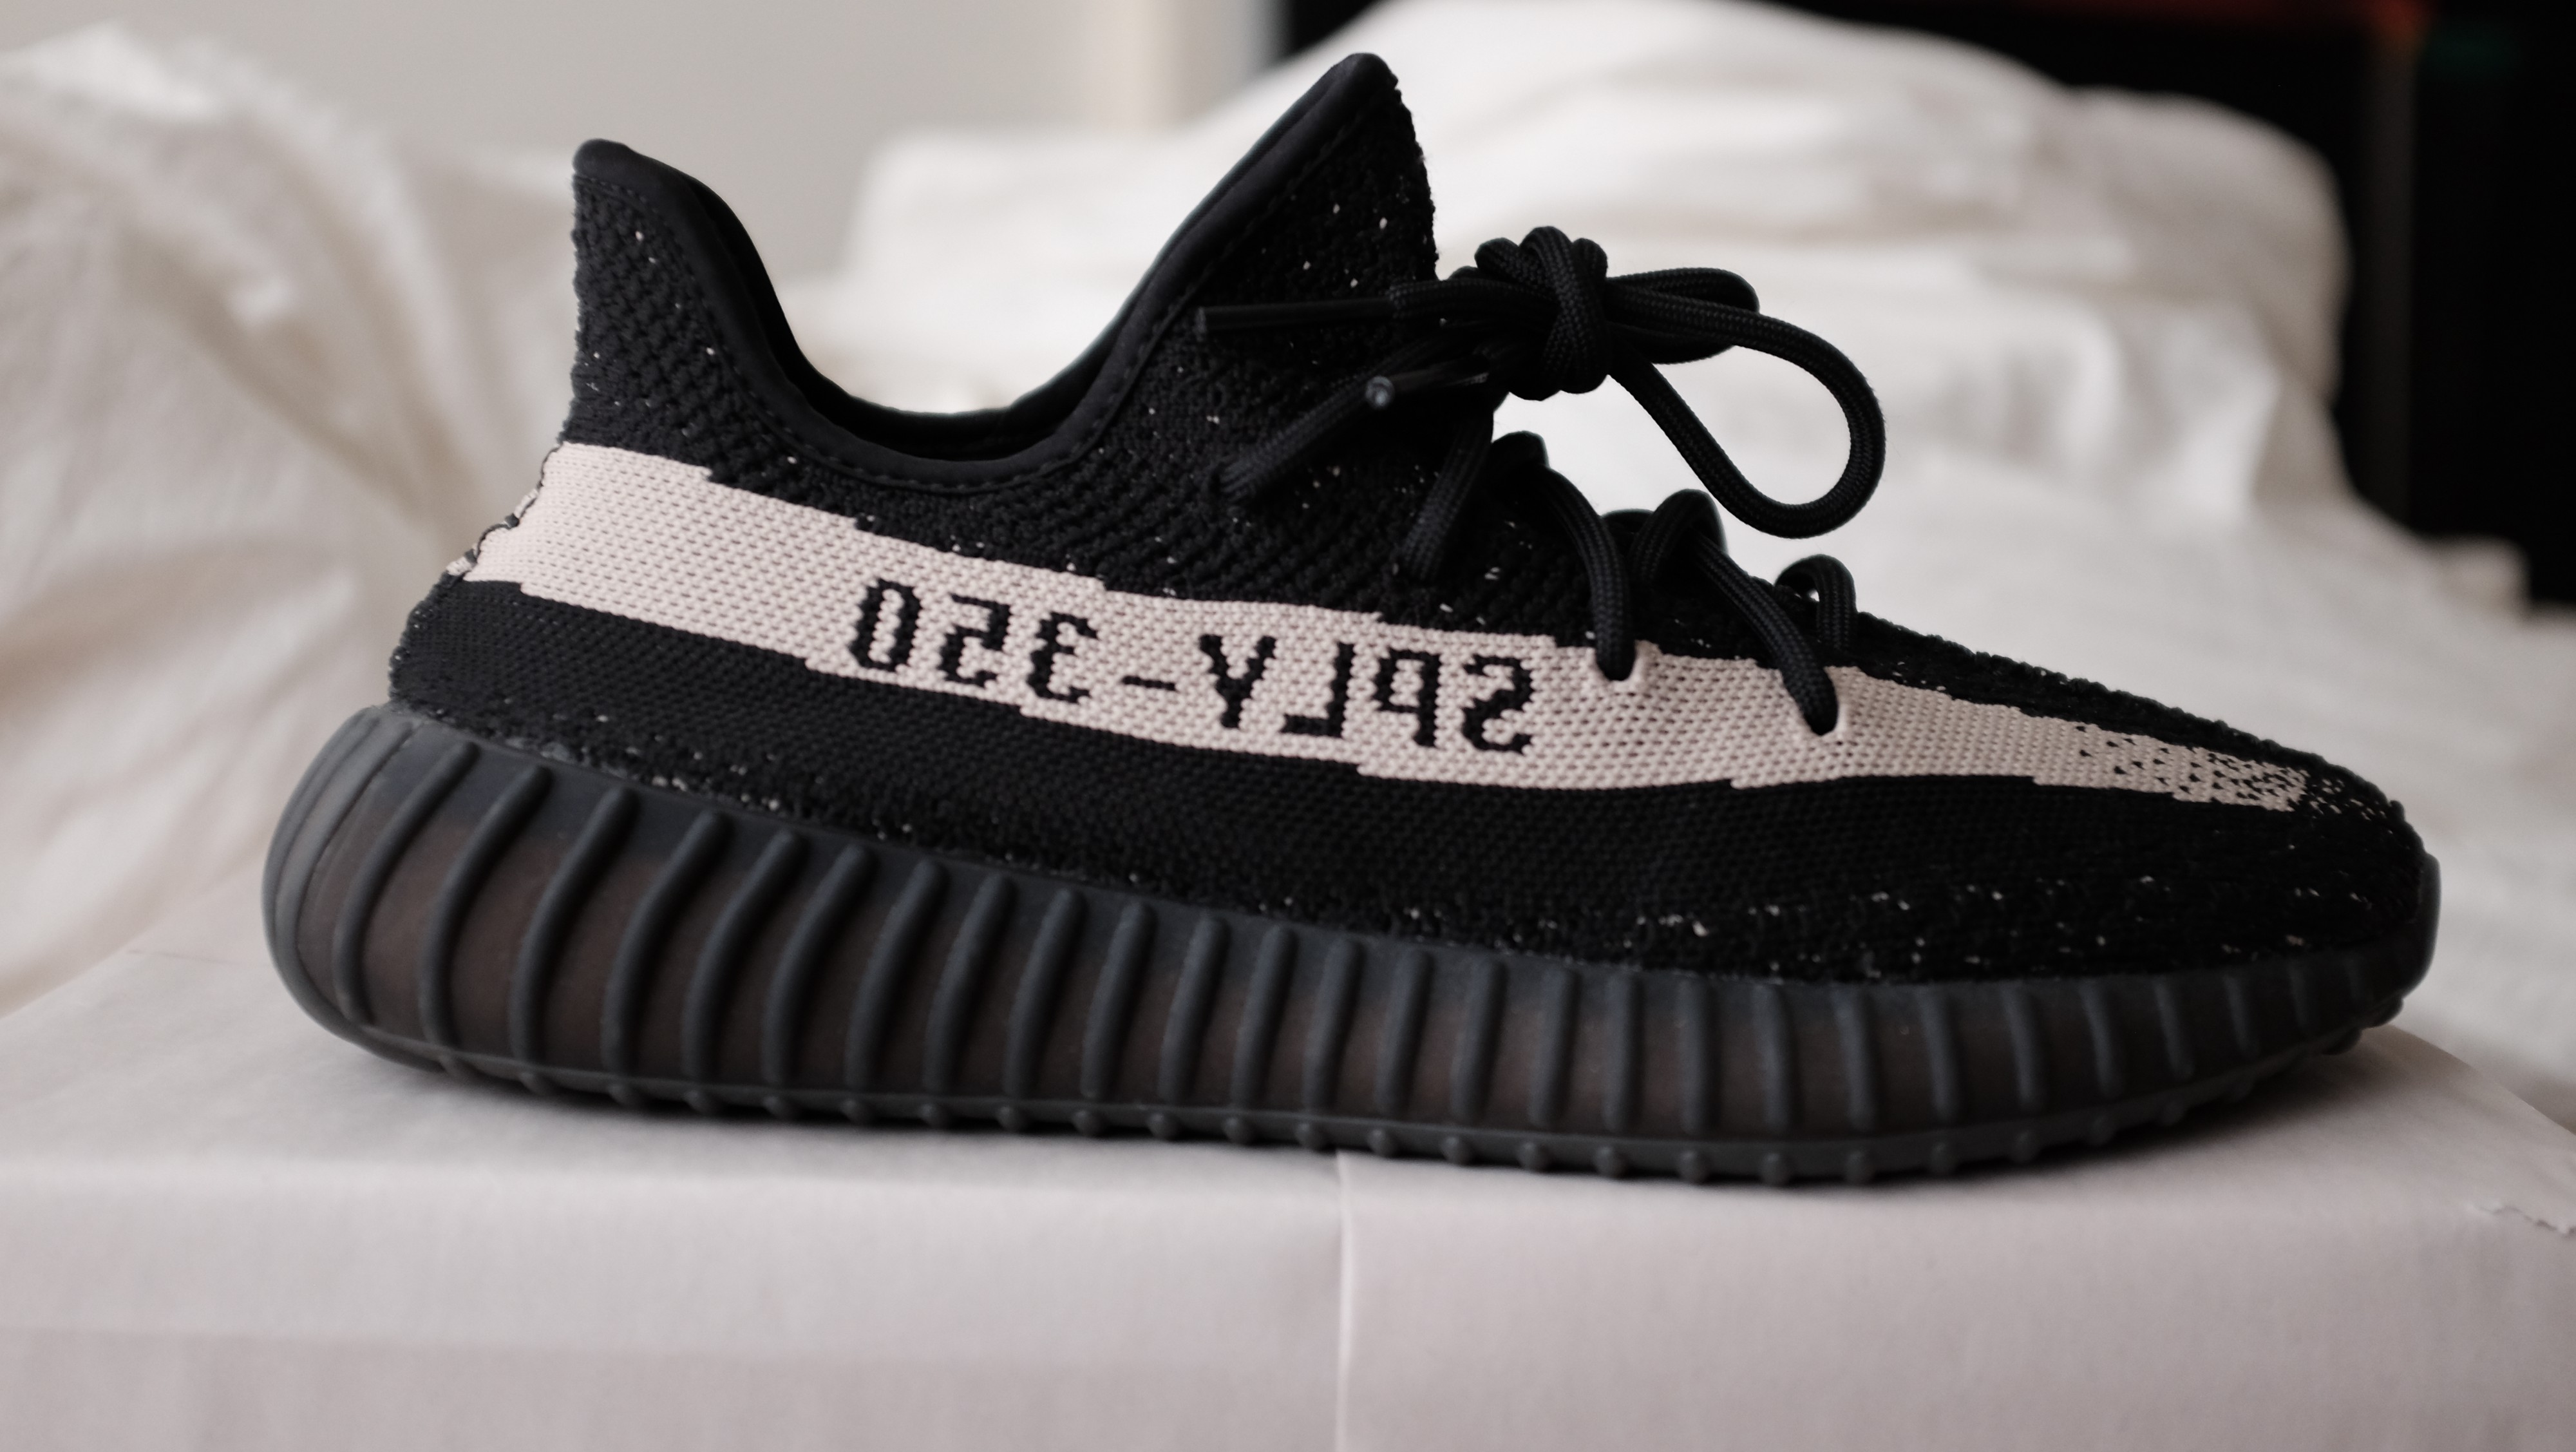
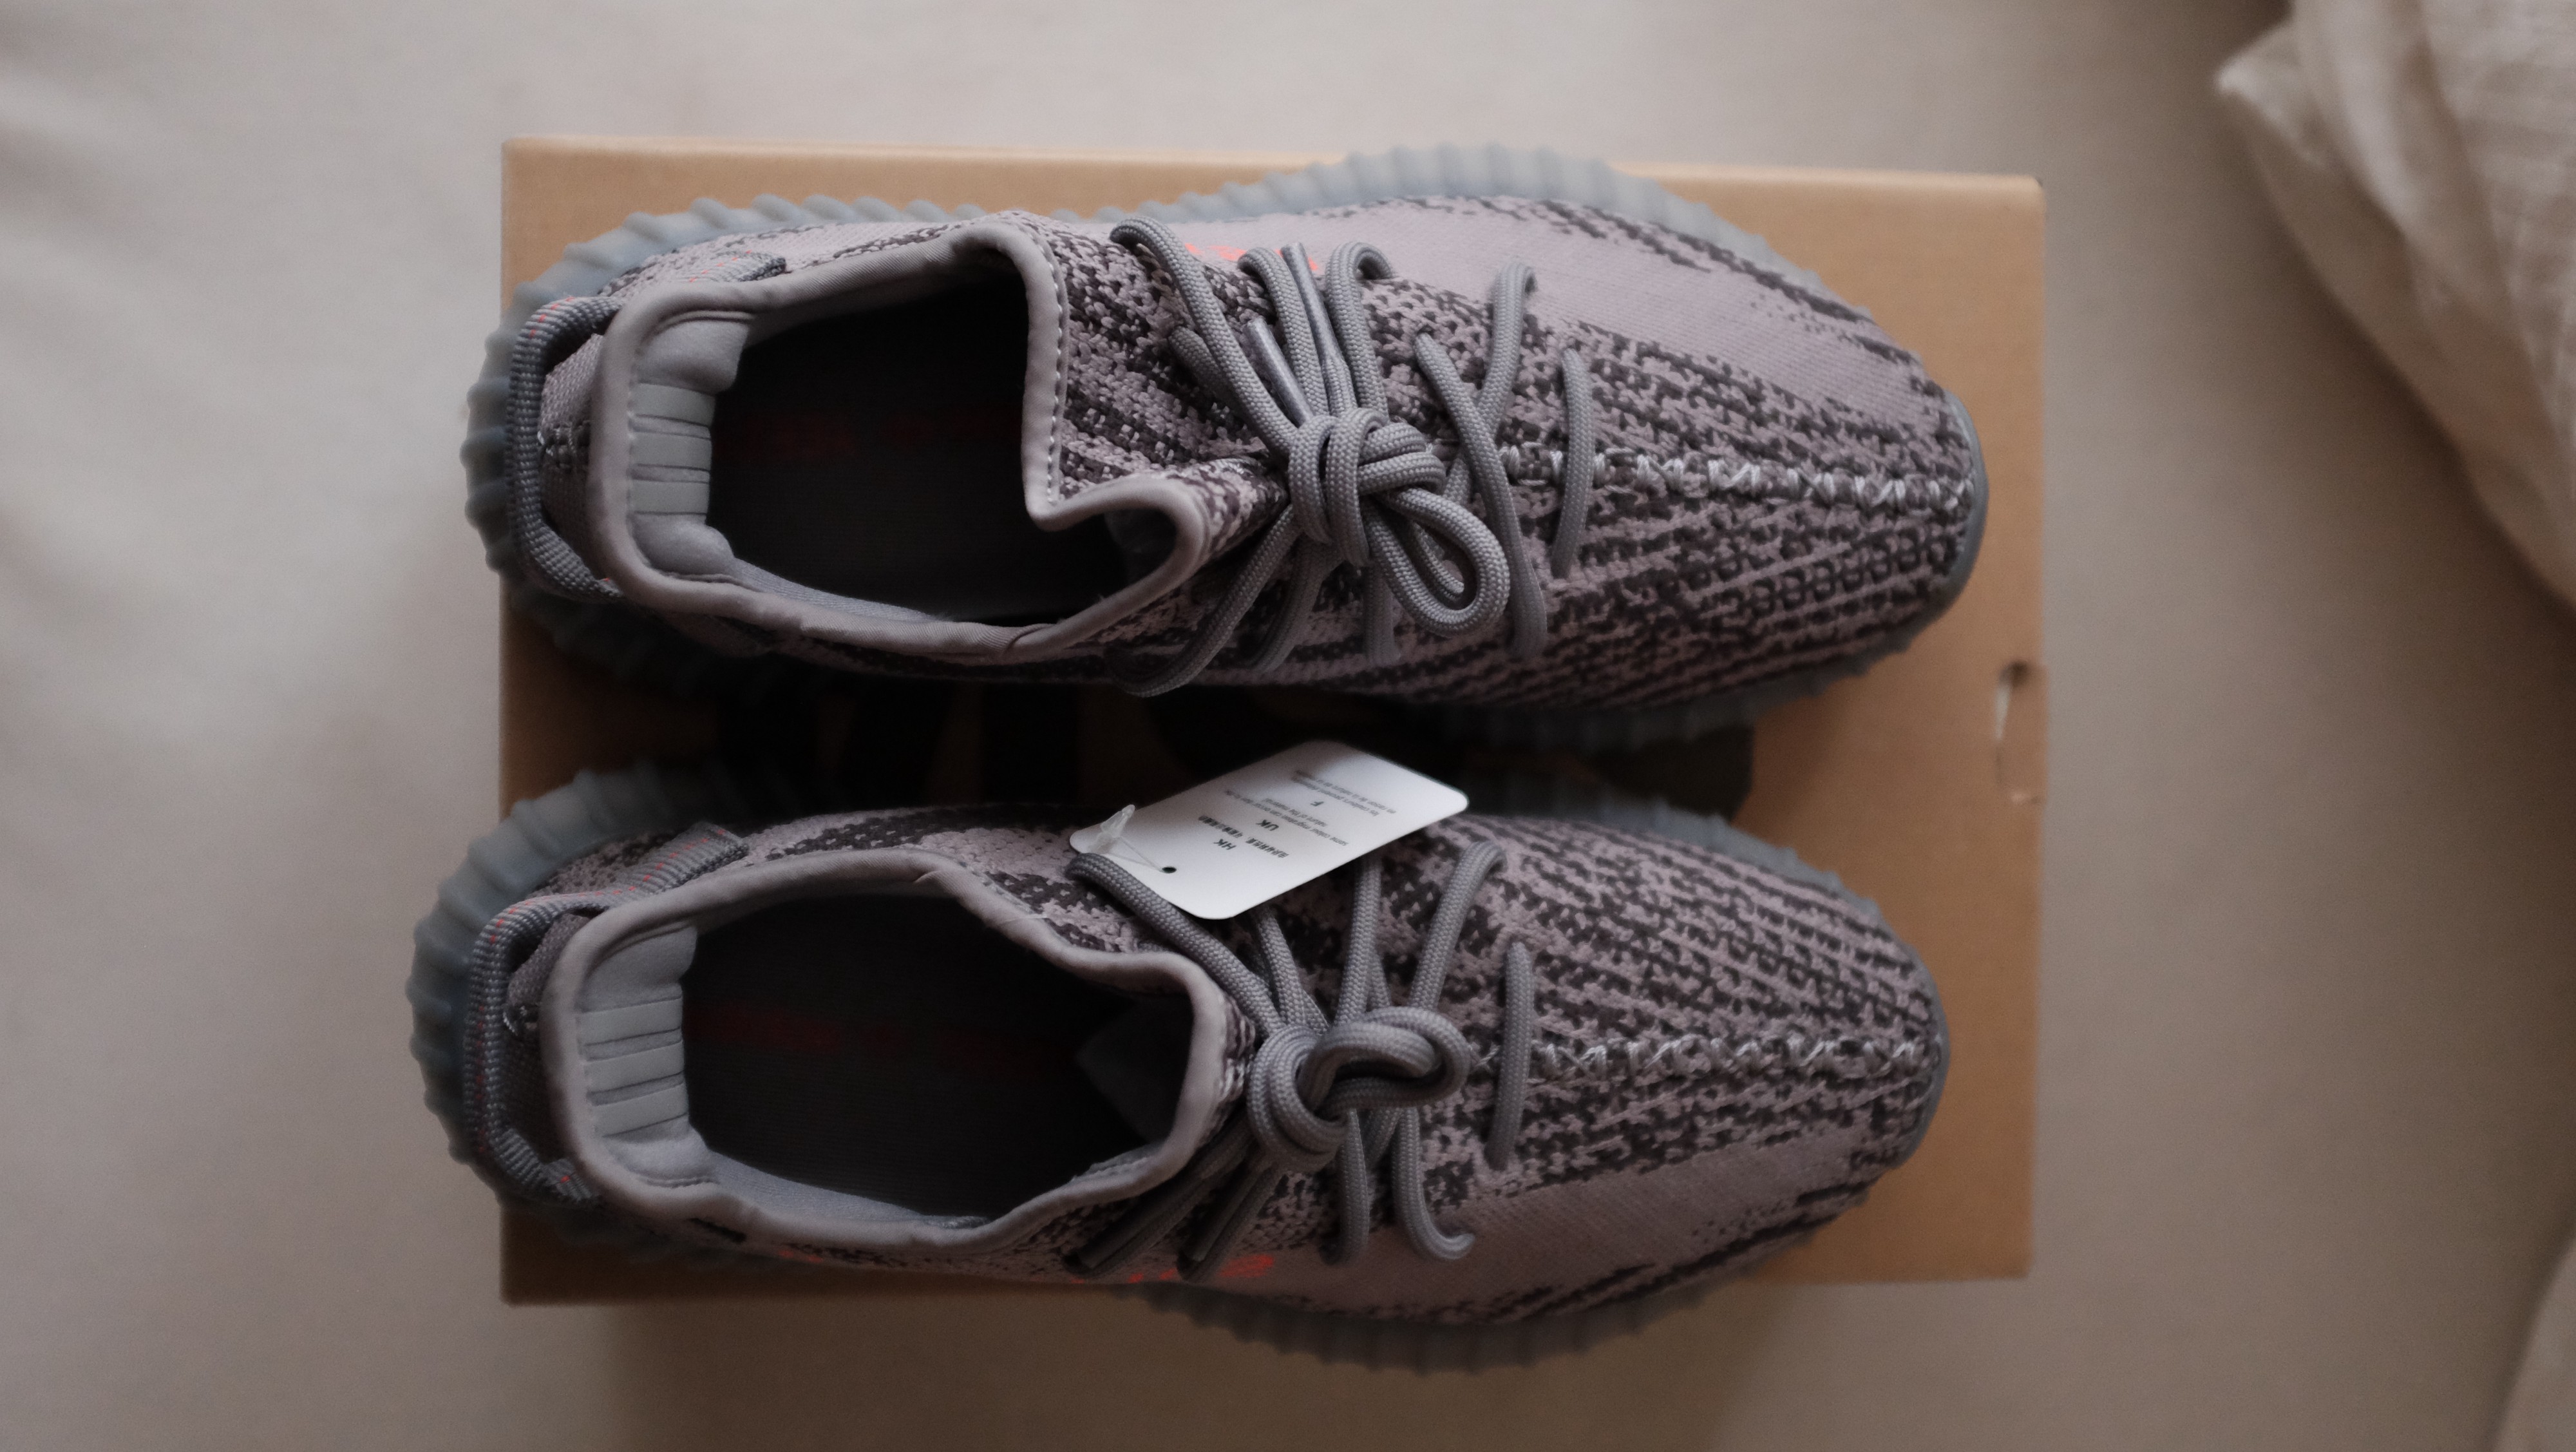
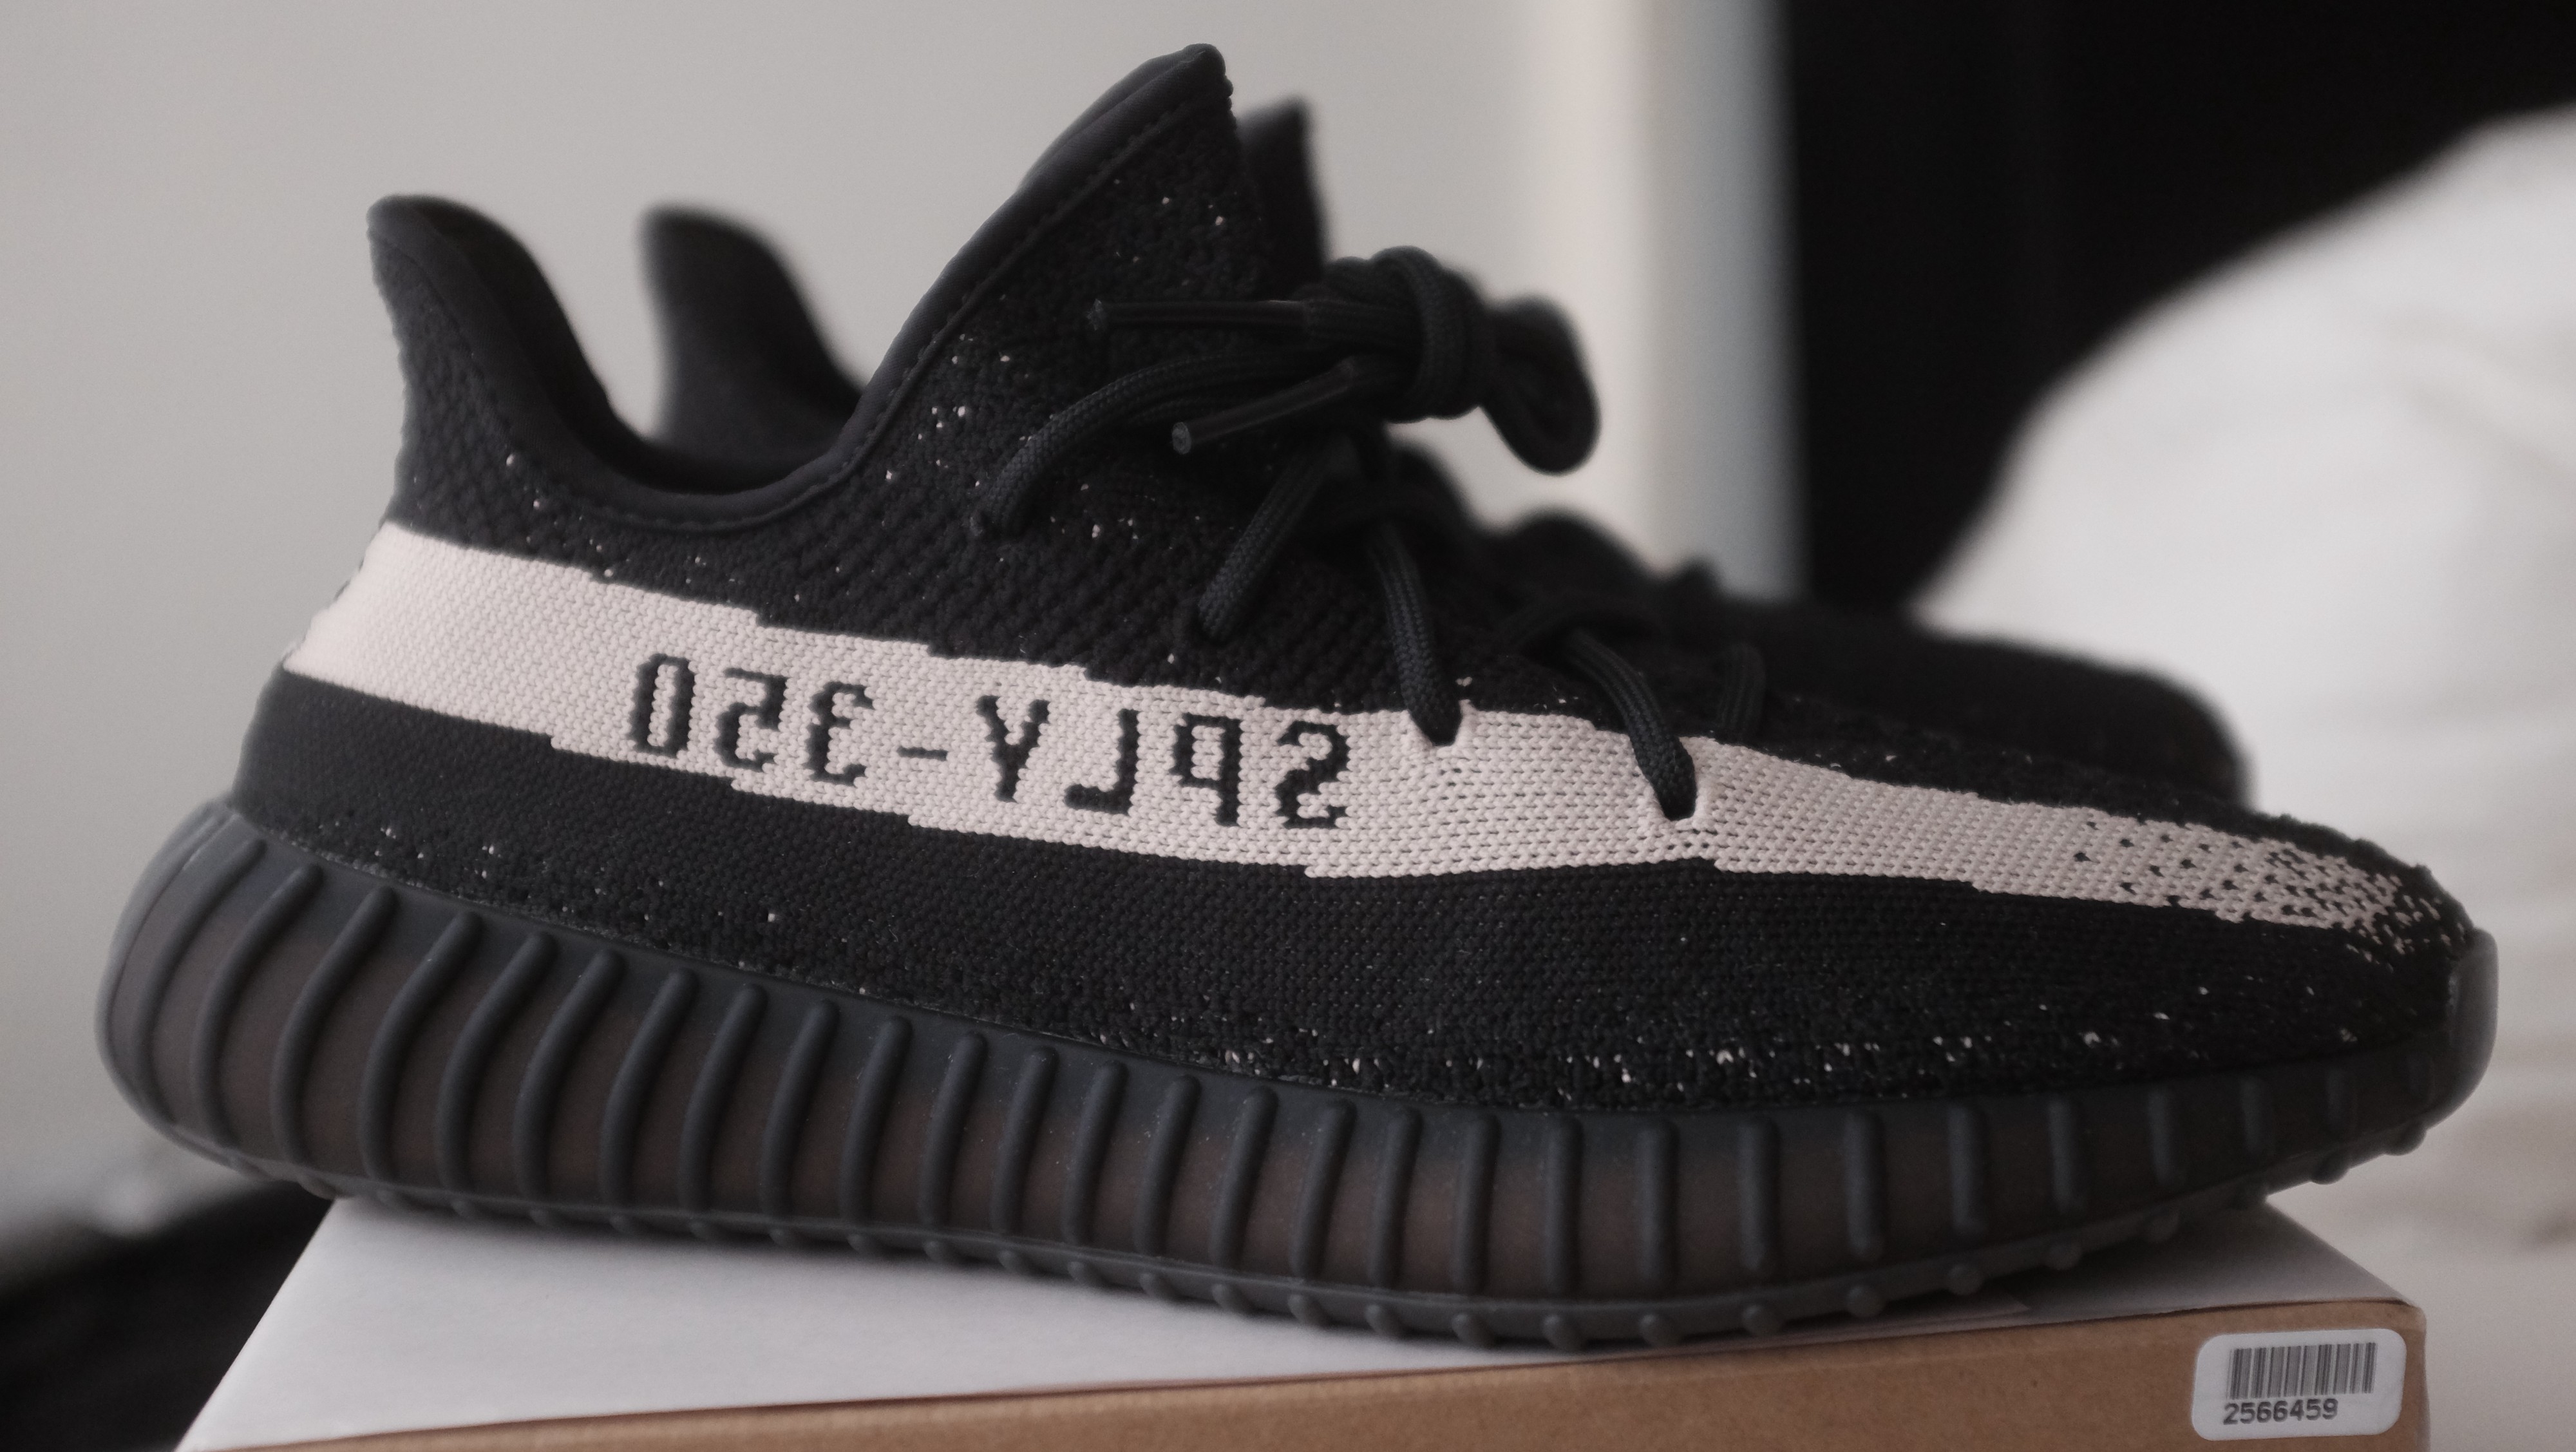
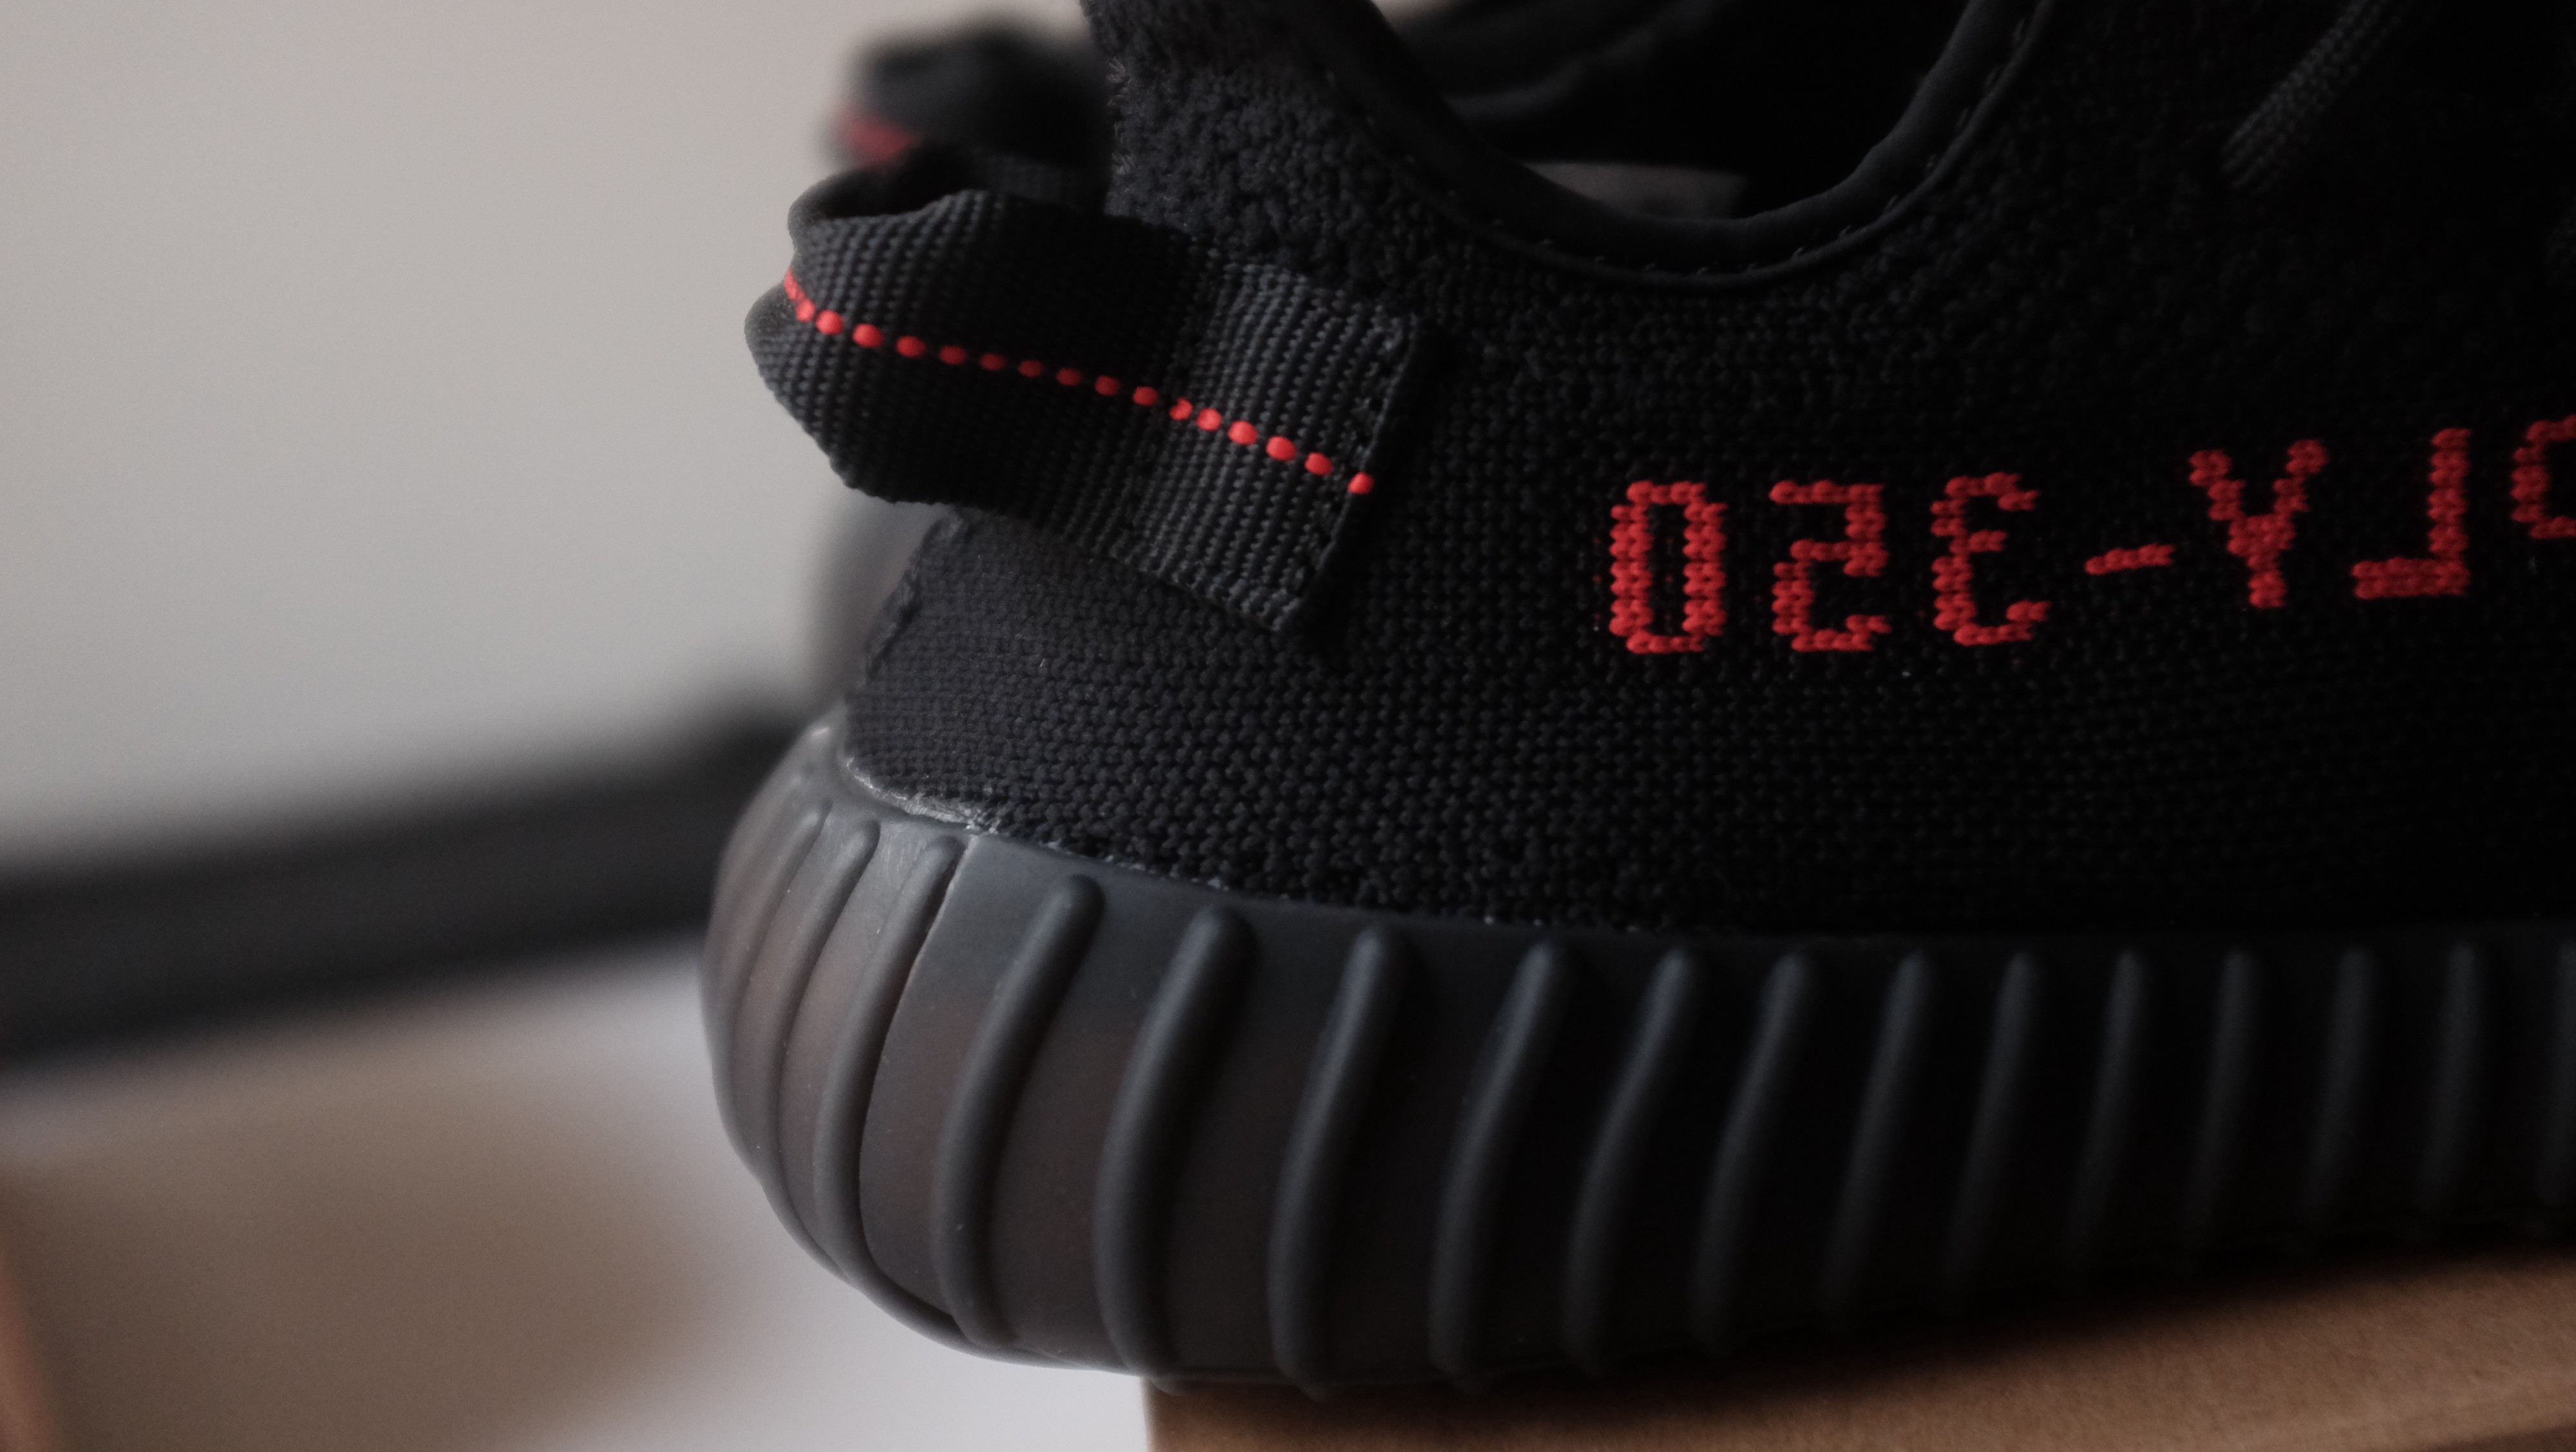
 On Black Striped V2?s some sizes will have the dots near the bottom of the prime knit, most common in smaller sizes.
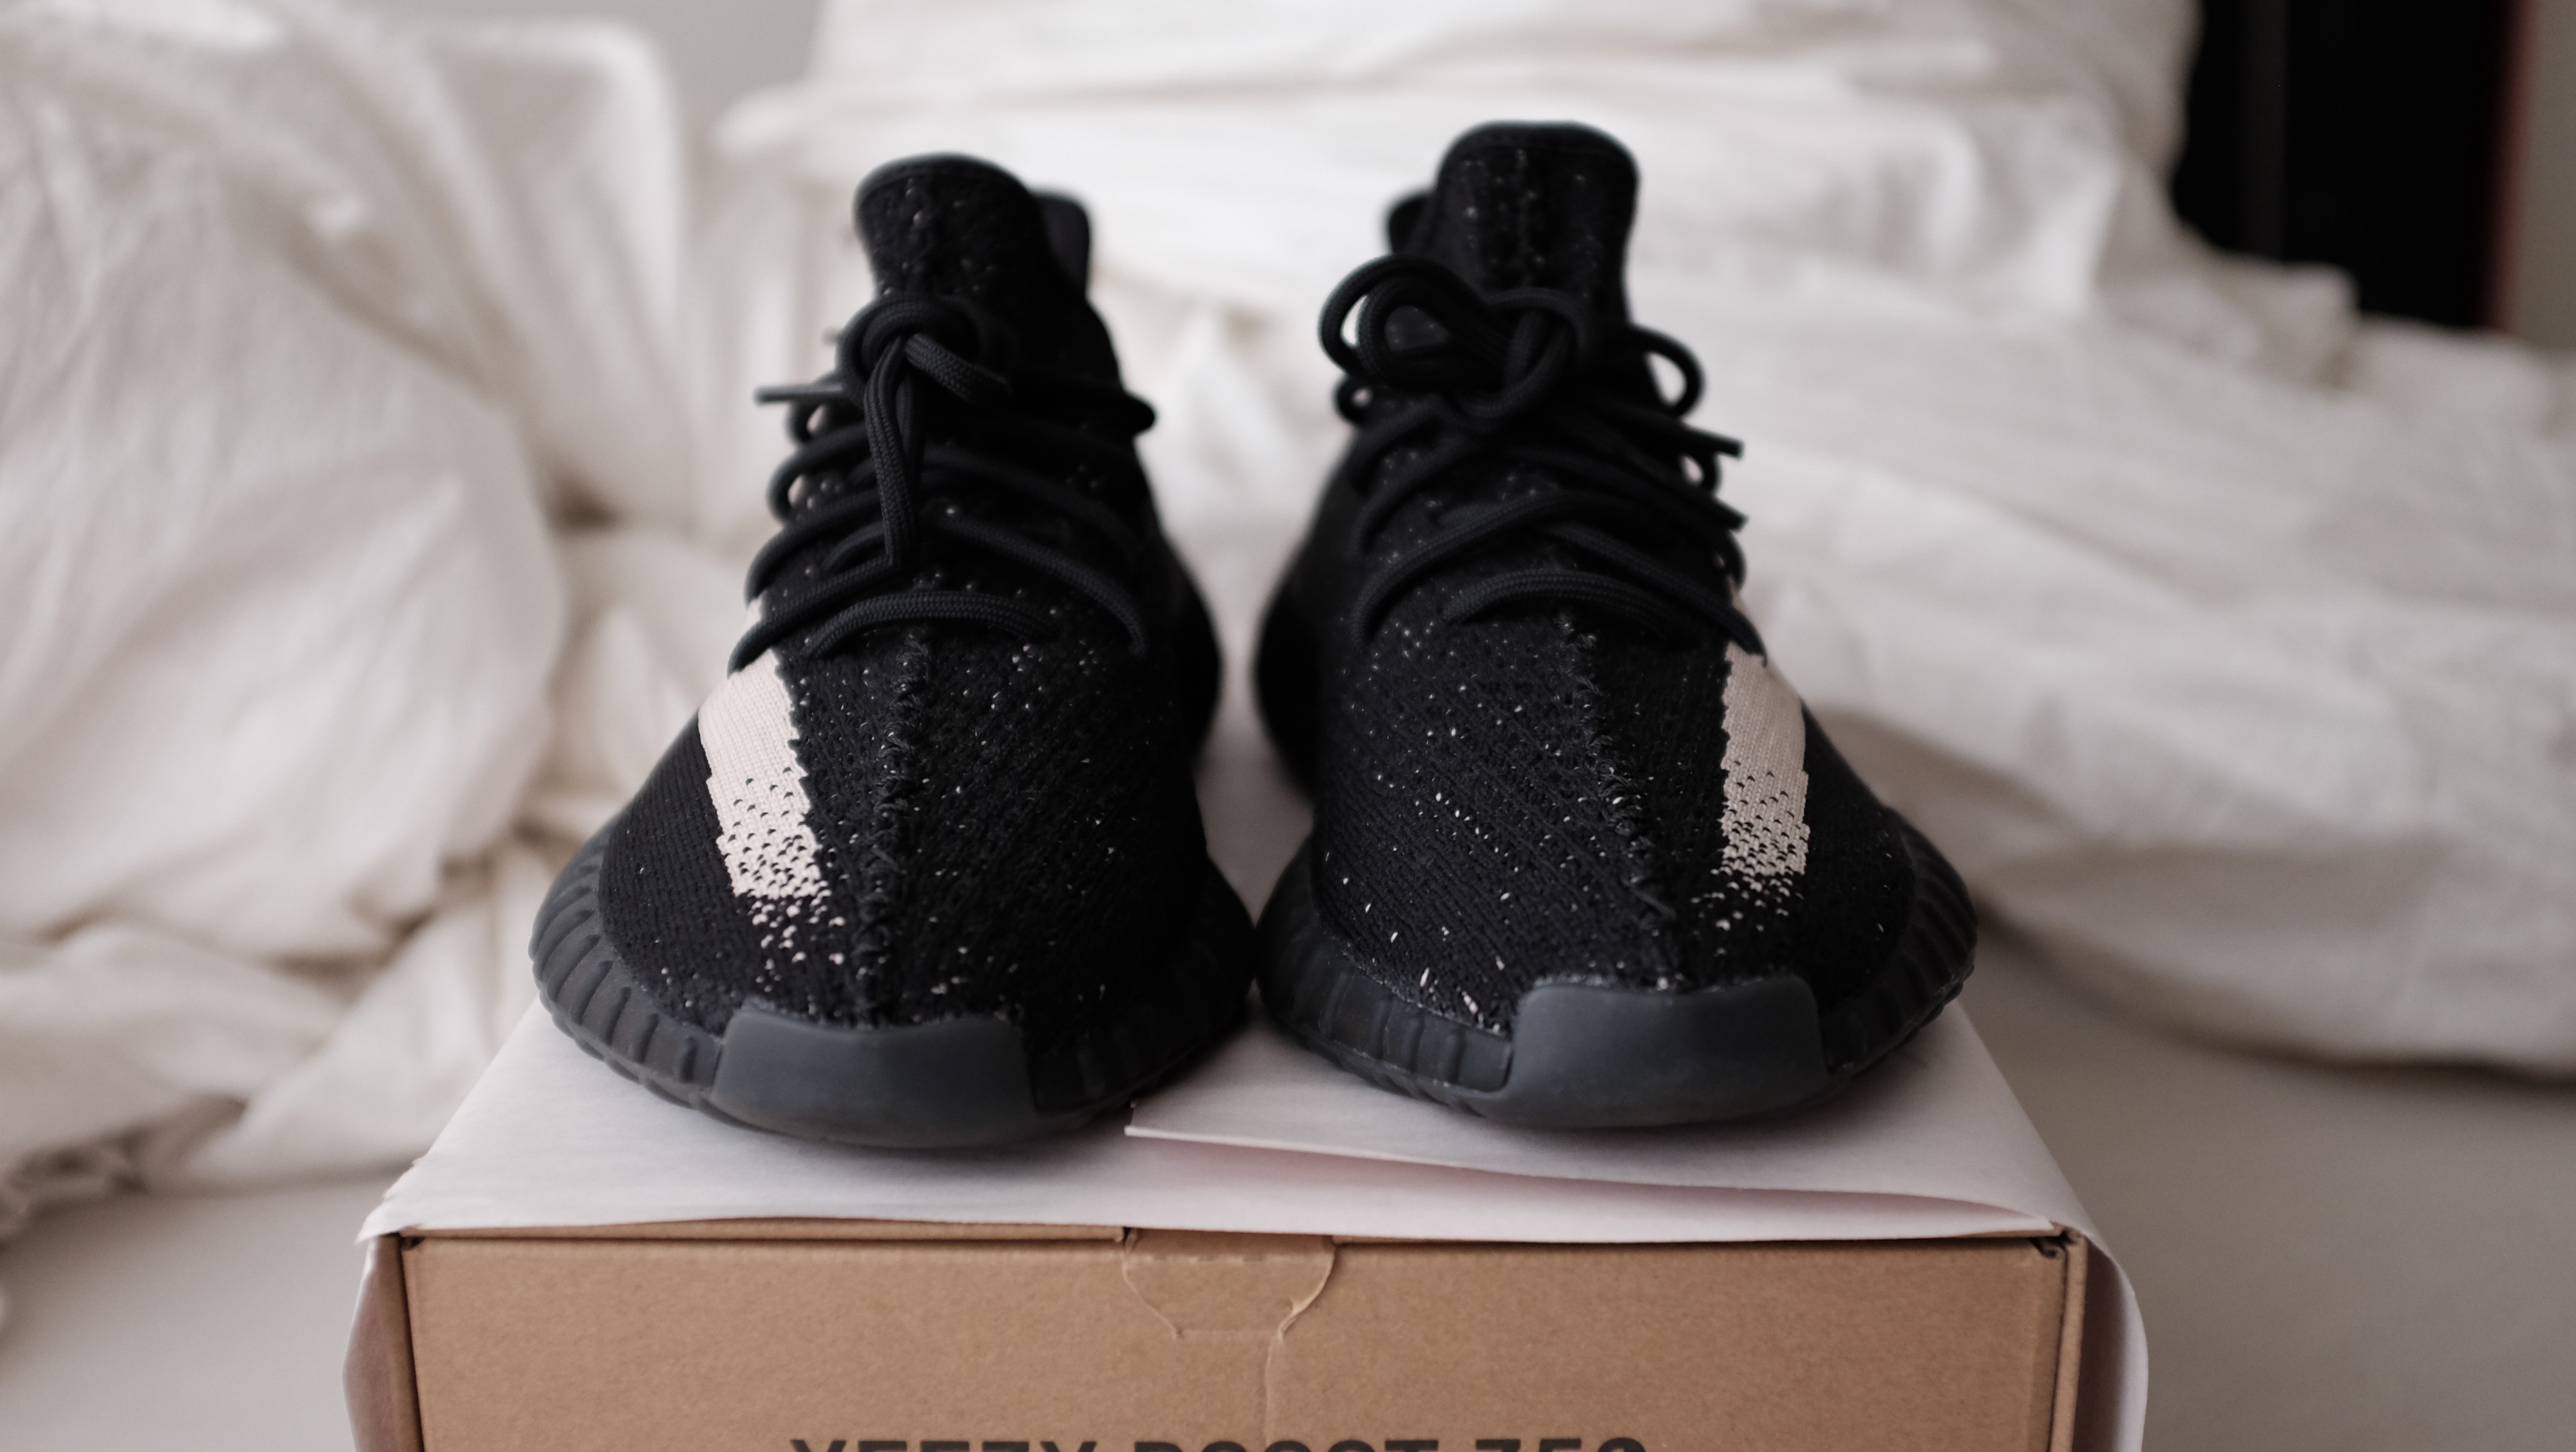
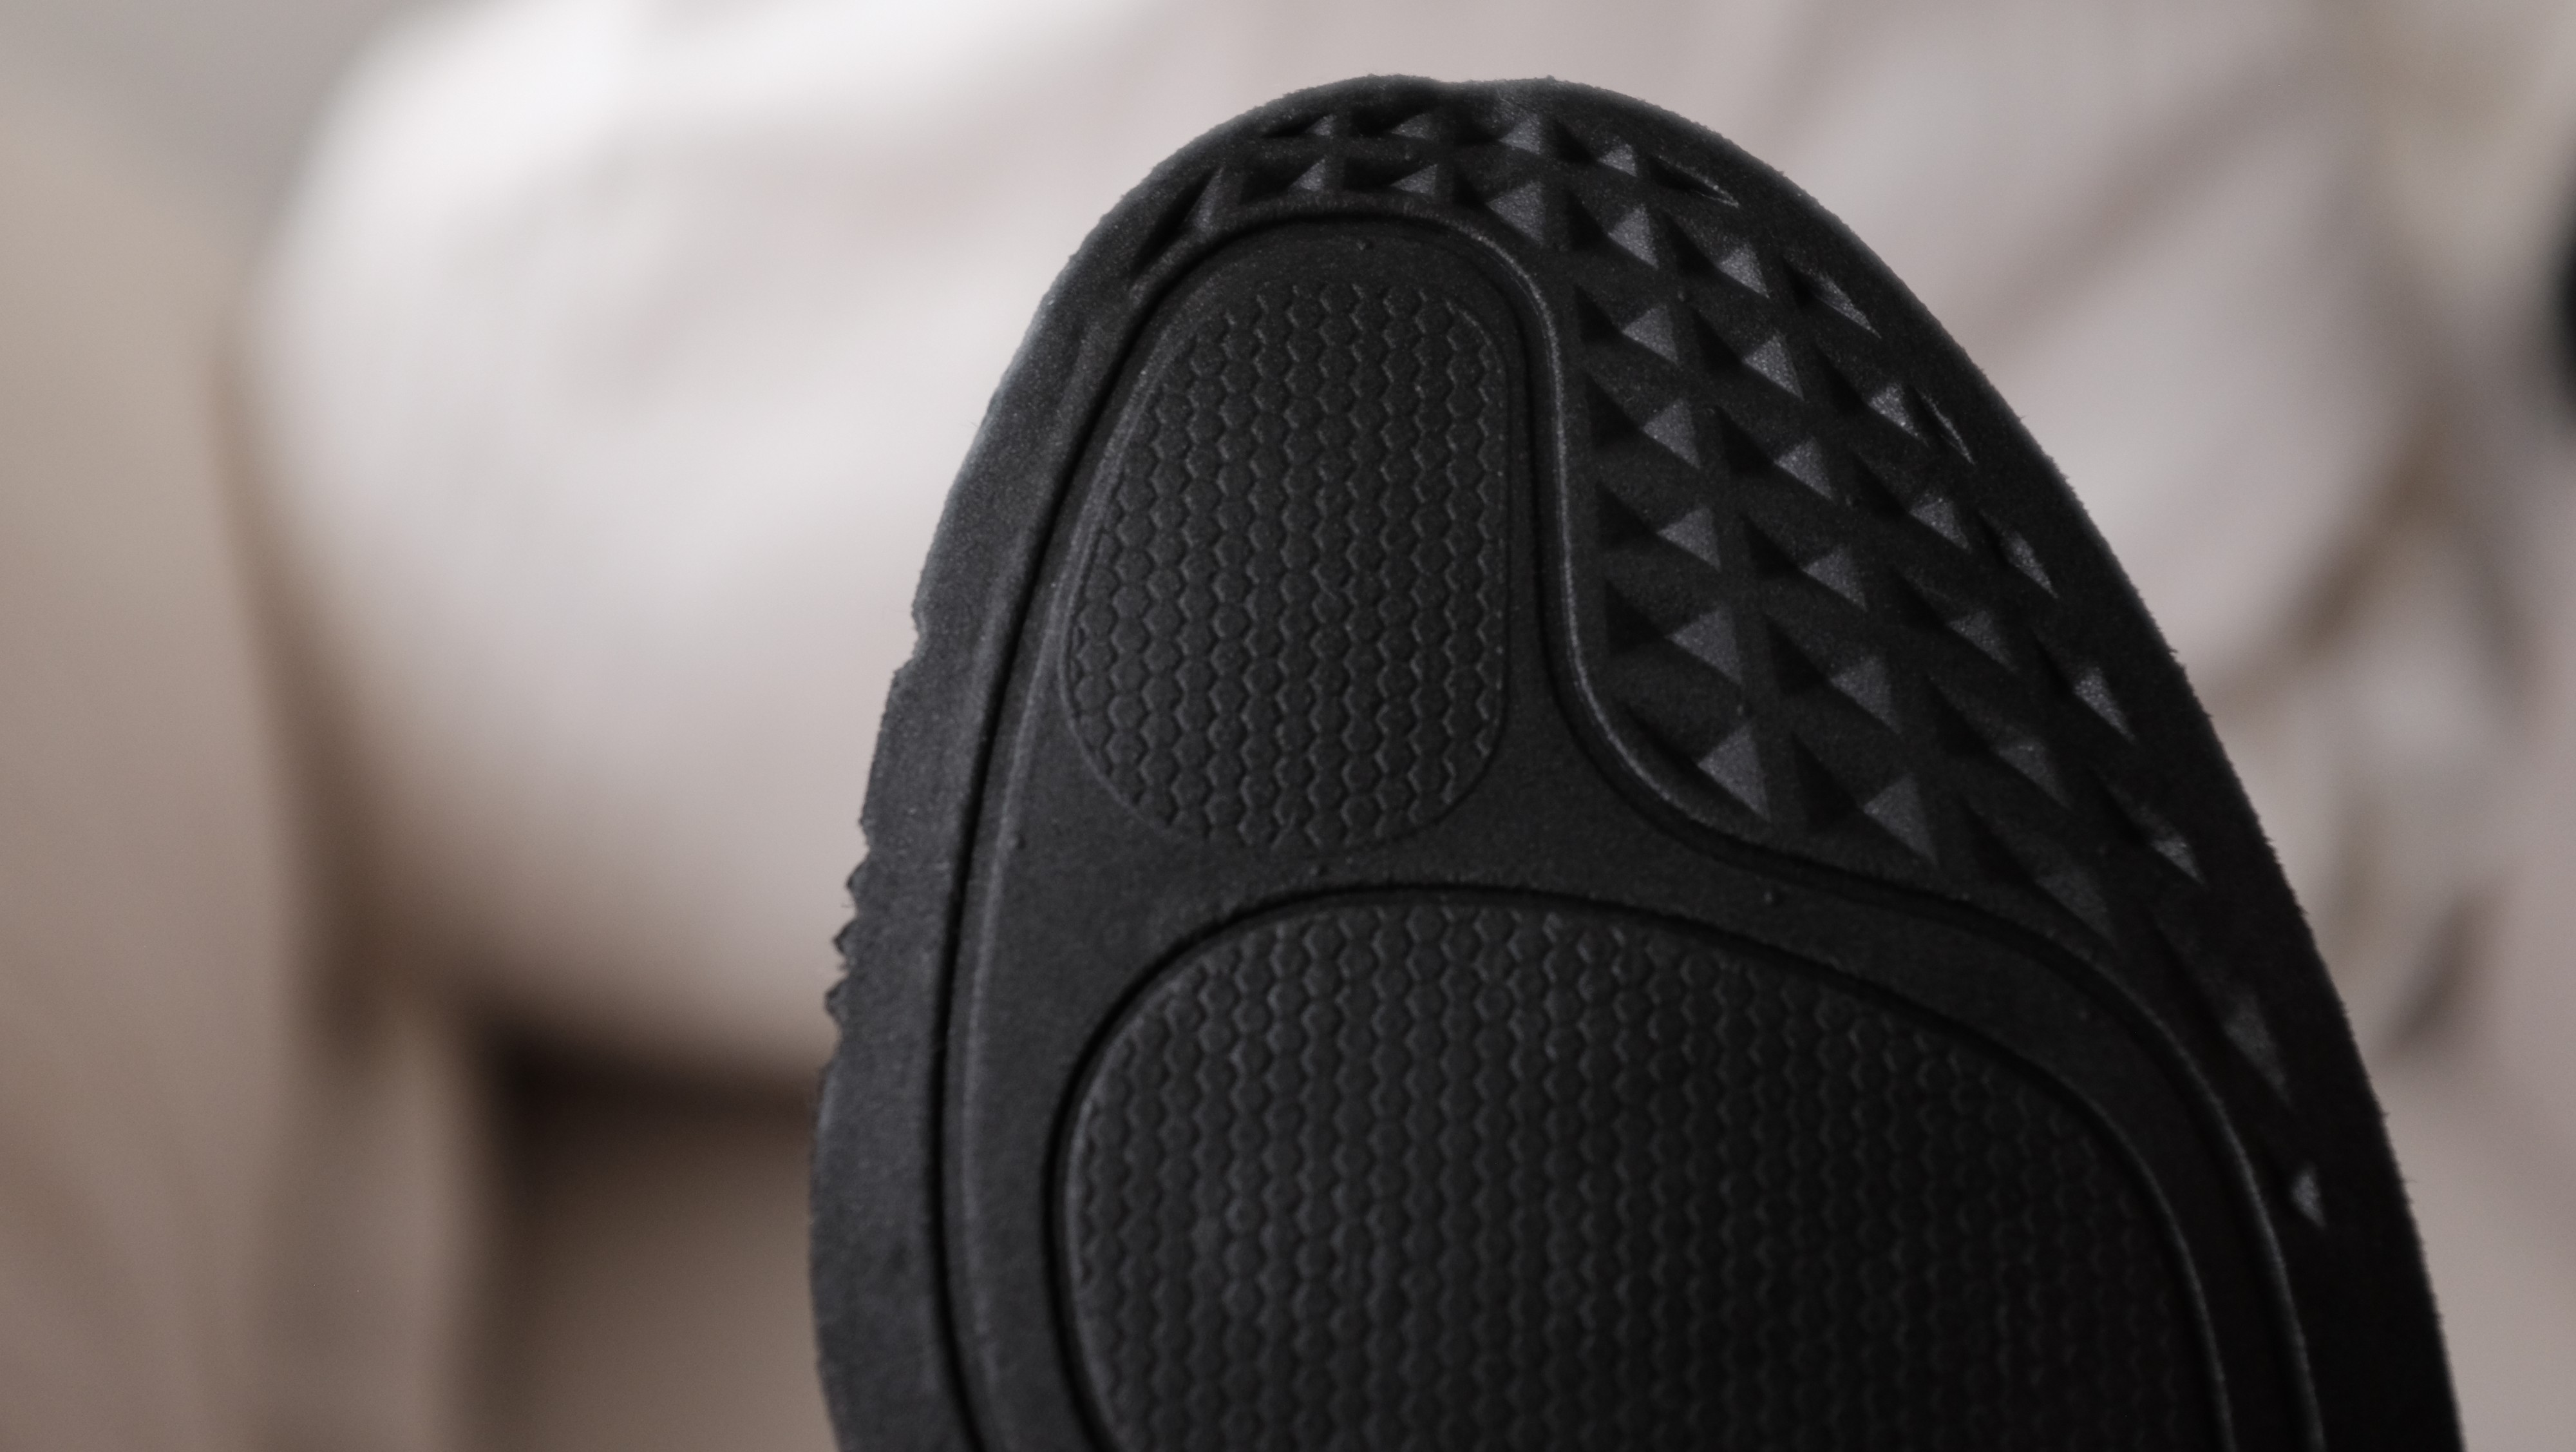
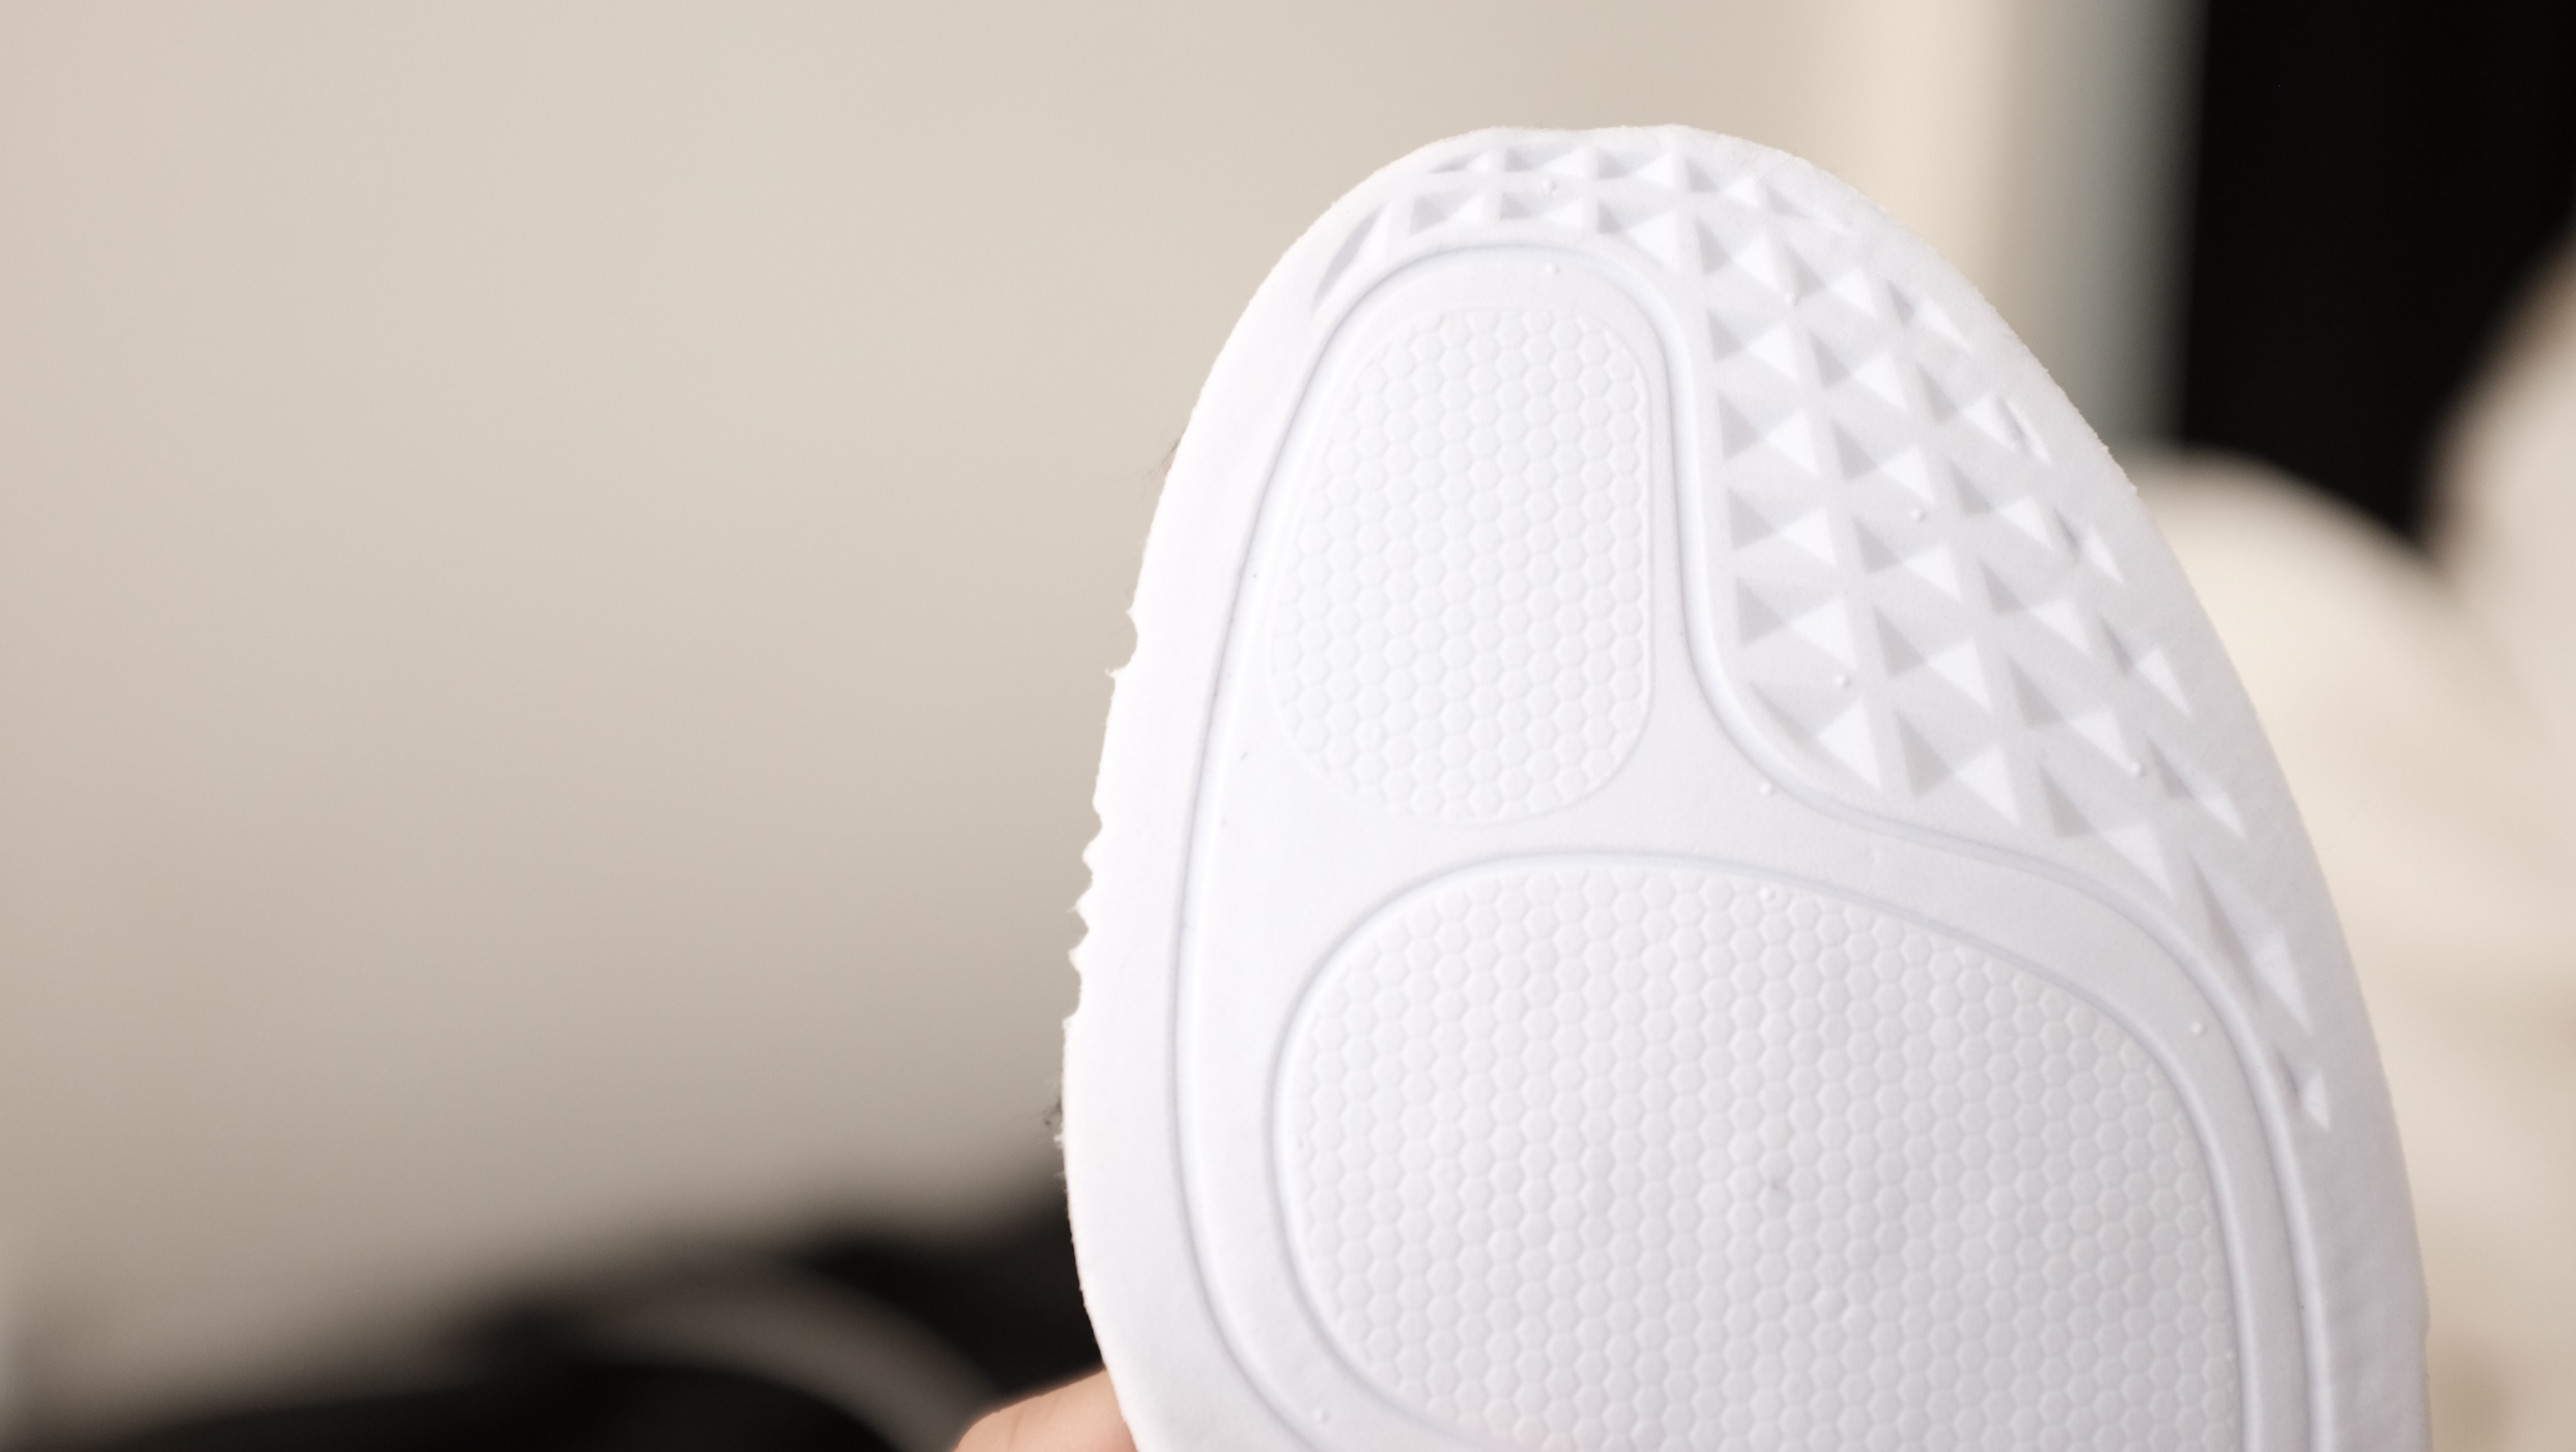
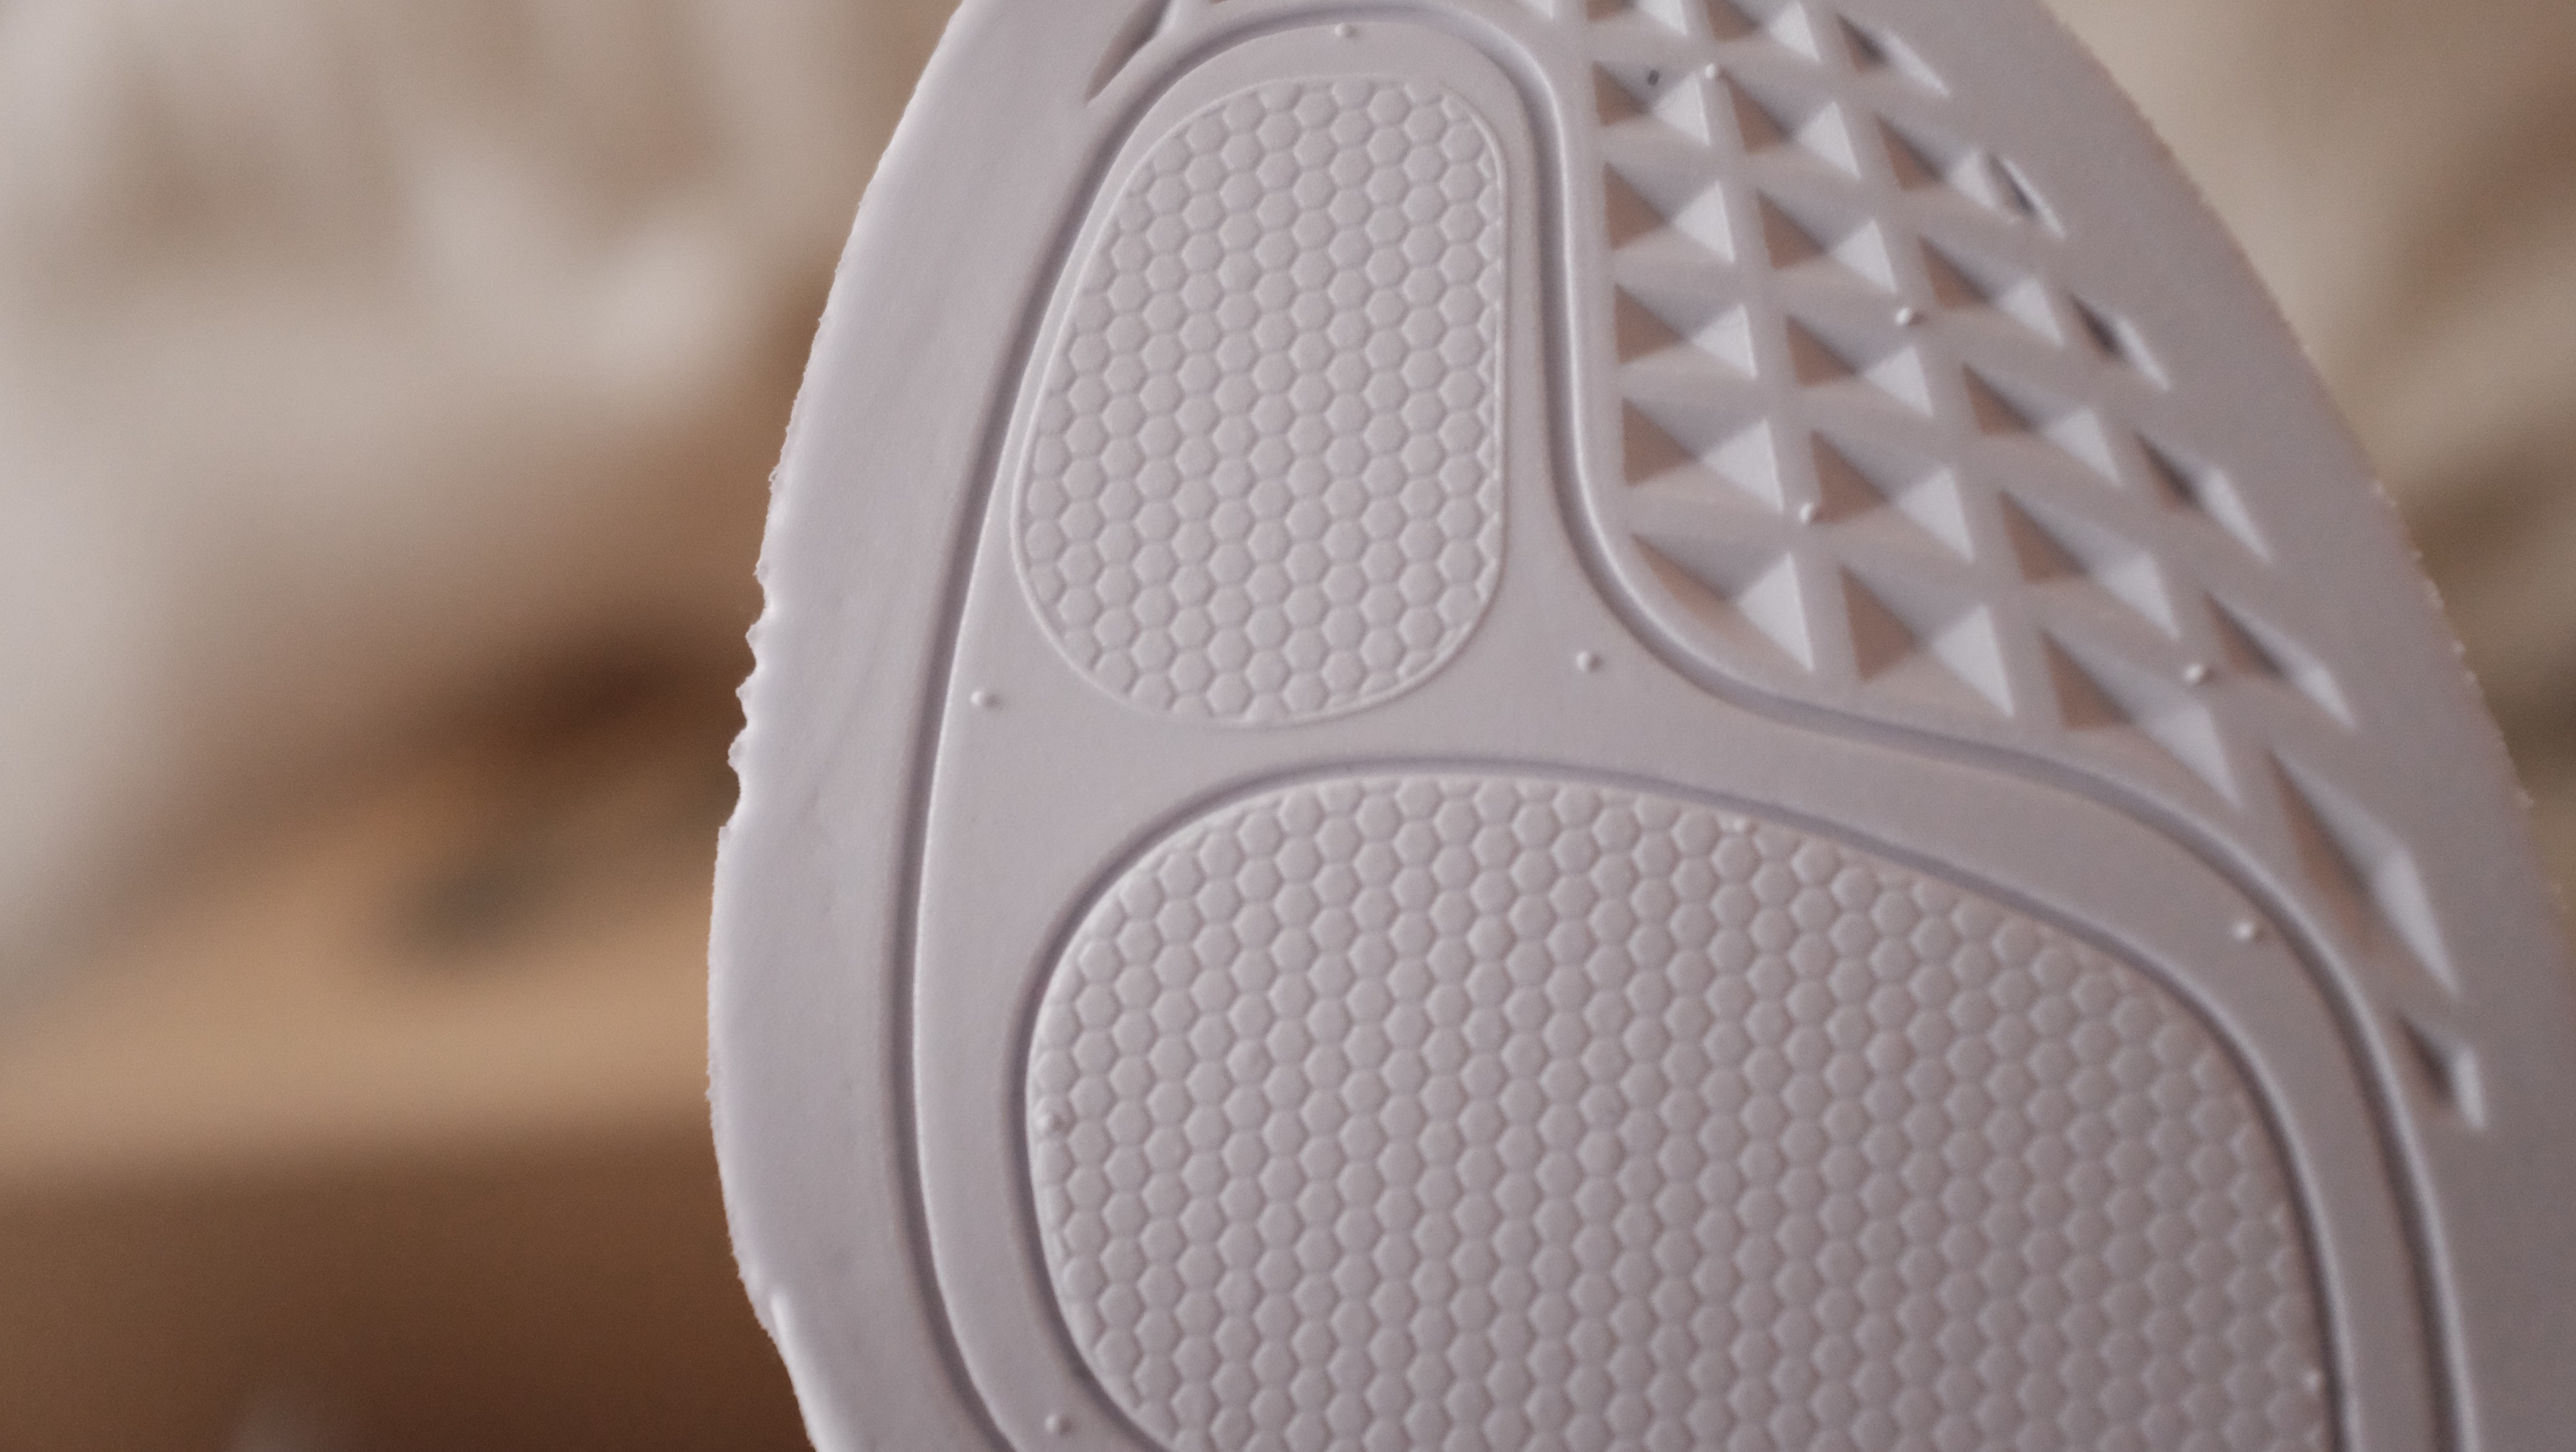
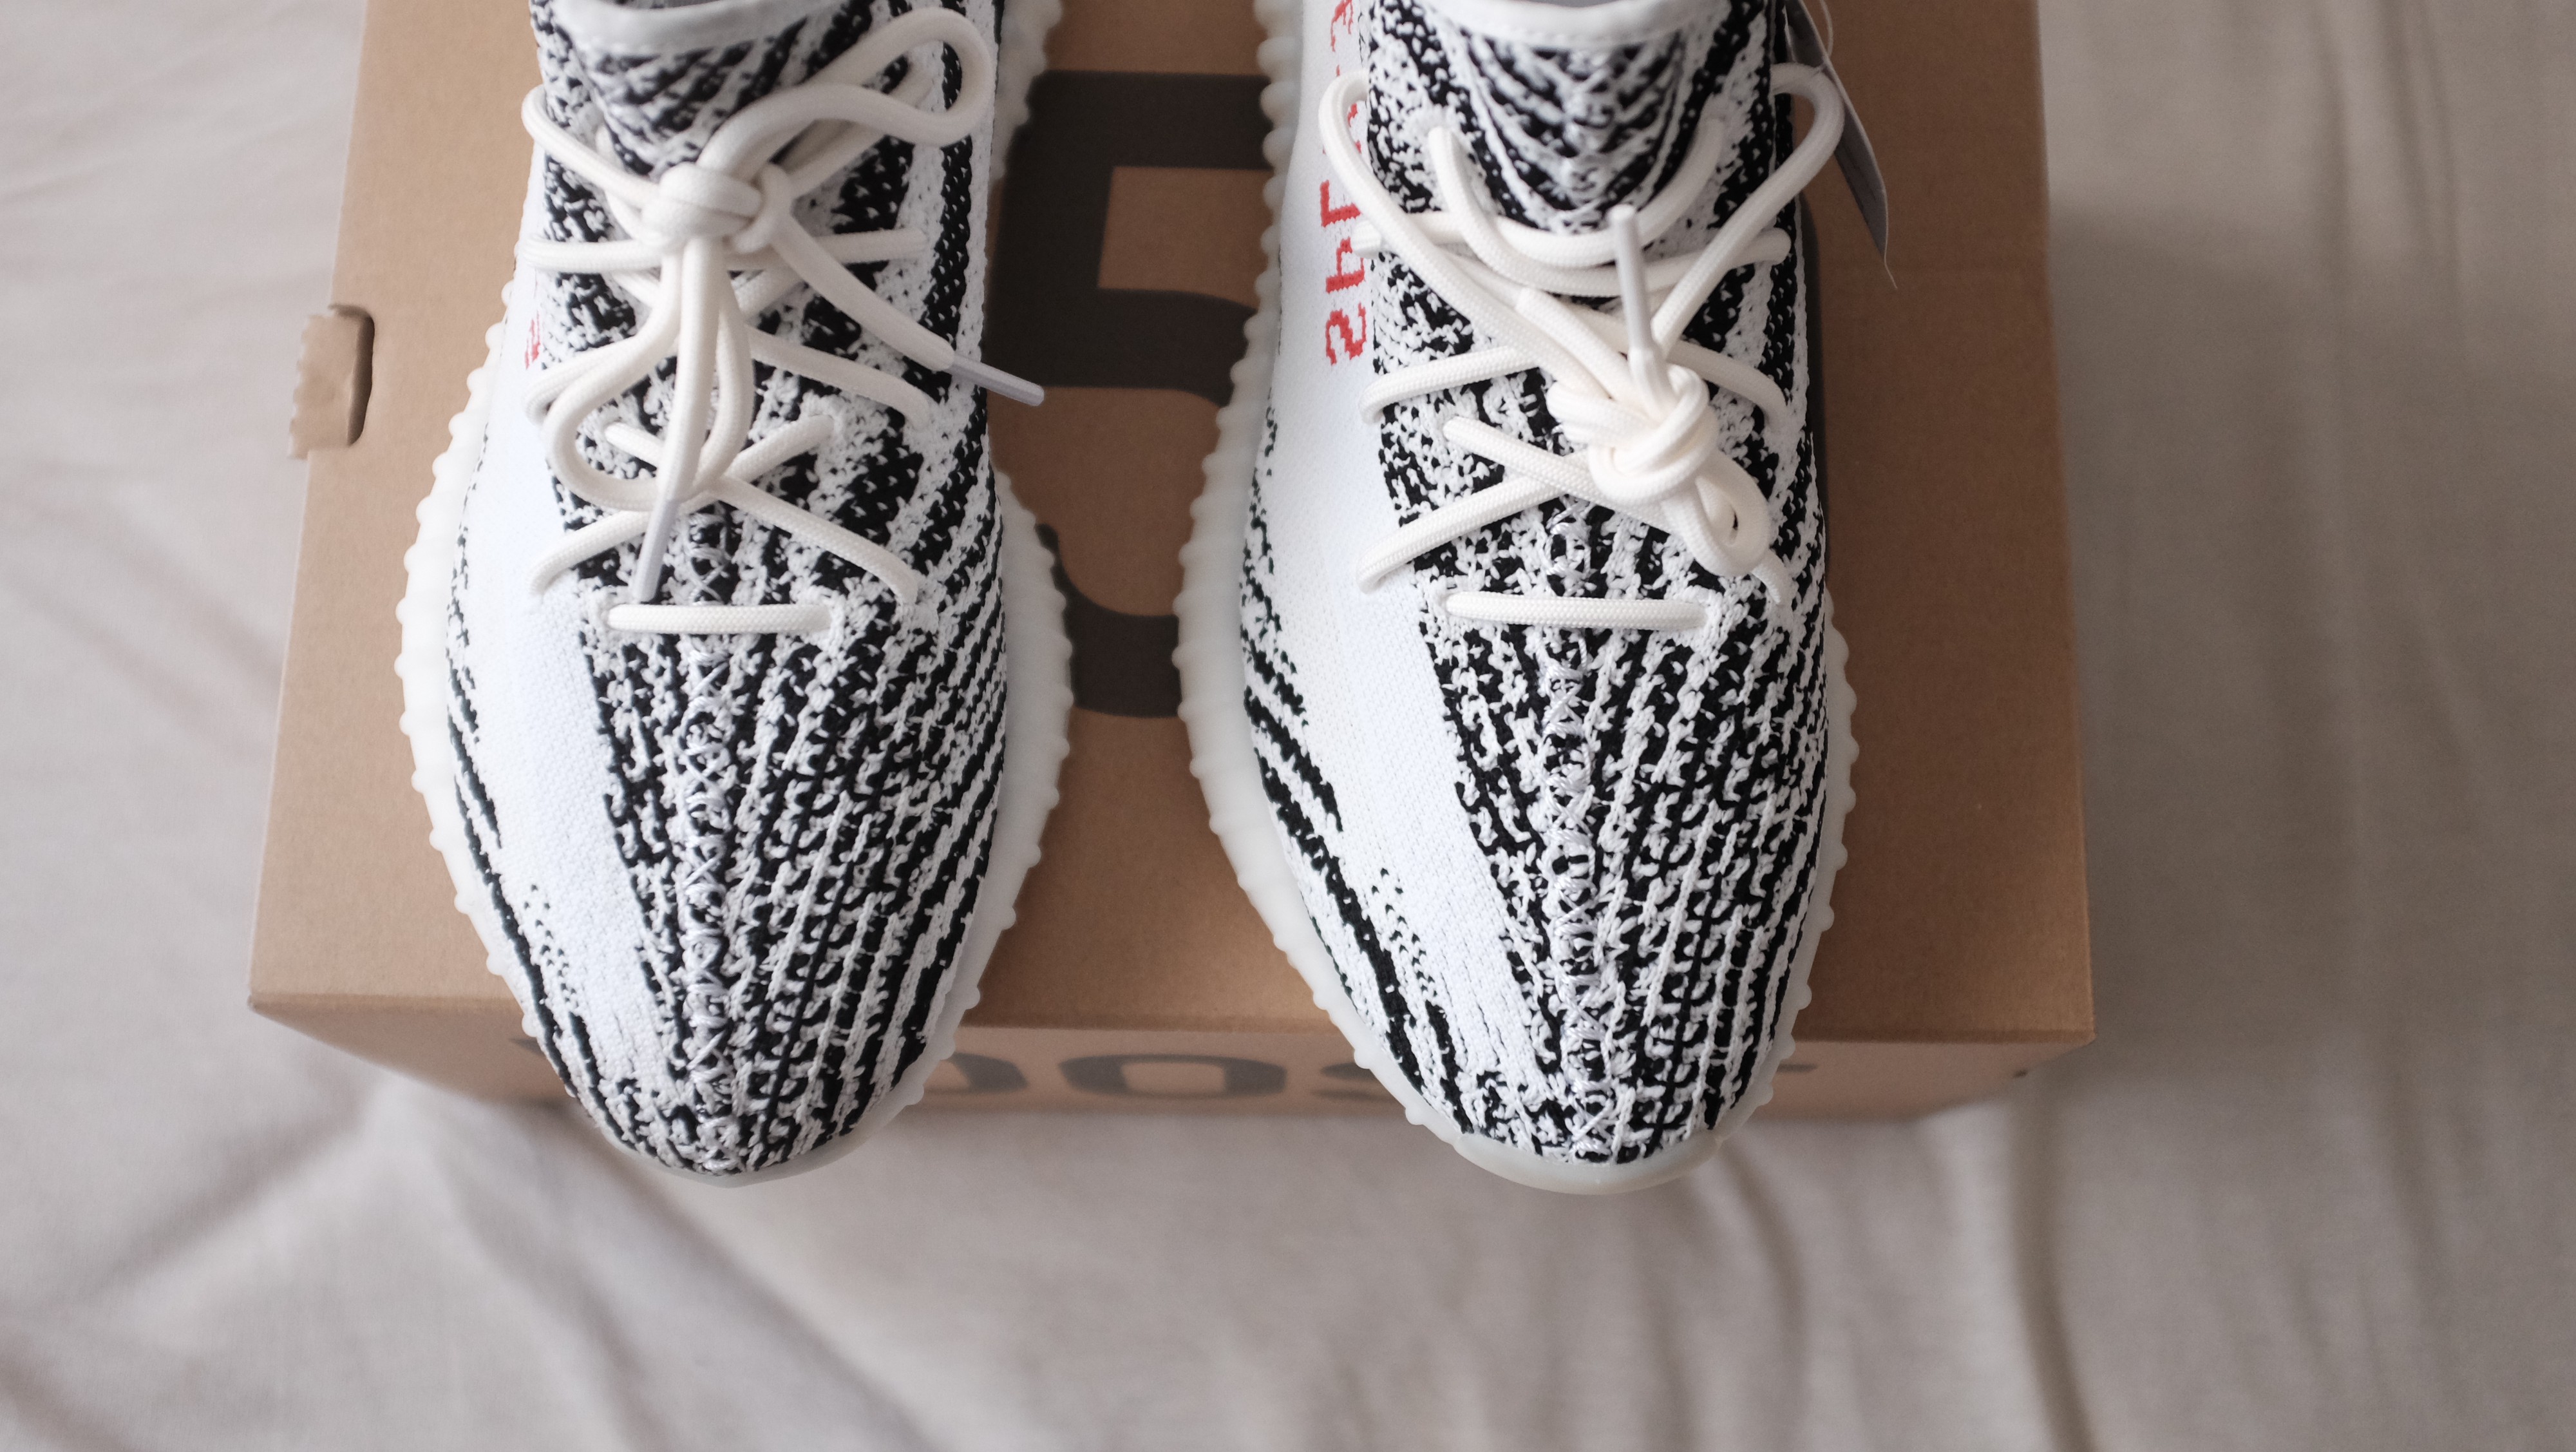
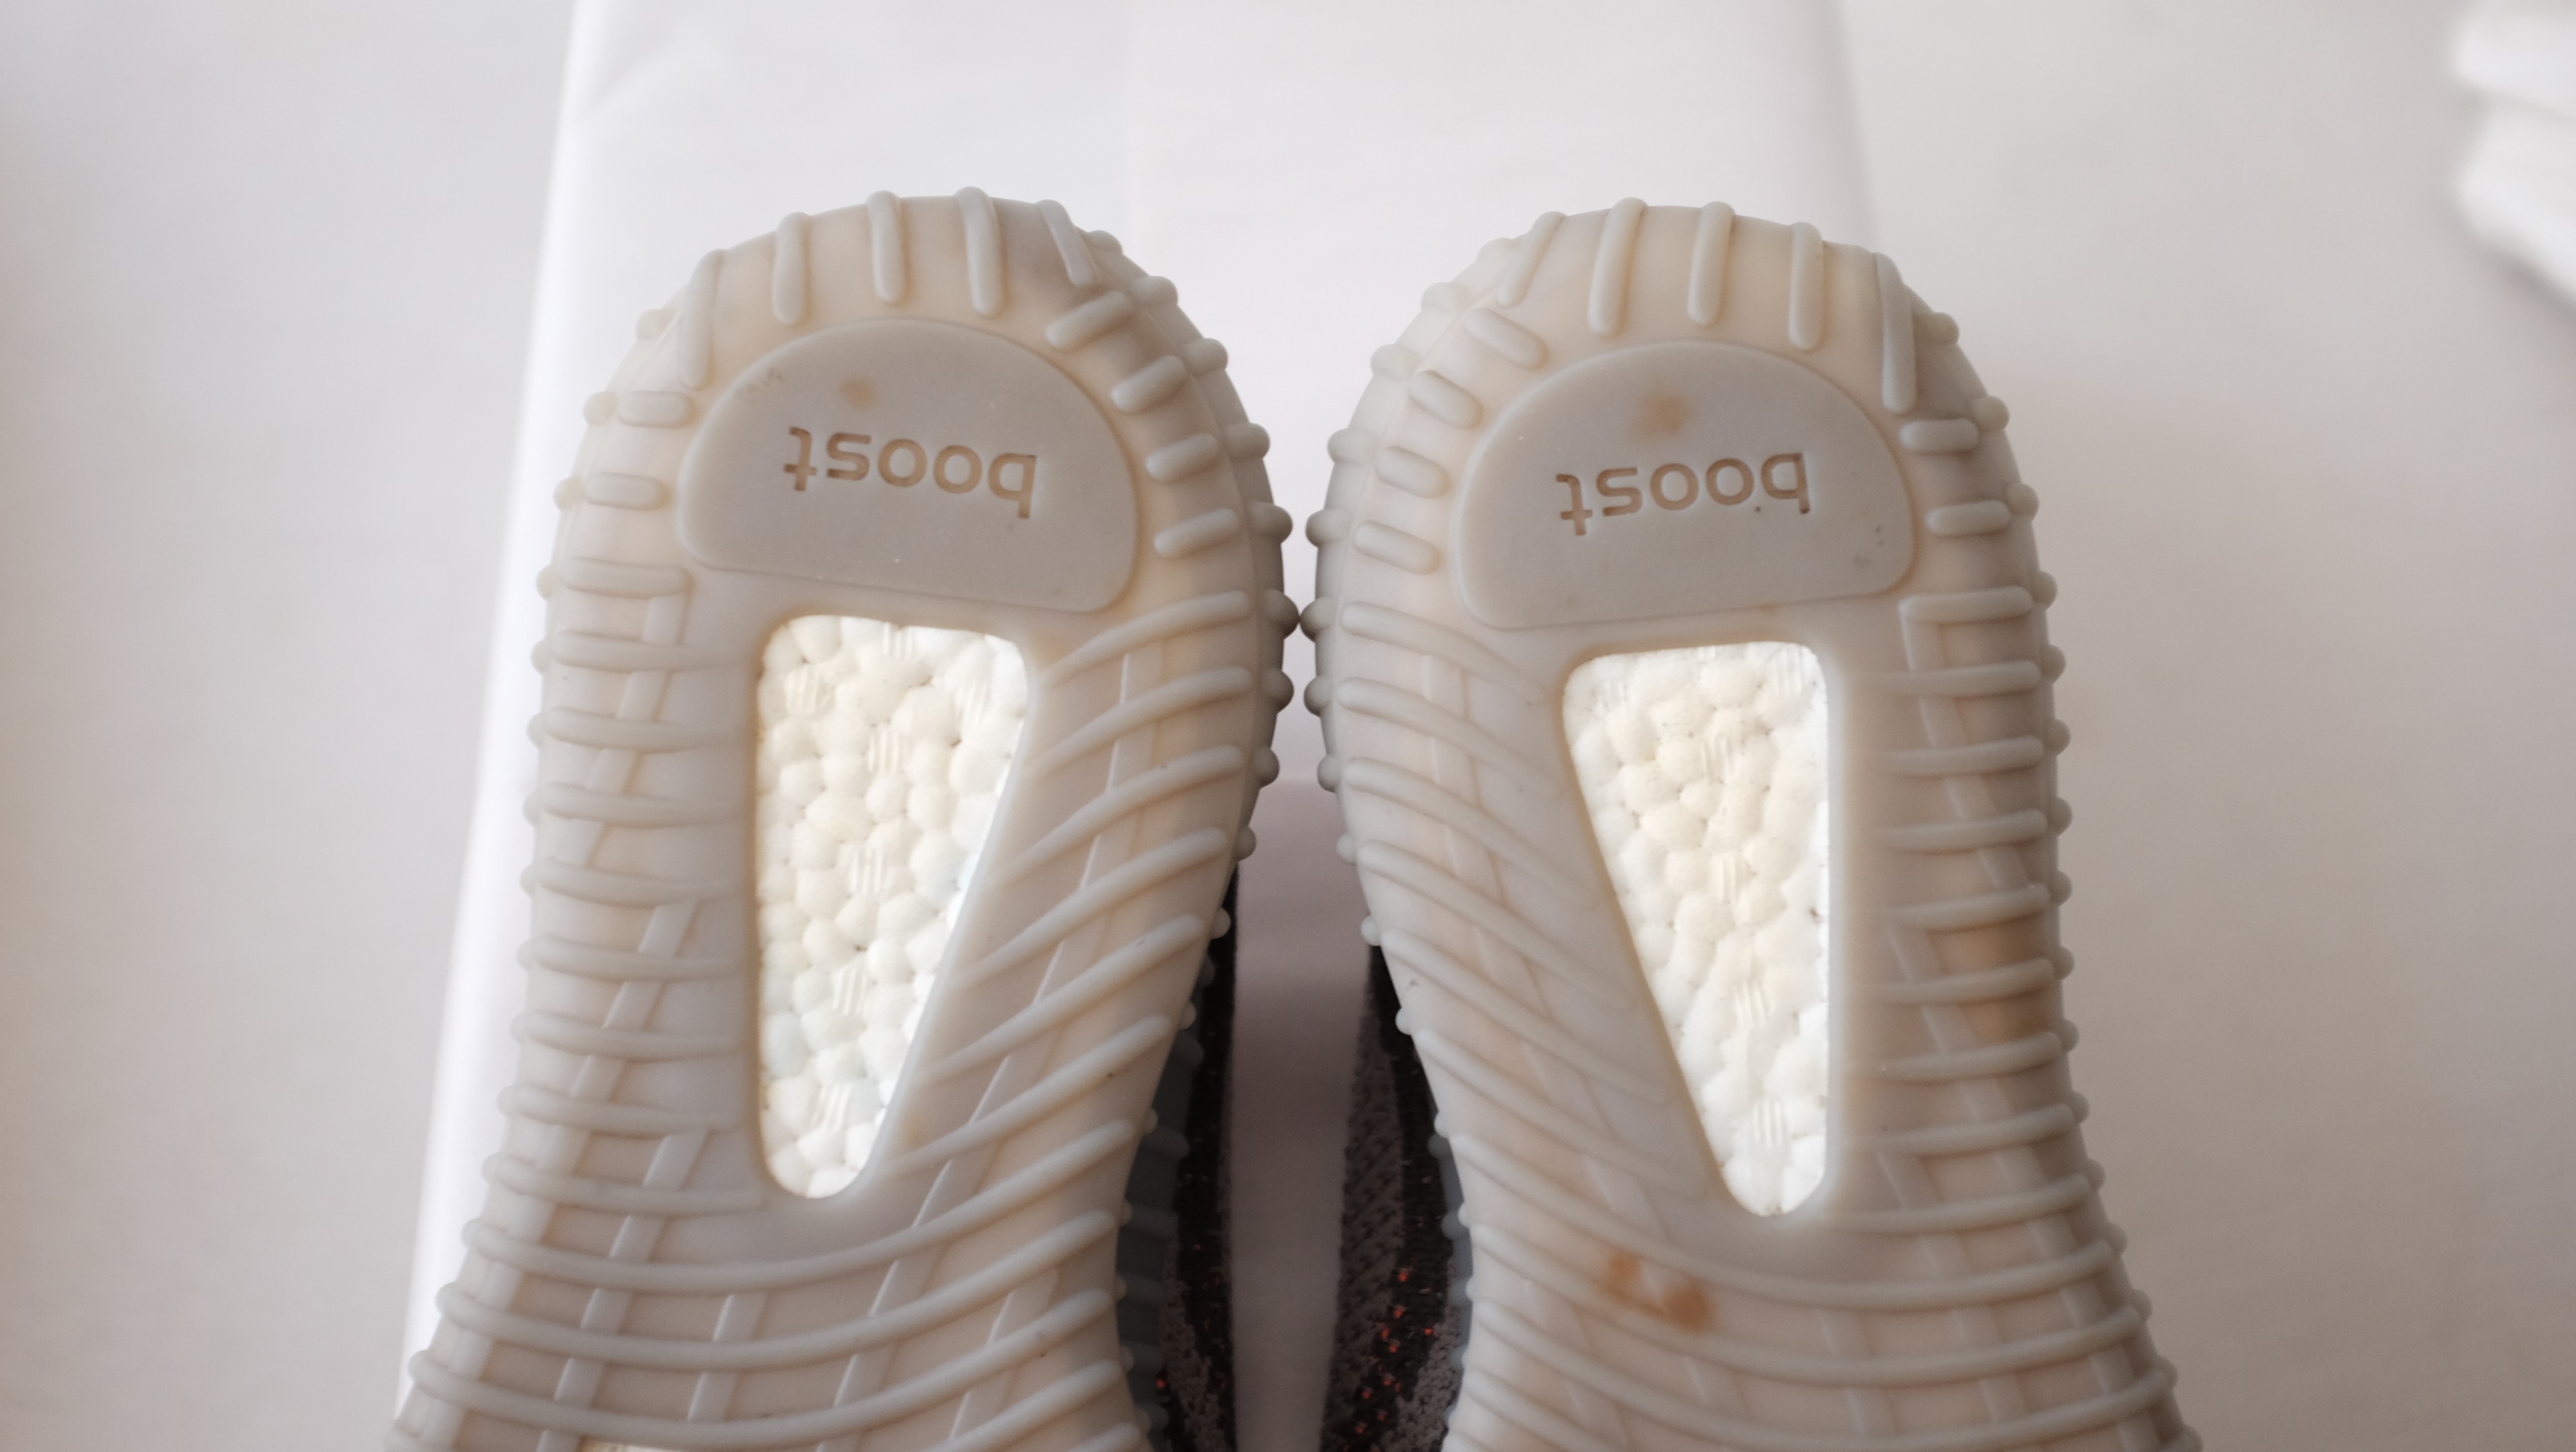
 Note the front of the sole, you can see the center line stitching bump.
If you run your hands down the middle stitching onto the sole, you should feel the stitching bump underneath the rubber sole. Fakes such as KO/PK get this wrong, their sole will rise too high, and the stitching bump underneath the rubber sole is non-existent.
Inside

 Left Beluga 2.0 // Right Zebra Restock V2
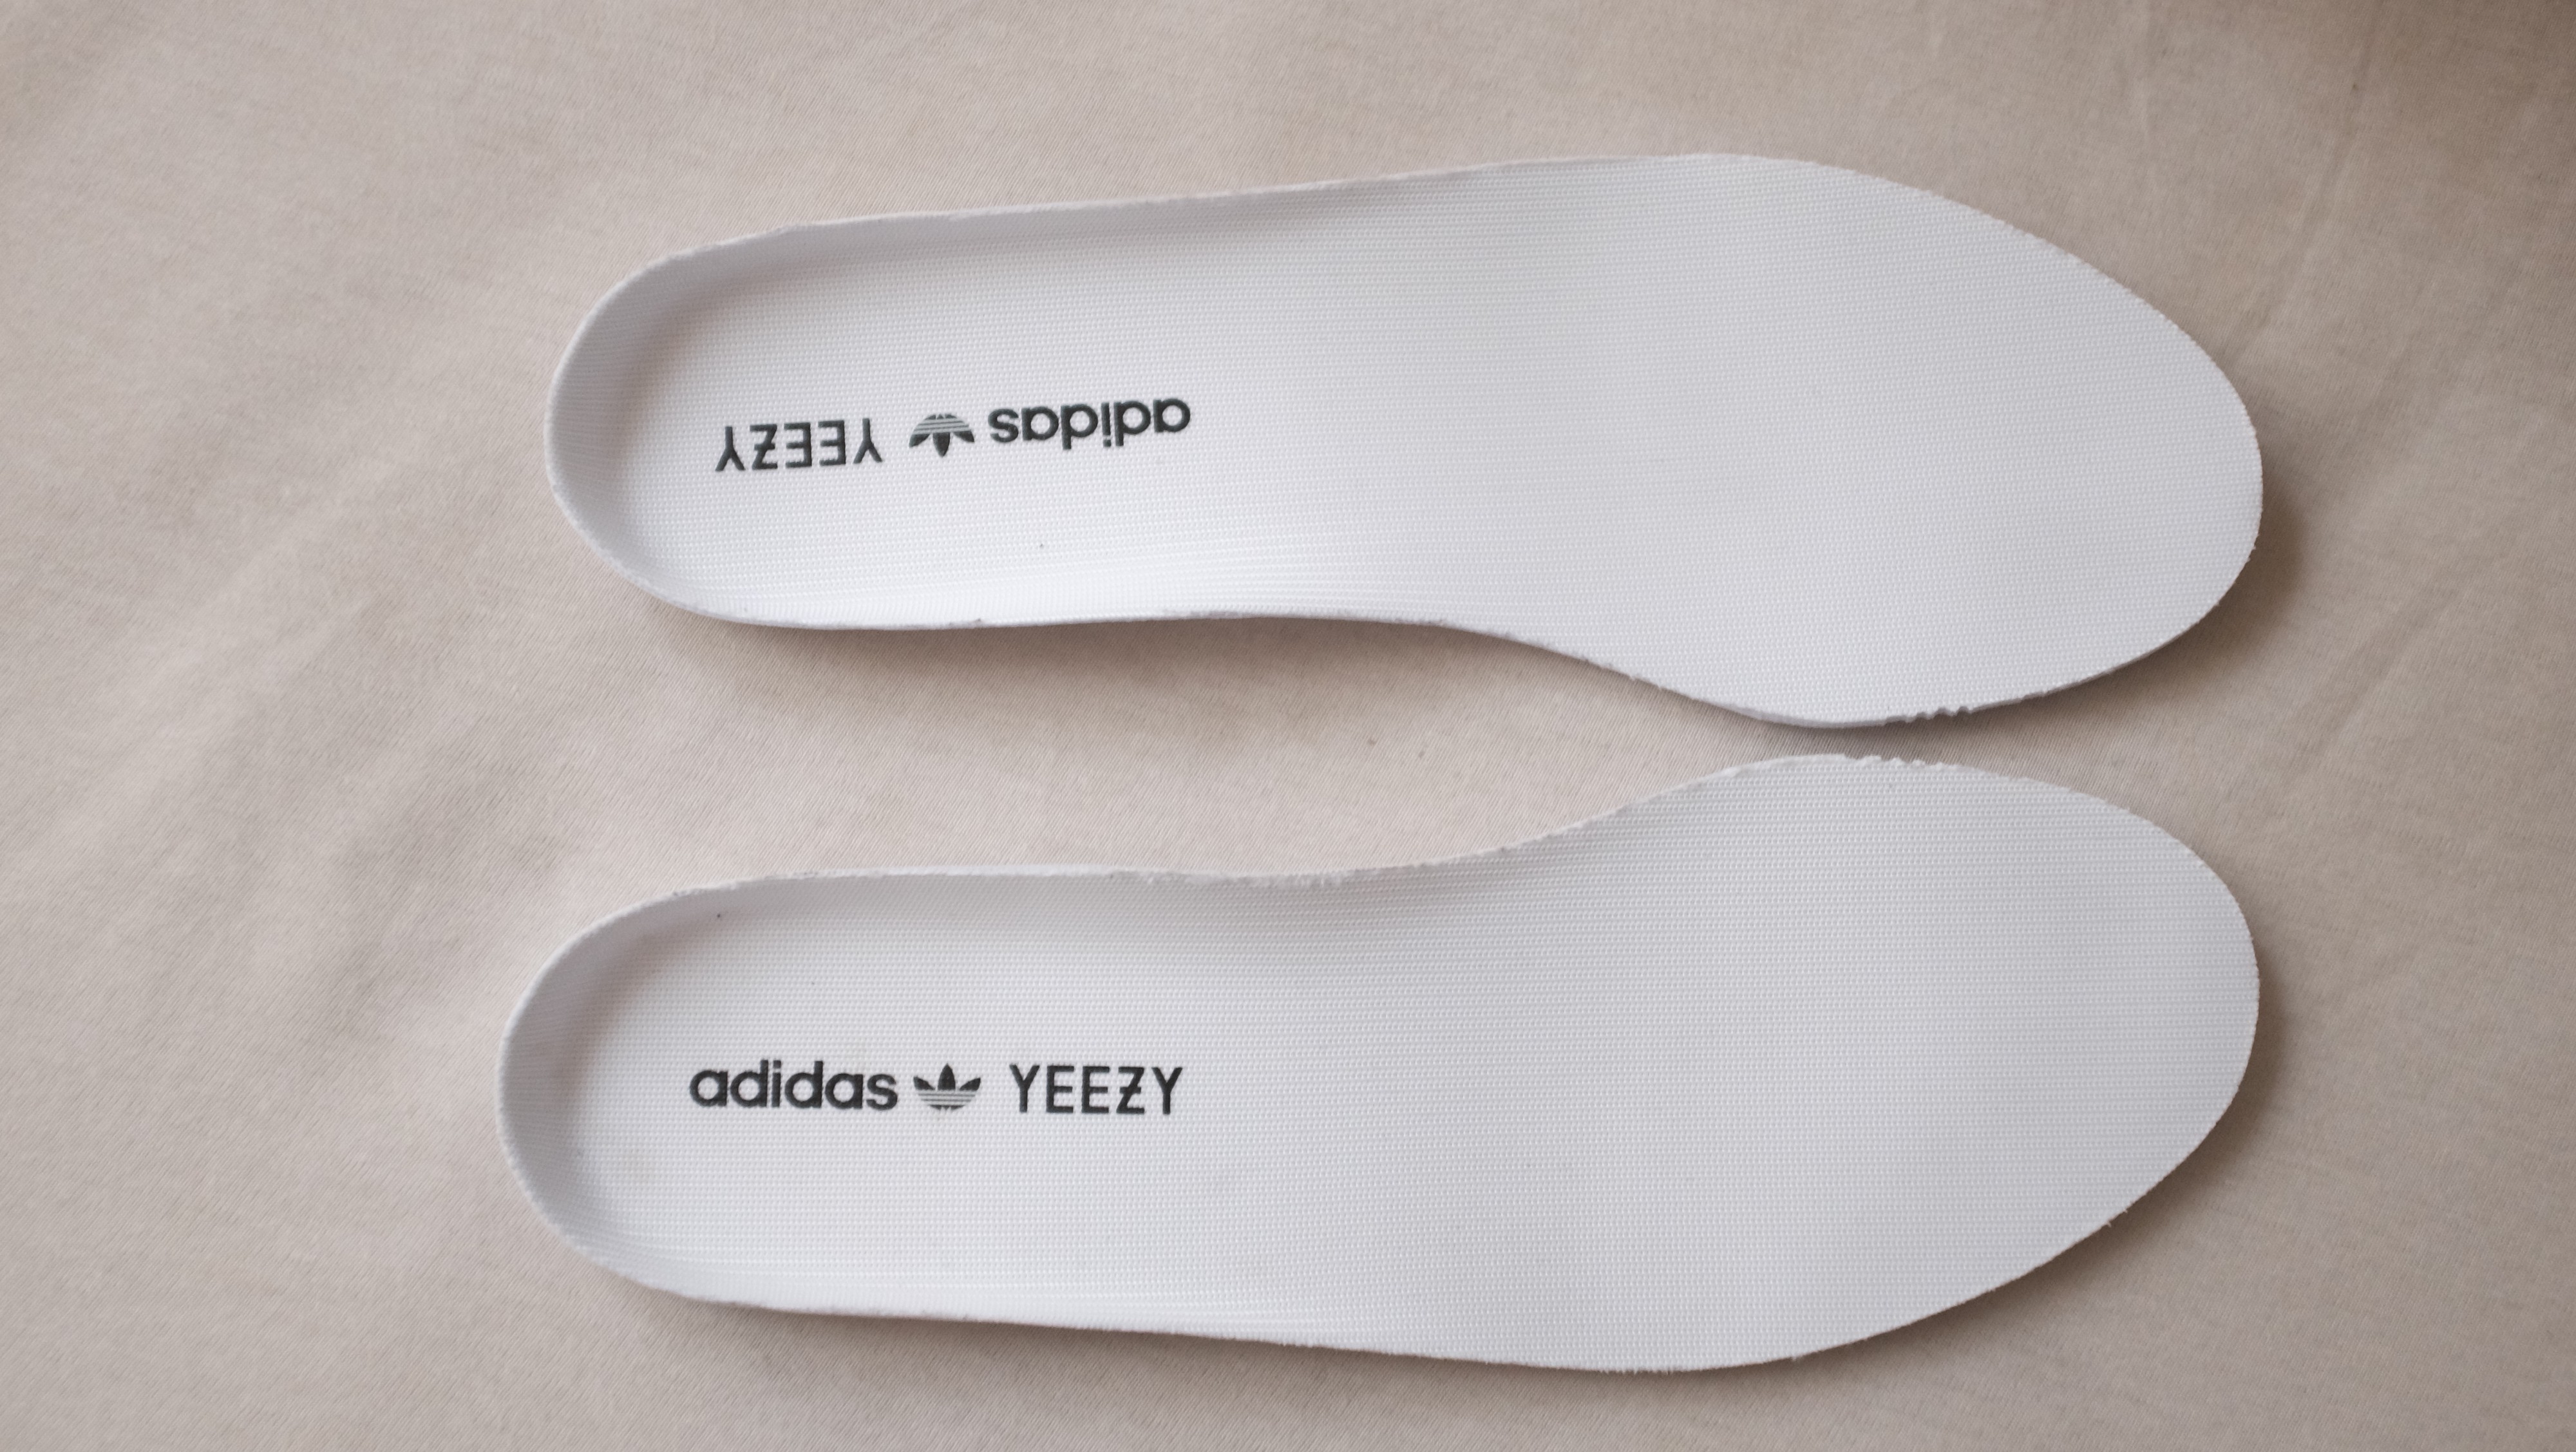
 Left Zebra OG V2 // Right Cream V2
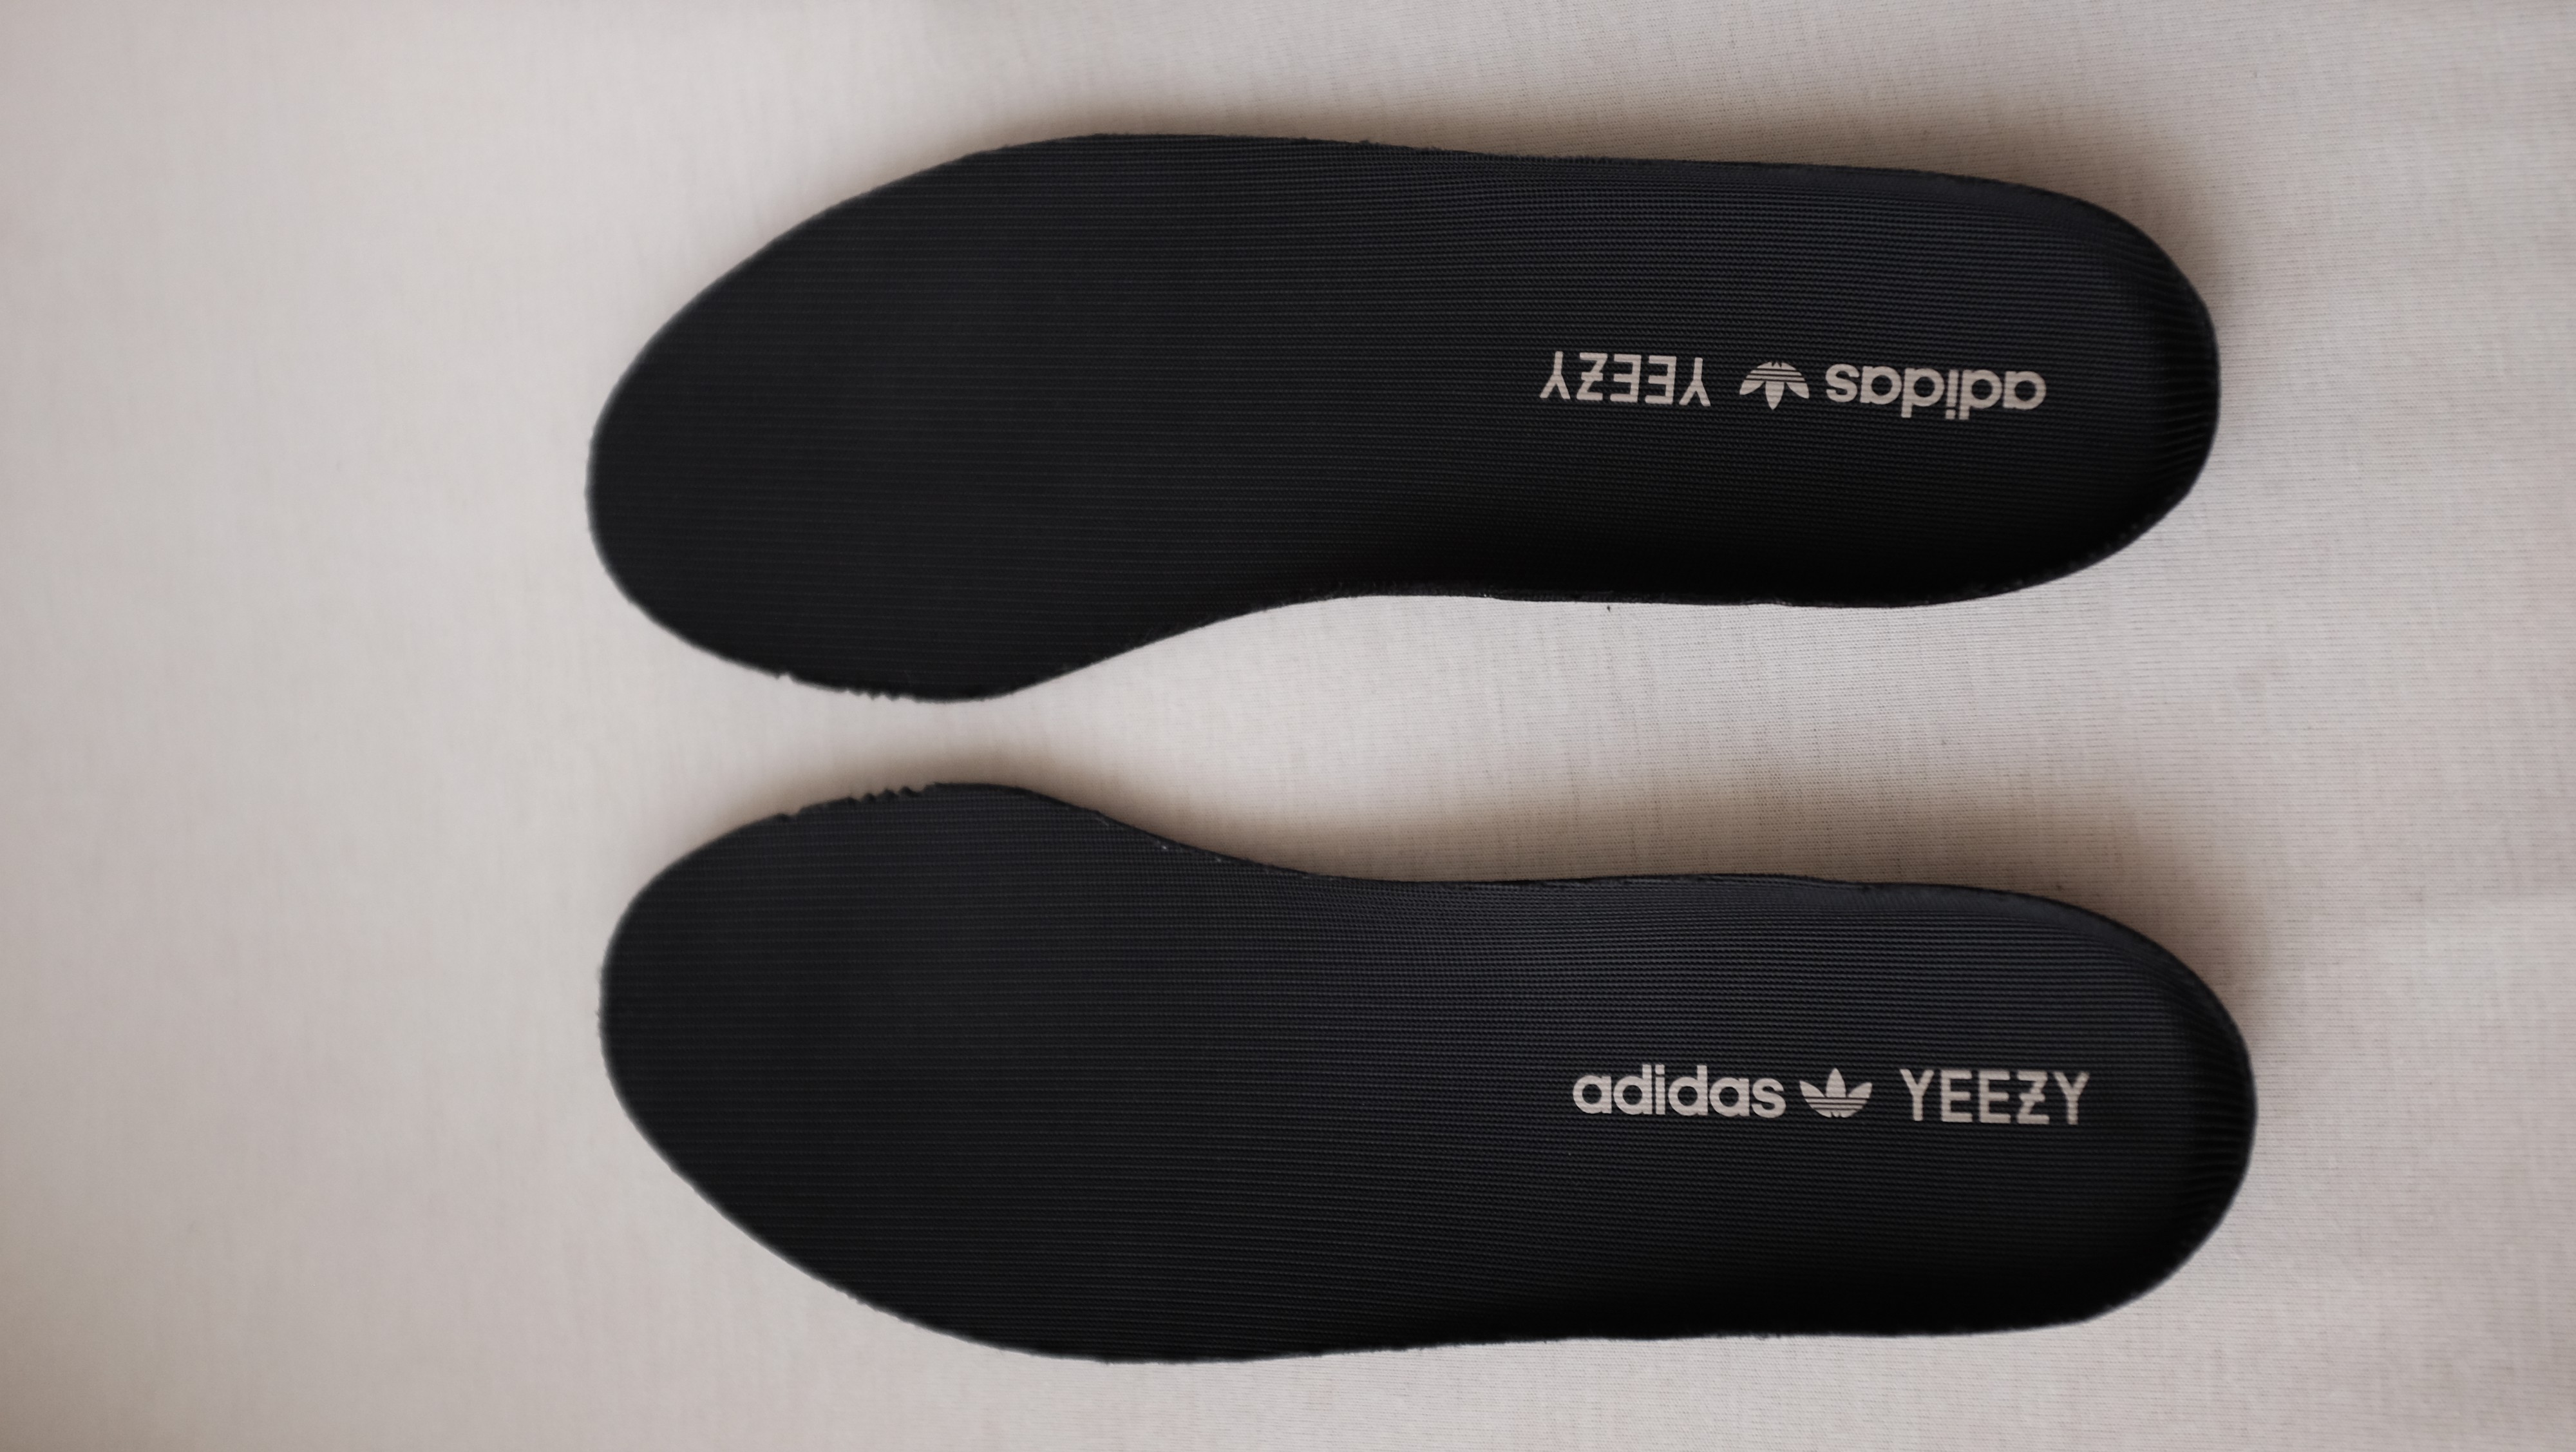
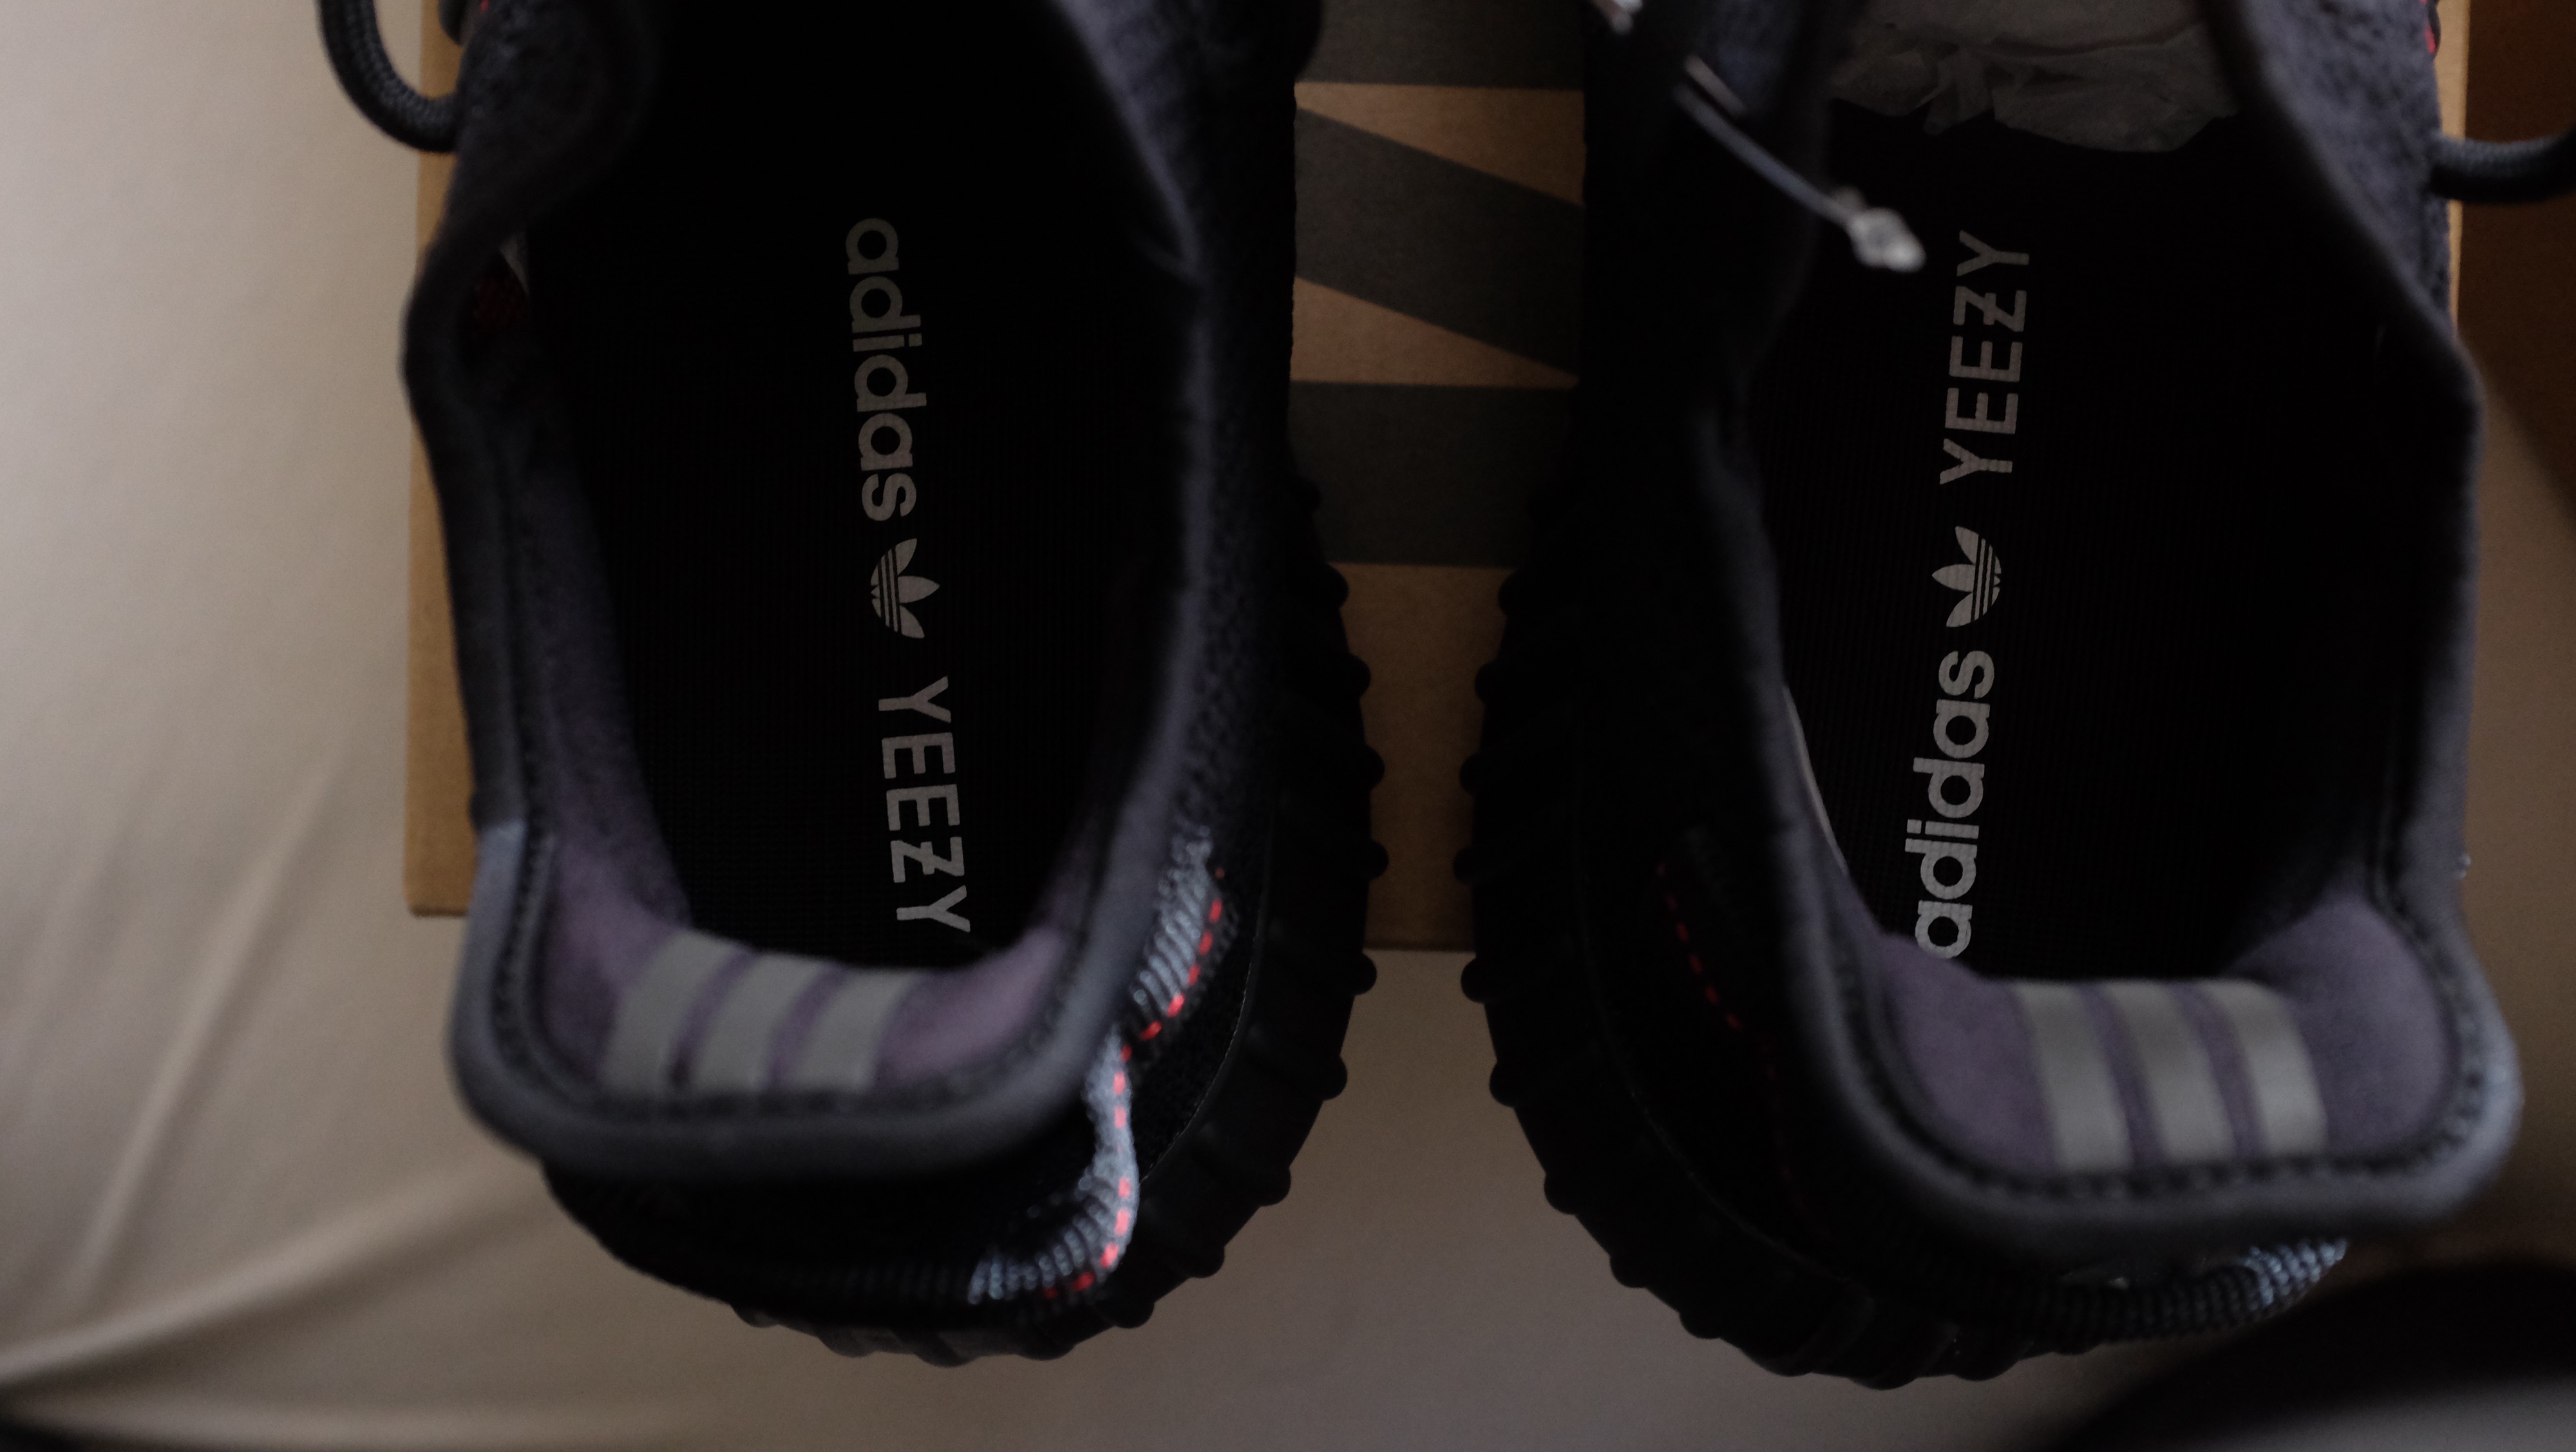
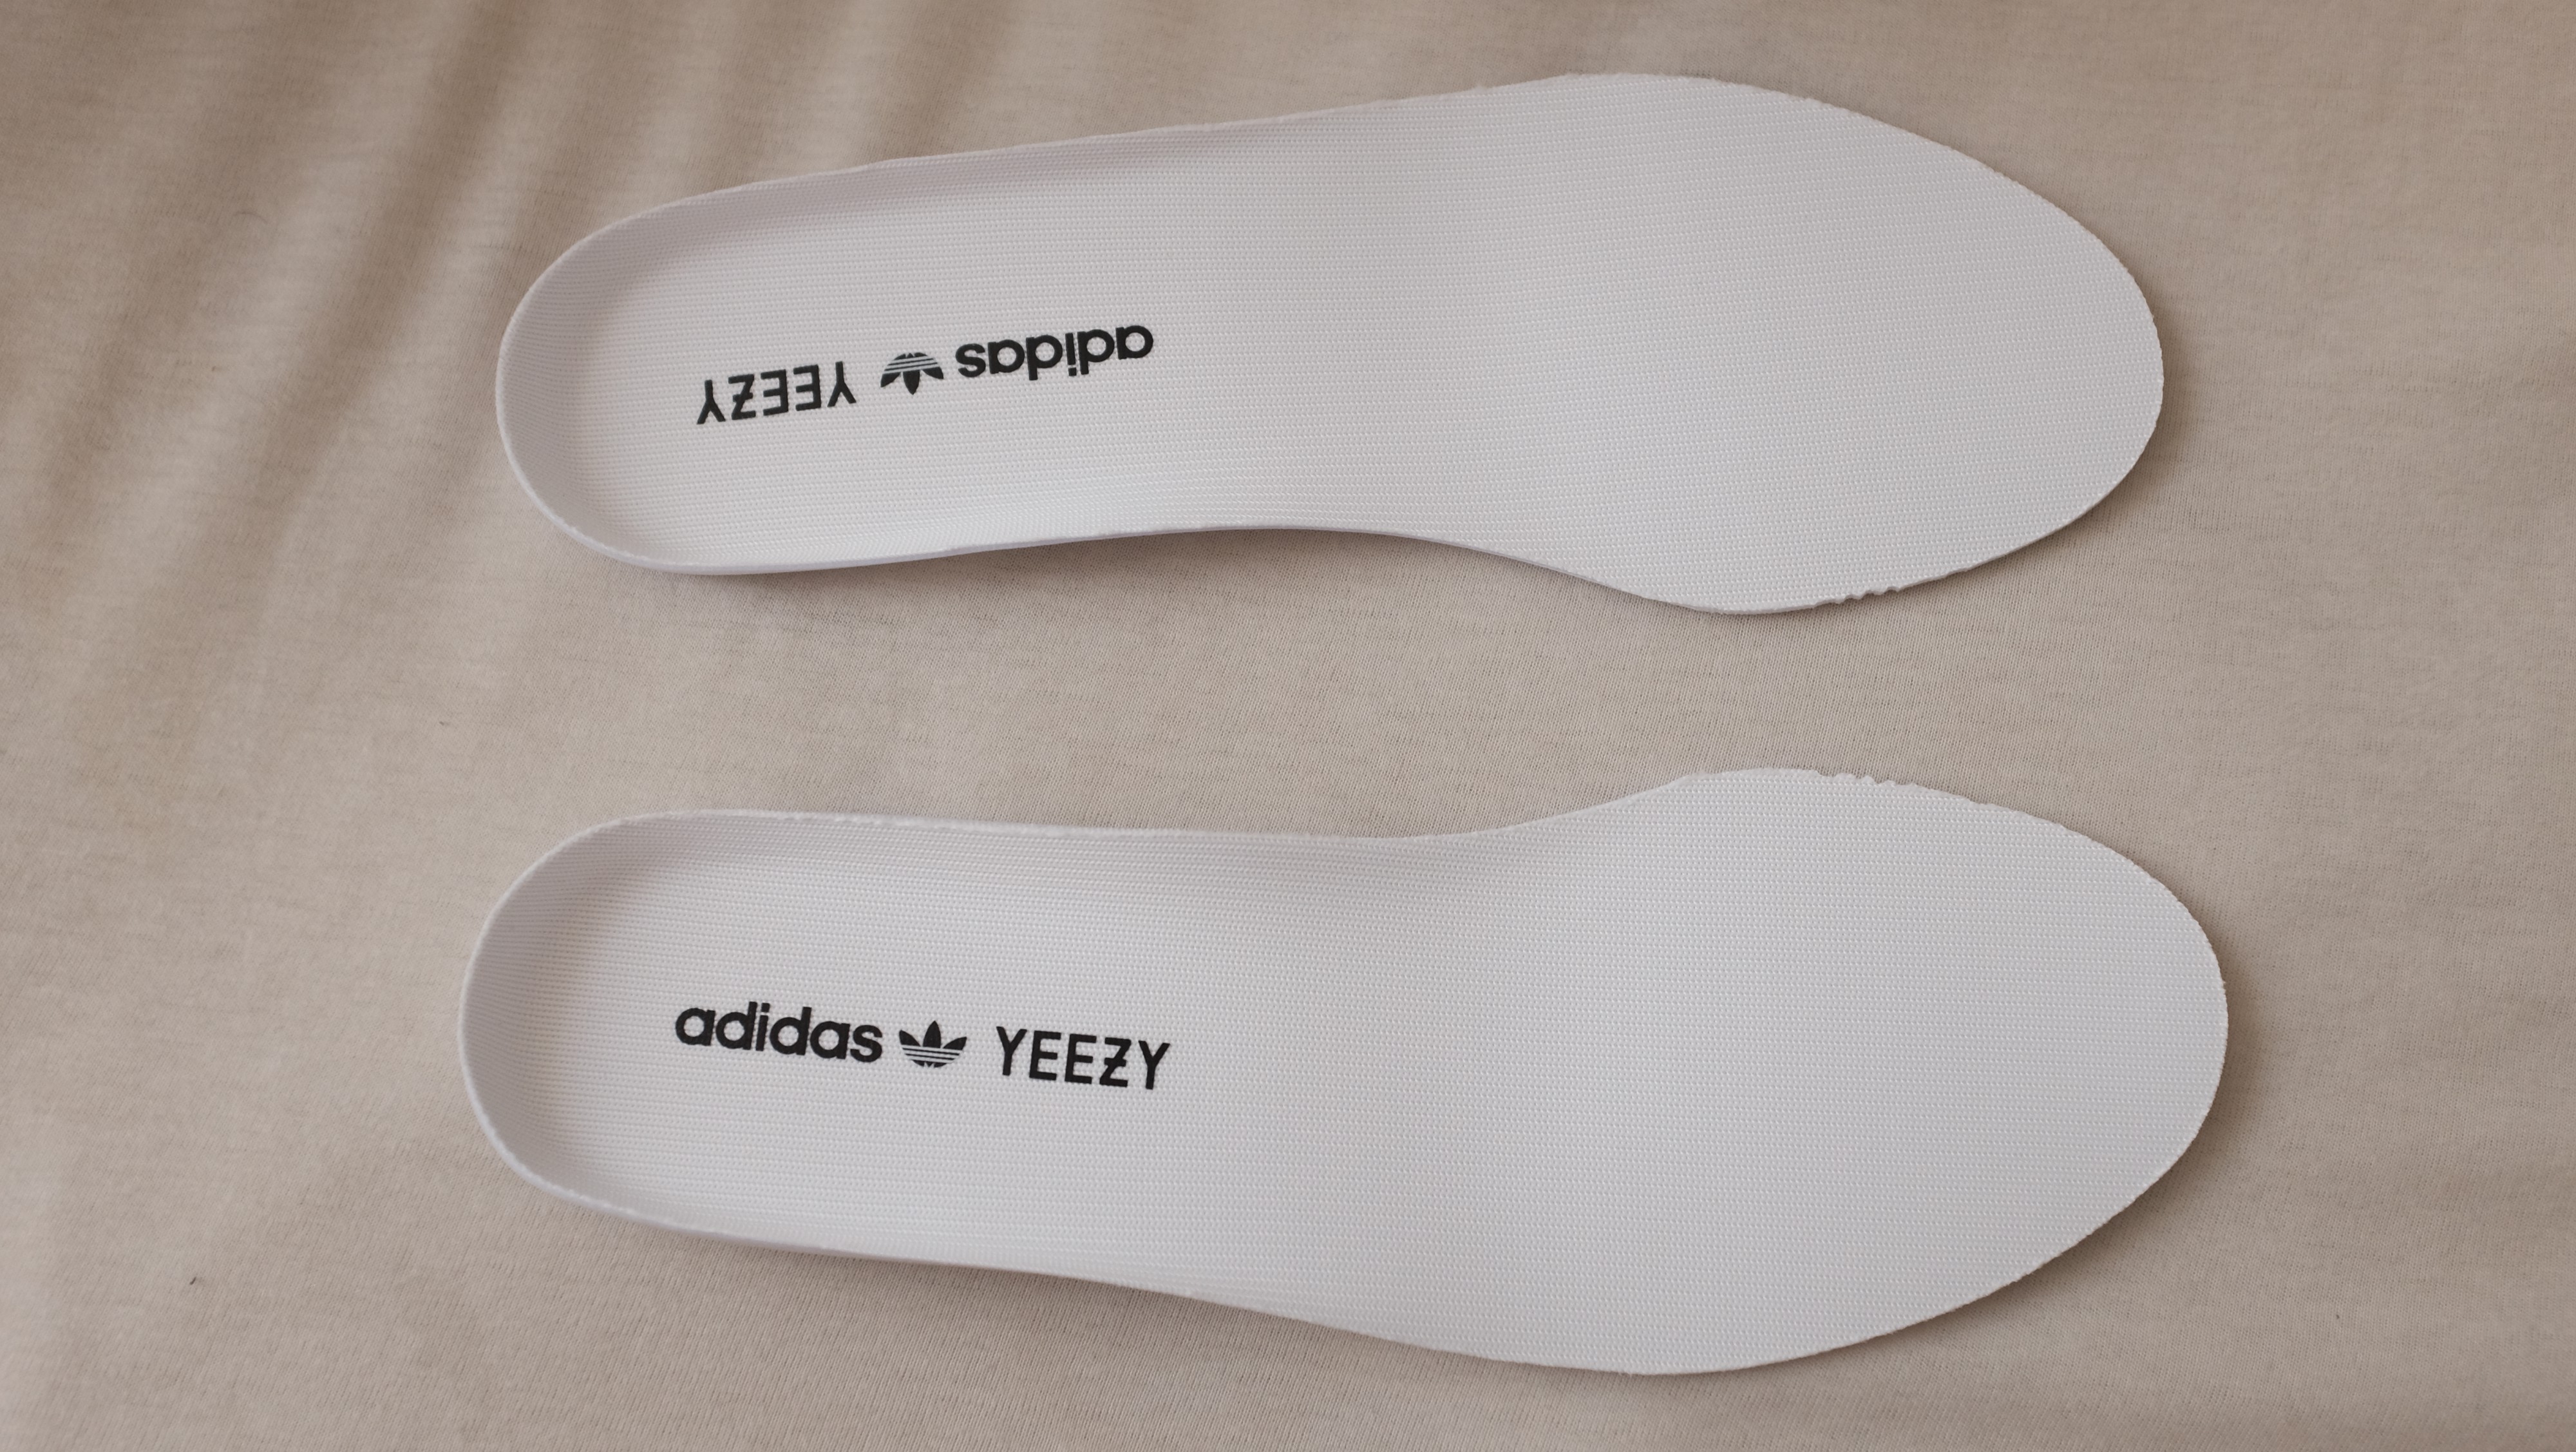
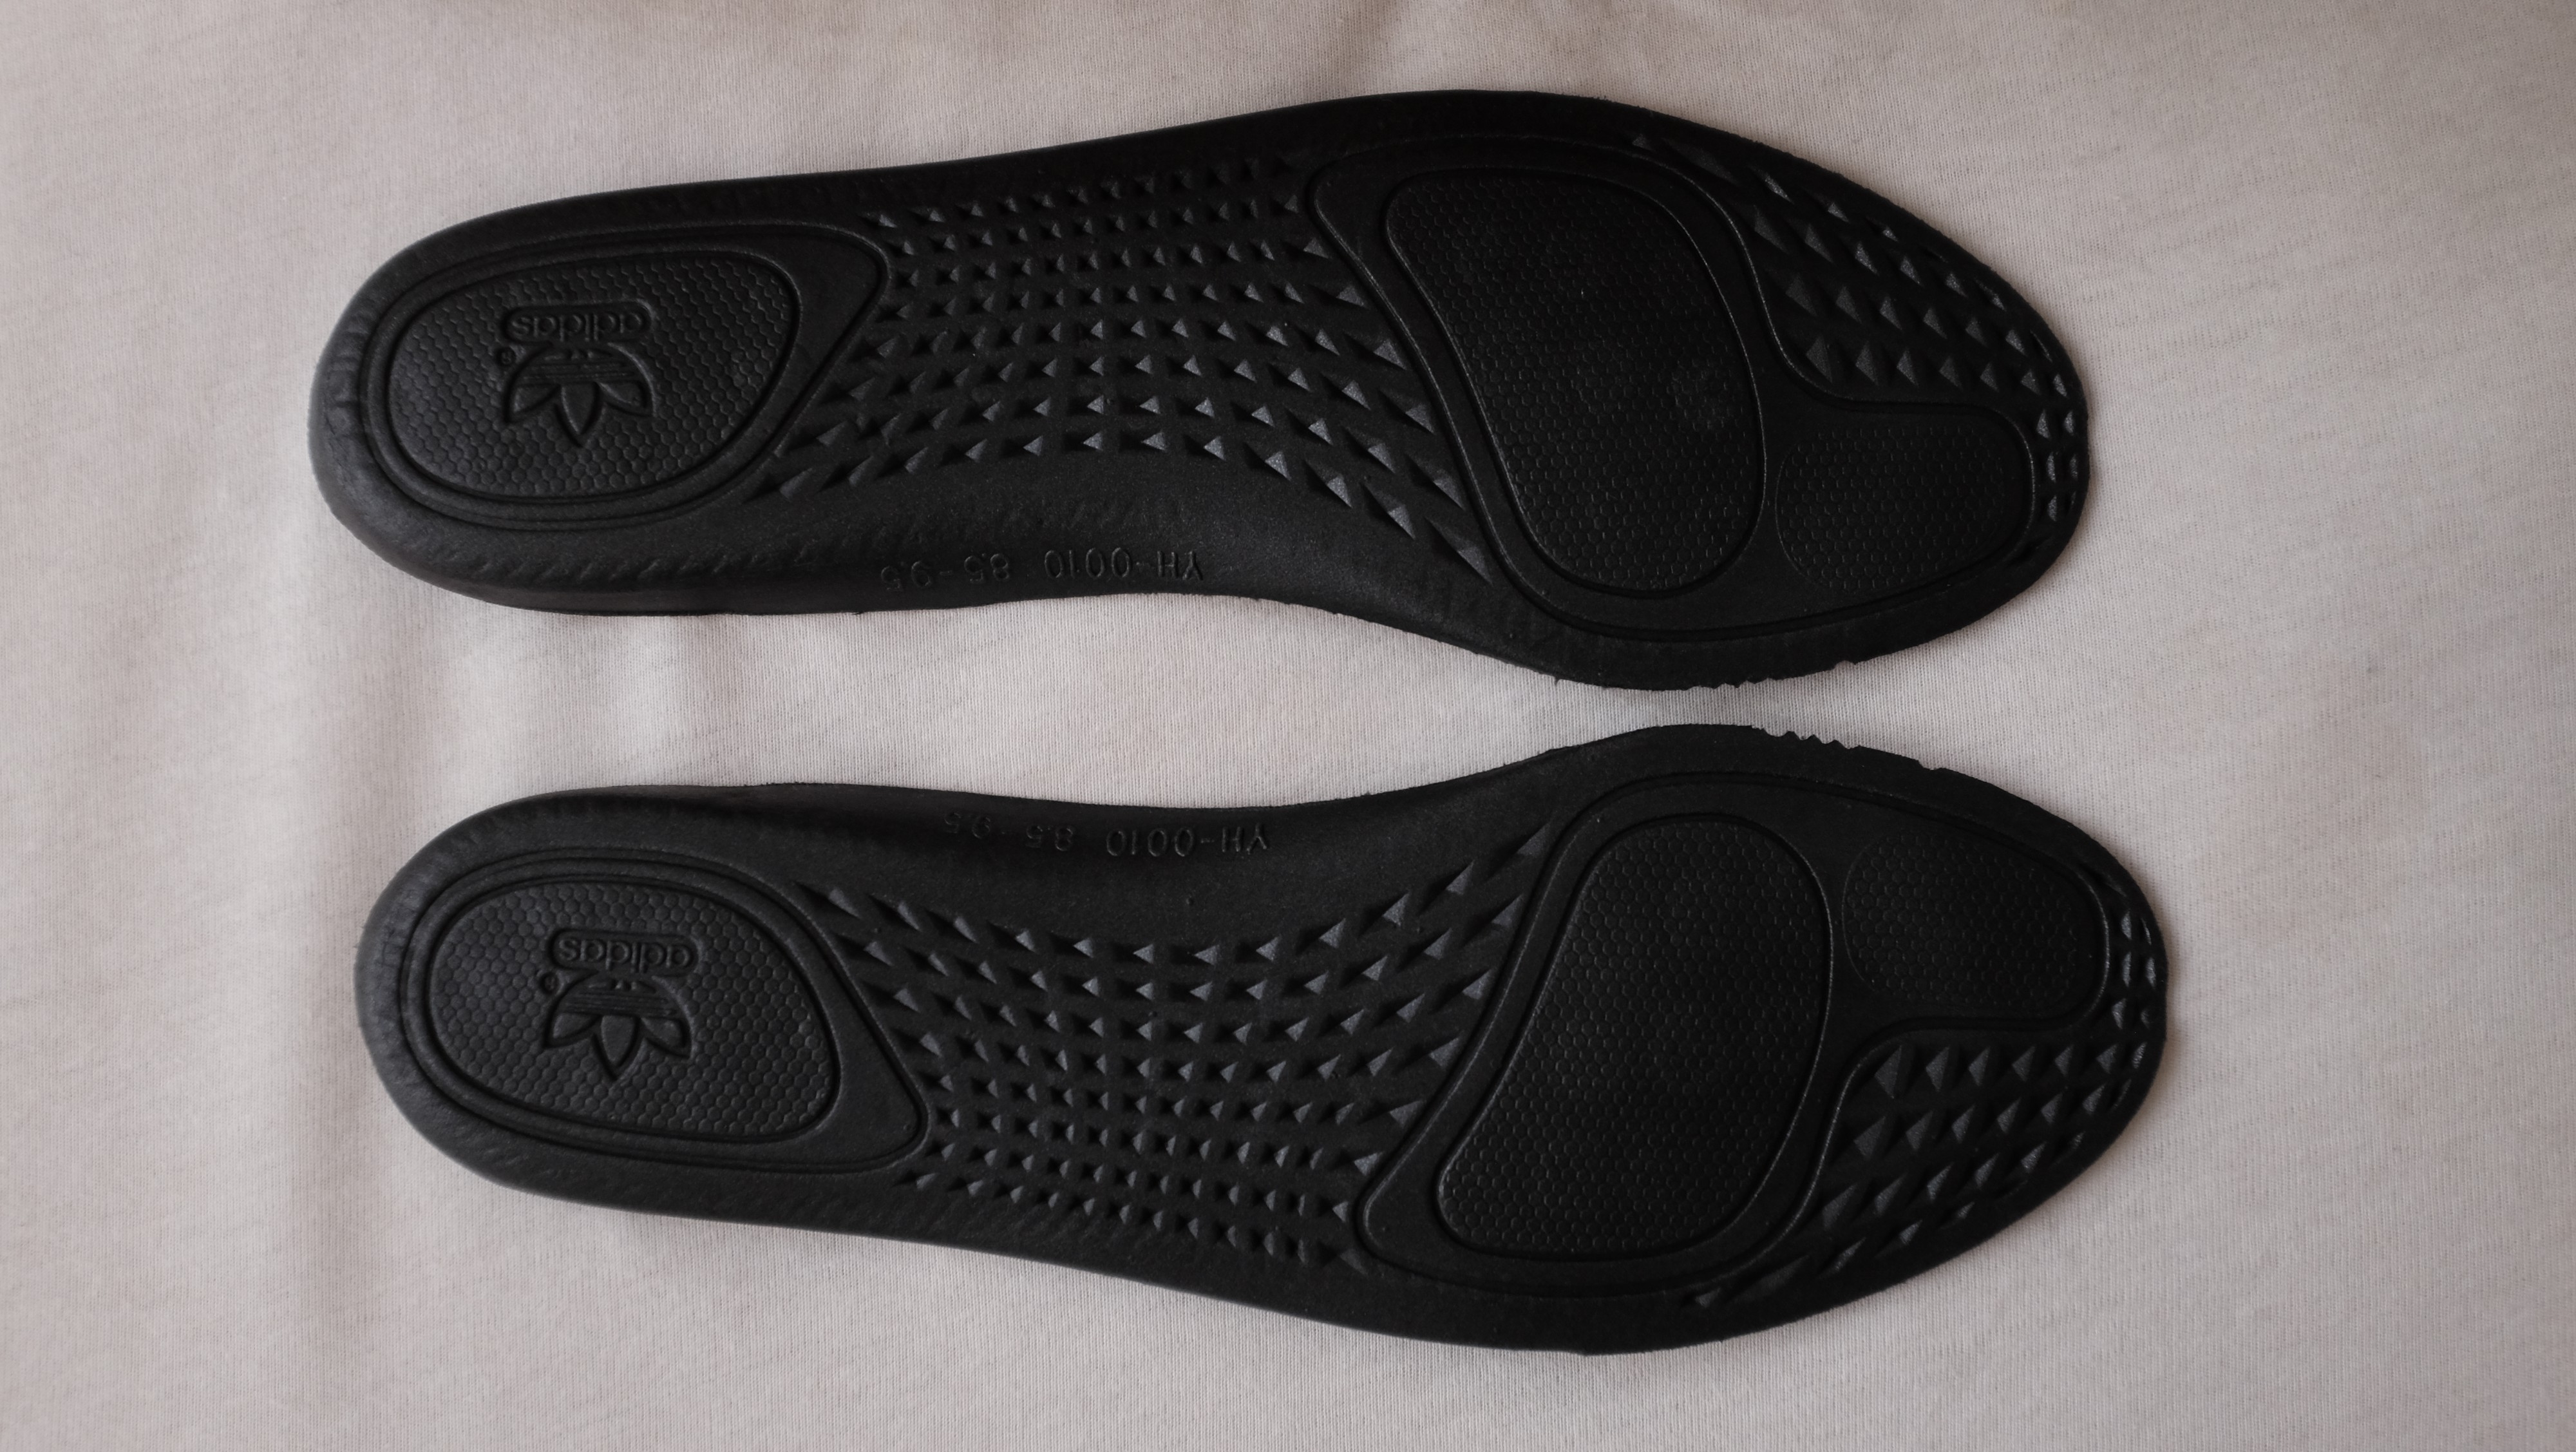
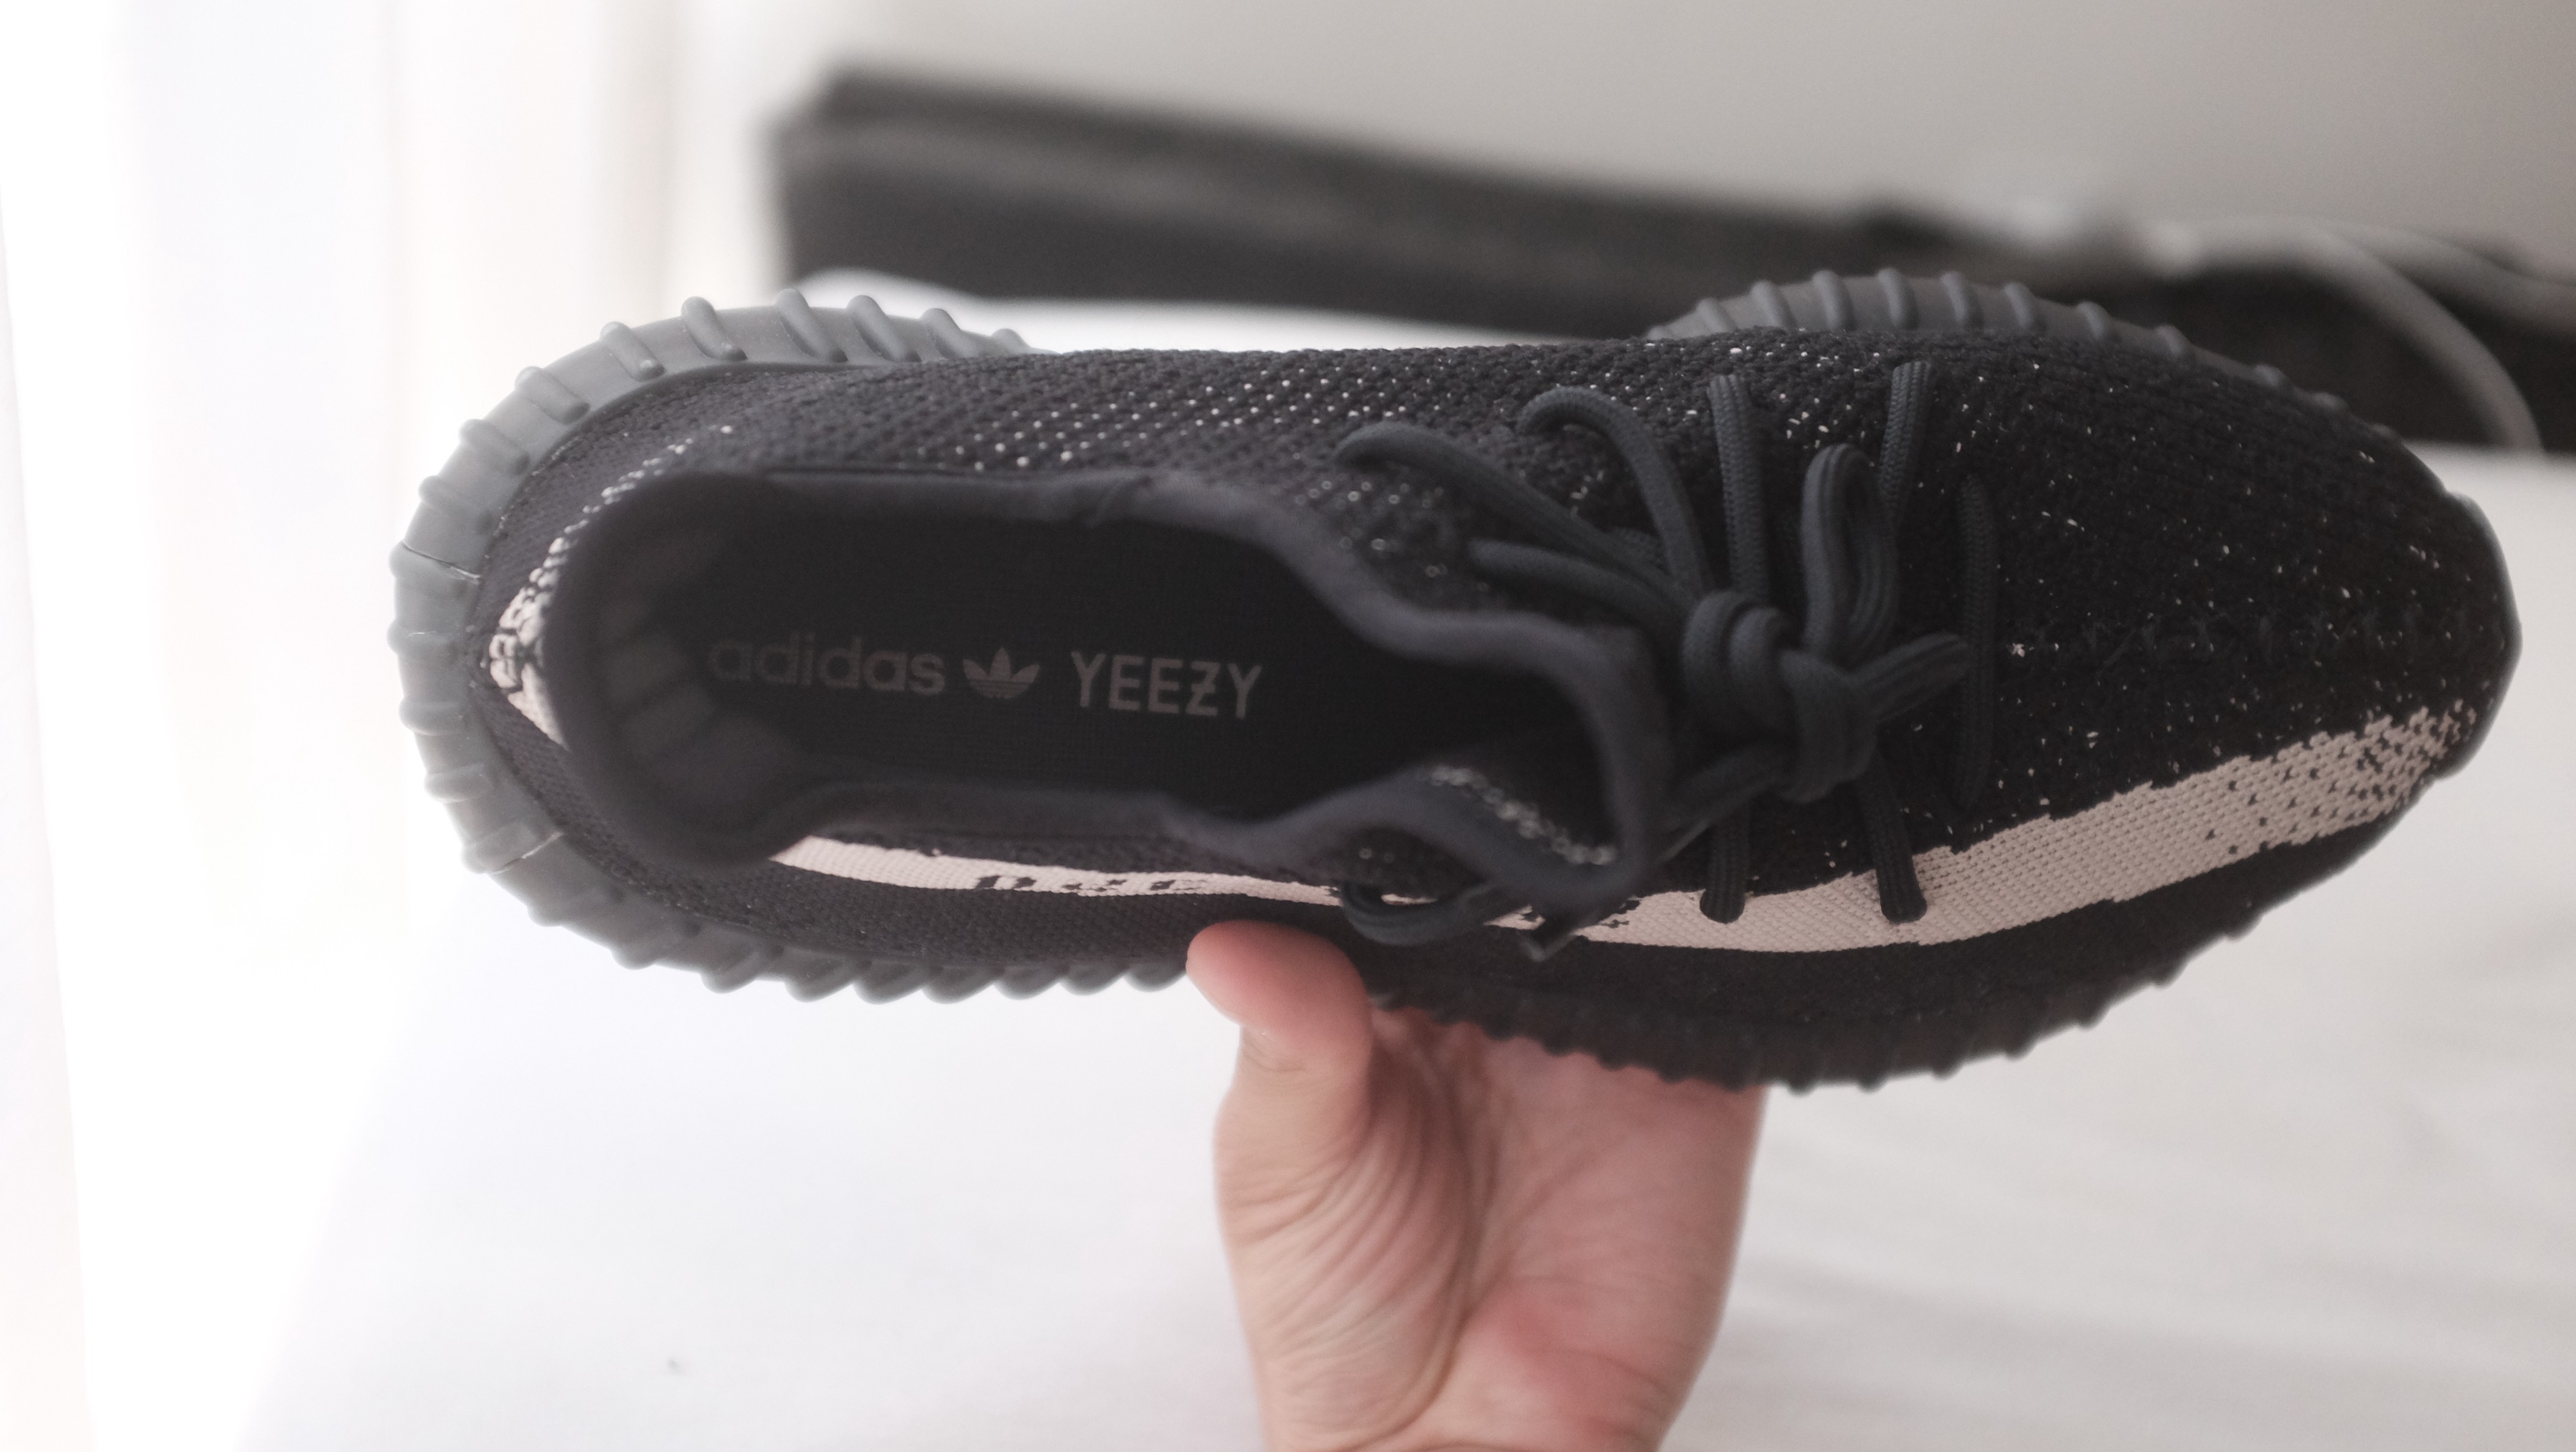
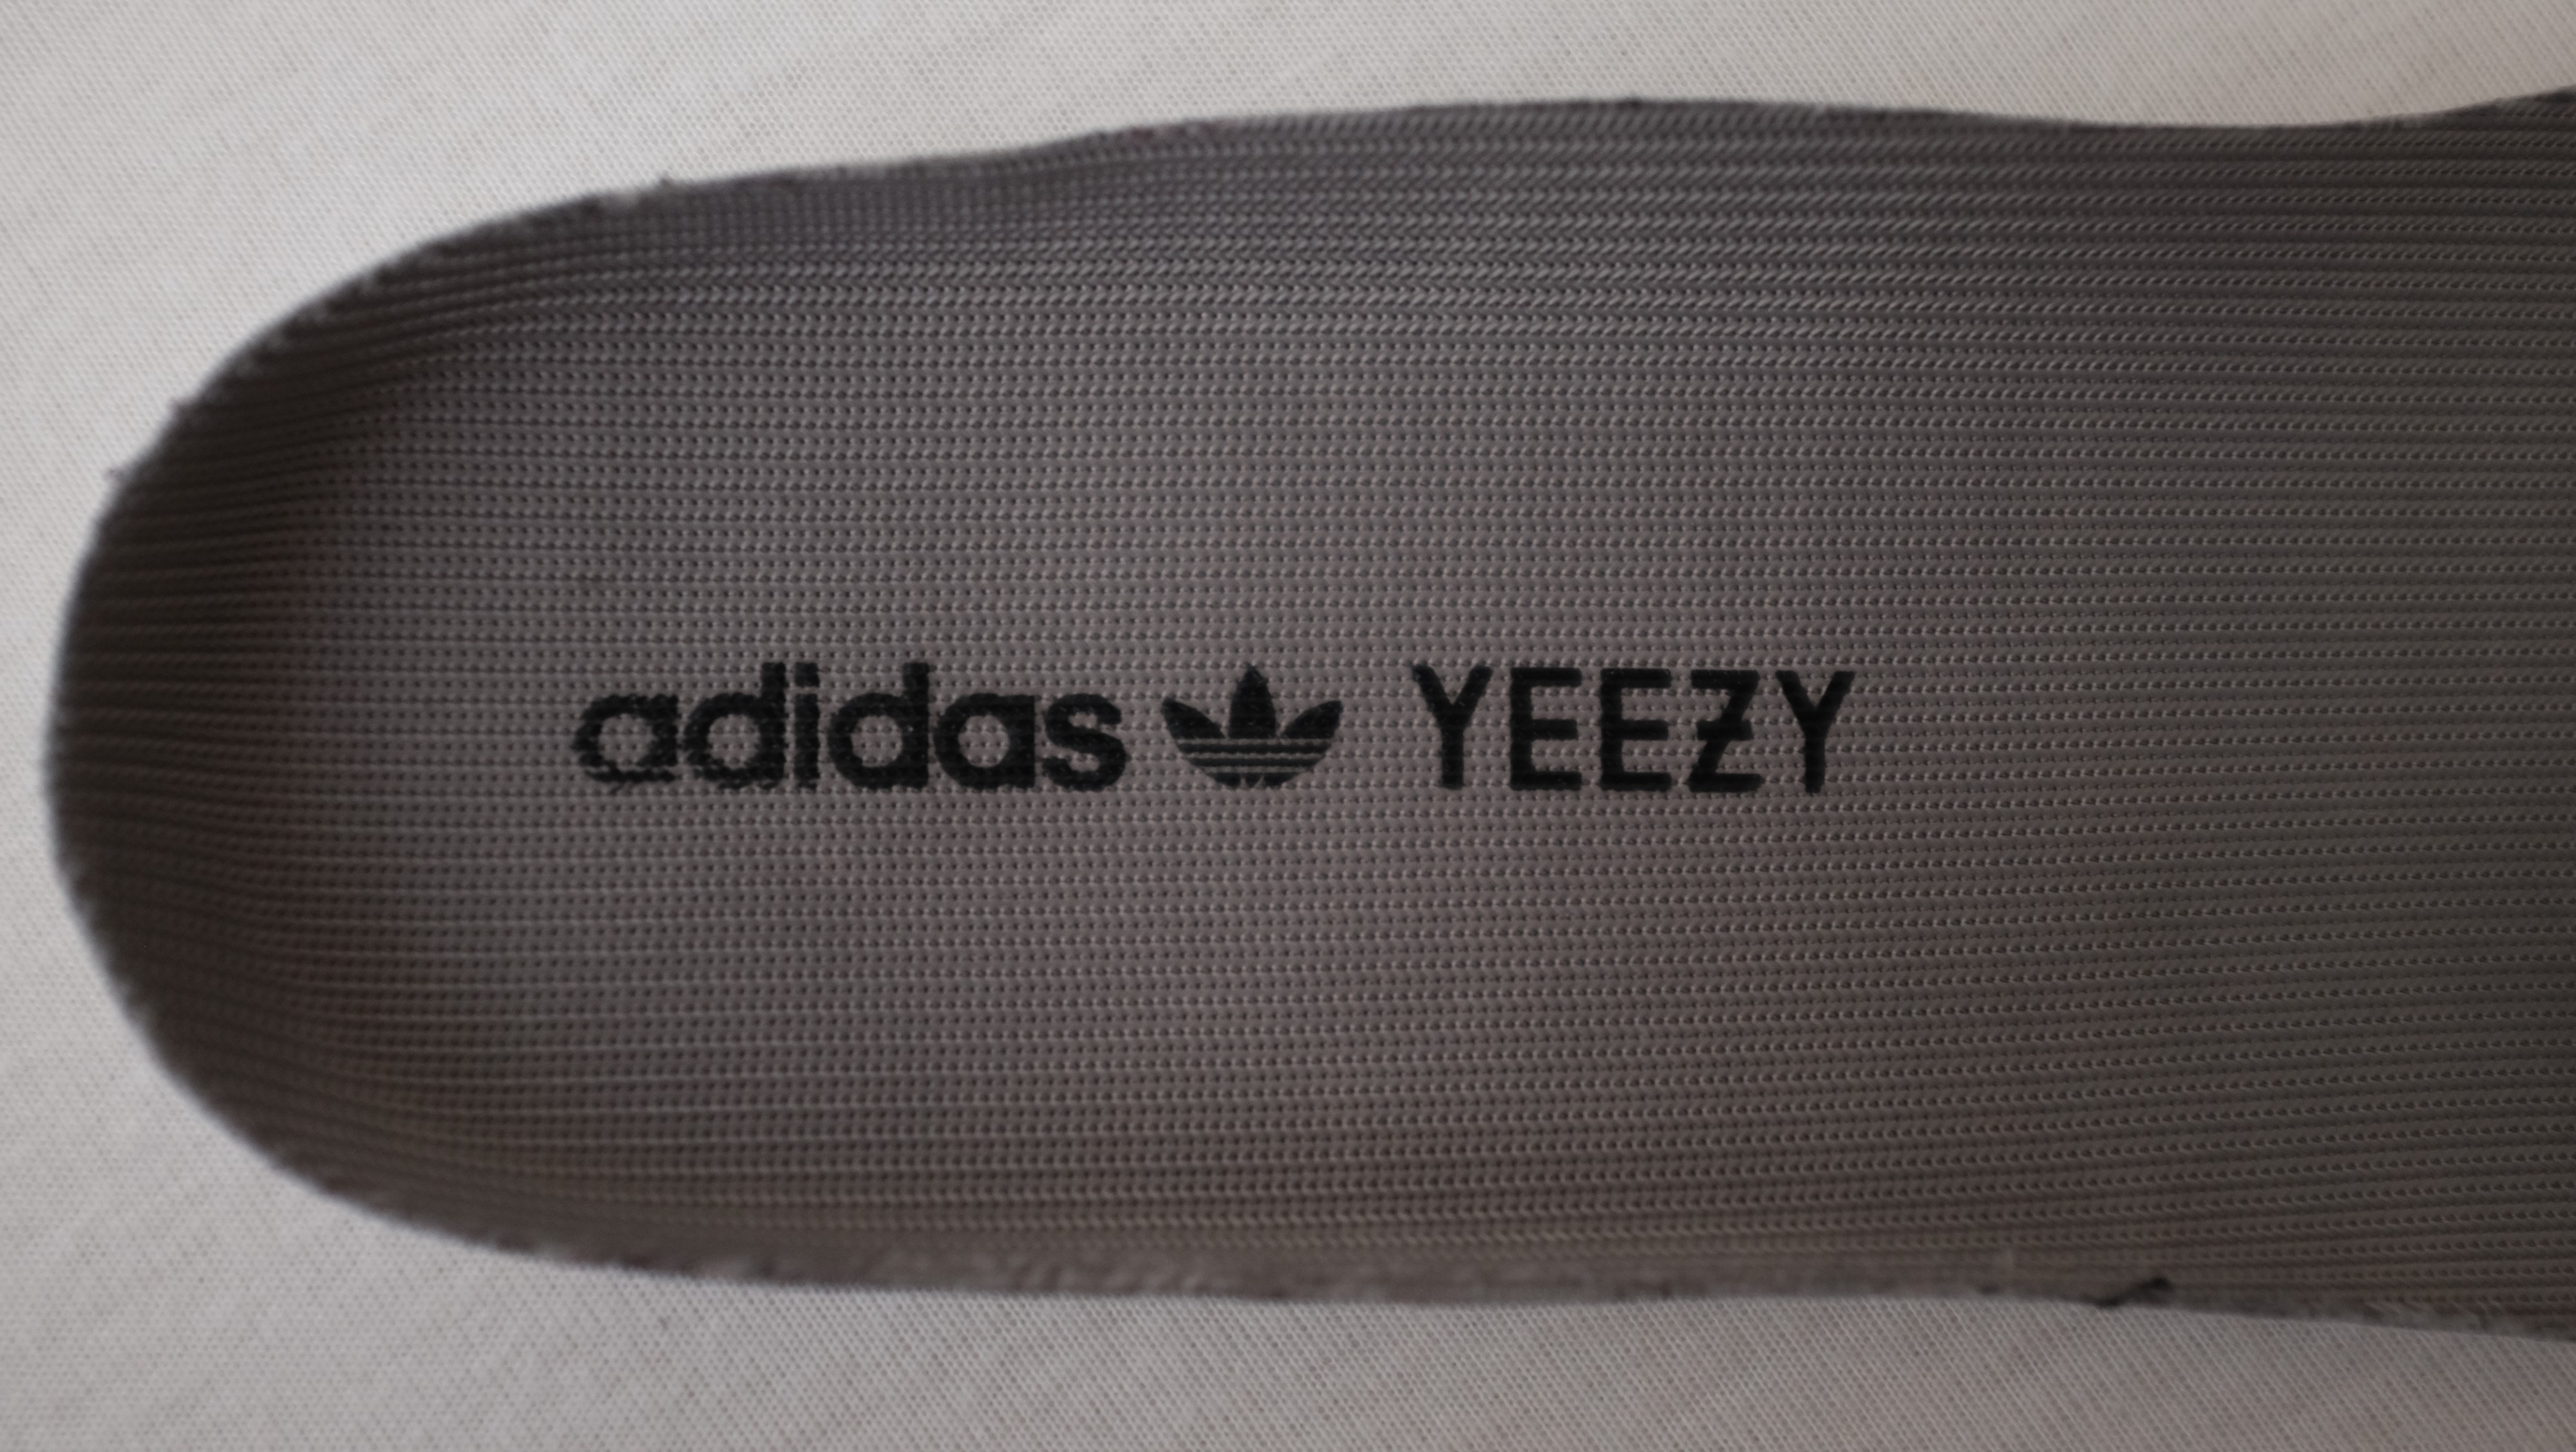
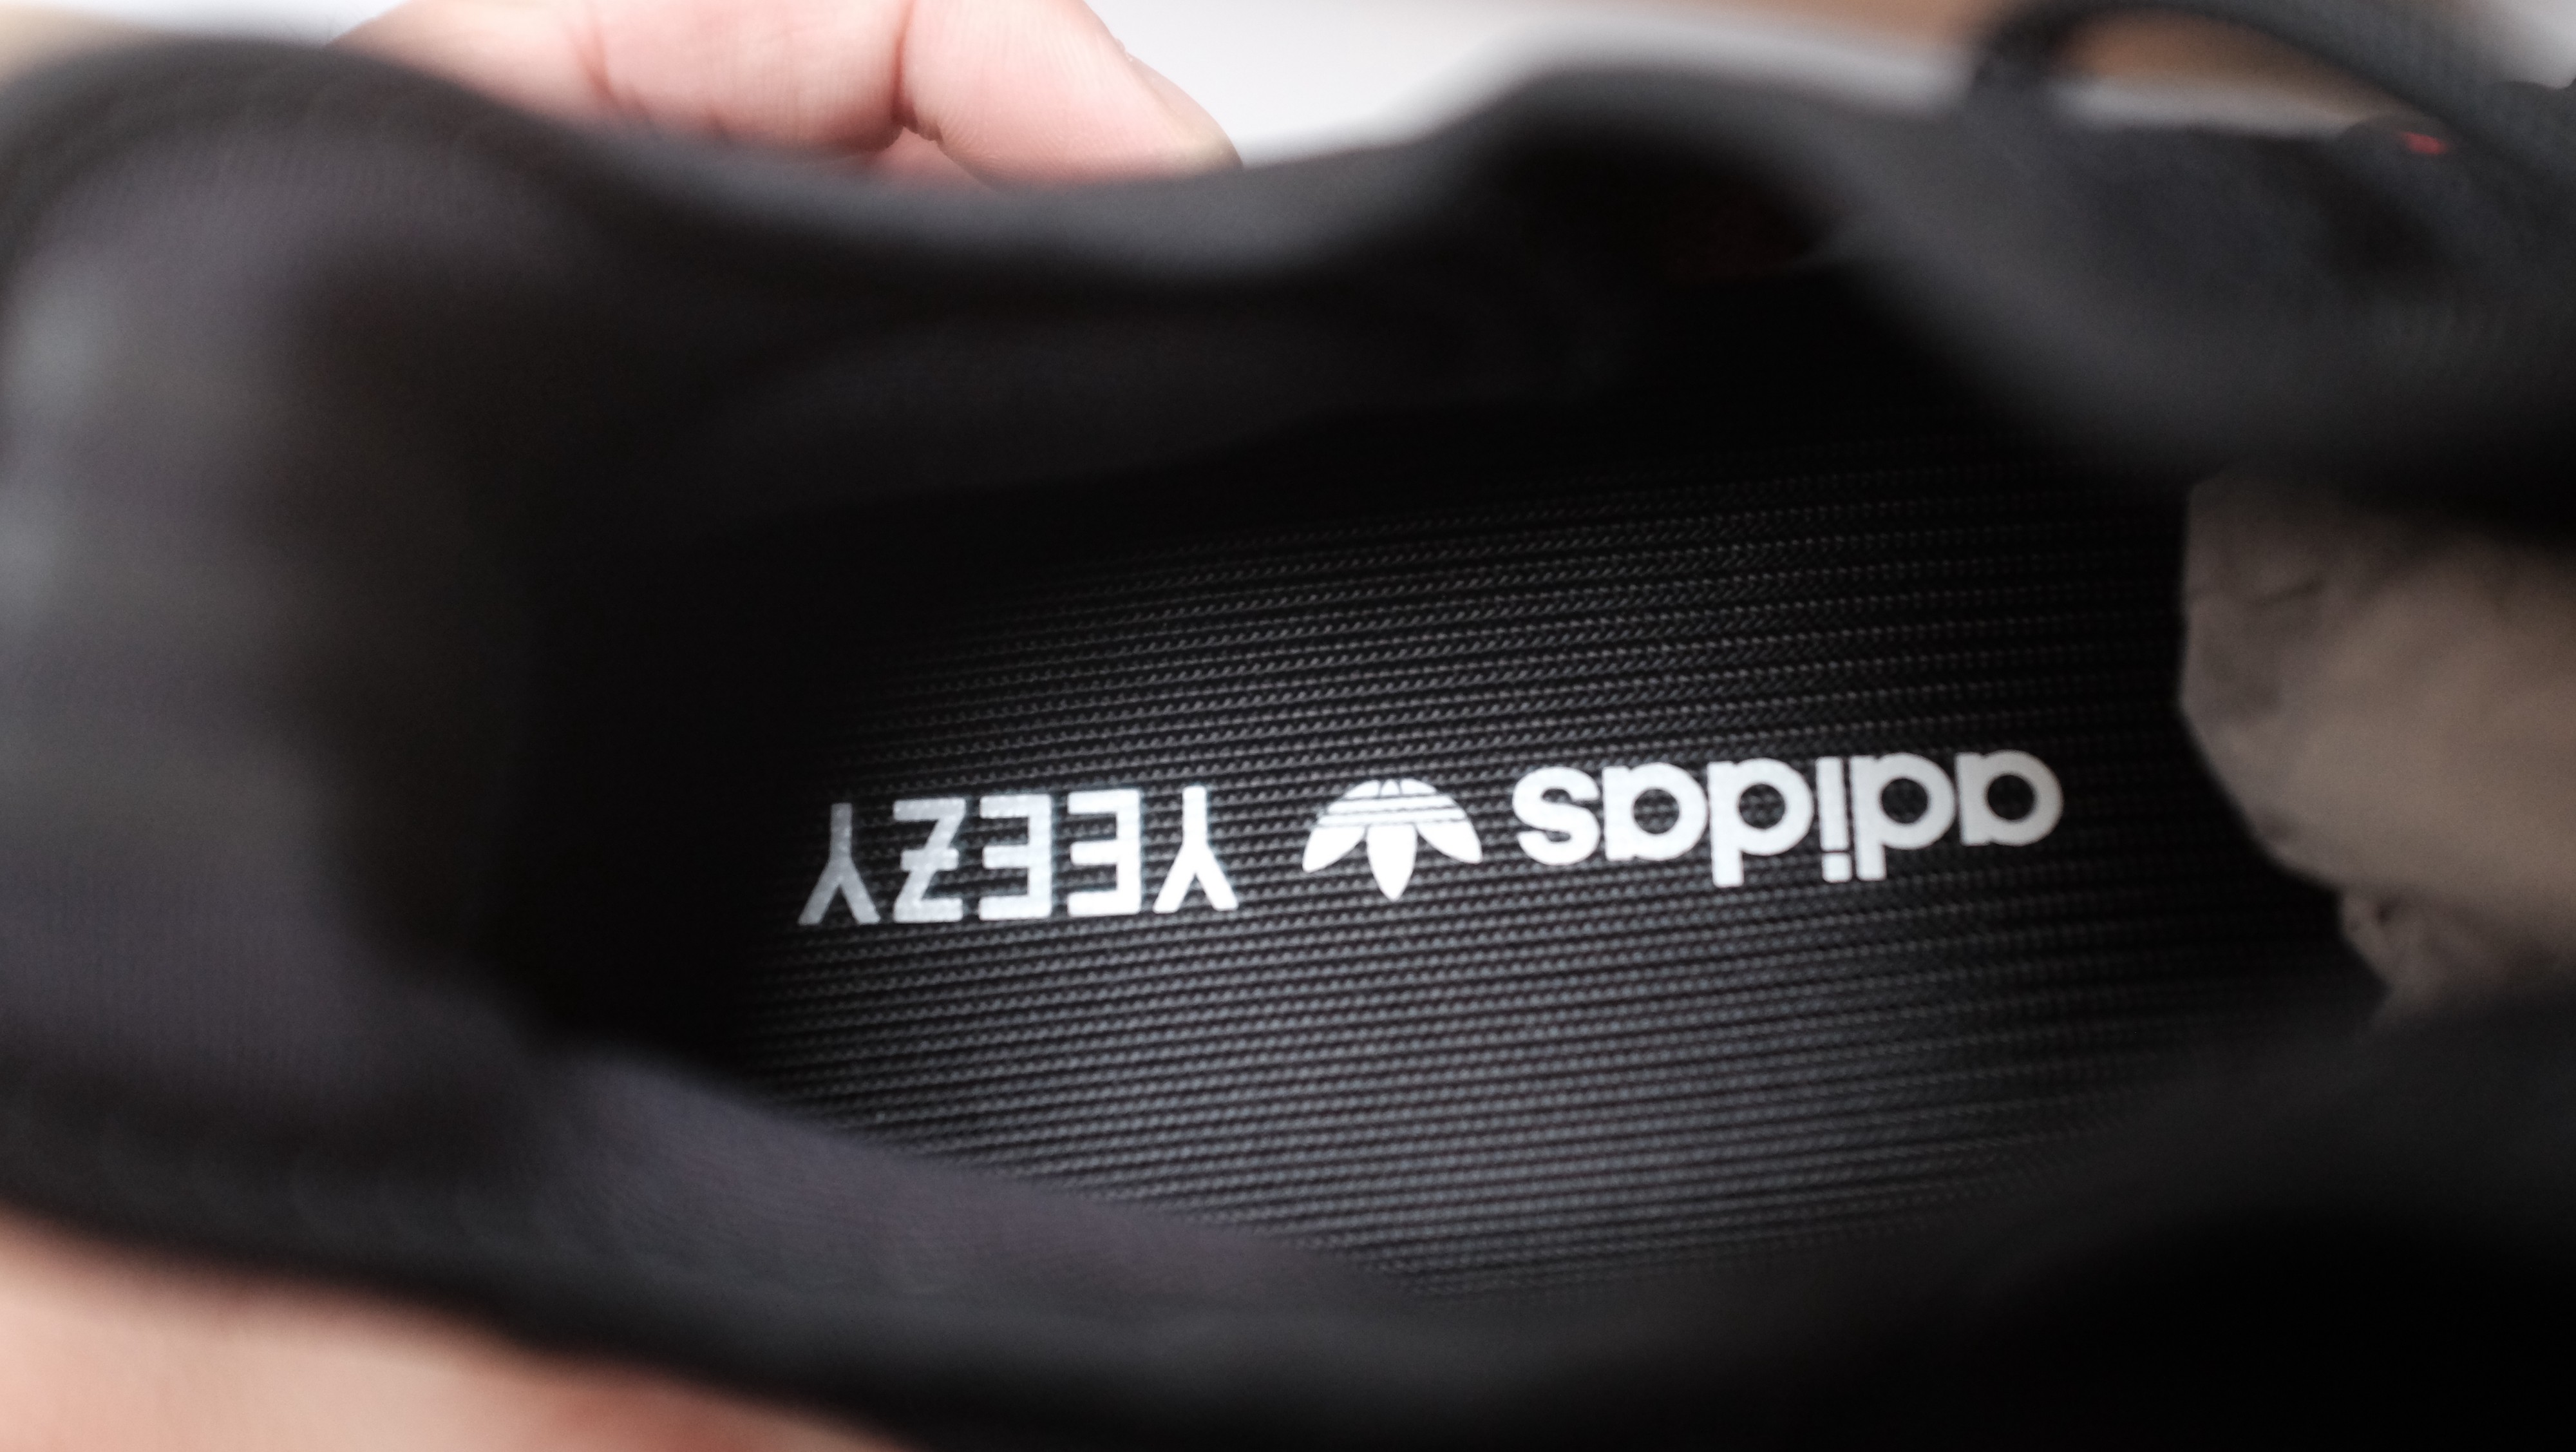
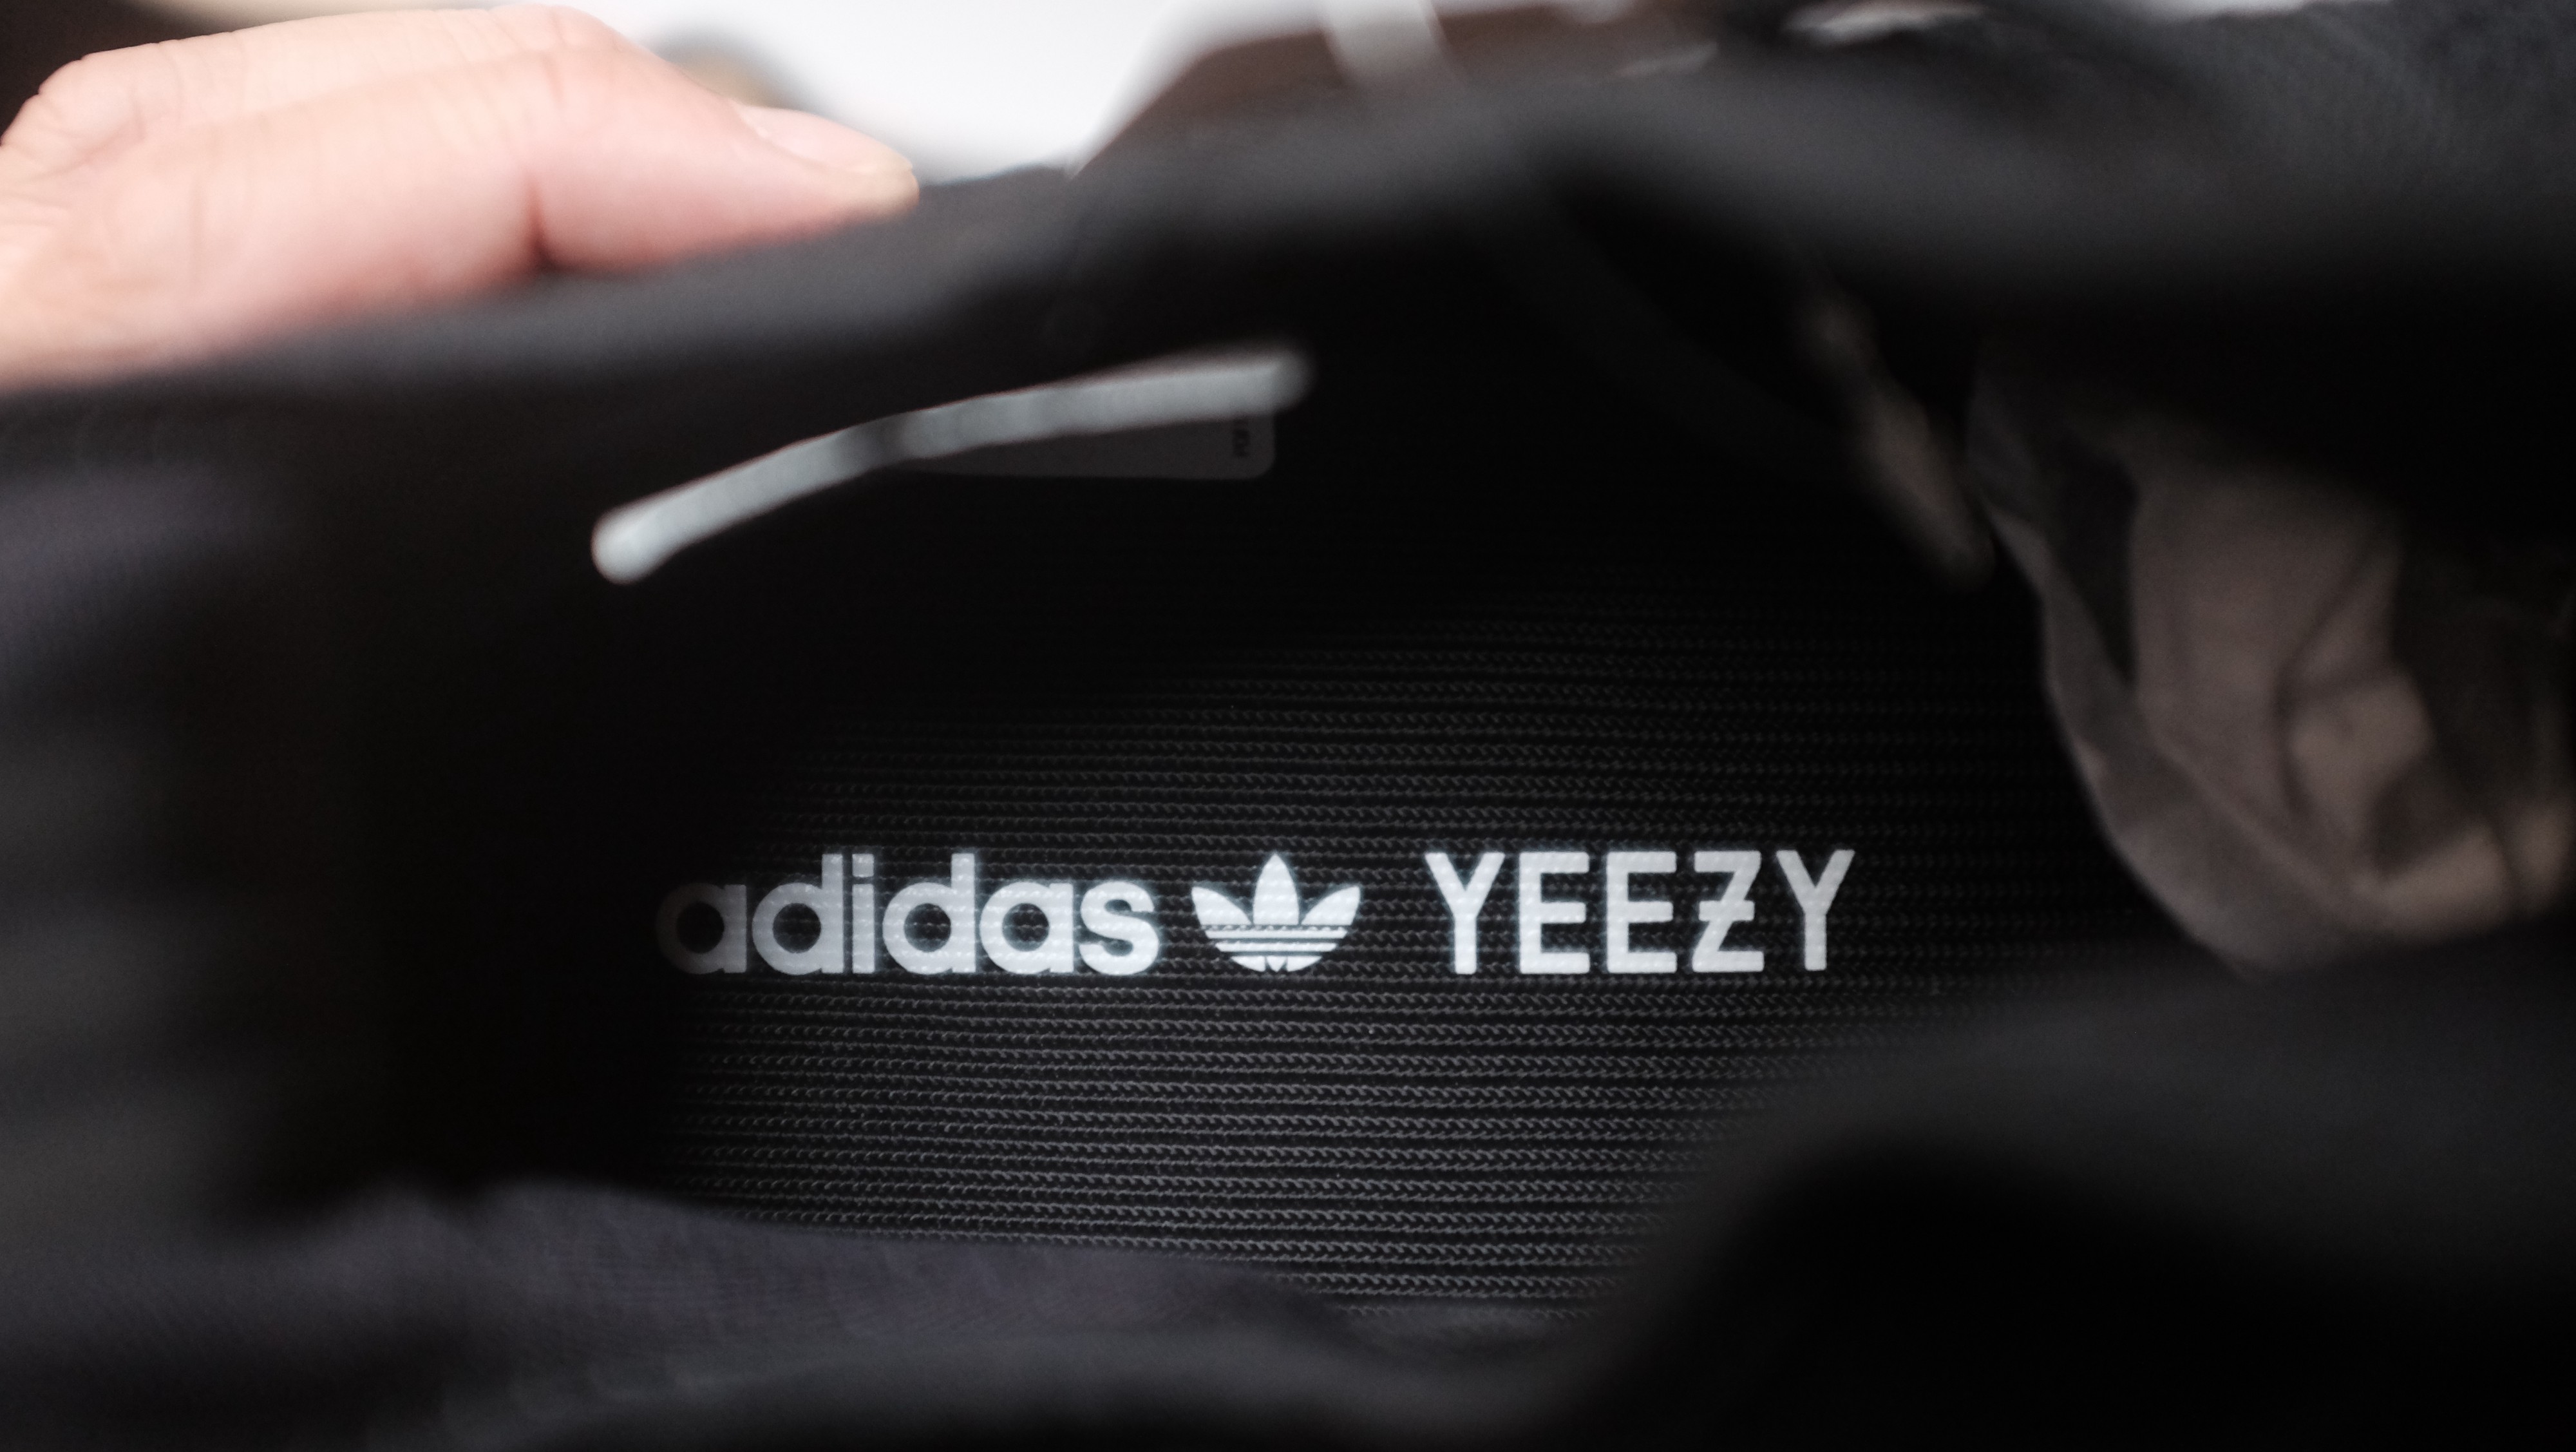
 Left Oreo V2, Right Beluga V2 // Adidas logo placement should be in a perfect straight line with the insole.
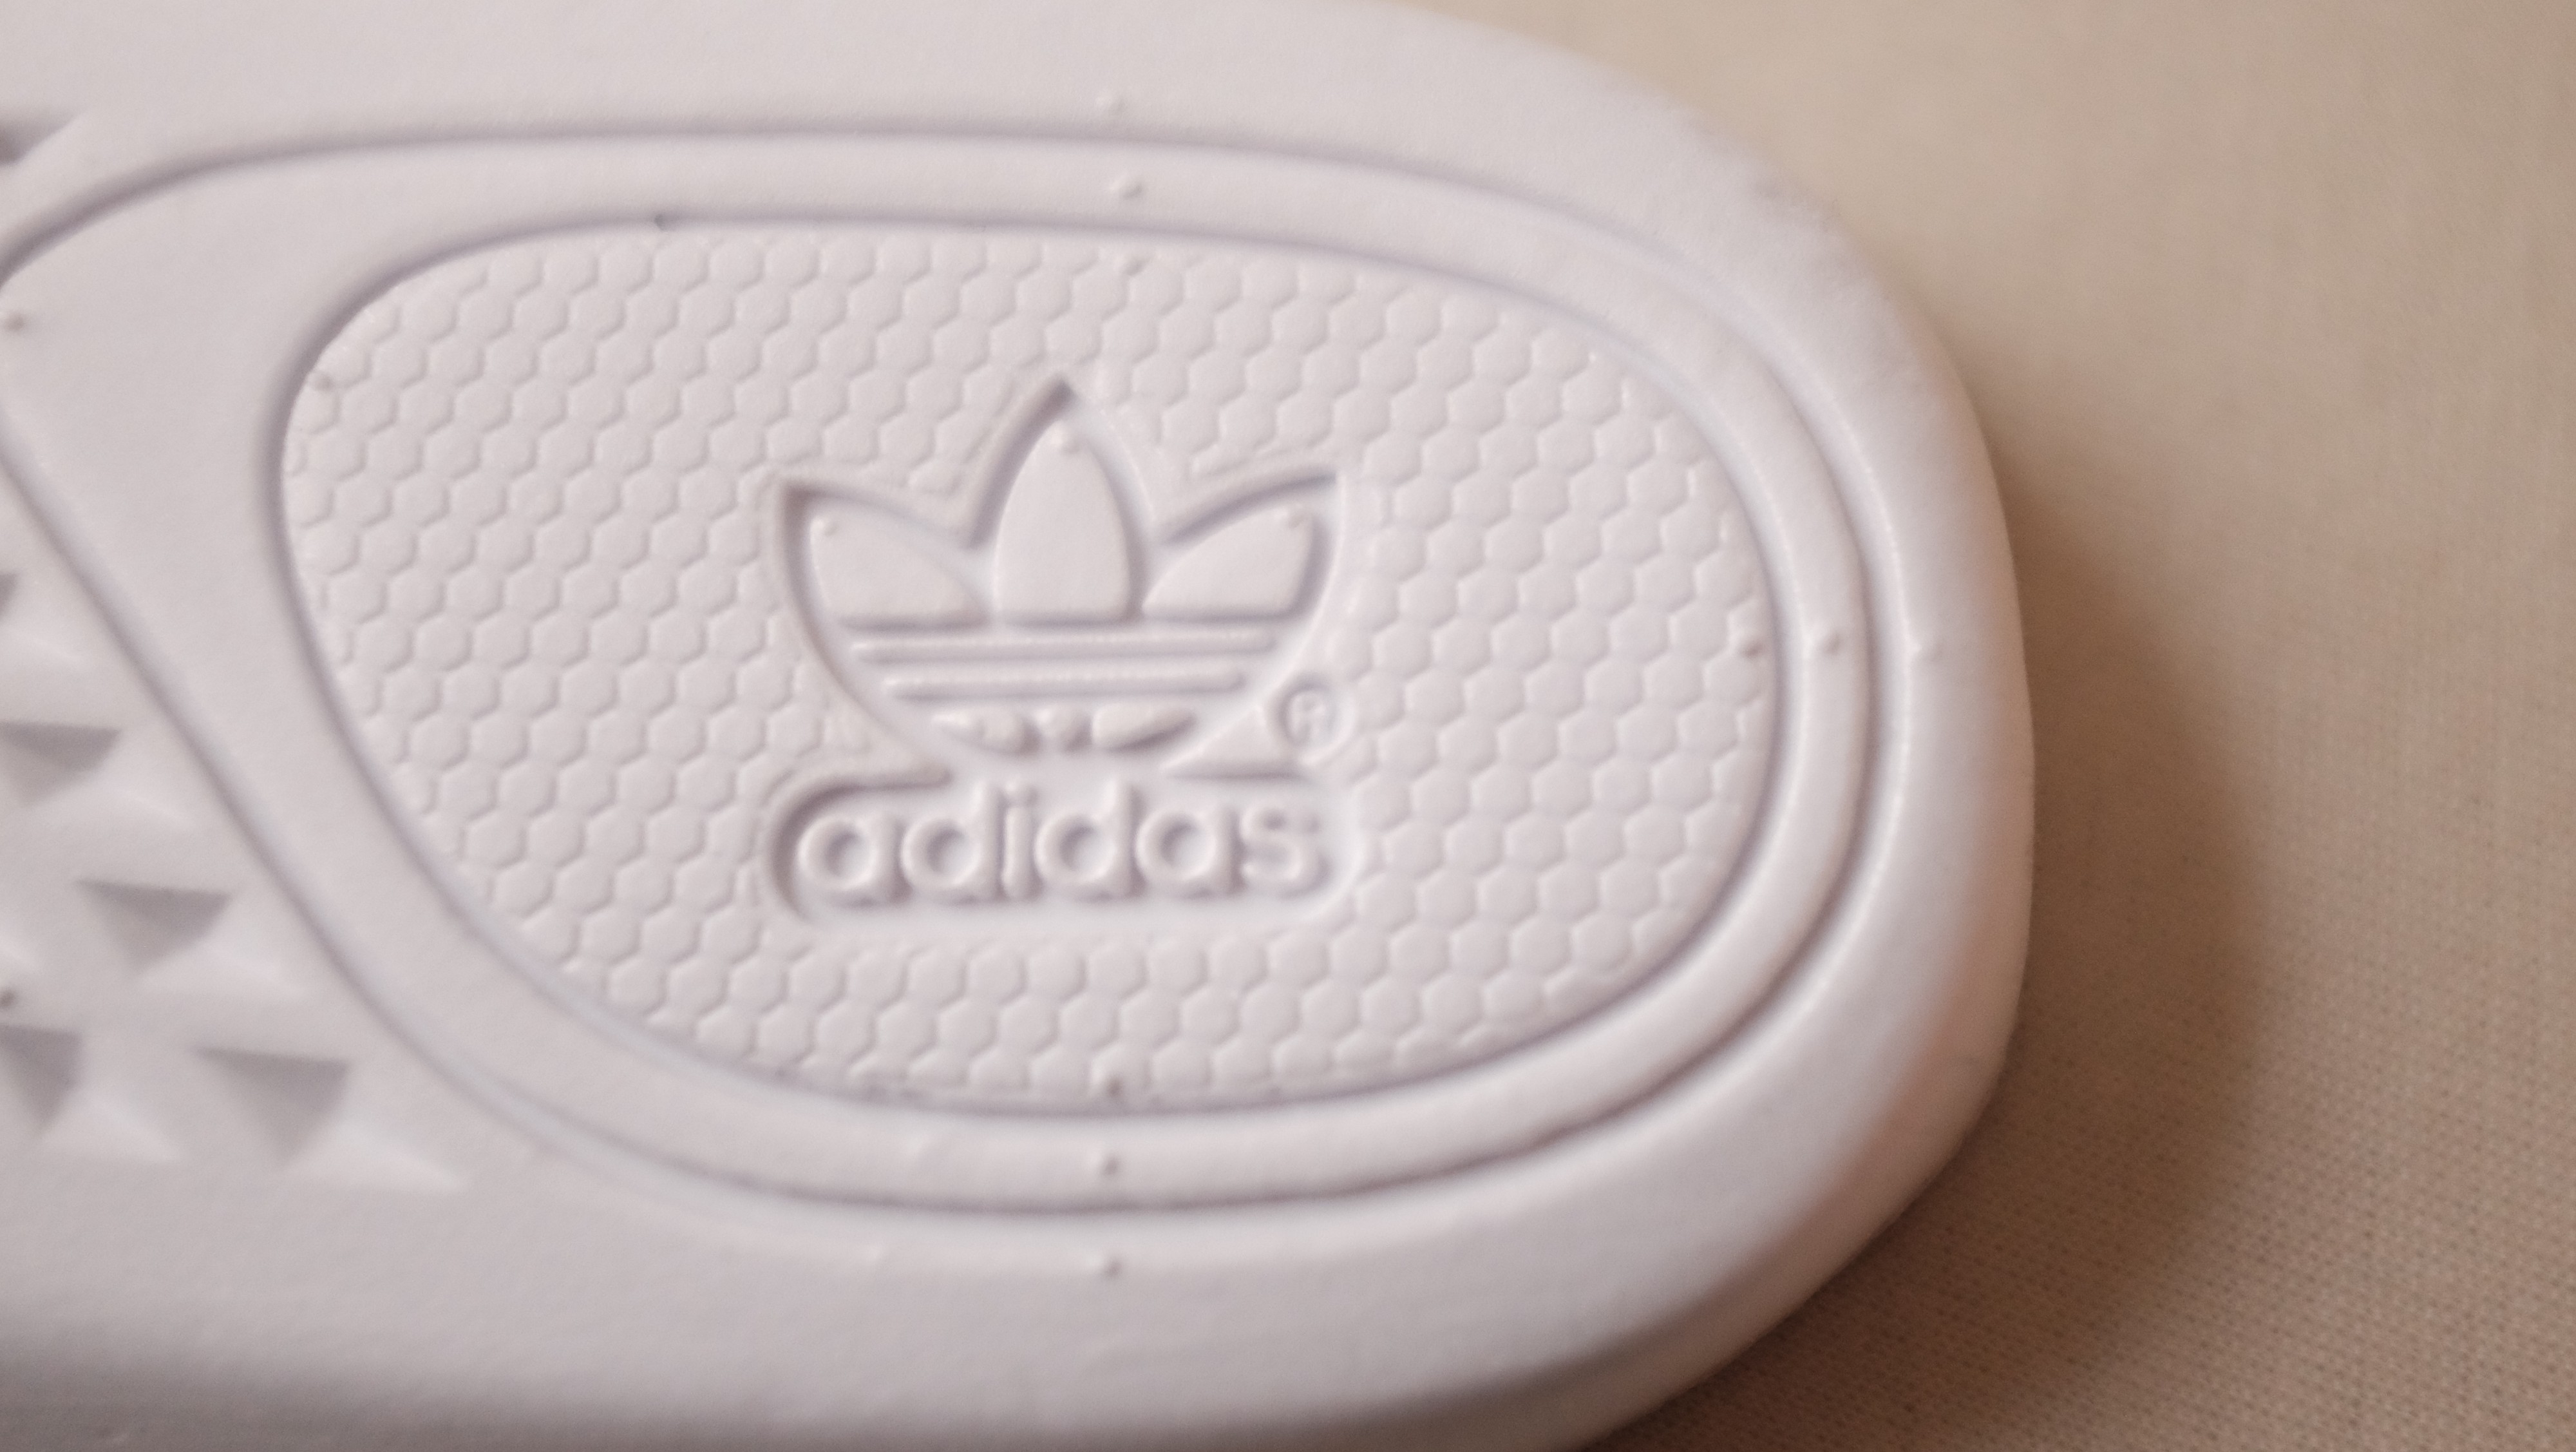 Beluga 2.0
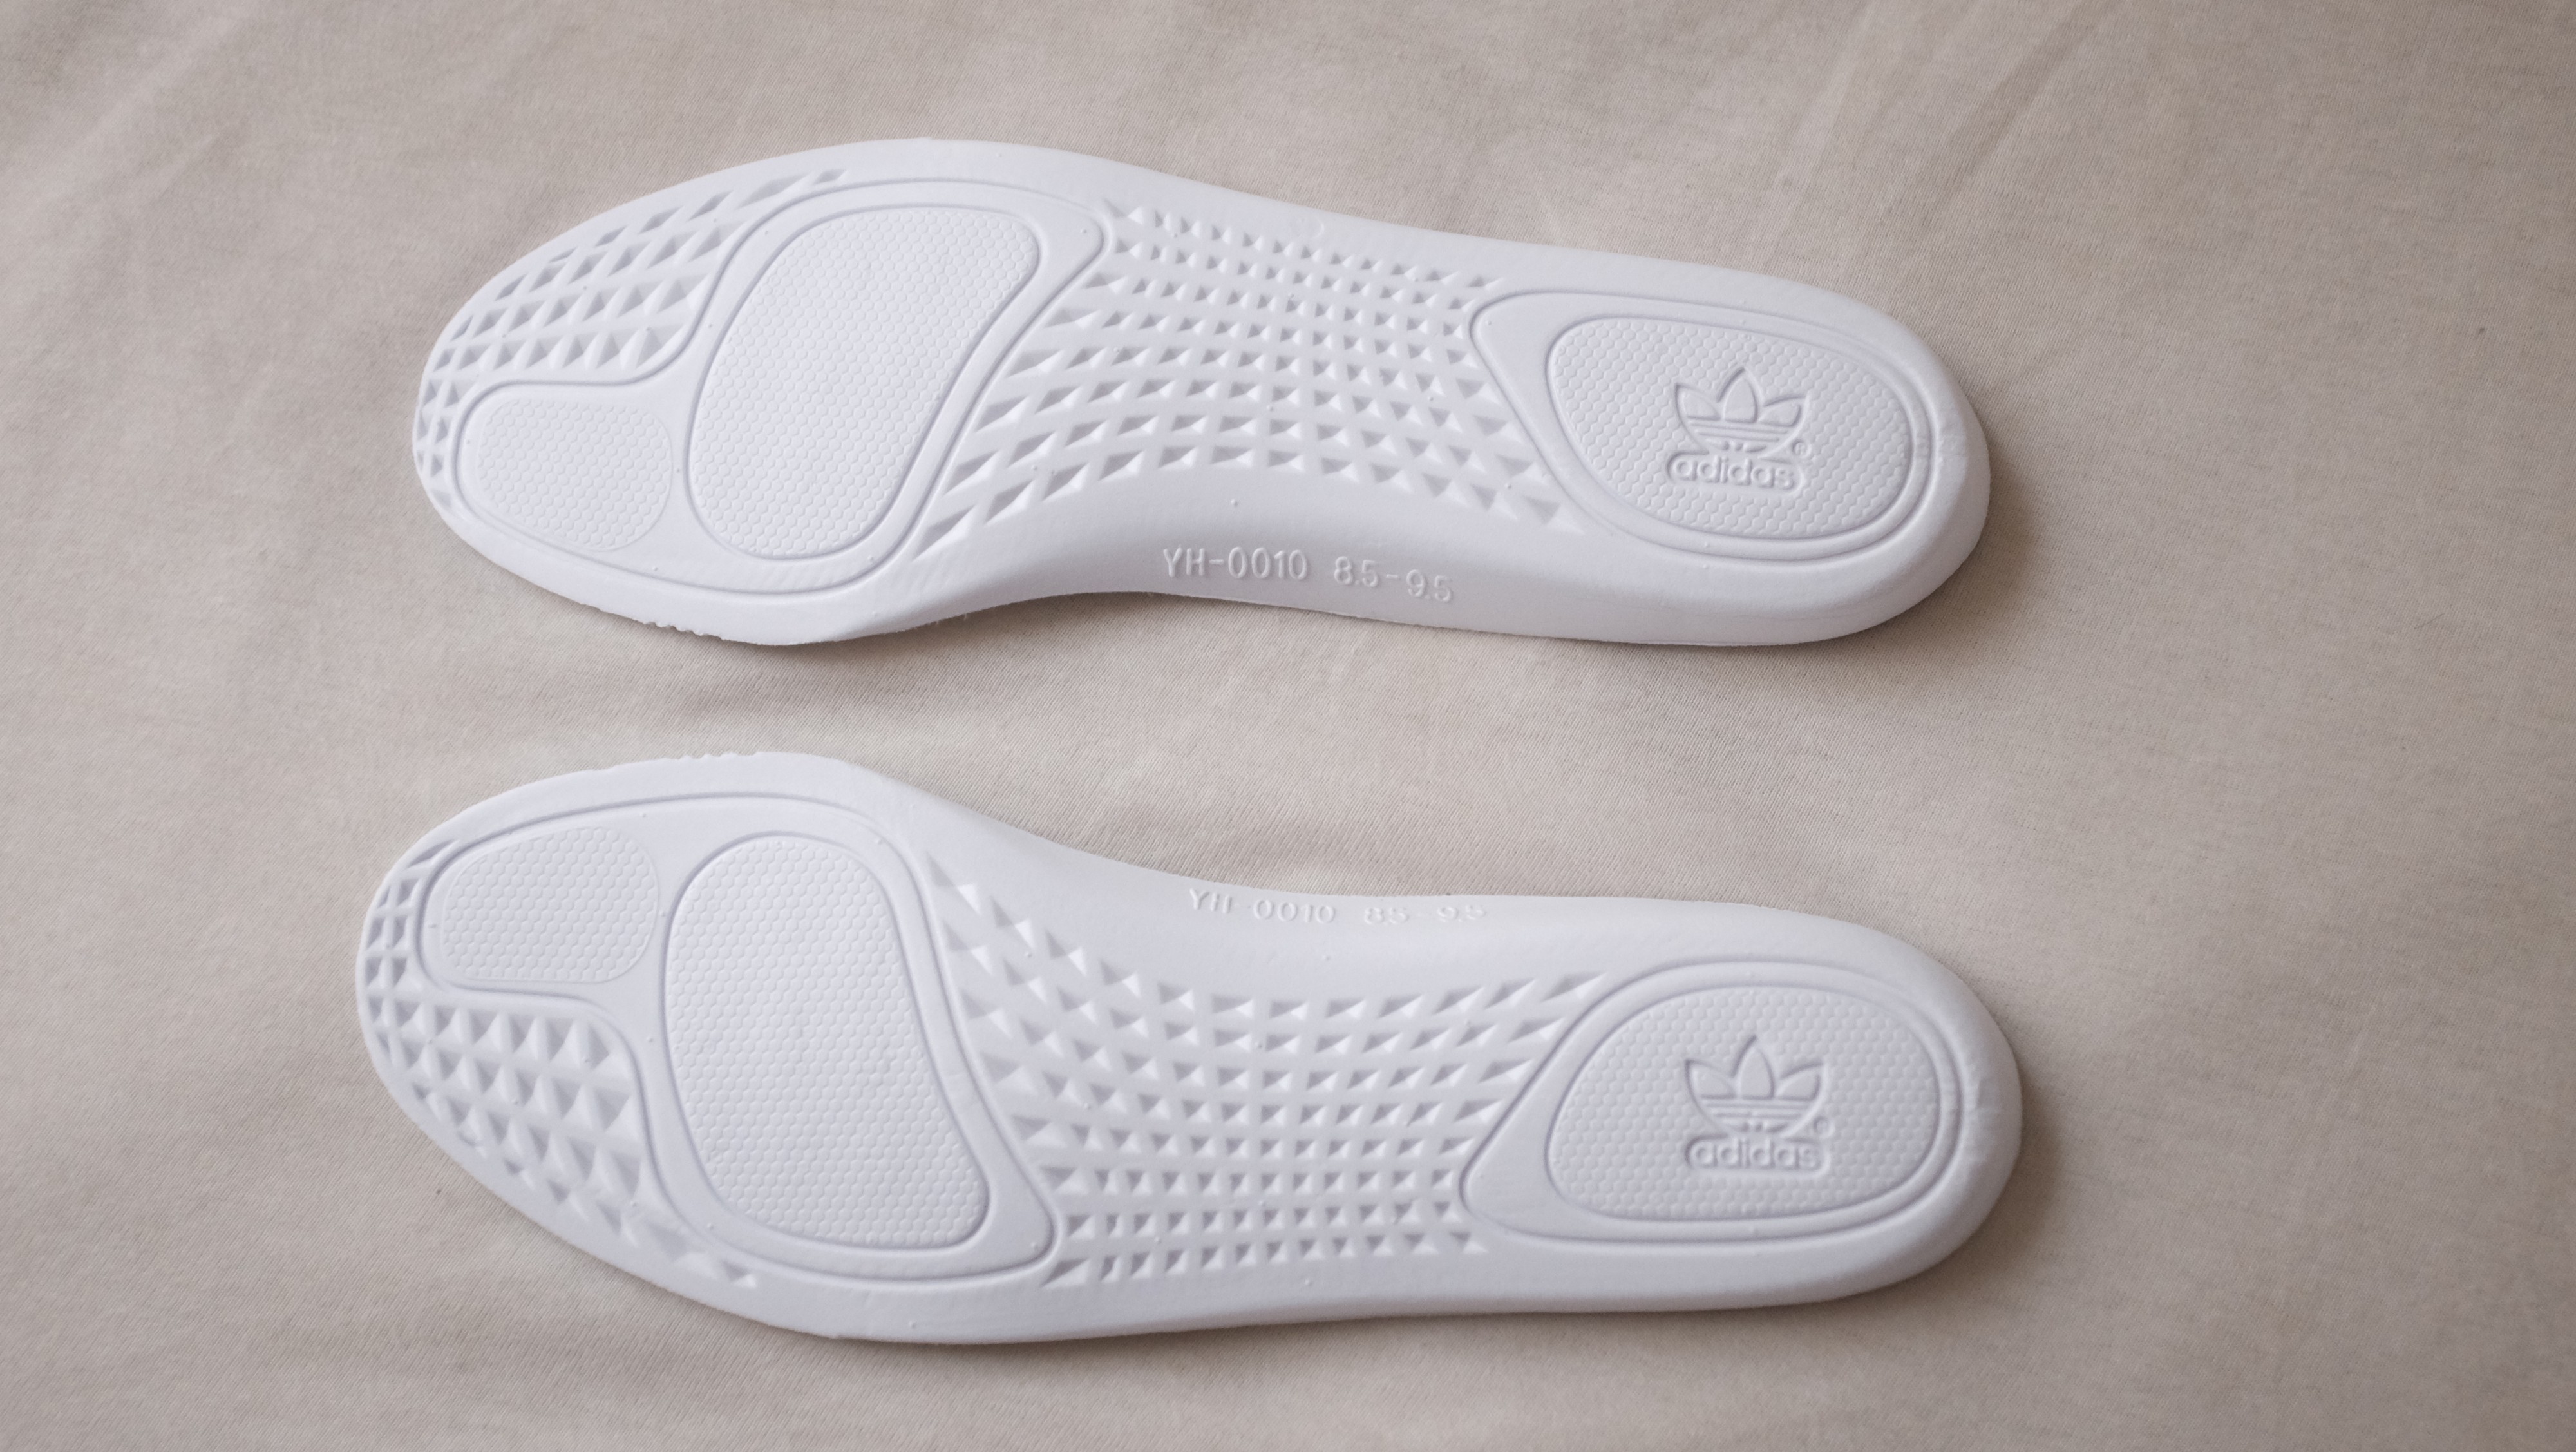
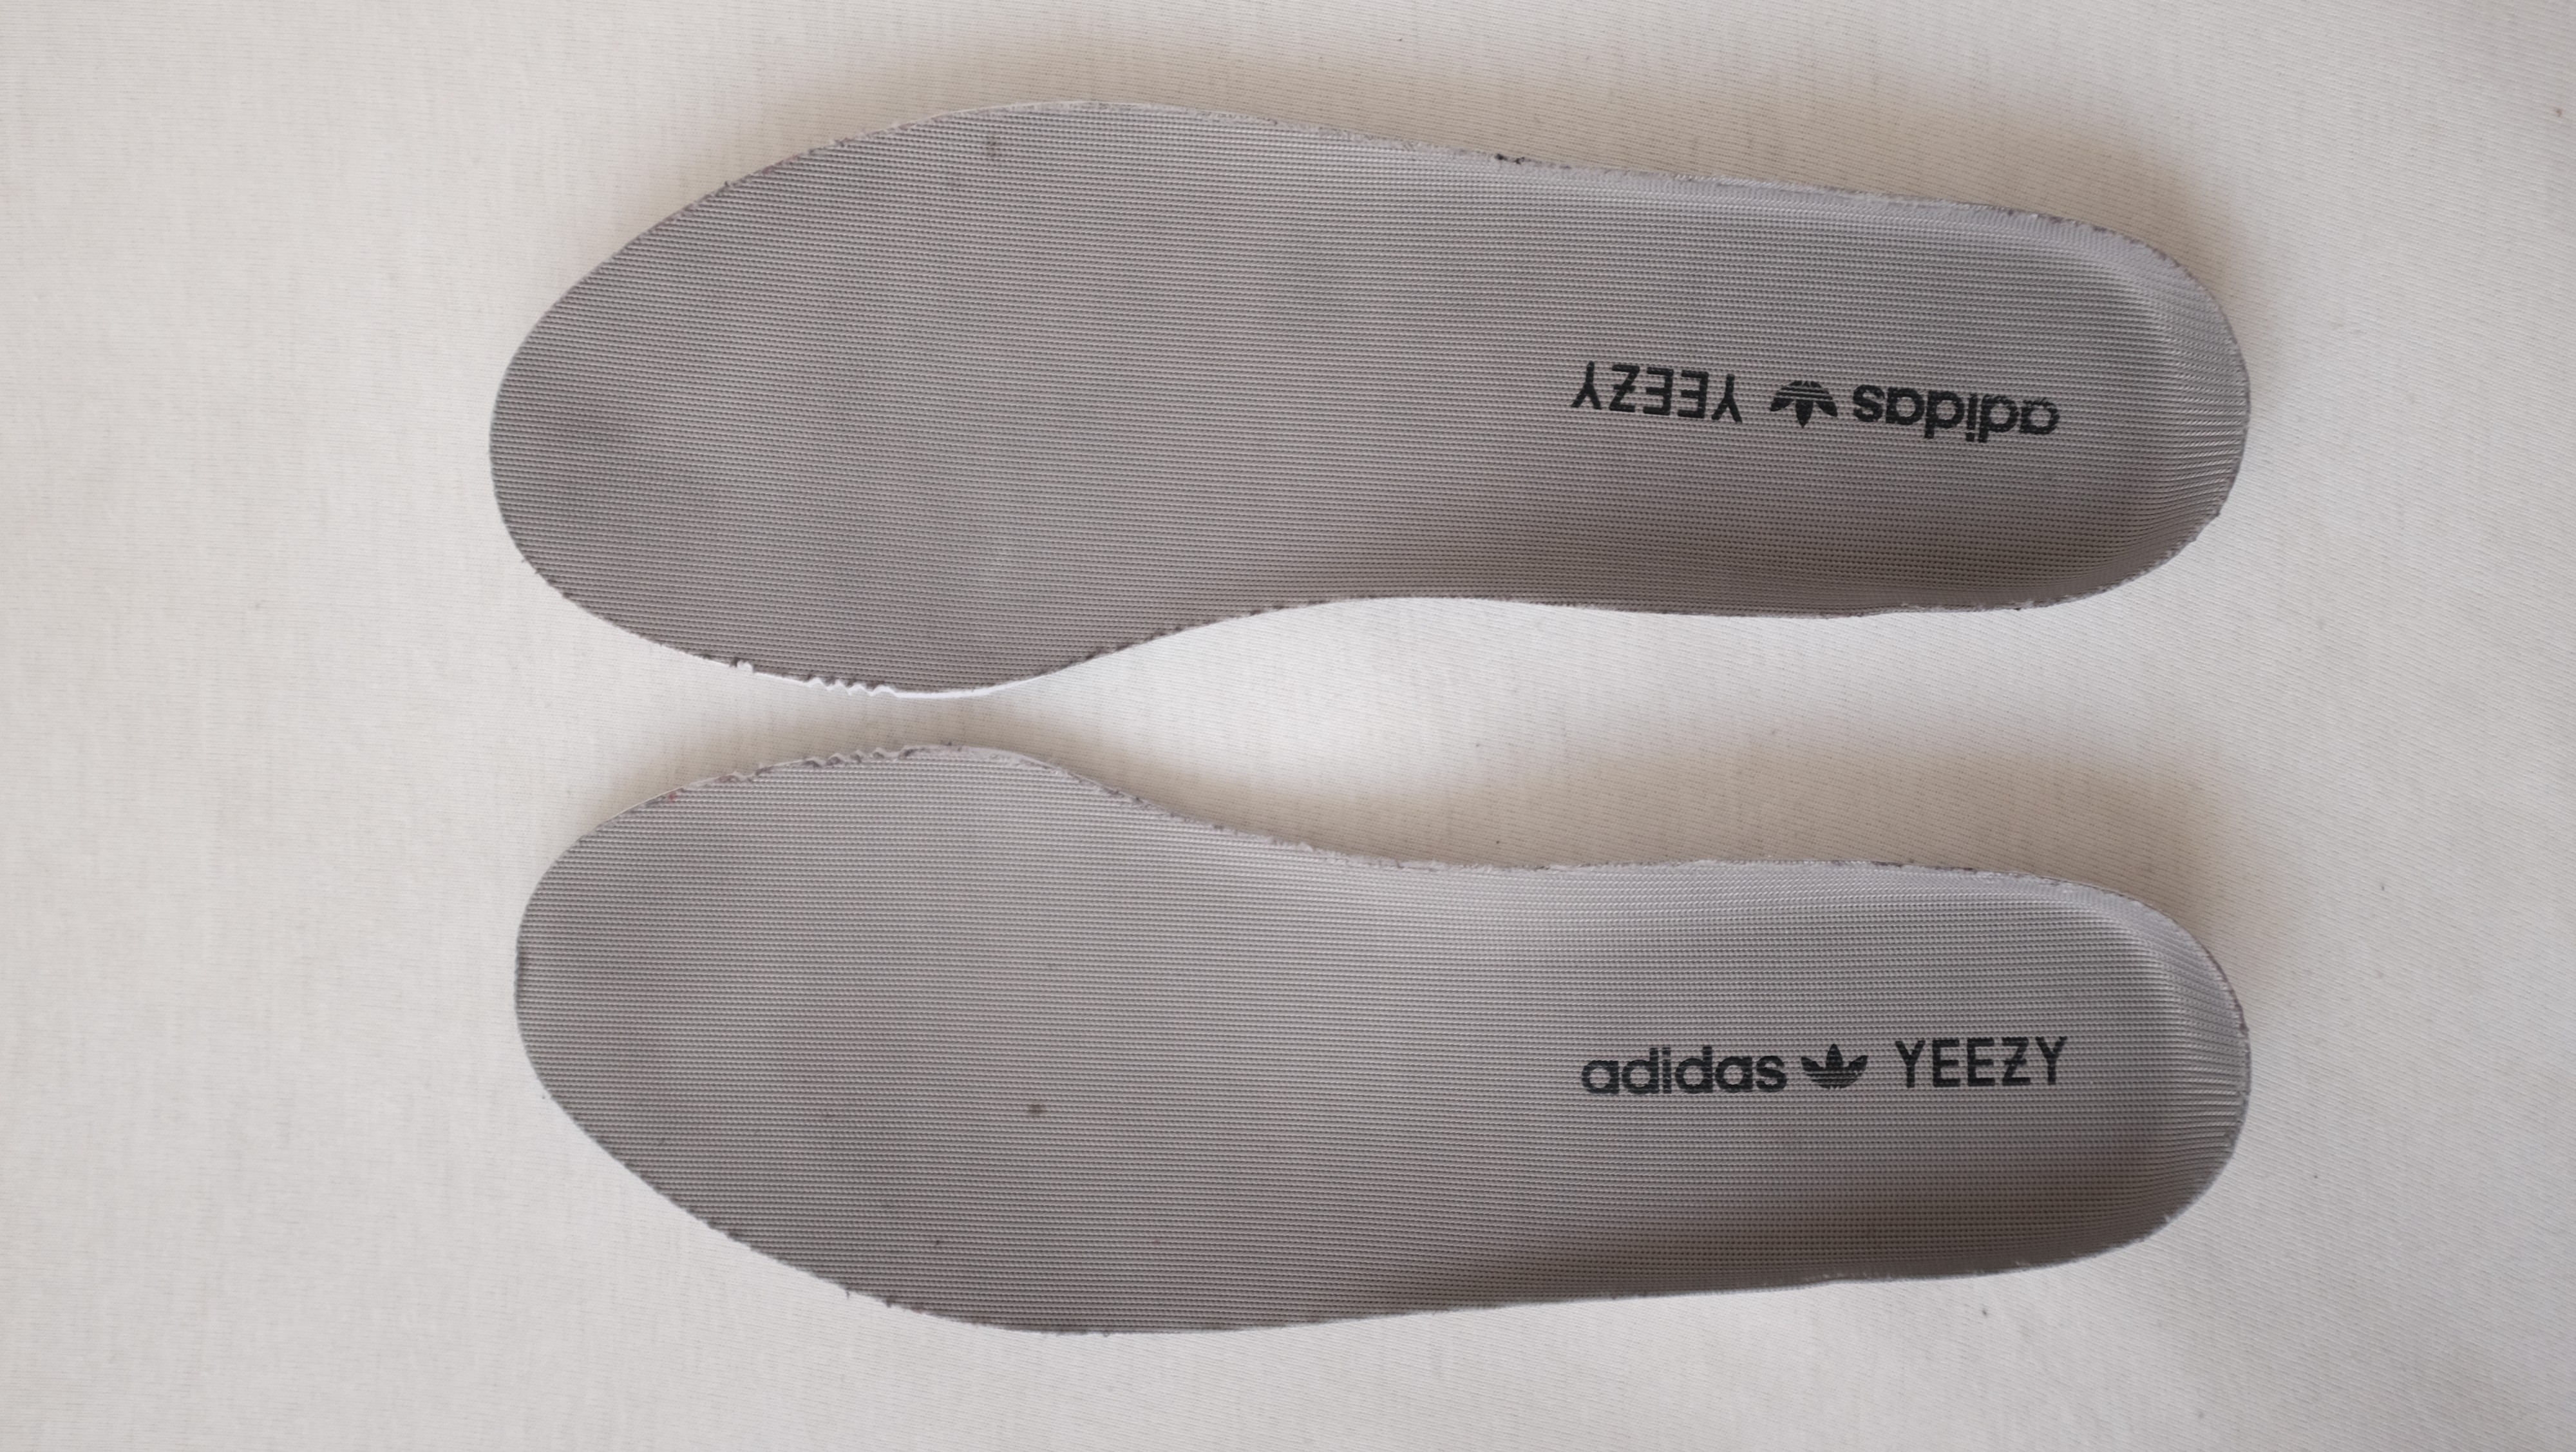
 Zebra OG V2 Insole Left & Middle // Right Zebra Restock V2 Insole
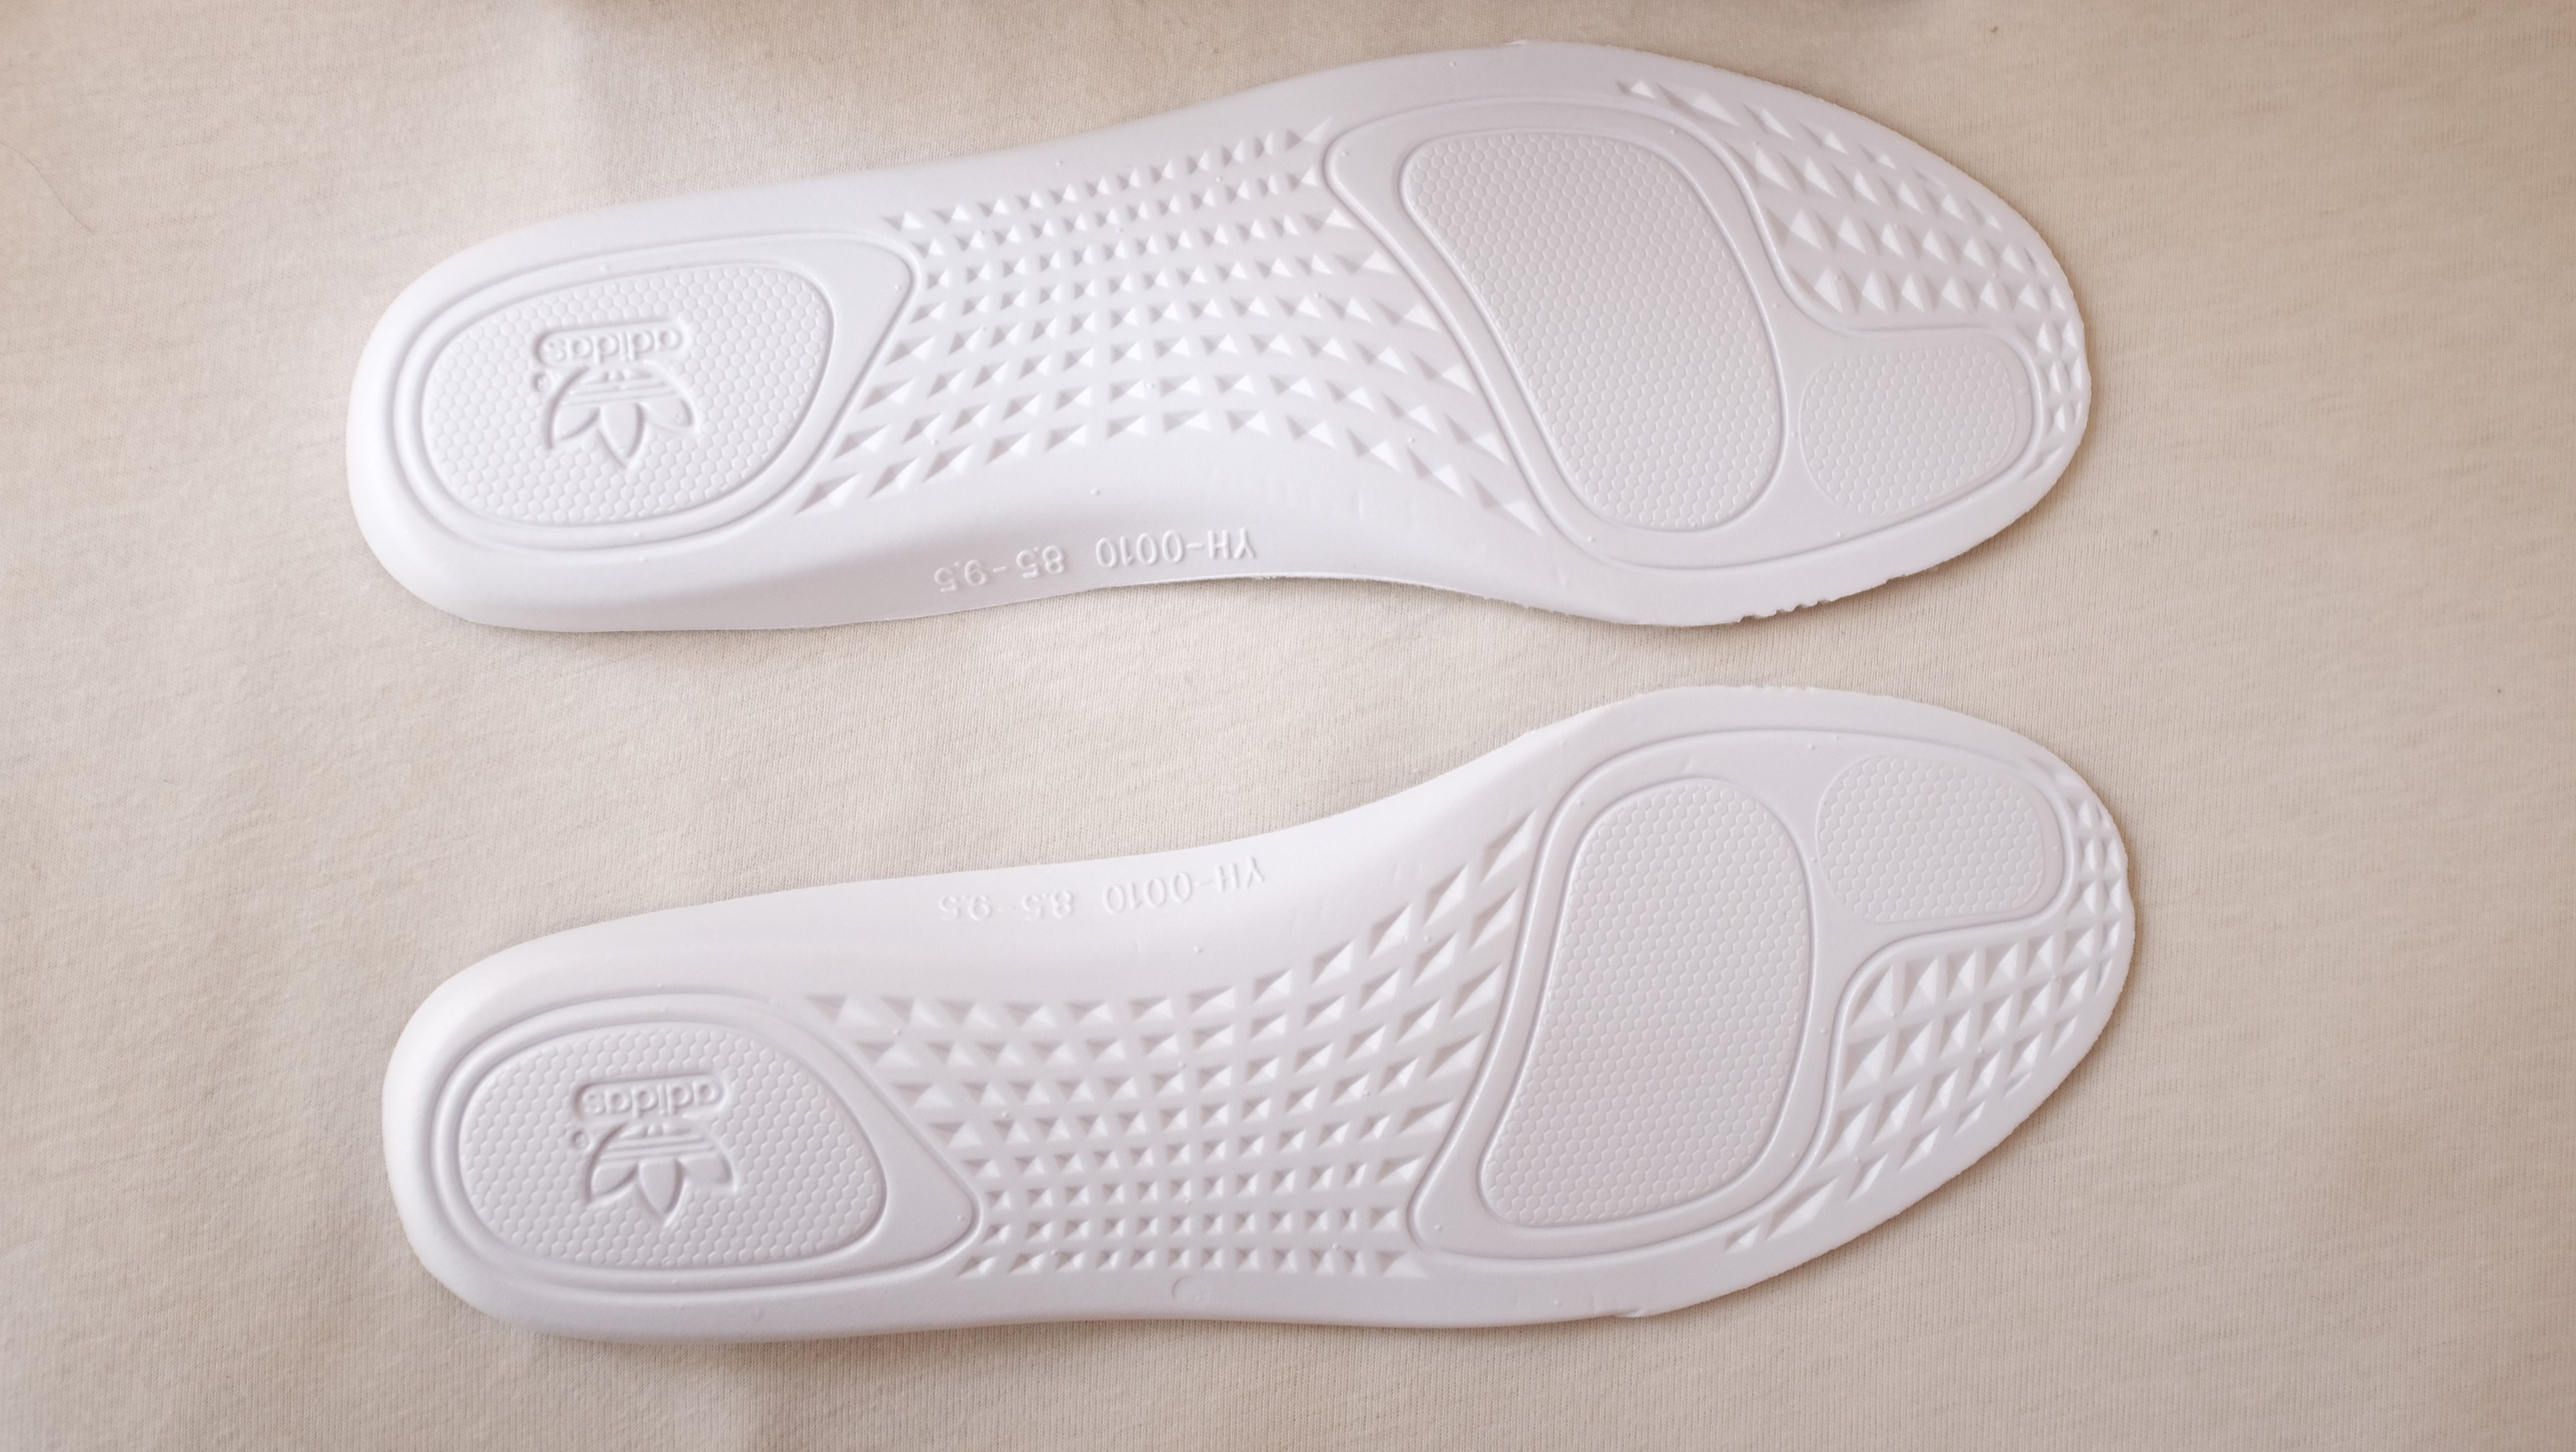
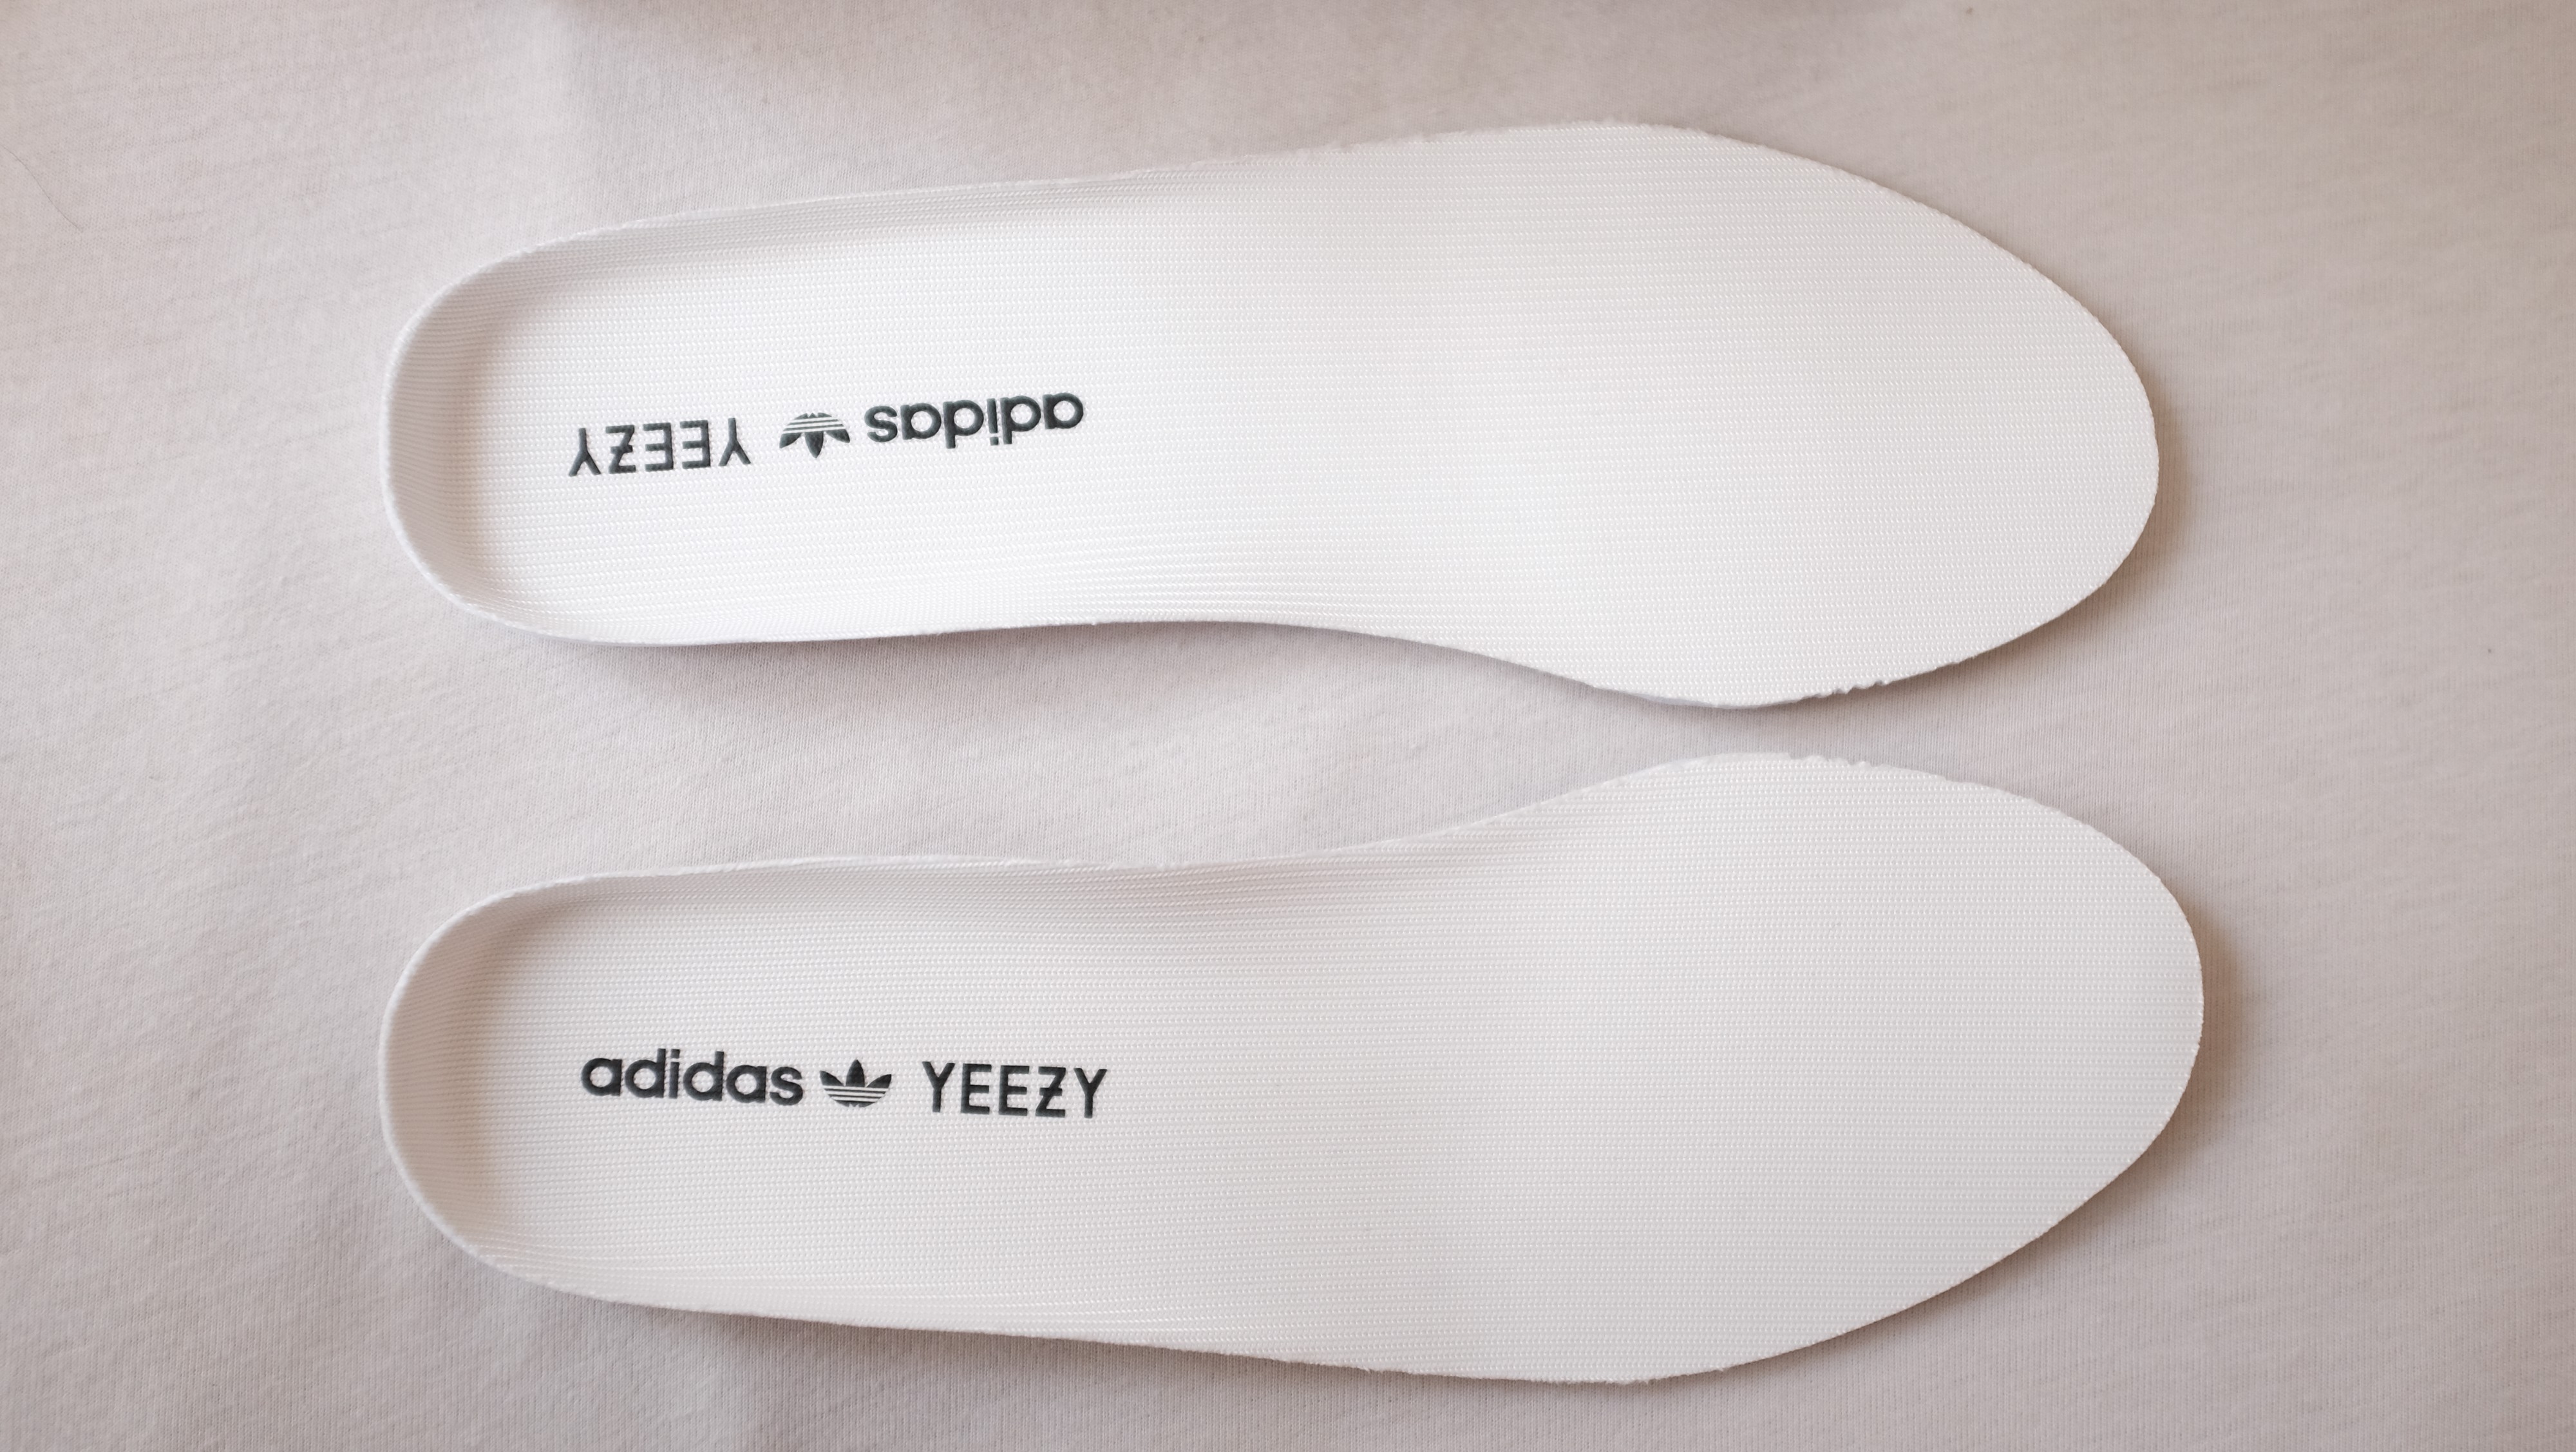
 Left Cream V2, Middle Oreo V2, Right Beluga V2
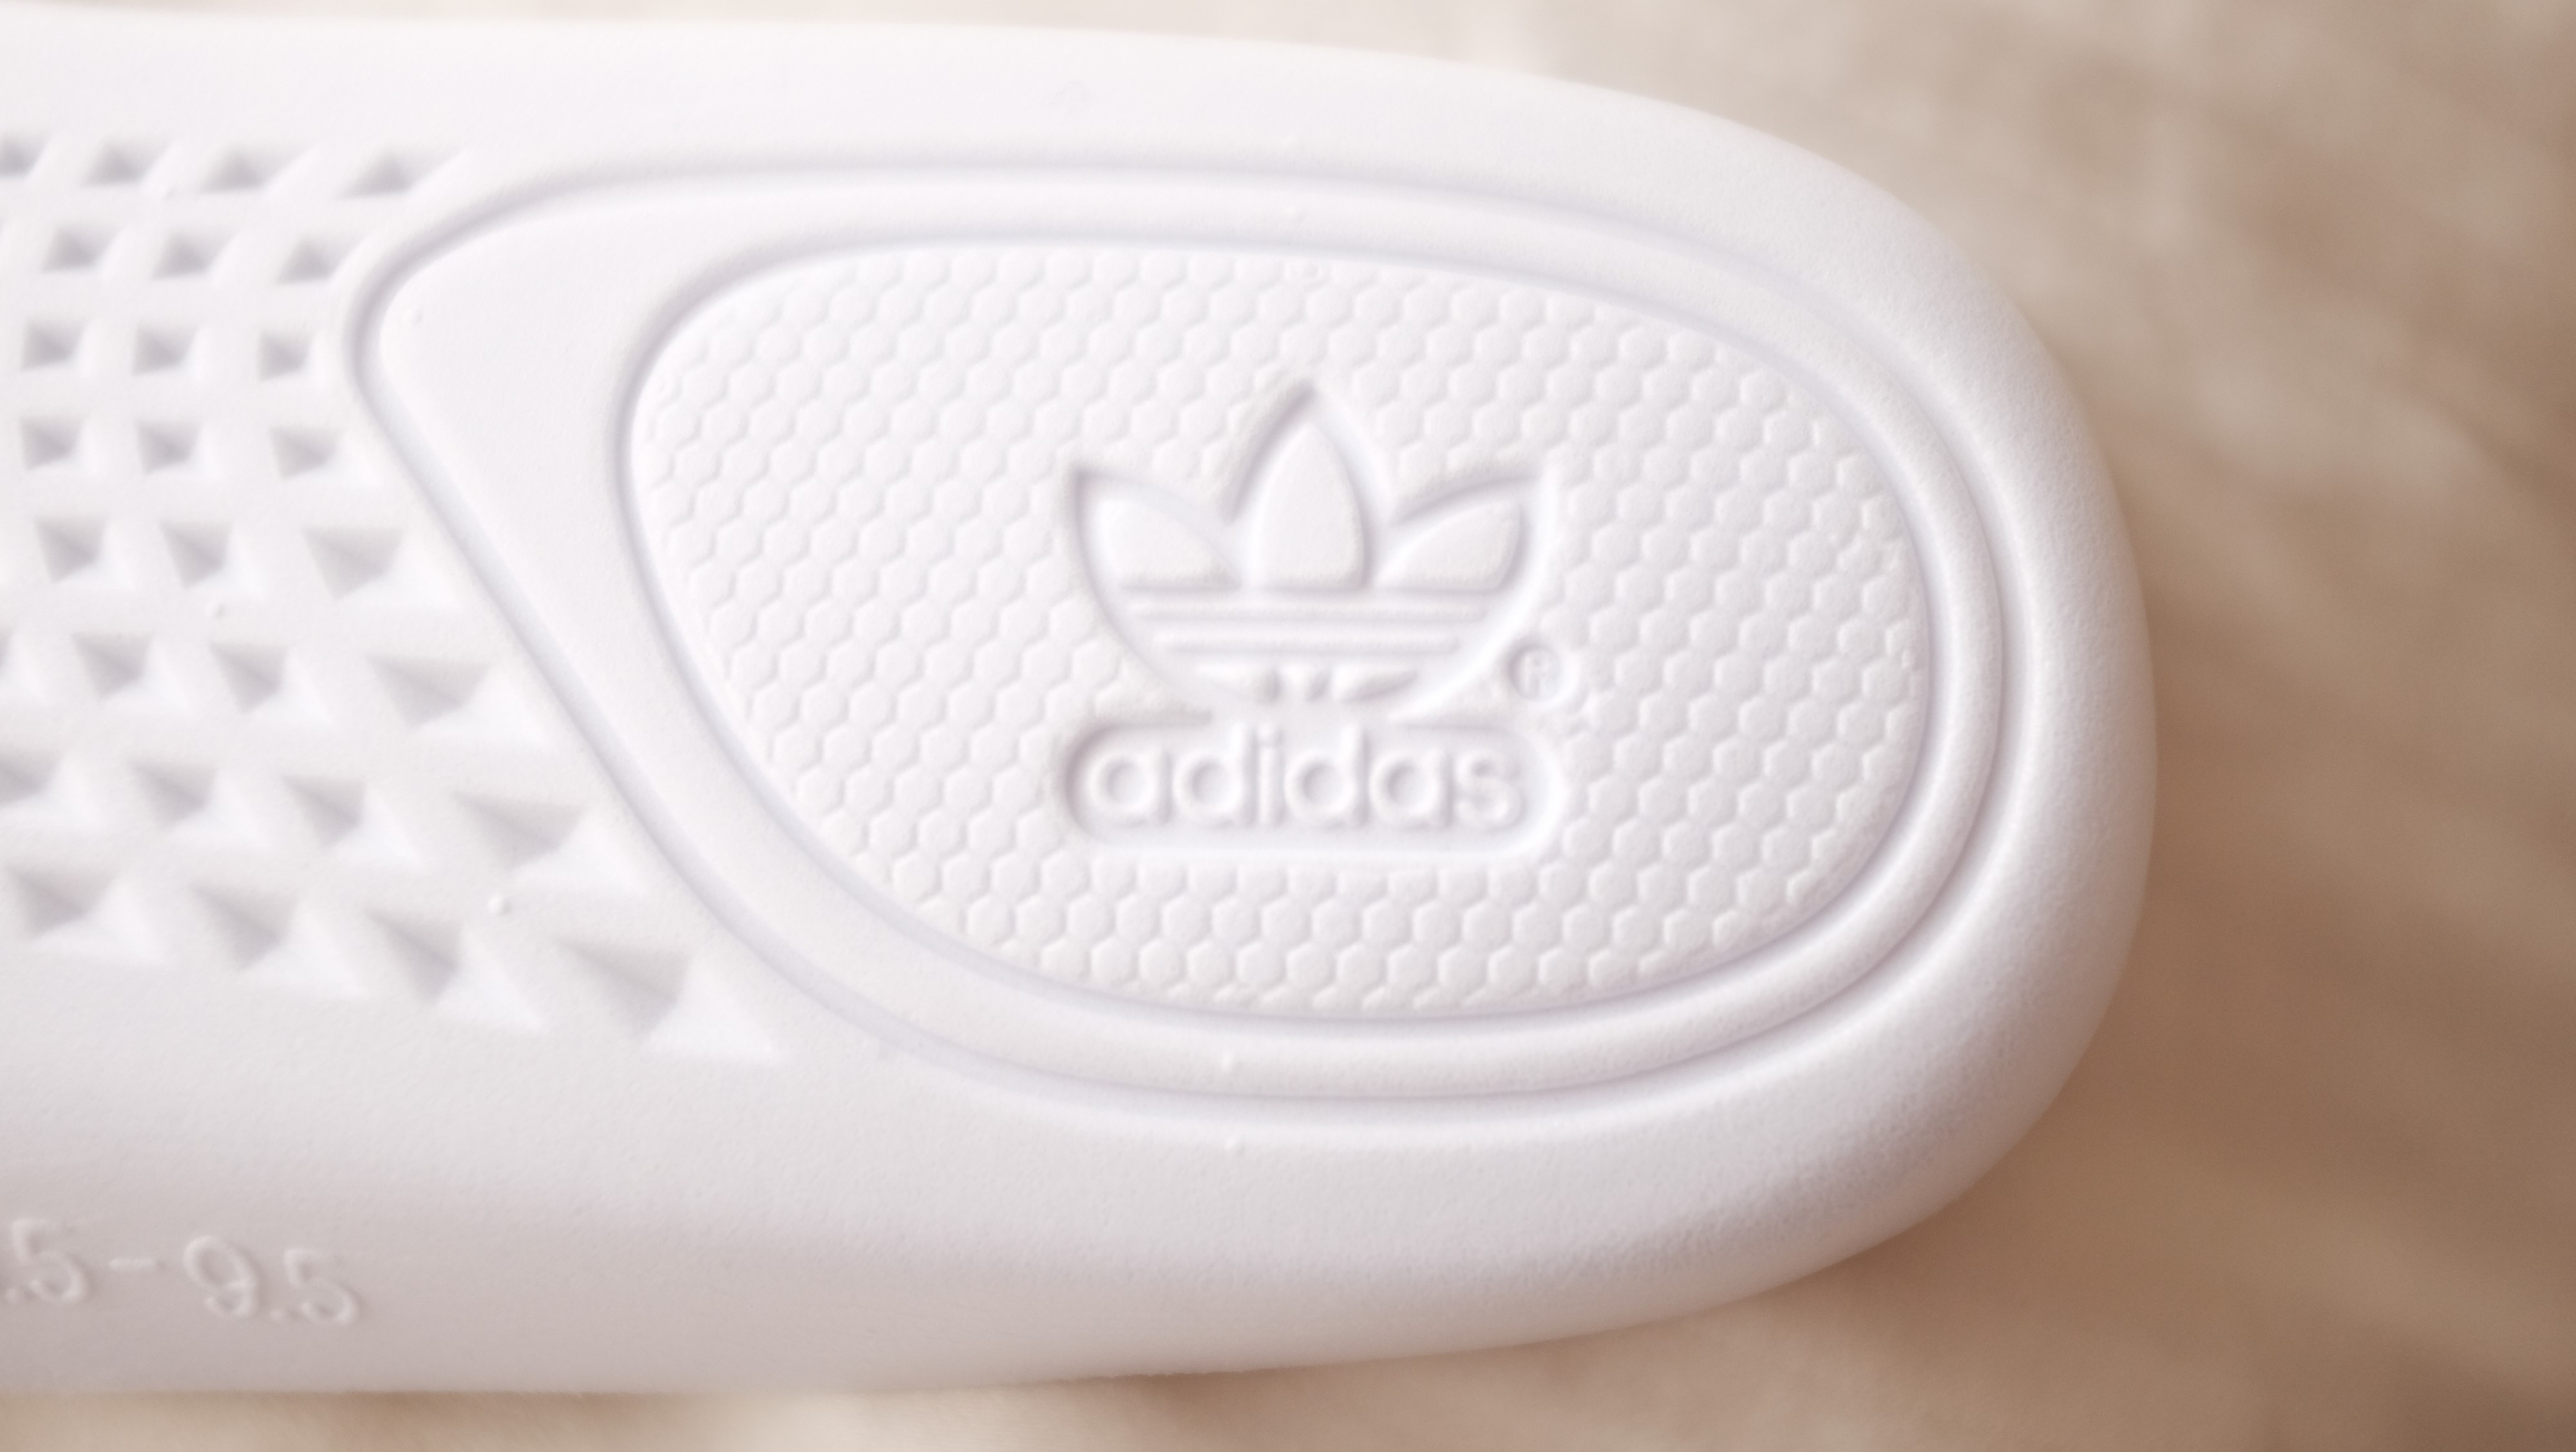
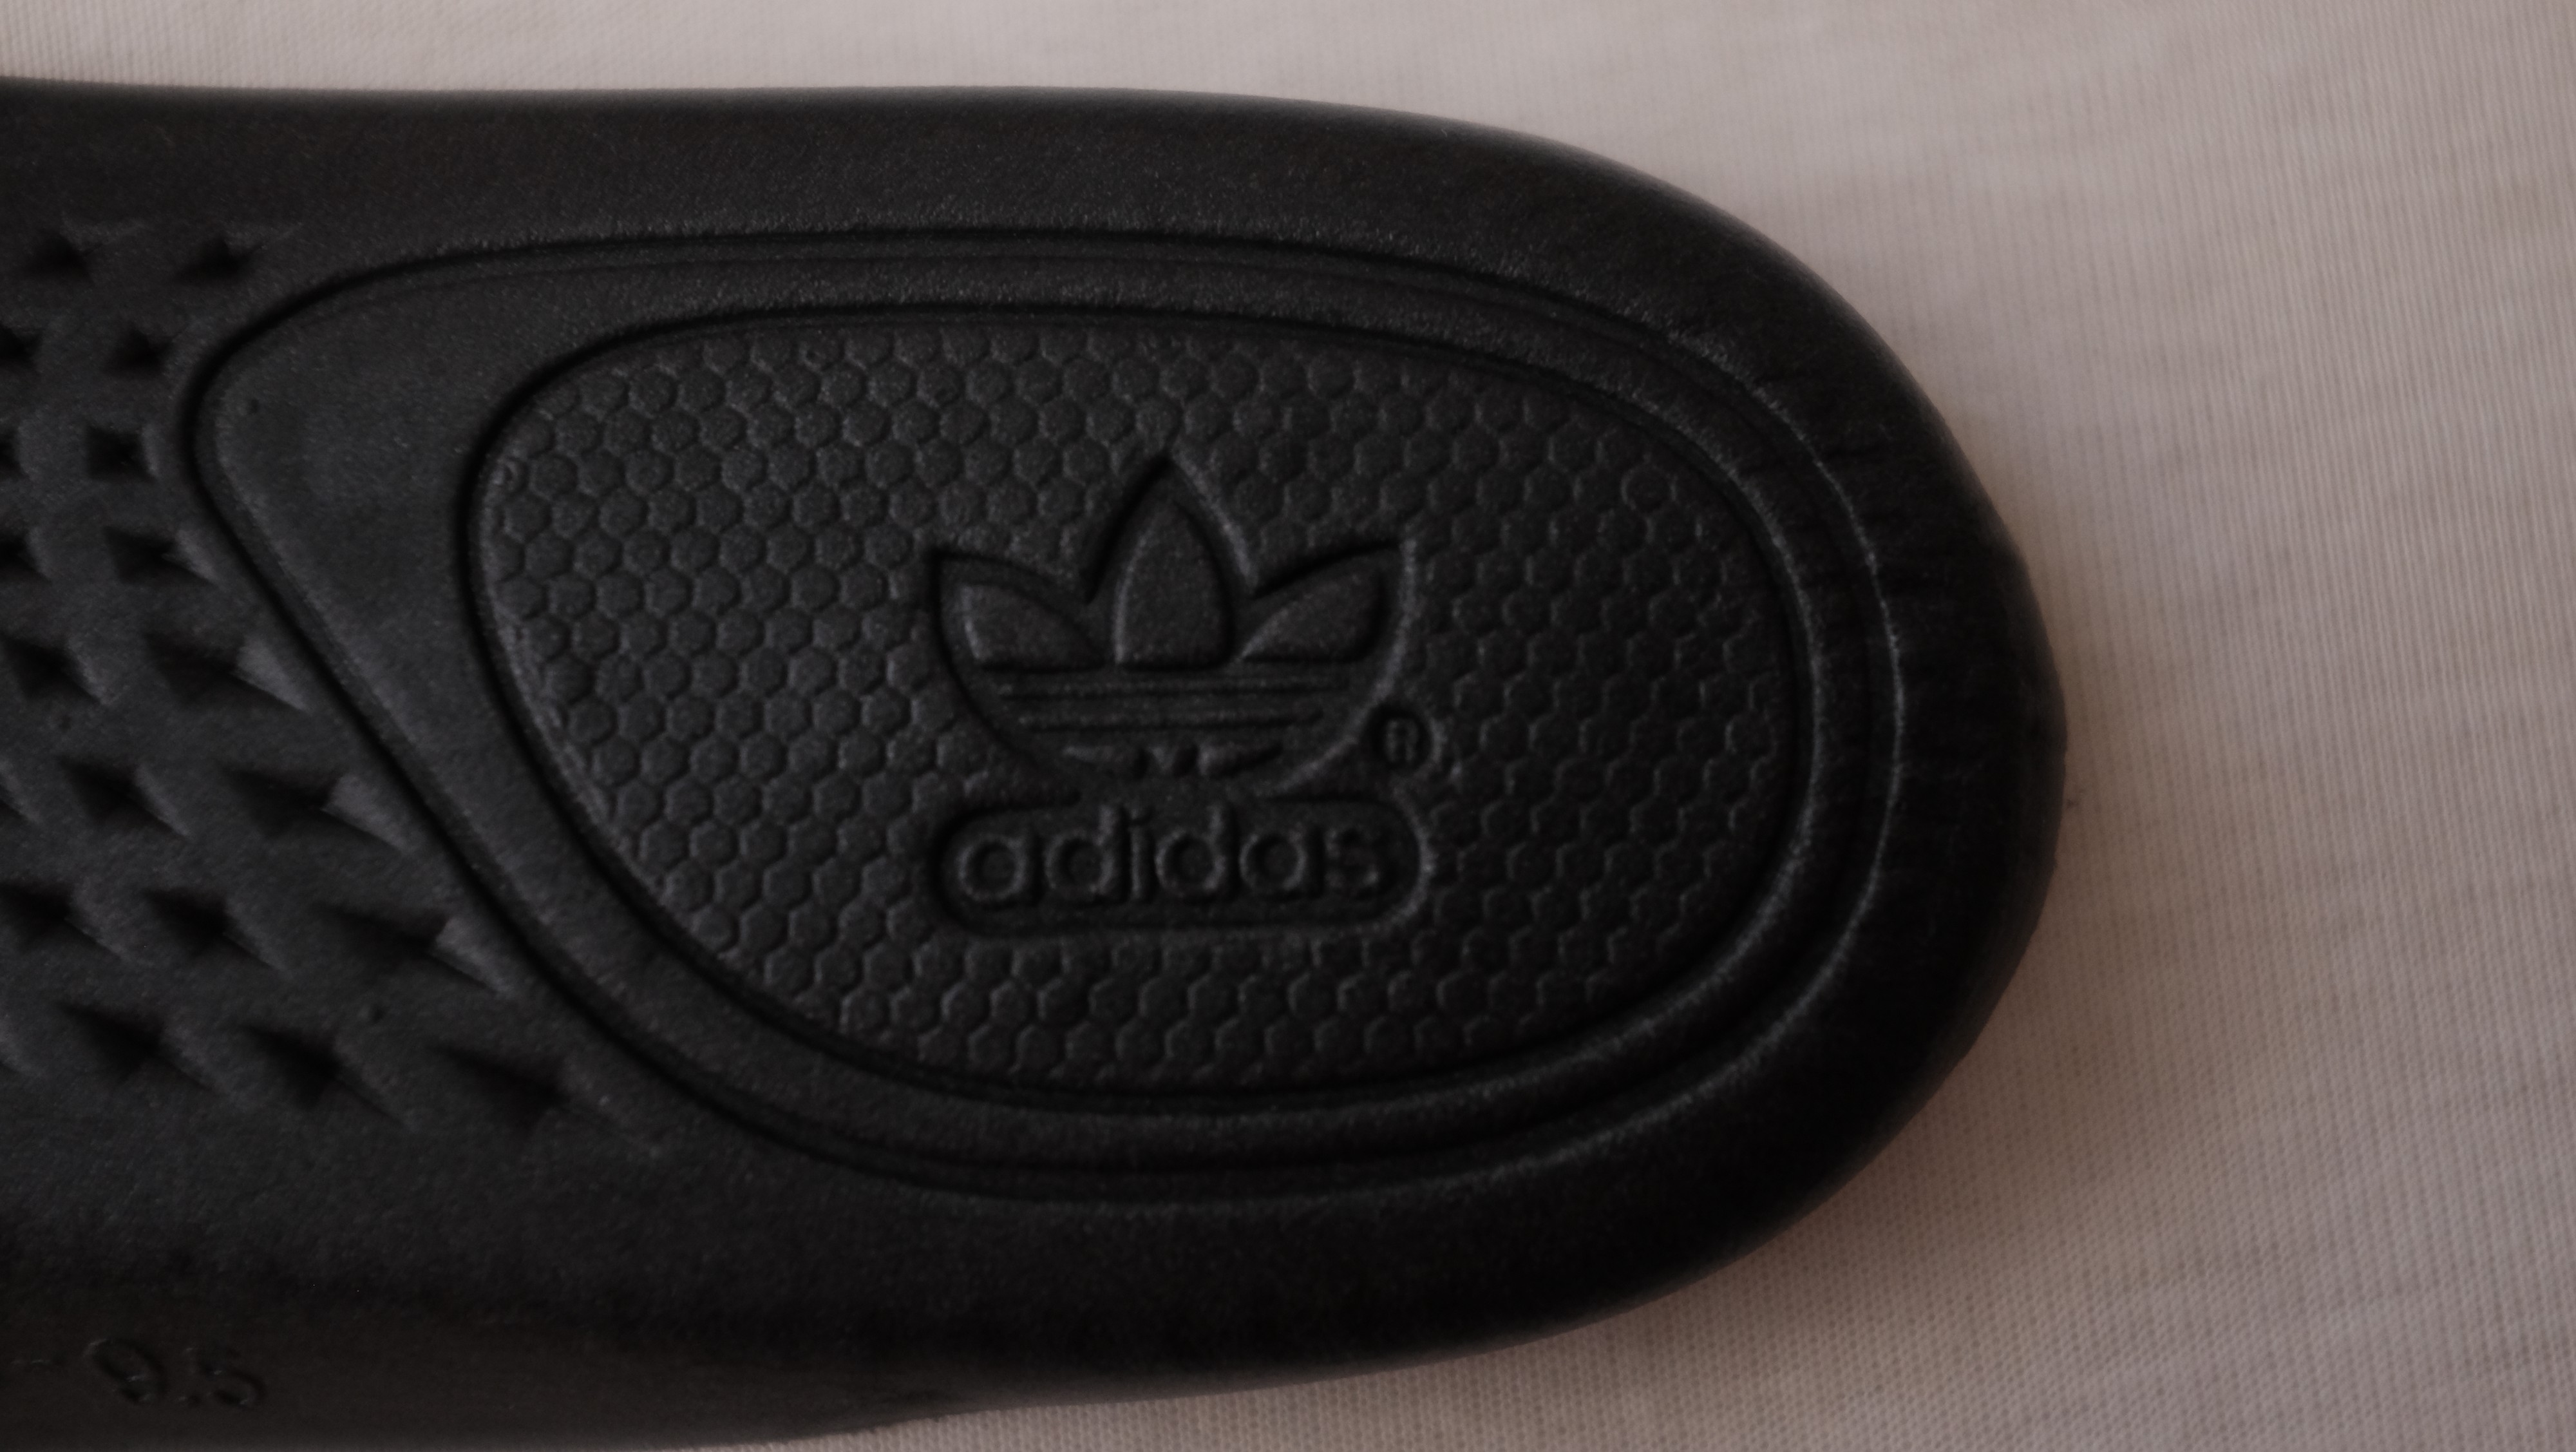
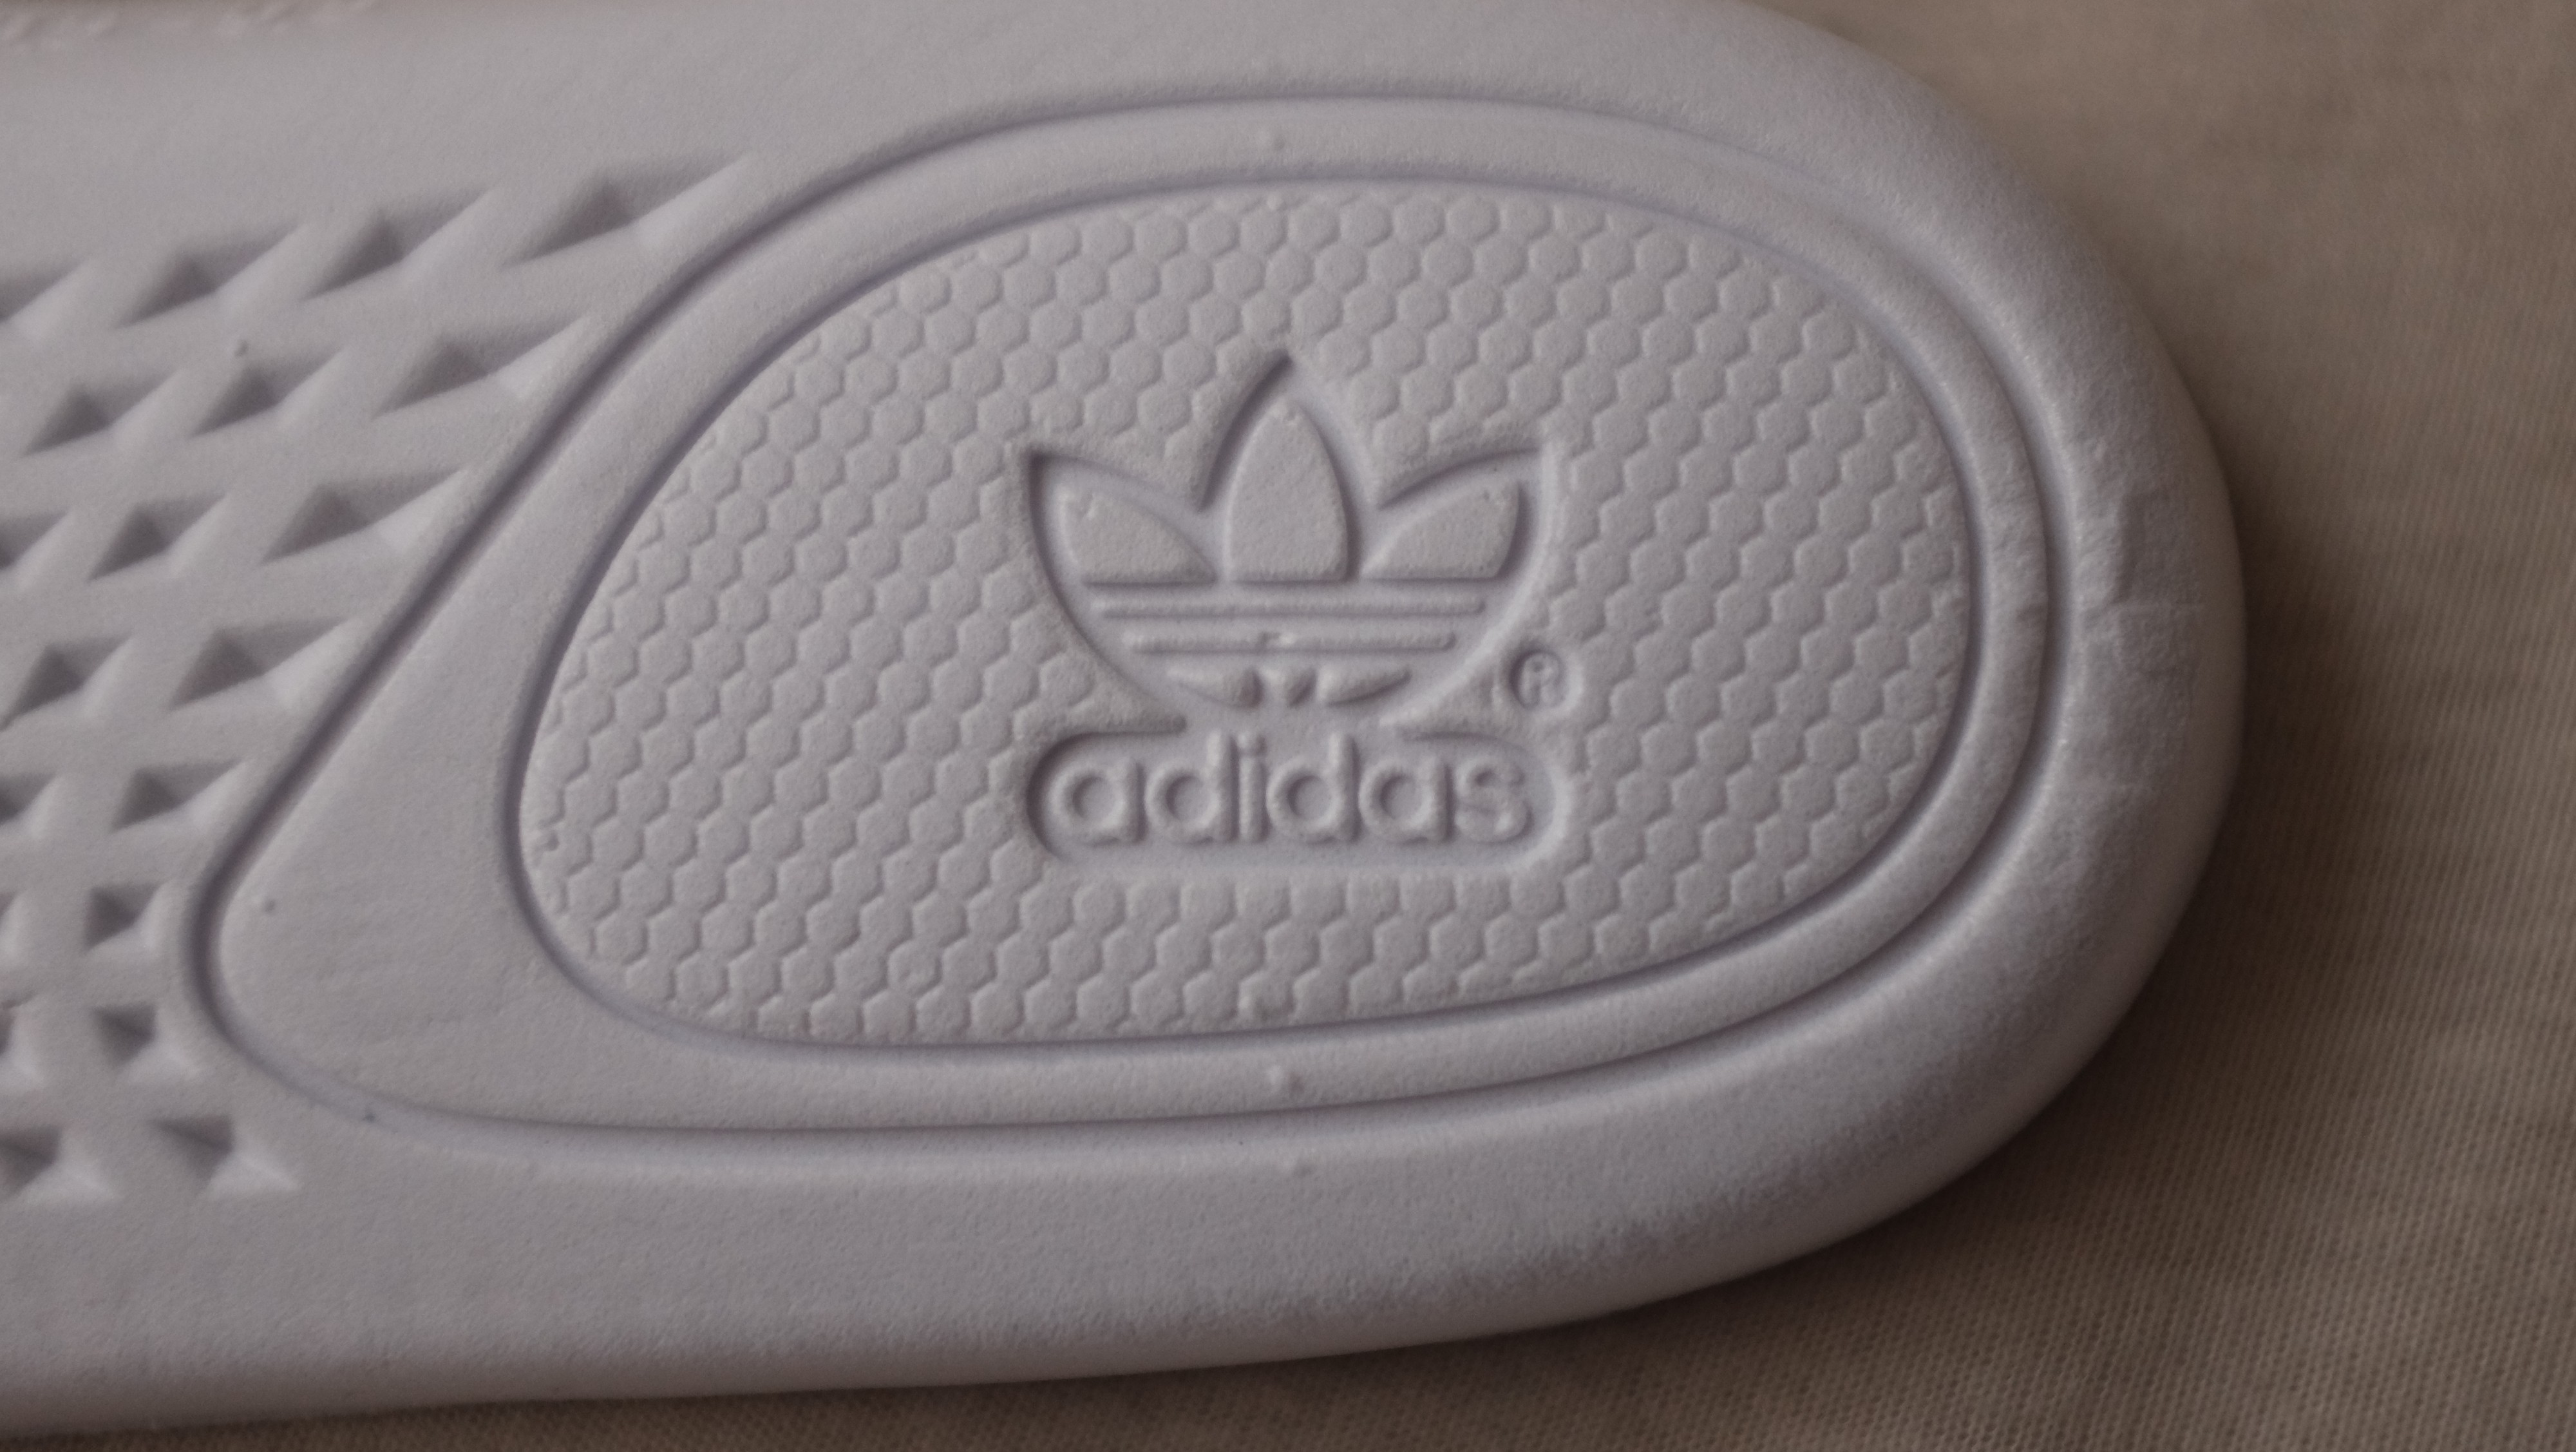
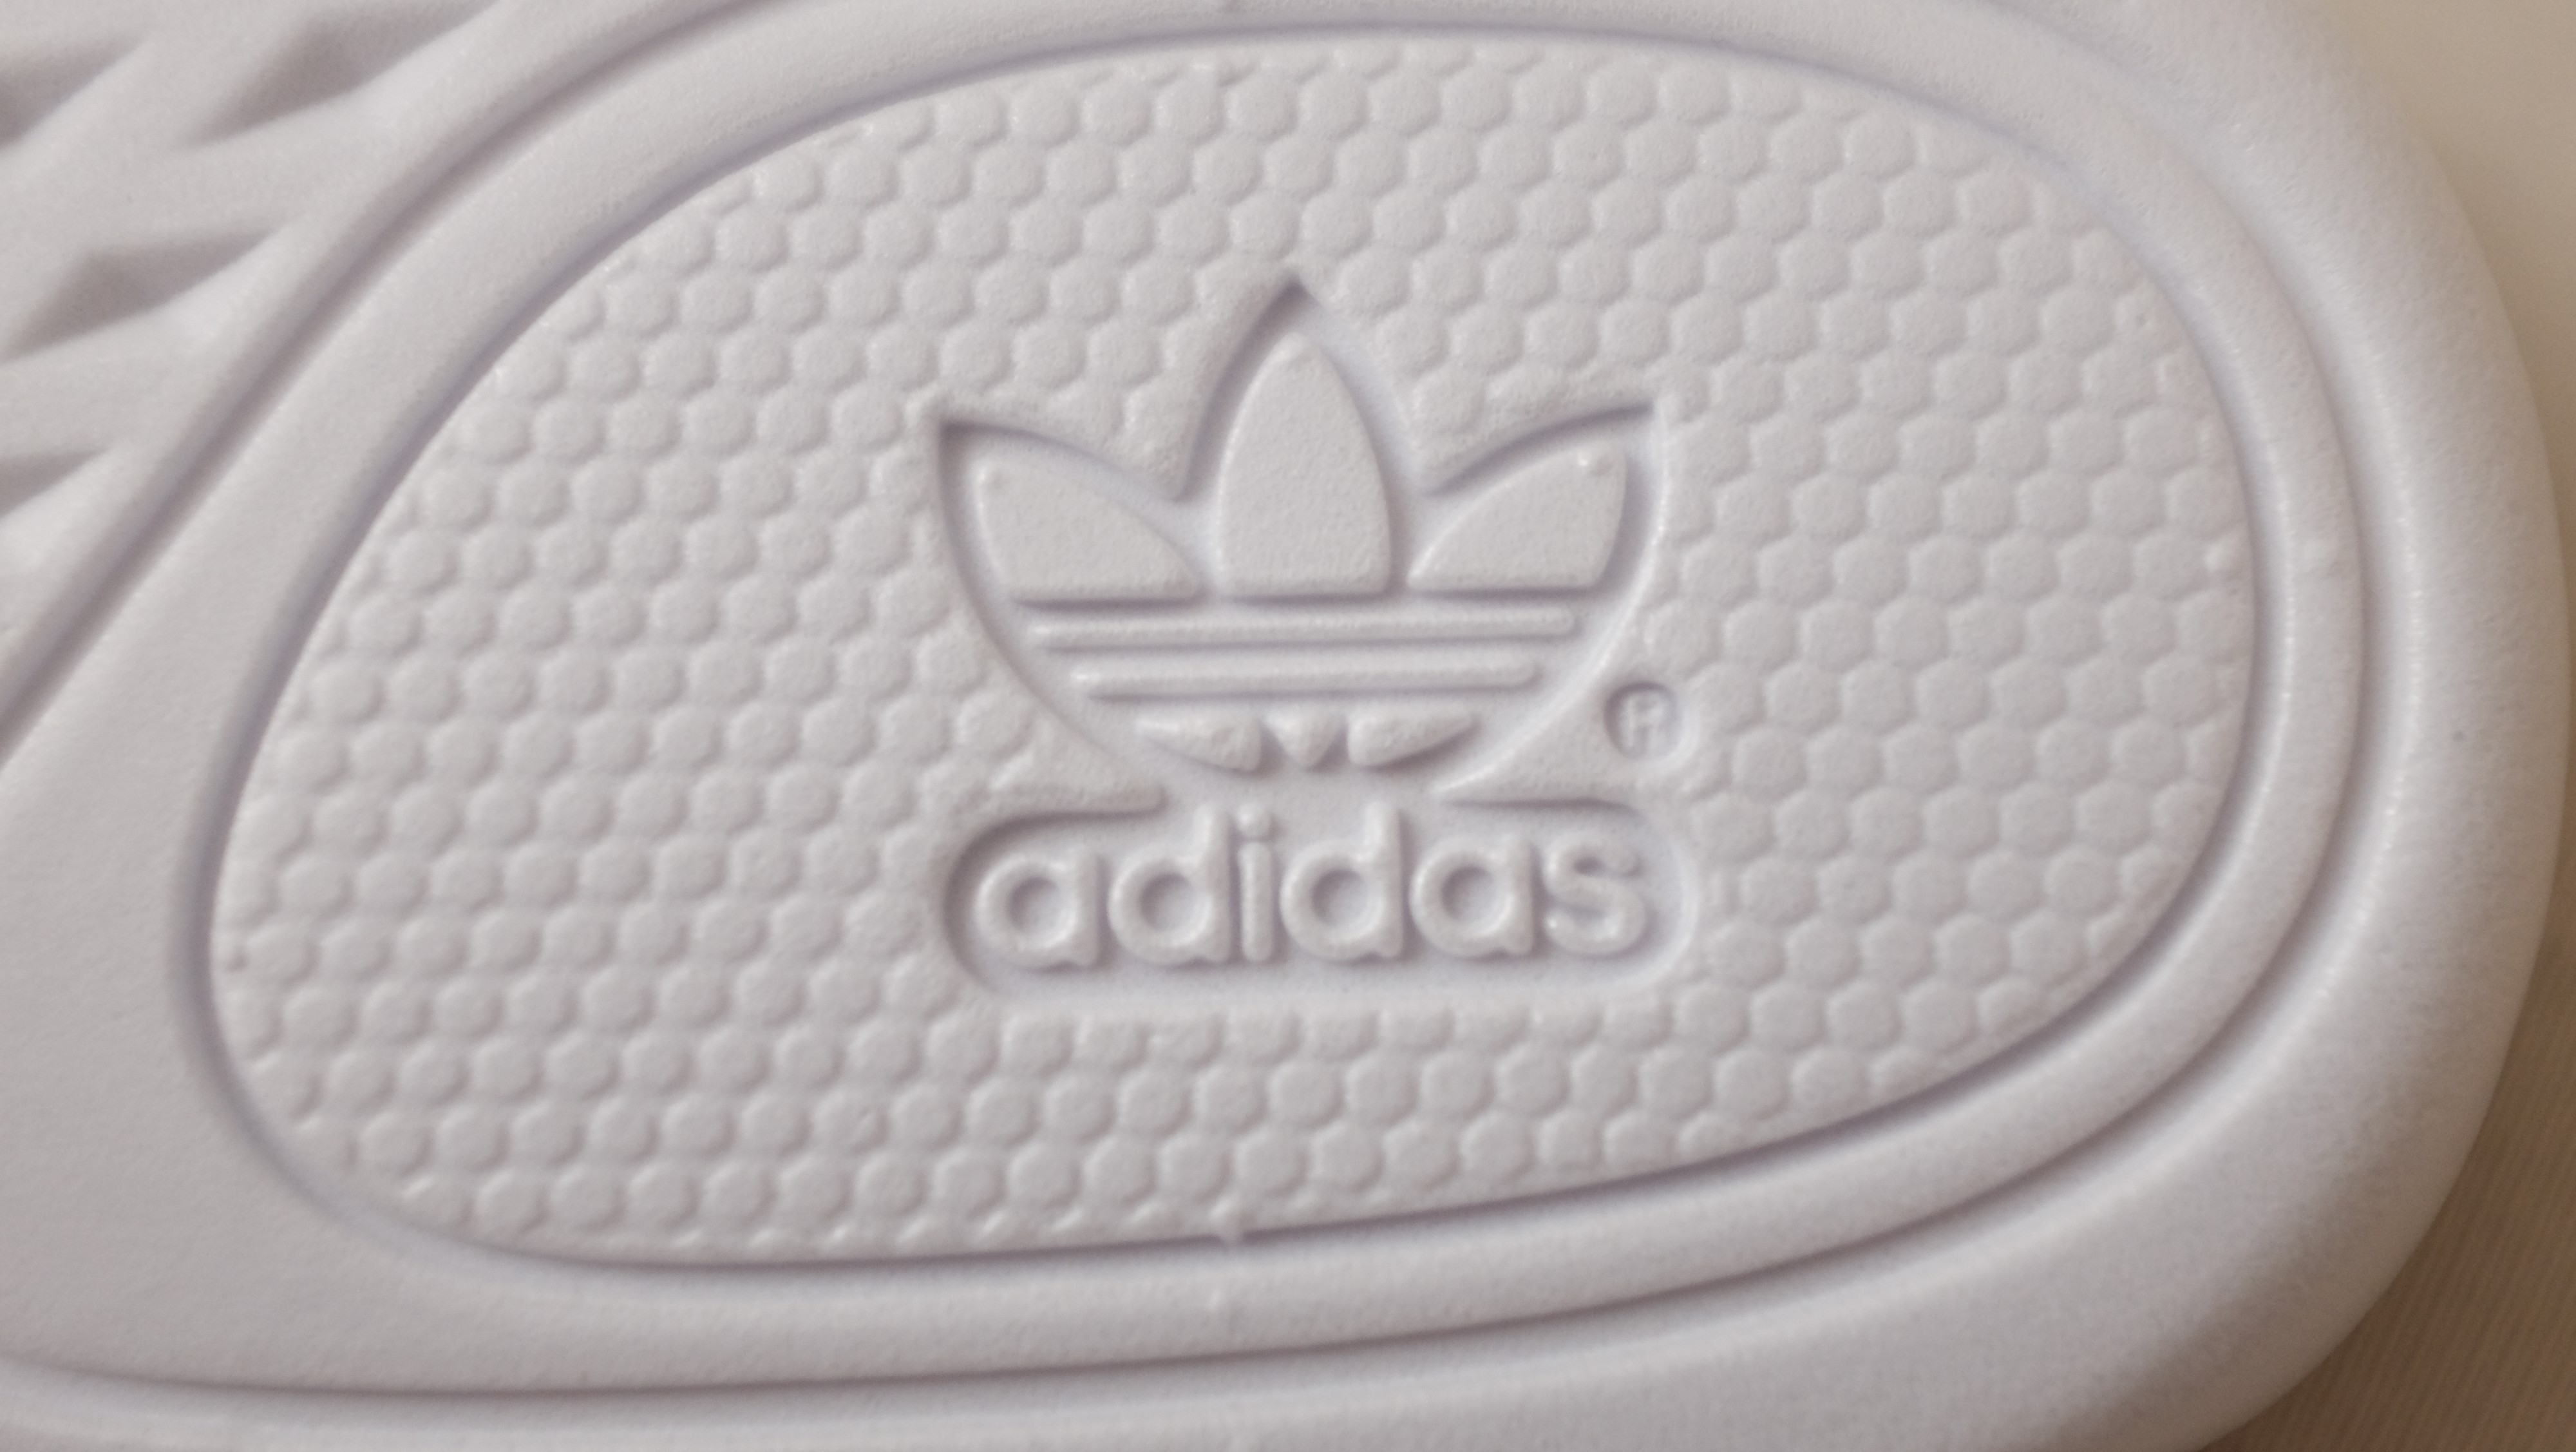
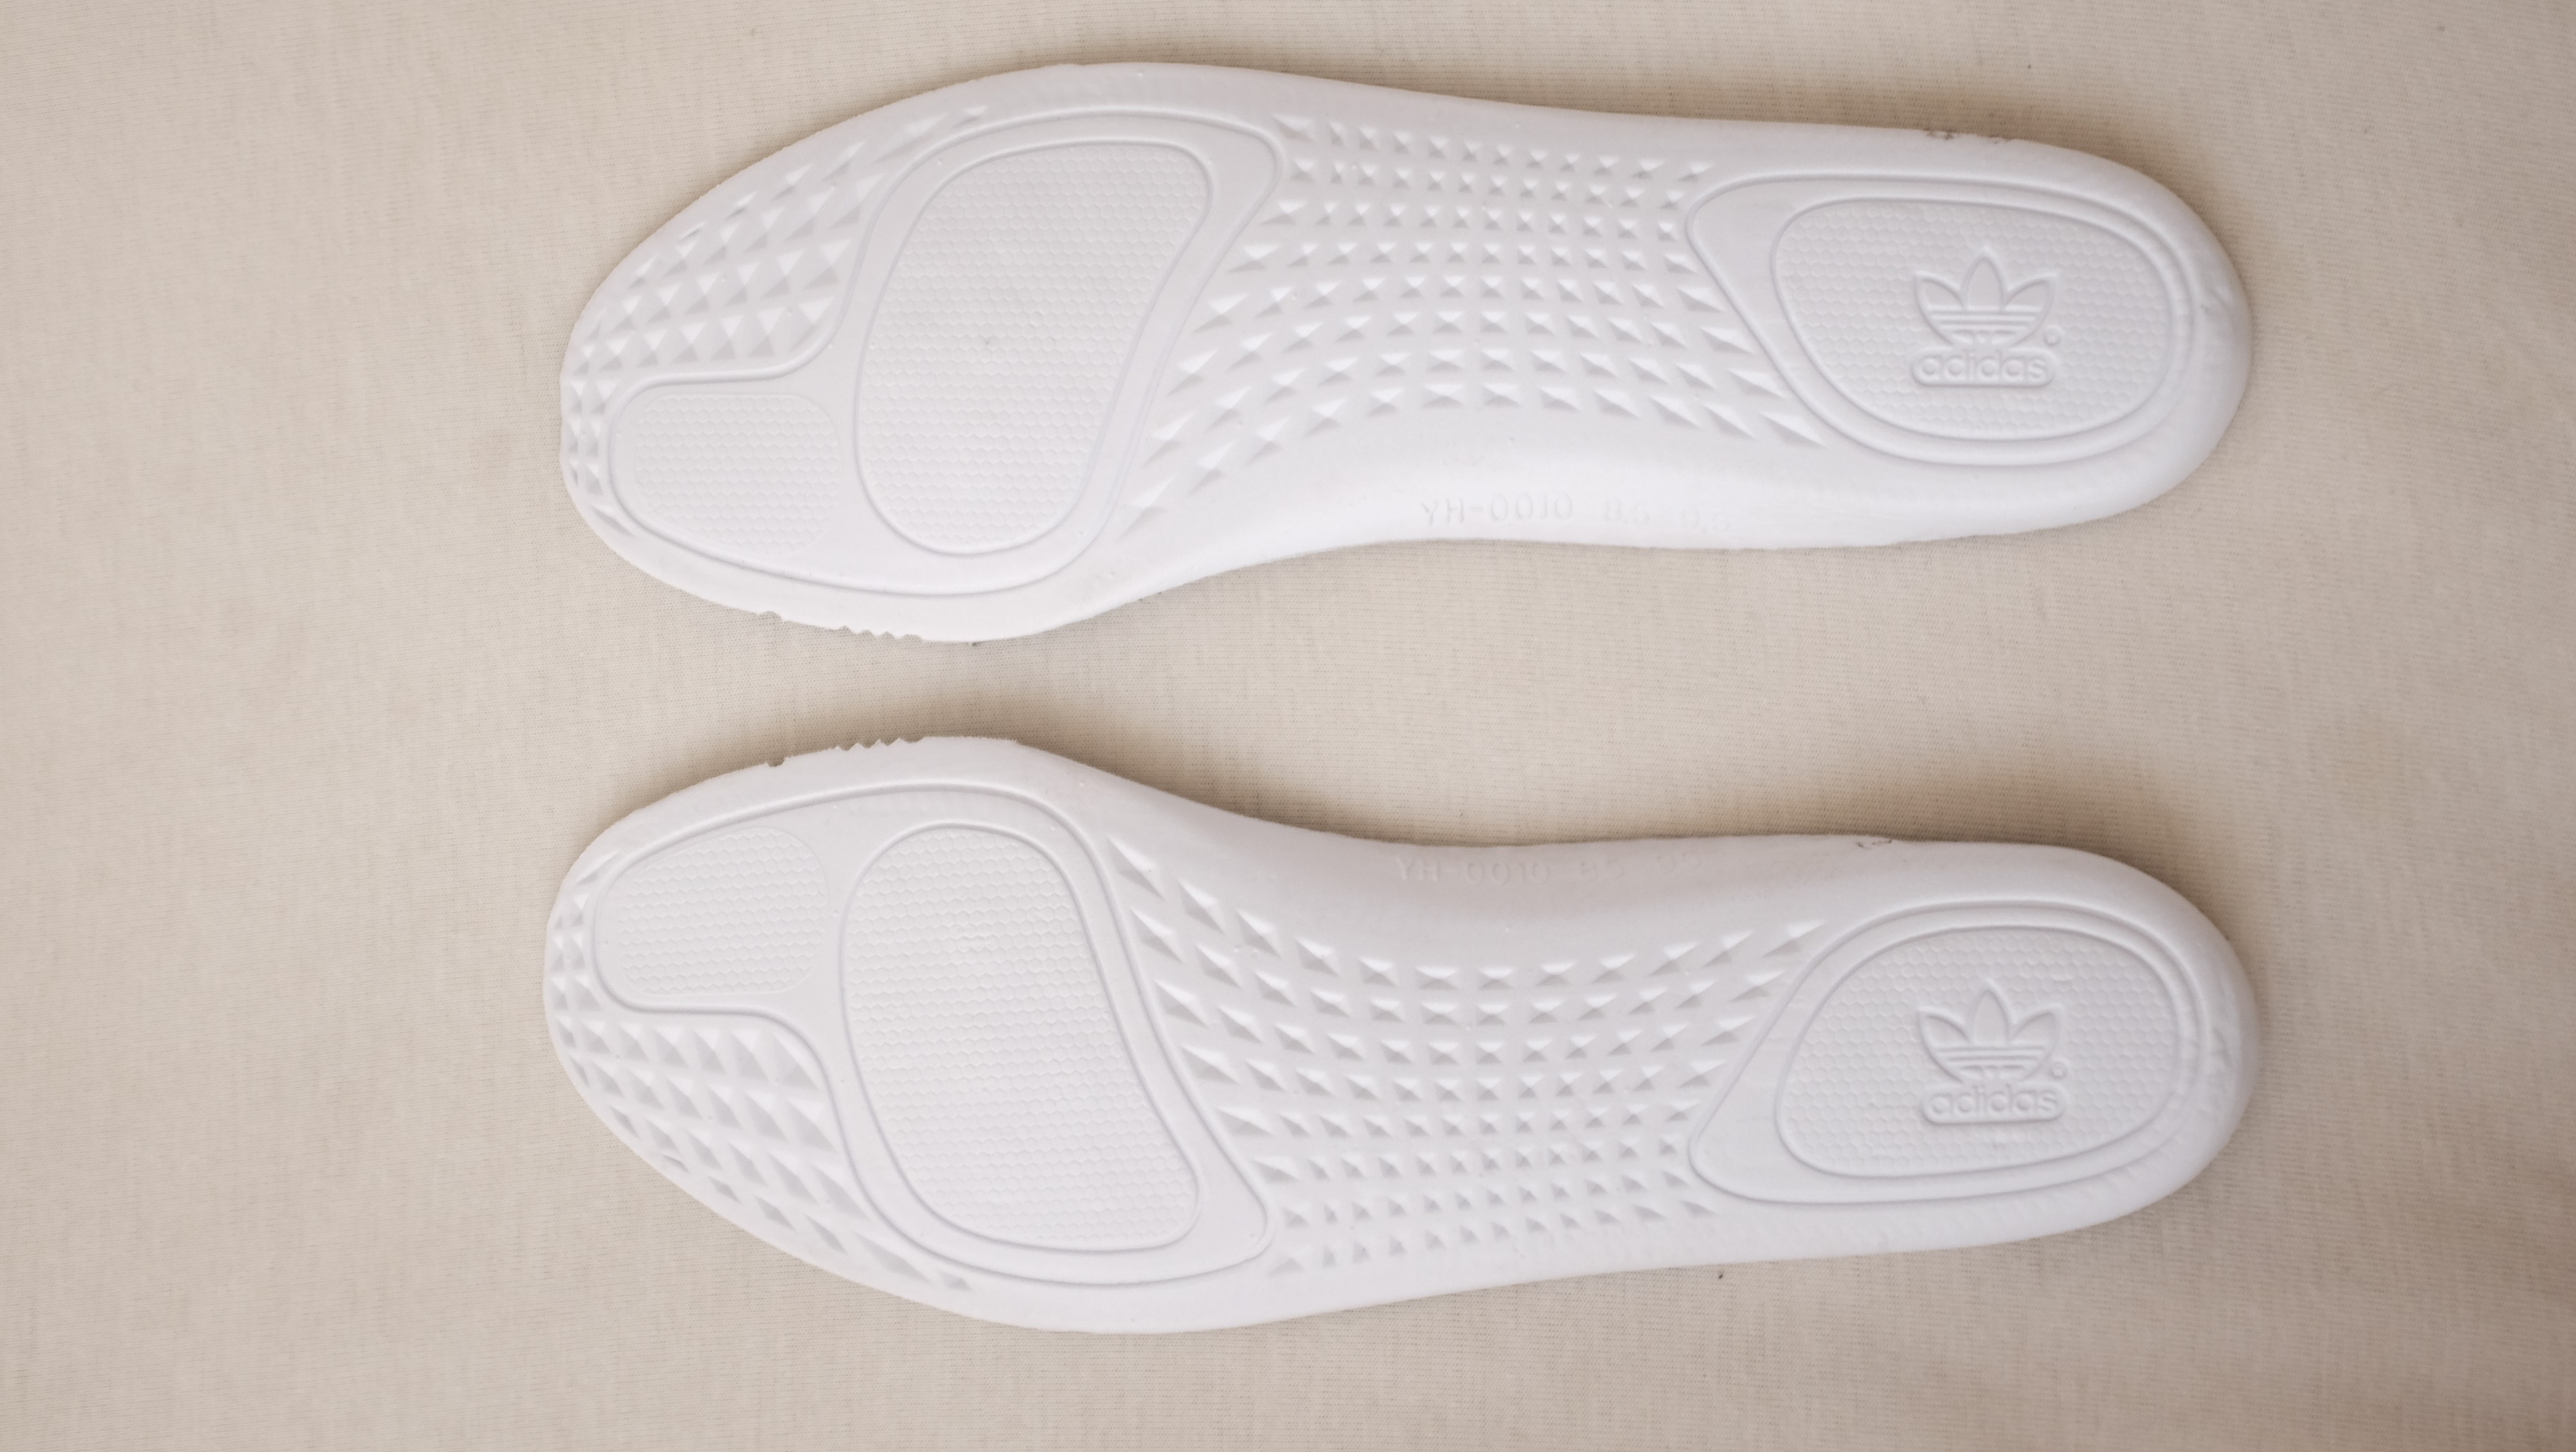
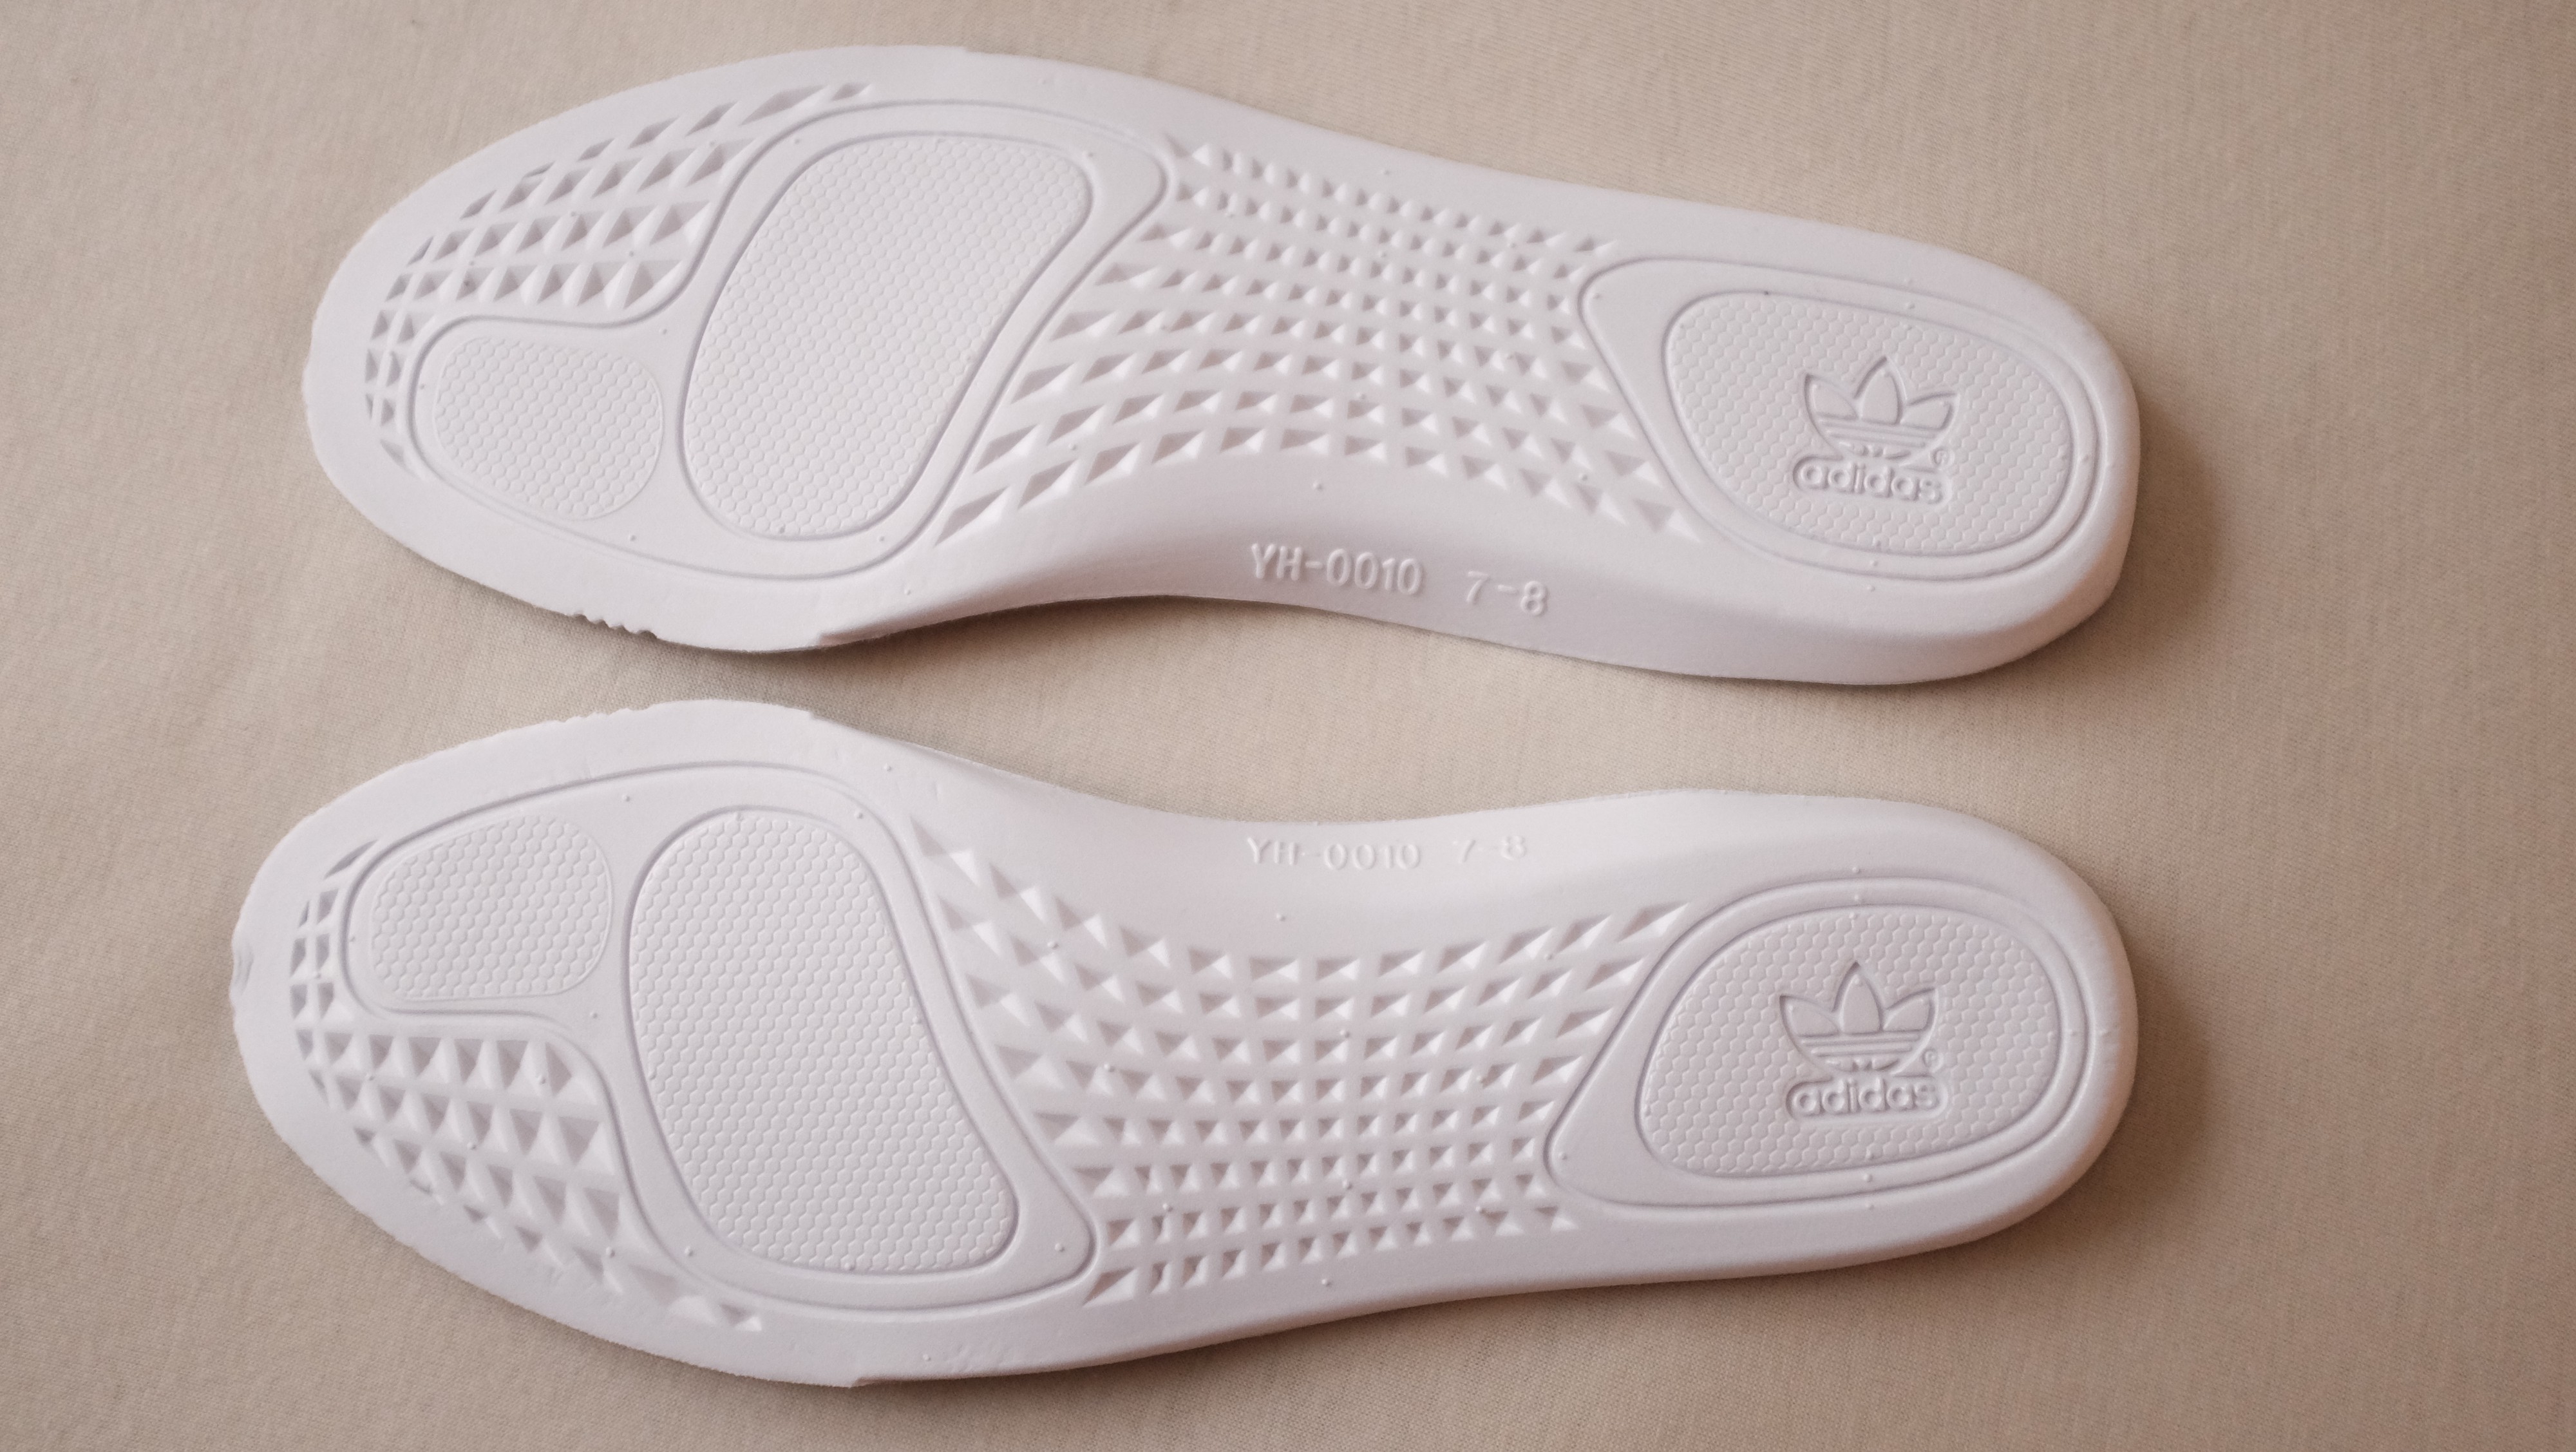
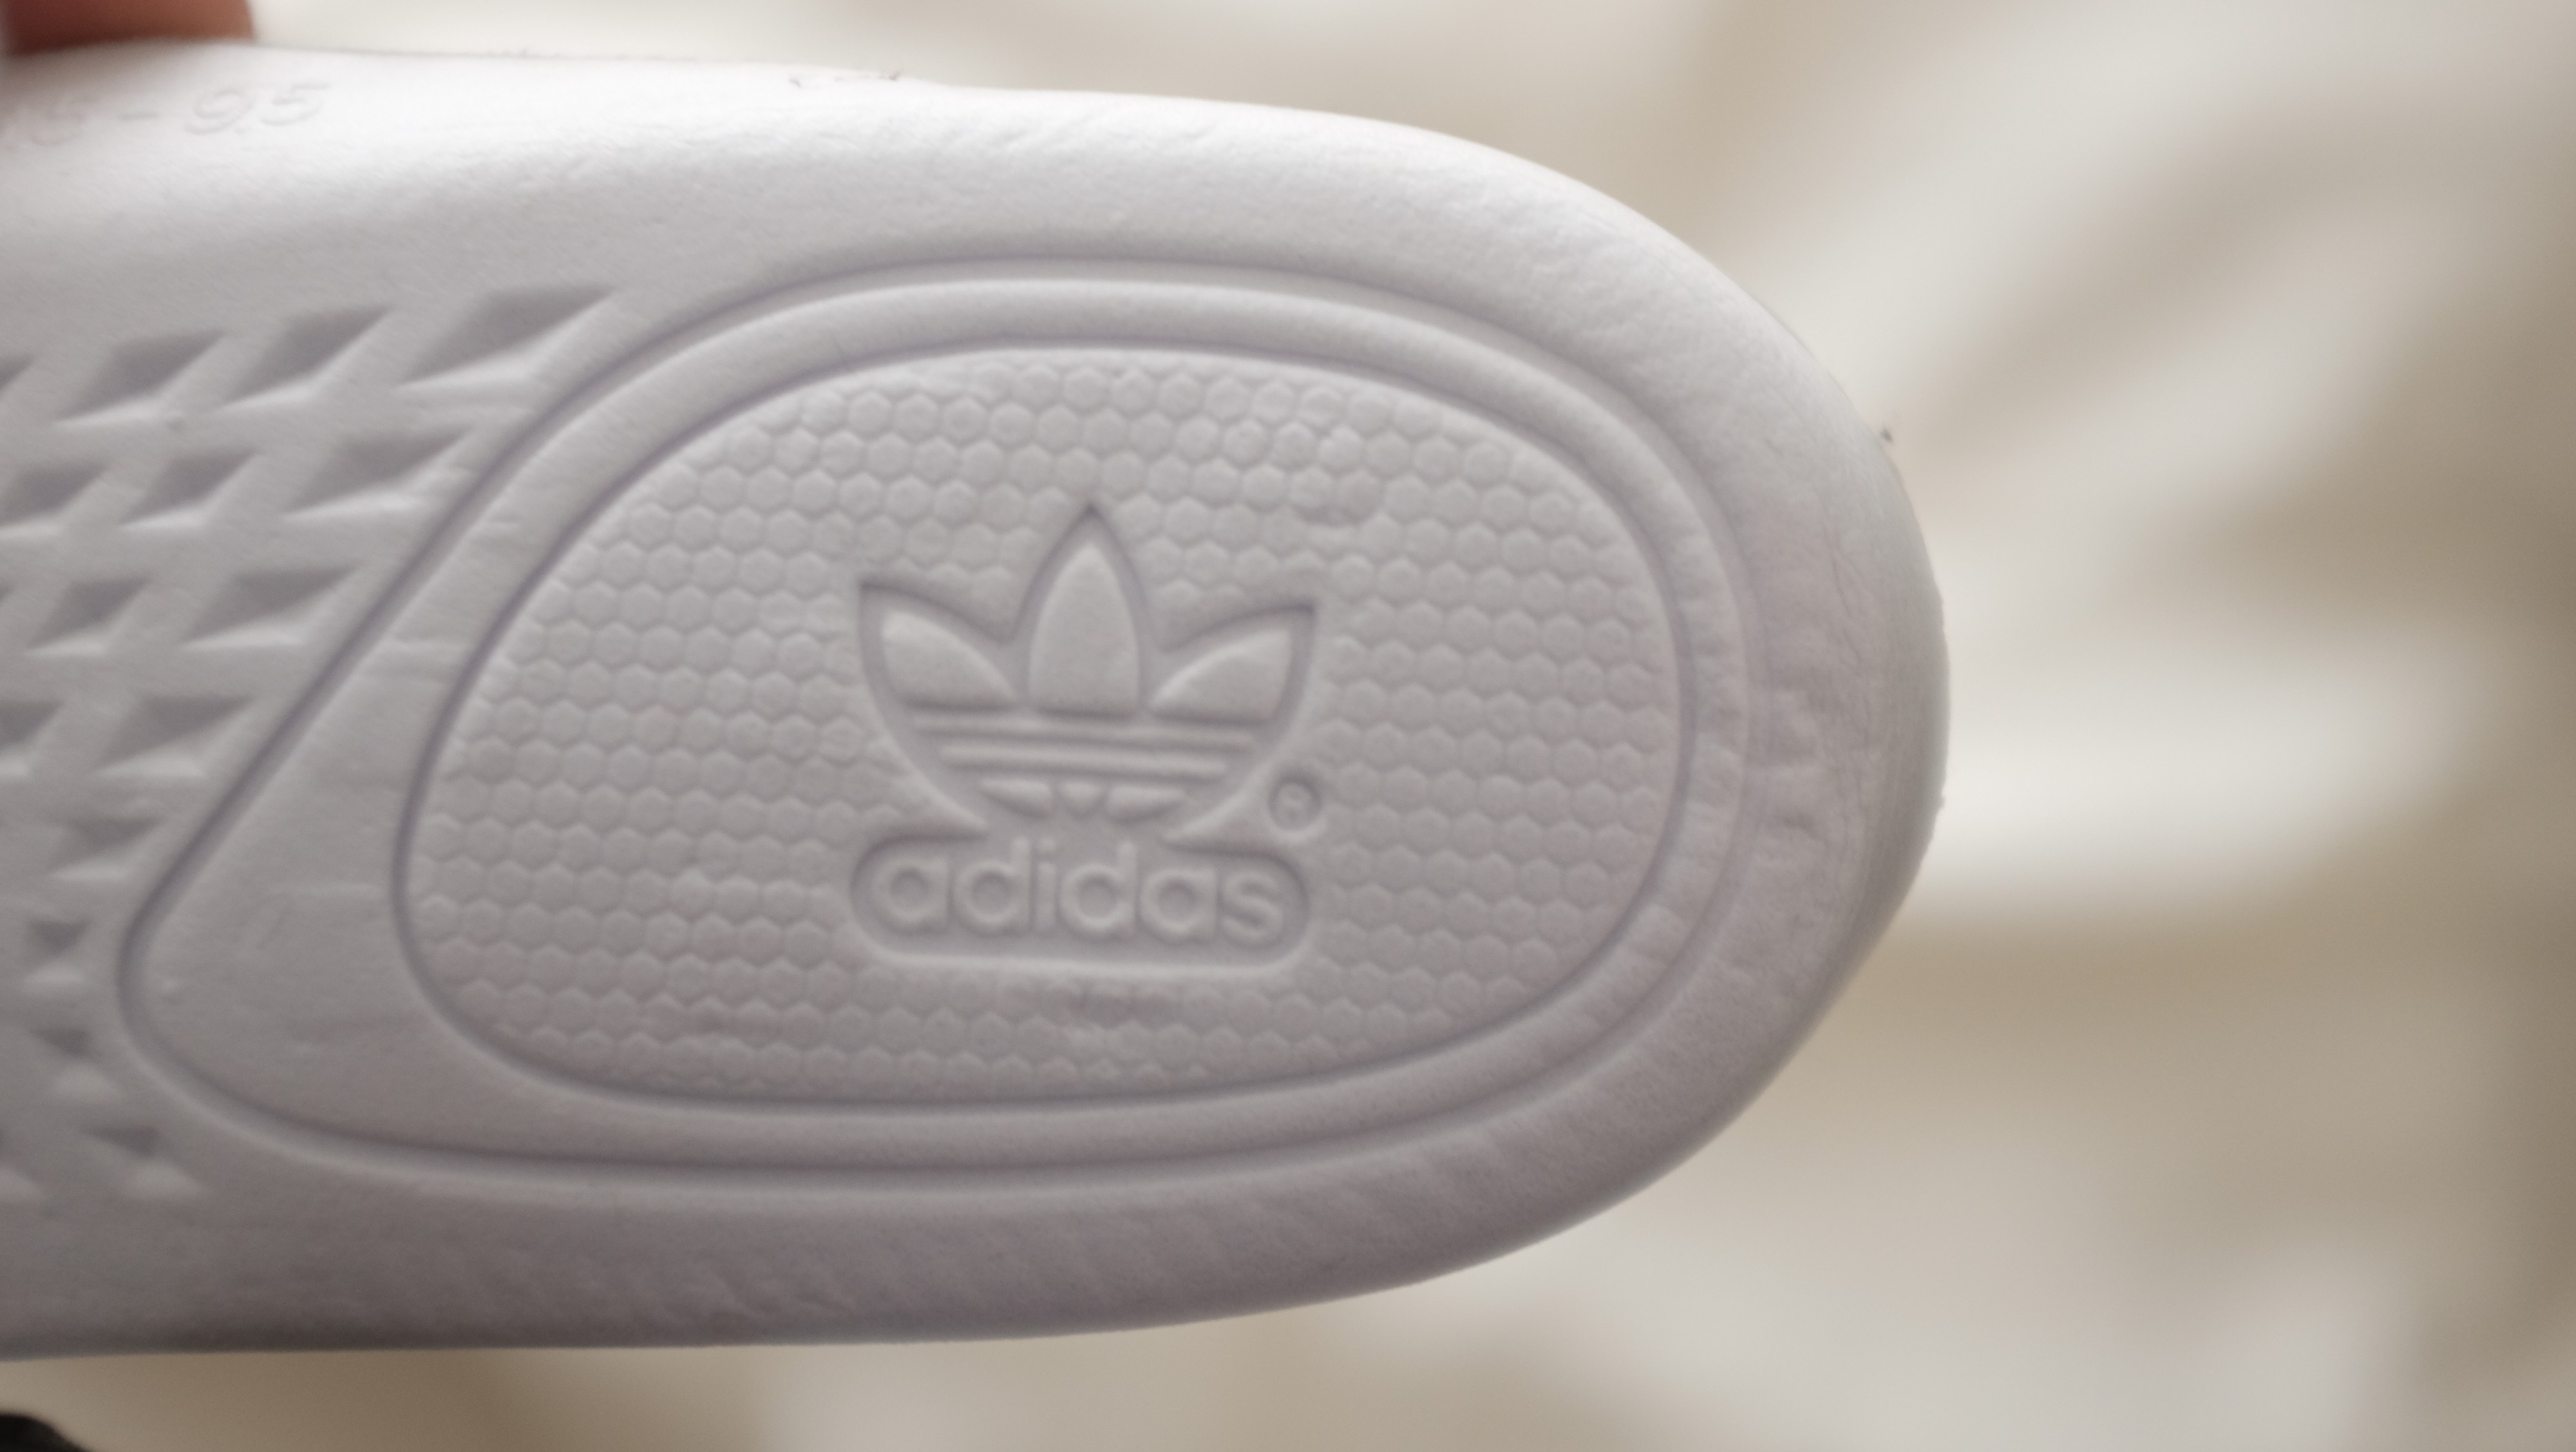 Left Cream V2, Middle Oreo V2, Right Beluga V2 // Fakes will have the R almost fused with the Logo, also note the thickness/spacing of the indentation around the adidas logo.
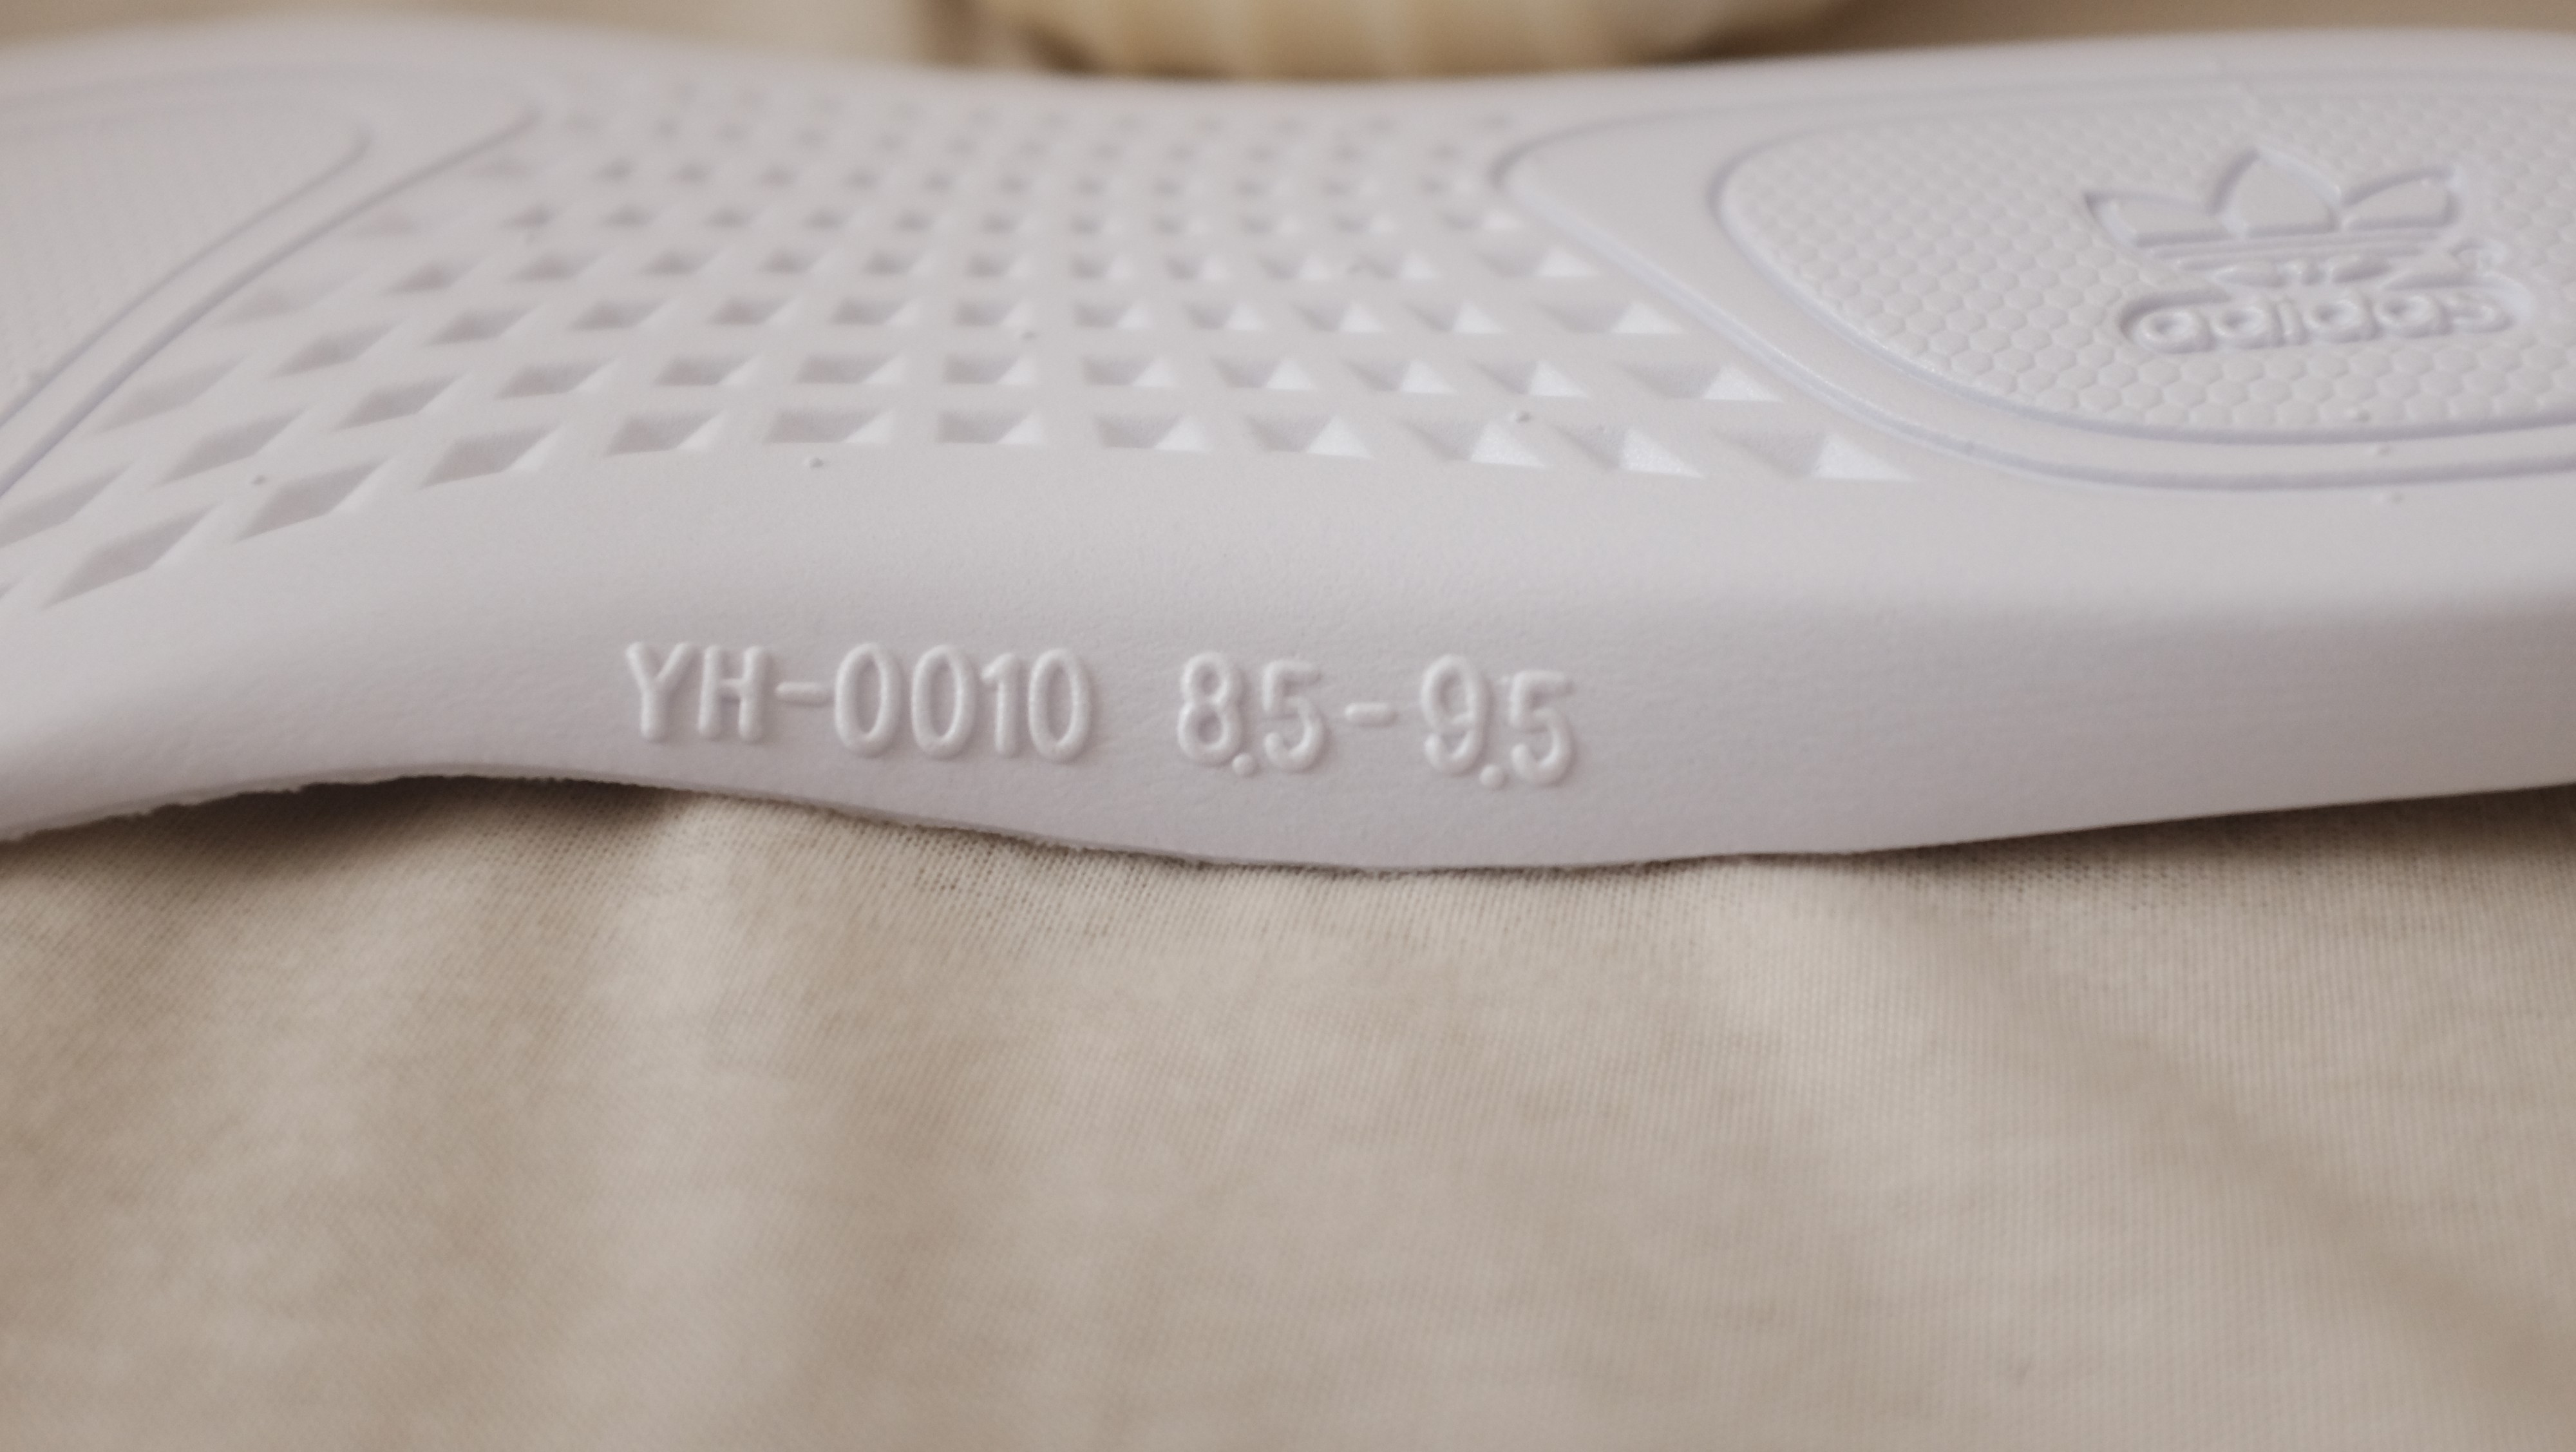
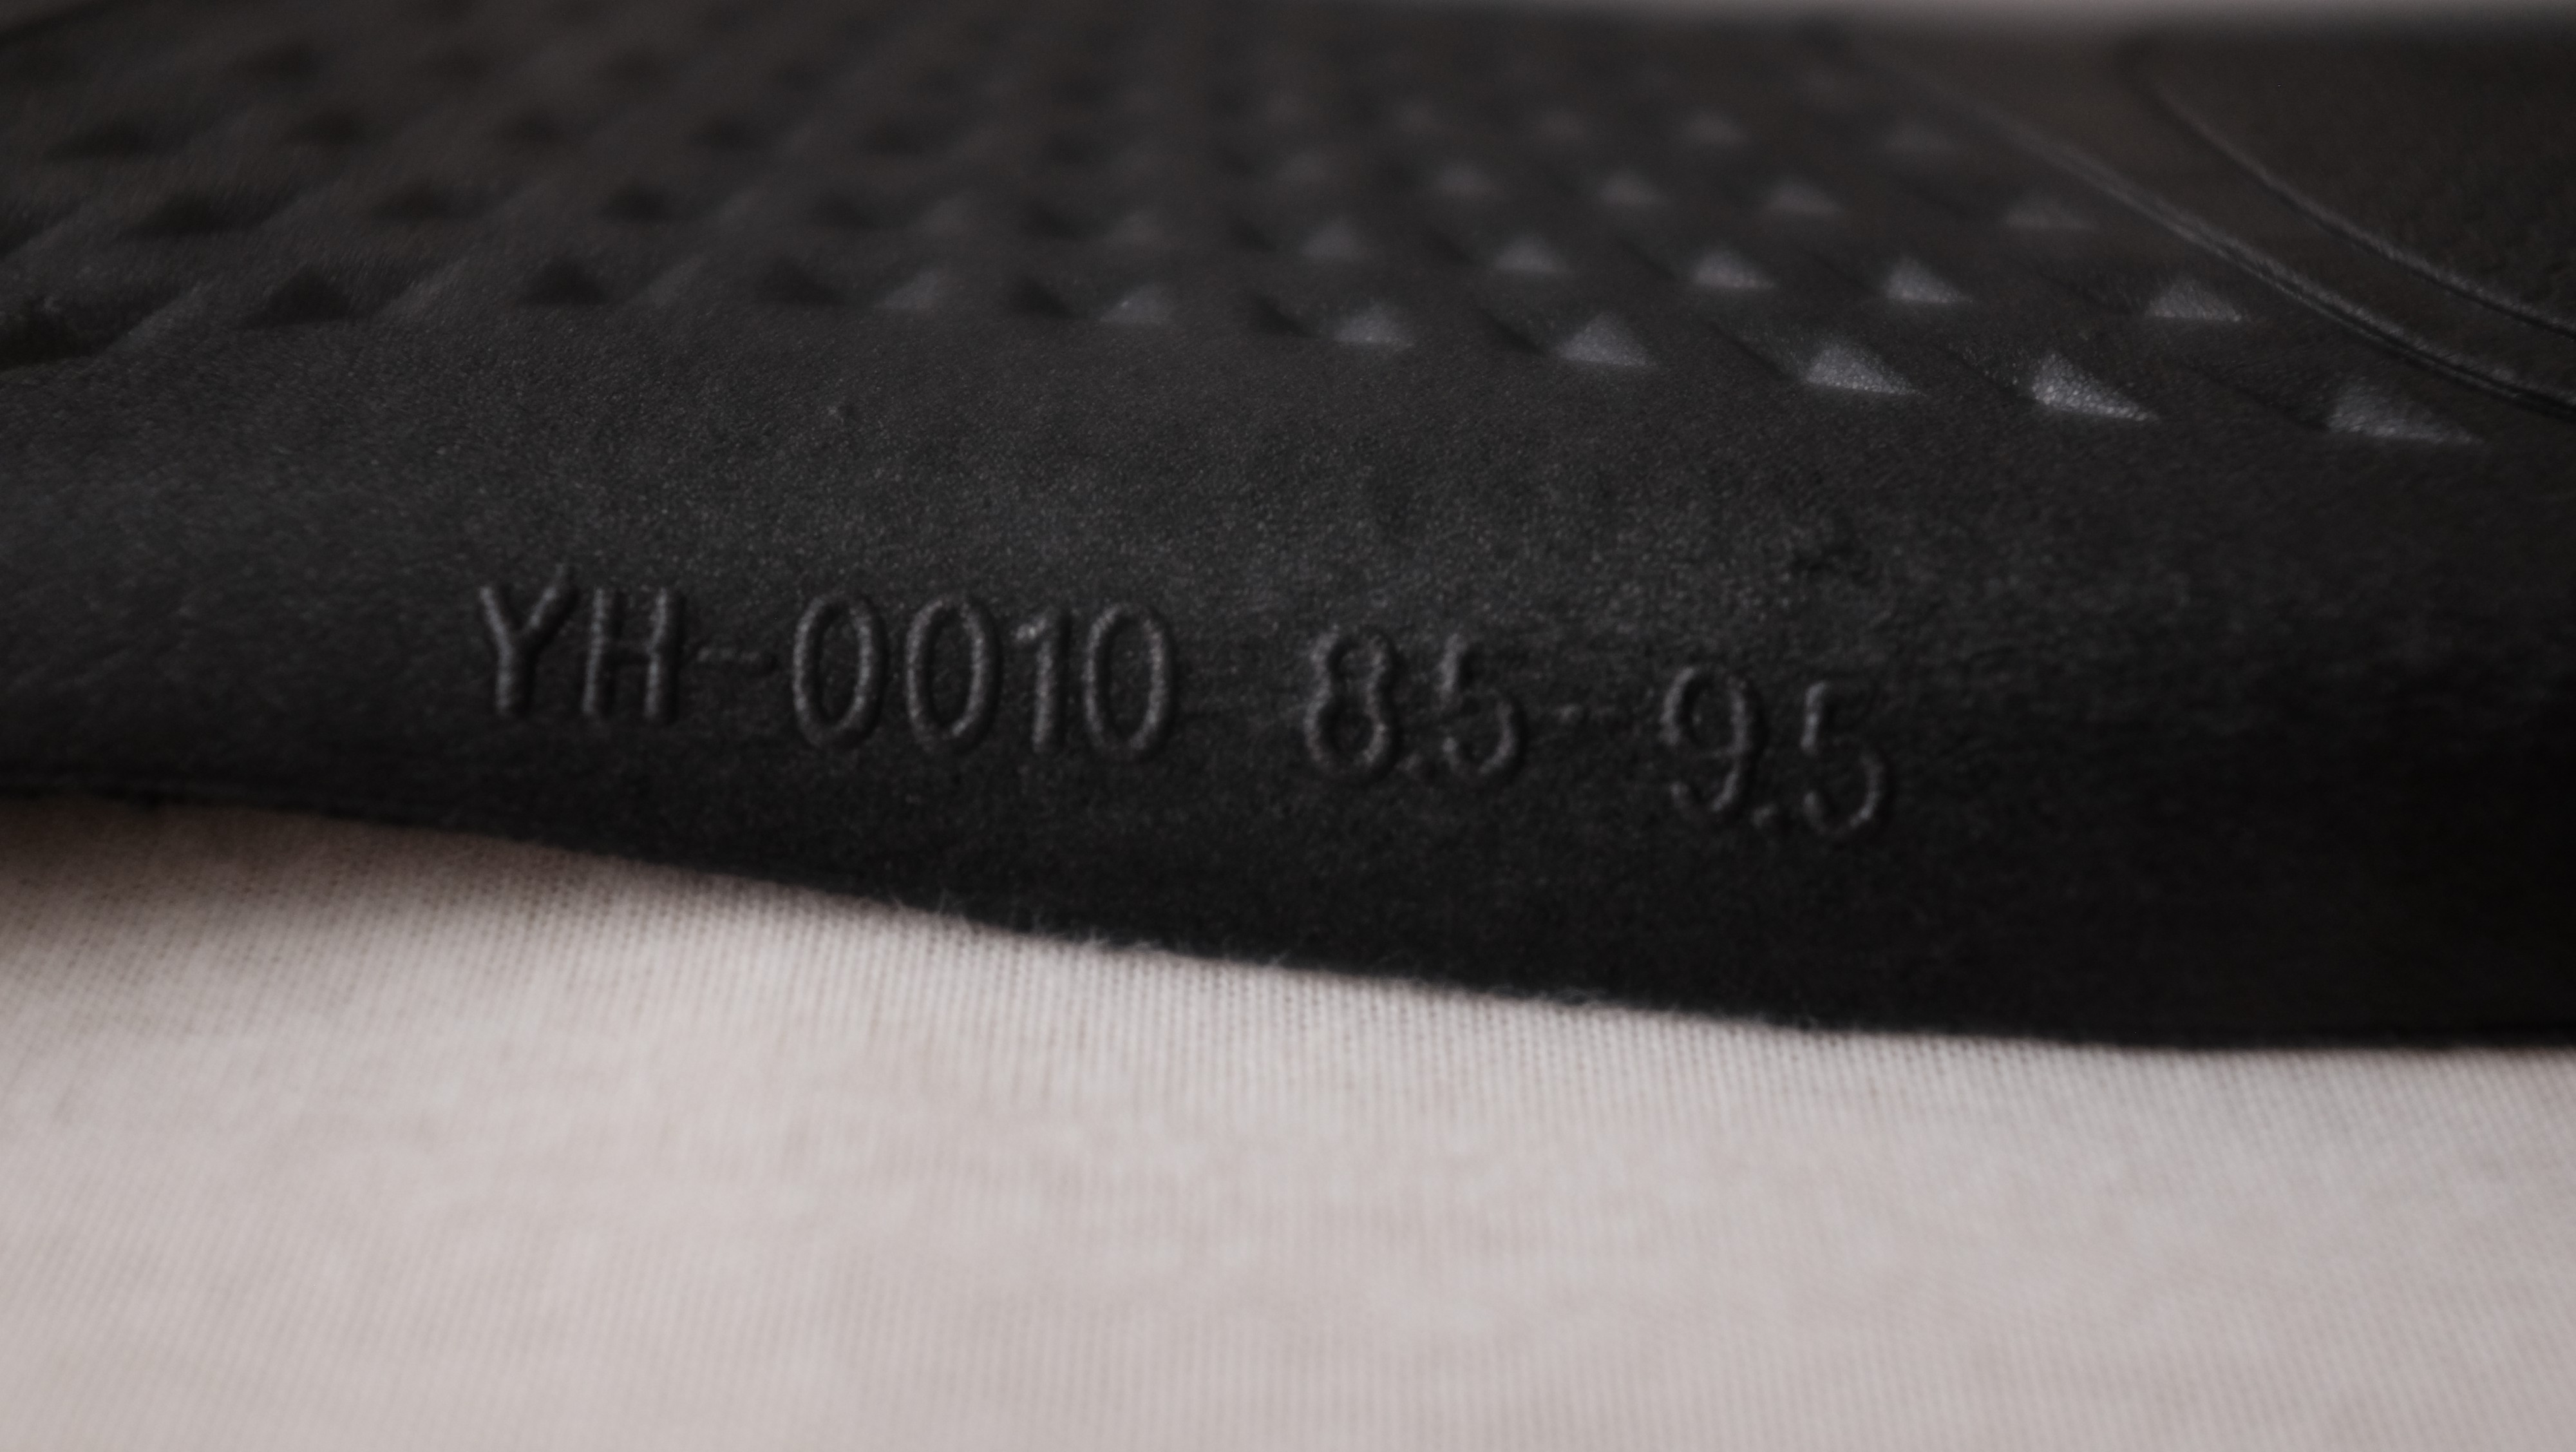
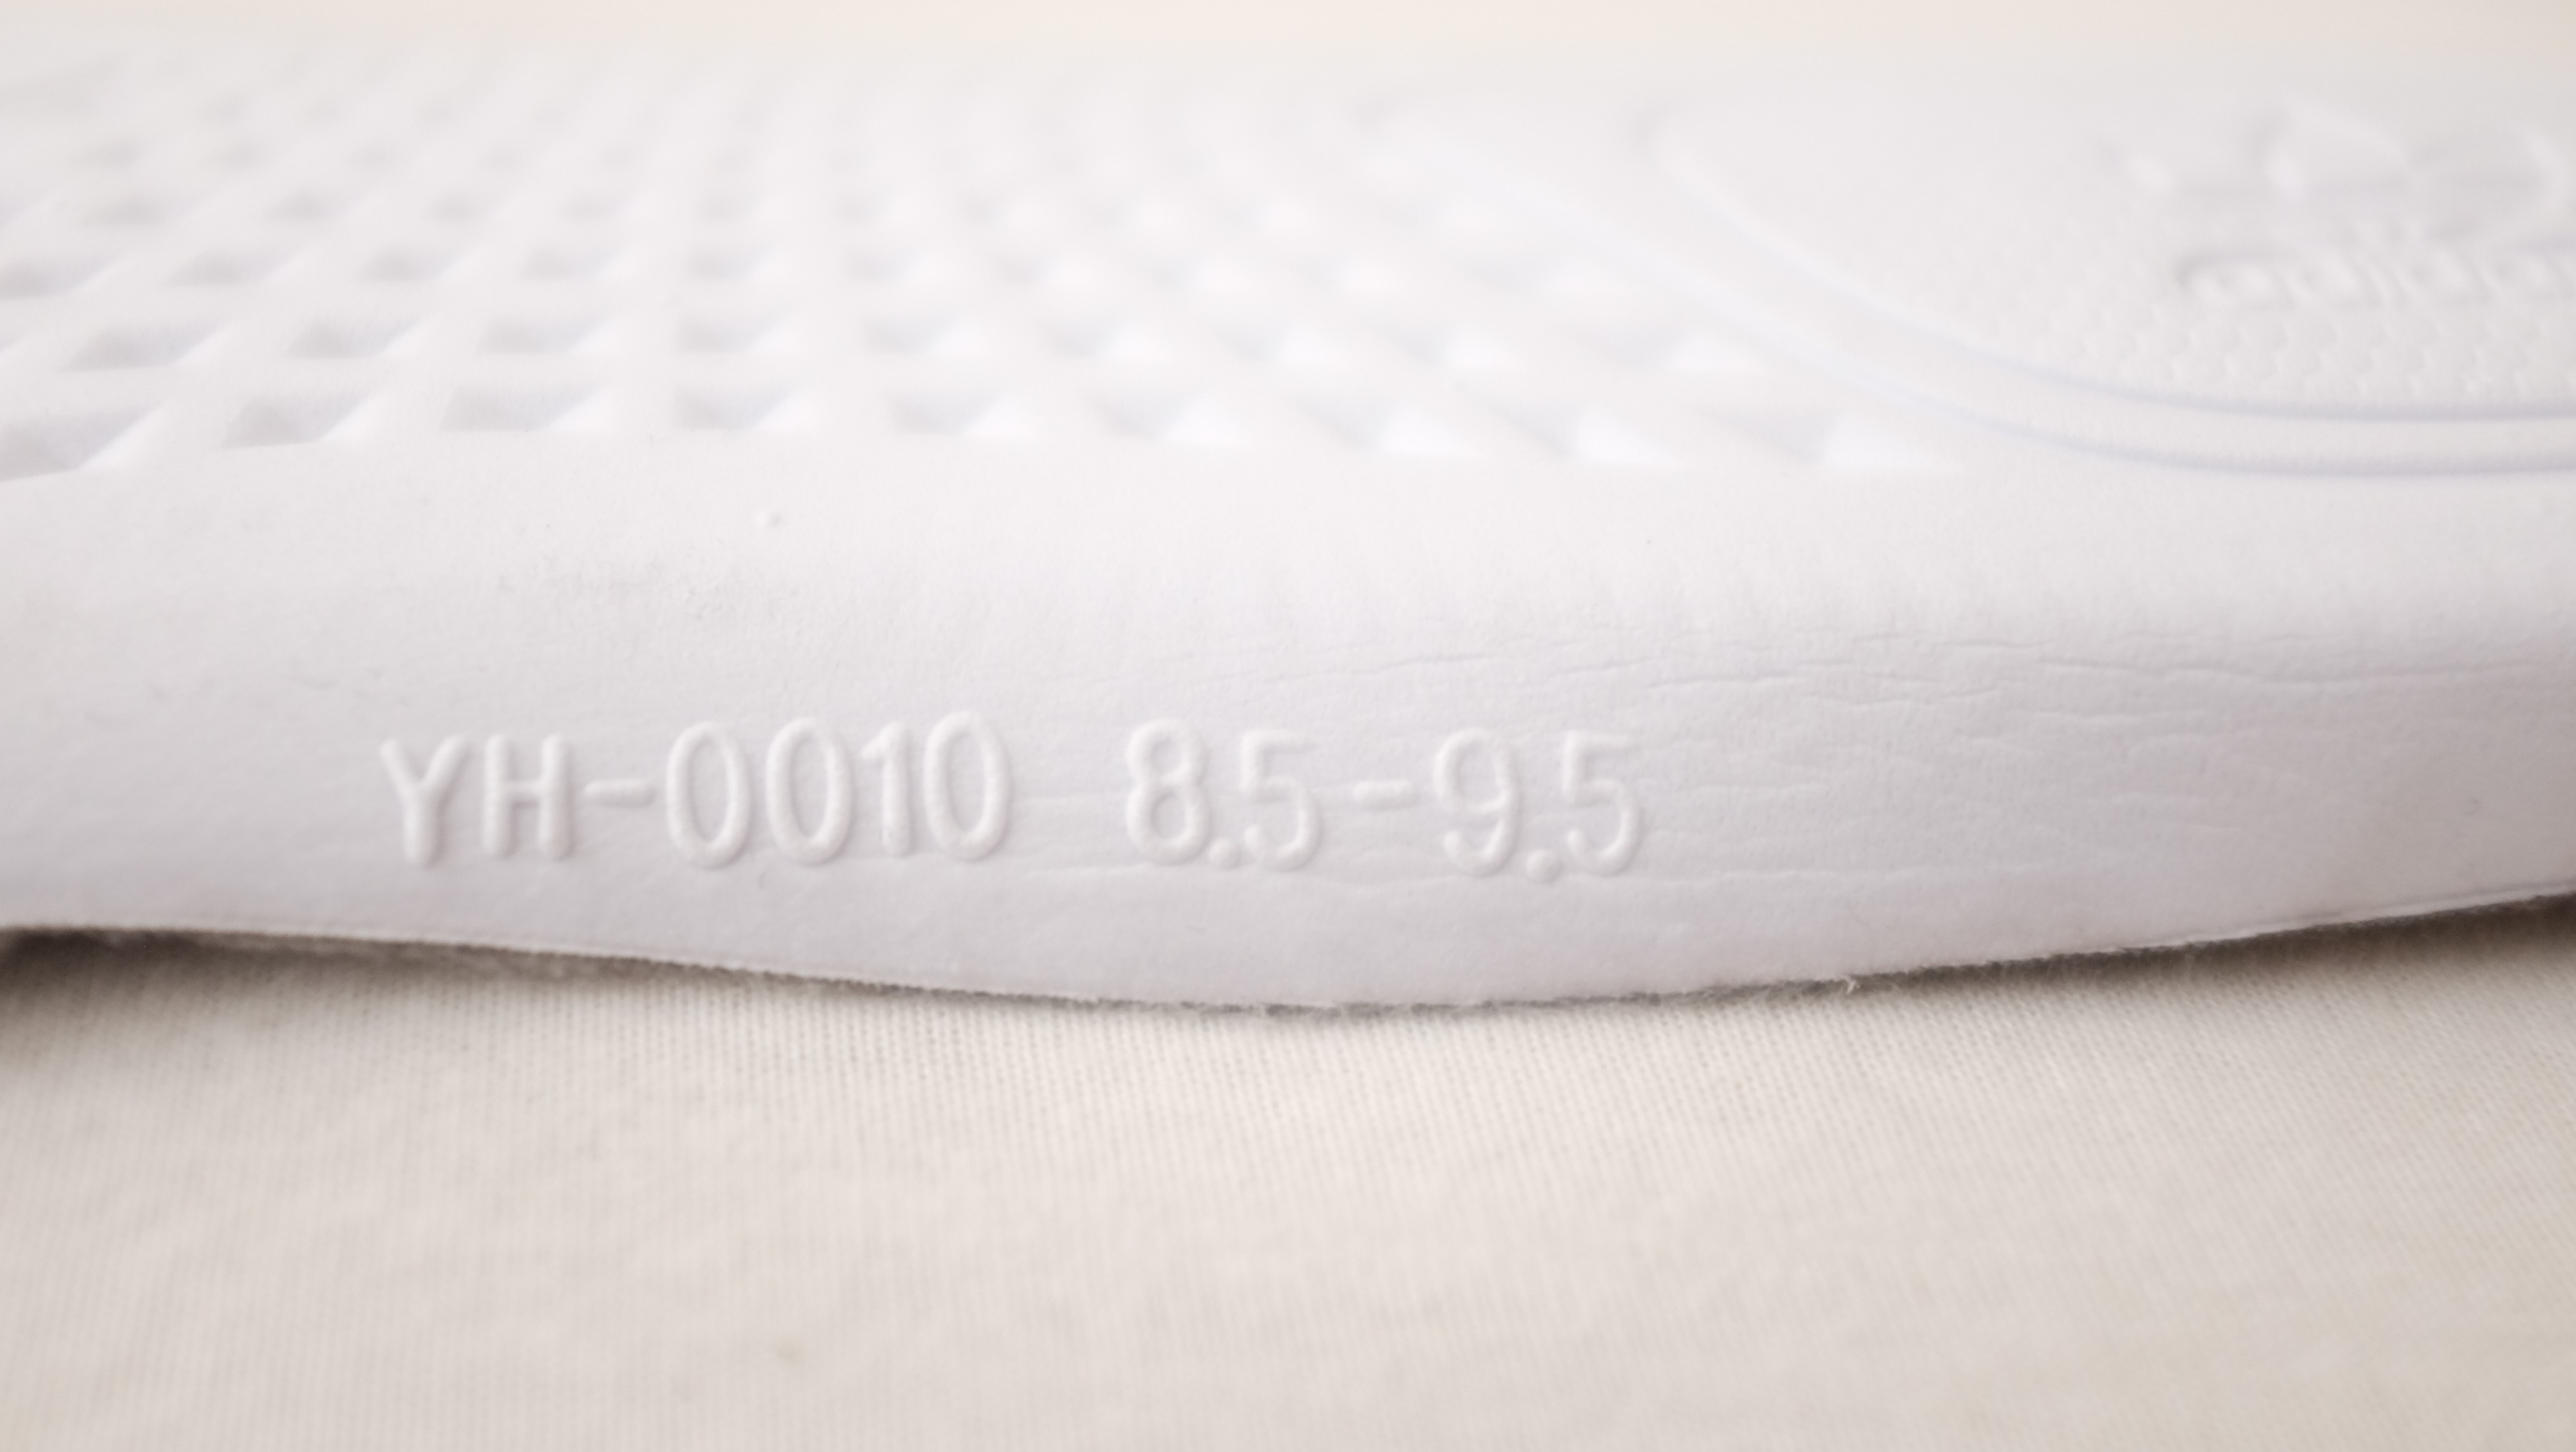
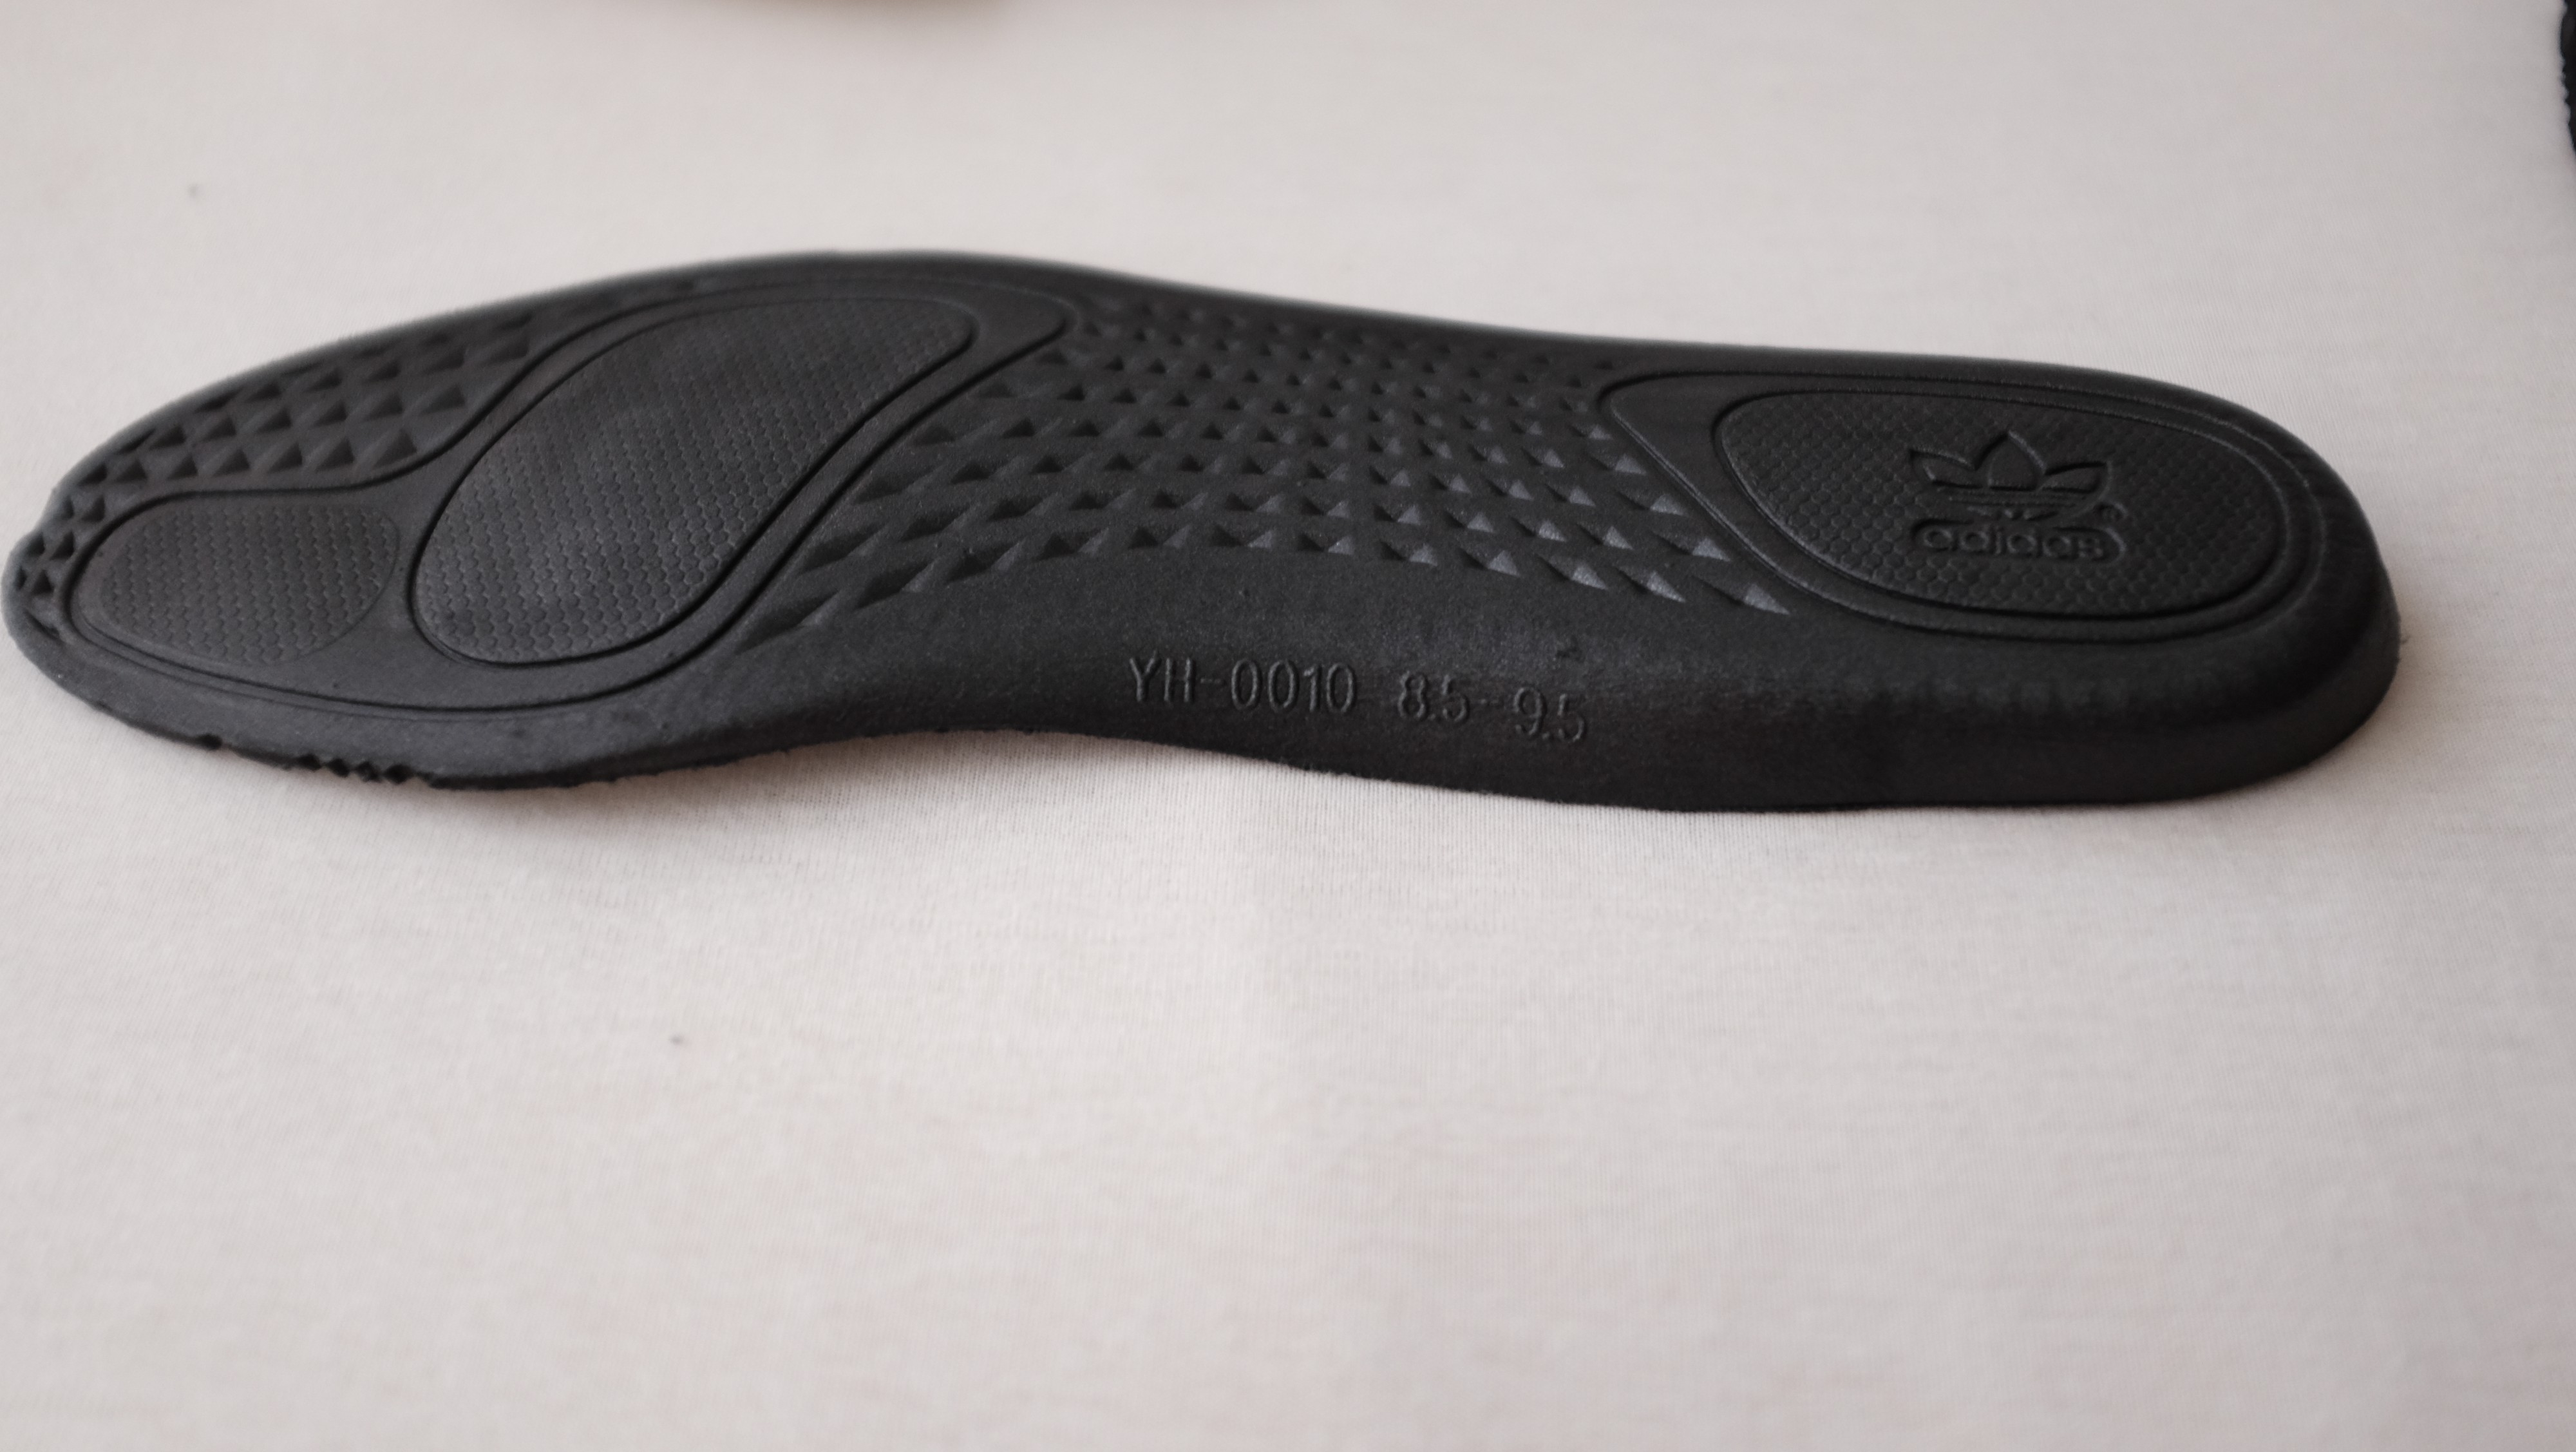 Oreo V2 // Fakes will have the YH number in a diagonal direction ? retail runs parallel with the insole.
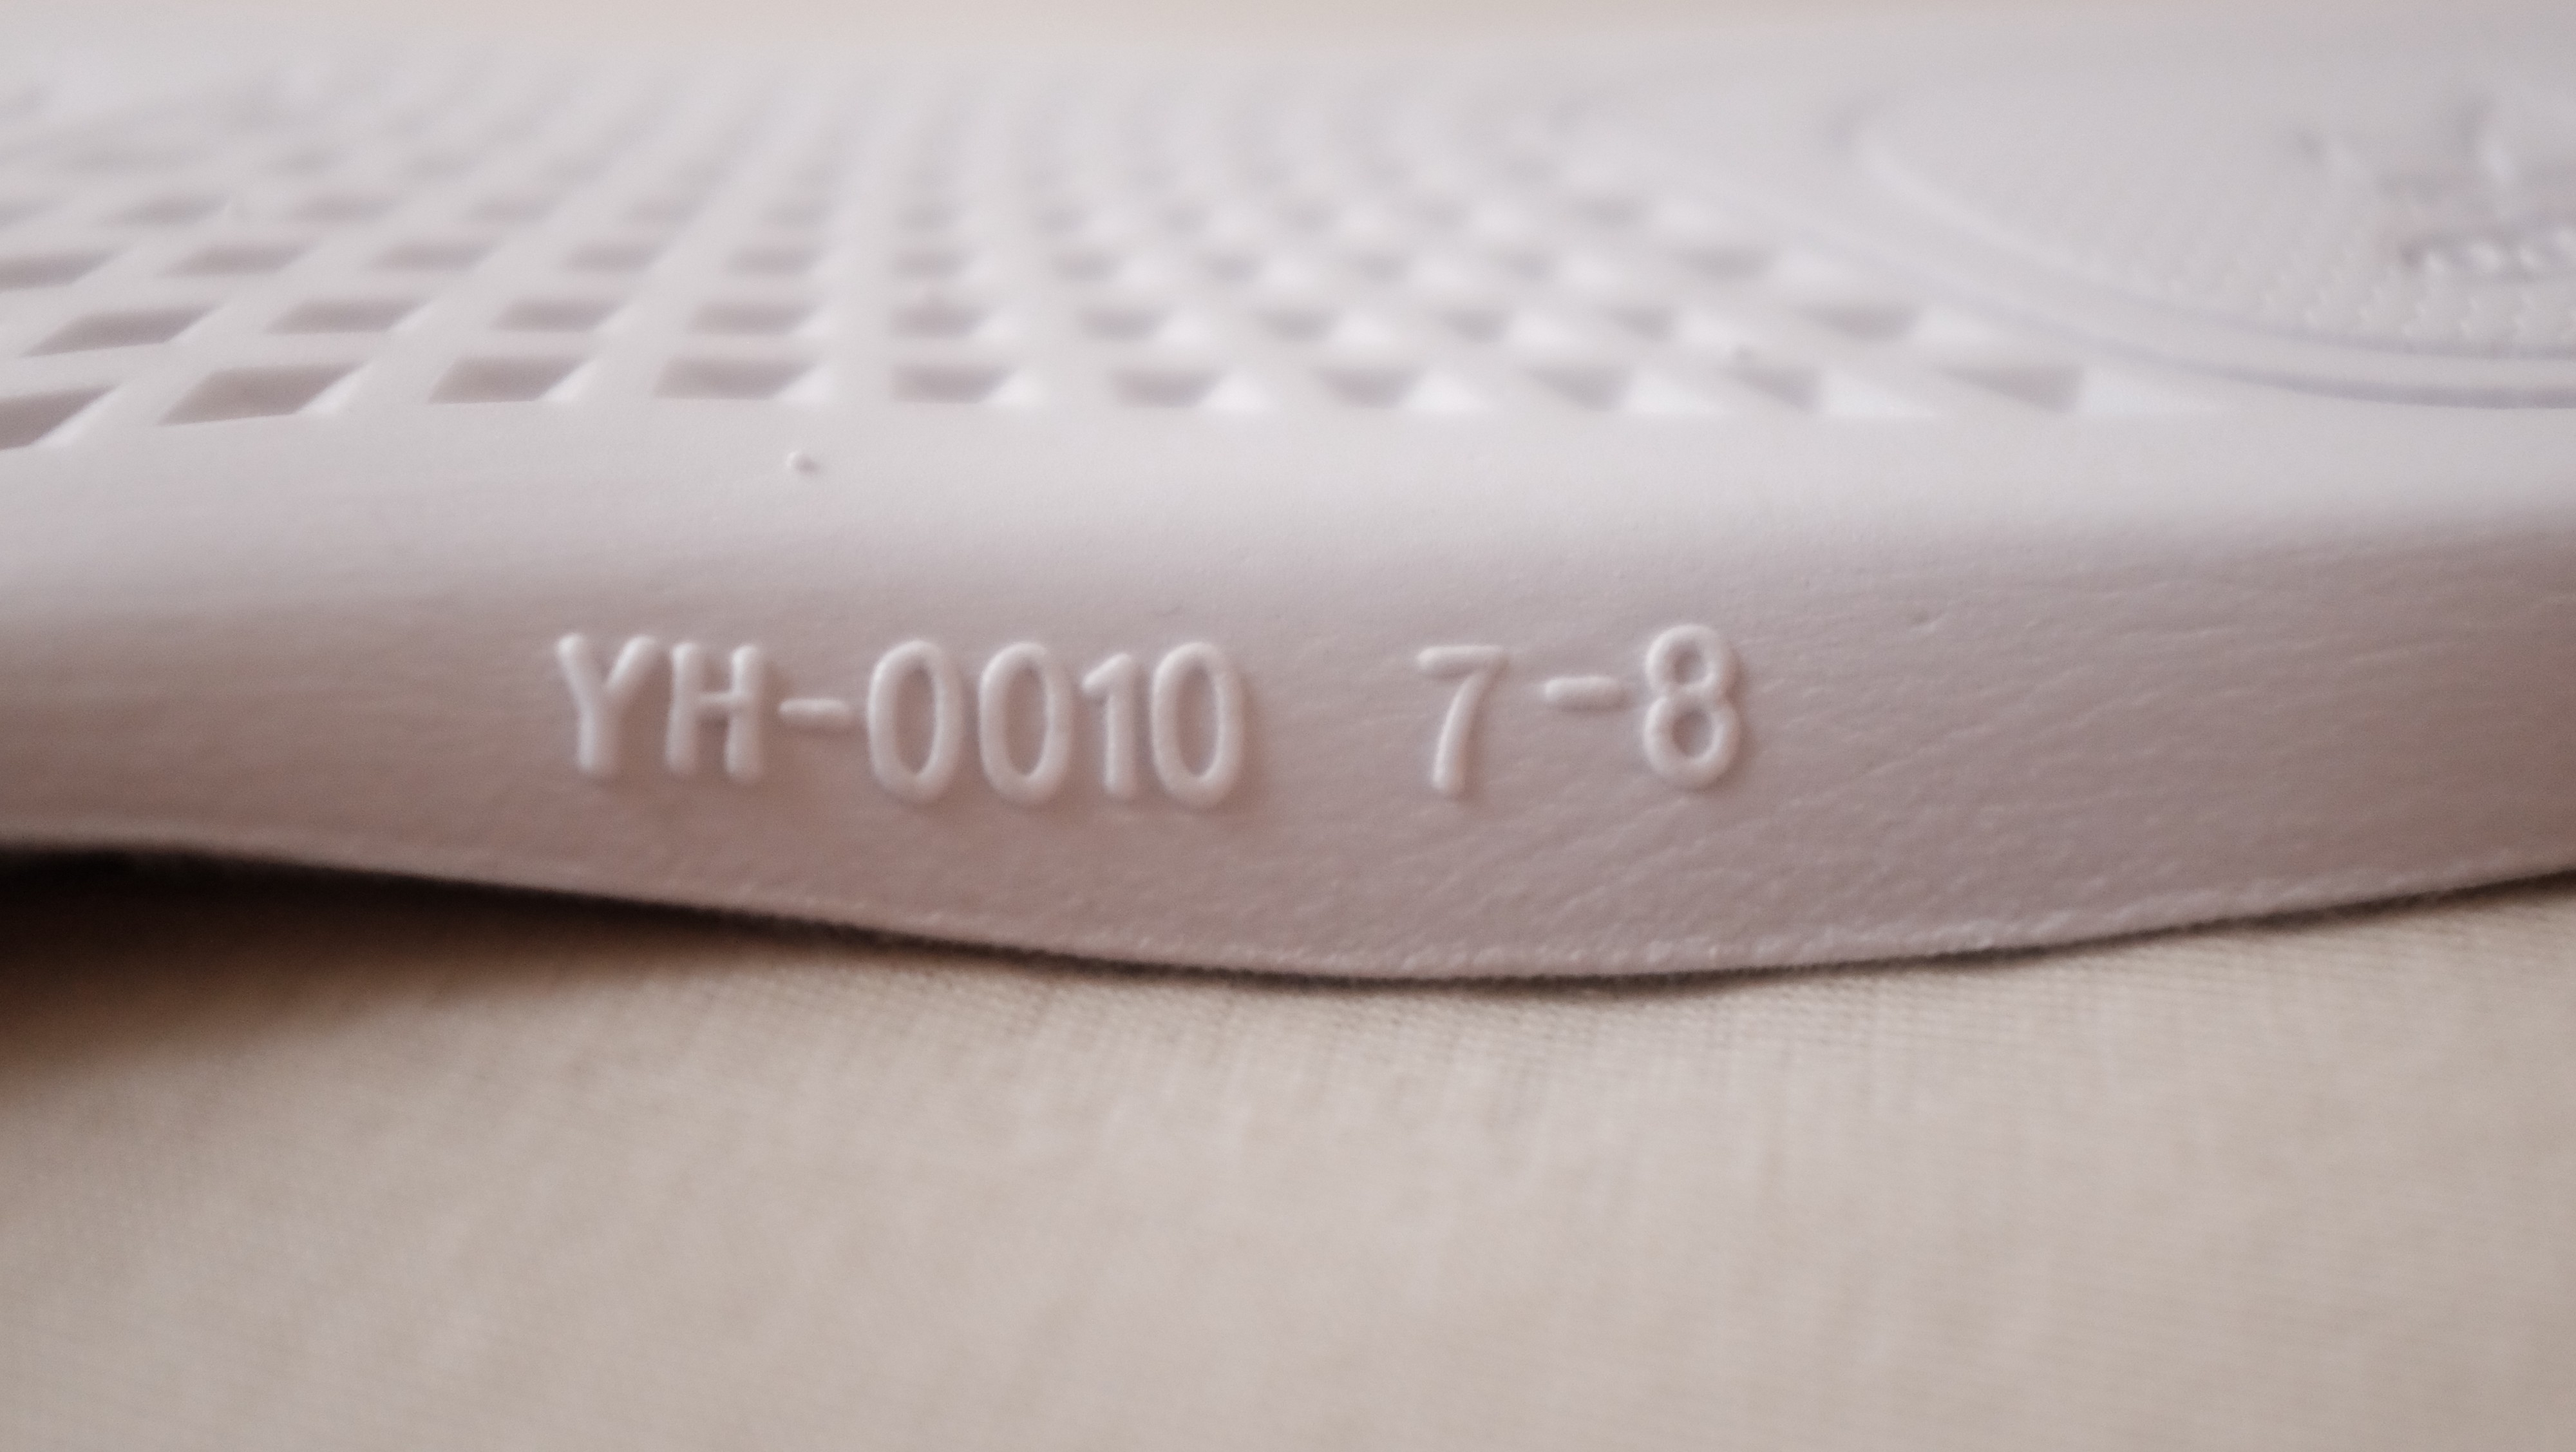
 Left Beluga 2.0 // Right Zebra Restock V2
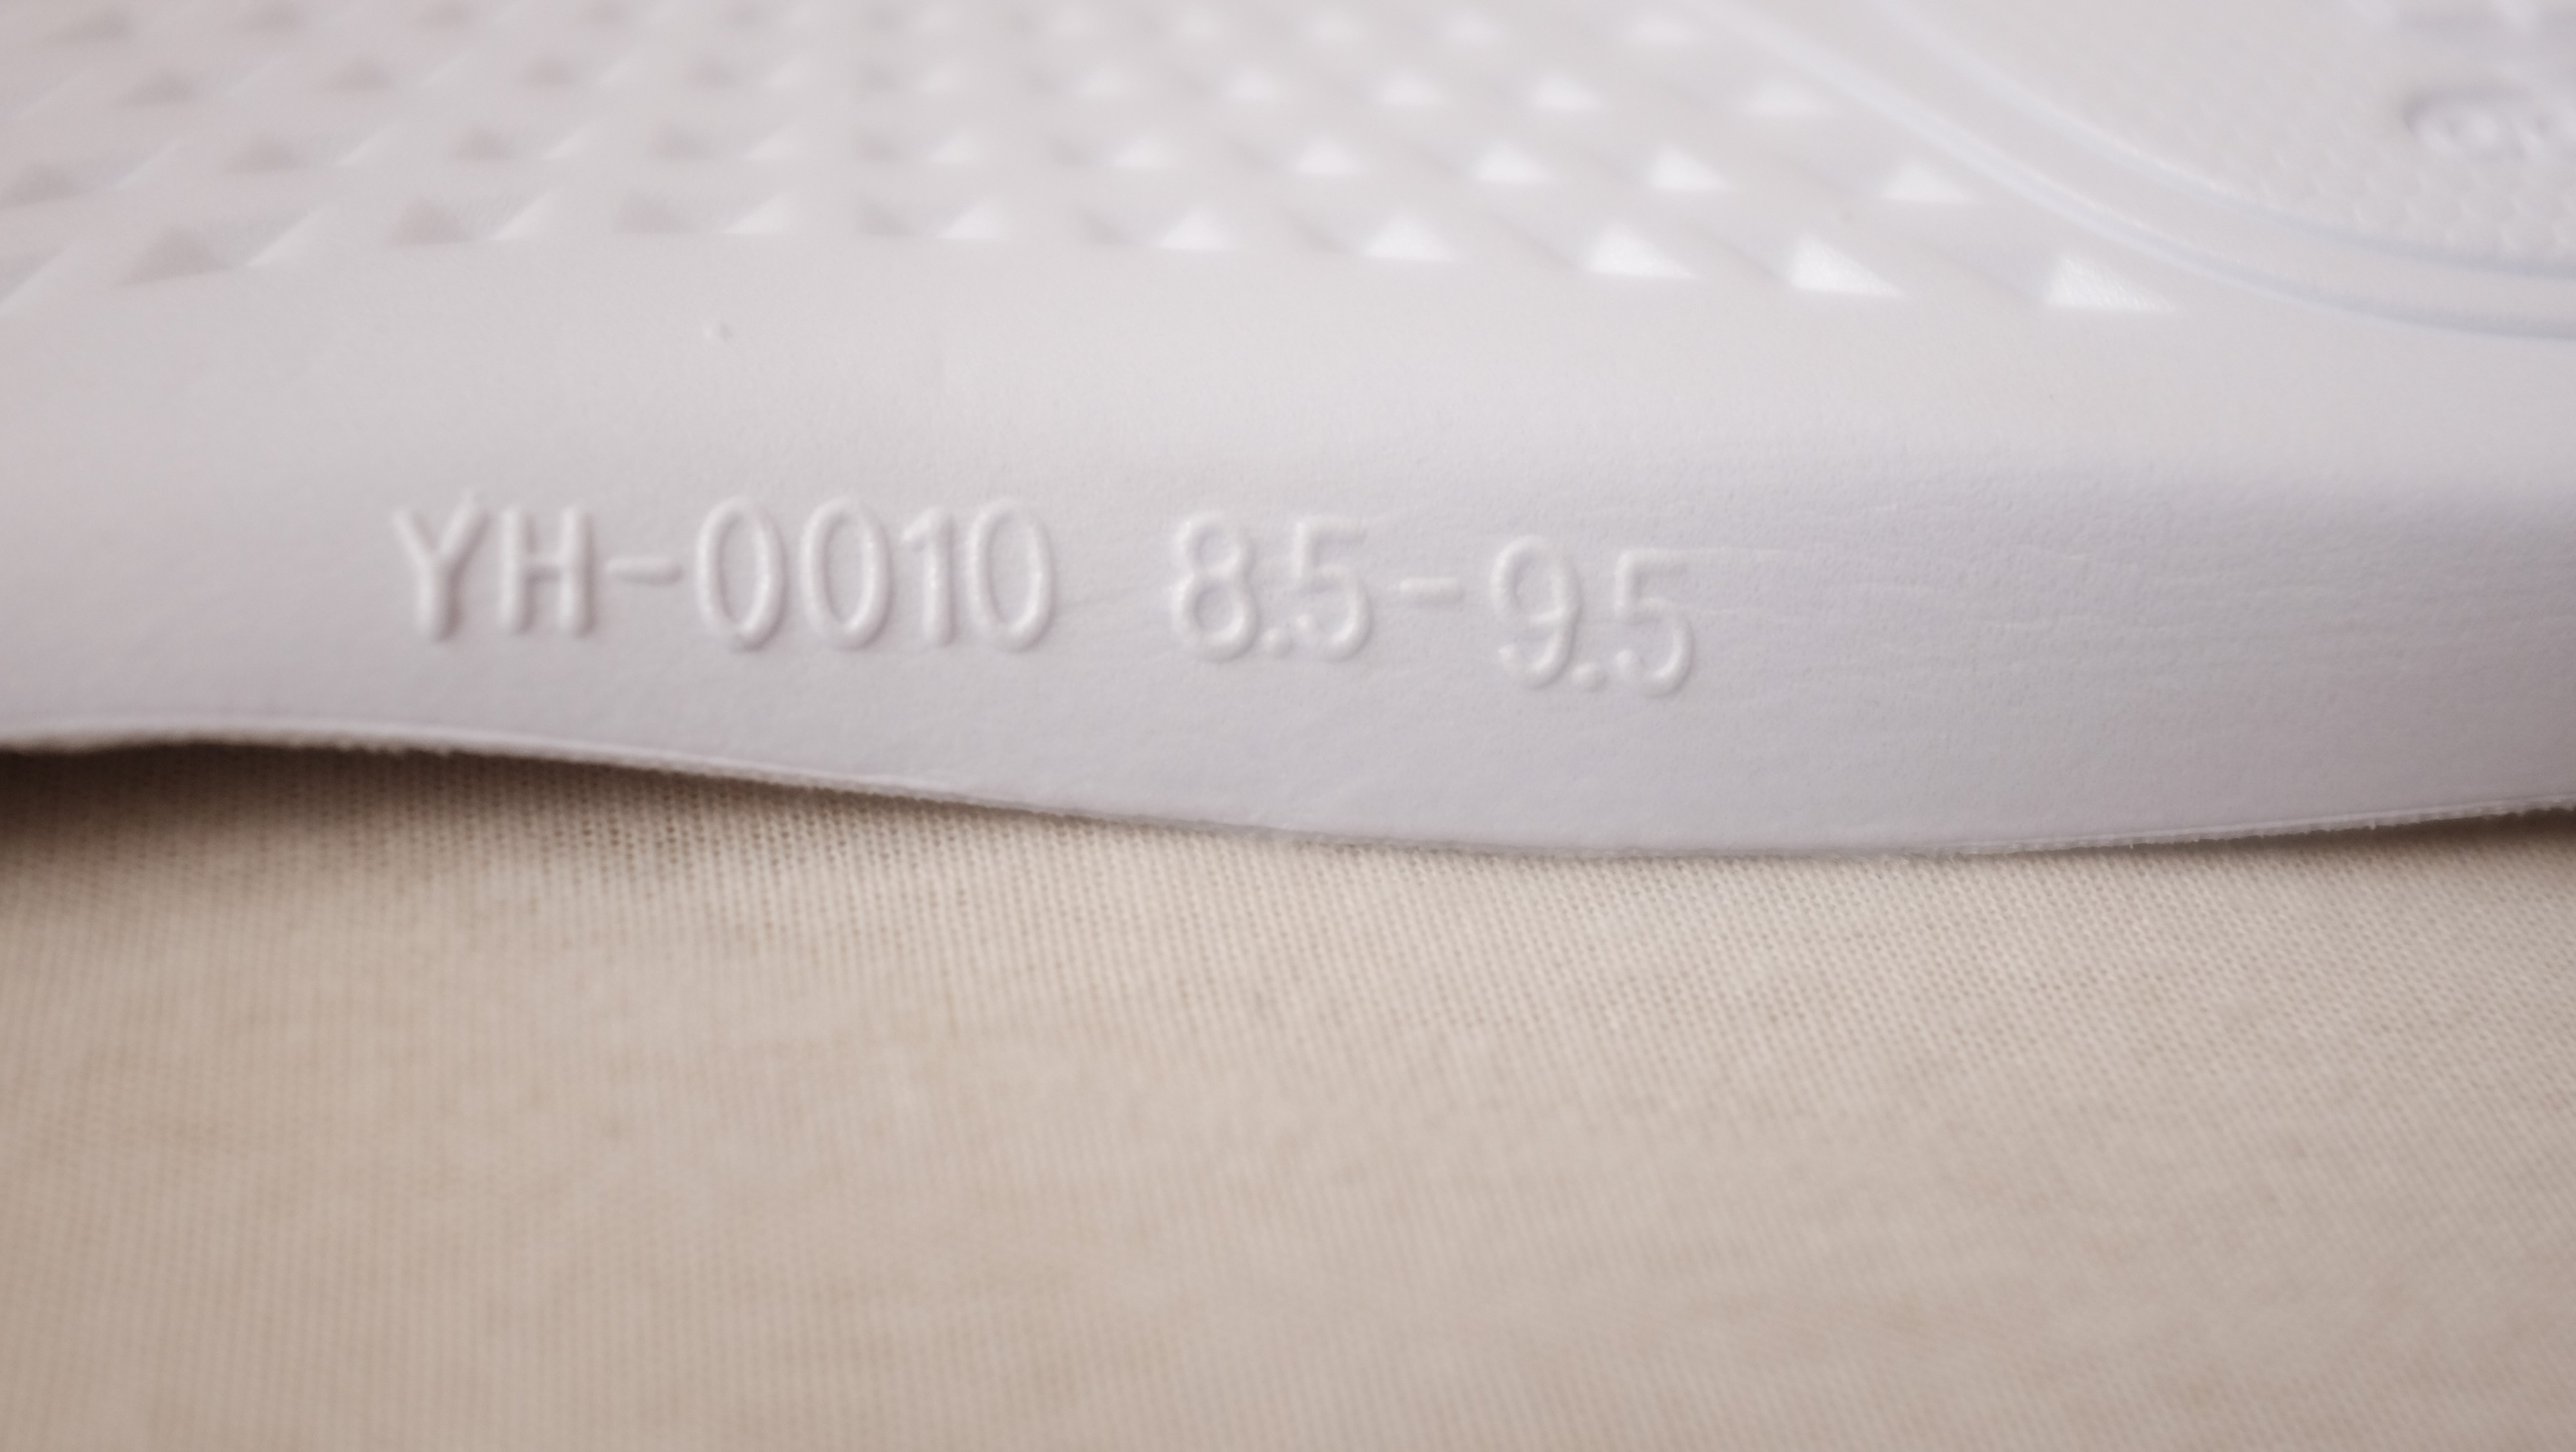
 Left Cream V2, Middle Oreo V2, Right Beluga V2 // Fakes will have the YH number in a diagonal direction ? retail runs parallel with the insole.
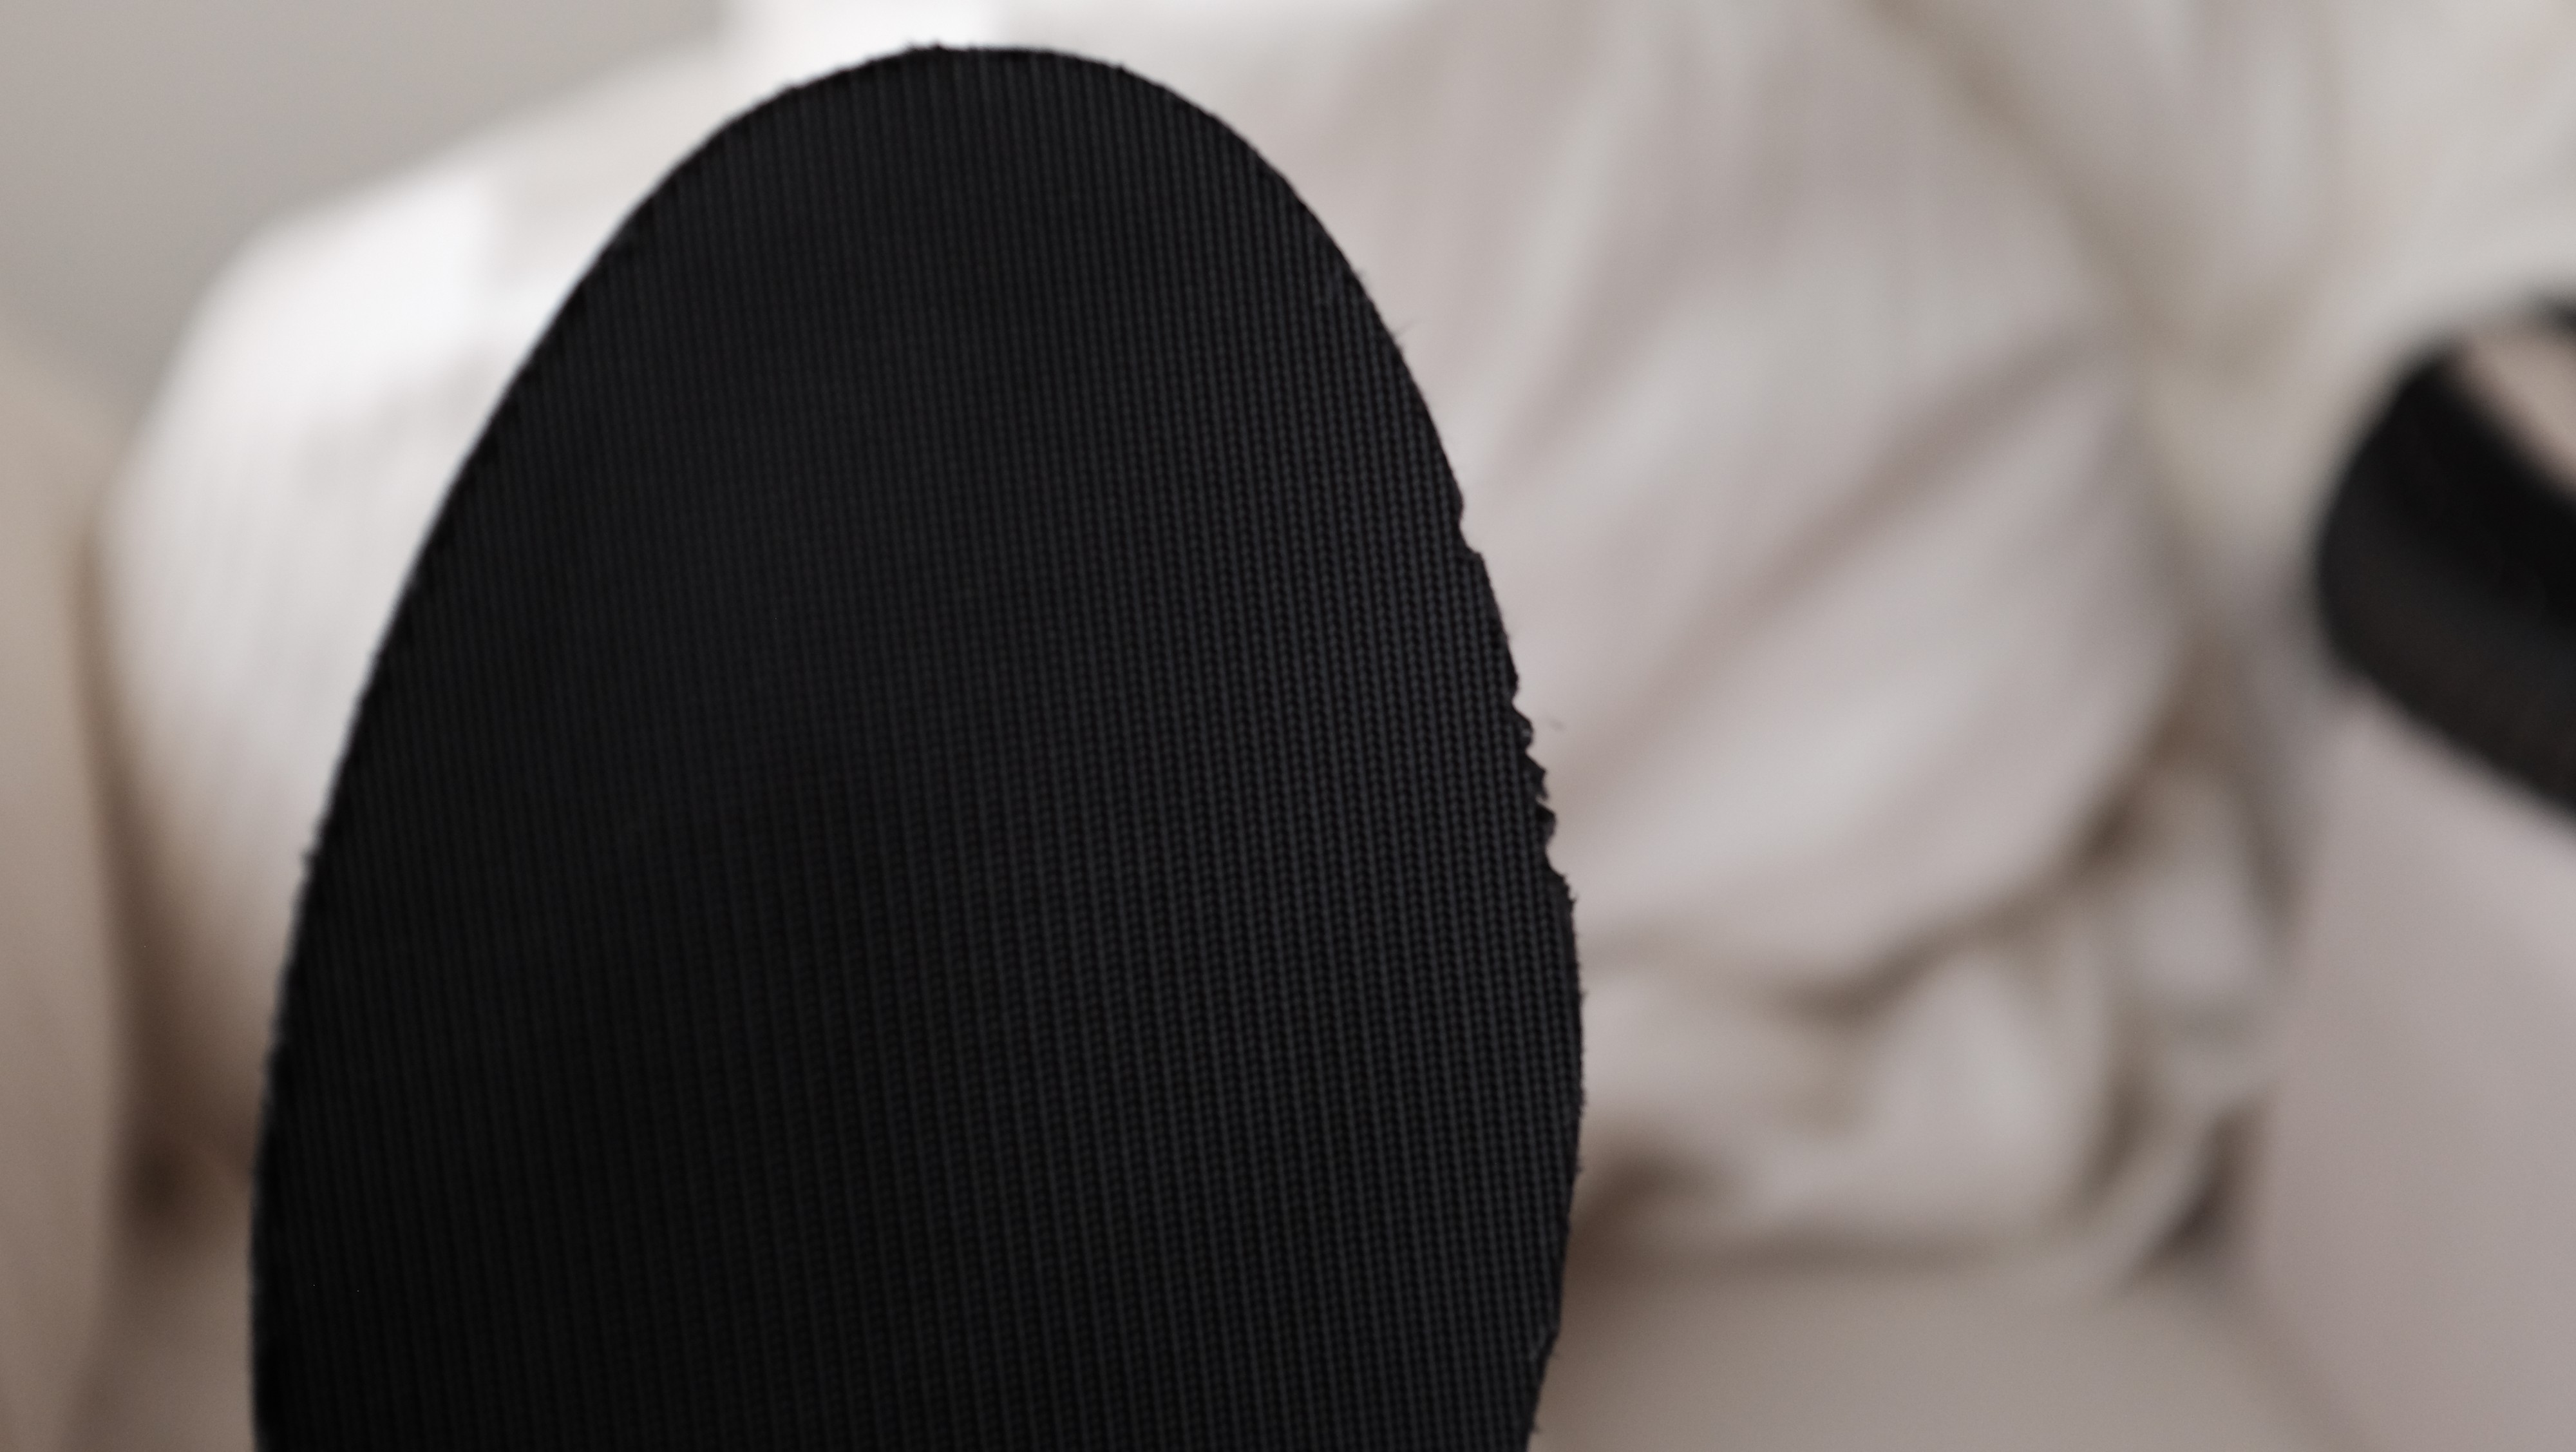
 Oreo V2
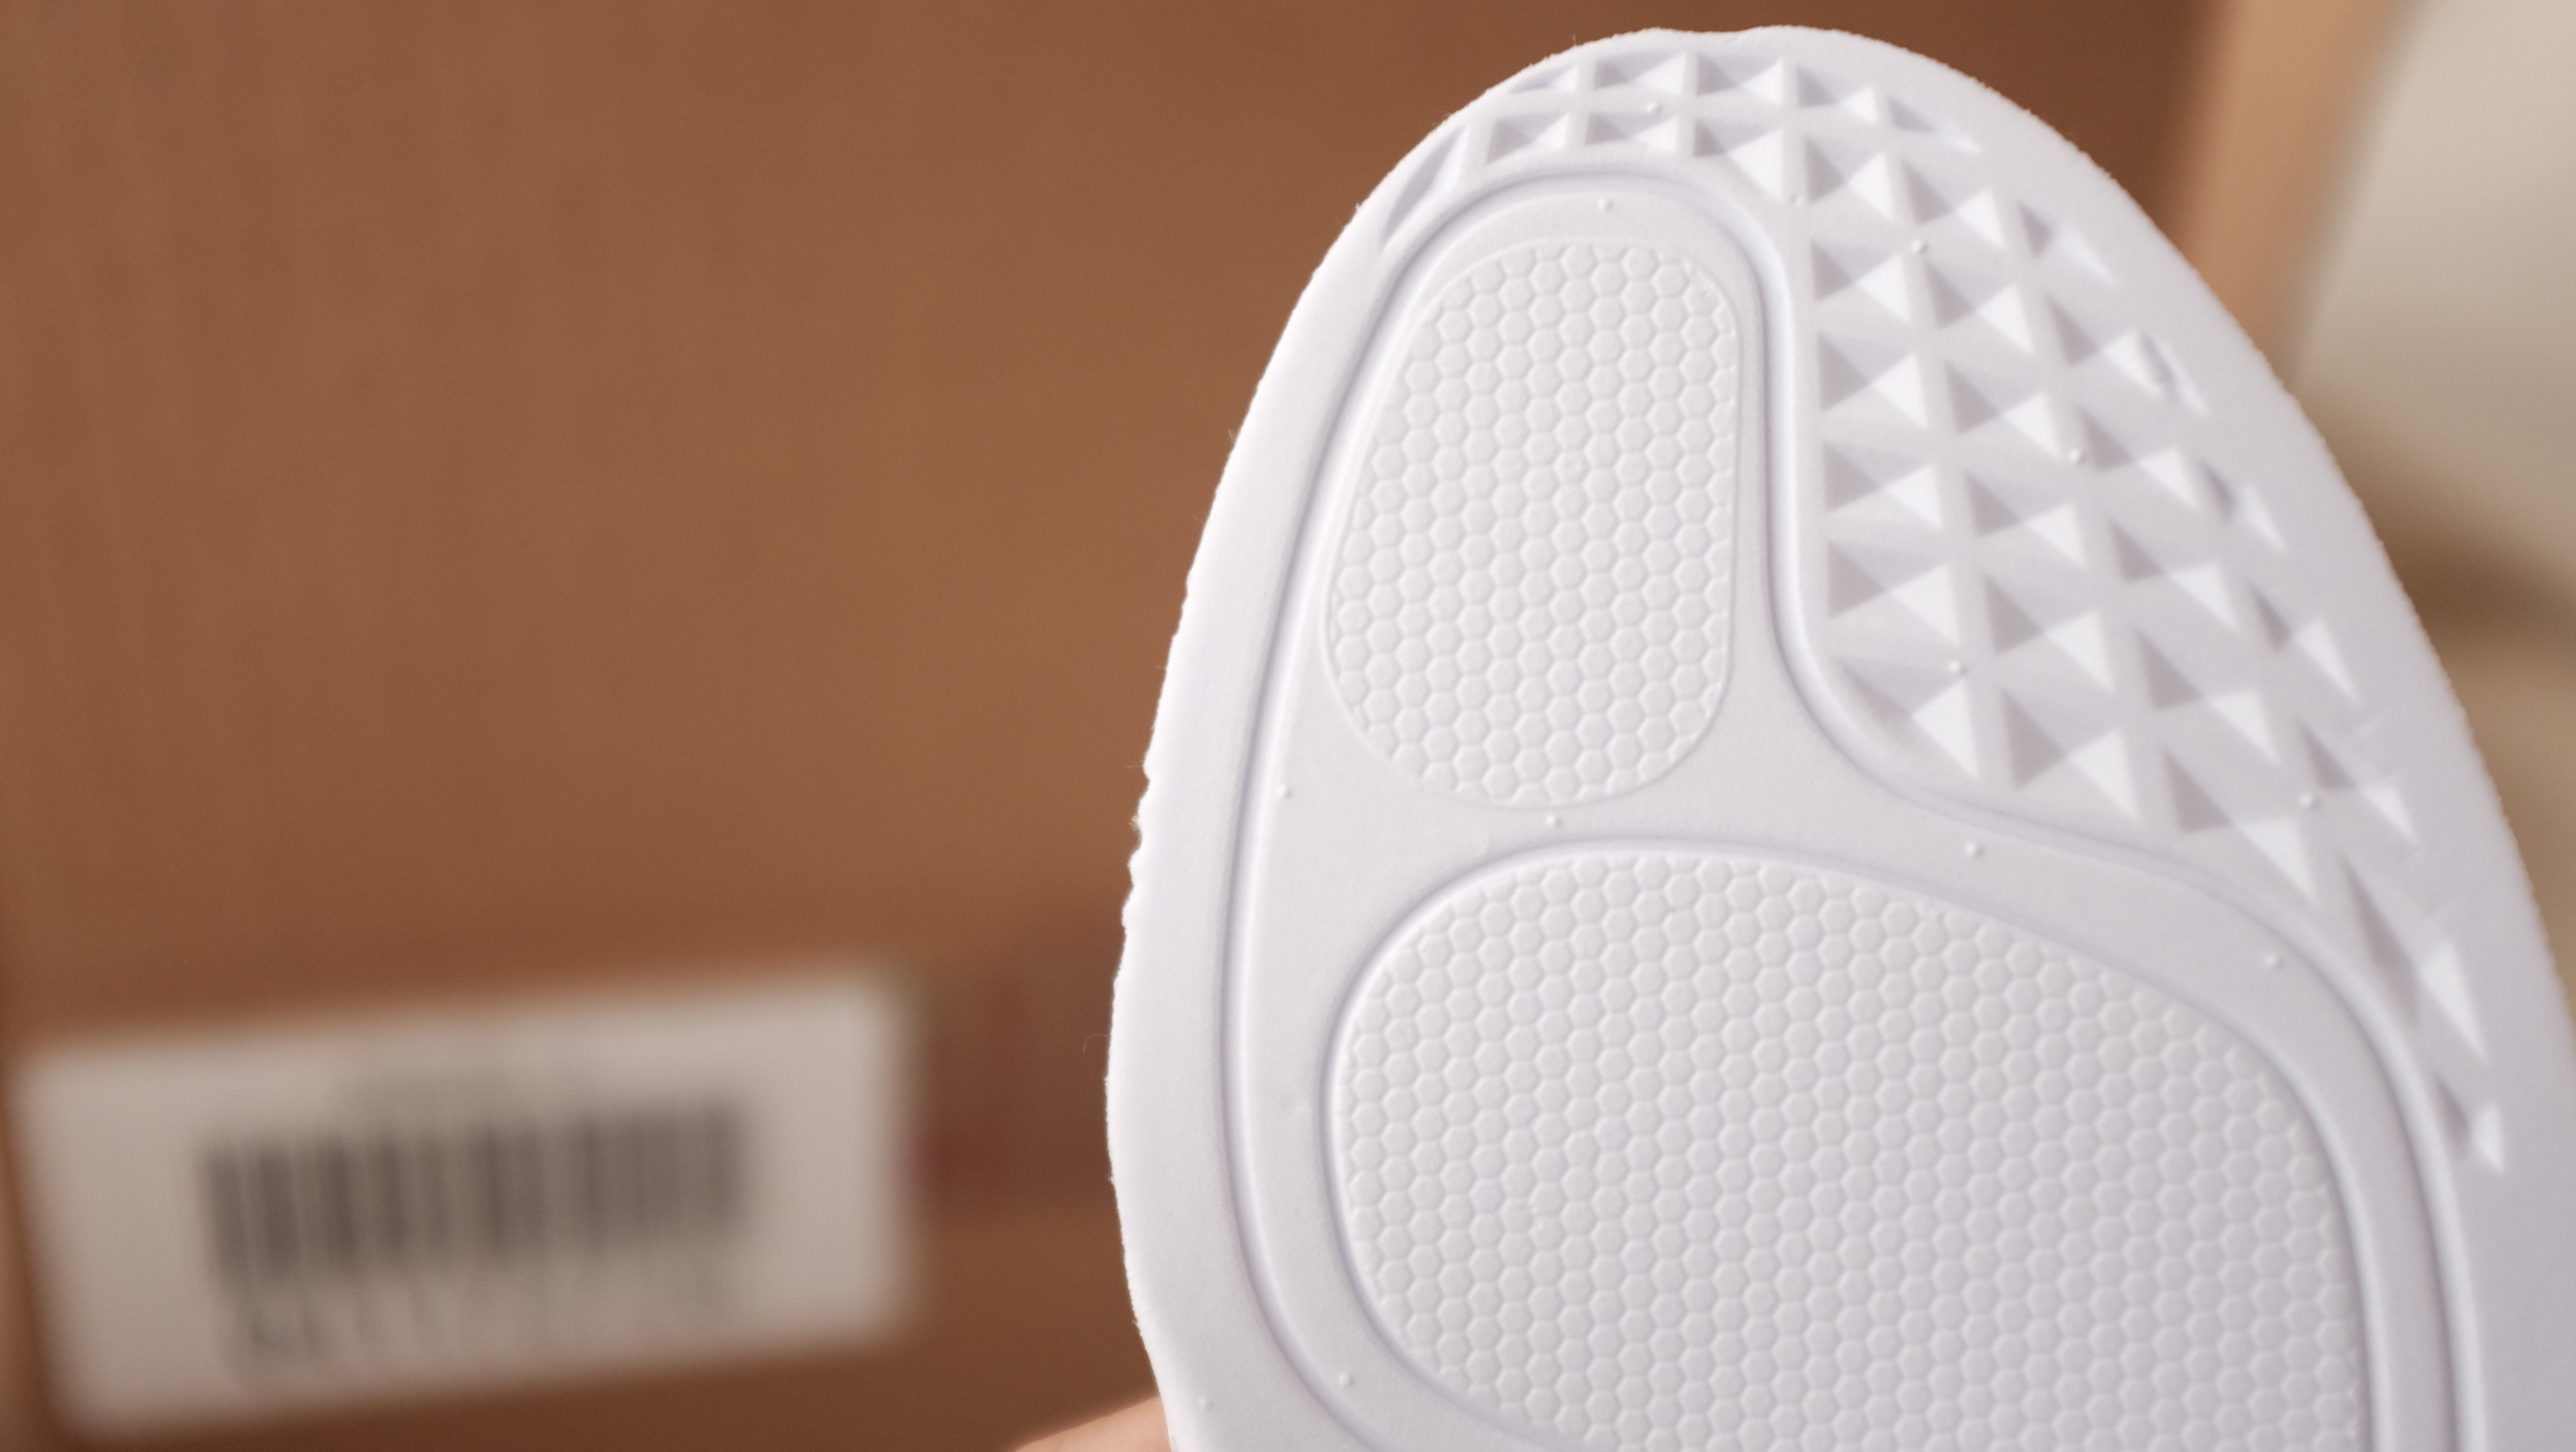
 Left Cream V2, Right Beluga V2 // 3 zig zags will be on all insoles
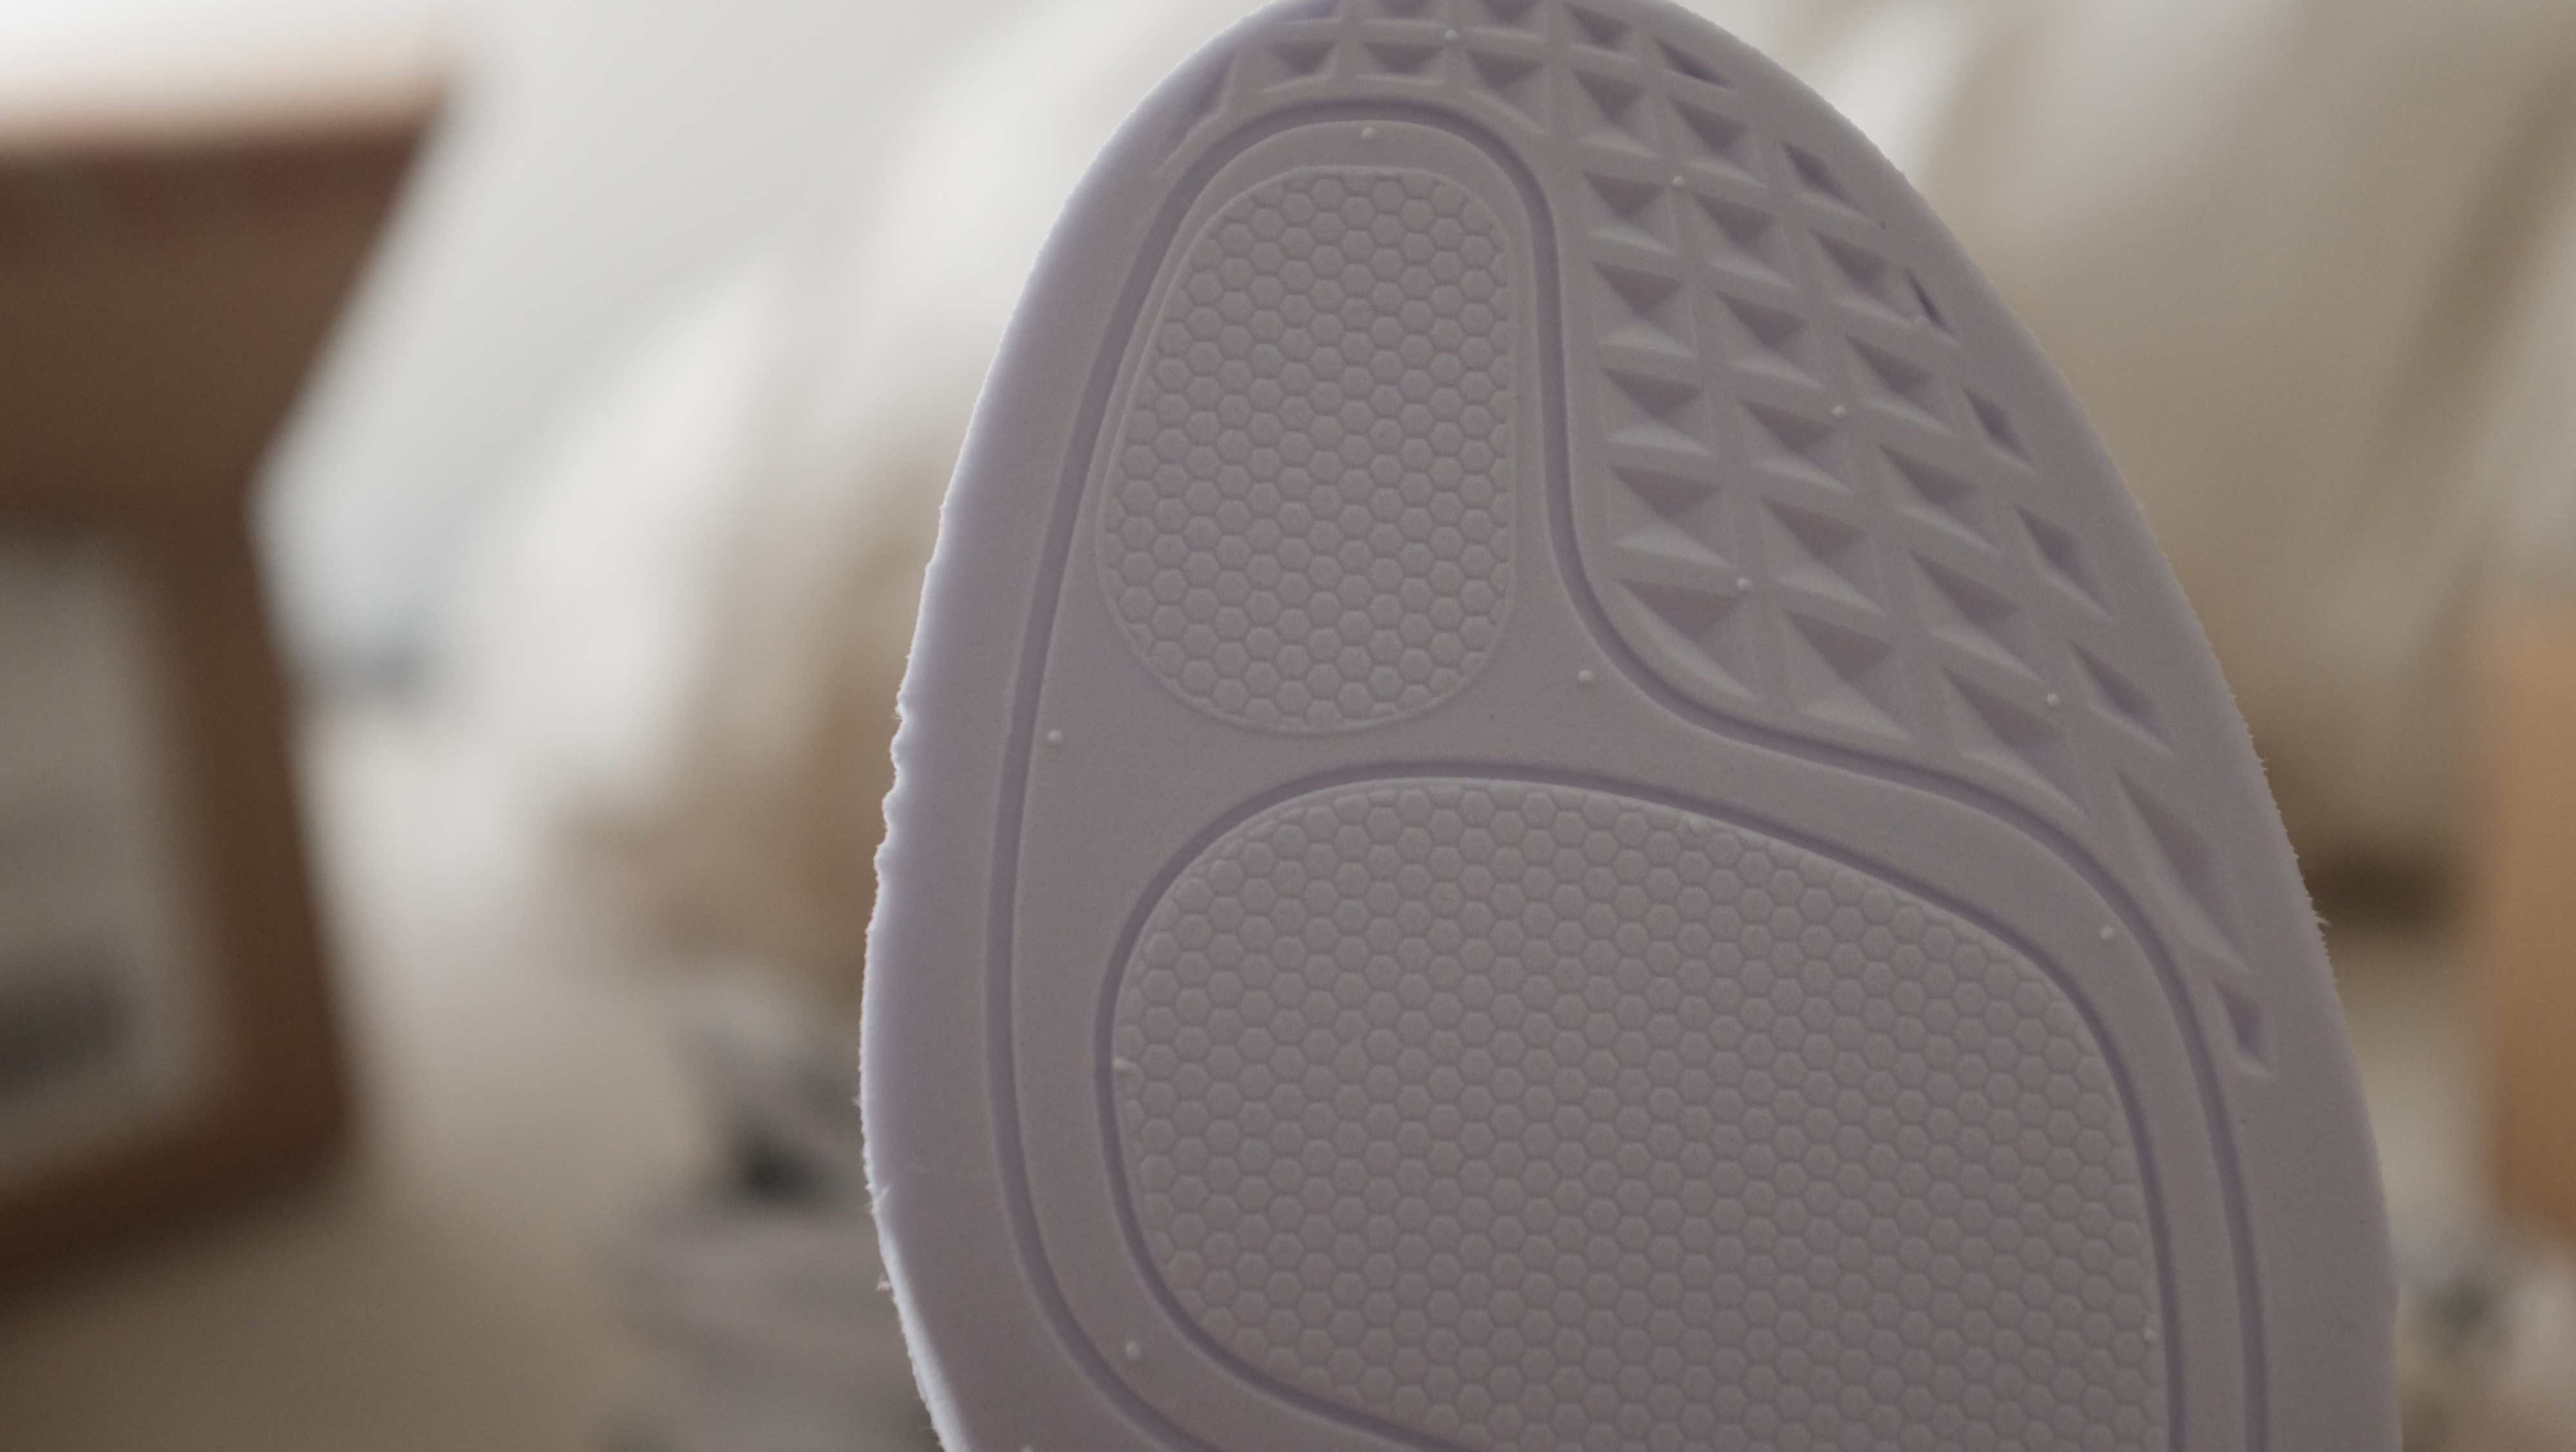
 Left Zebra Restock V2 // Right Beluga 2.0
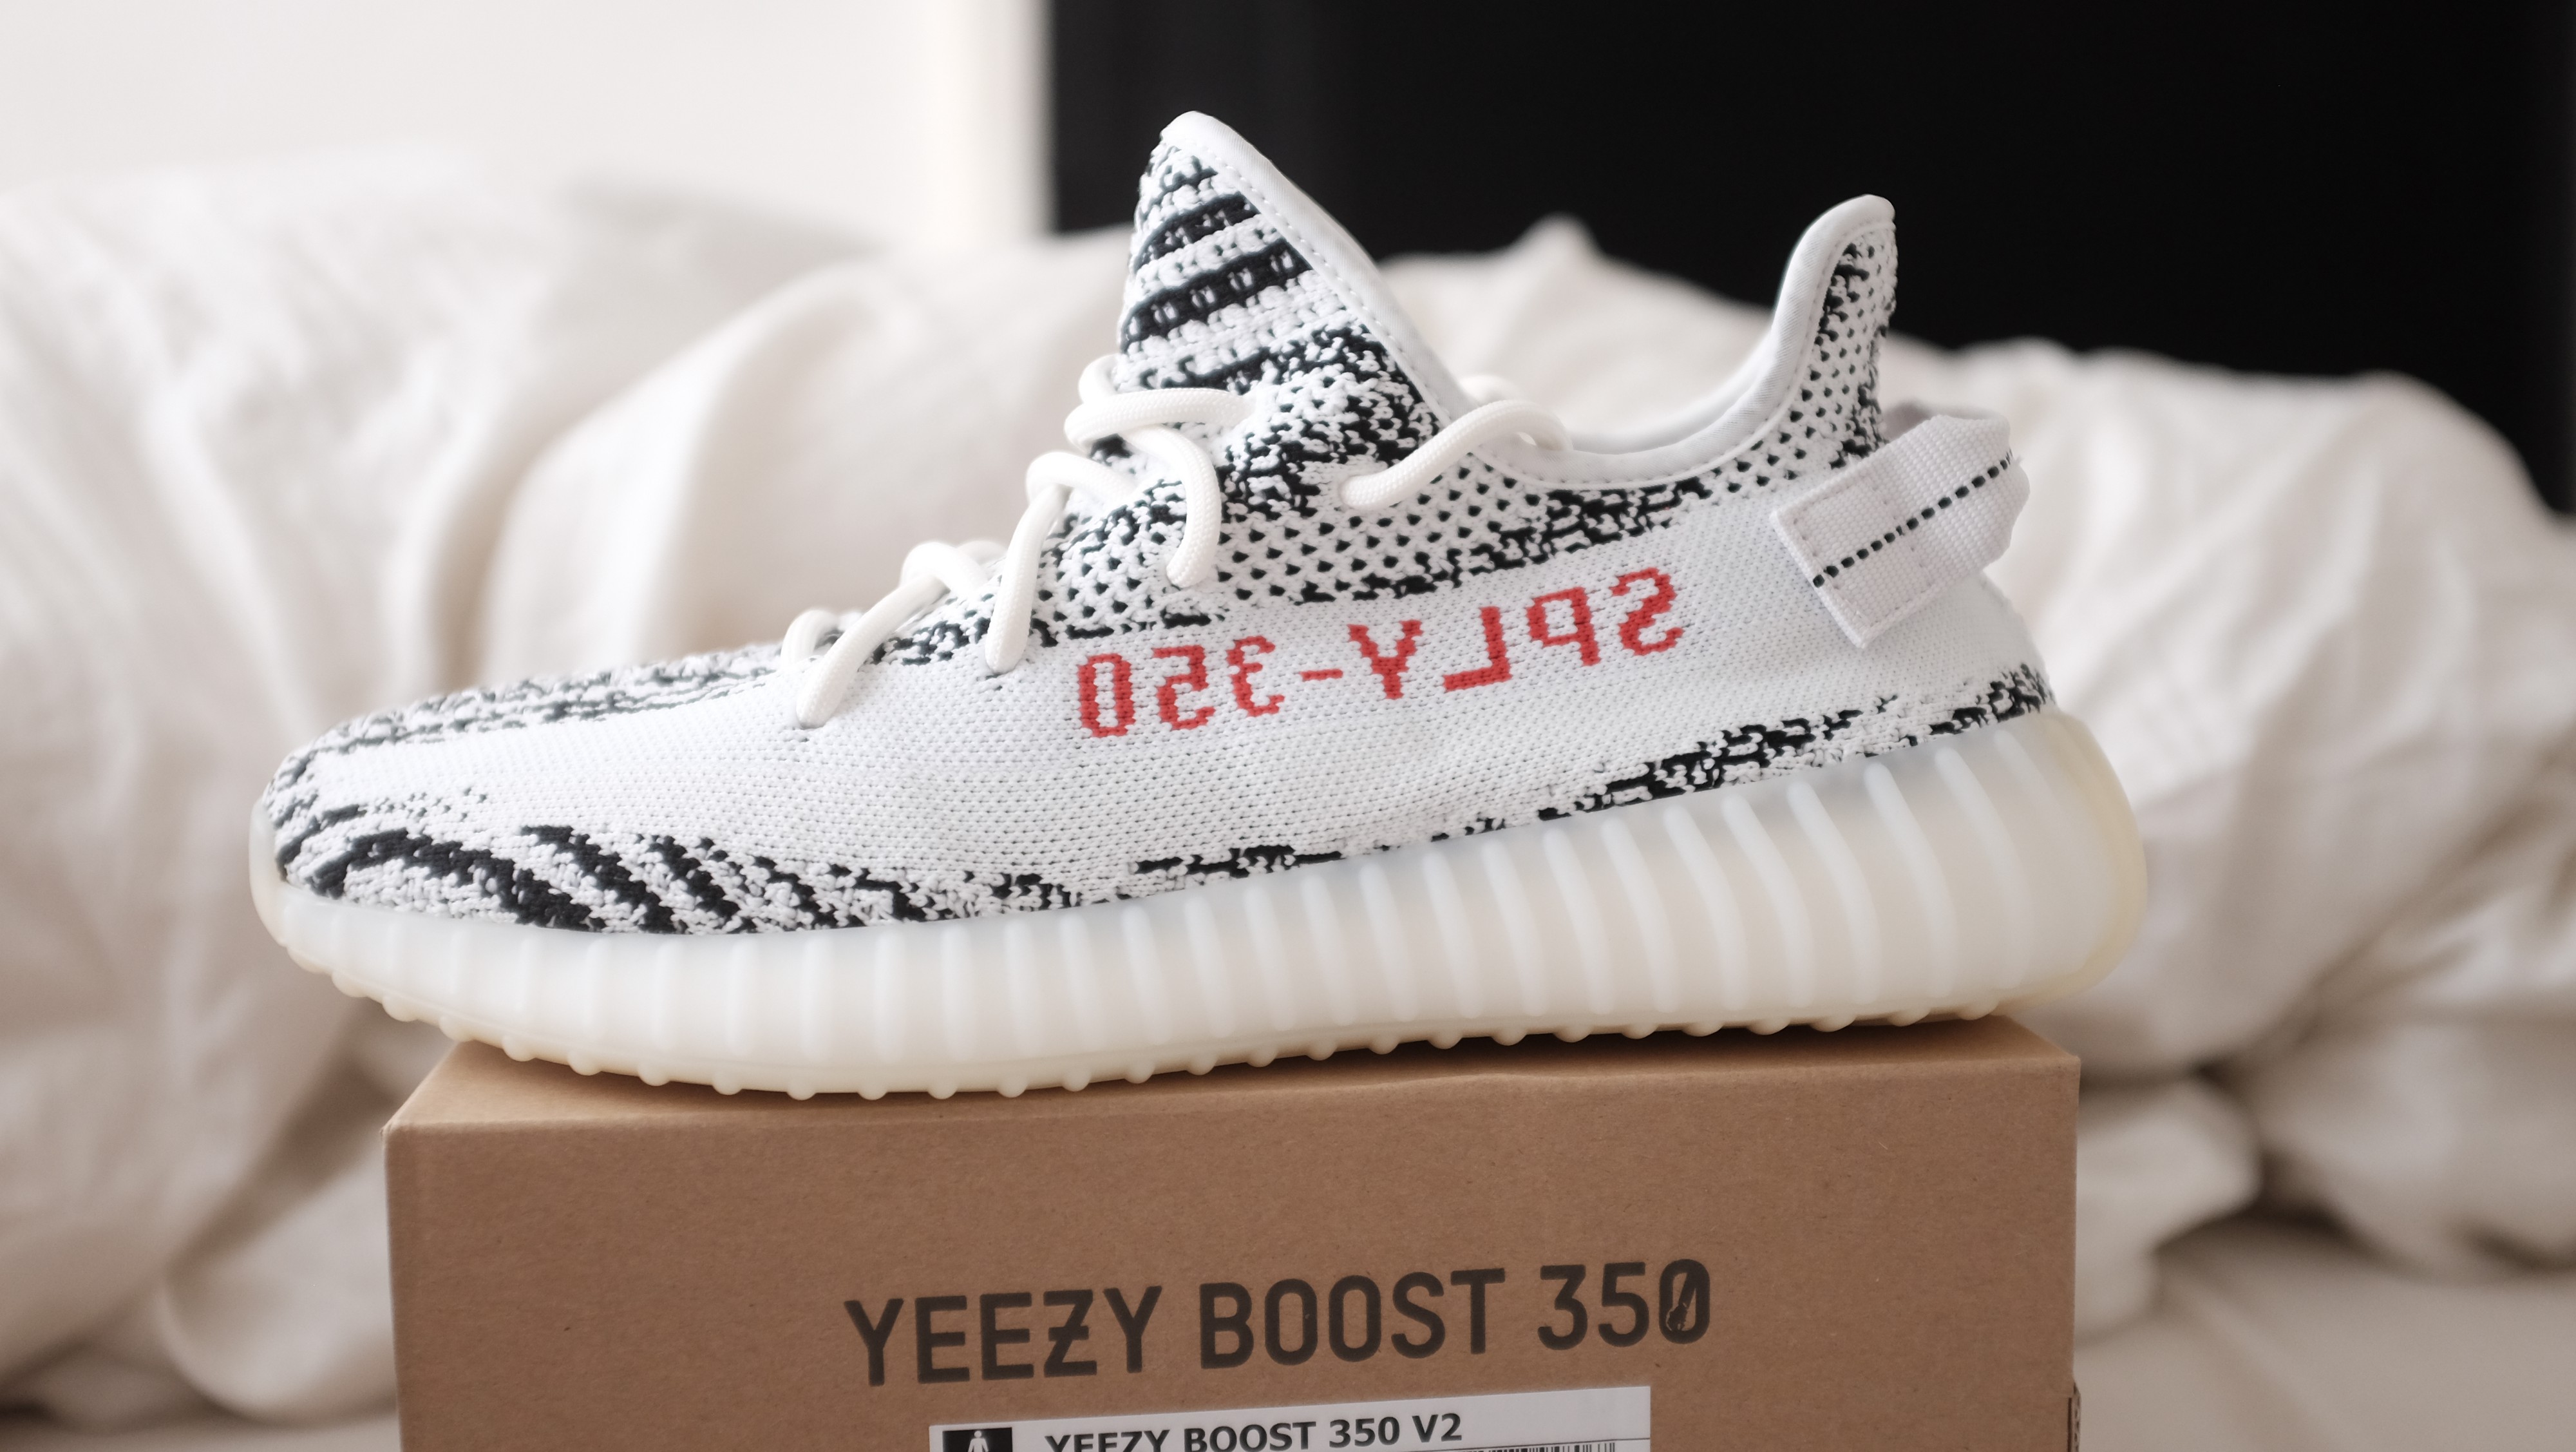
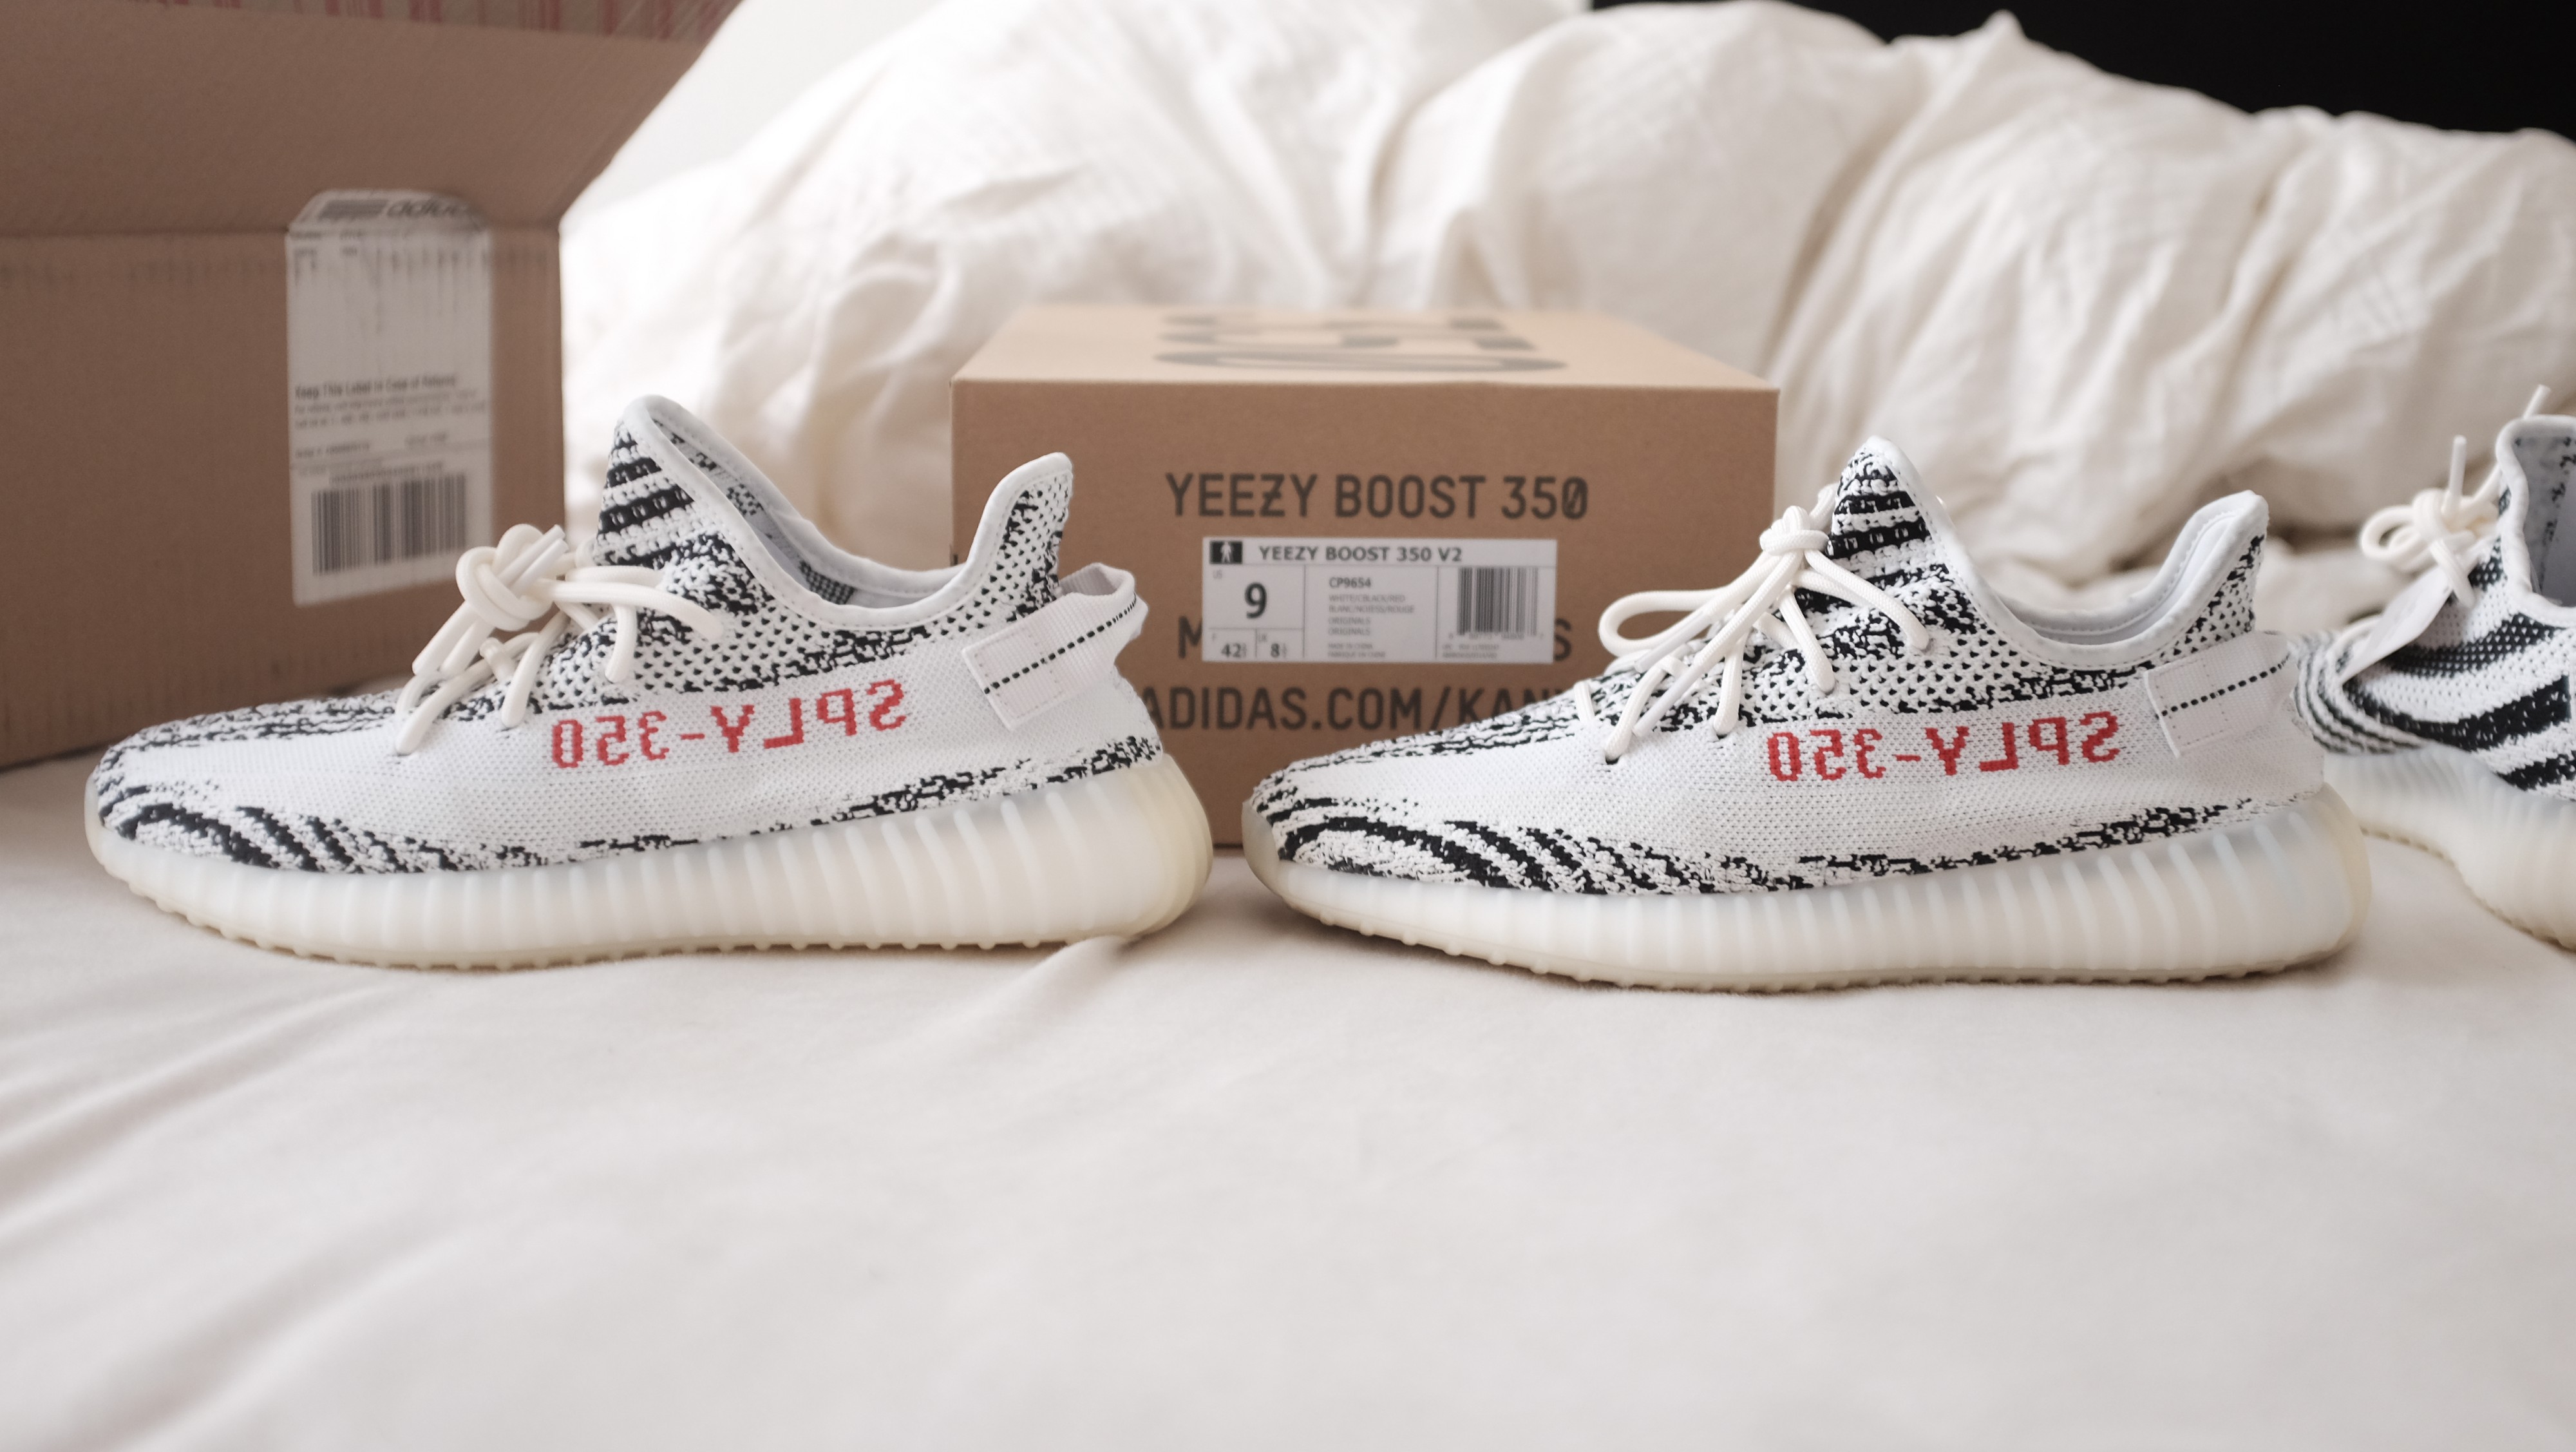
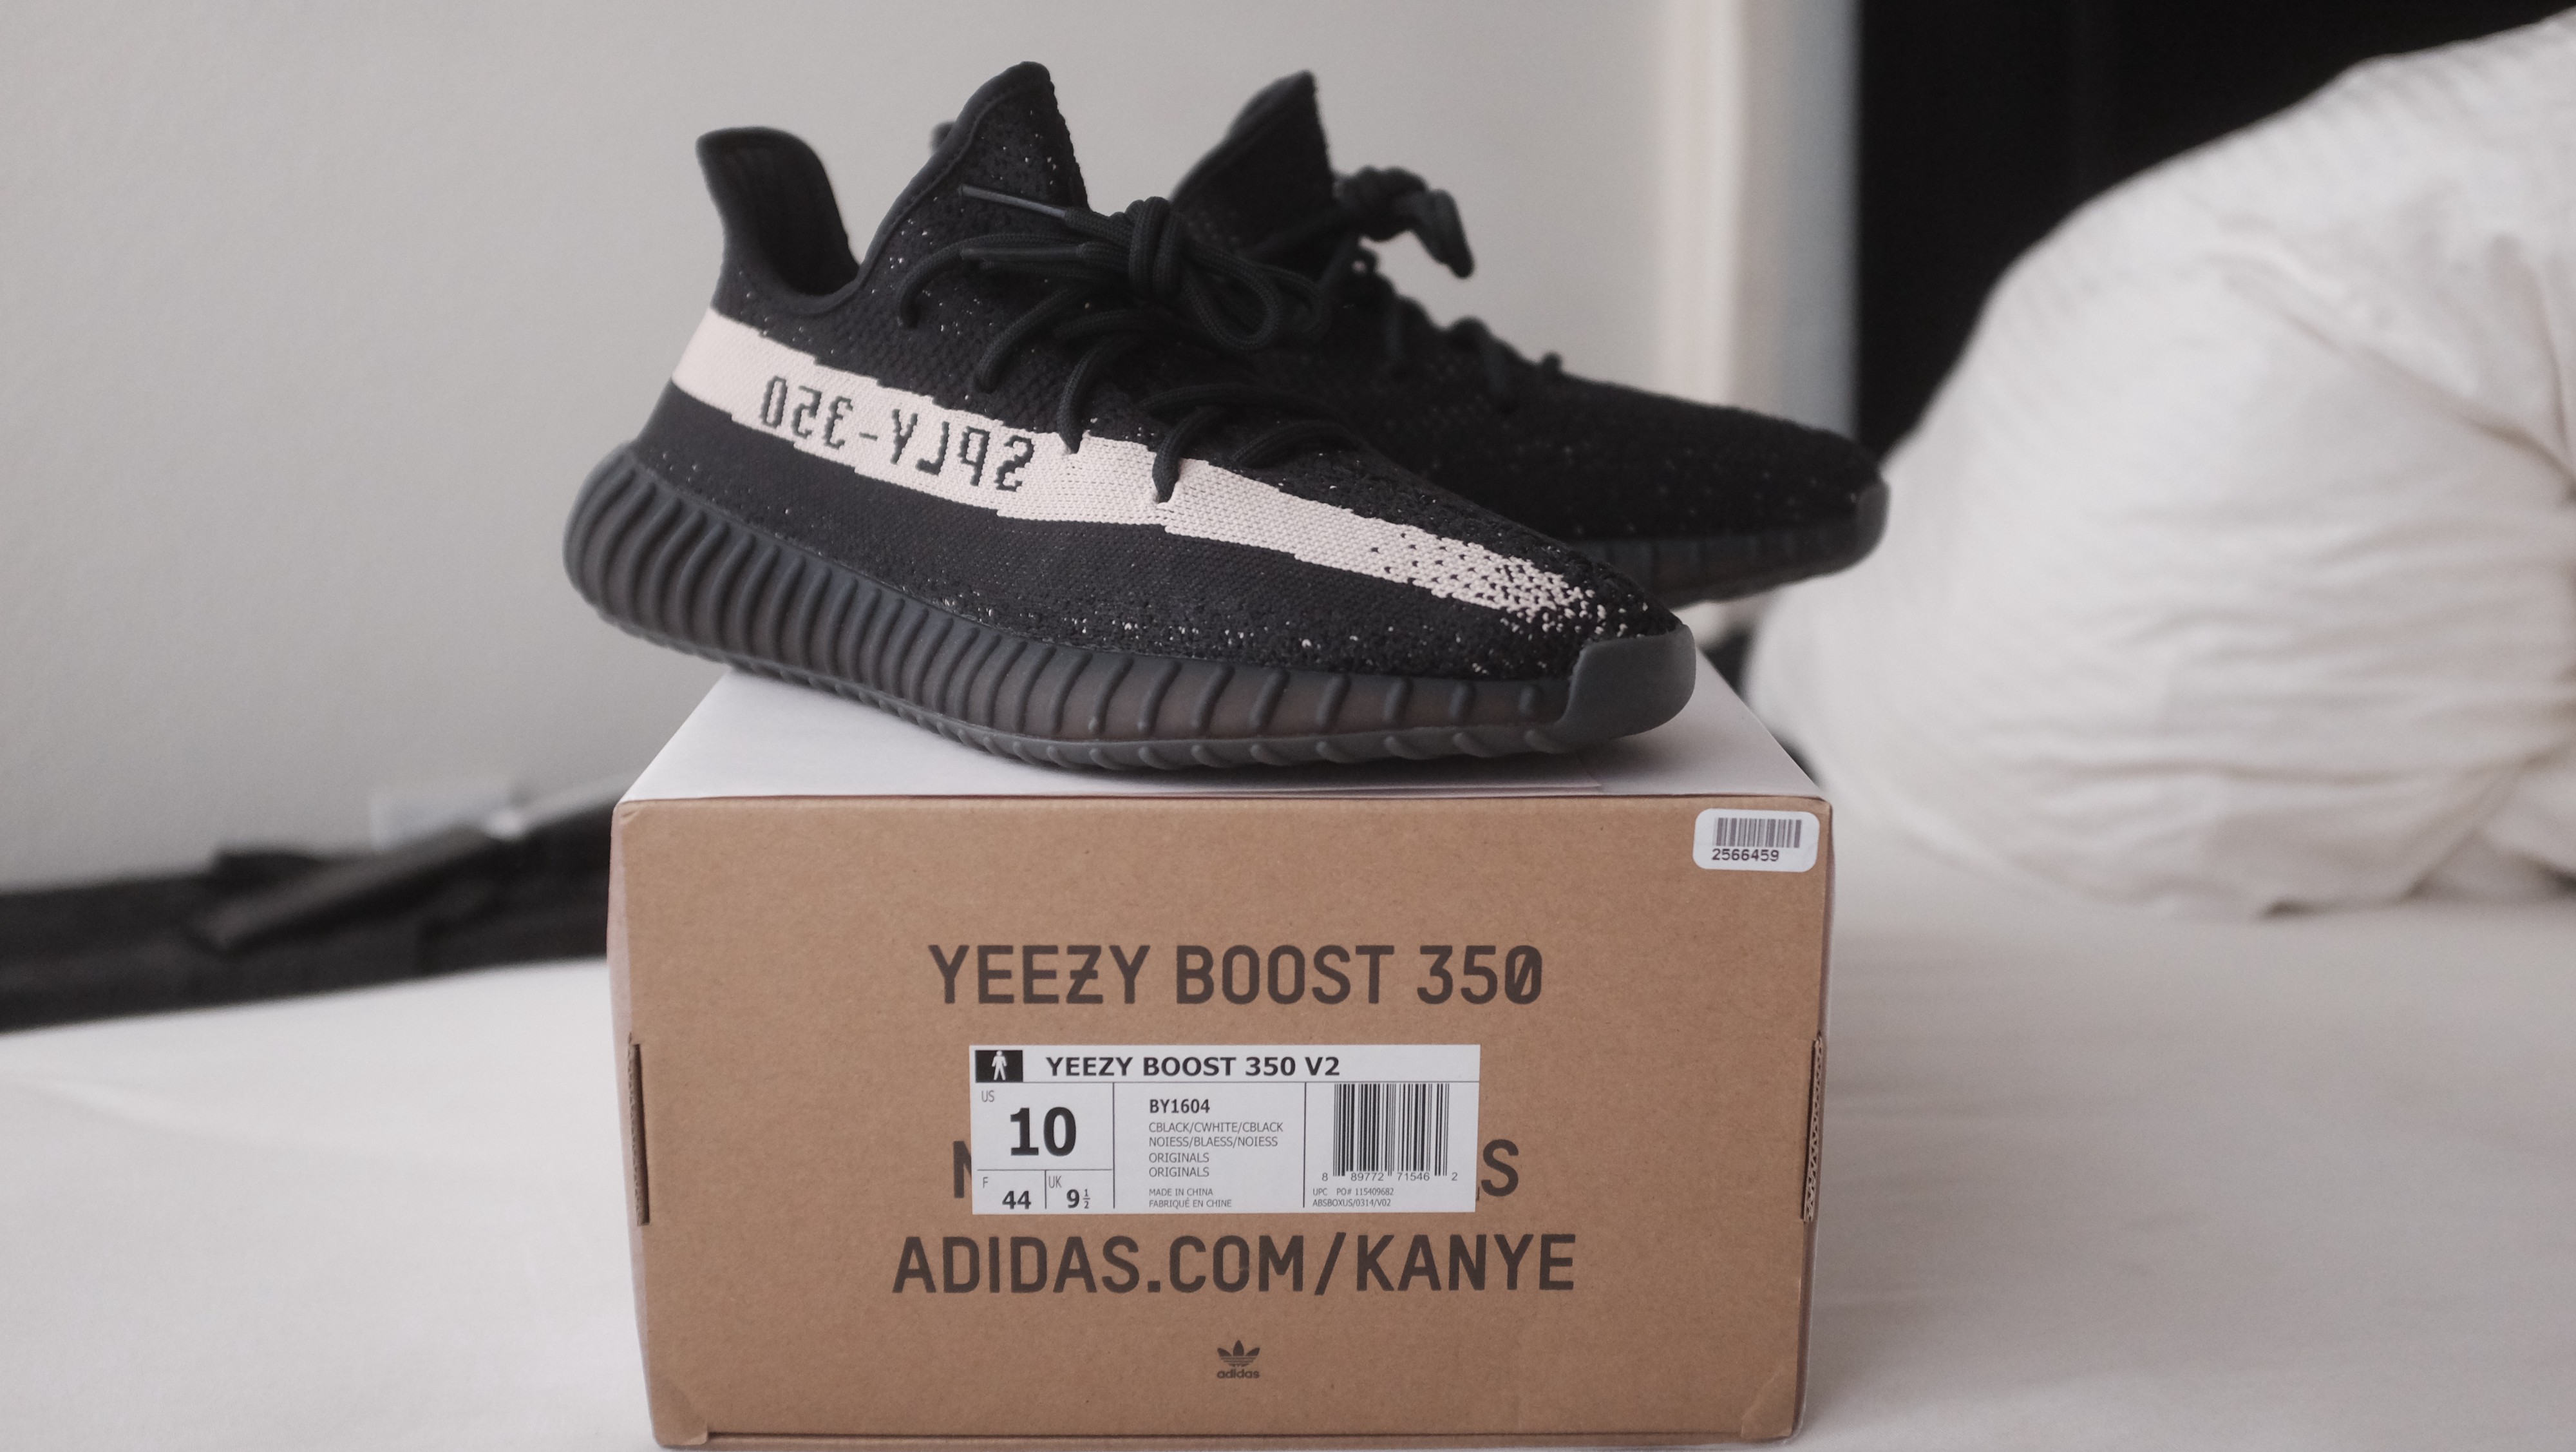
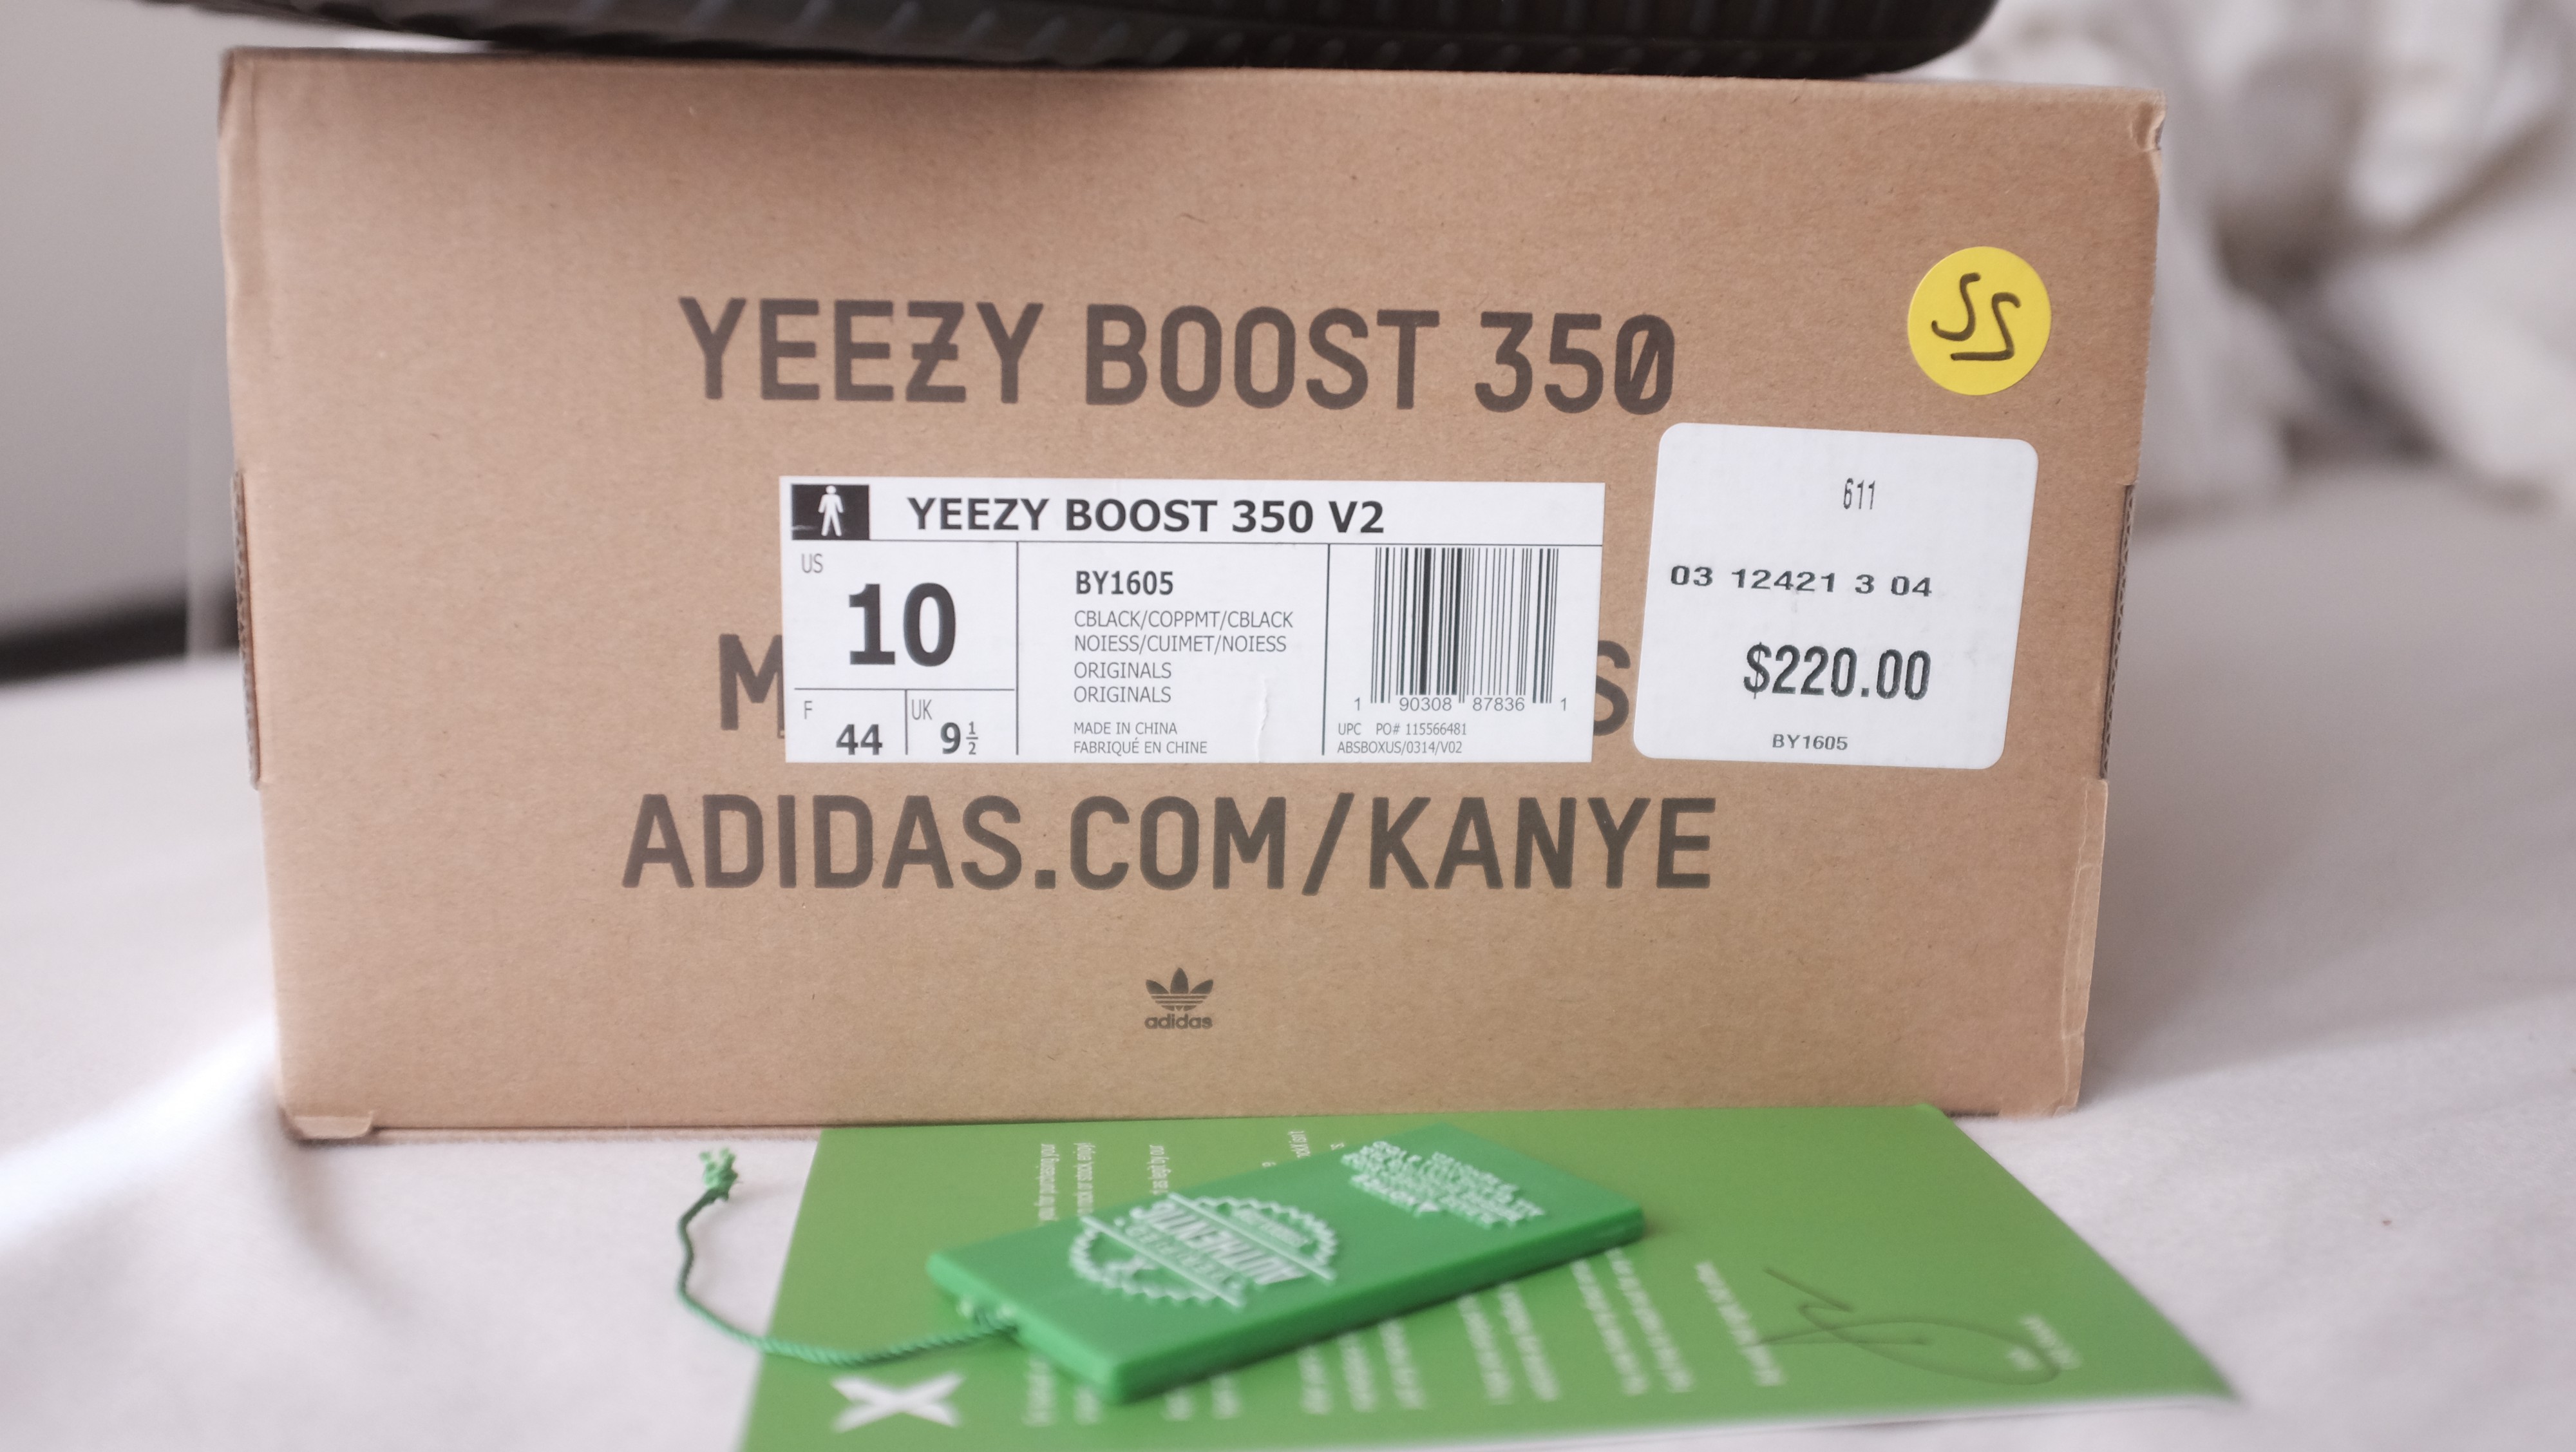
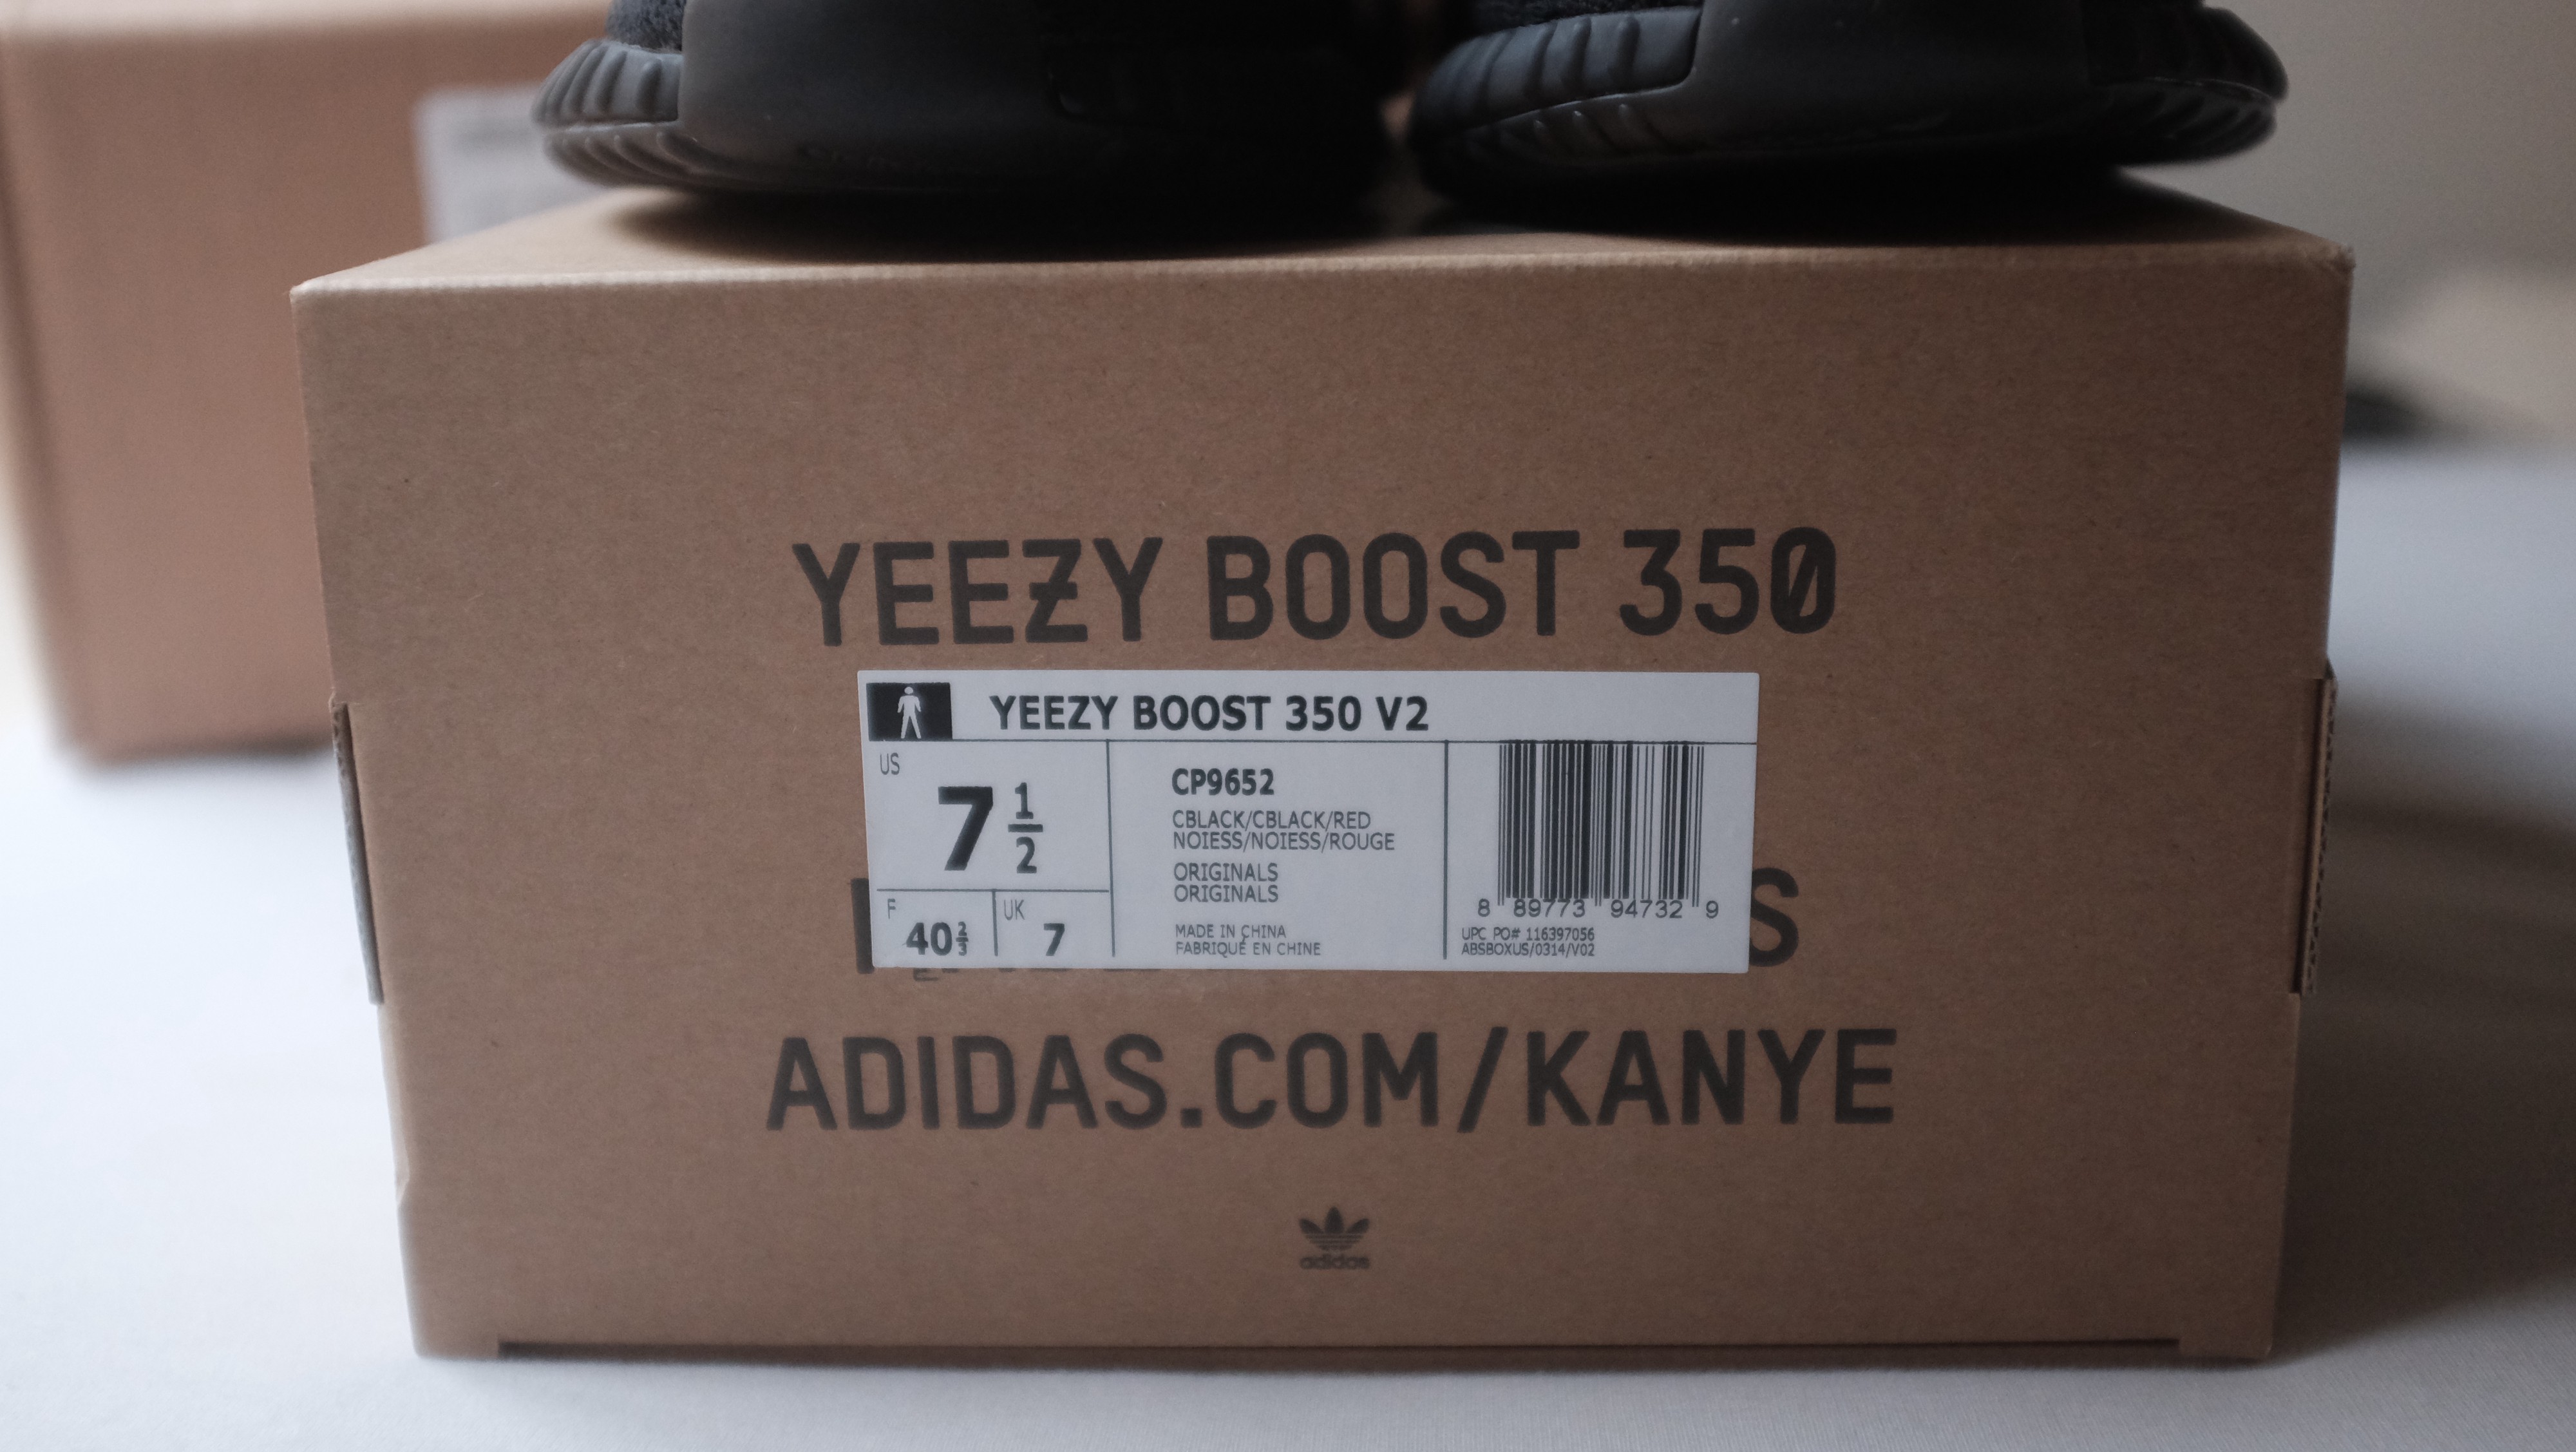
#Tag
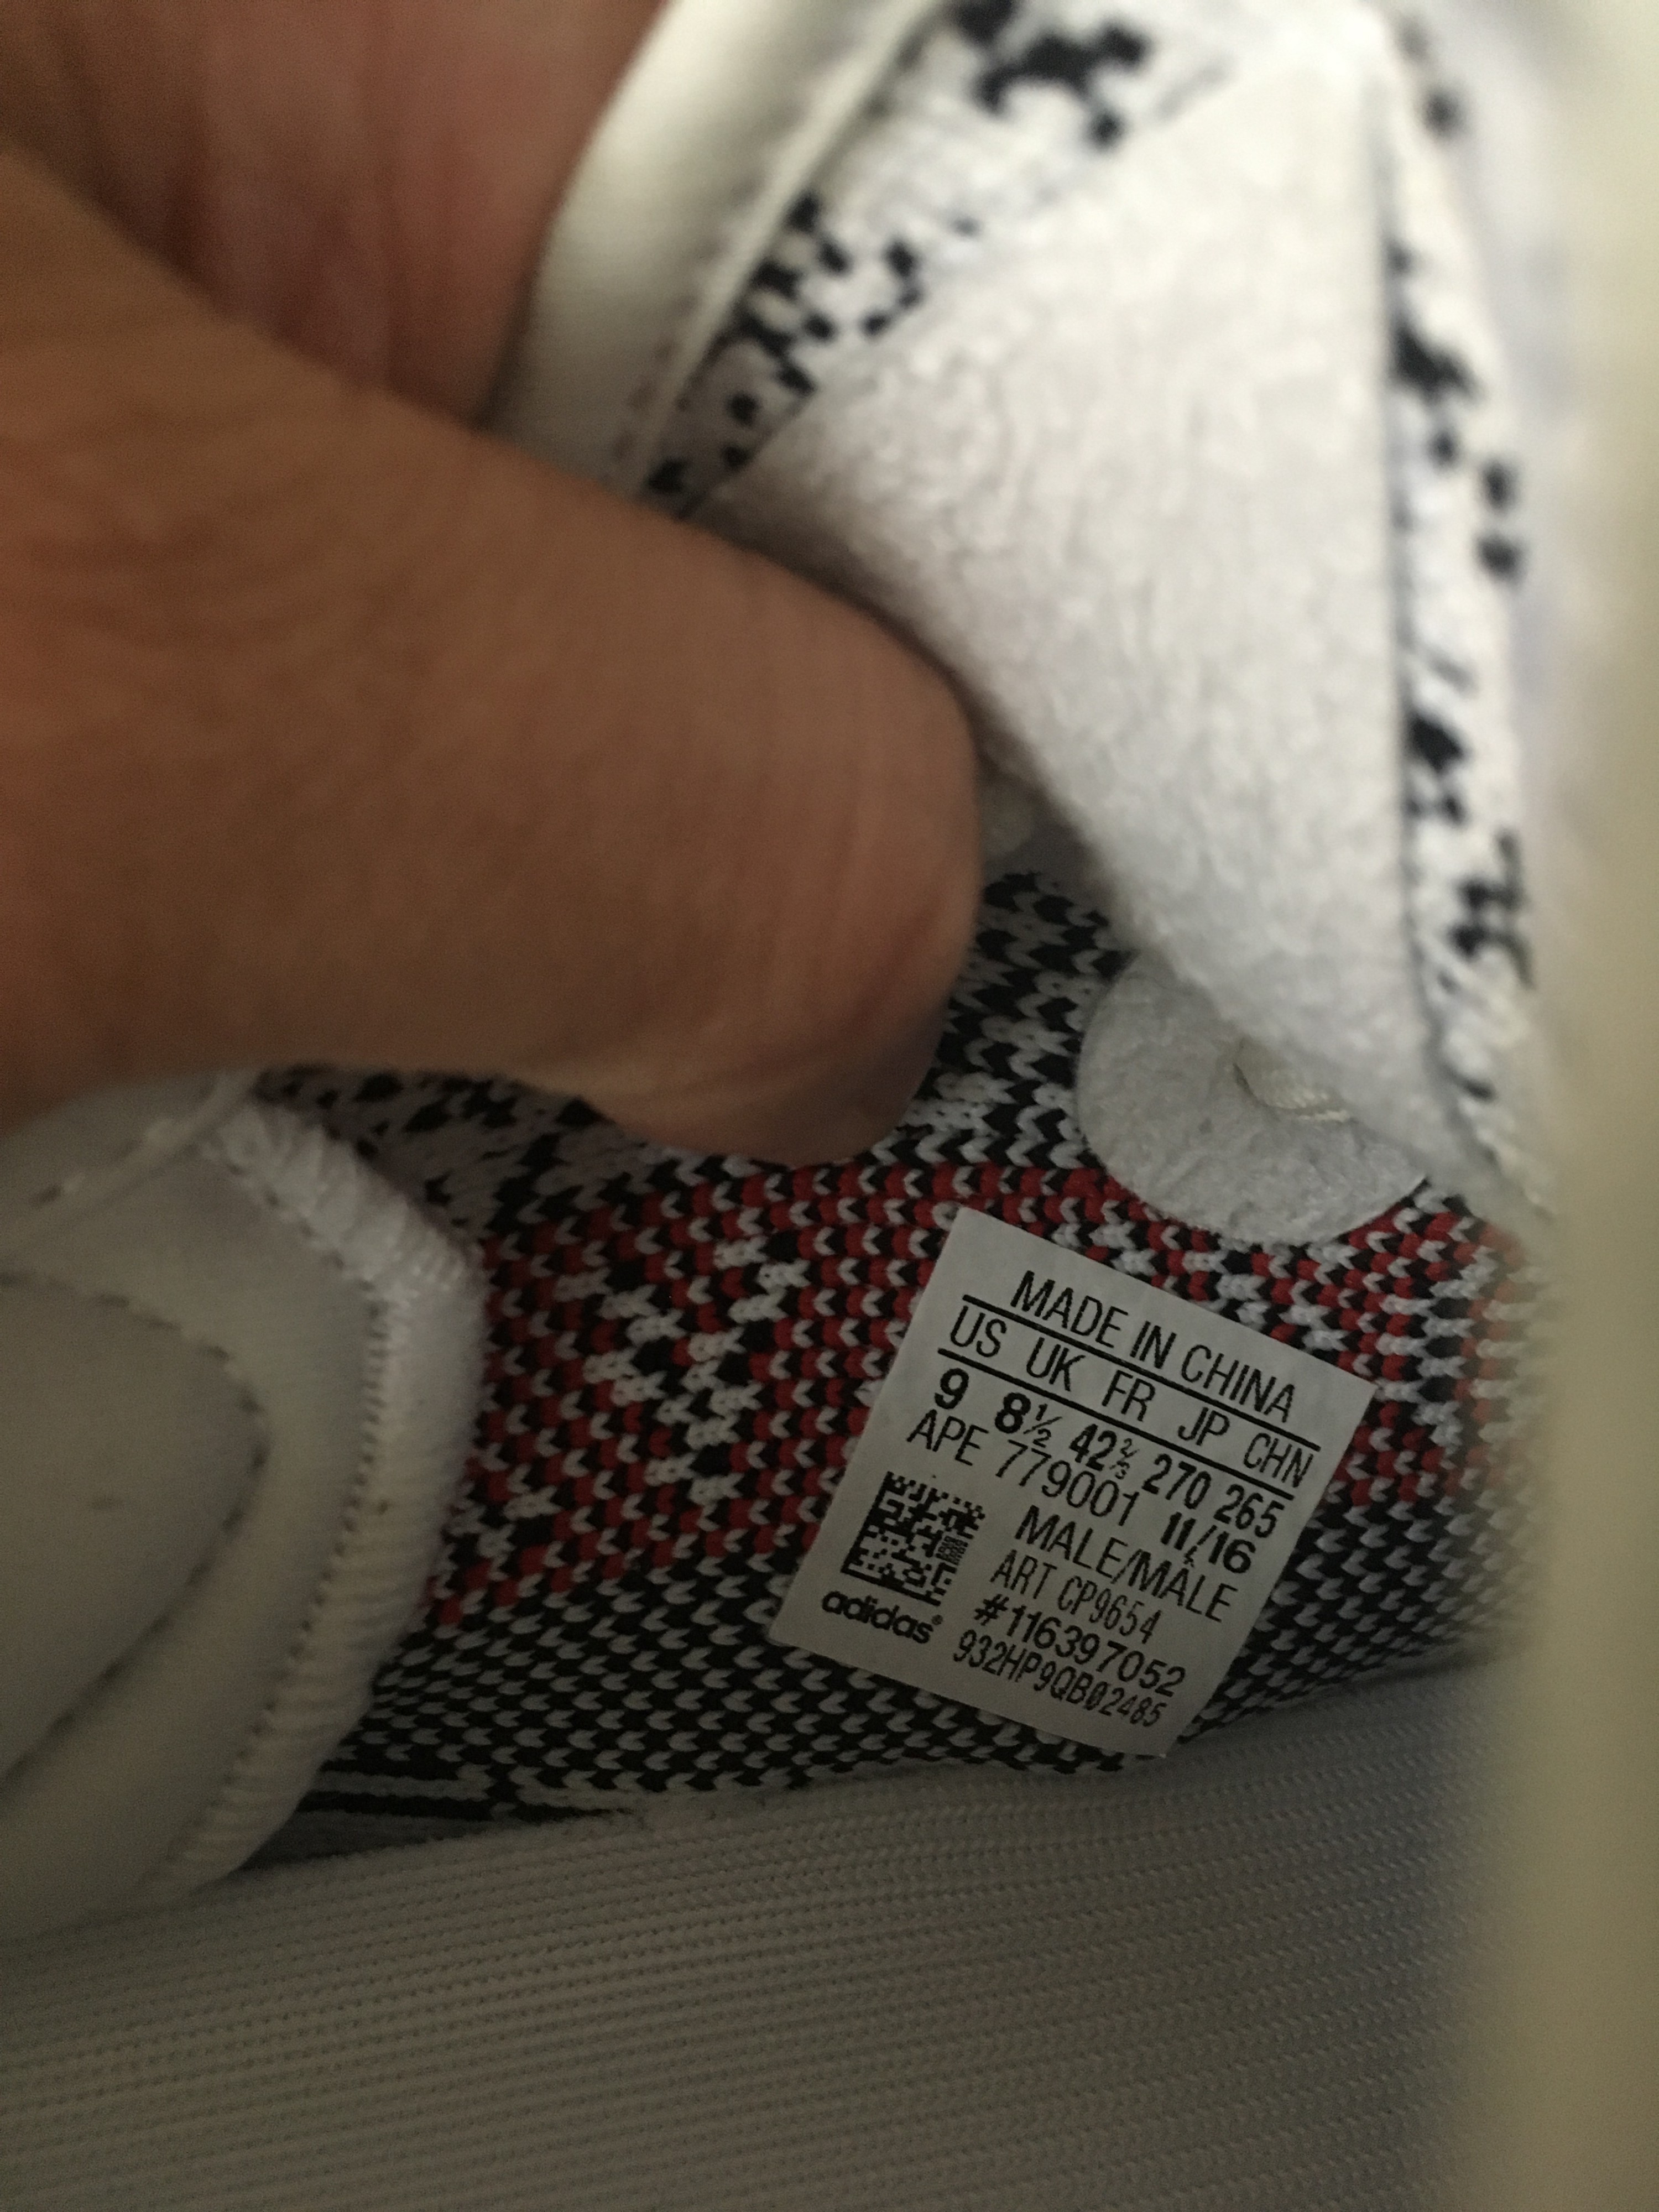
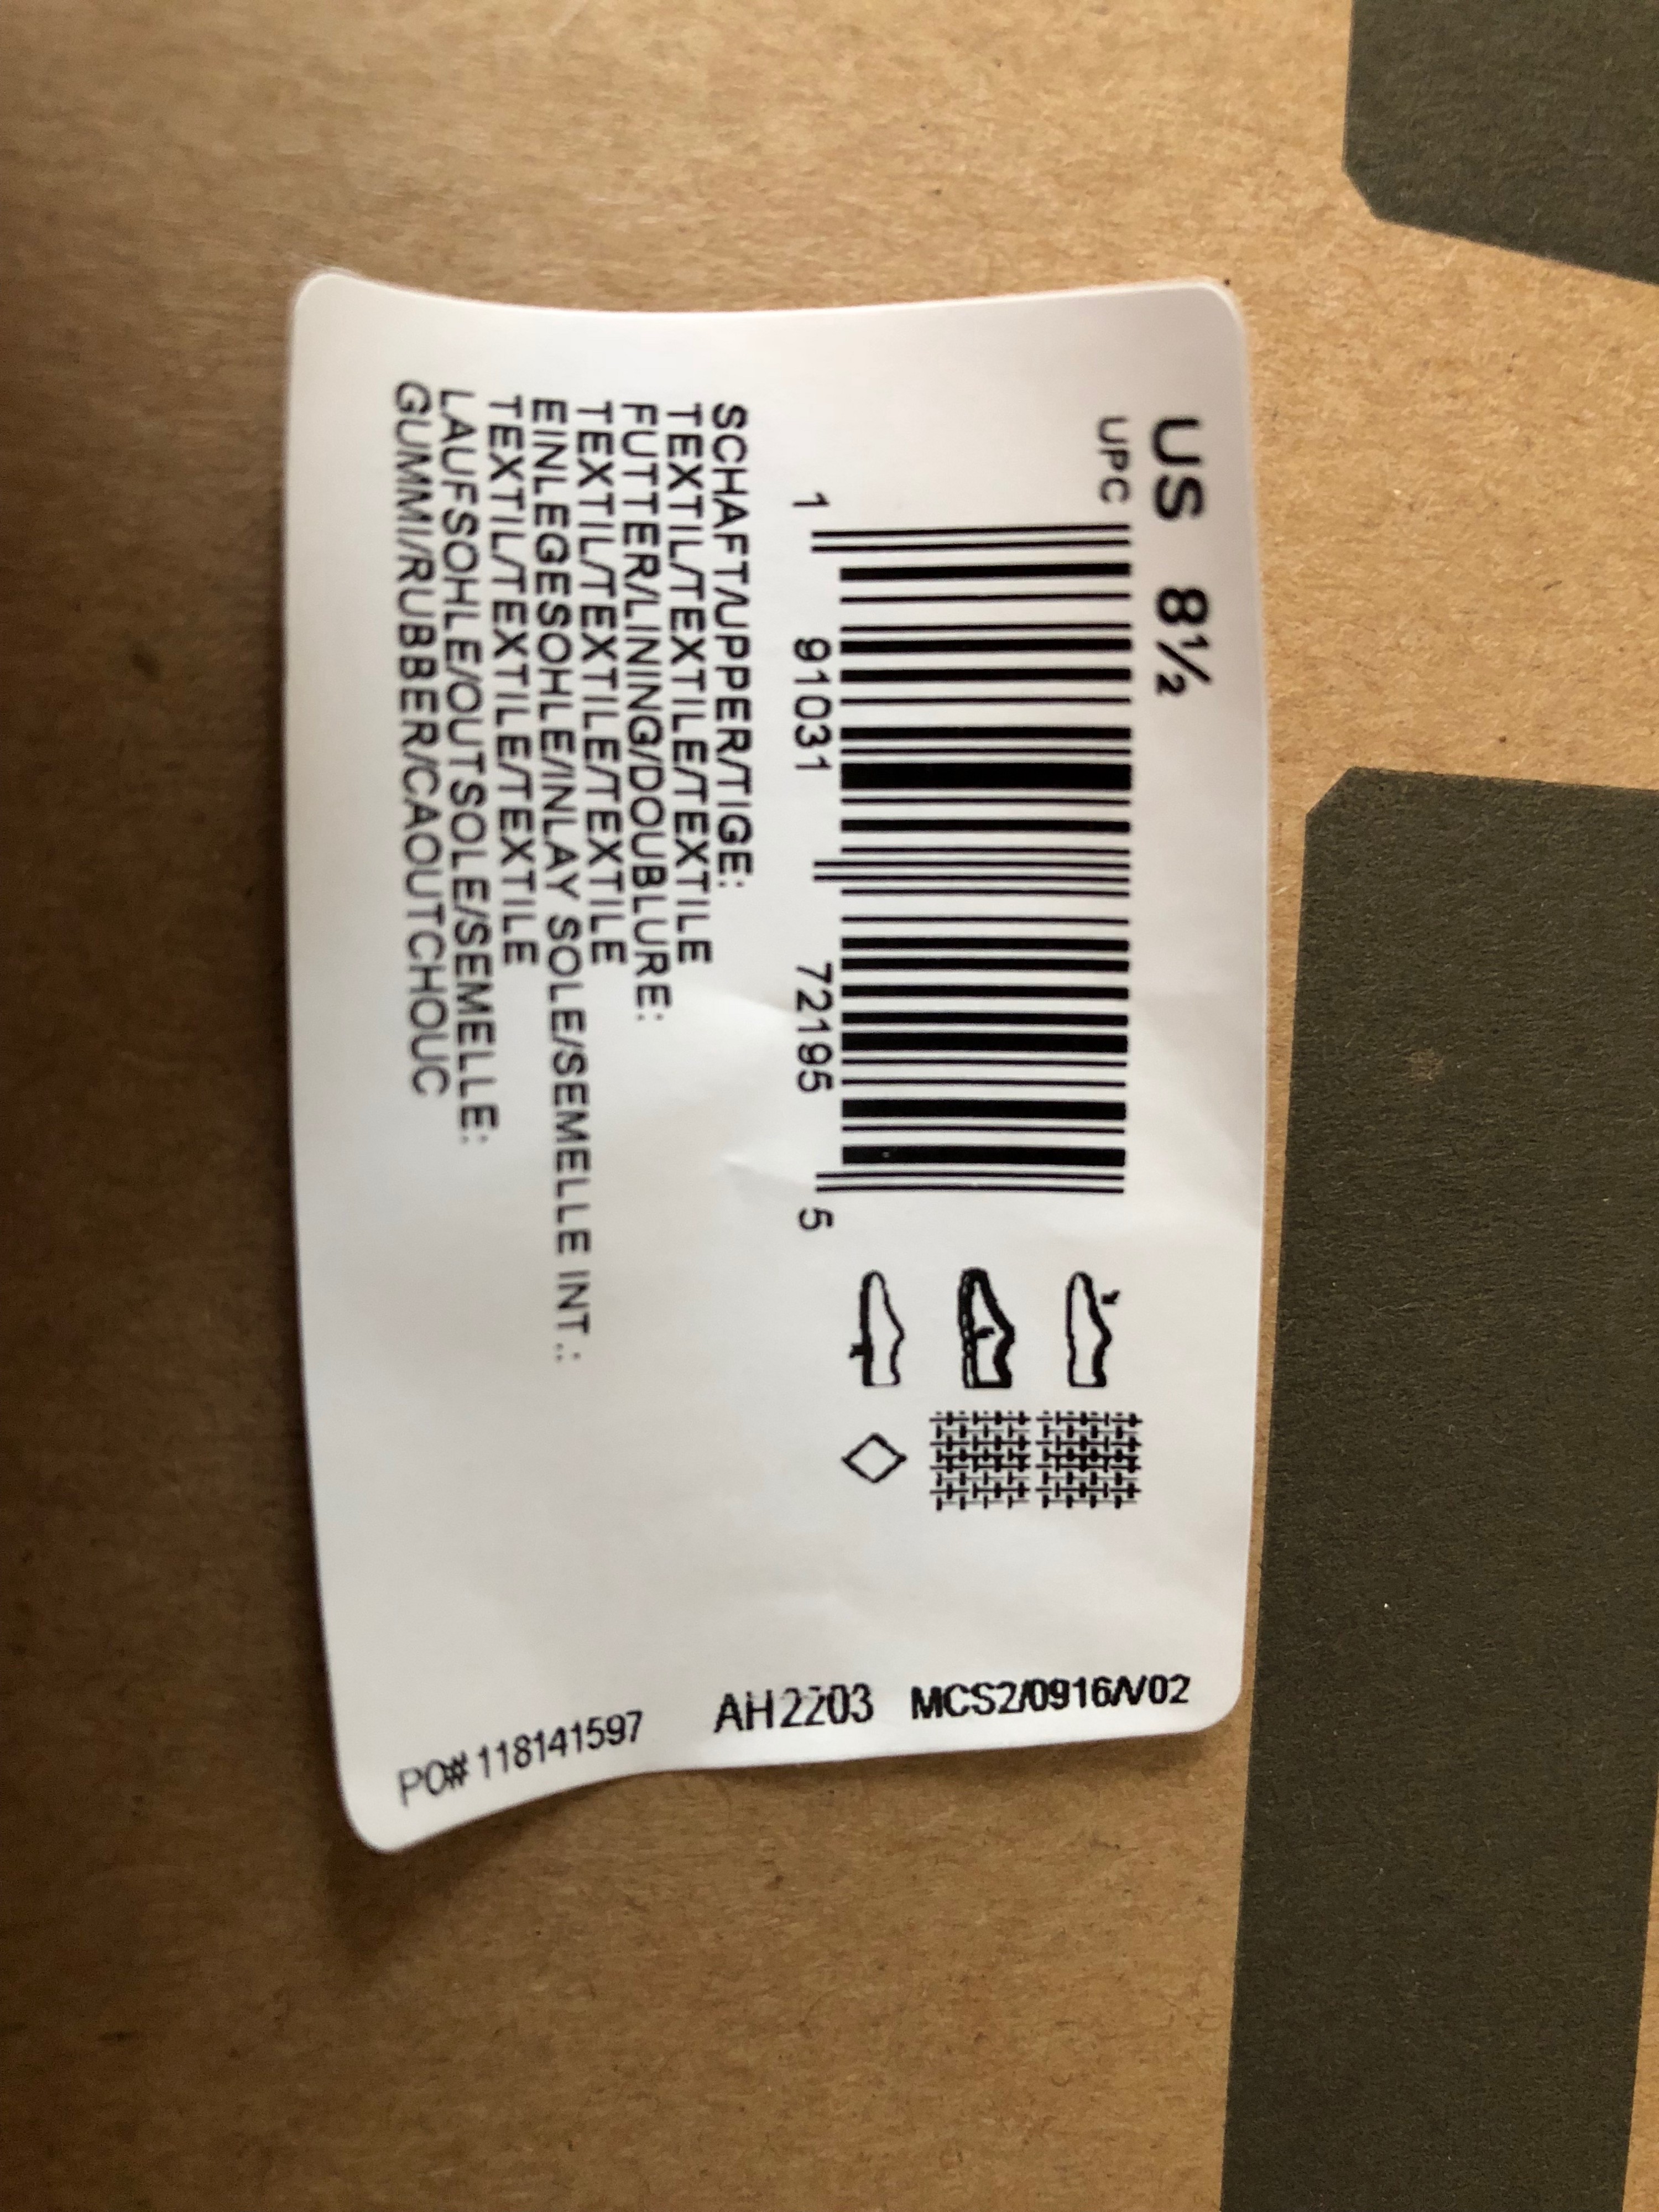
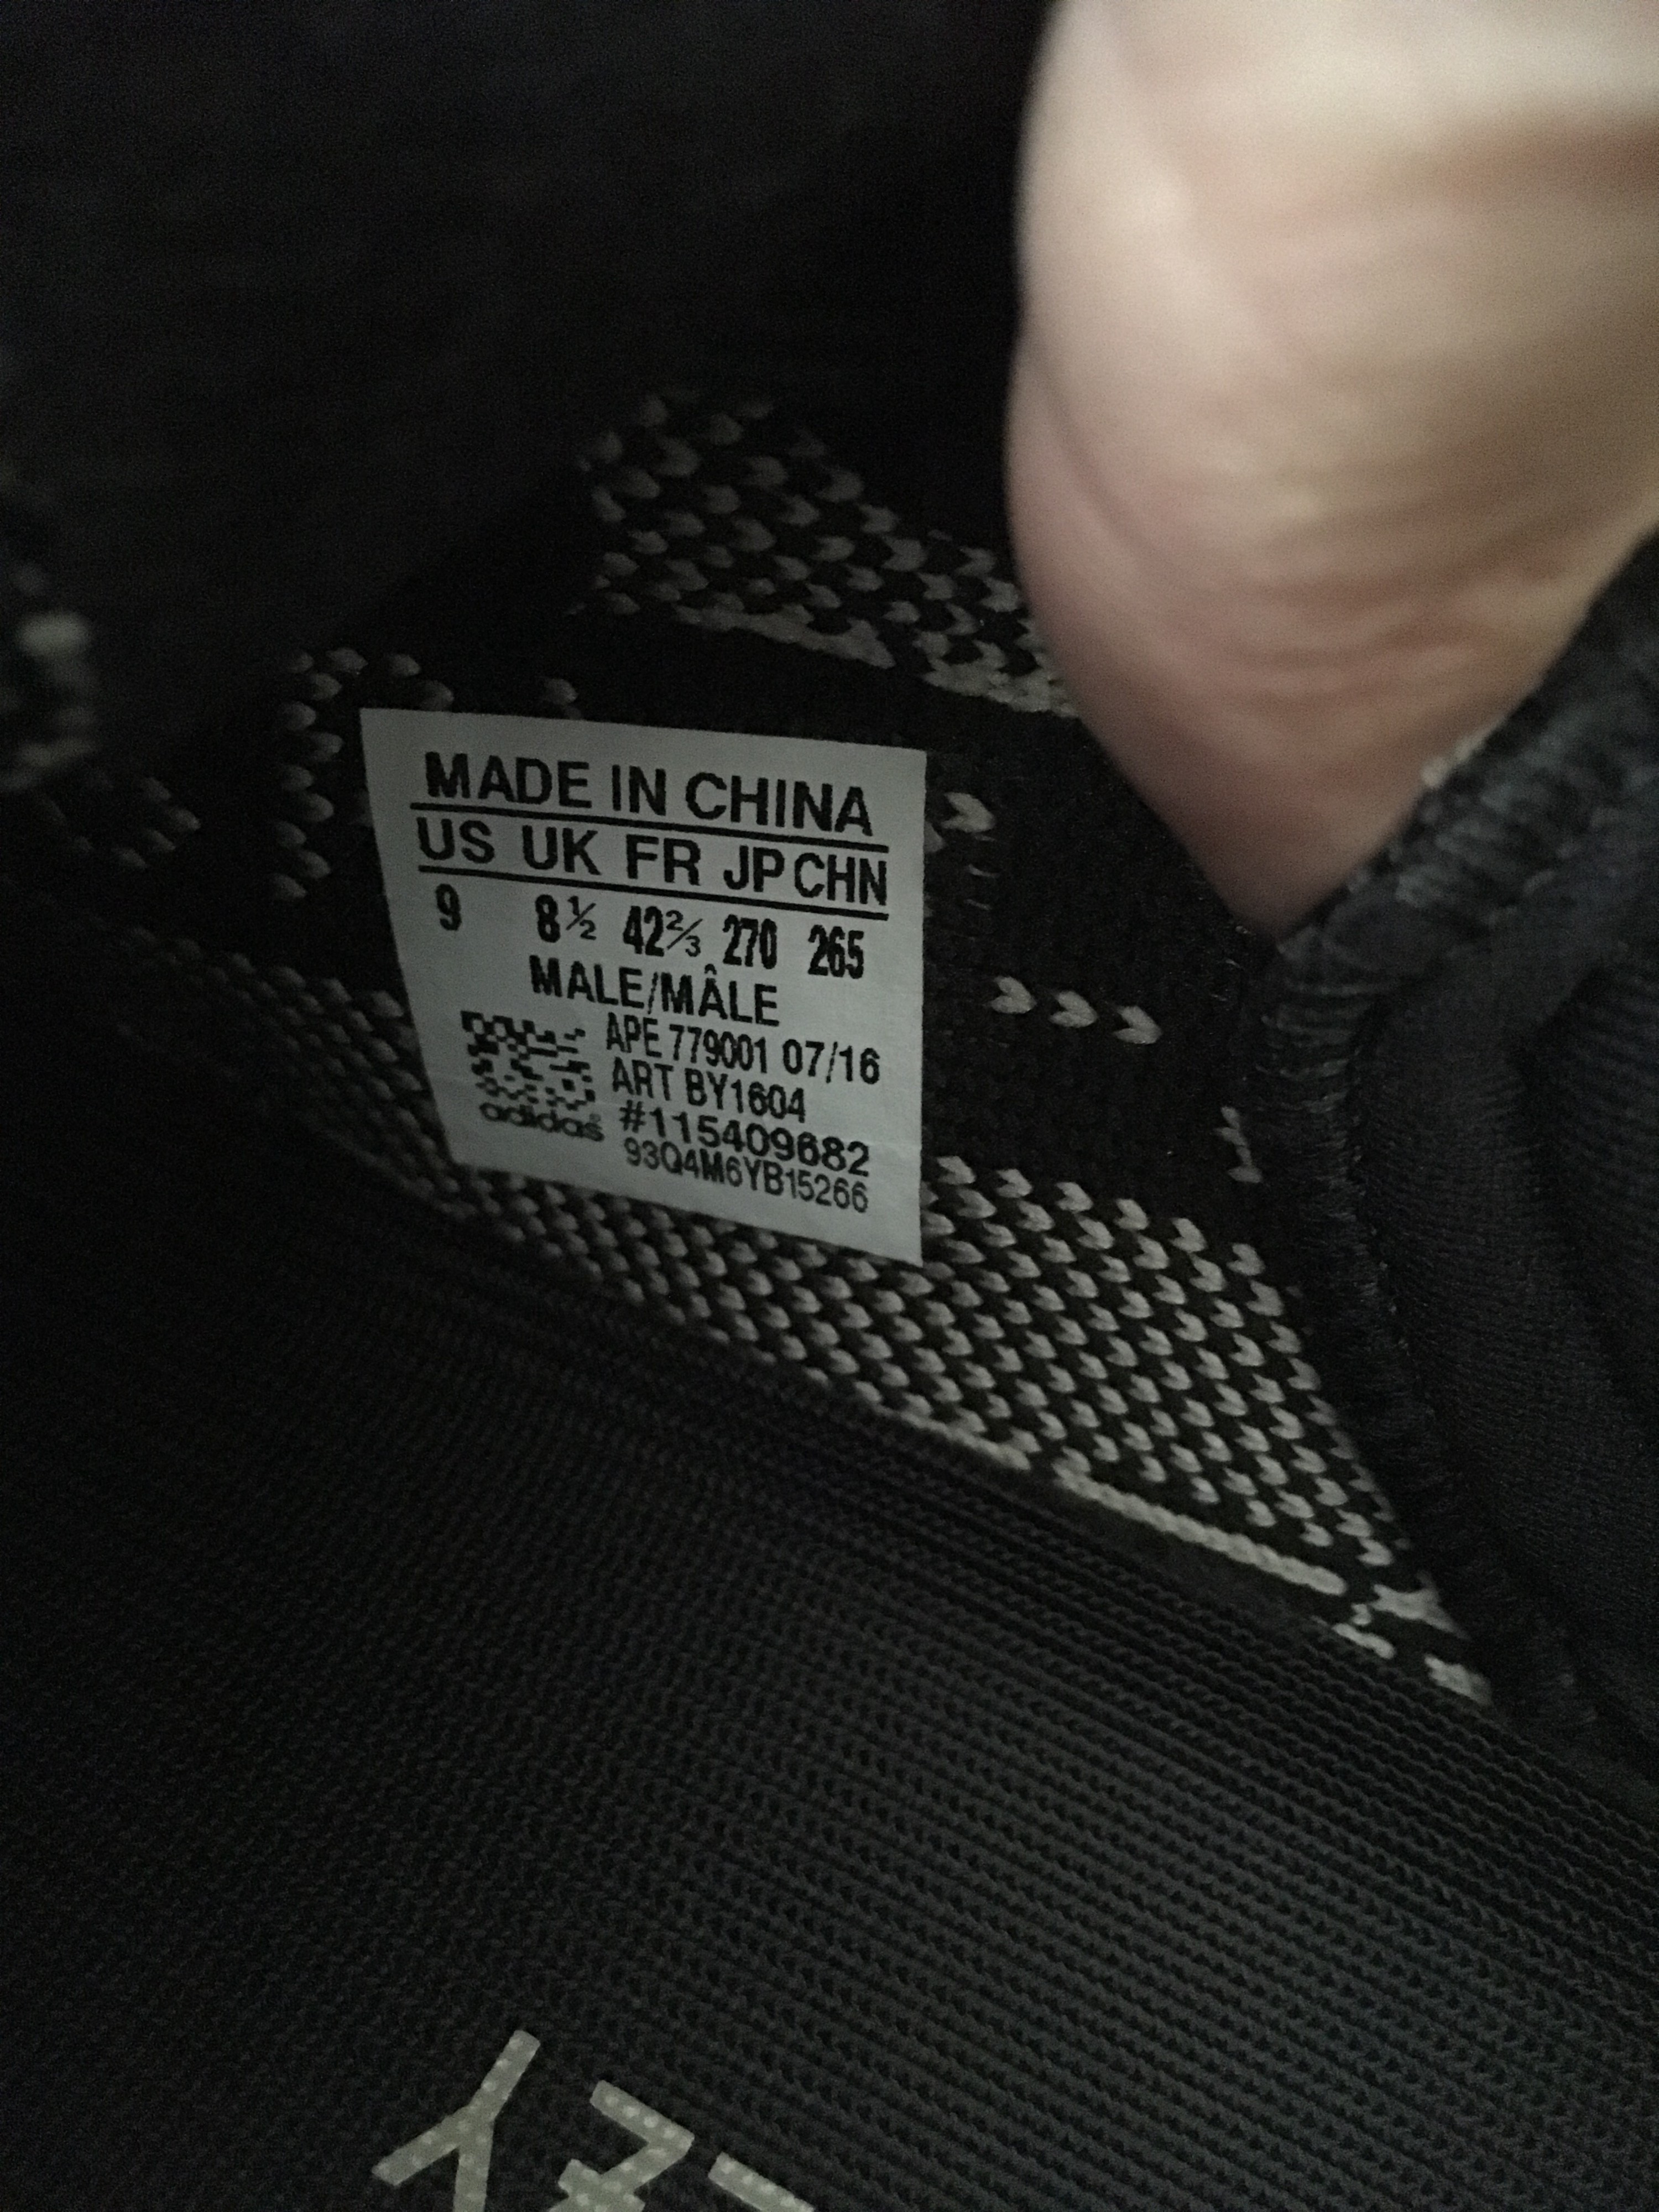 Oreo V2 sz 9 // Always make sure the UPC & Style codes match up with the box
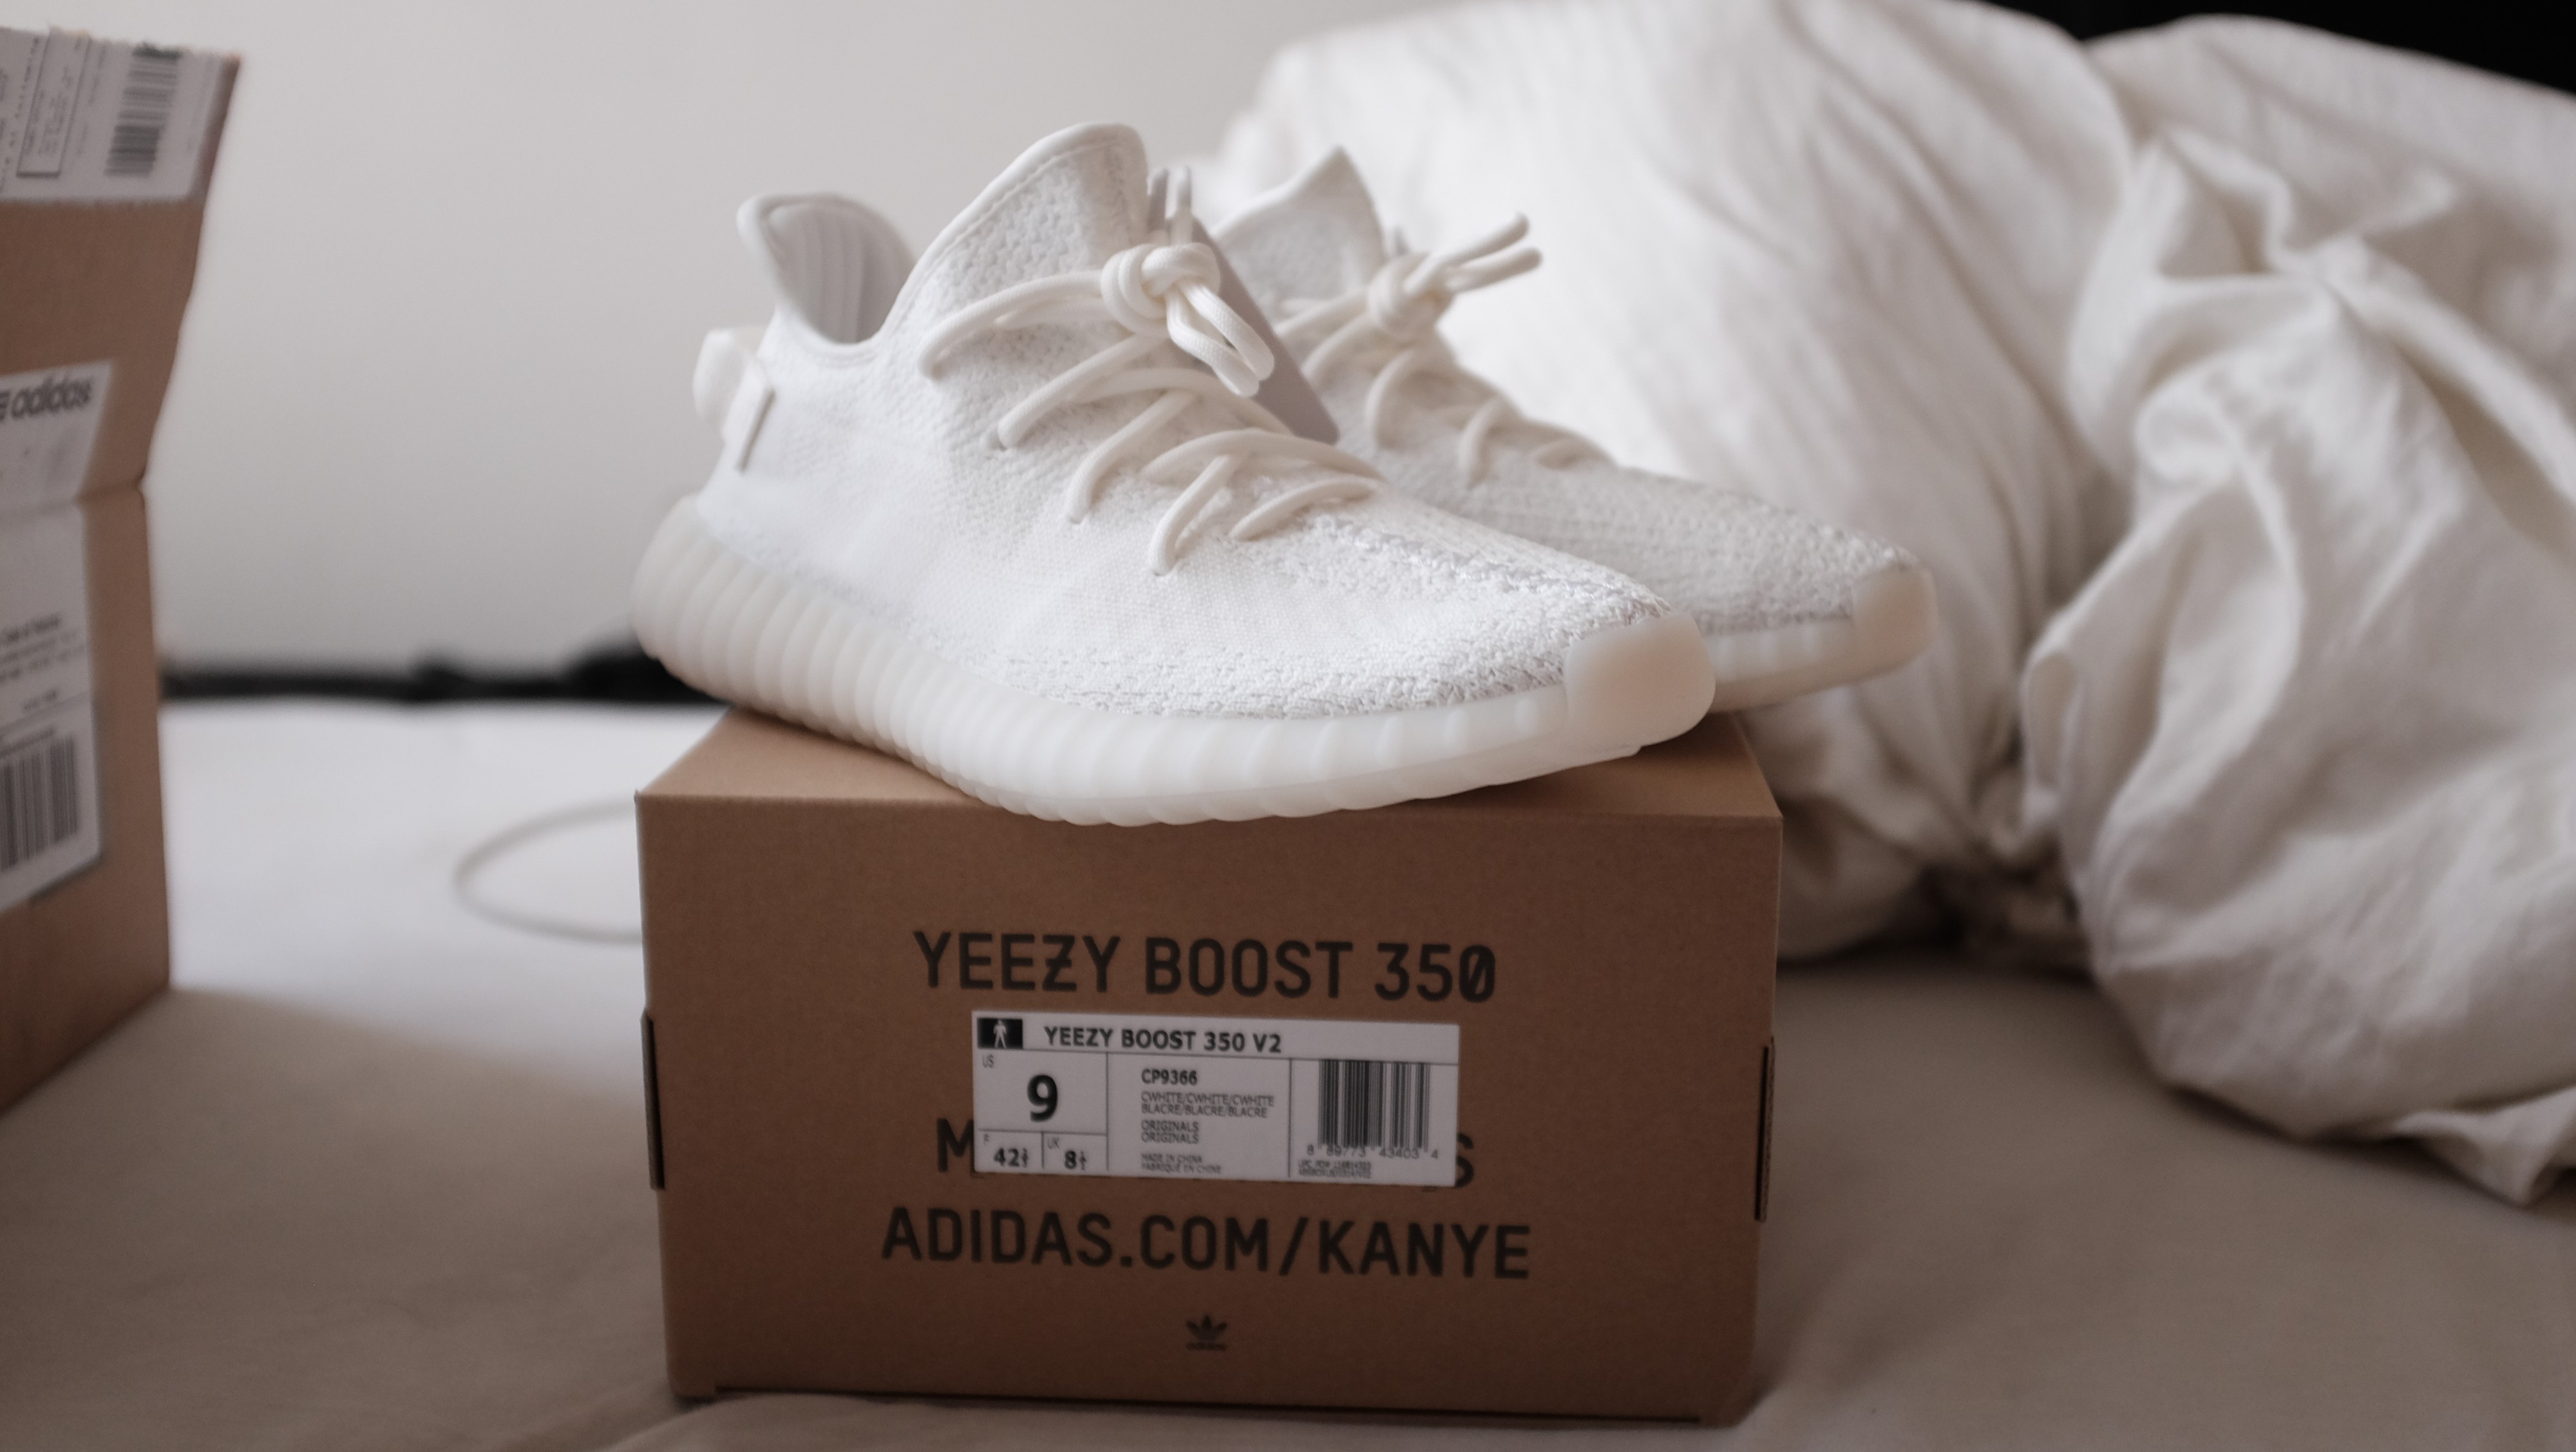
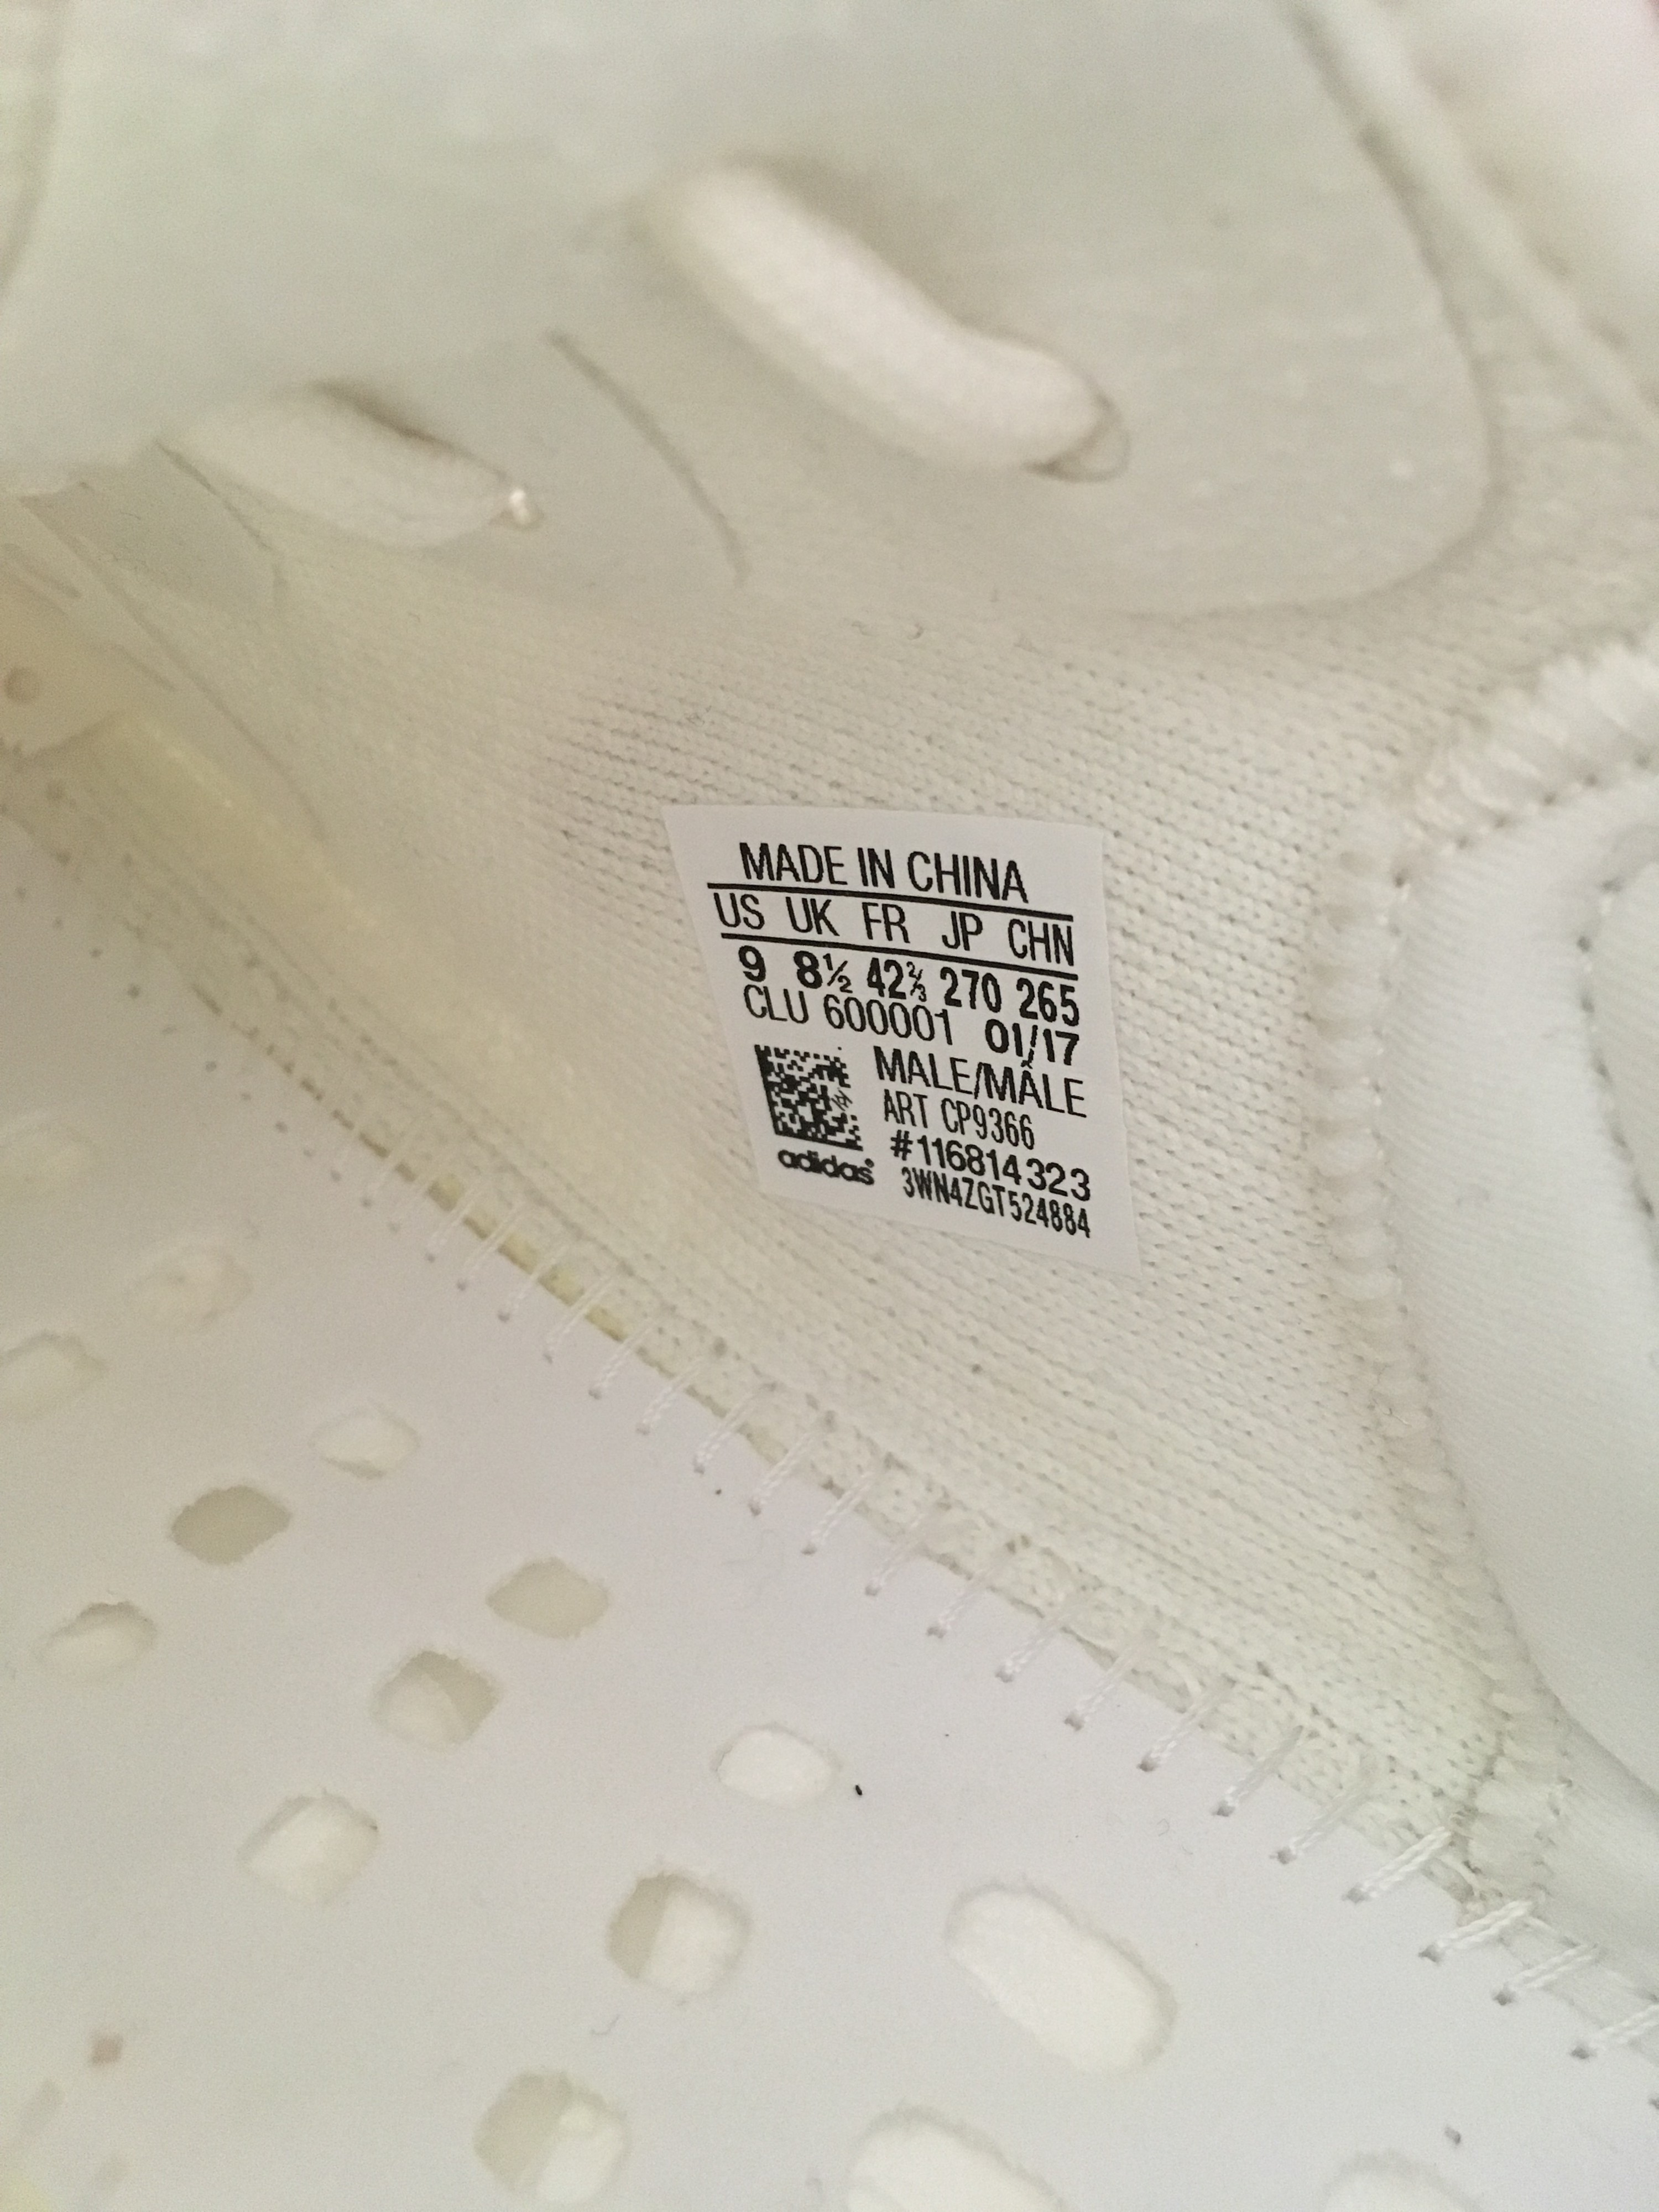 Cream V2 sz 9 (Note Cream Box Label- ?YEEZY BOOST 350 V2? Lettering ends before the barcode, whereas all other boxes for V2 are after the barcode.)
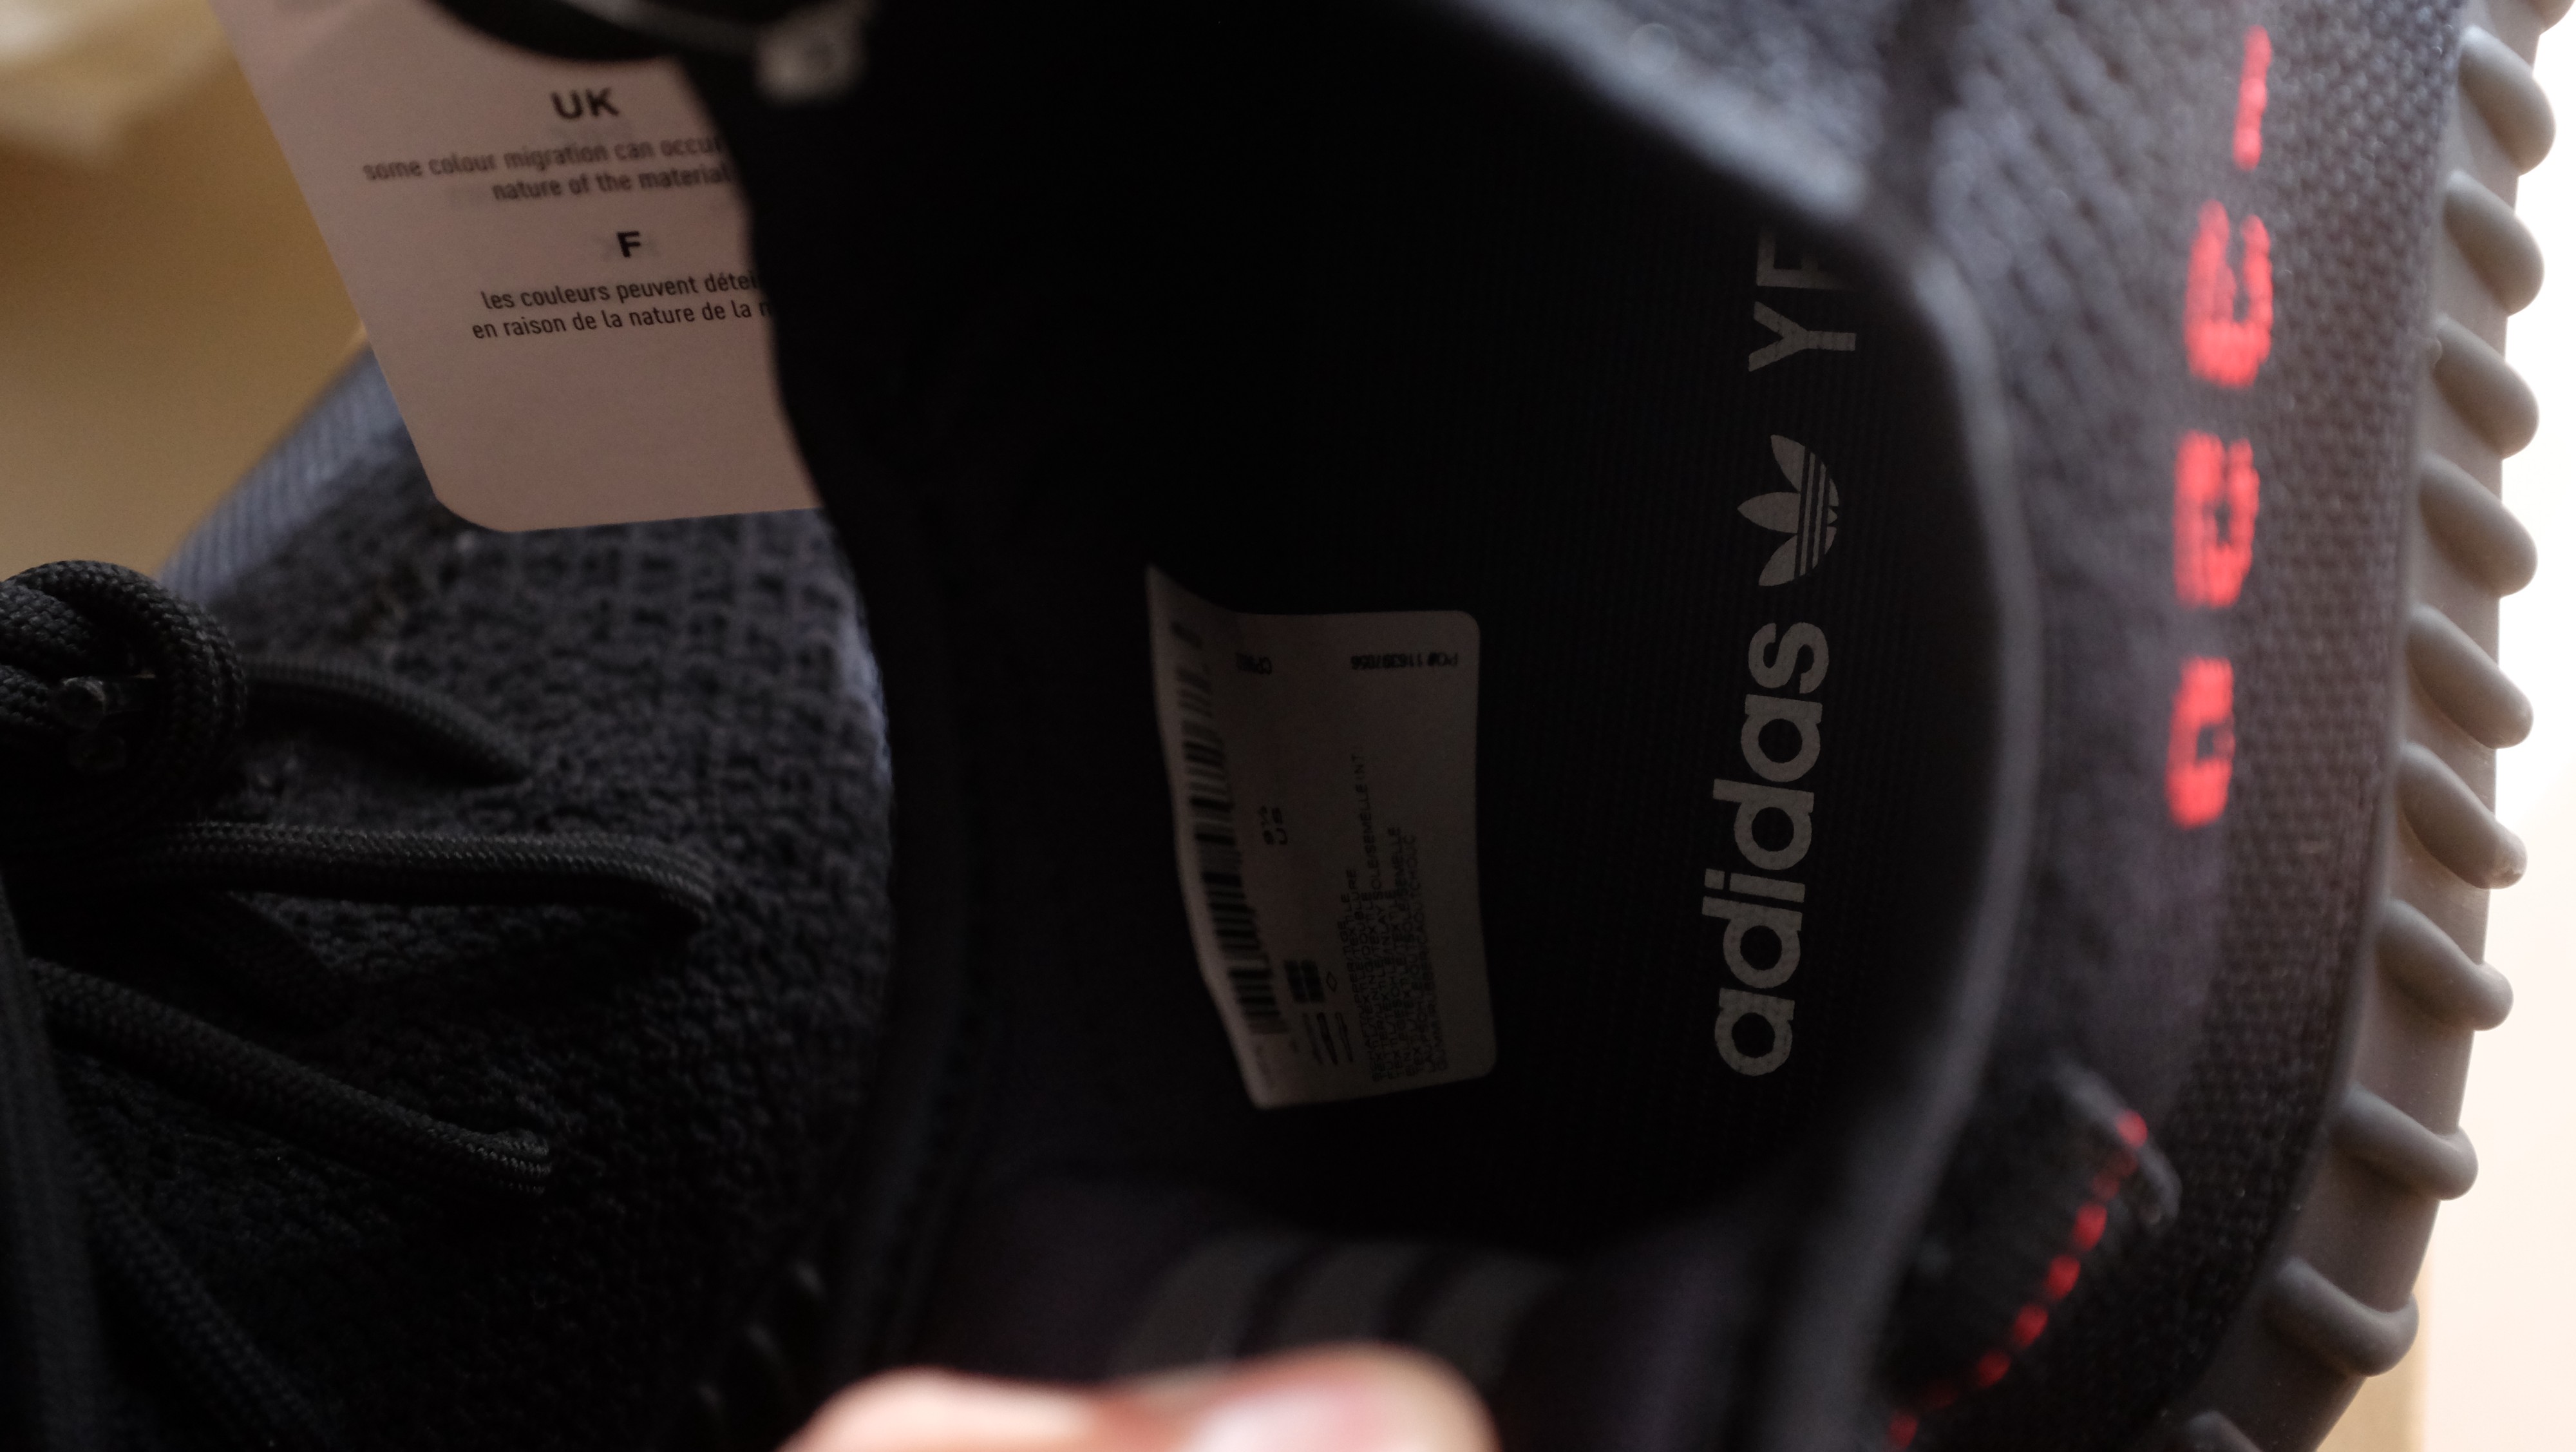
All Creams? inside tag will have a small dot in the right corner above the adidas scan code.
 Zebra OG V2 size 9
All Zebra OG V2?s inside tag will have a small dot centered above the adidas scan code.
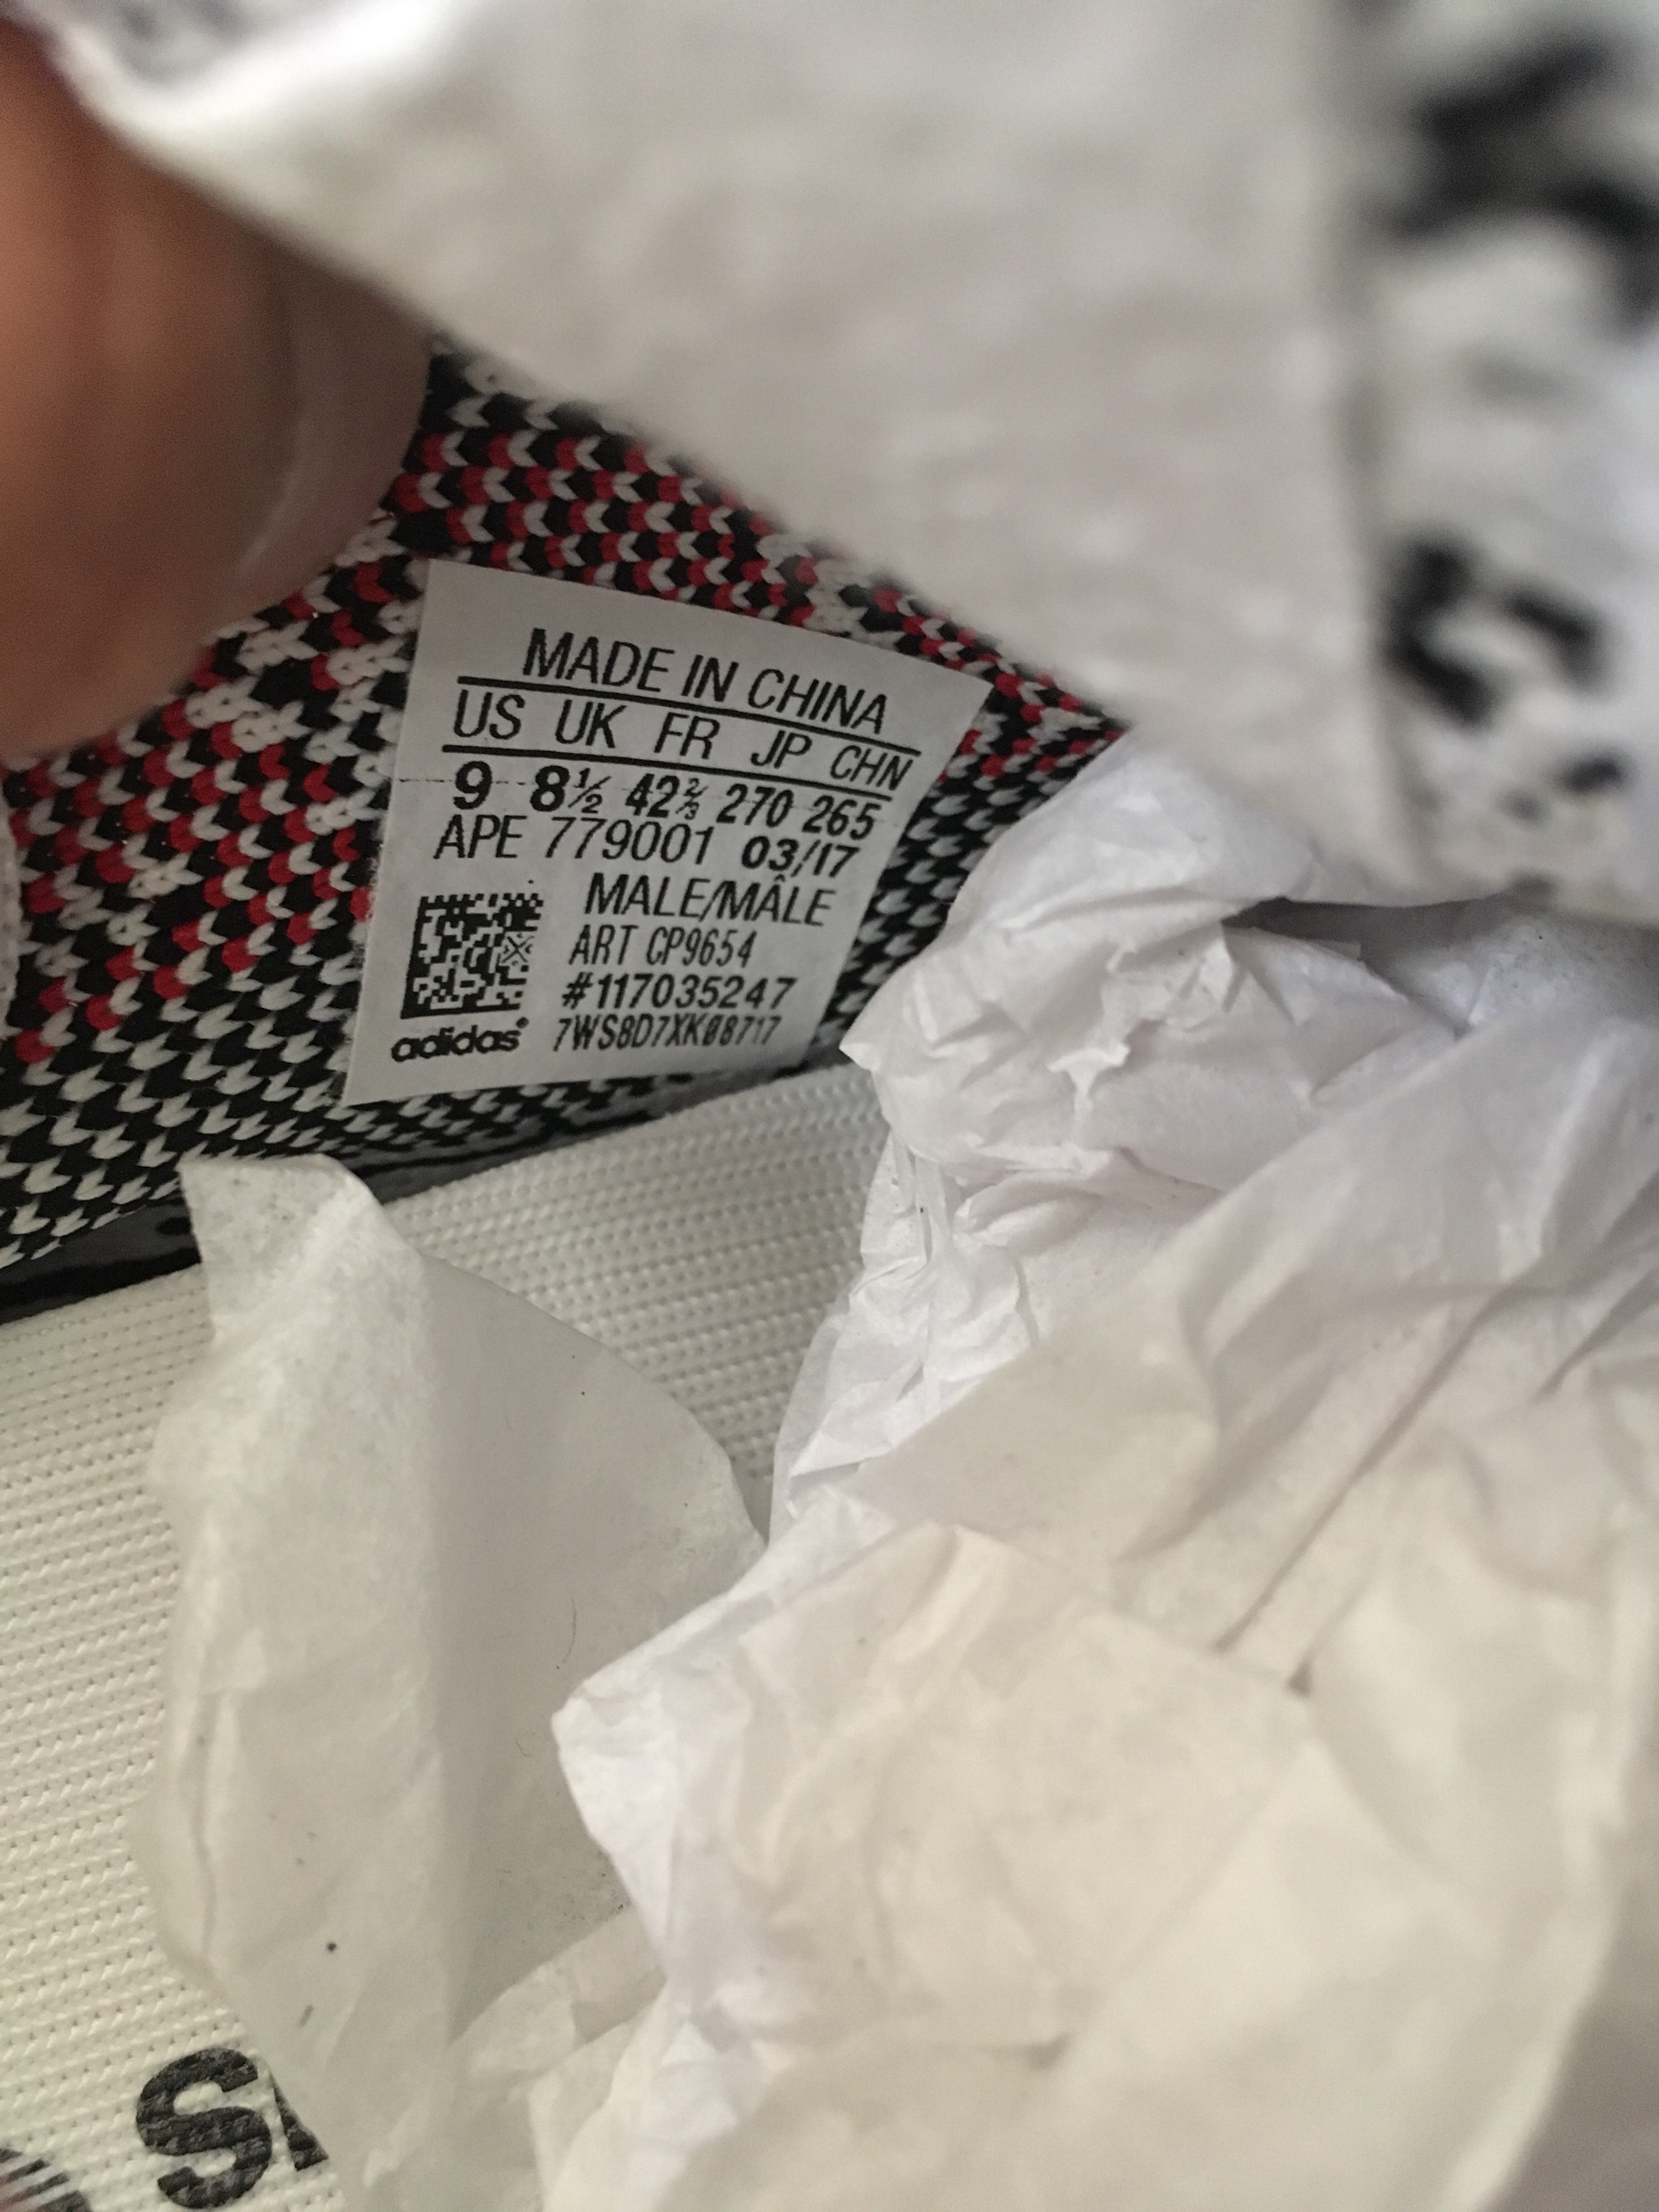
 Zebra Restock V2 sz 9
All Zebra Restock V2?s inside tag will have a small dot in the right top corner above the adidas scan code. Production date will also be either 2/17 or 3/17.
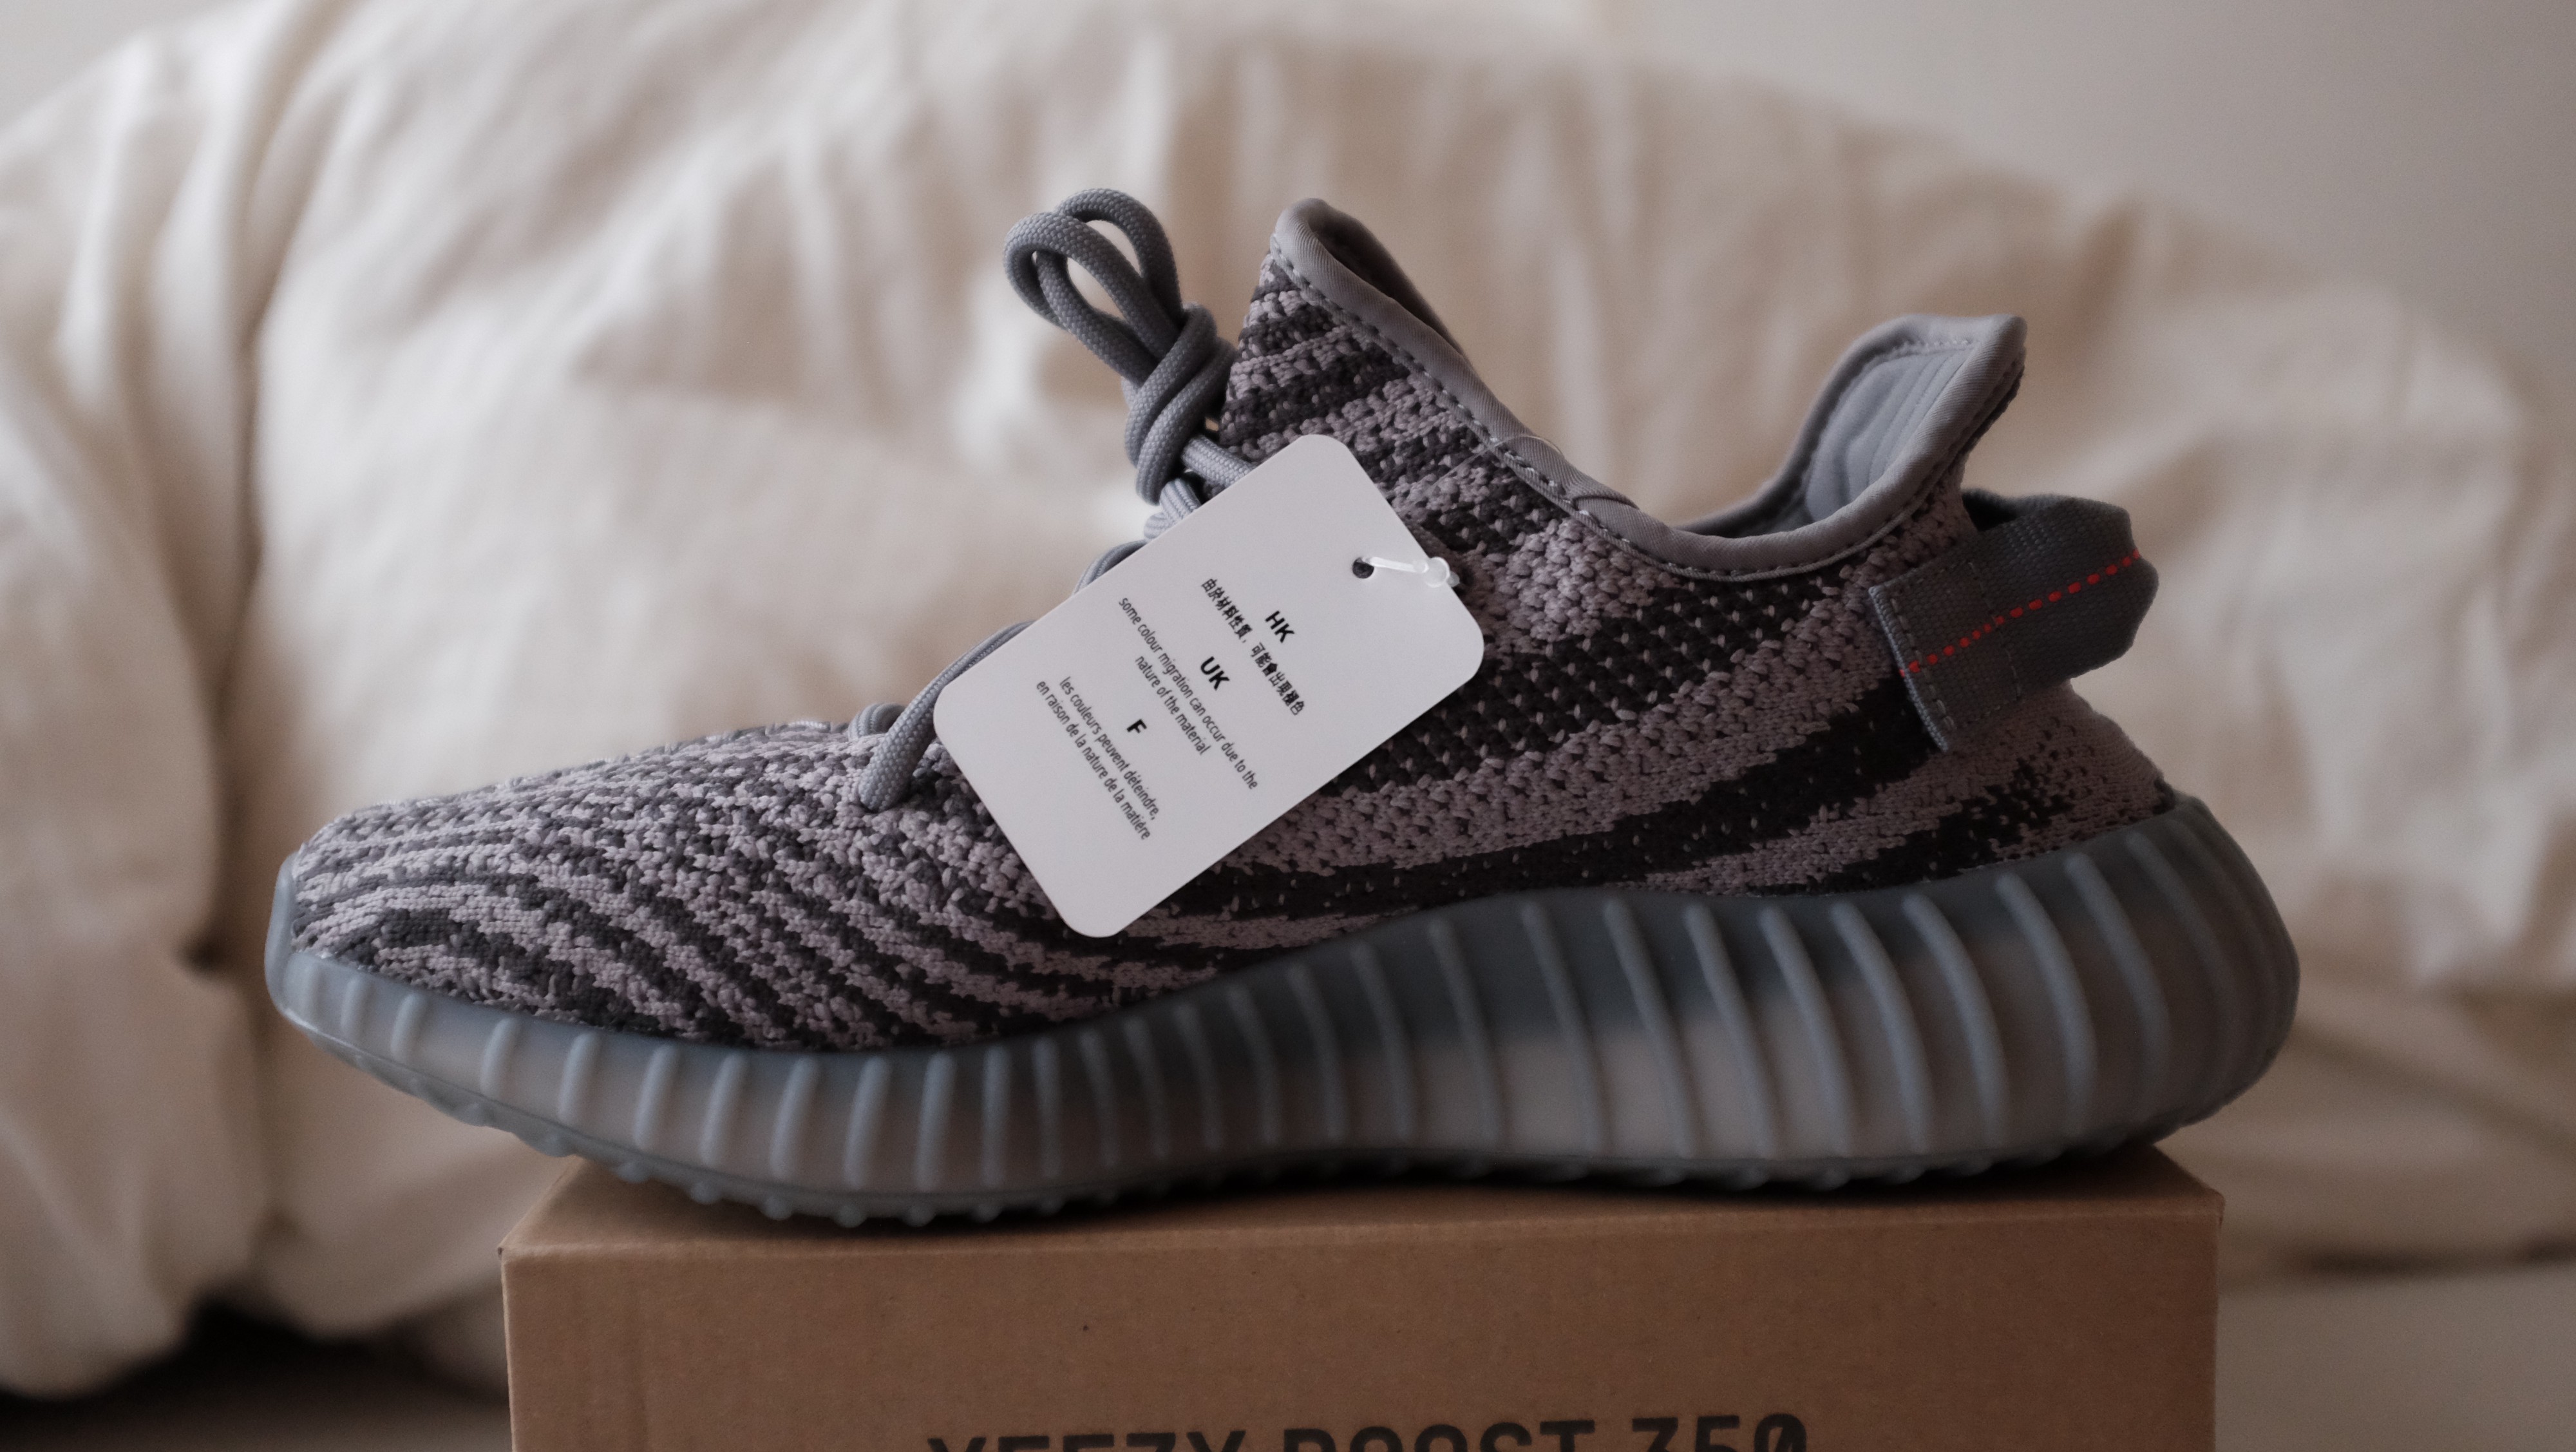
 Beluga 2.0
All Beluga 2.0?s inside tag will have a small dot towards the upper center right of the adidas code.
 Left Beluga sz 9, Right Oreo sz 9 // Beluga inside tags are slightly more bold than Black Stripe V2 inside tags.
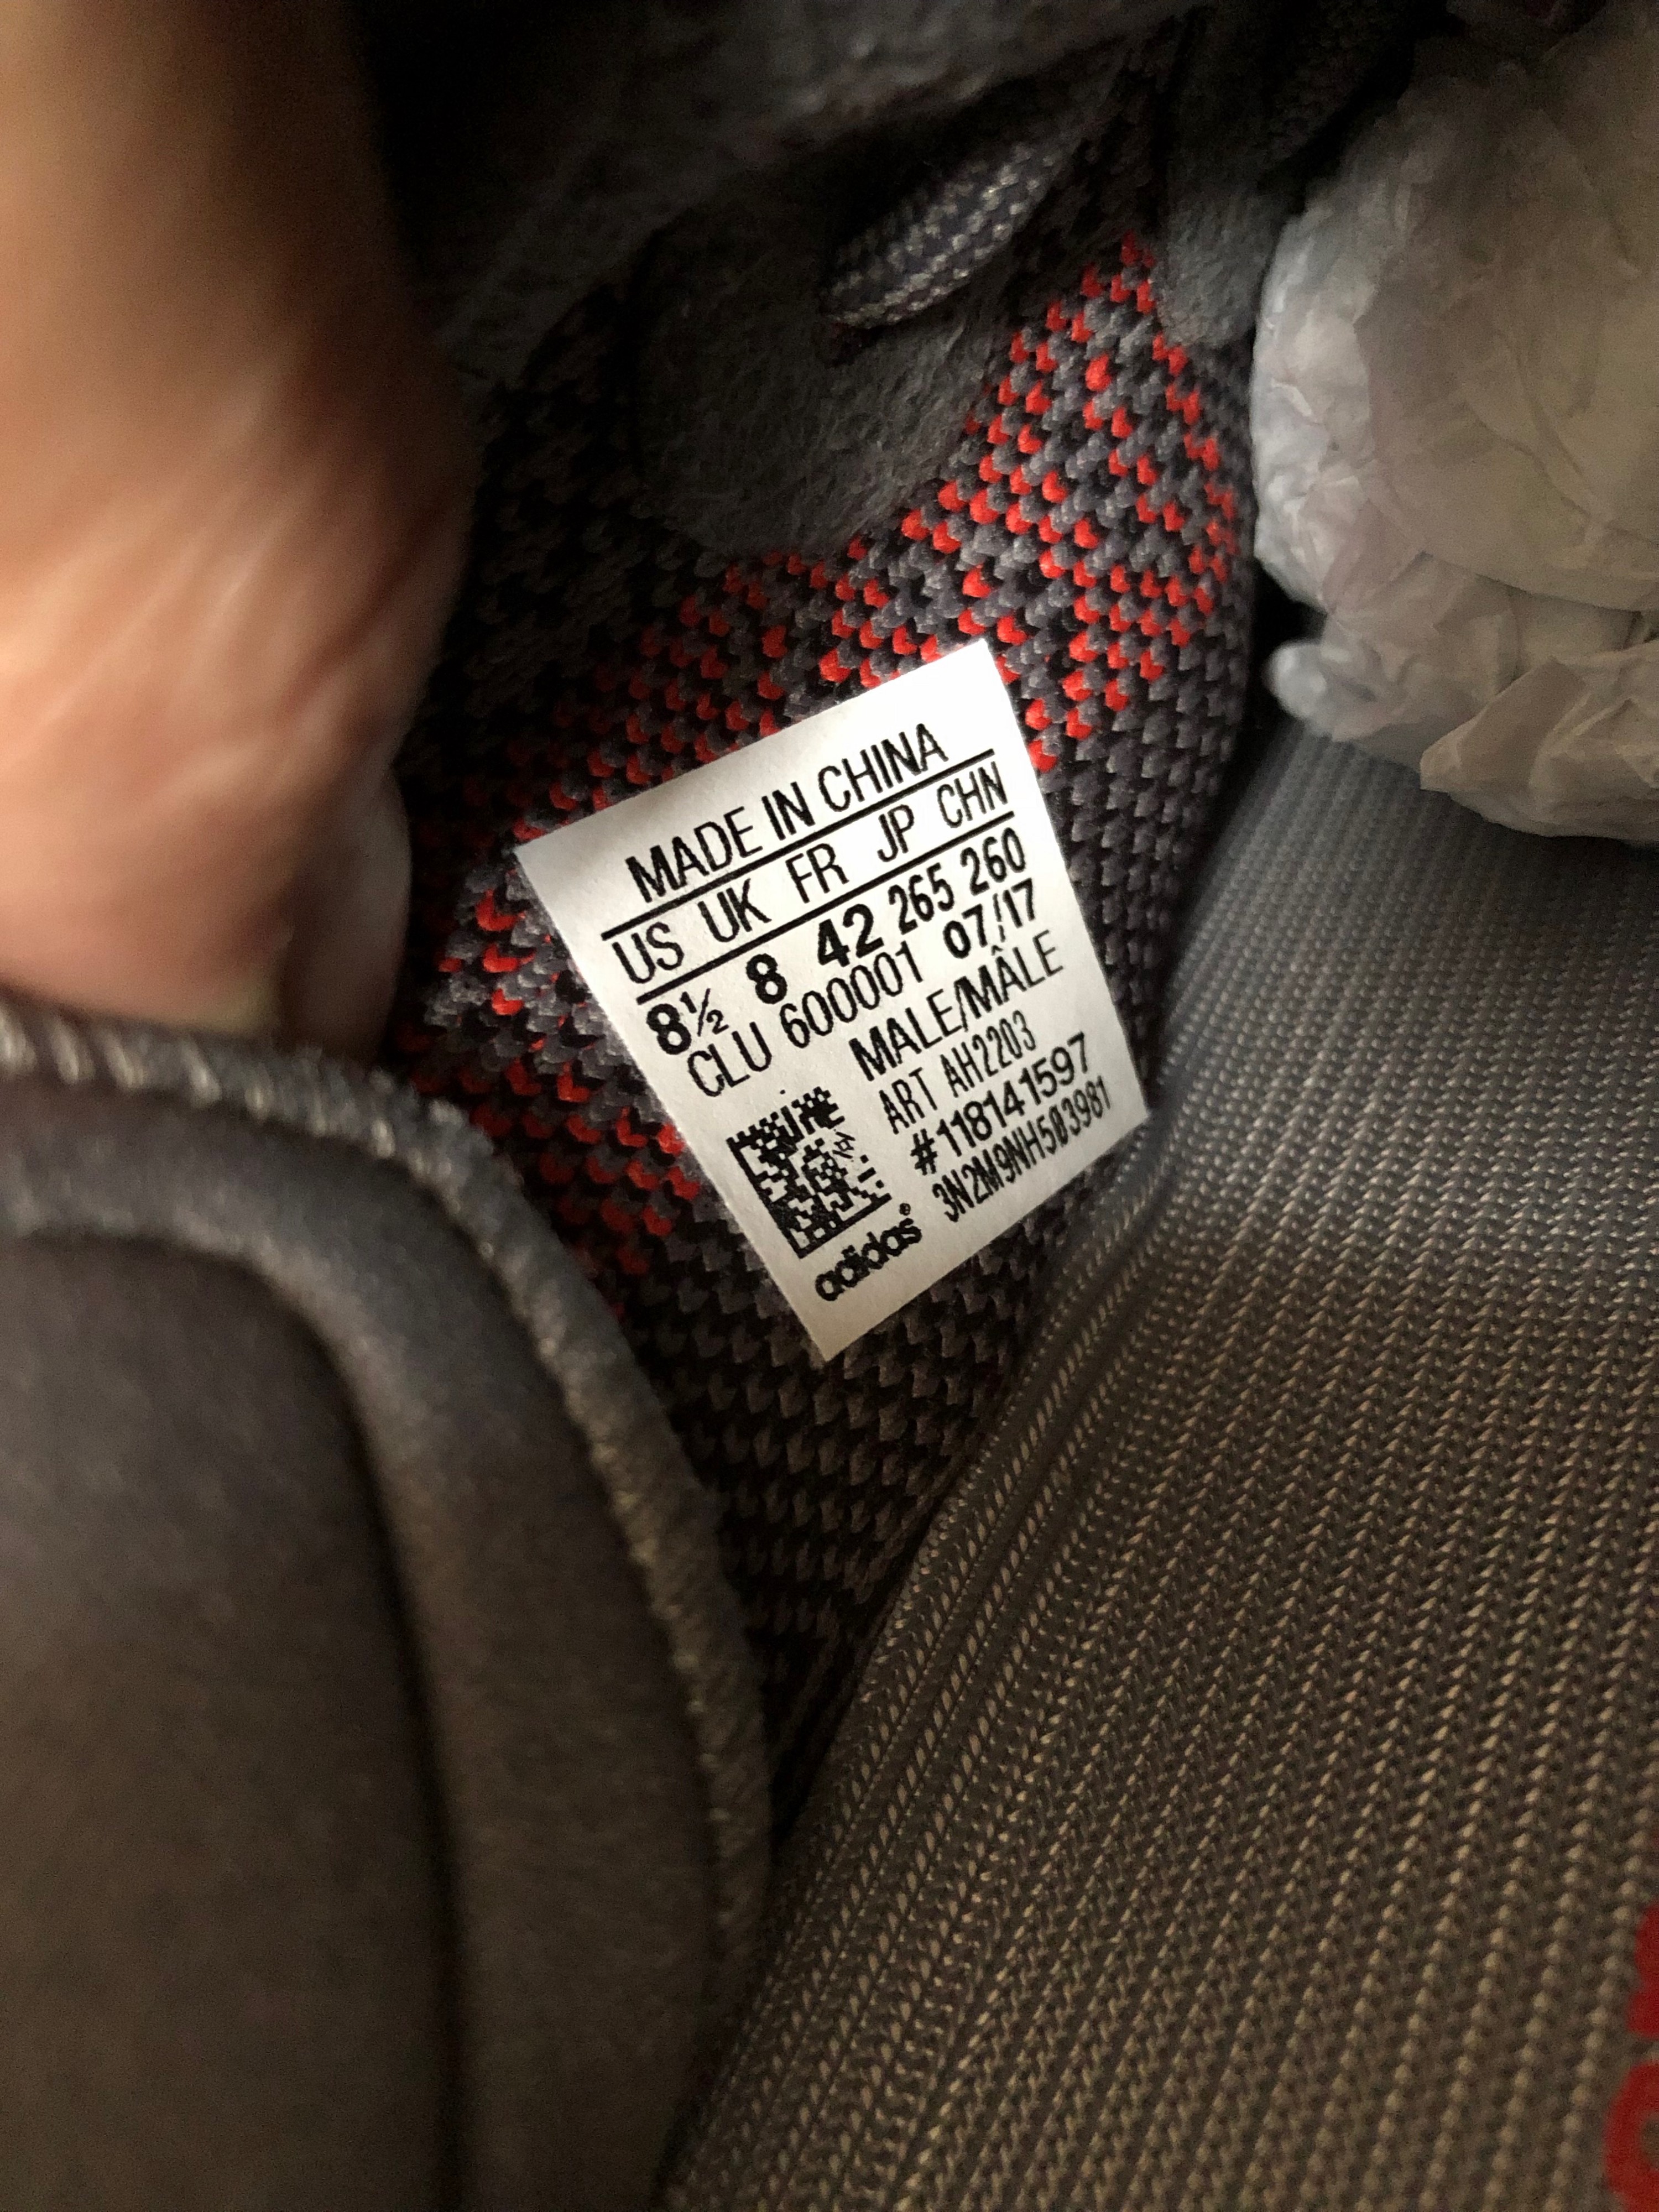
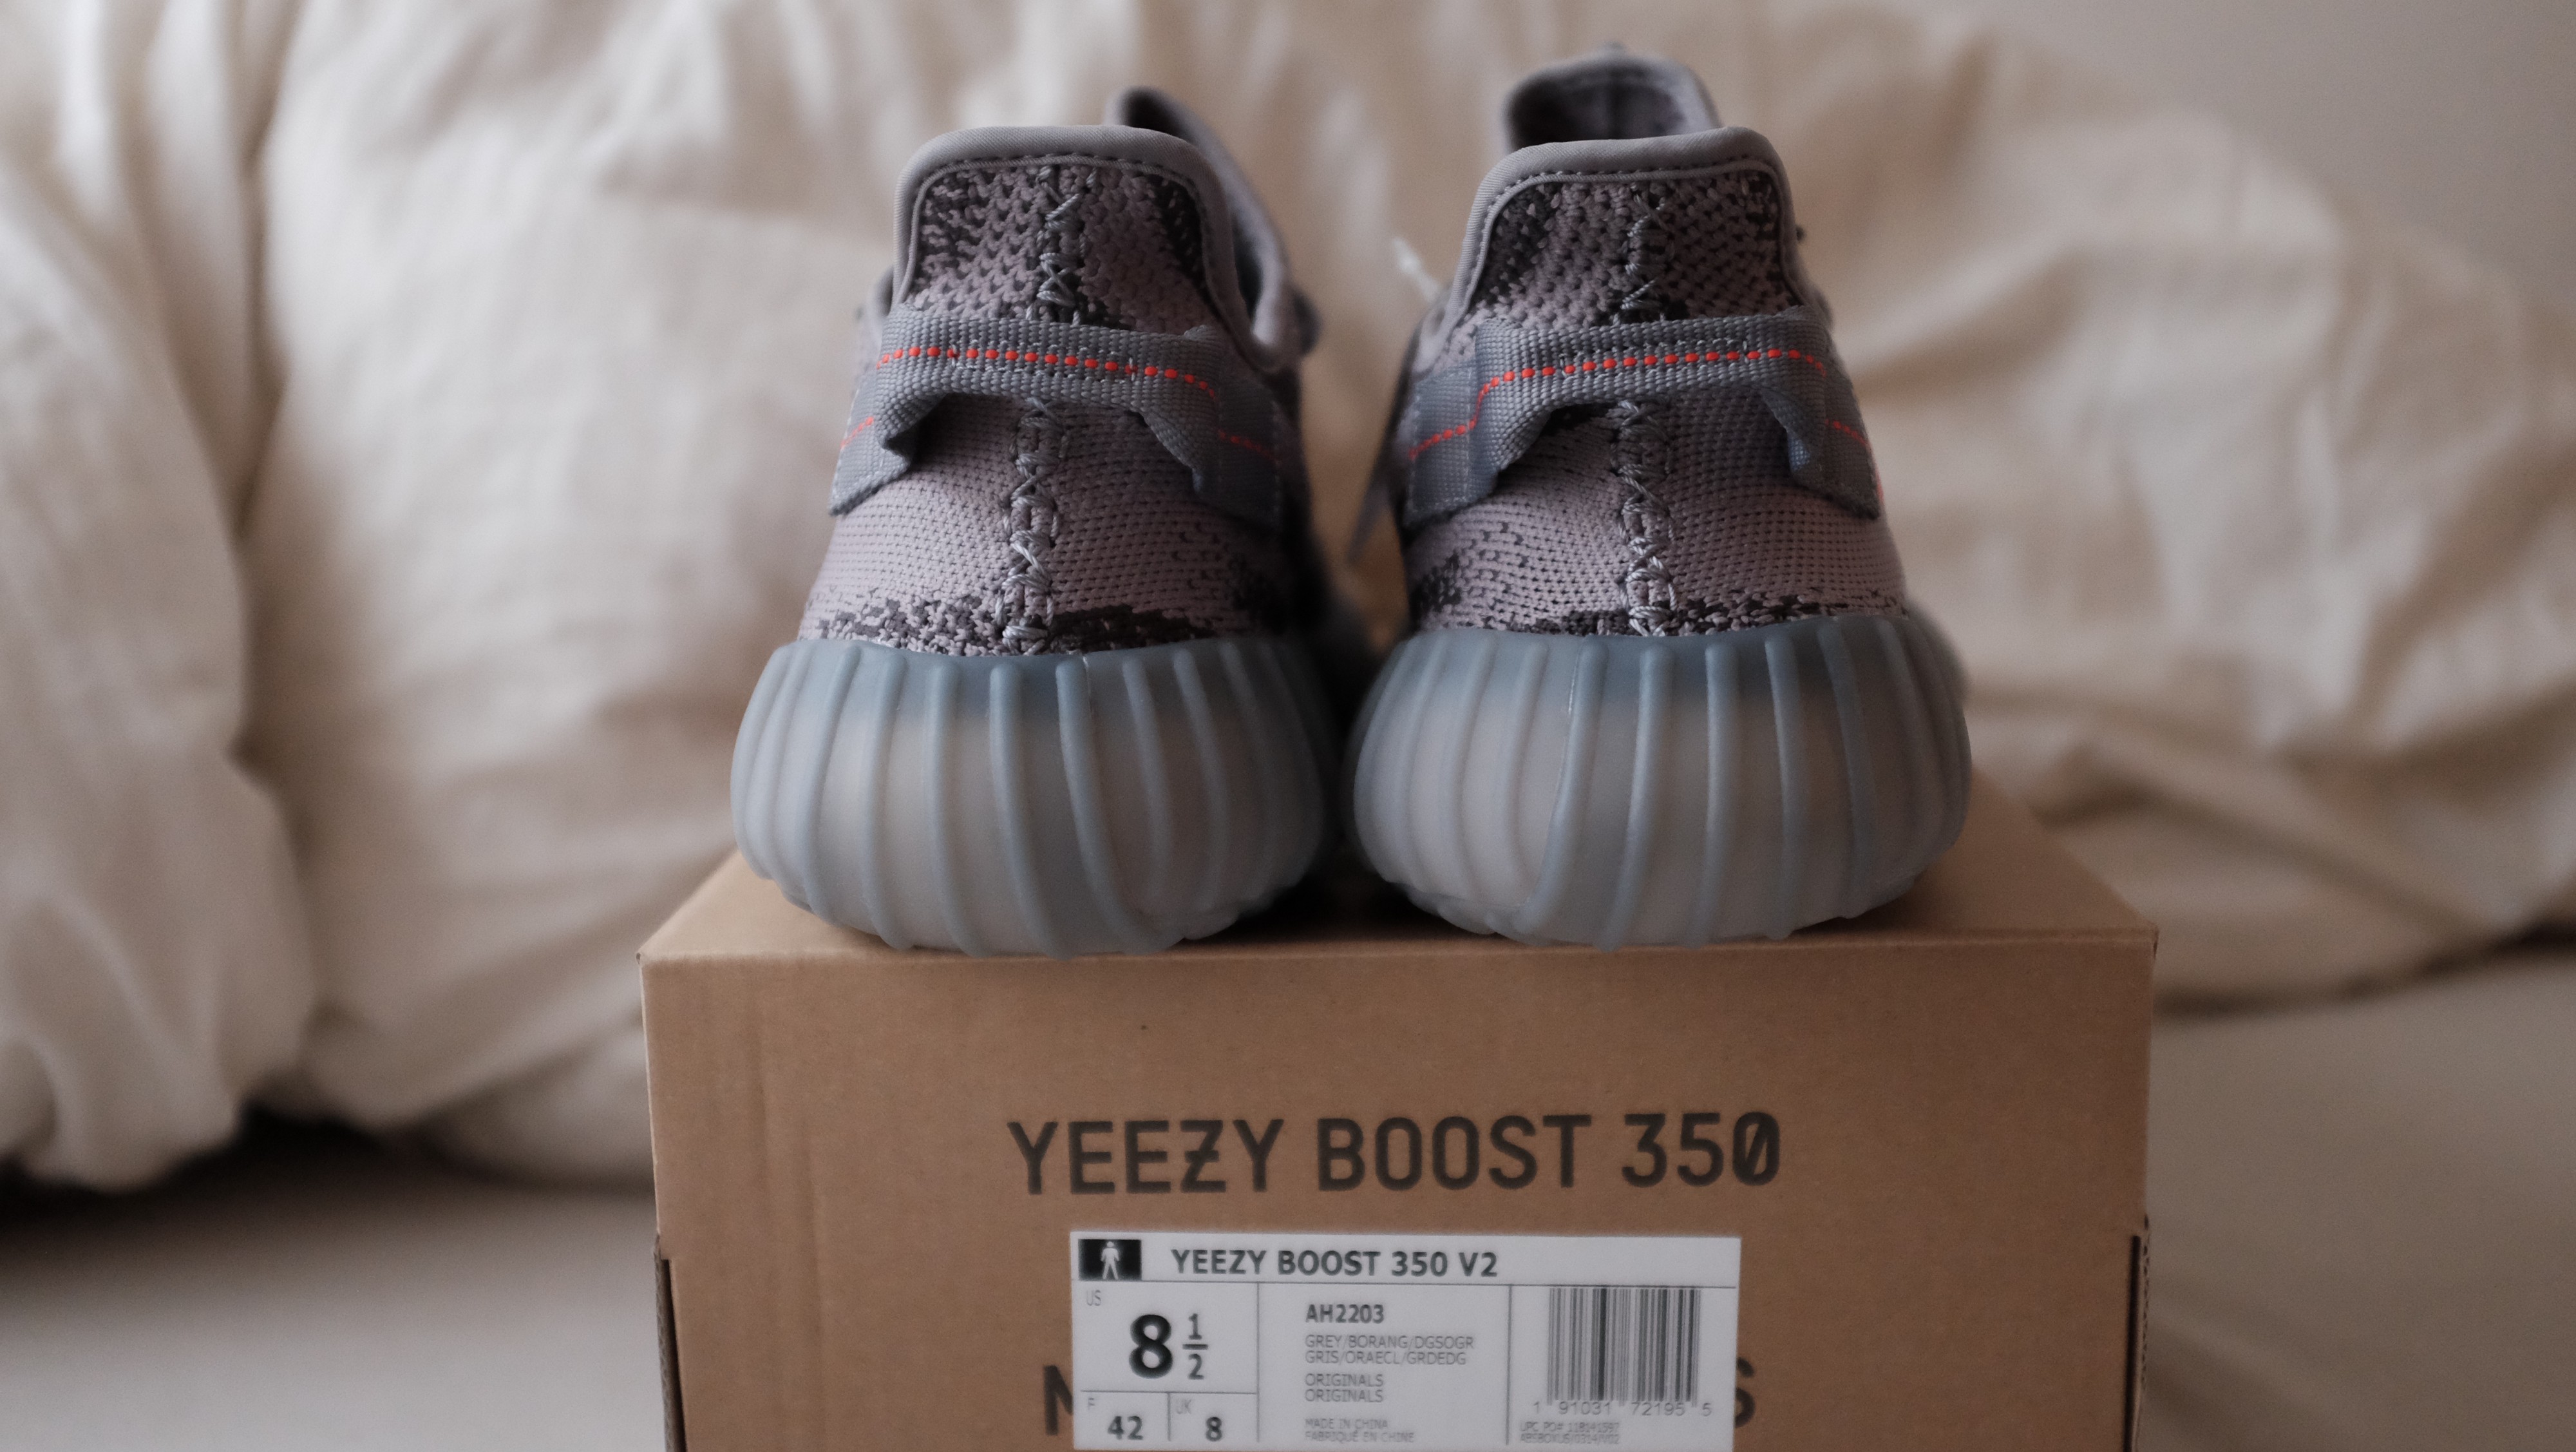
Focus on the ?Male/Male? text placement. It should be just a touch more forward than ?8 1/2?. On fakes the ?Male/Male? will be sticking out way too far. Always make sure your codes match up!
Variation
Each size will have their own variations. And even the same sizes will have minor variations.
The main thing you want to focus on is the common similarities between them.
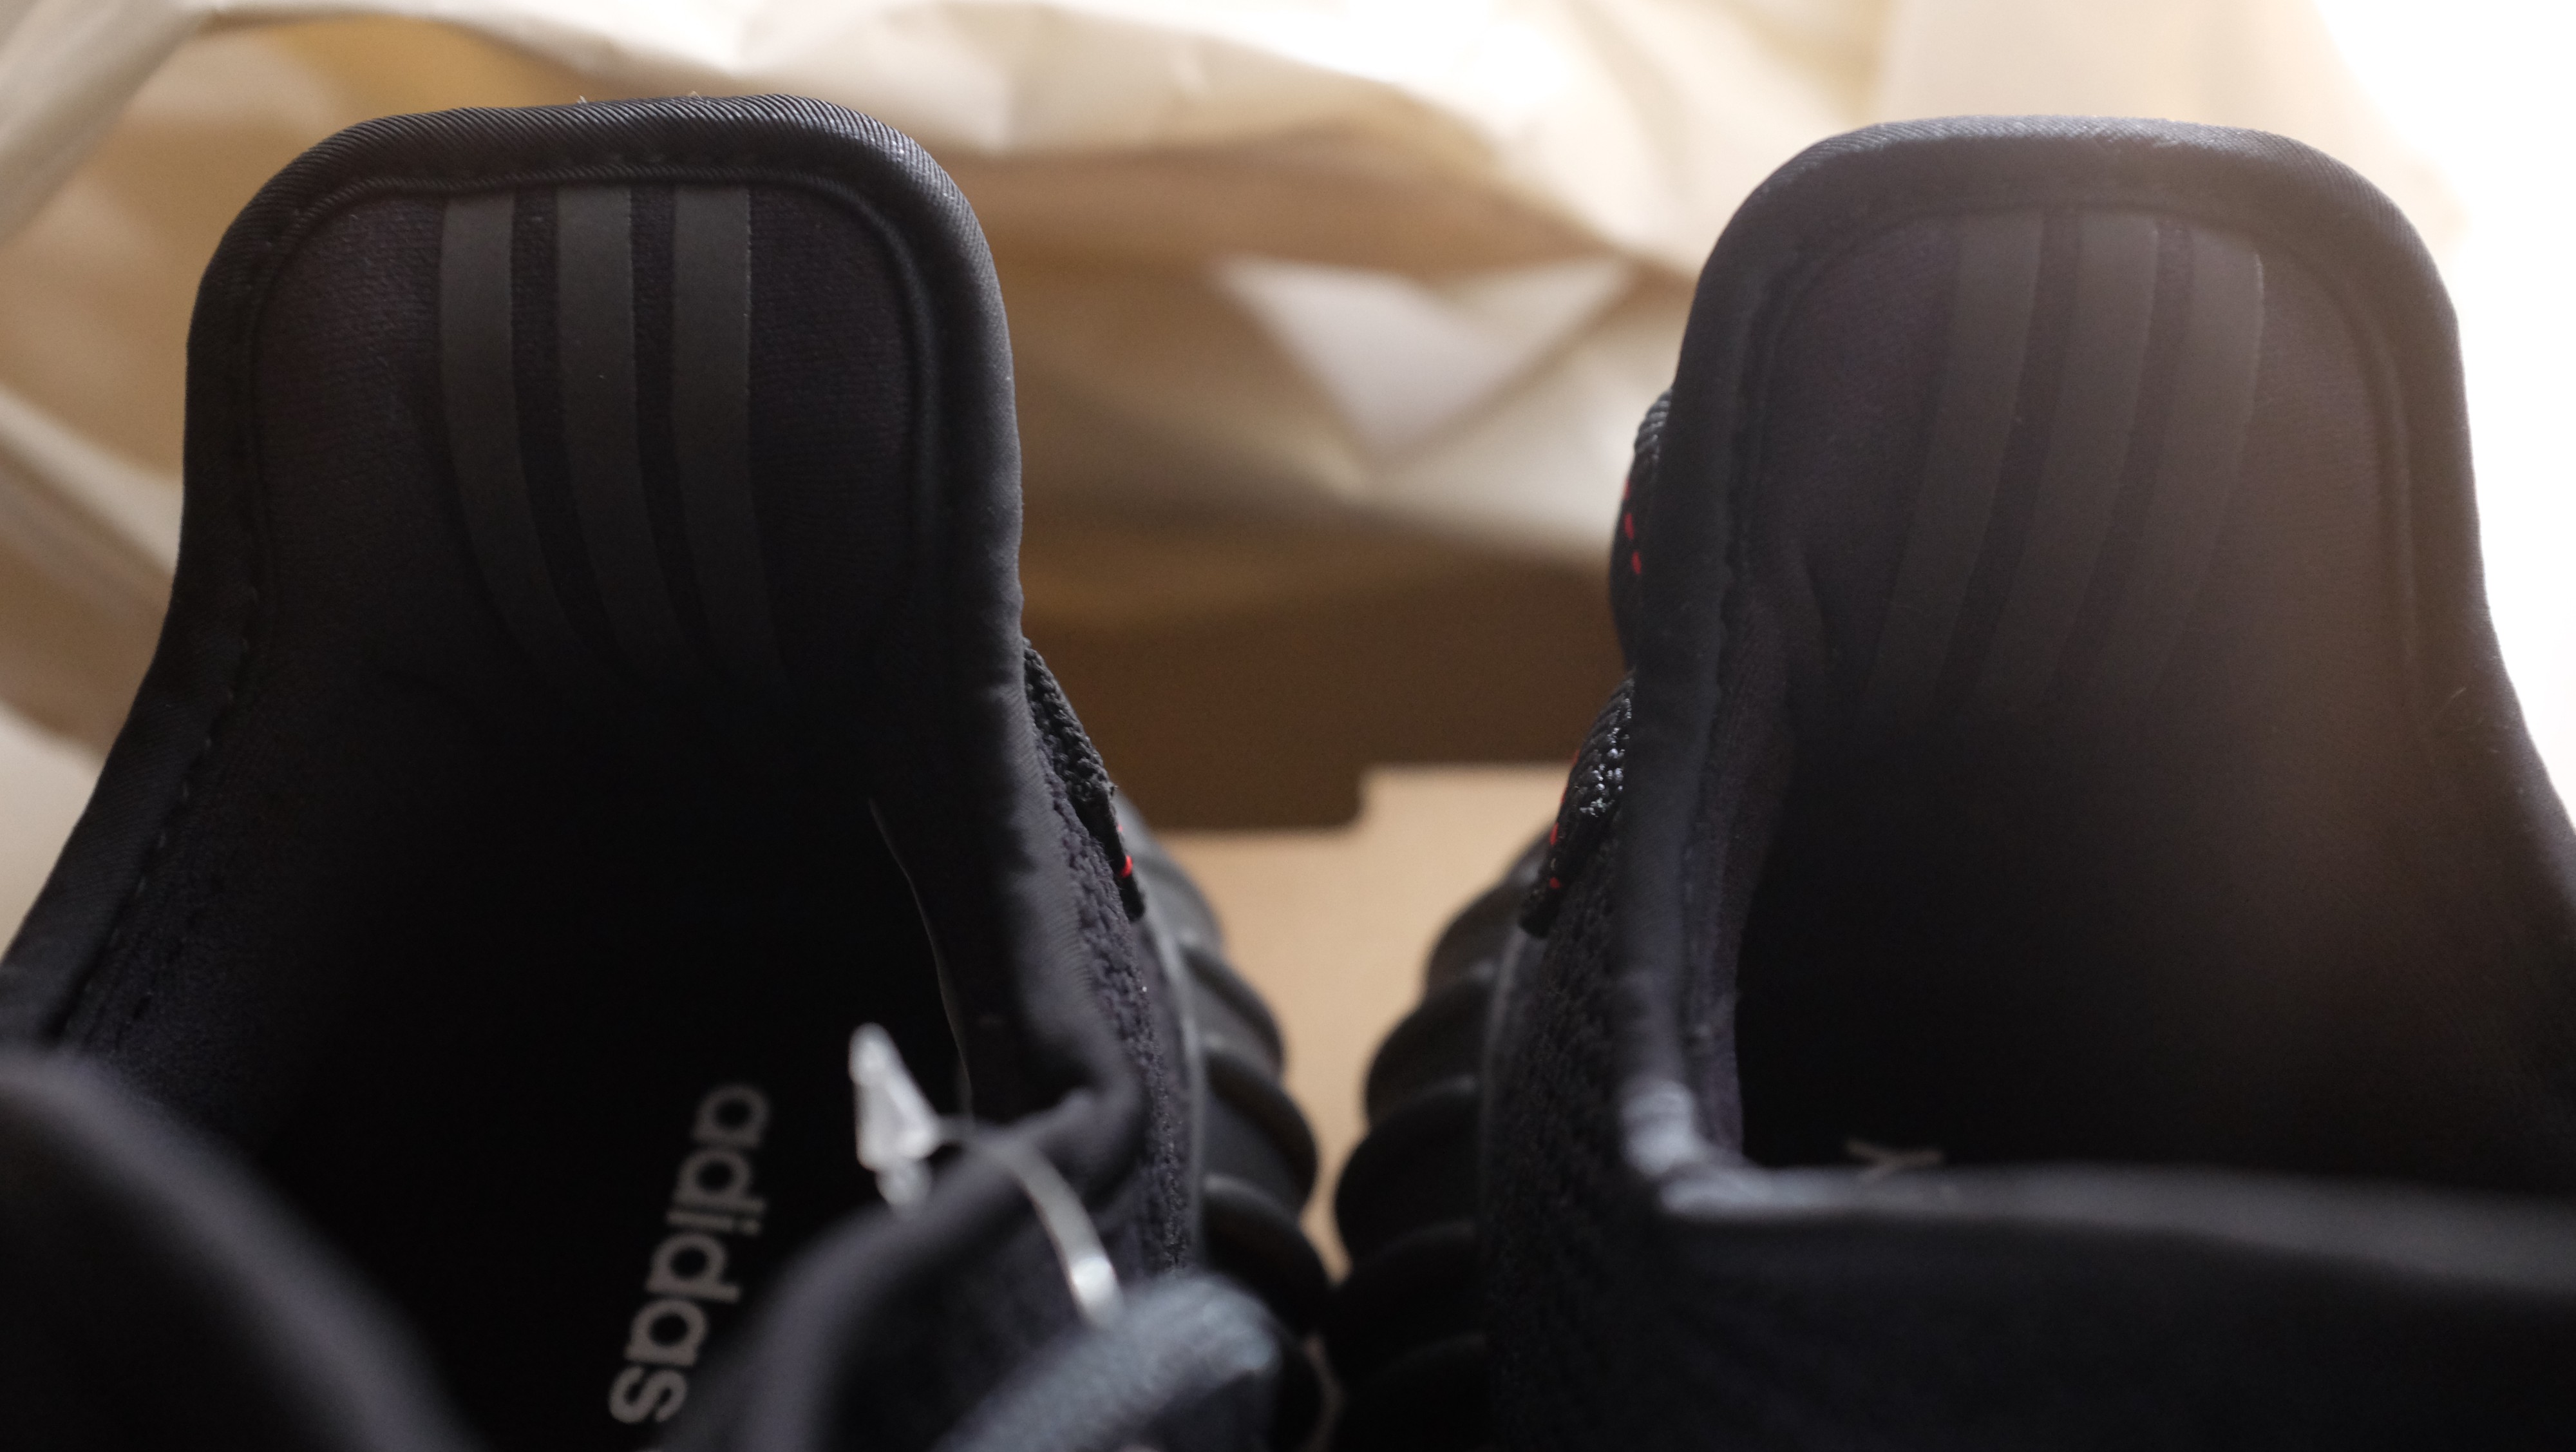
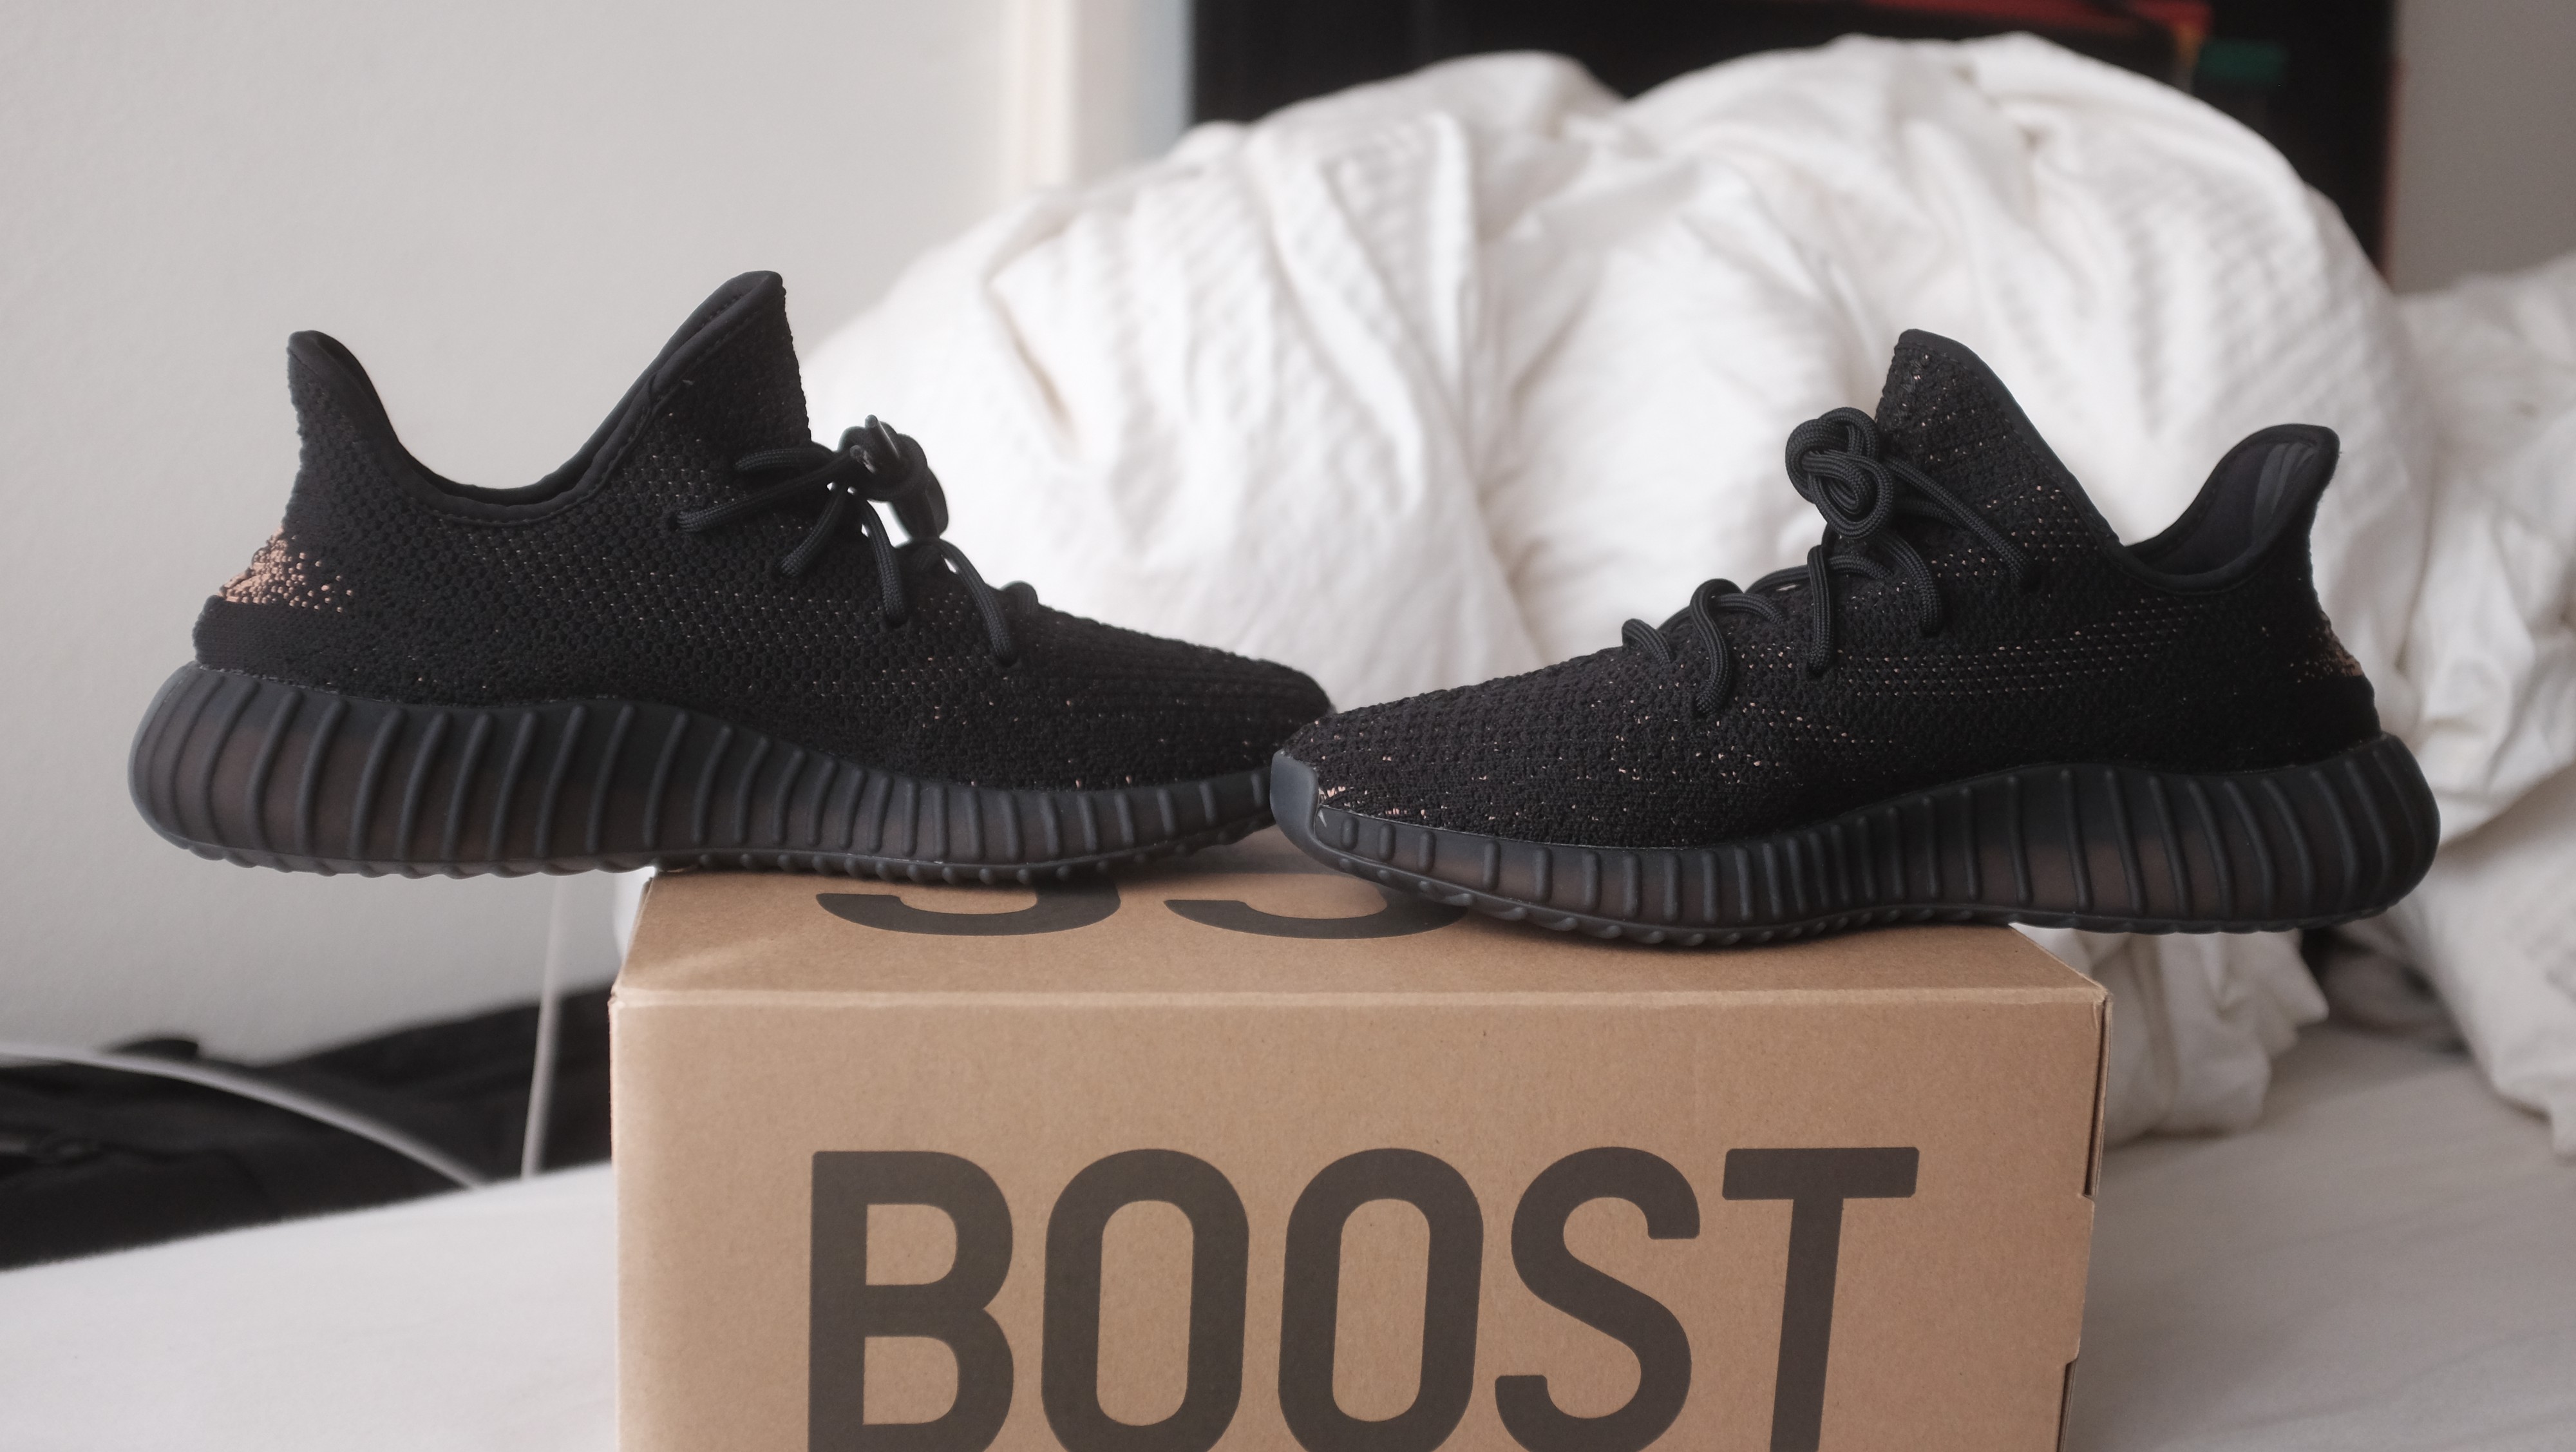
For Black Striped V2’s:
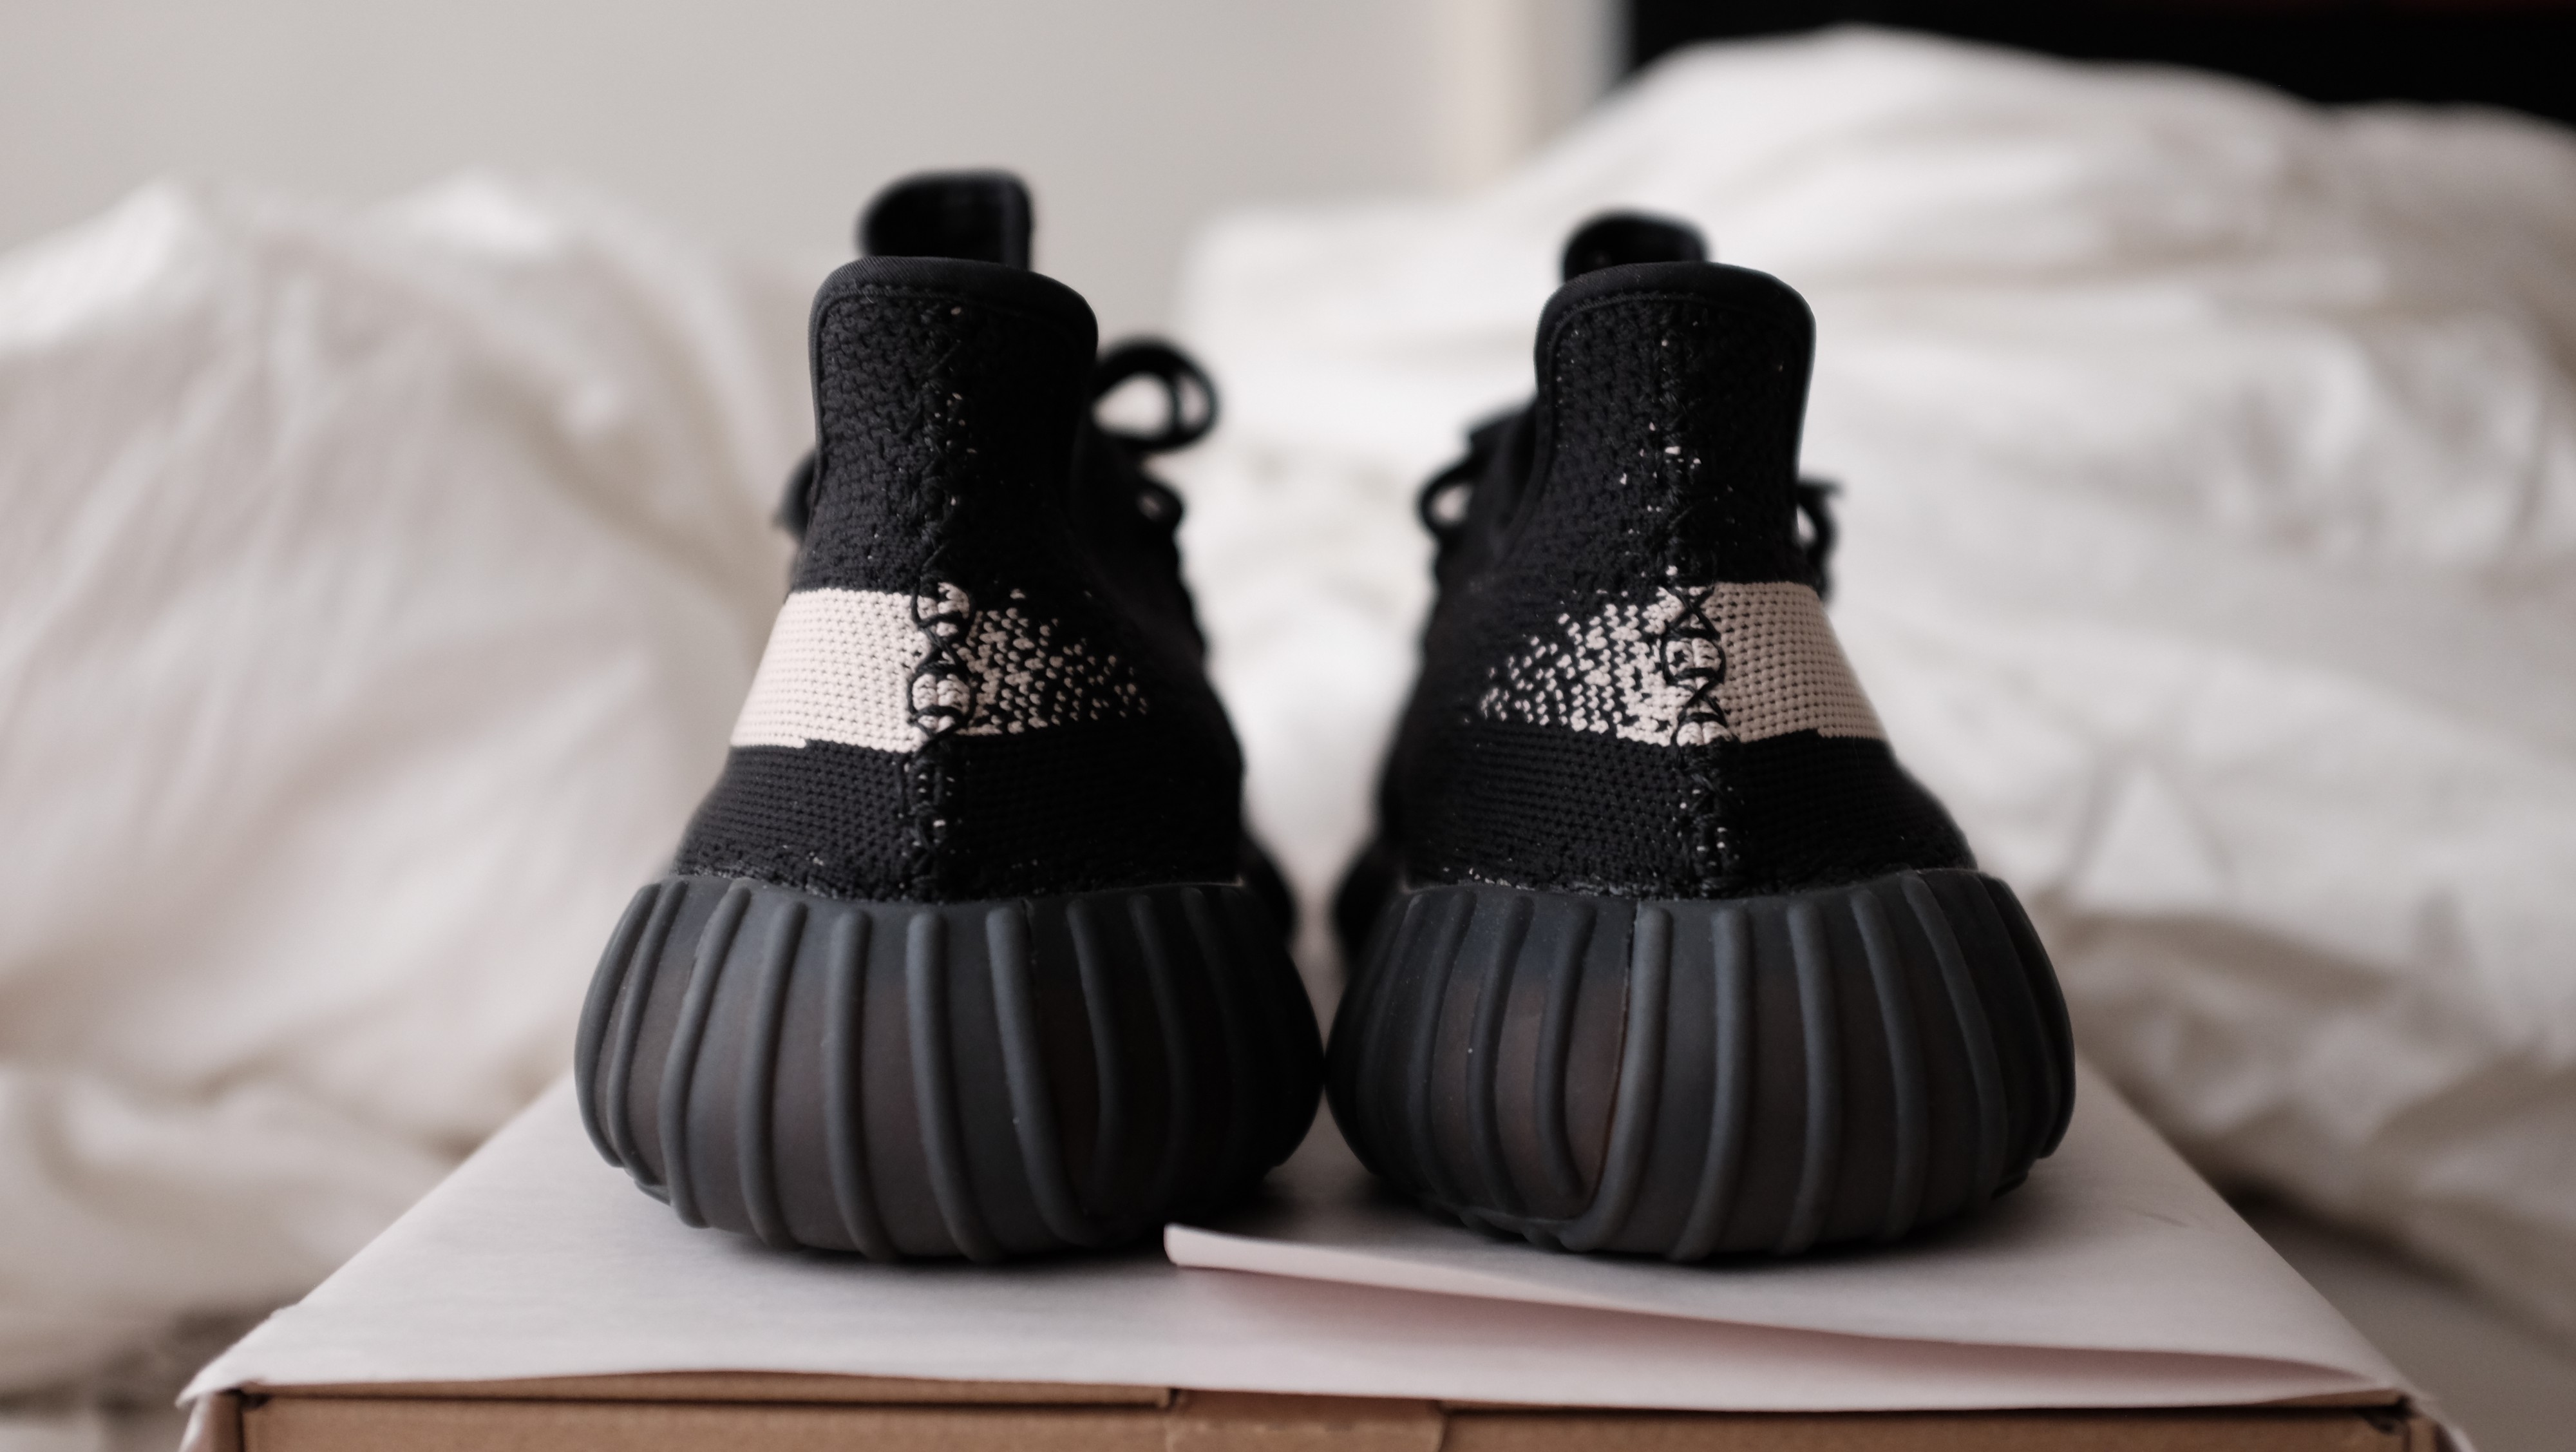
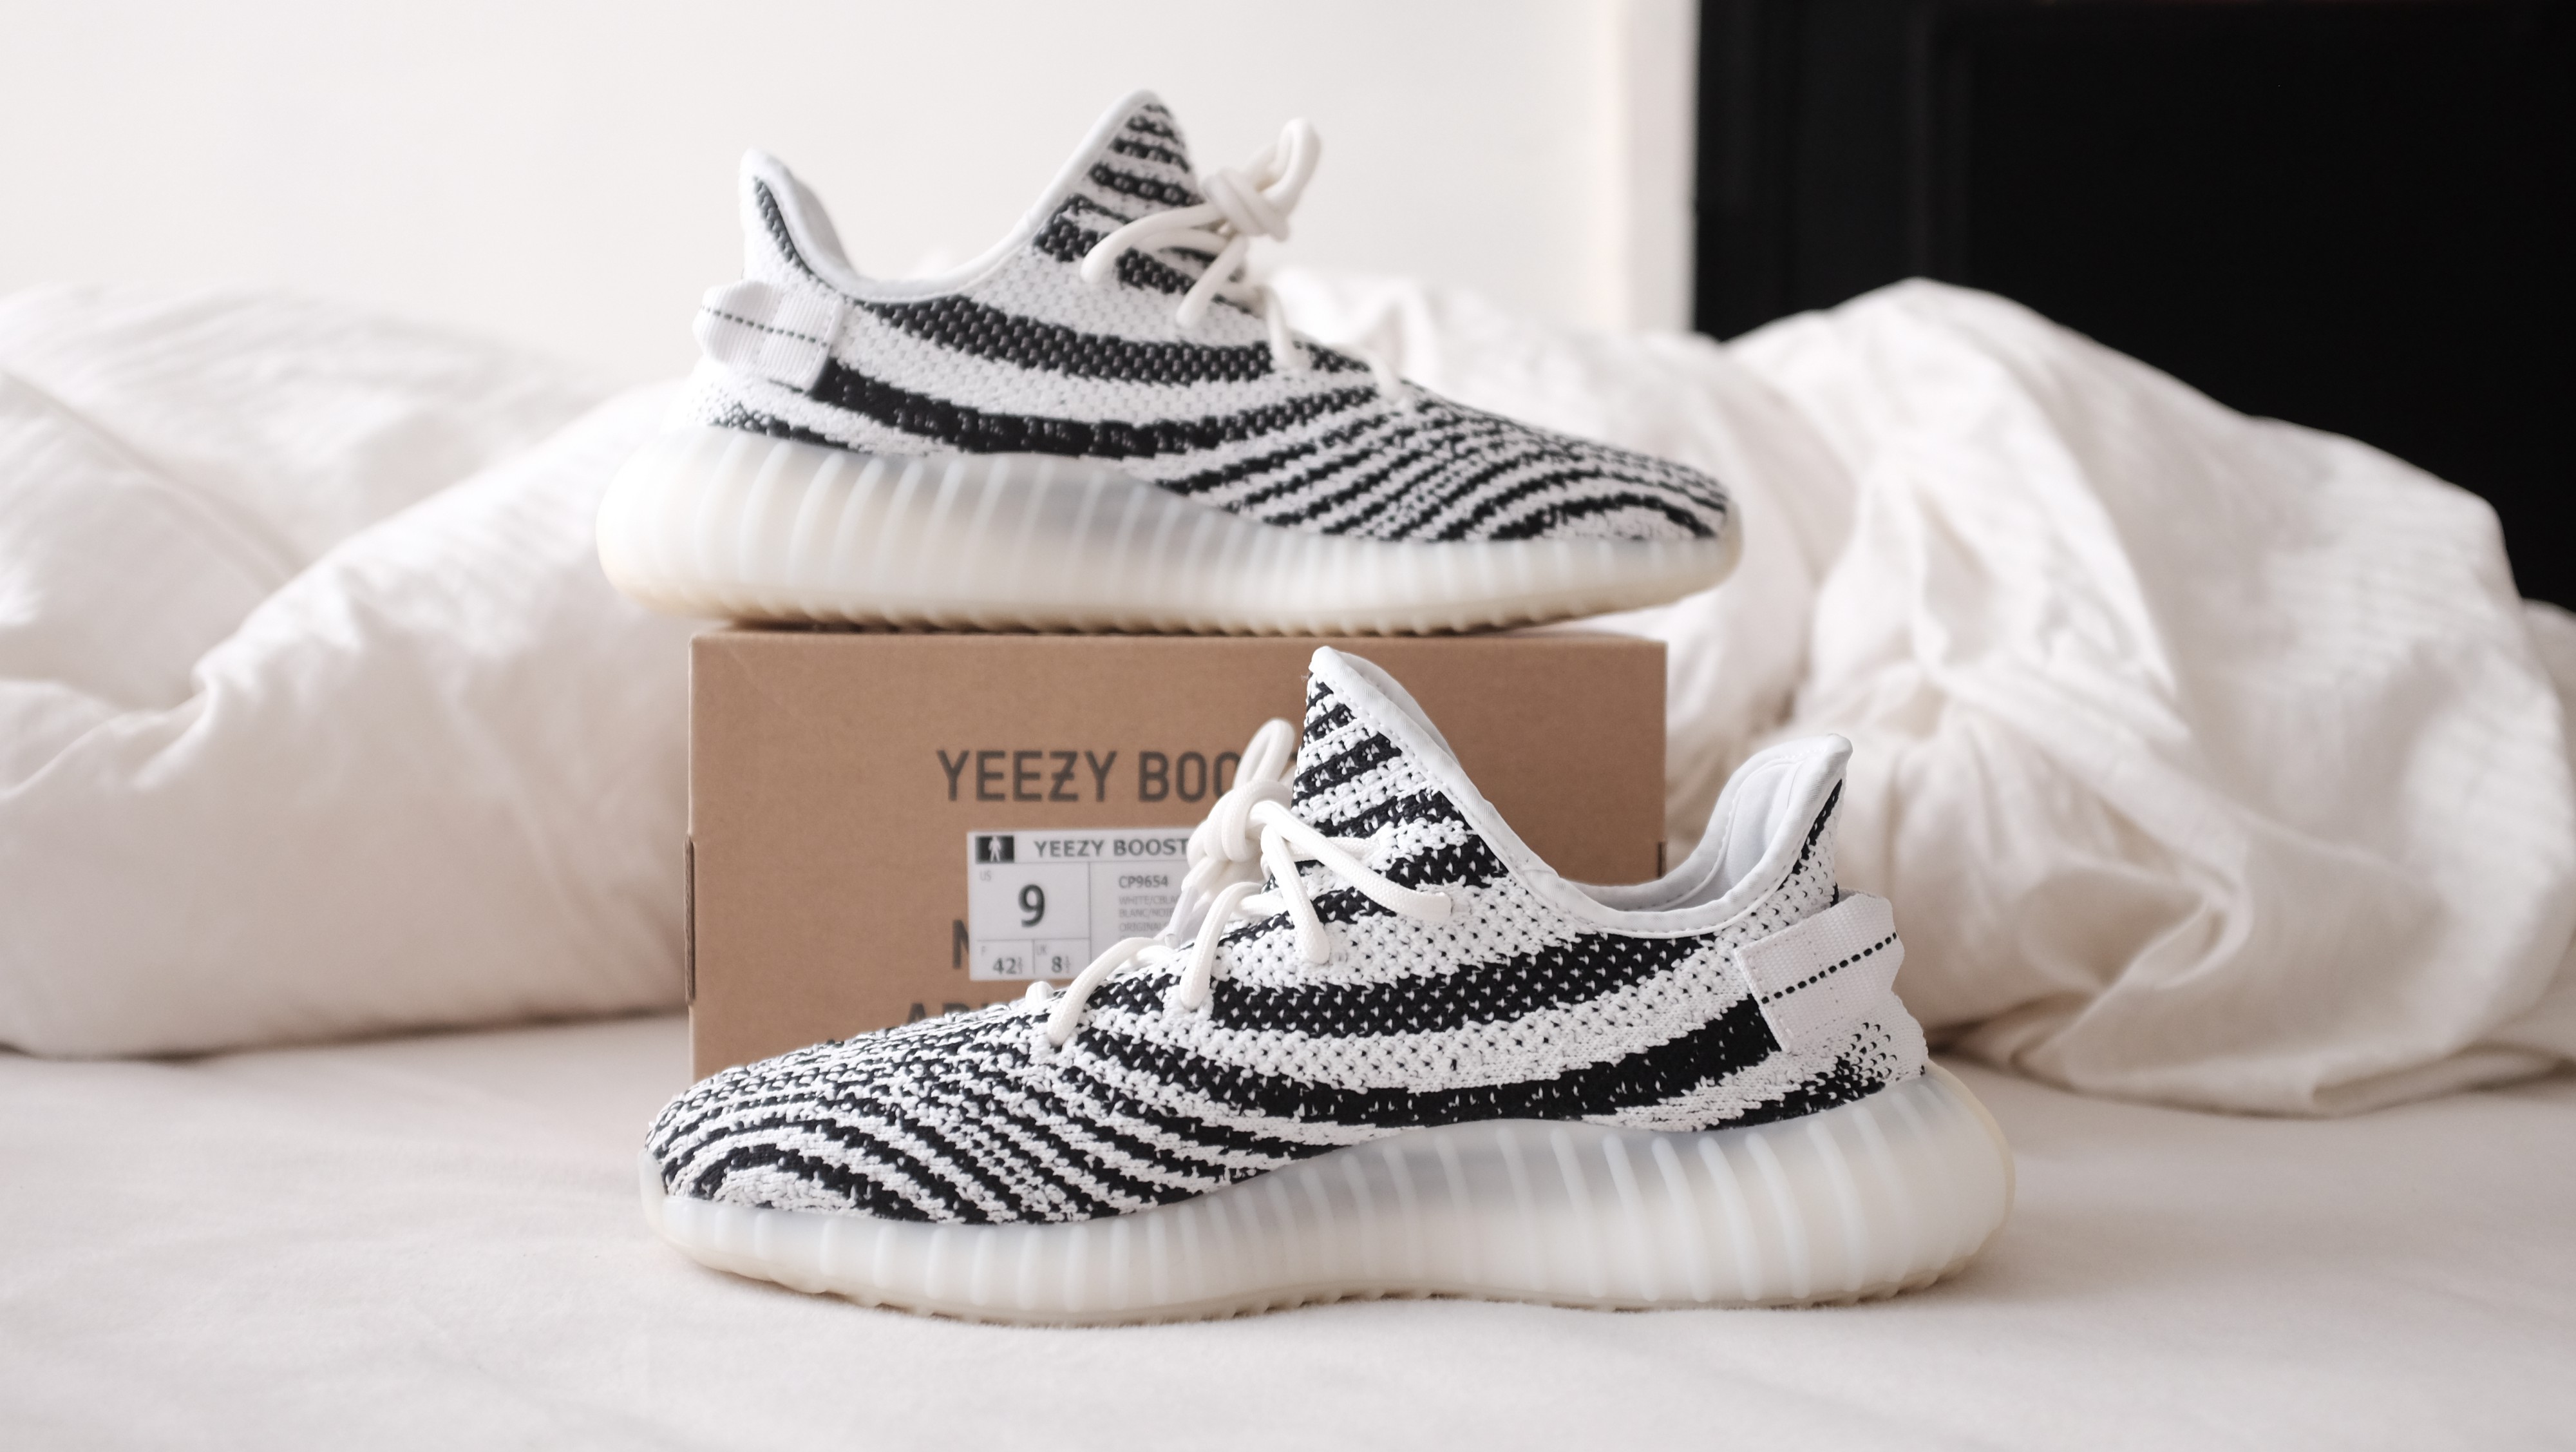
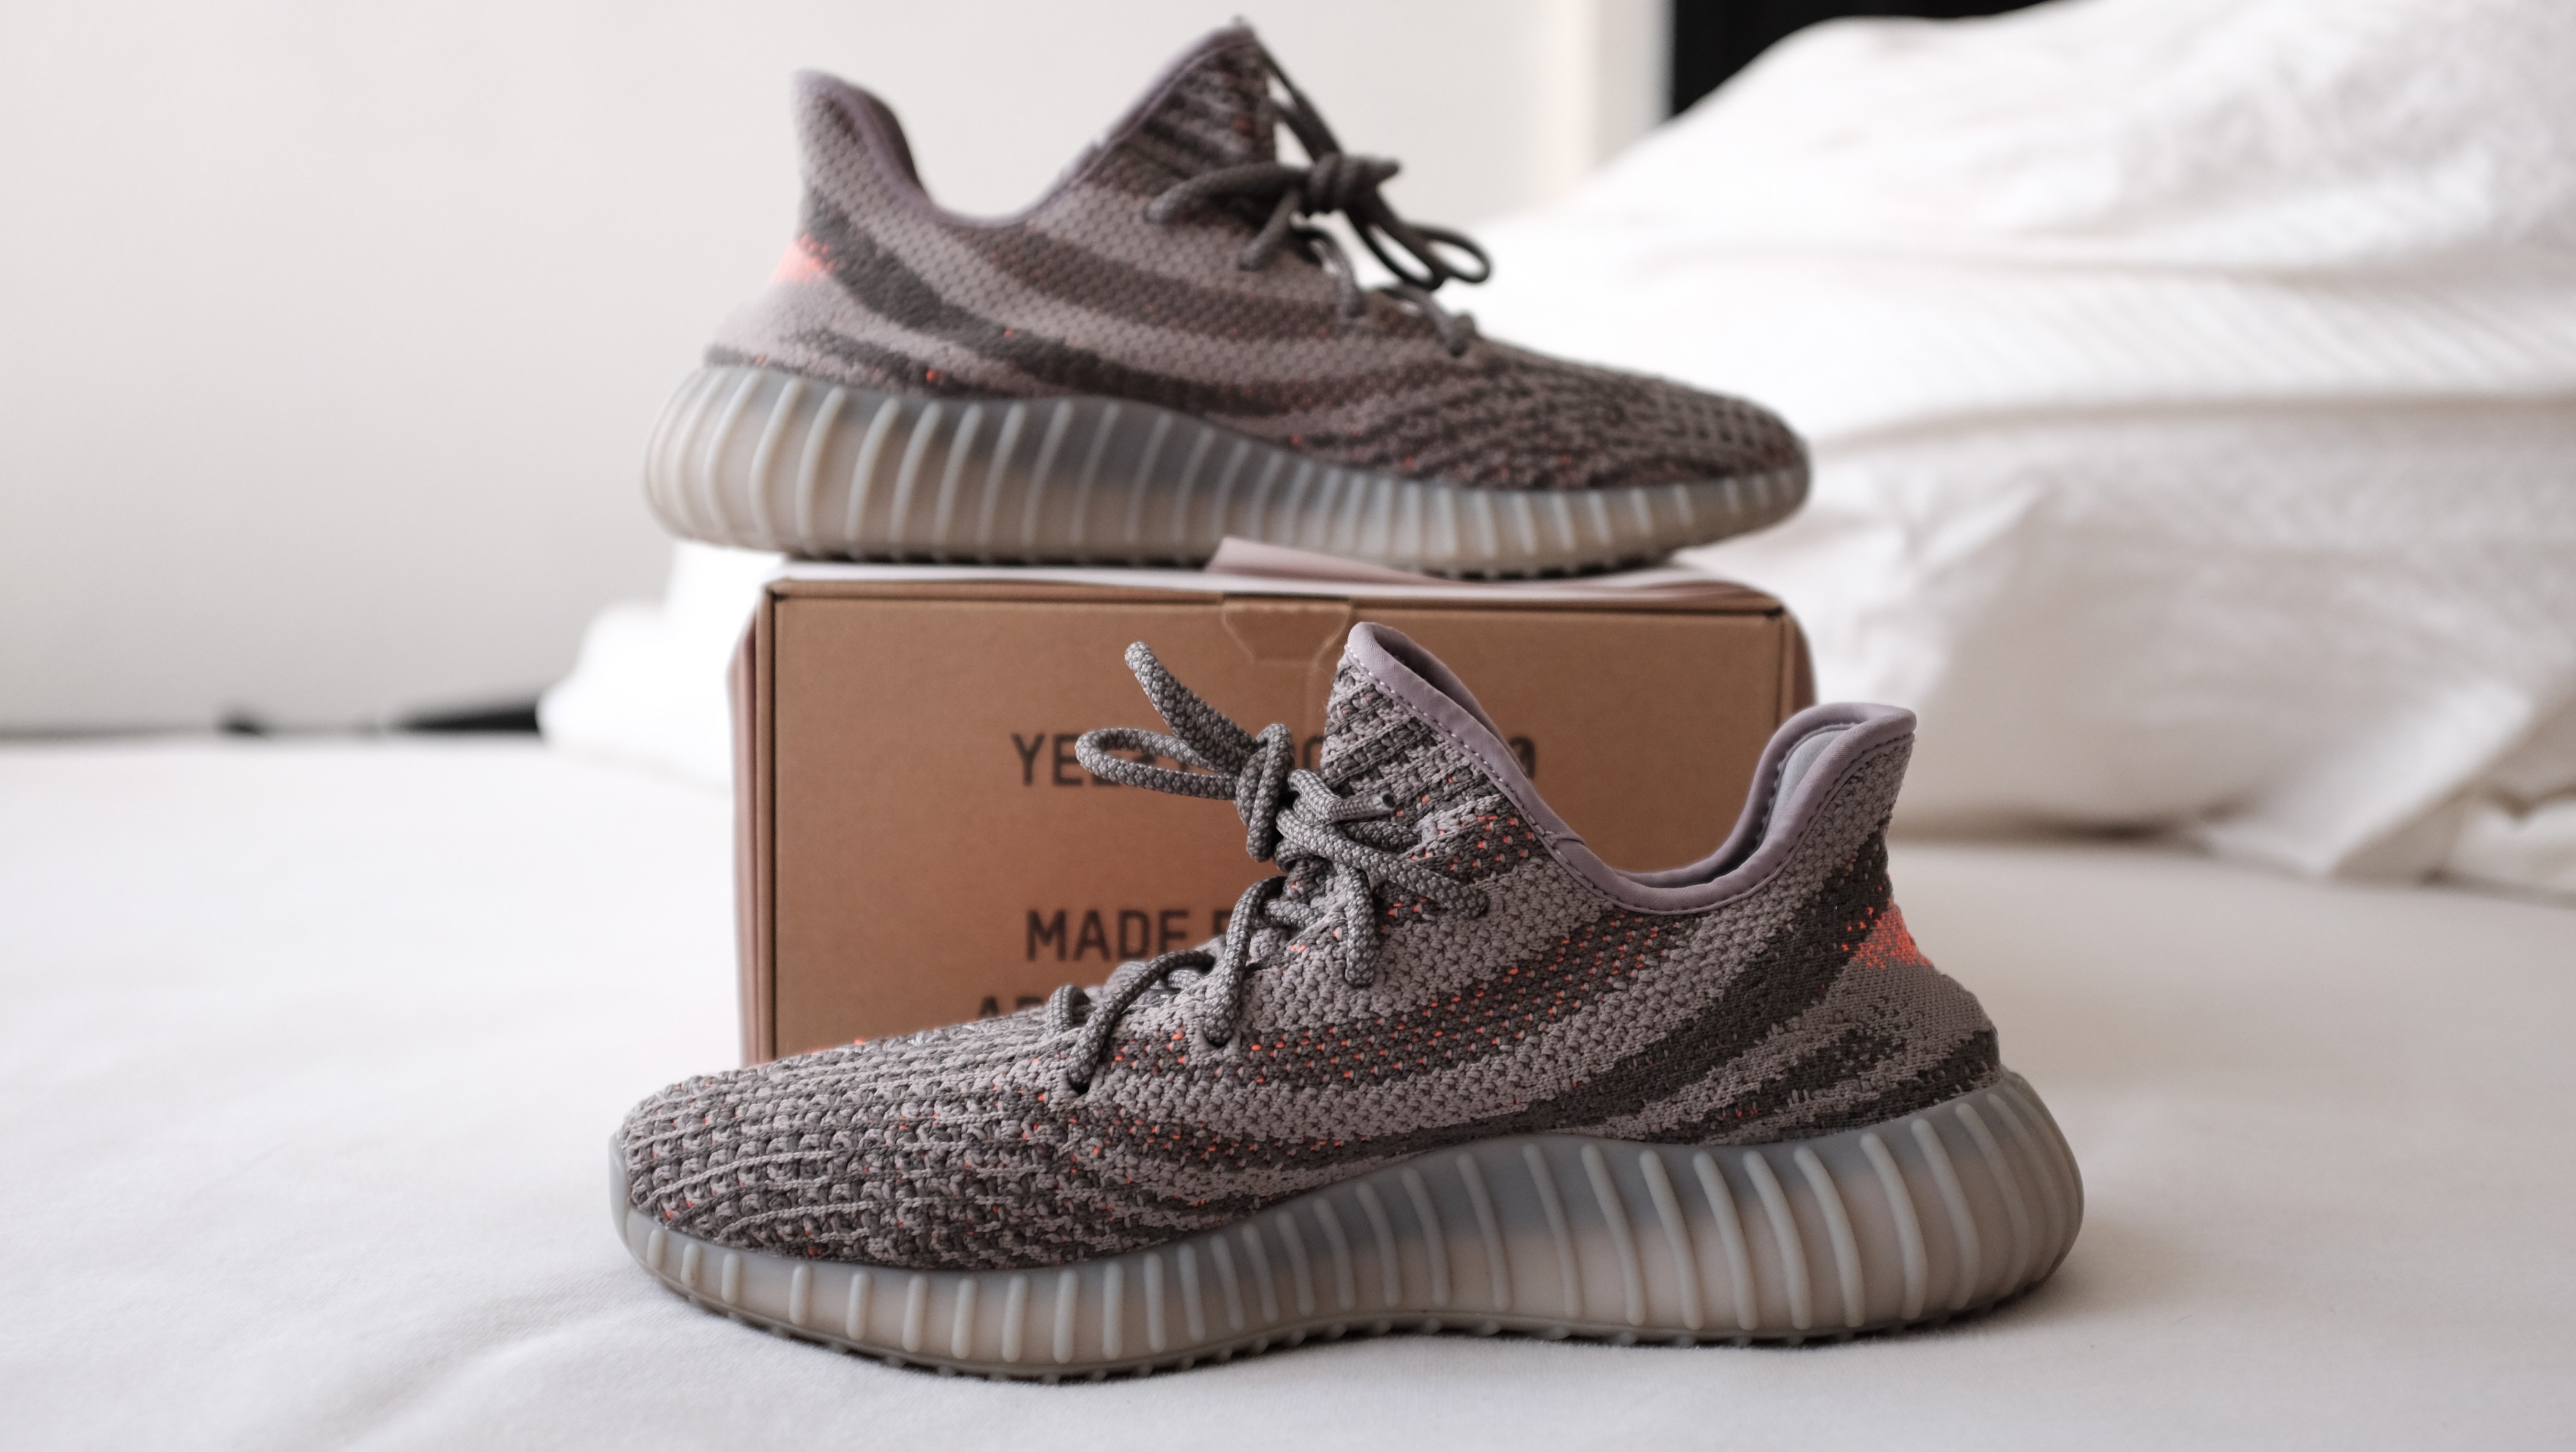
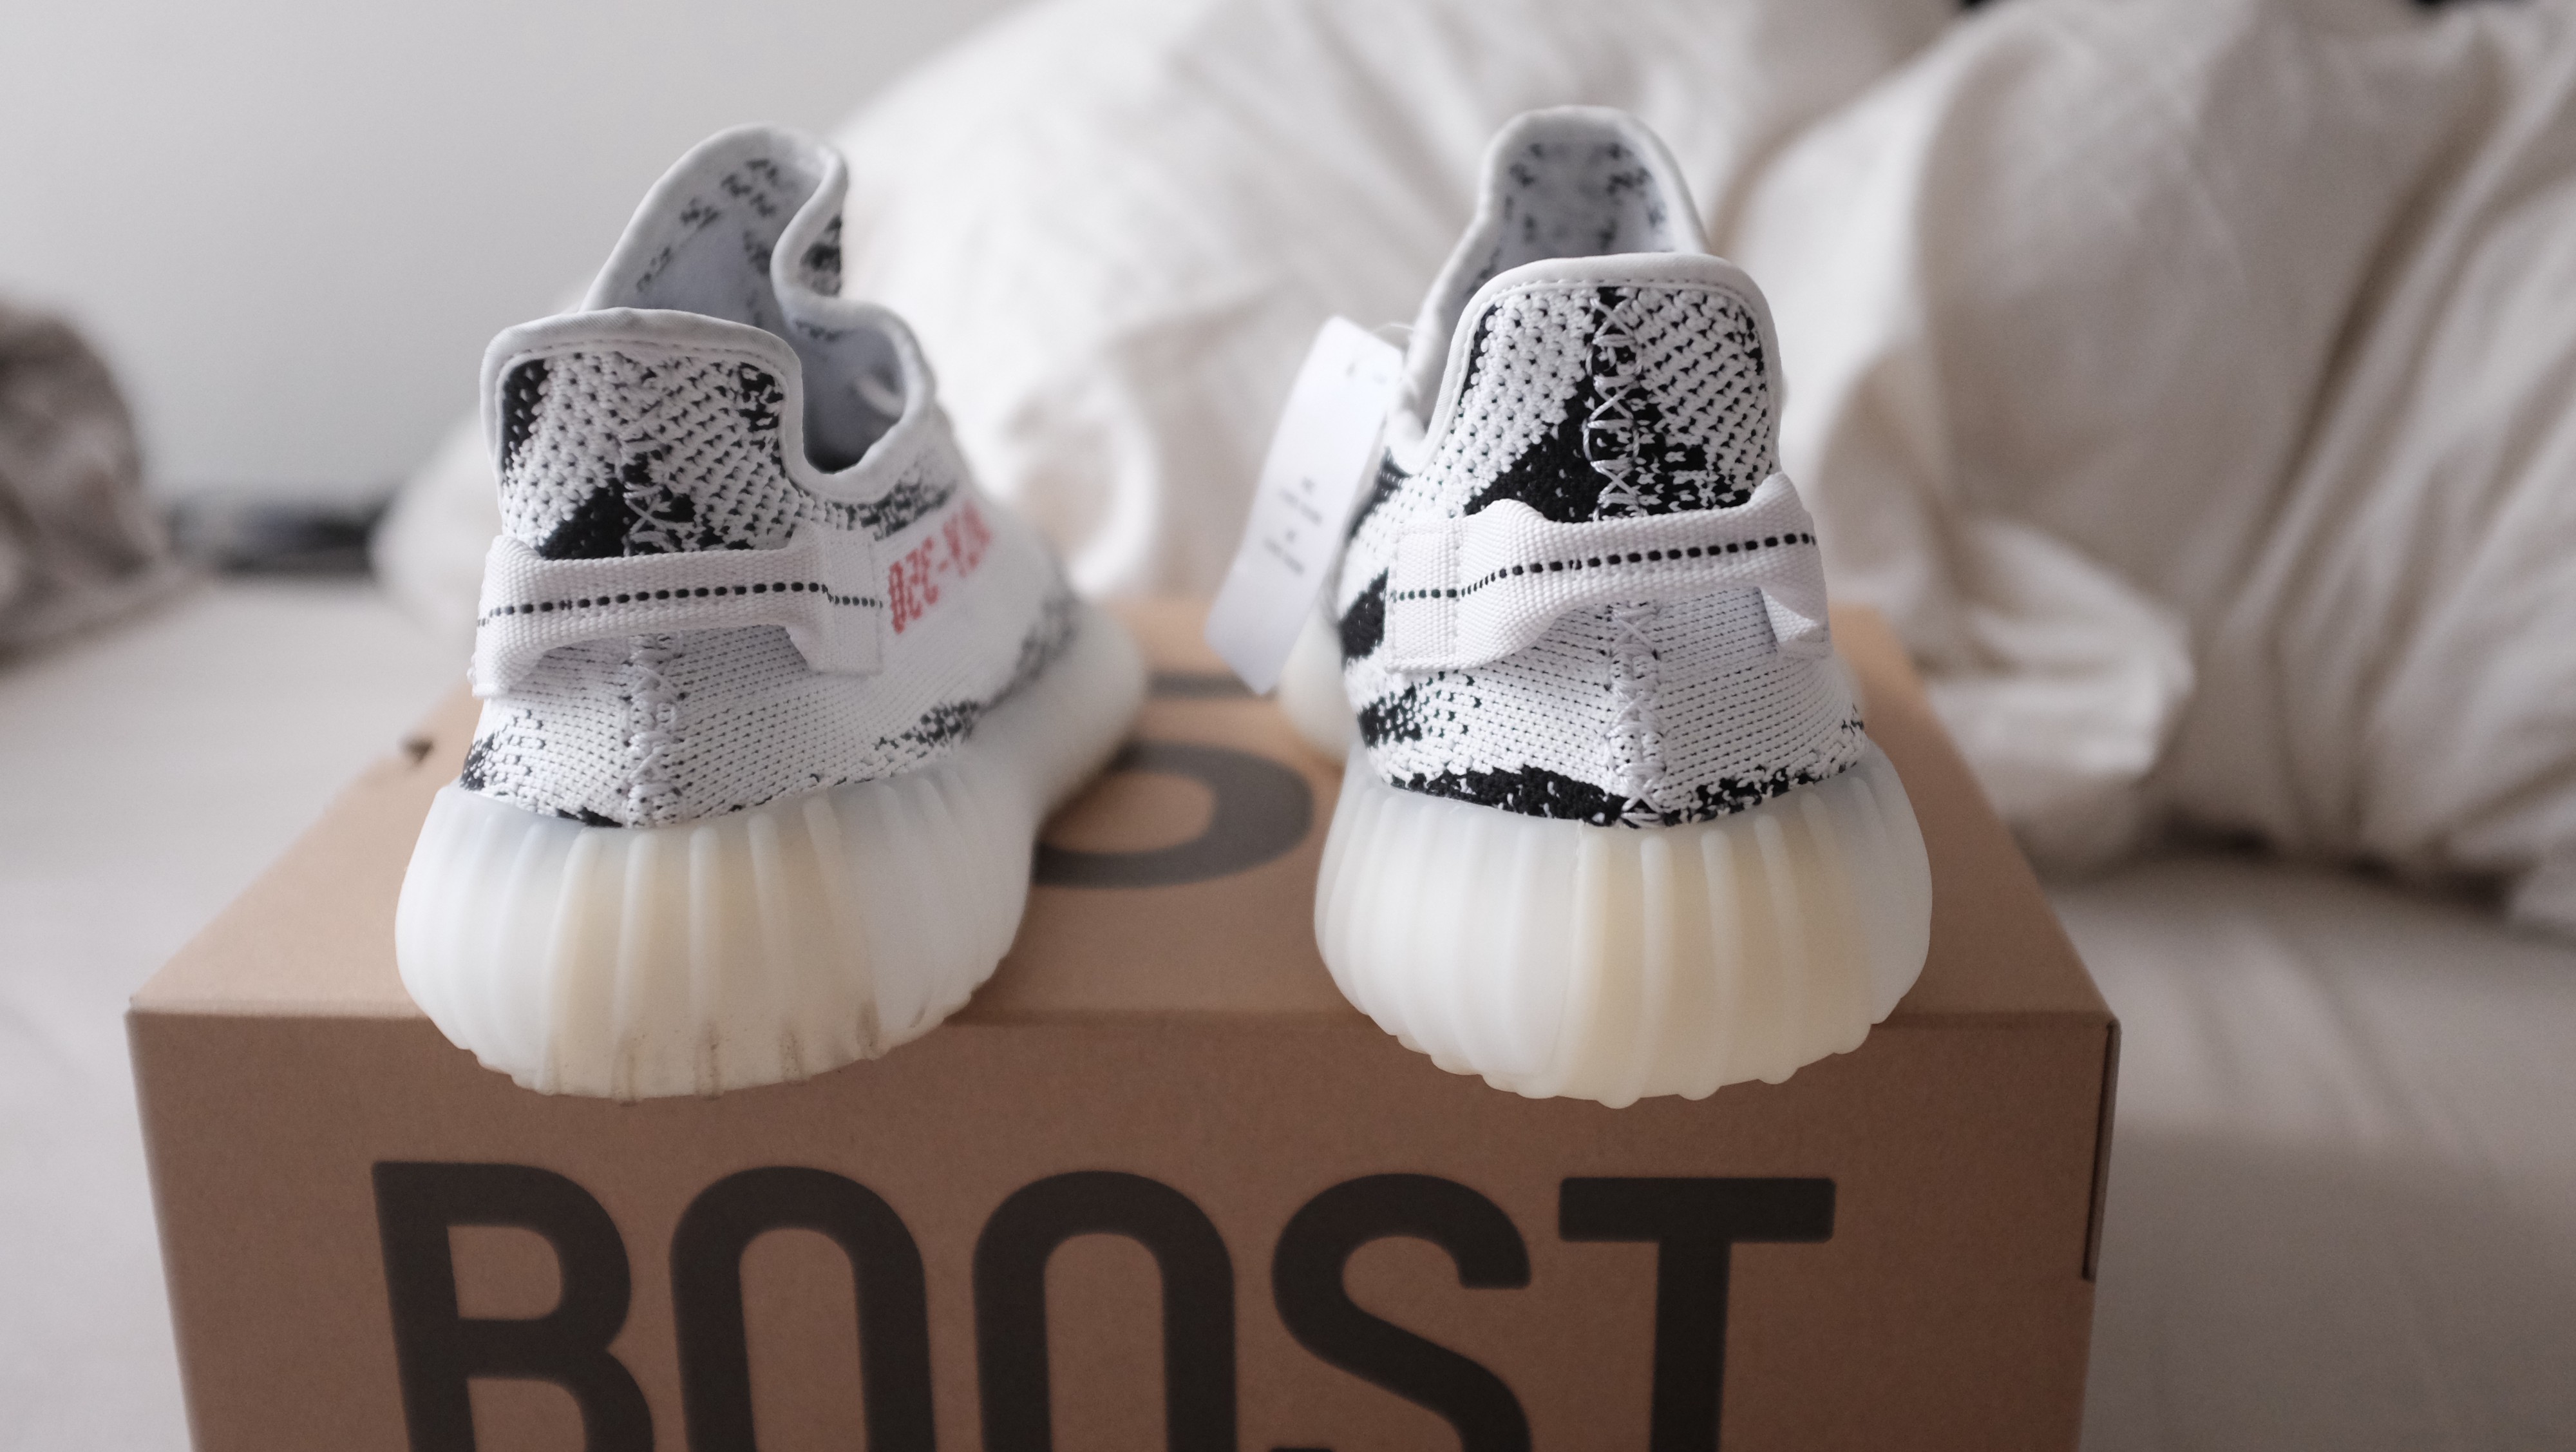
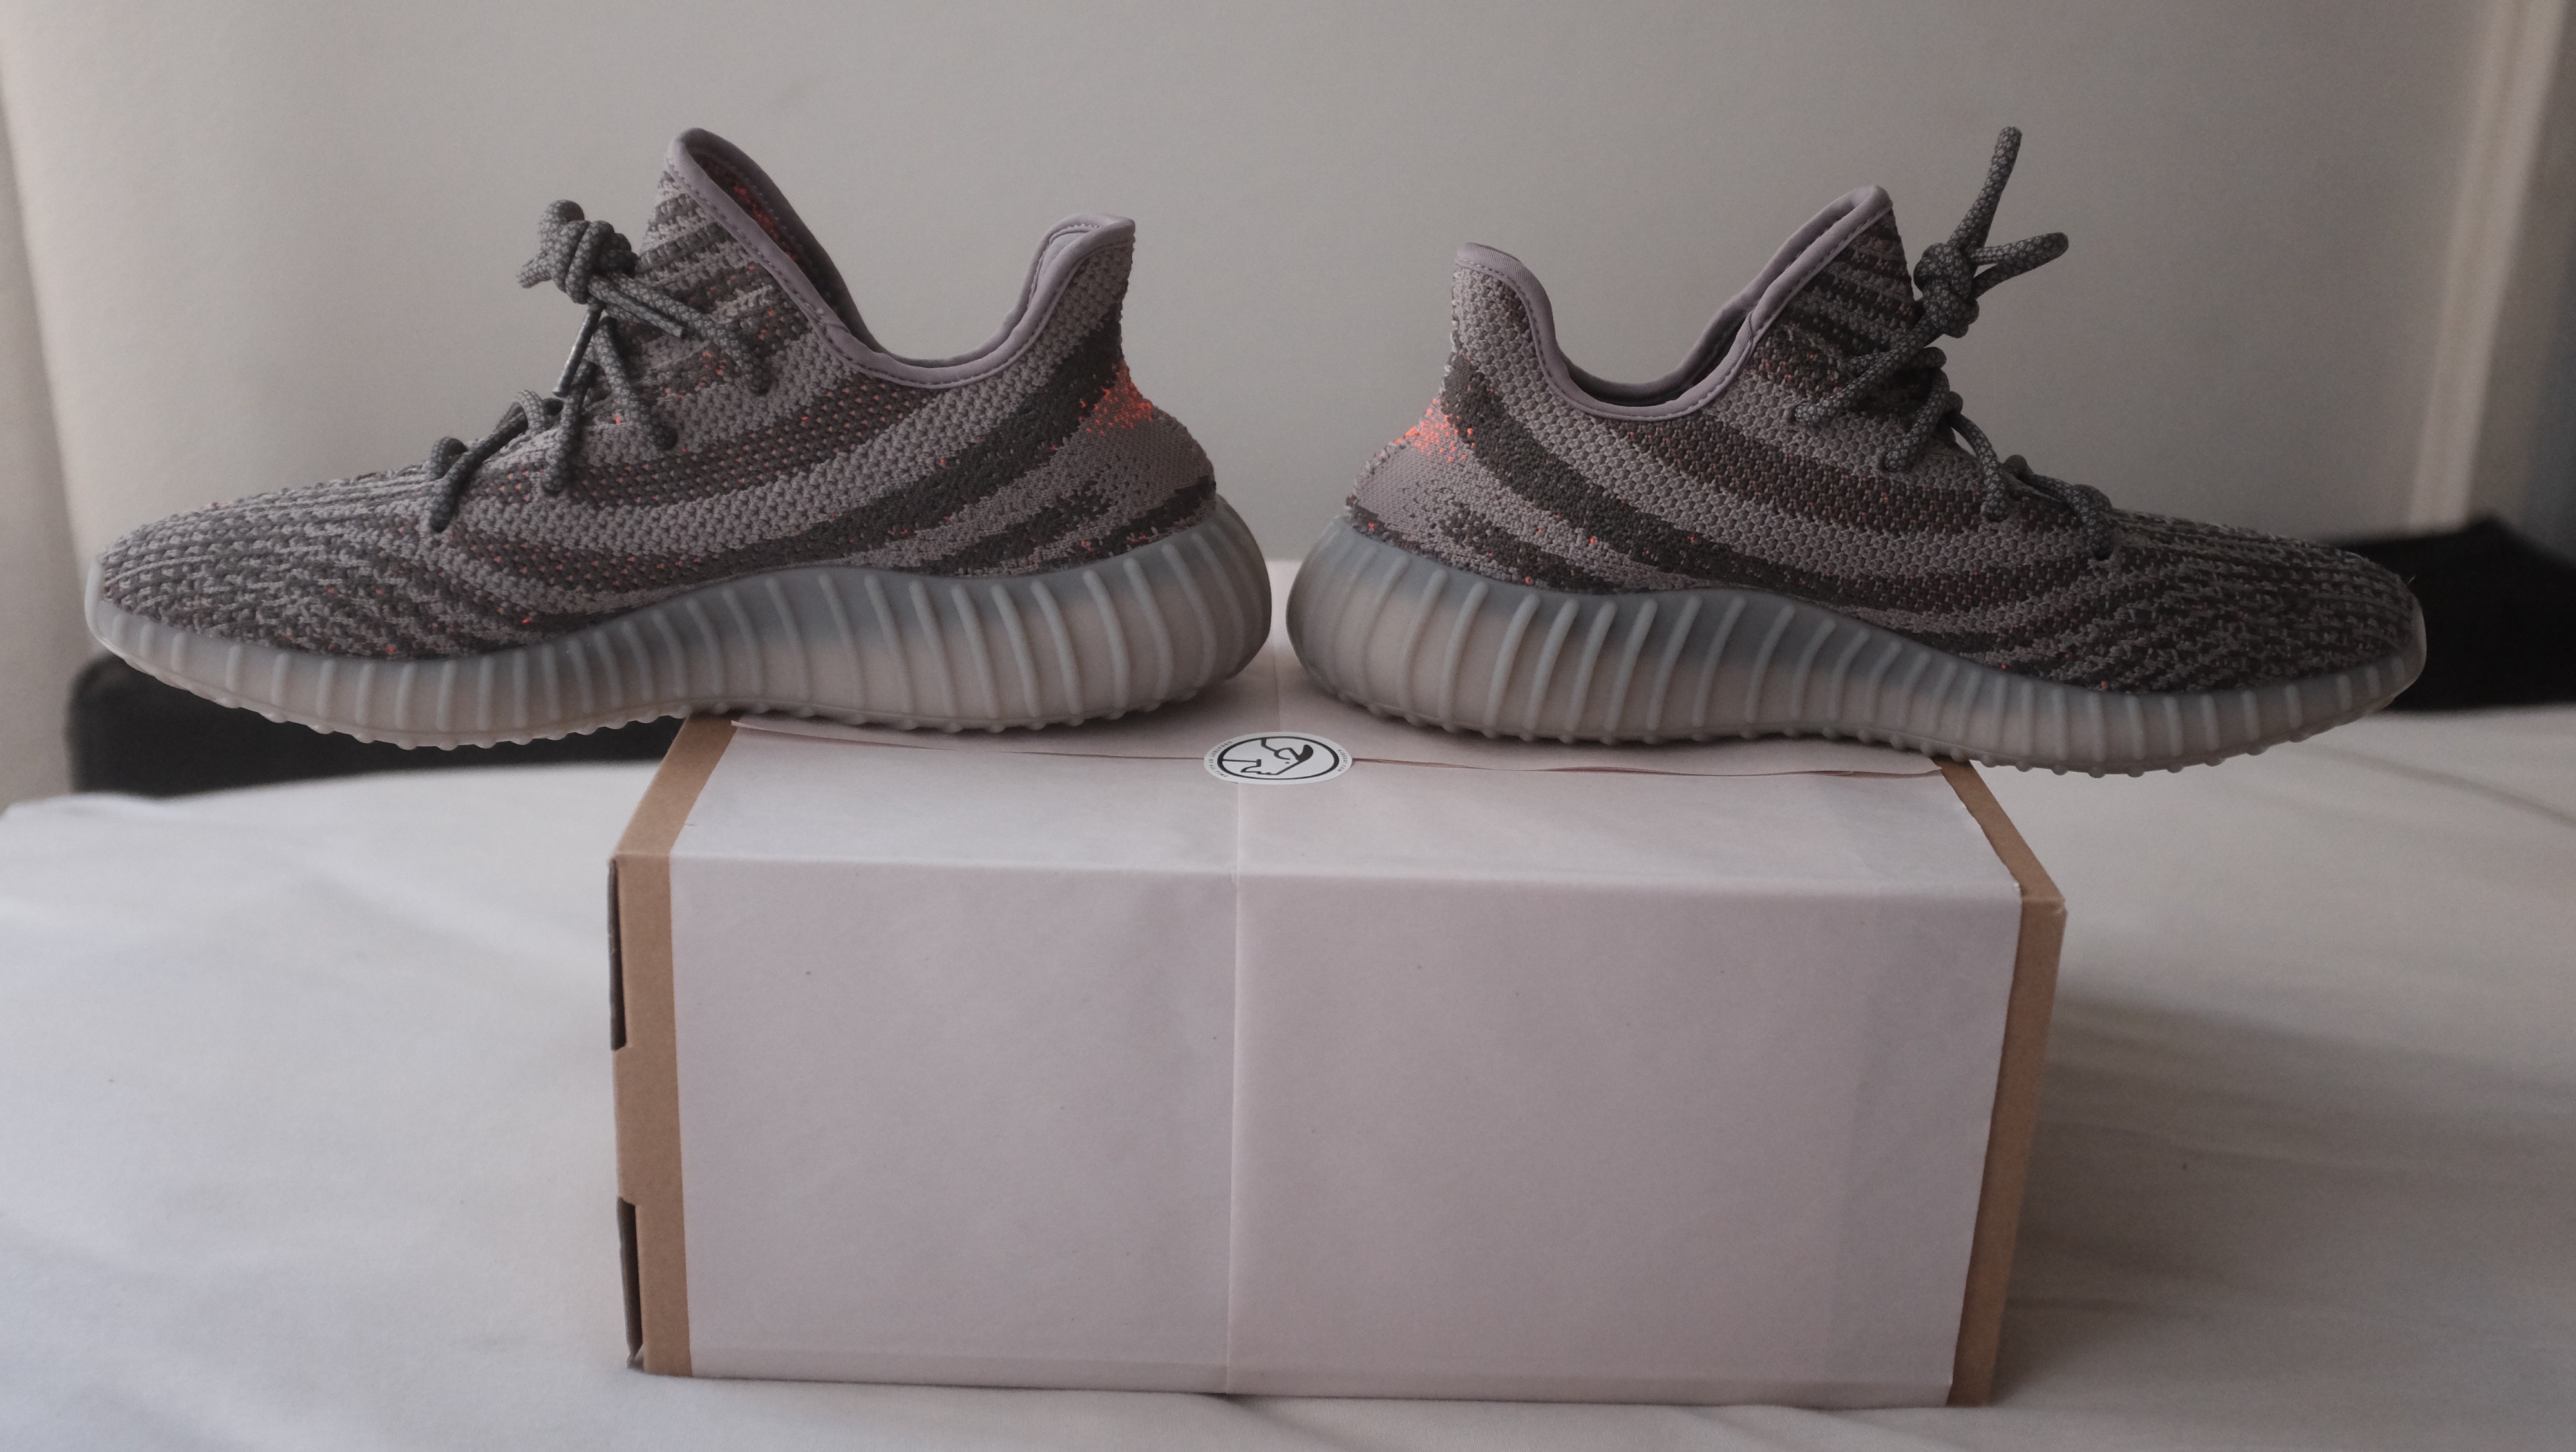
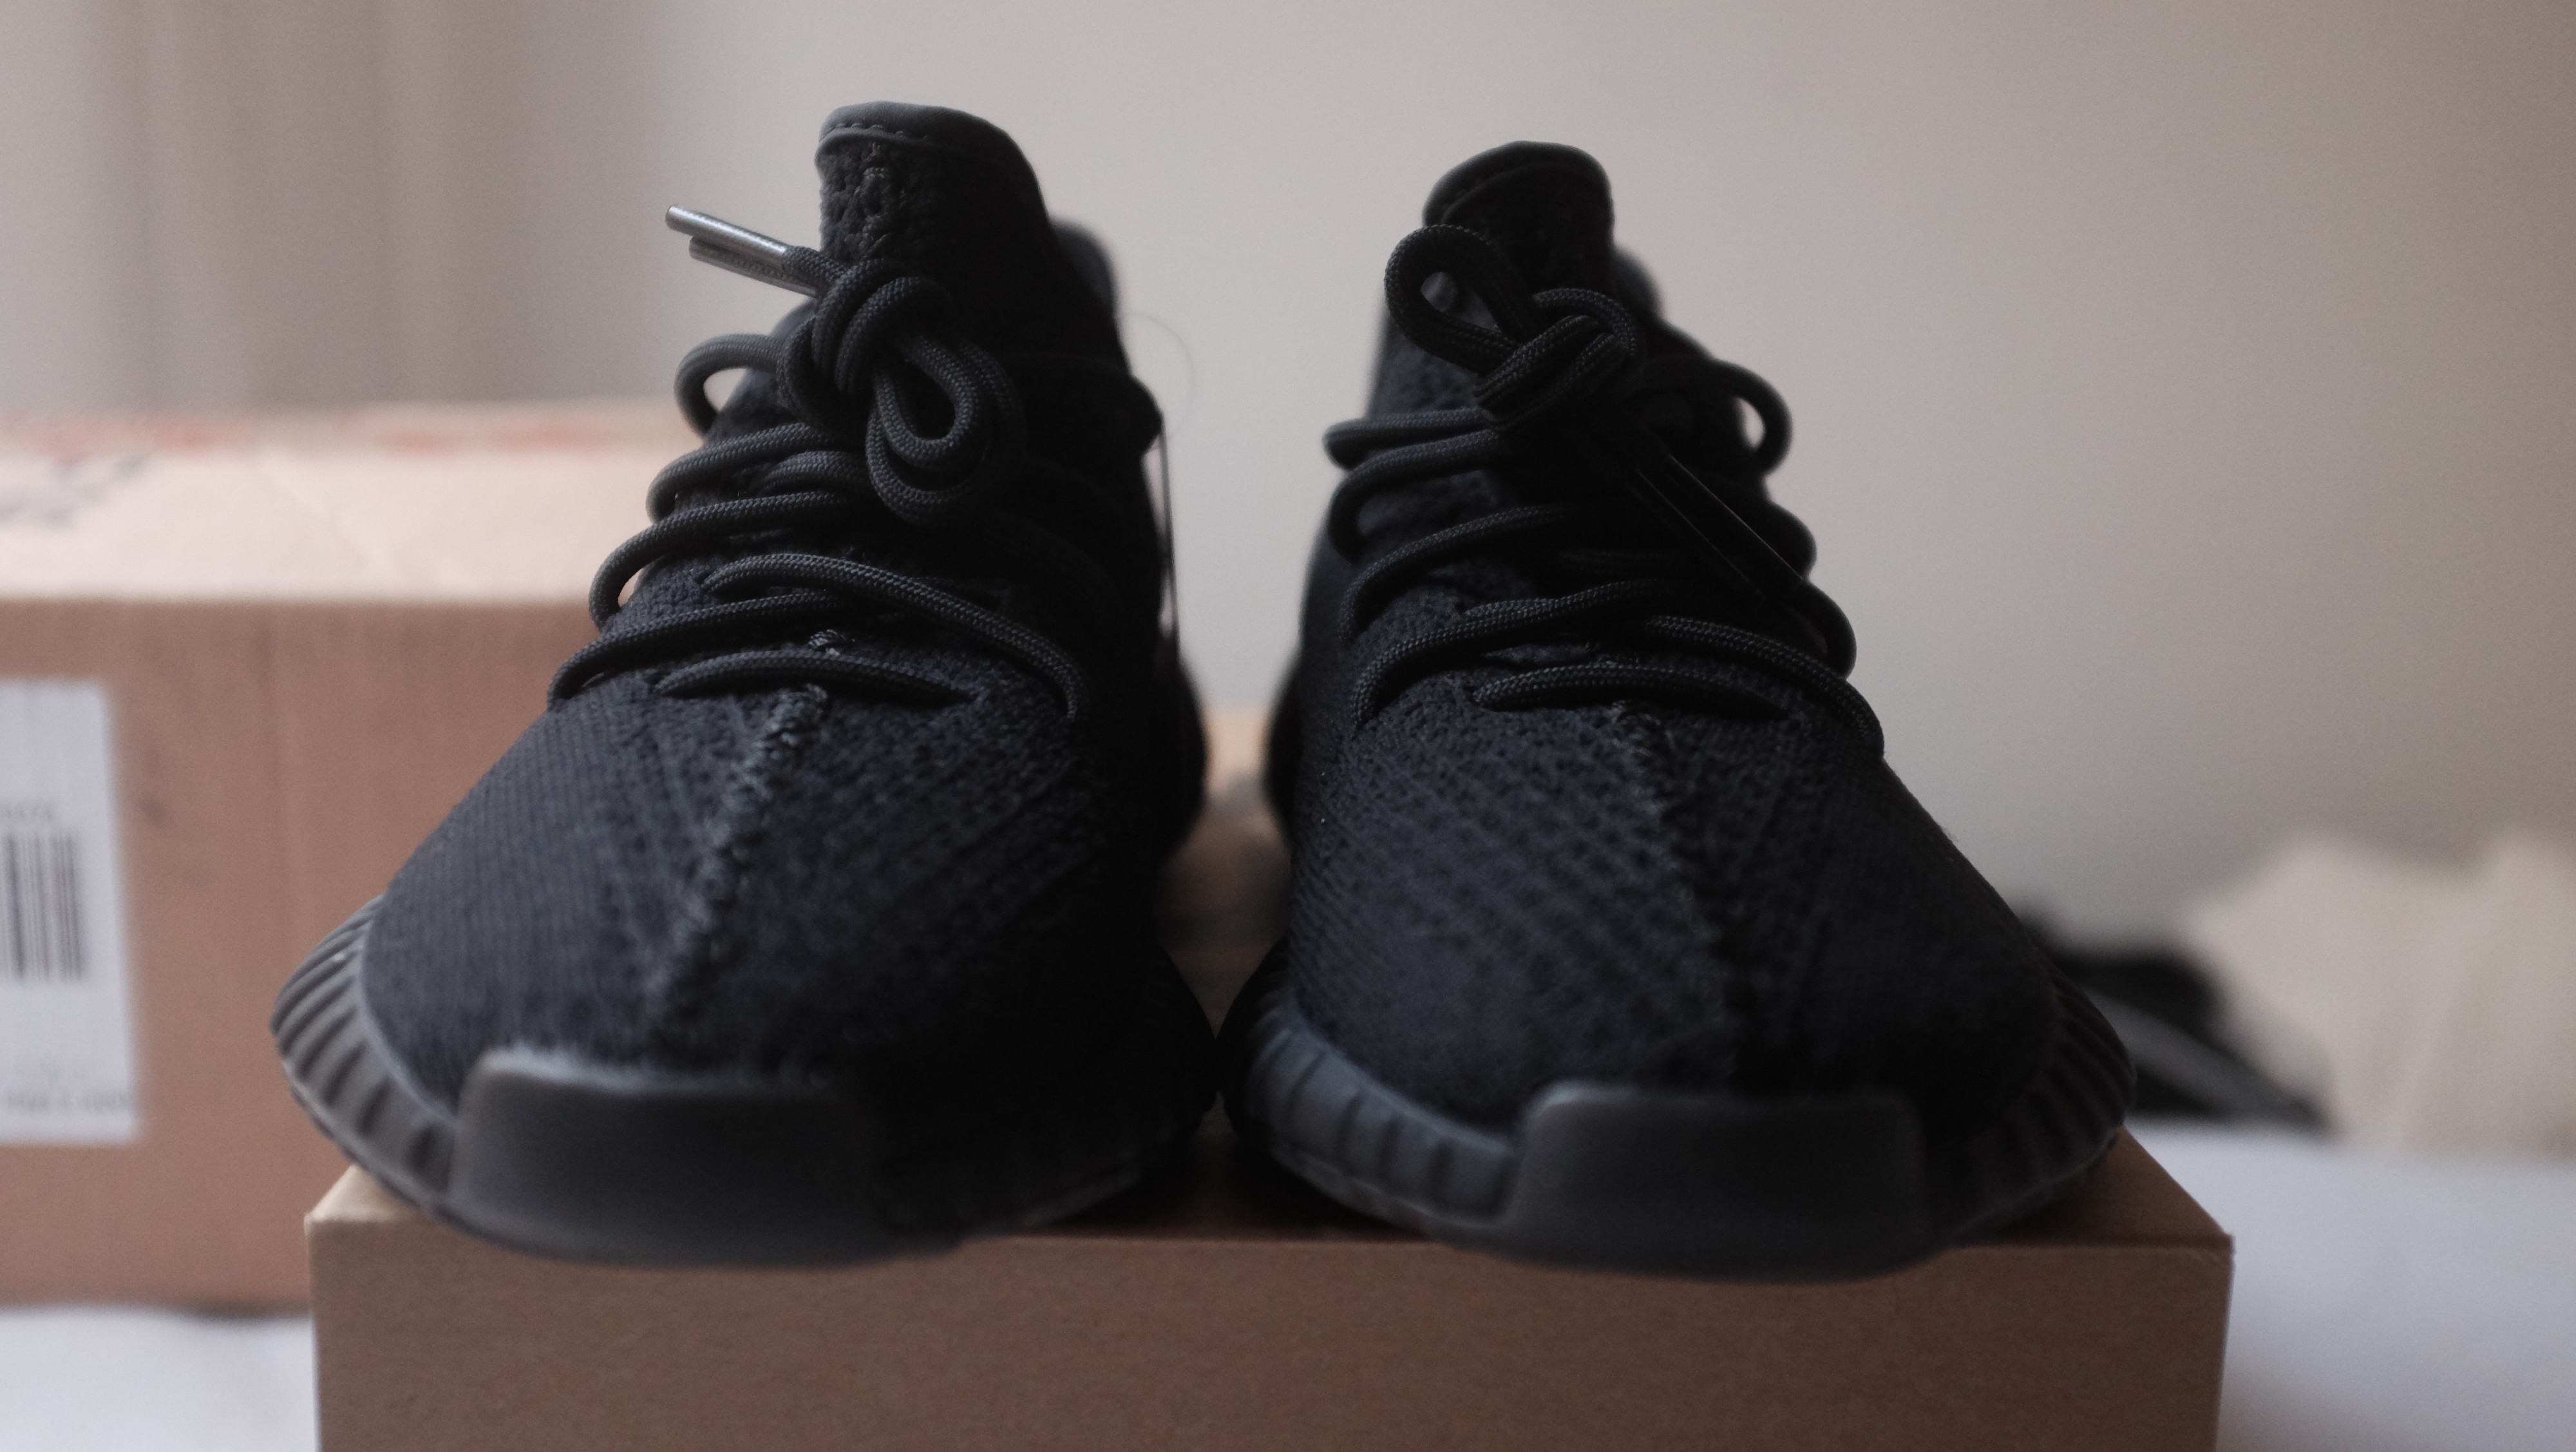
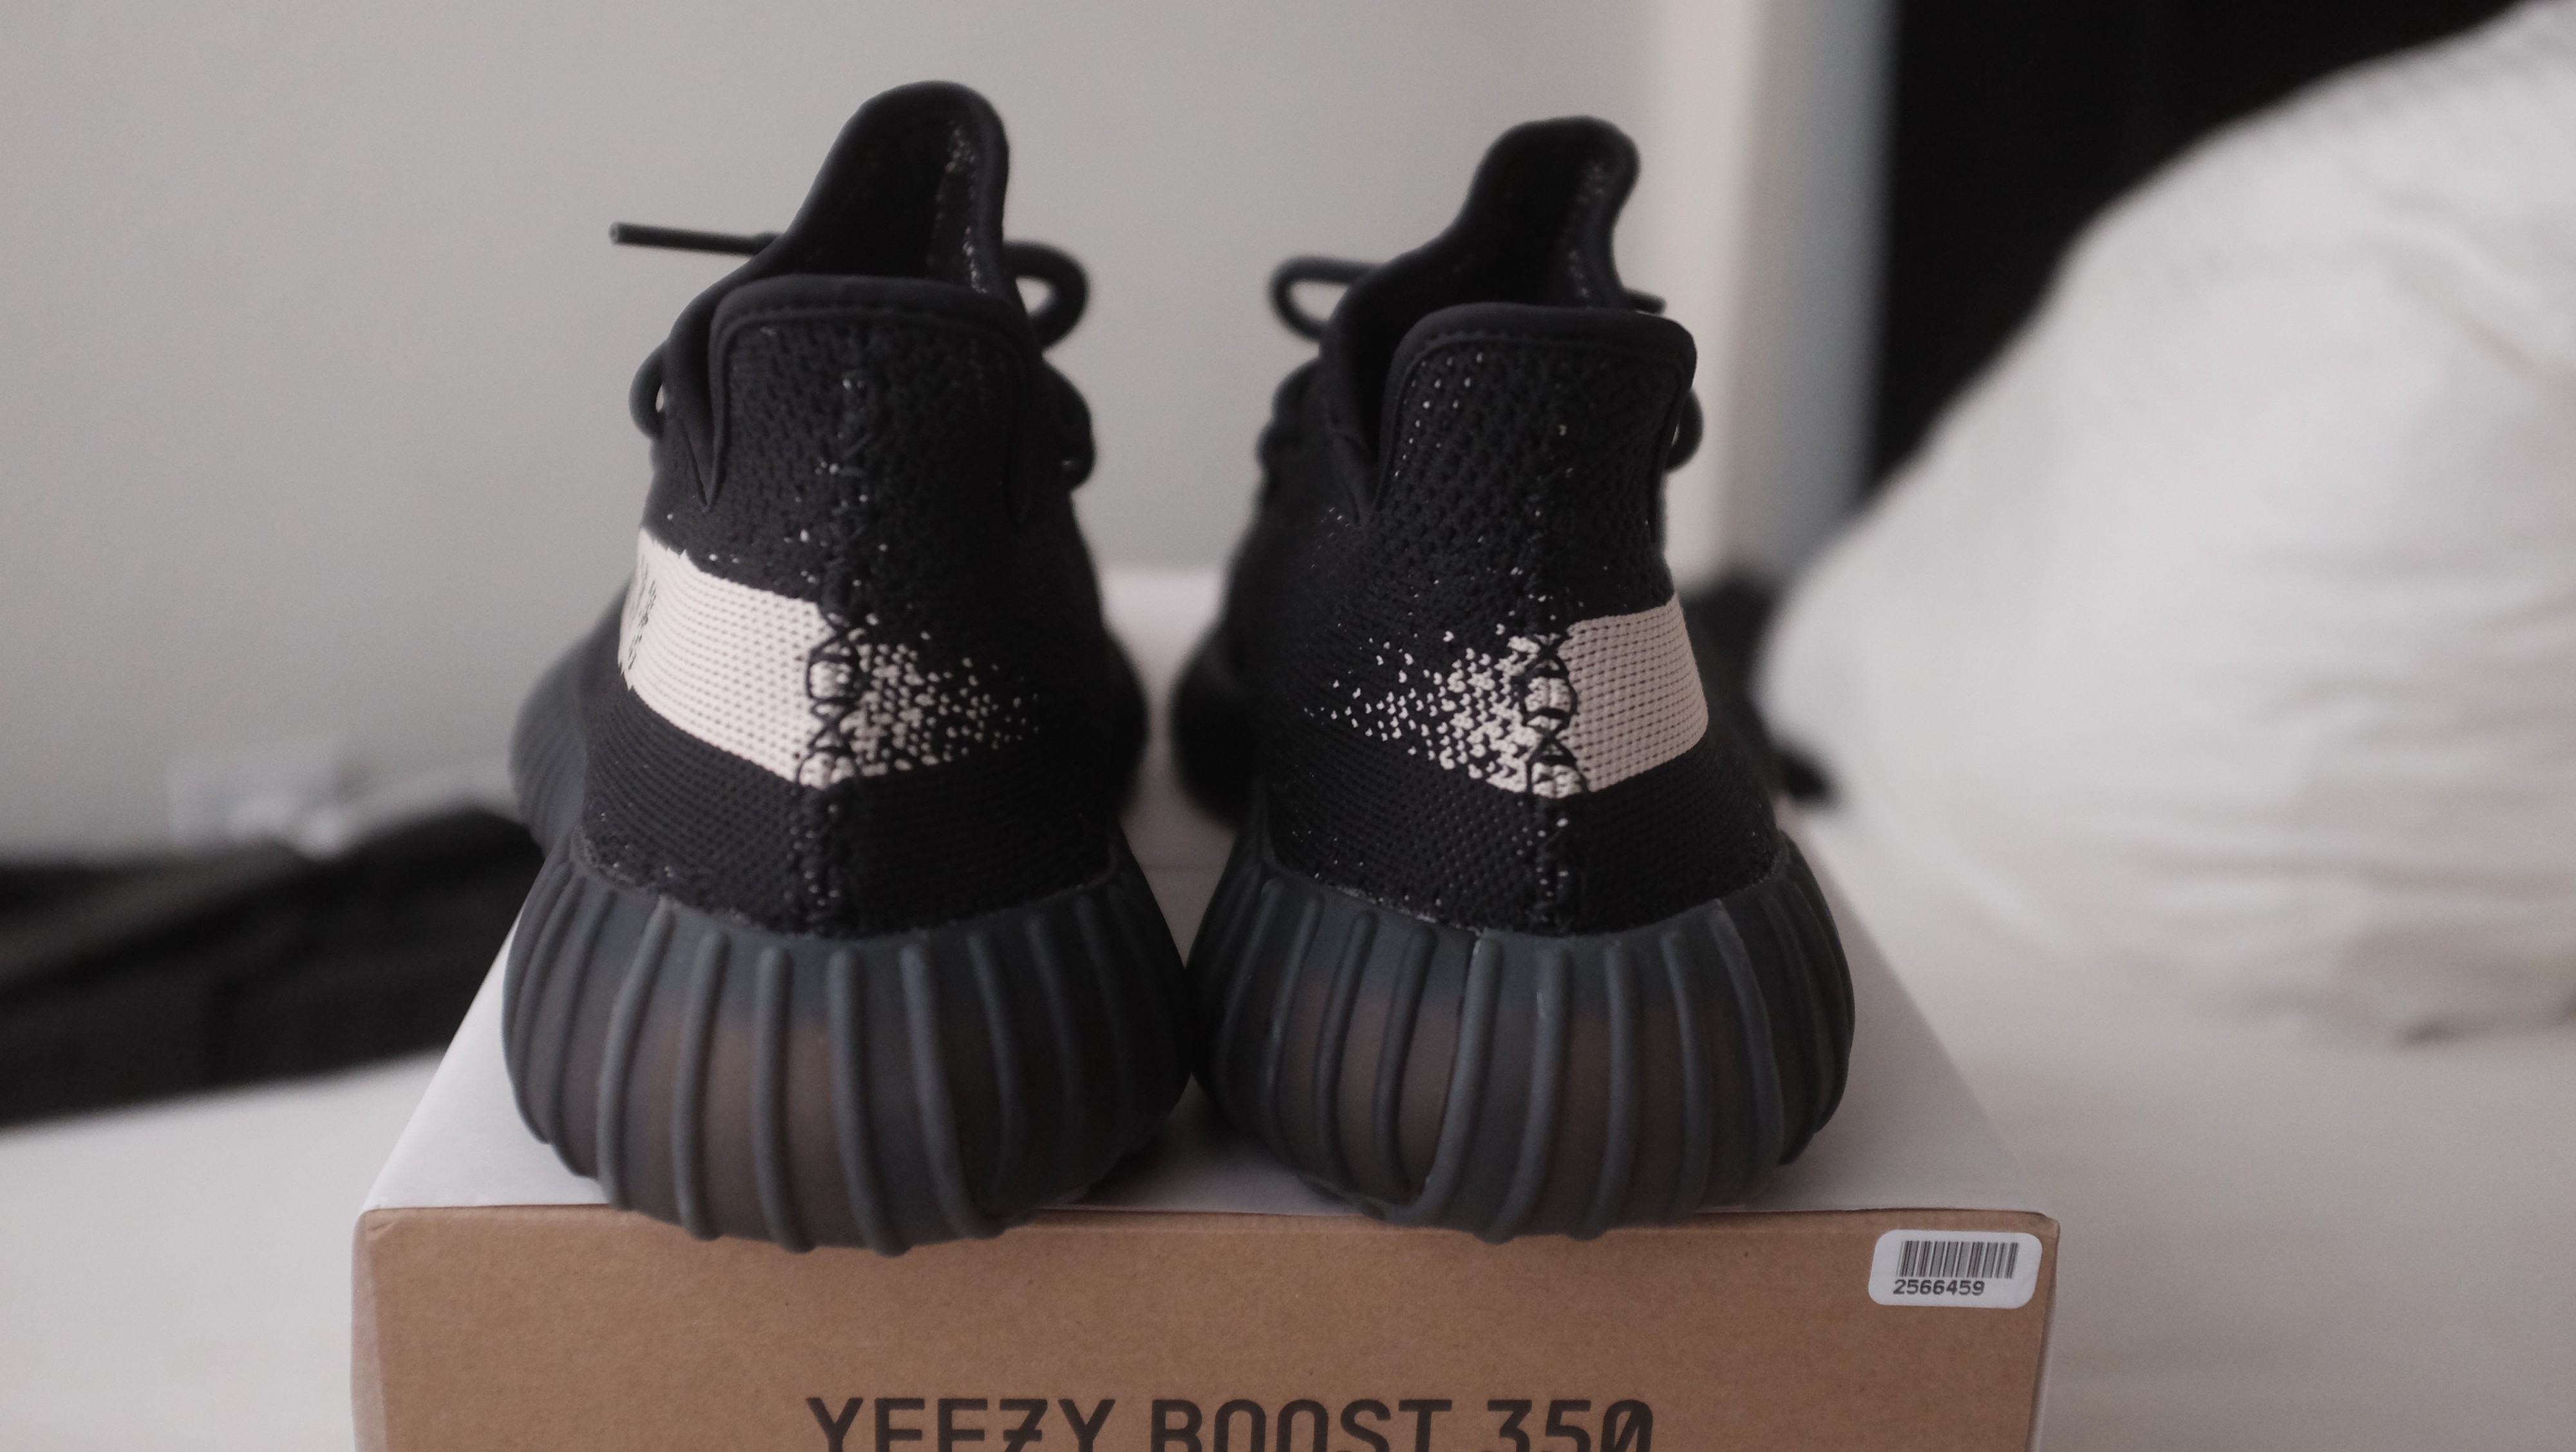 Left is sz 9, right is sz 10 // Back heel should almost resemble a pyramid shape.
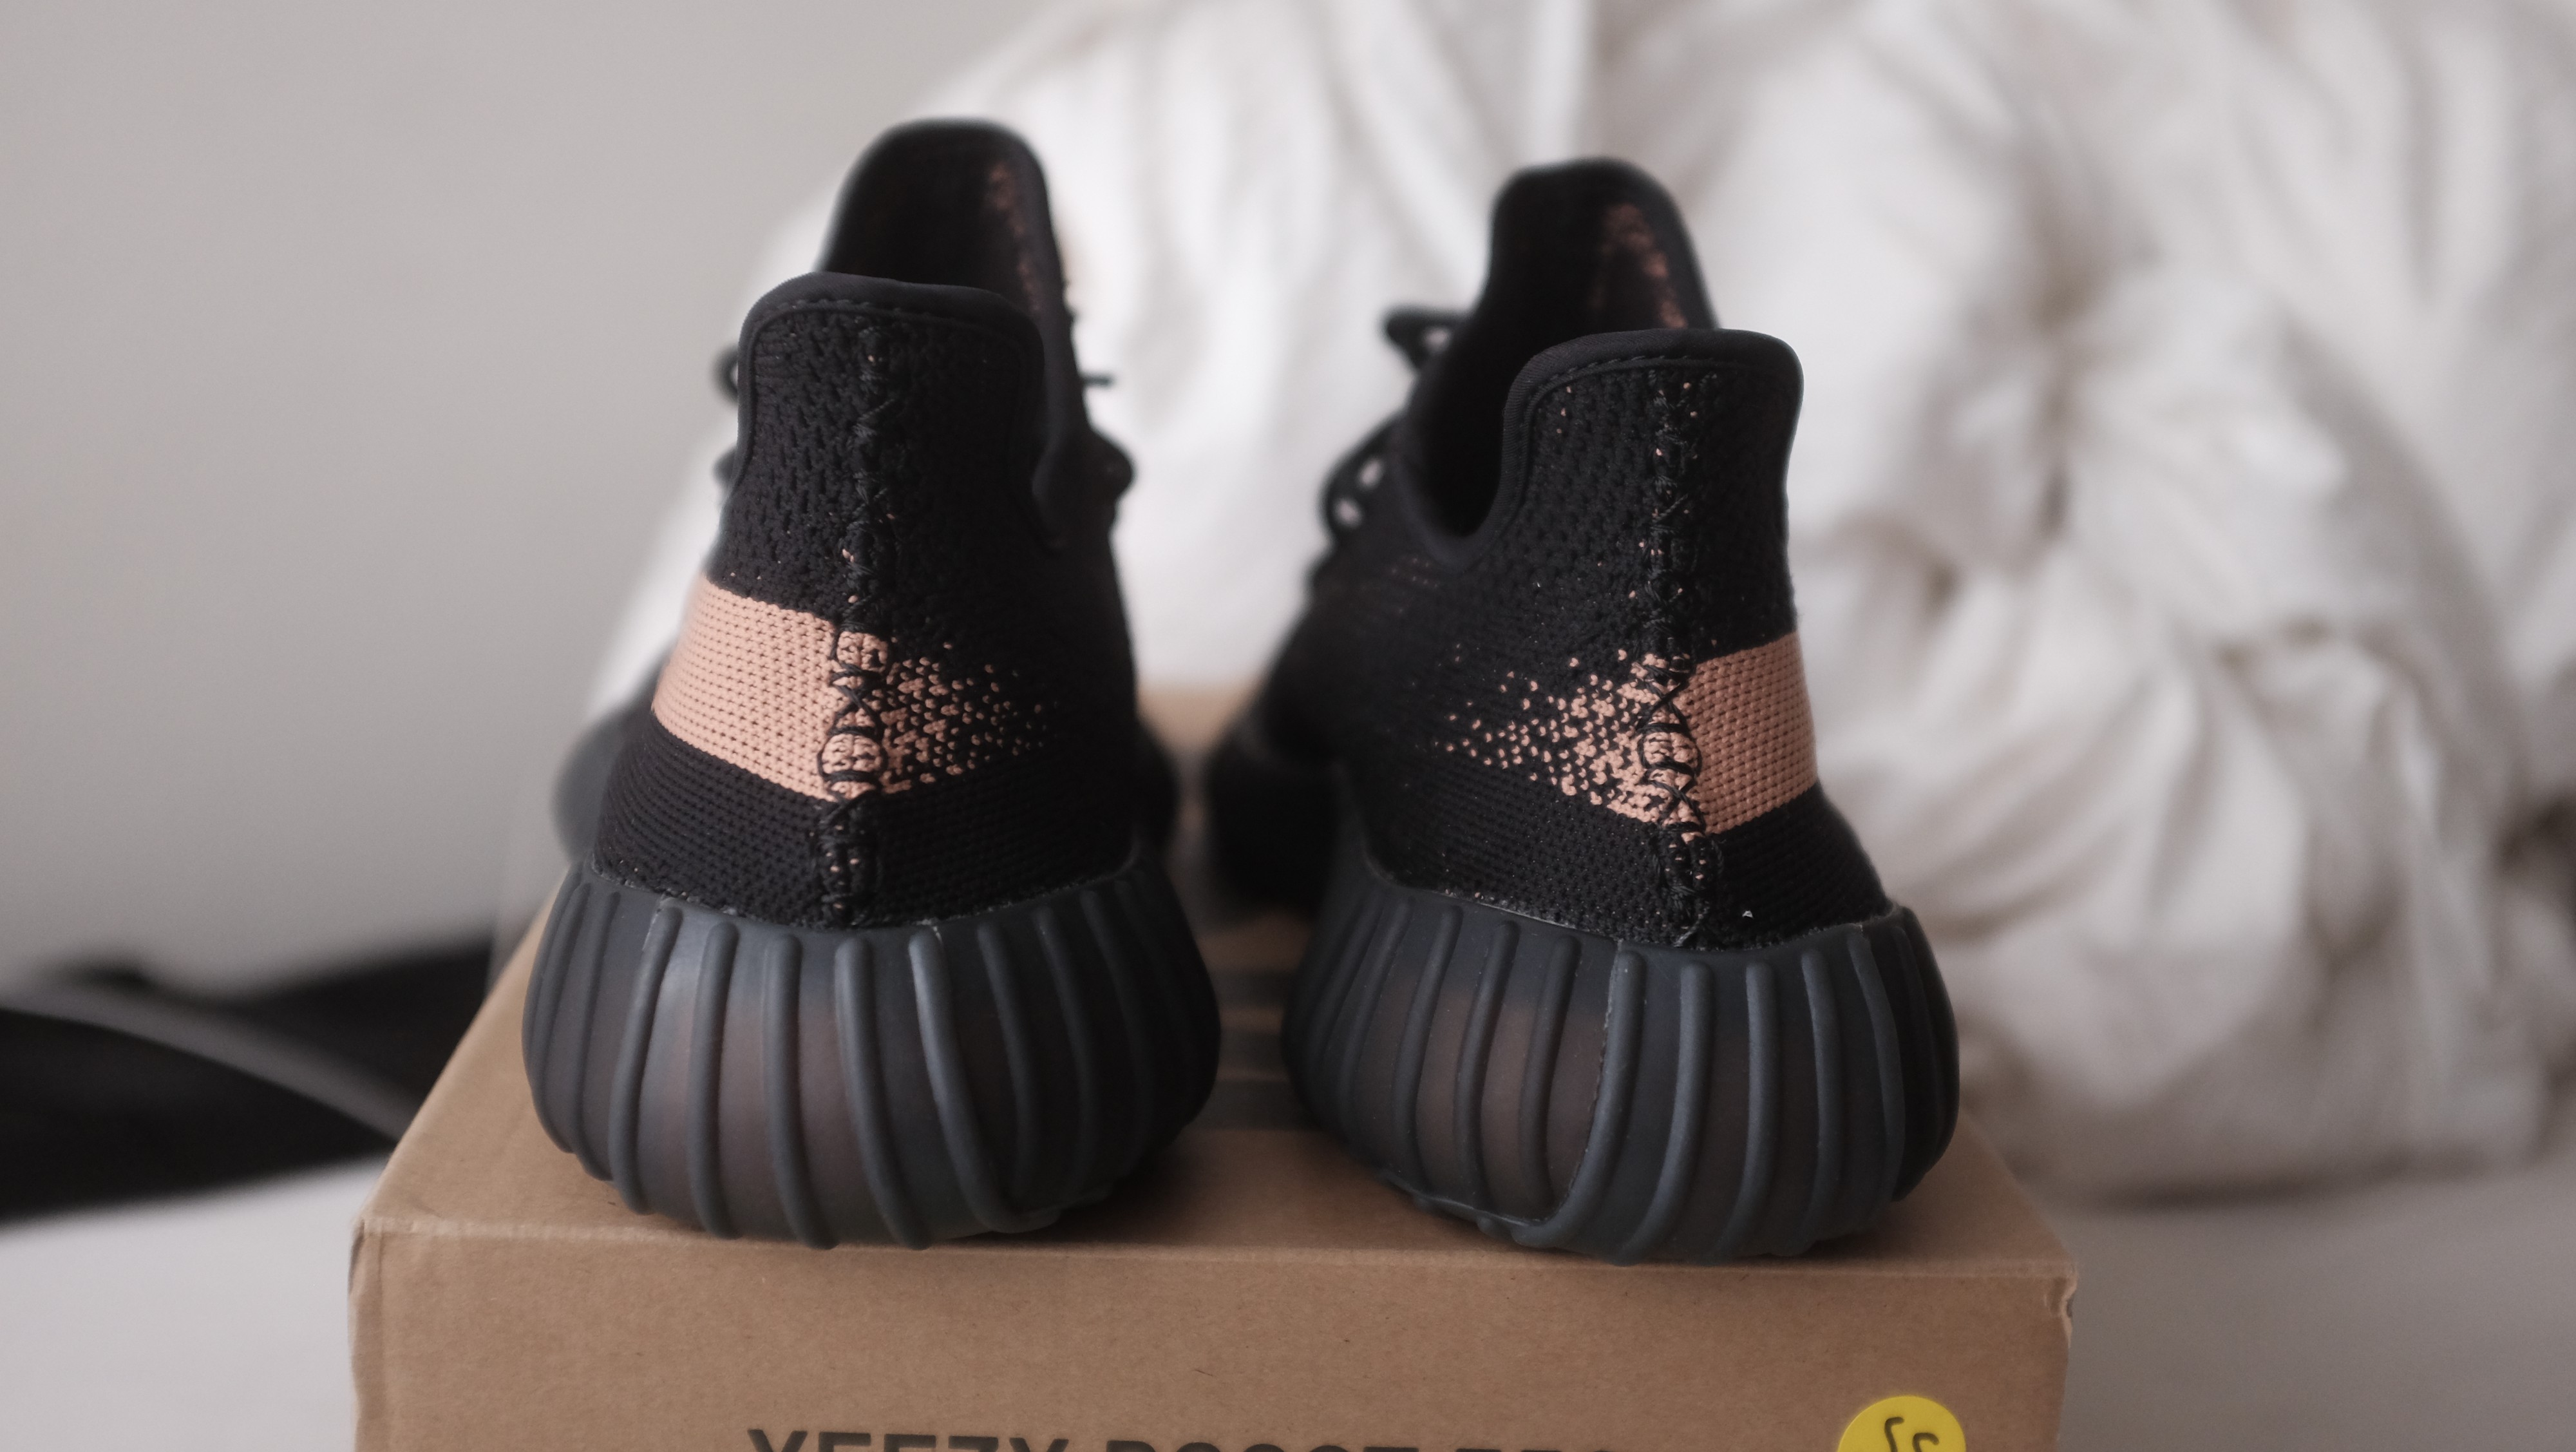 Copper sz 10 // Note the fade for Black Stripe V2?s- the stripe starts to fade a touch after the stitching.
Beluga Heel fade:
Beluga heel fades are different from Black Striped V2’s.
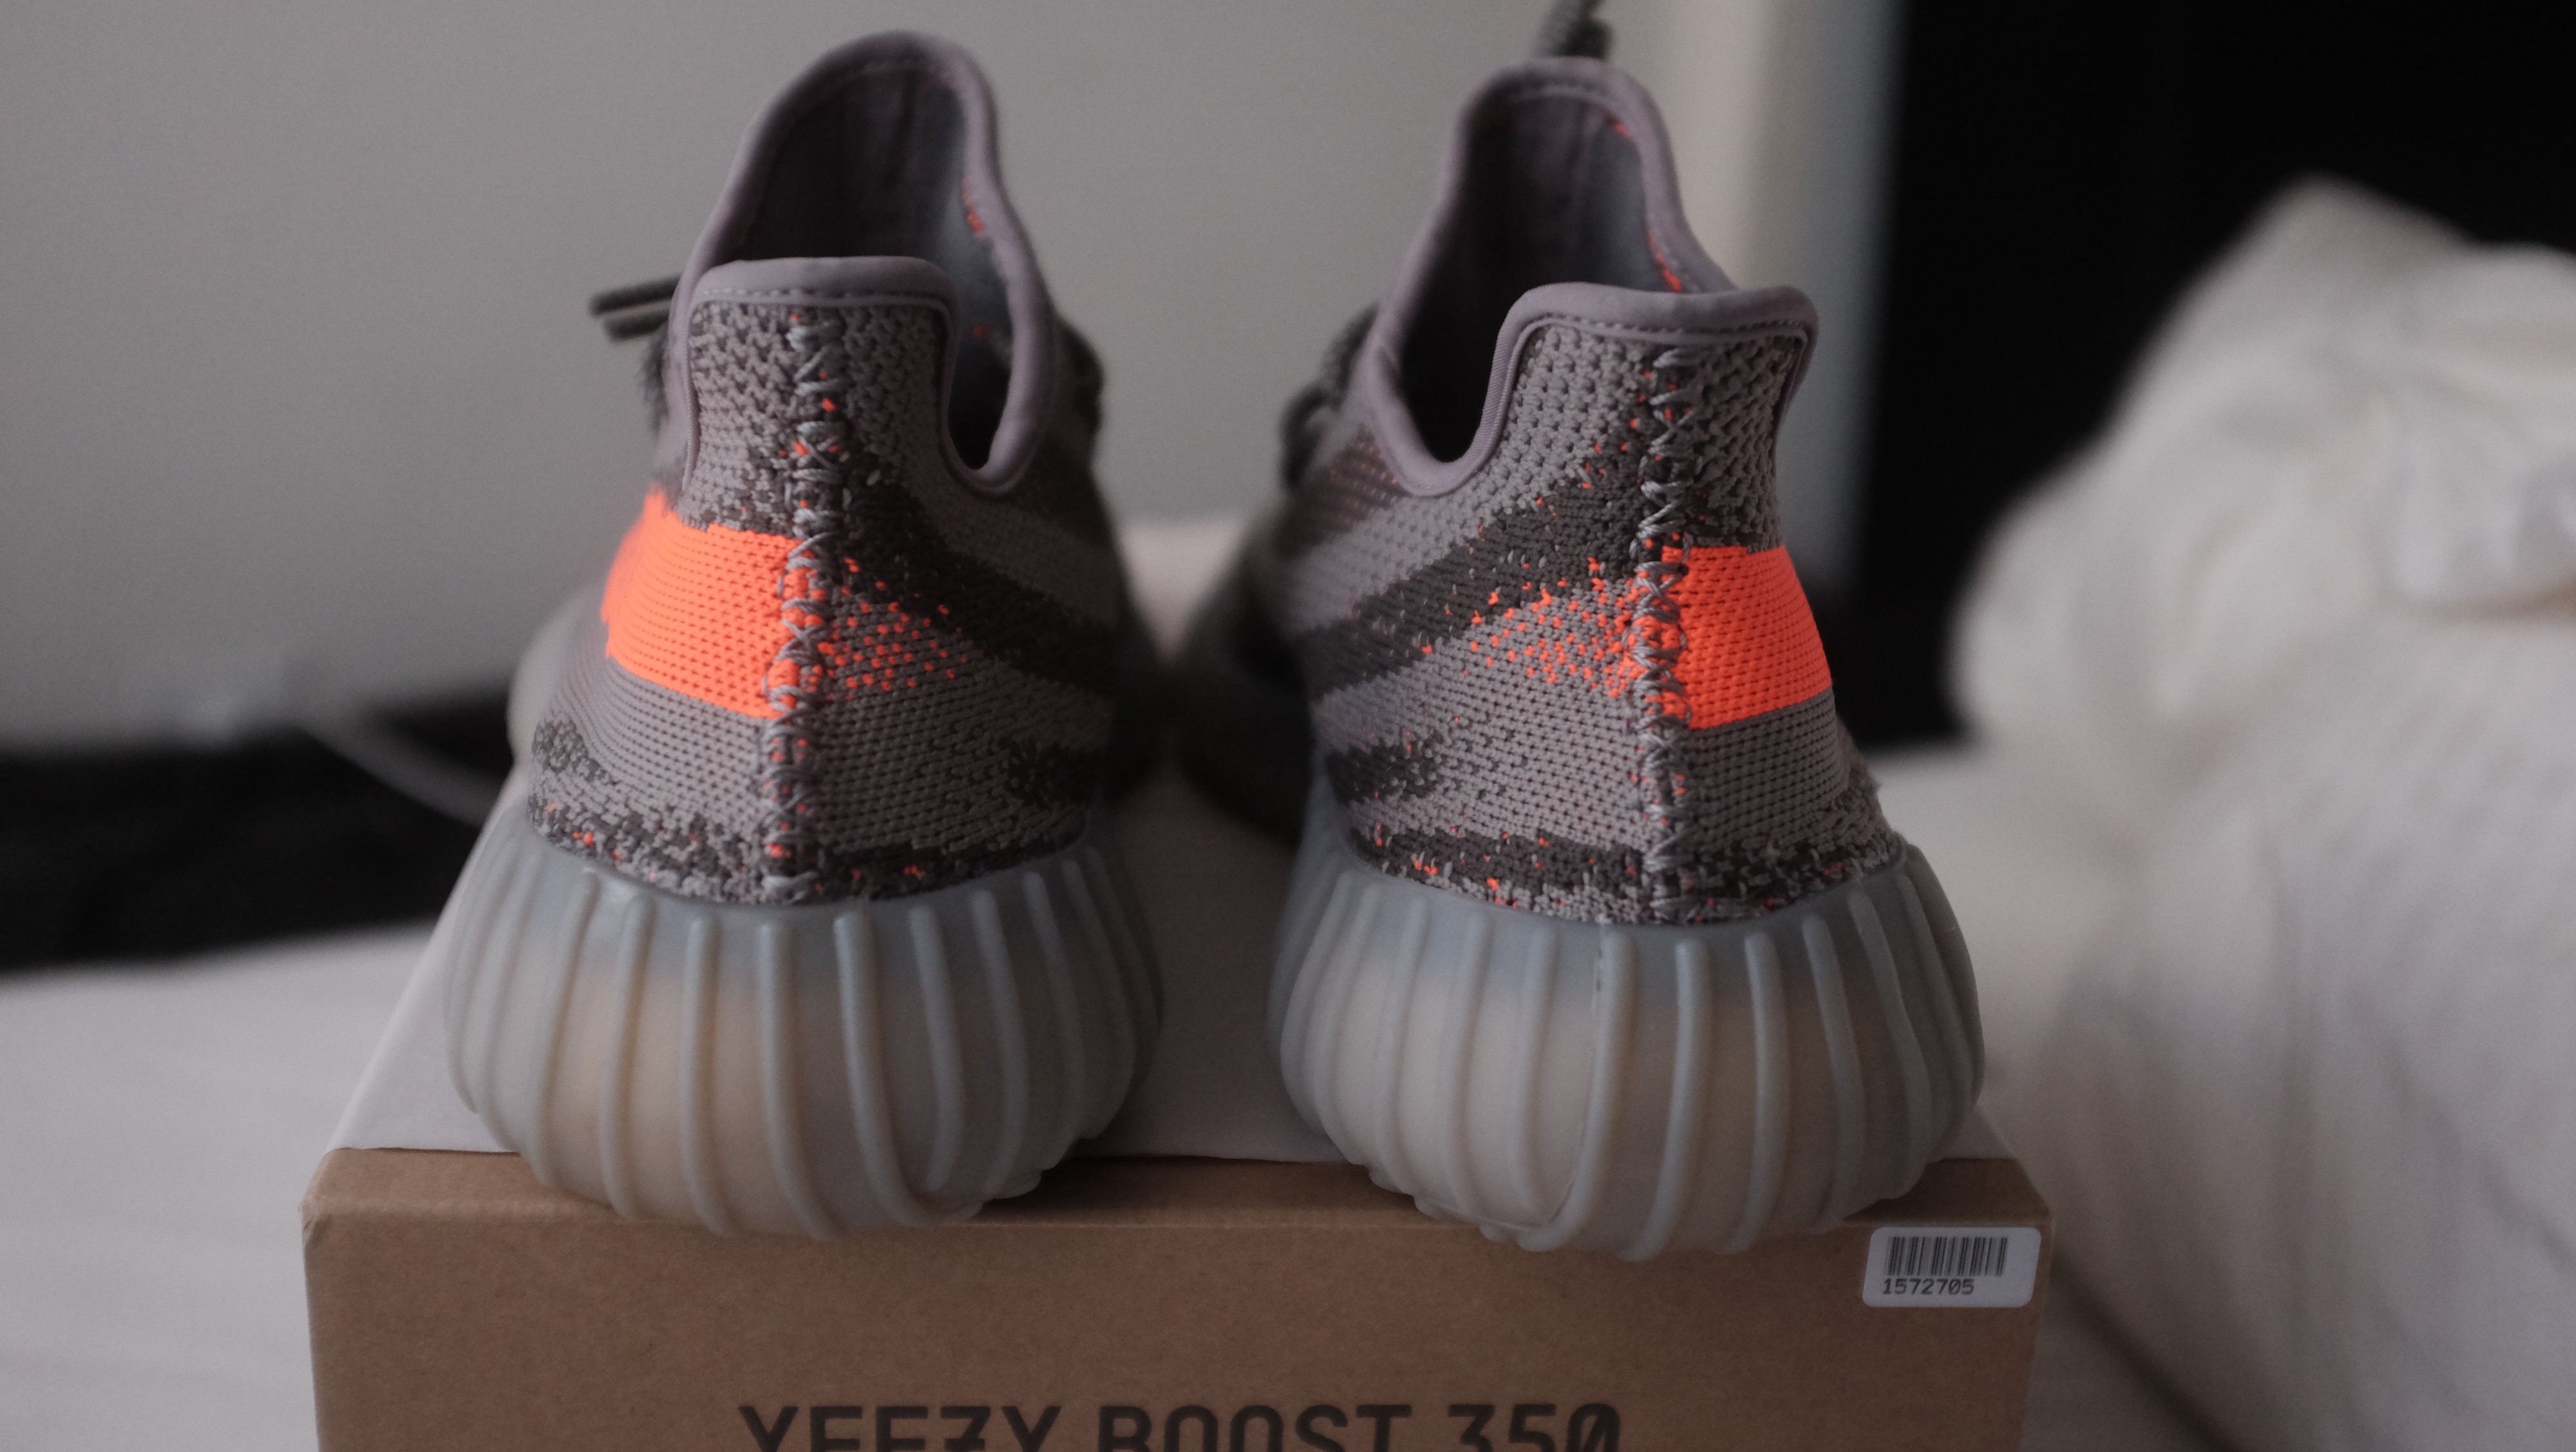
 Left Beluga sz 10, Right Beluga sz 9 // heel fades right at the stitching, should see very little to no stripe past stitching.
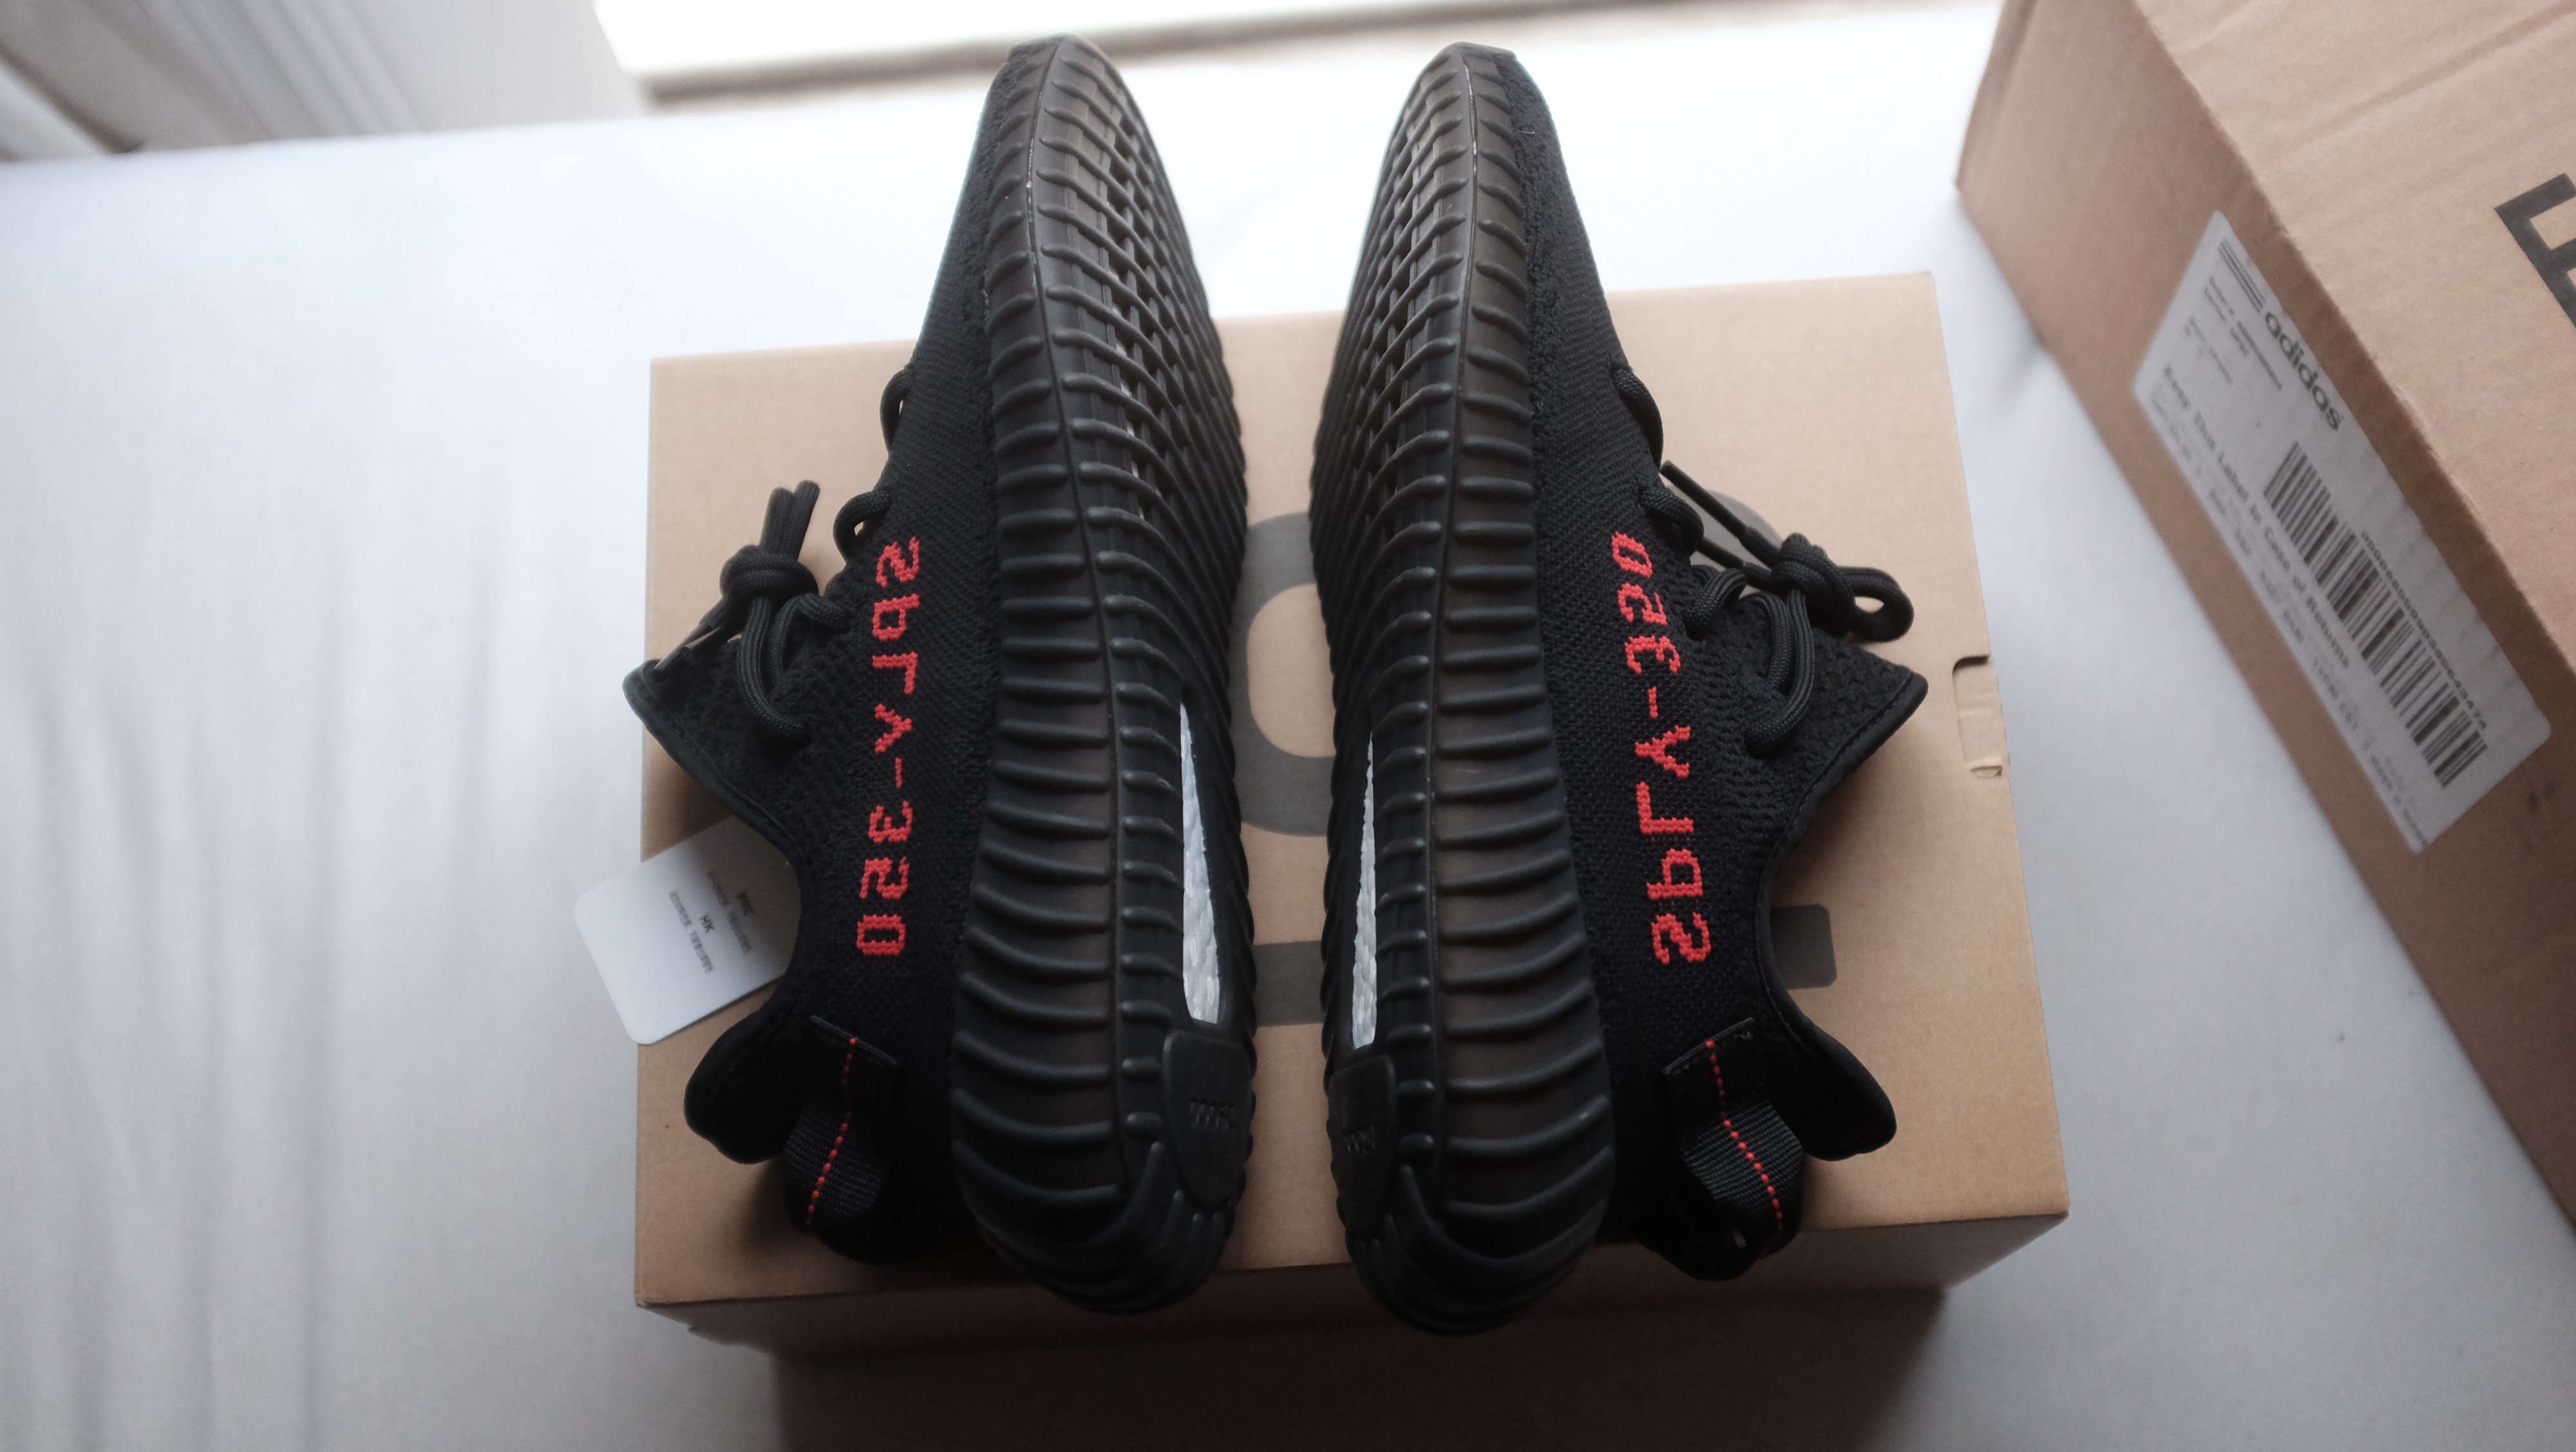
Bred Pull Tabs:
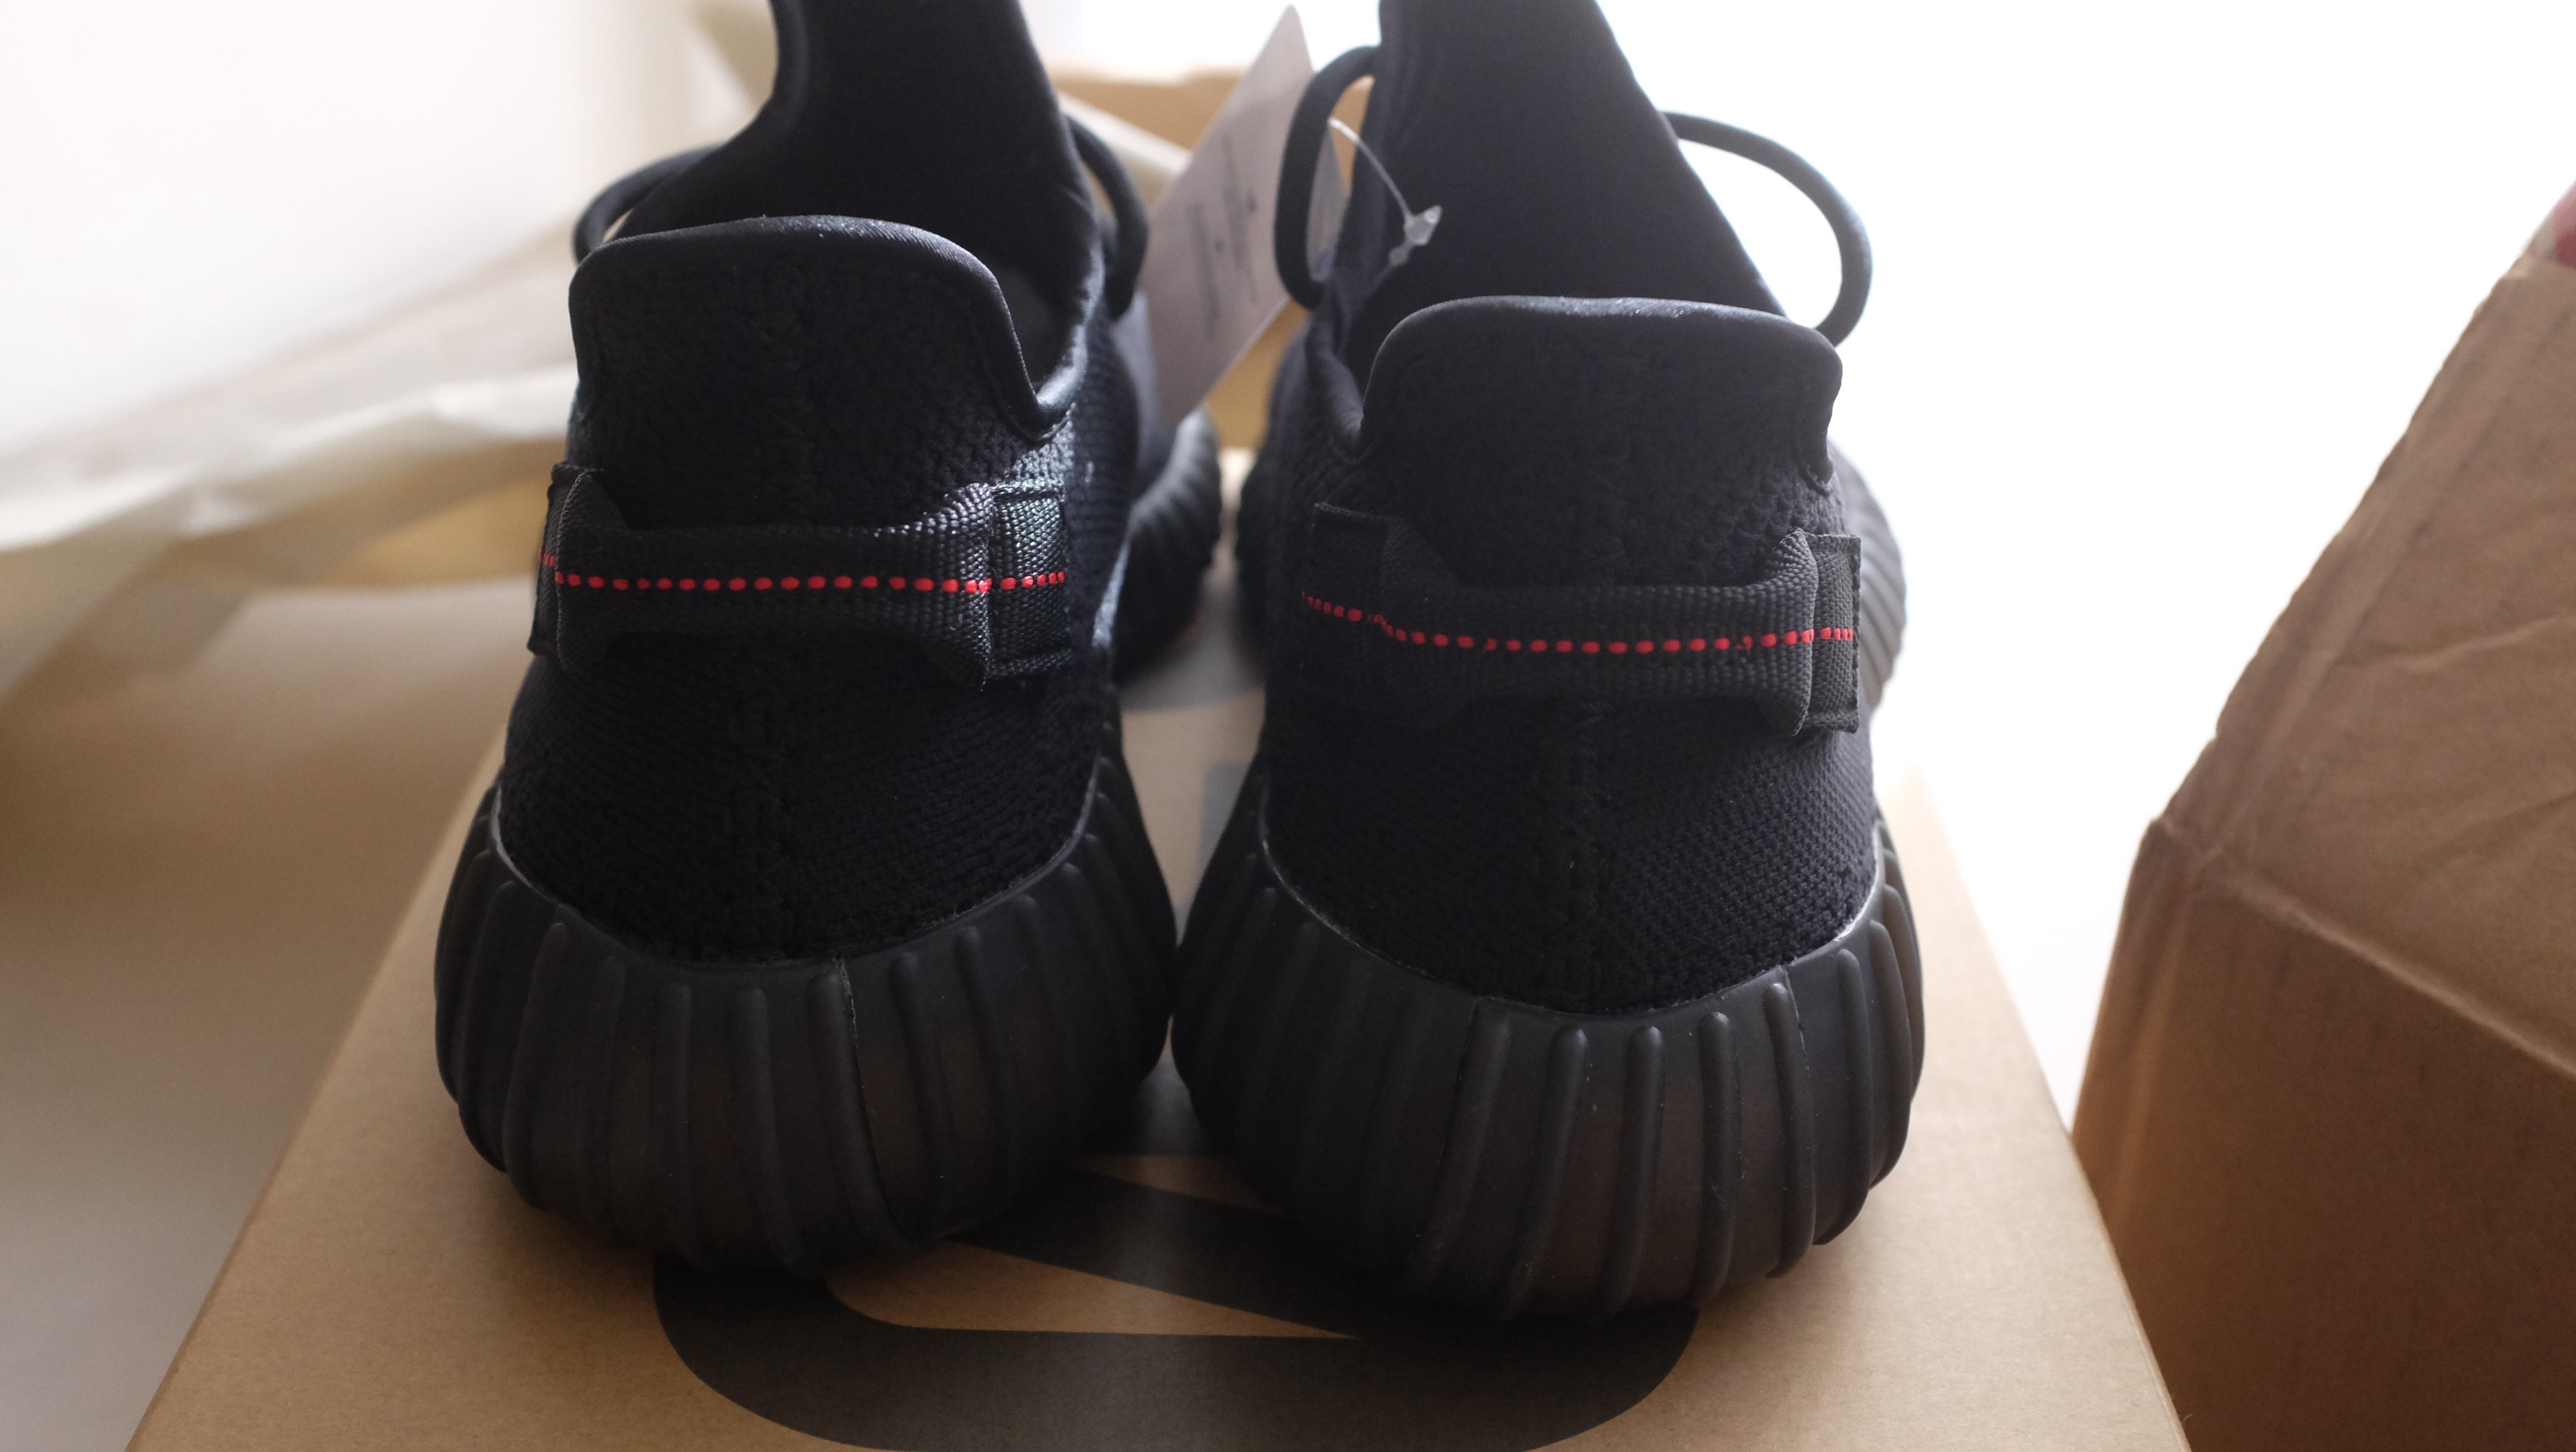 Bred Left sz 7.5, Right sz 9.5
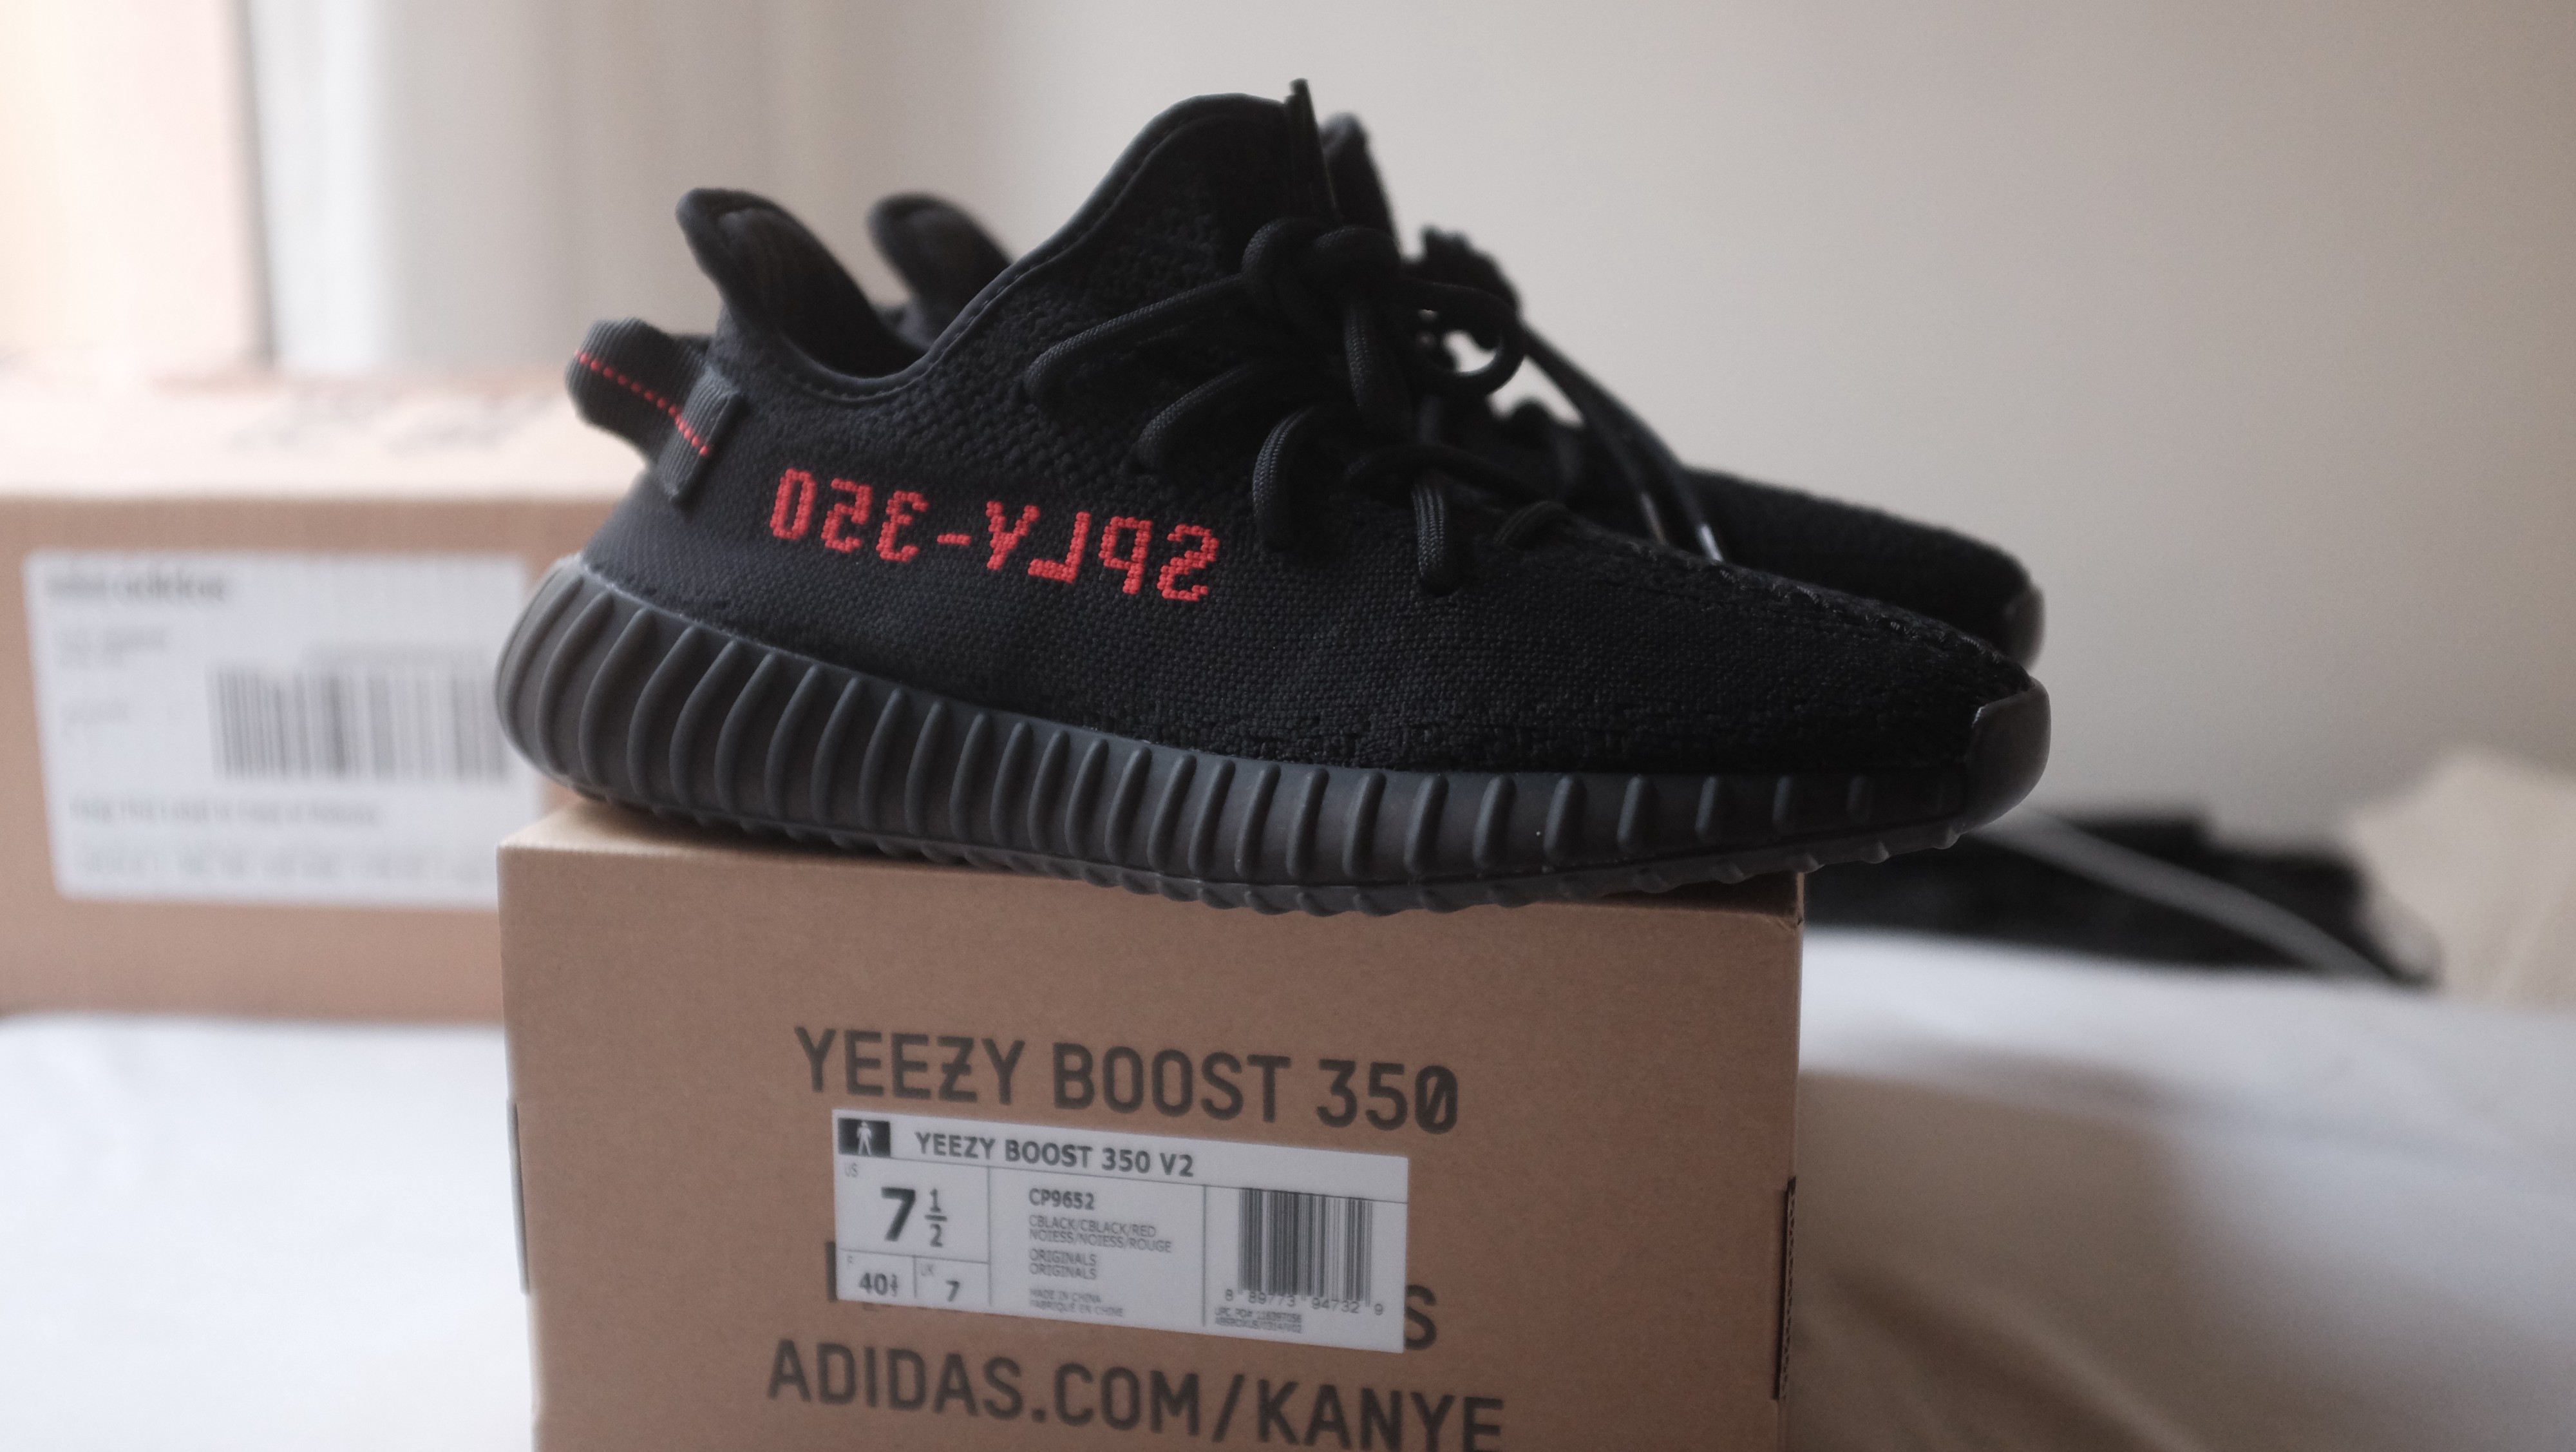
 Left sz 7.5, Right sz 9.5
Notice that the pull tab space is slightly different between sizes 7.5 and 9.5
 Close up on sz 9.5 // Dot variation on pull tab between 5?7.
Key thing to focus on is the placement of the pull tab for your size. Pull tab should be on a very slight angle, almost facing downward from the black stripe.
 Cream V2 sz 9 Pull Tab placement.
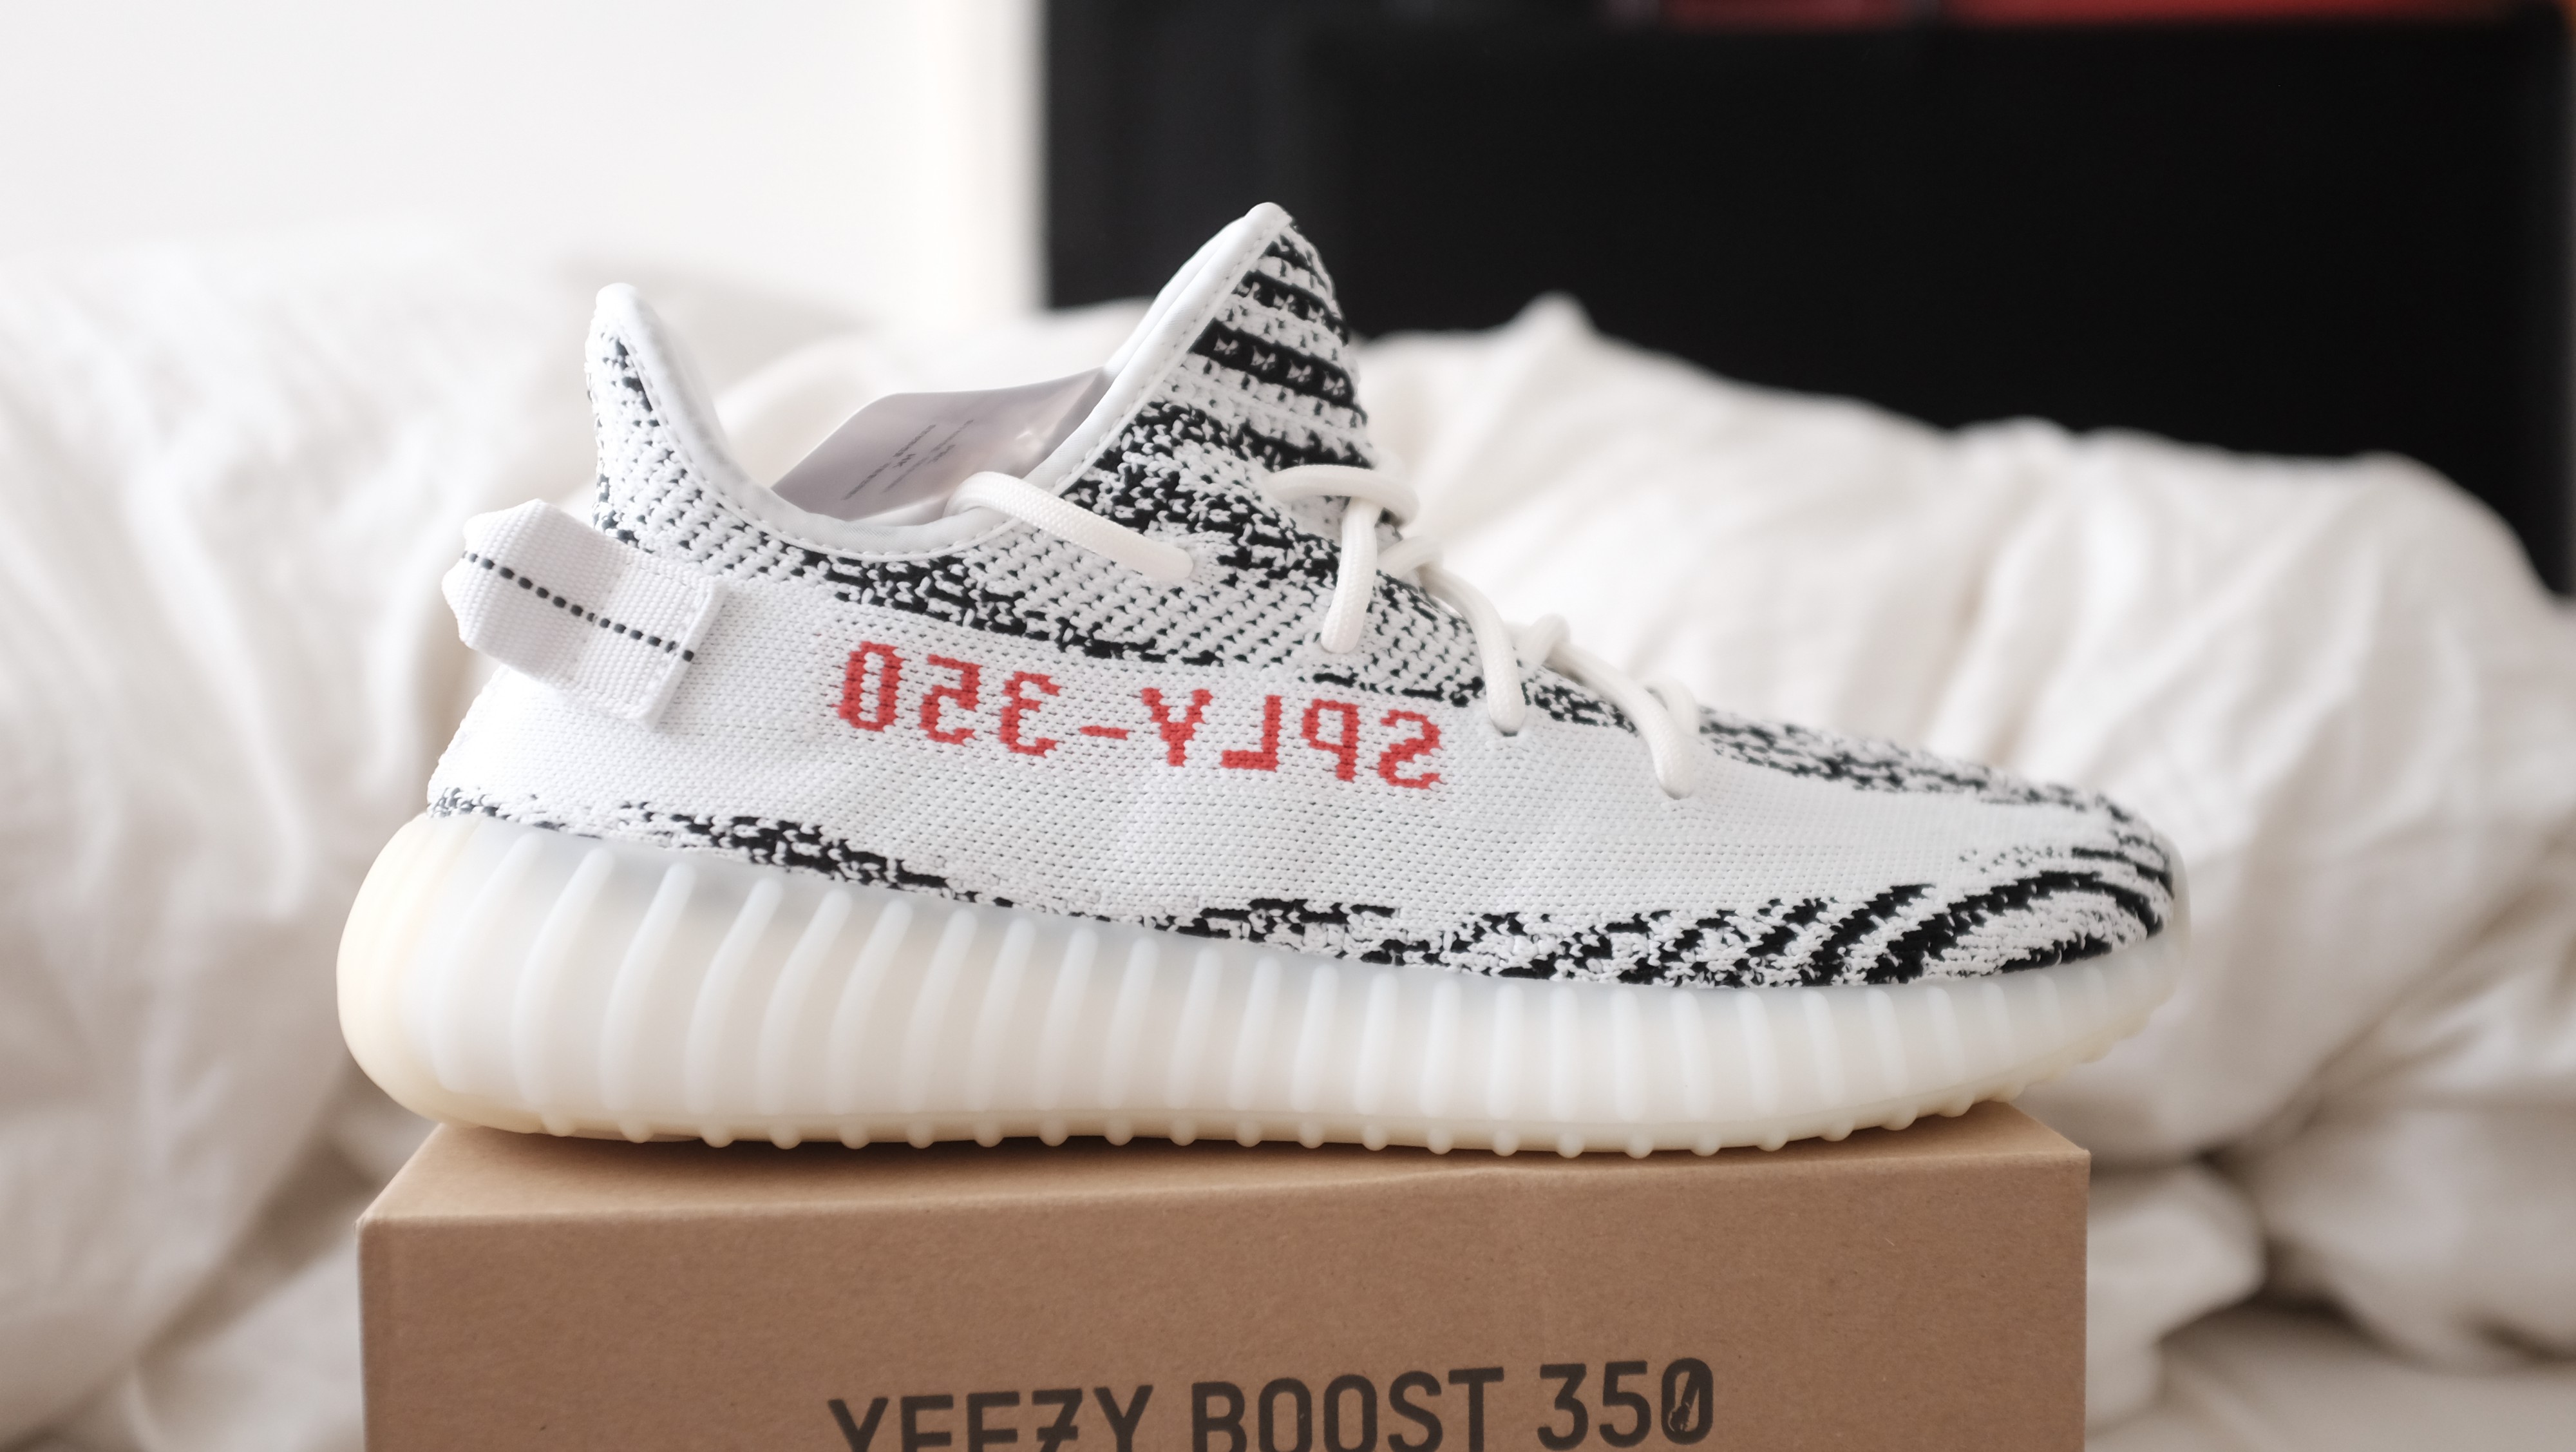
 Zebra OG pull tab placement is critical- one of the easiest call outs is the pull tab- no fake has the placement perfect like the Retail.
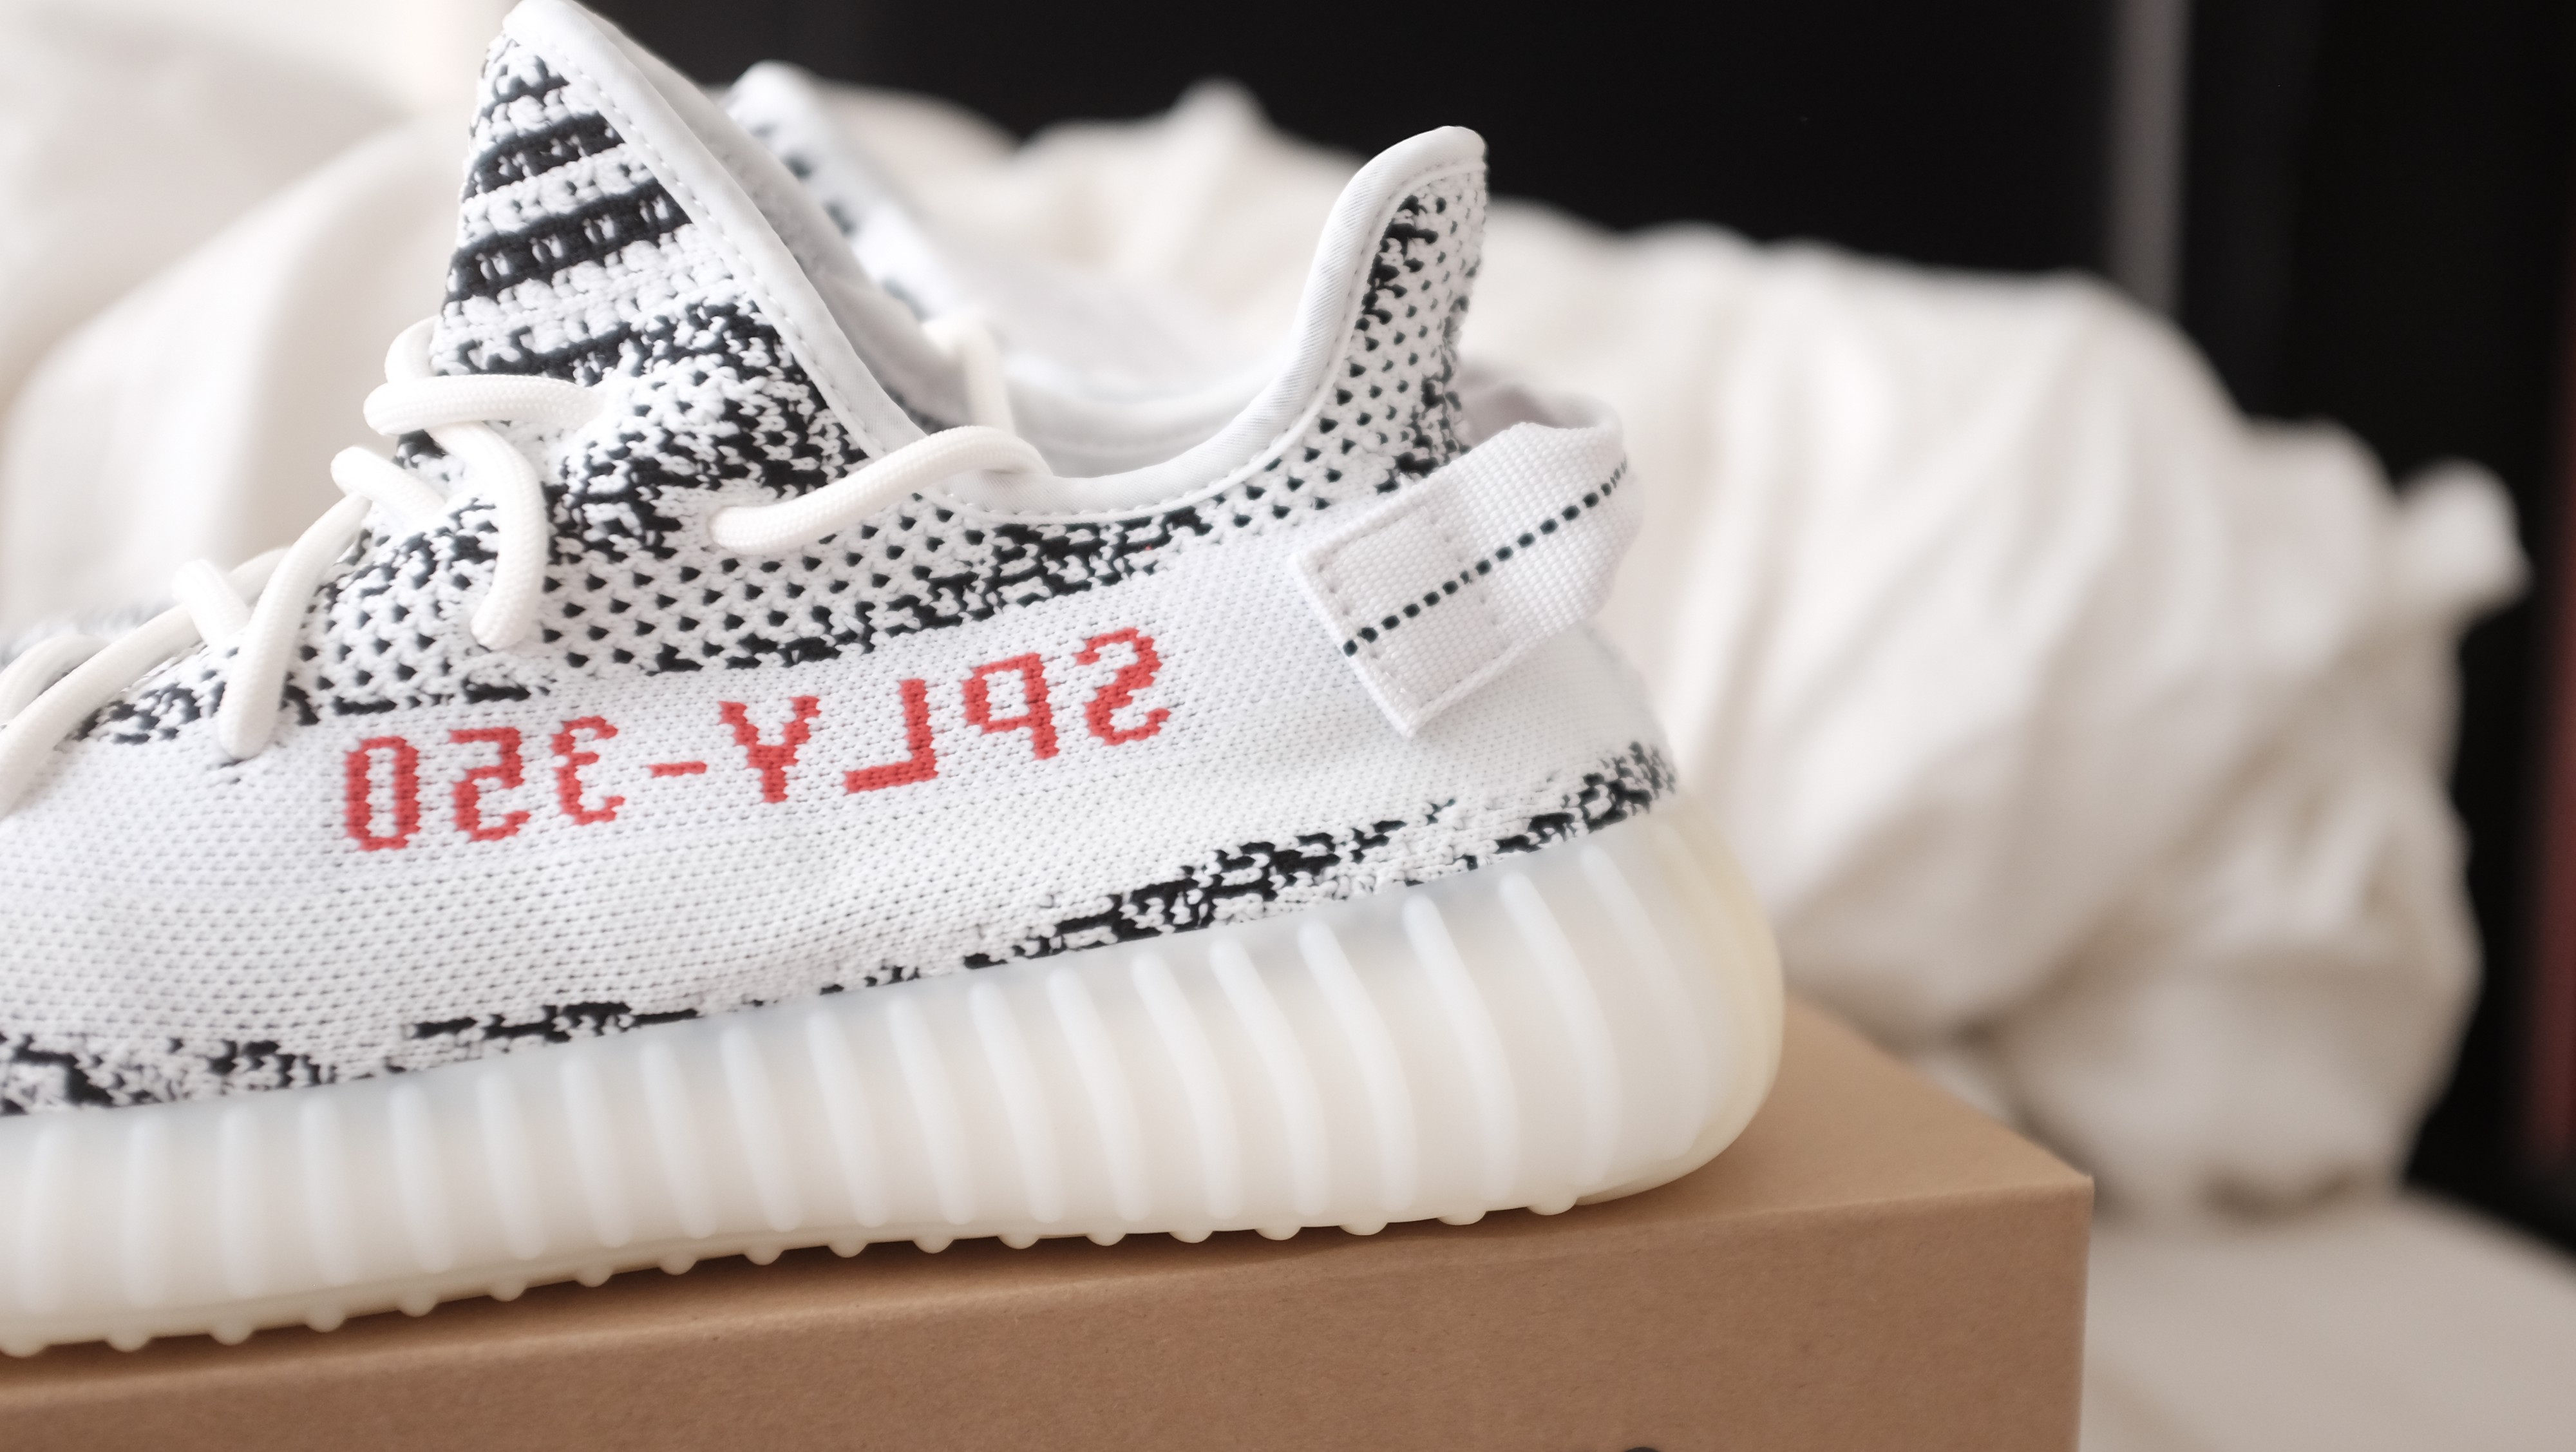 Zebra Restock Pull Tab is further back, in a lot of ways this will be more similar to the reps that have been floating around already. Also check inside tag to make sure if the pull tab is this far back it is the restock pair. No Zebra OG V2 has the placement this far back. In this way you can always tell when you have the OG Zebra V2, since no reps have the placement 1:1 // Zebra Restock ones do have their slight differences between OG vs Restock (which will be covered later).
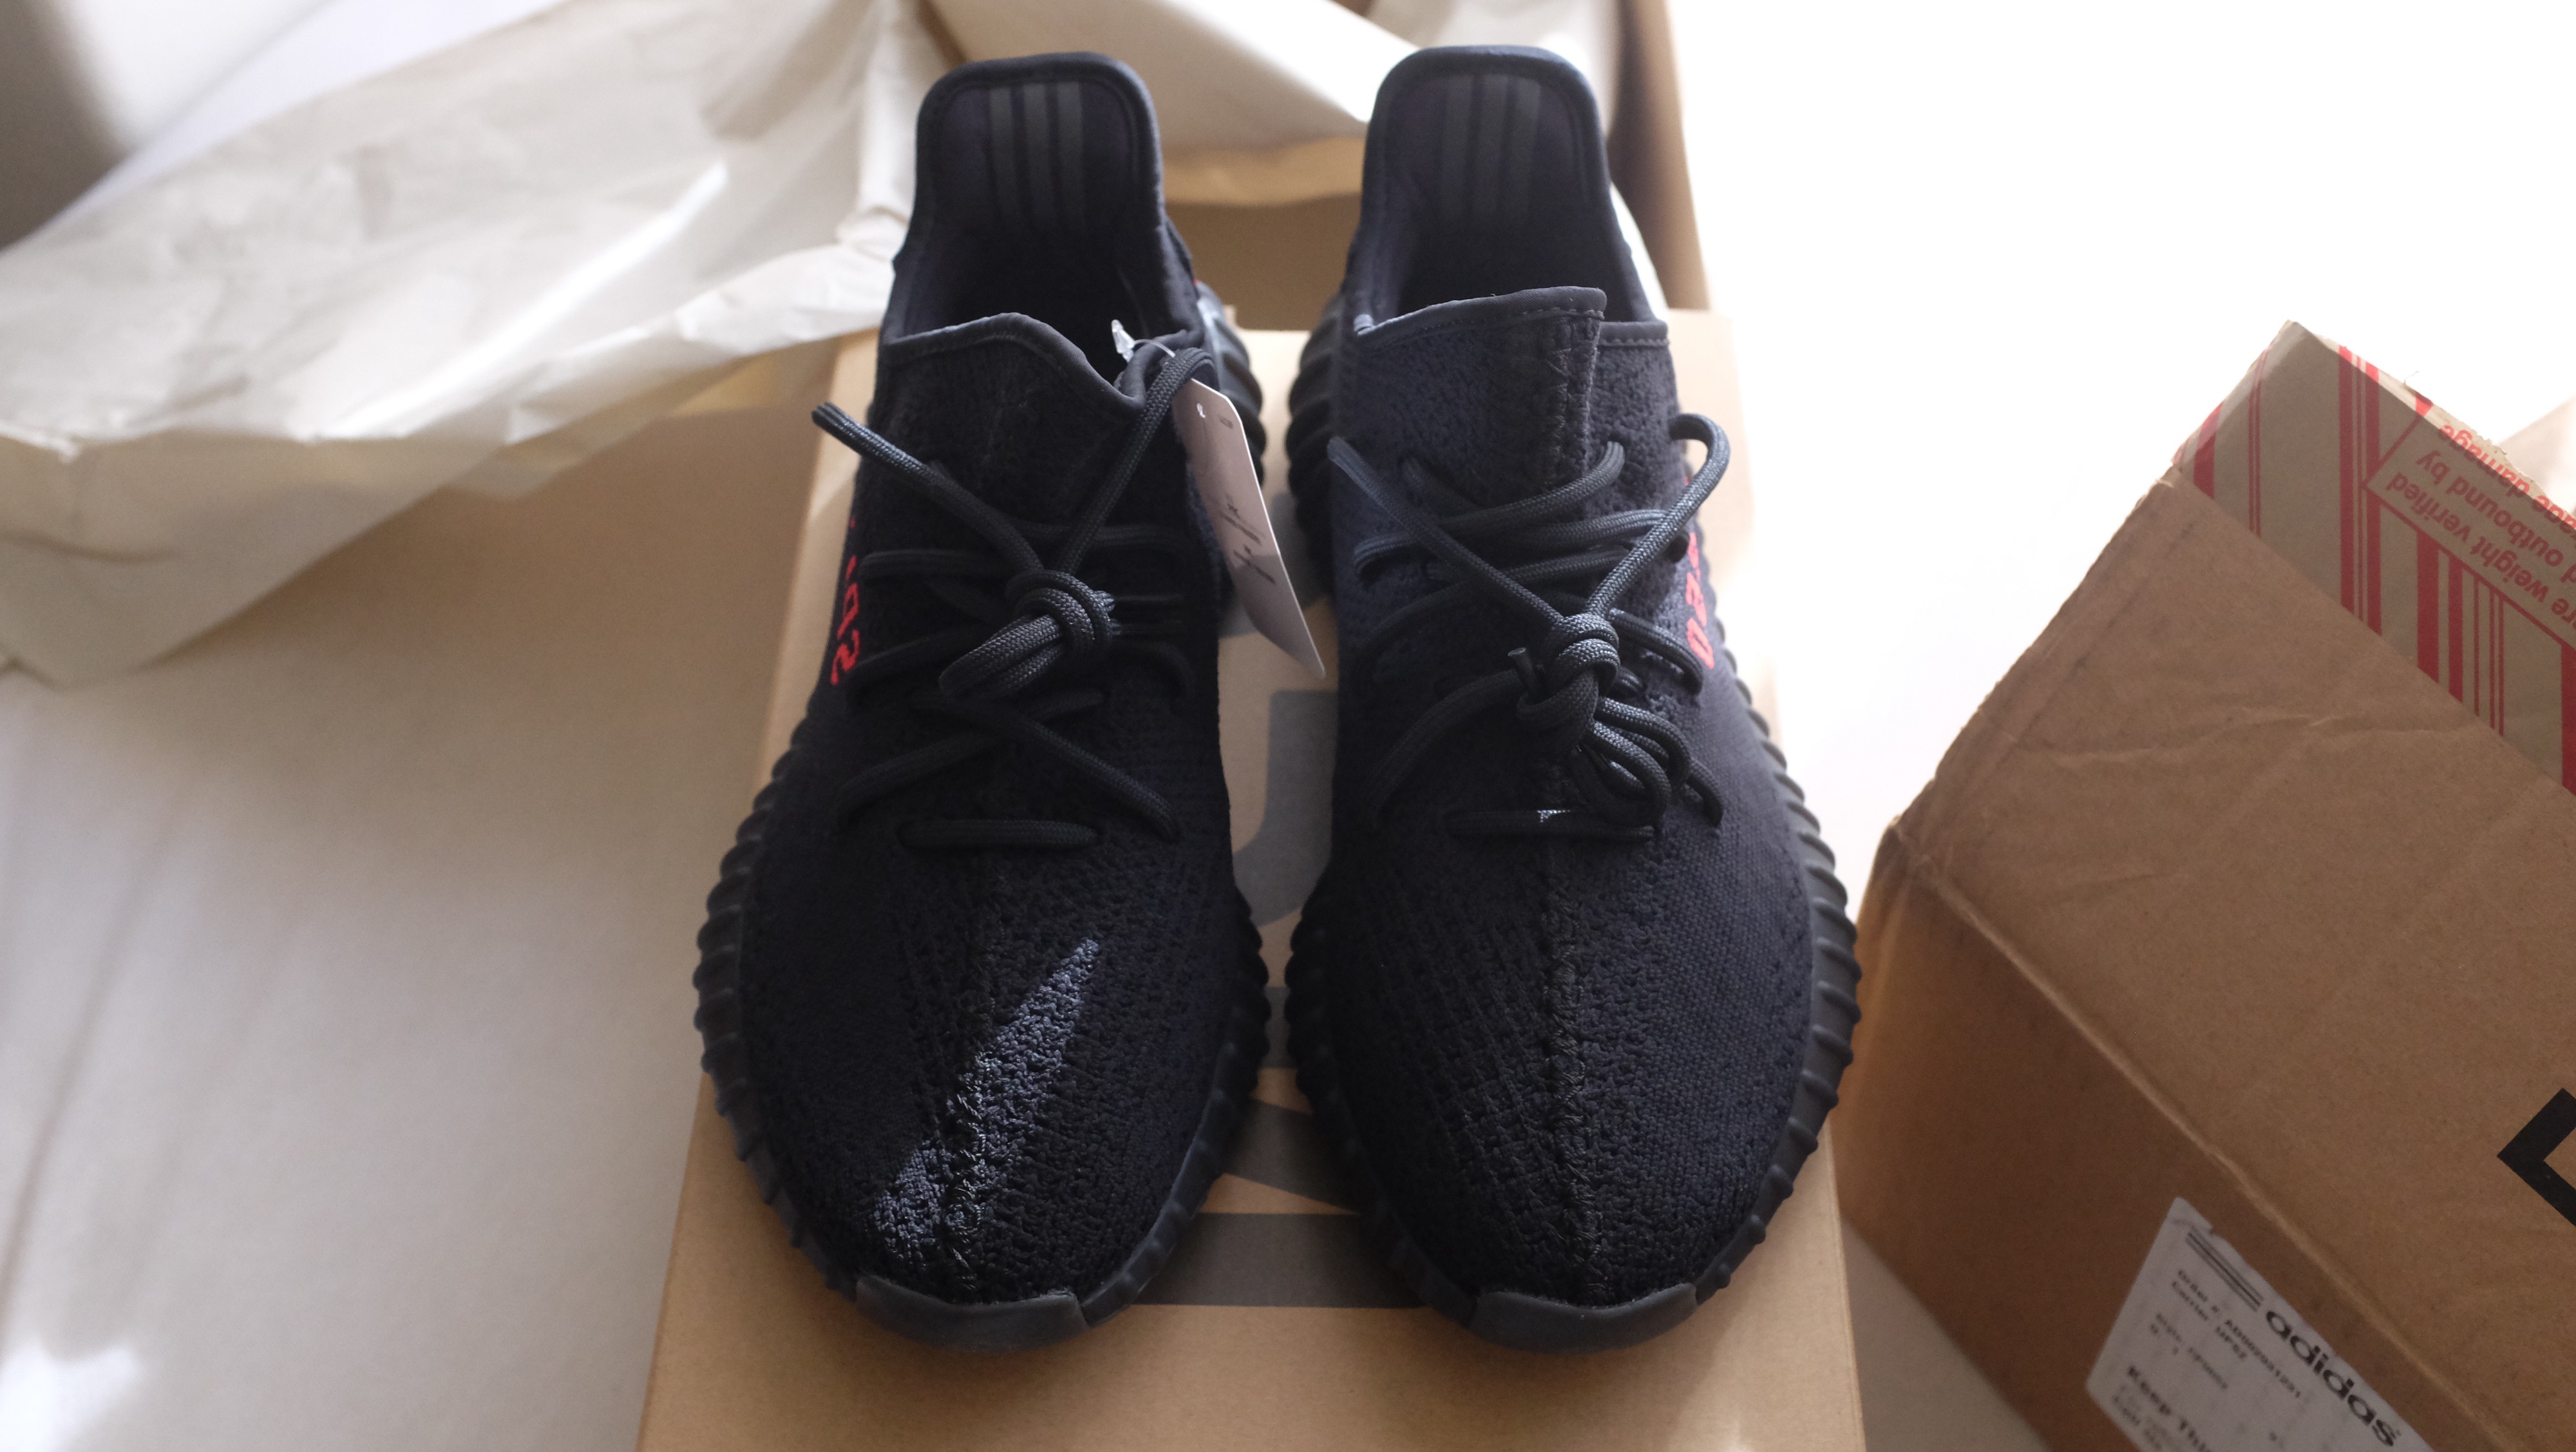
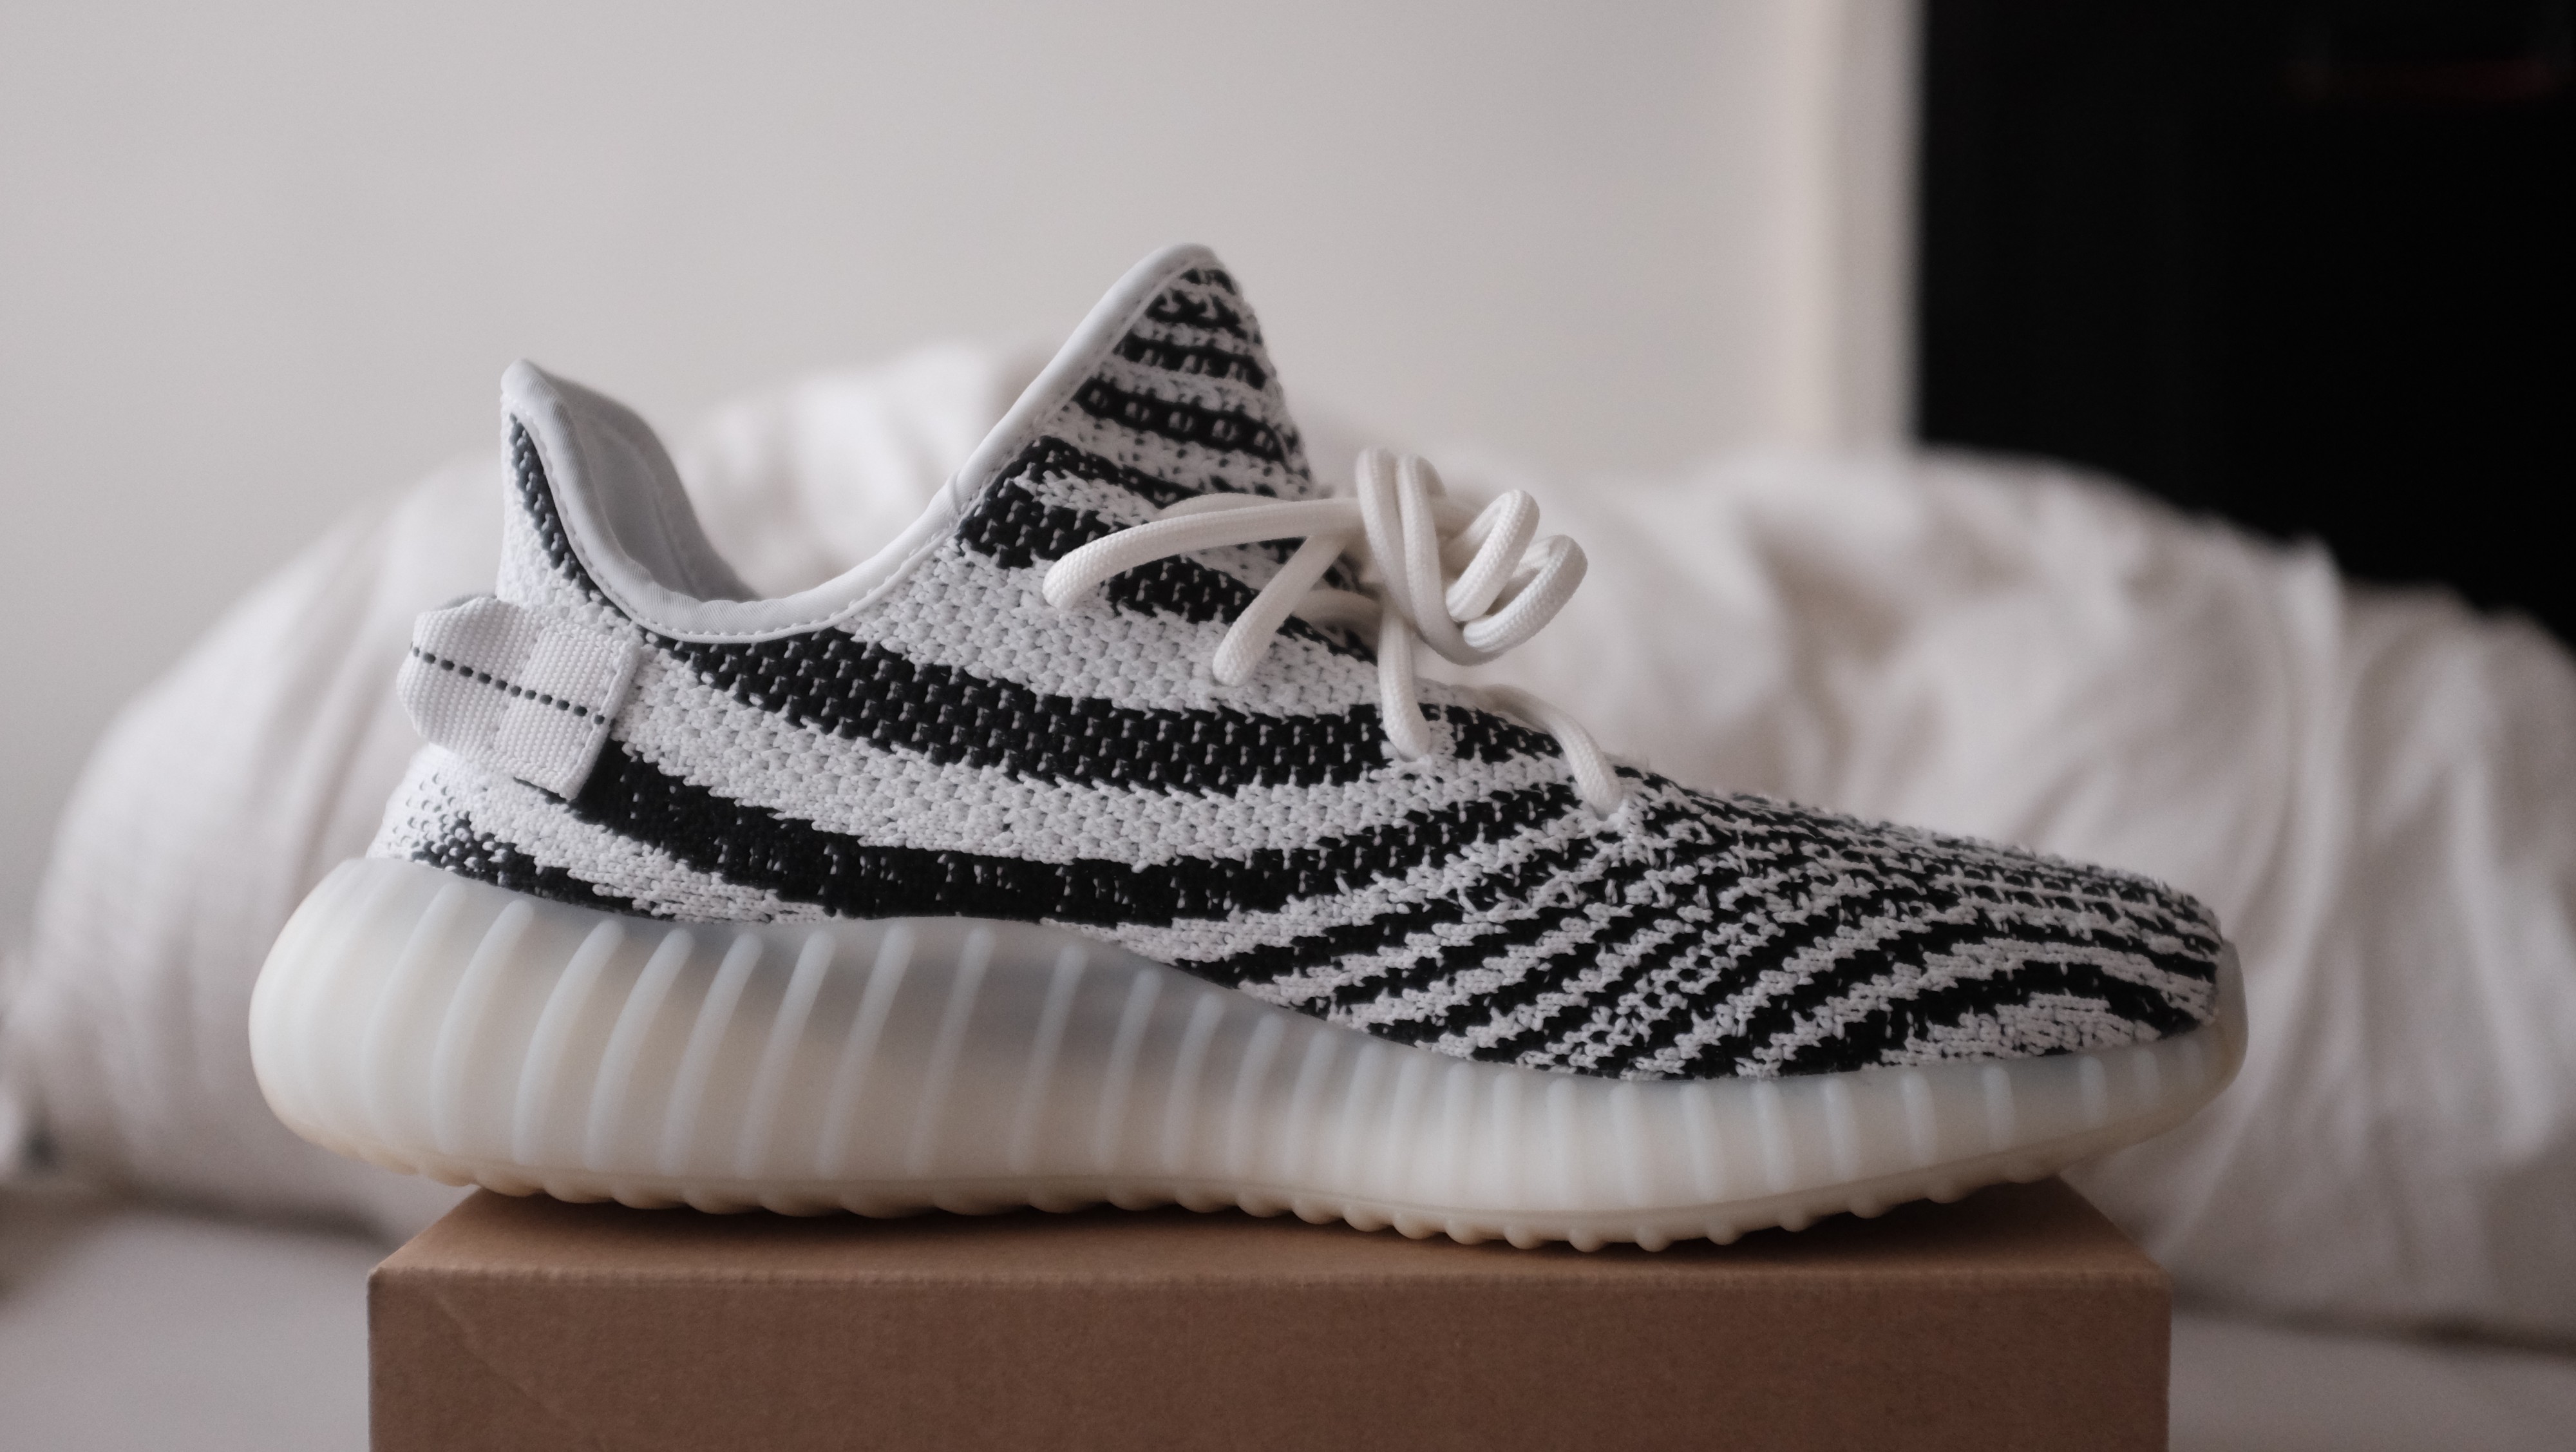
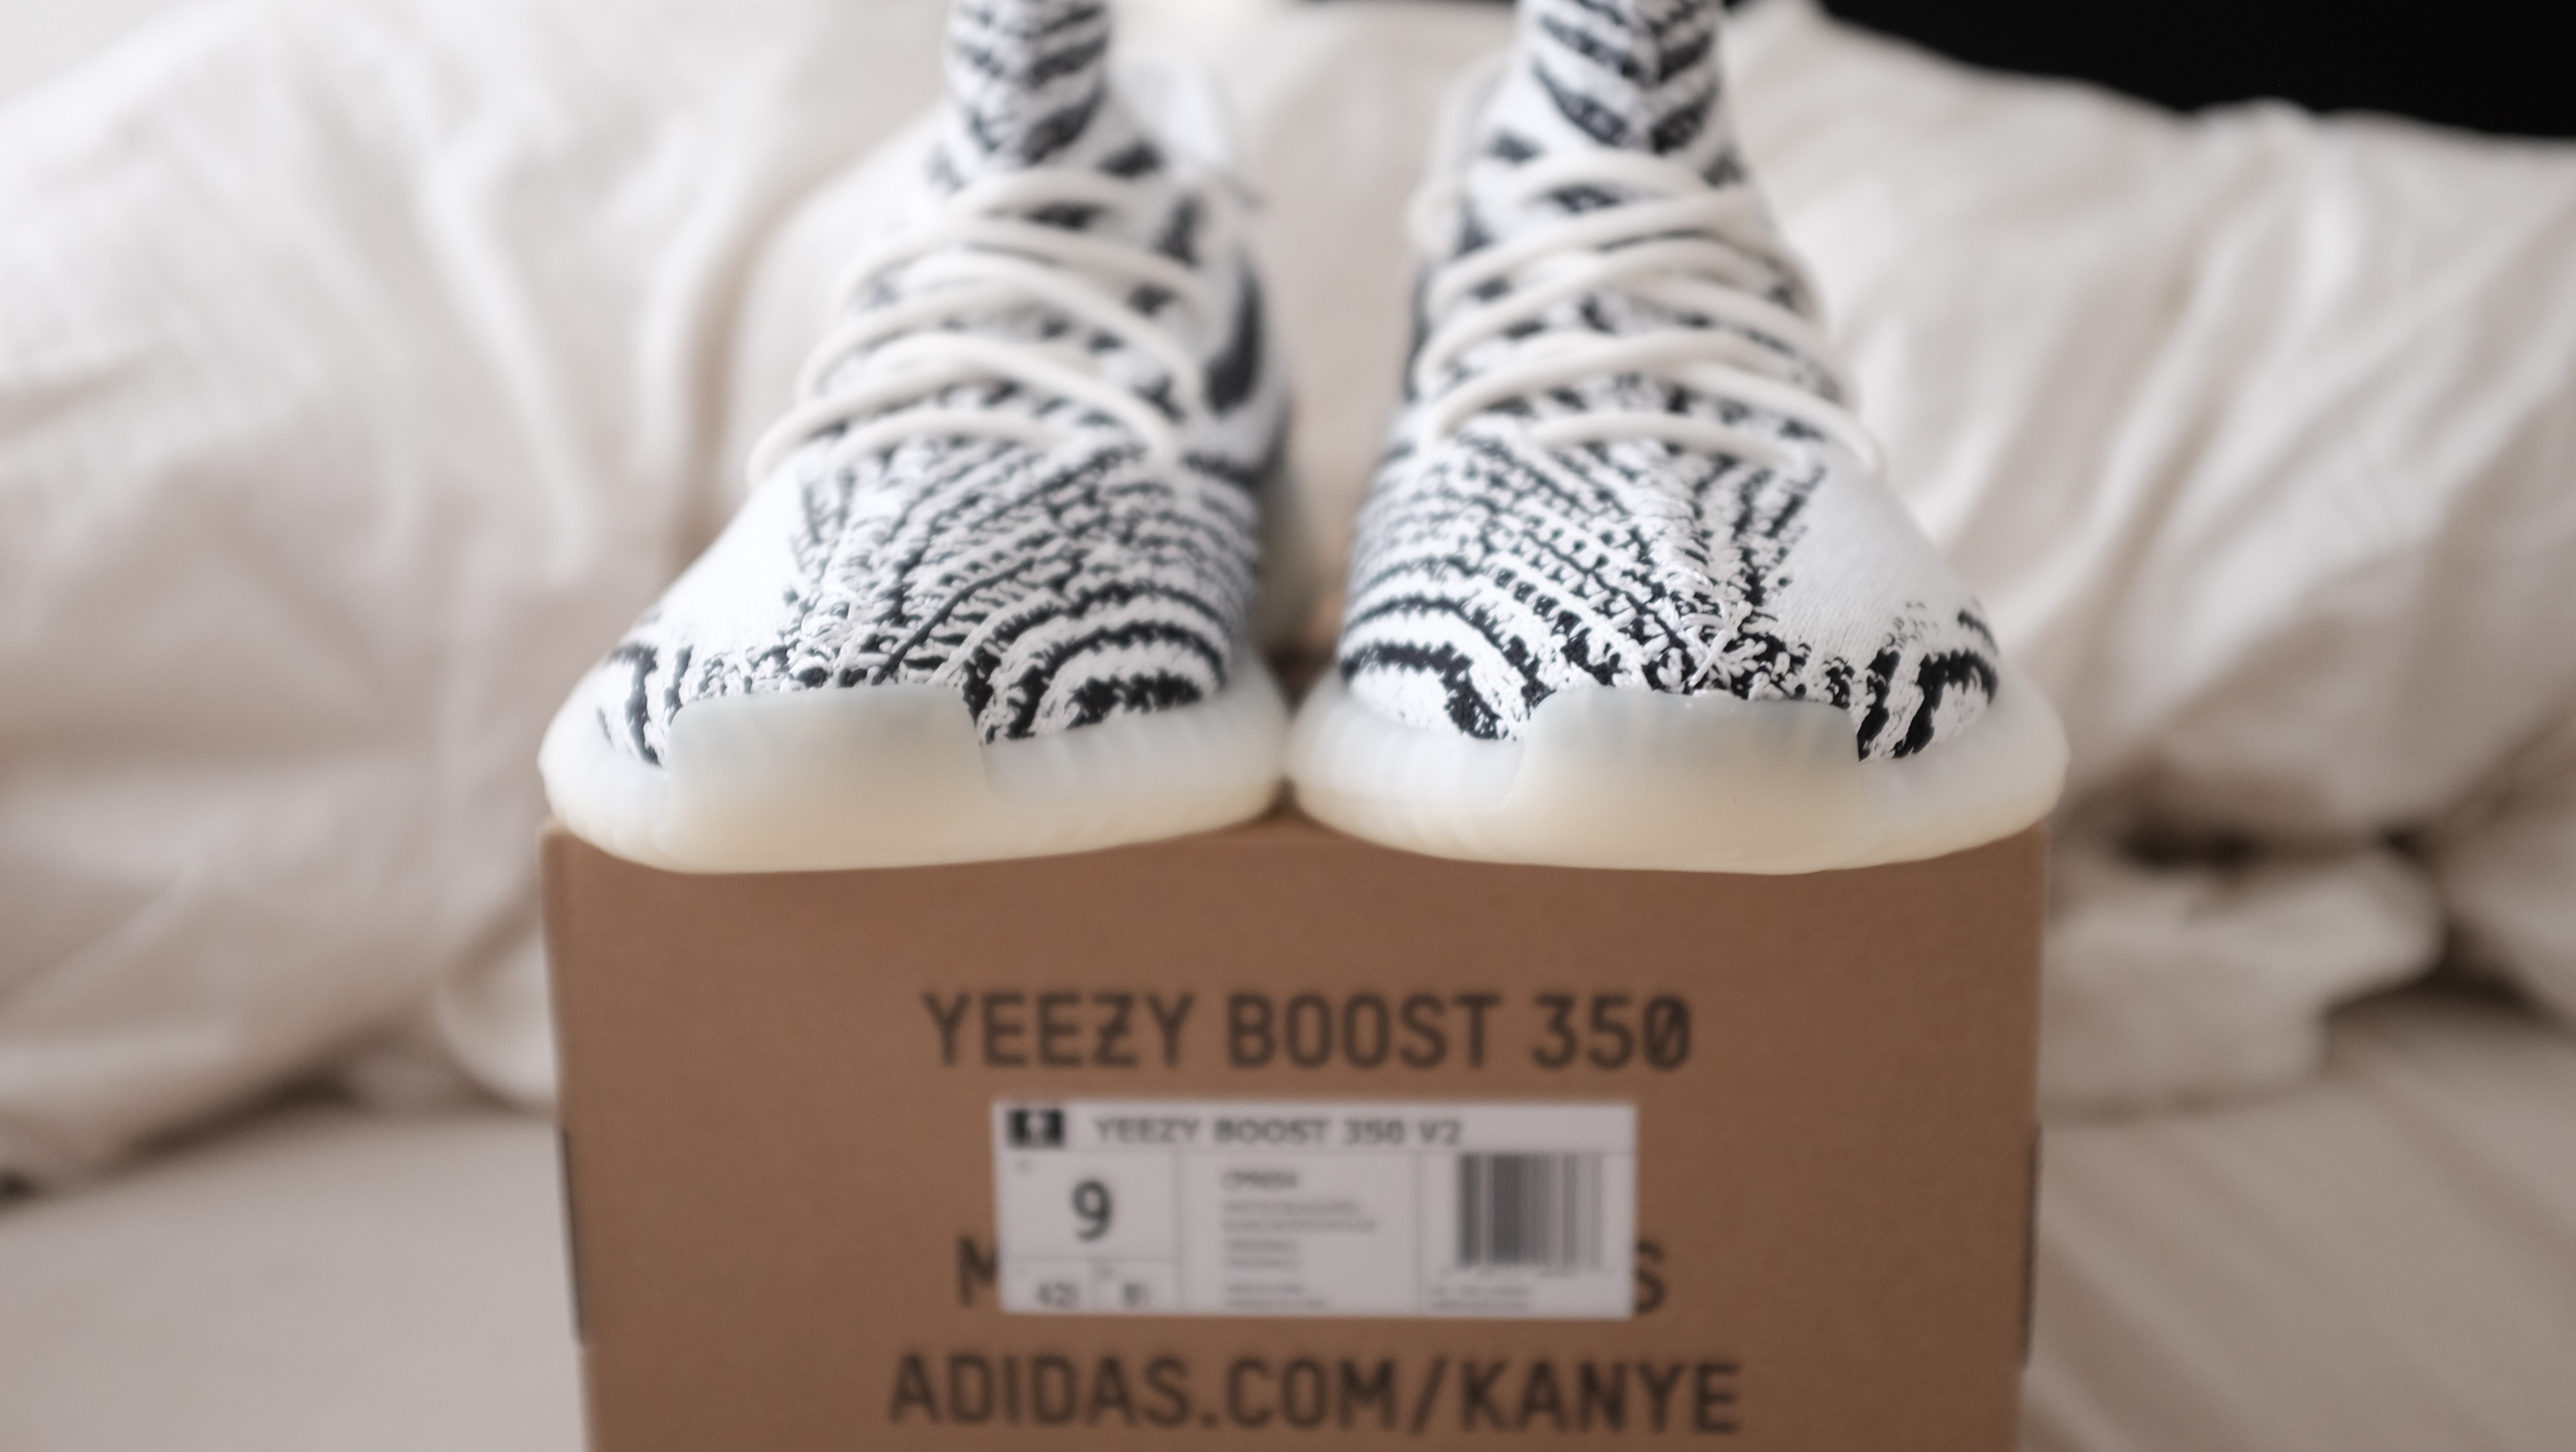
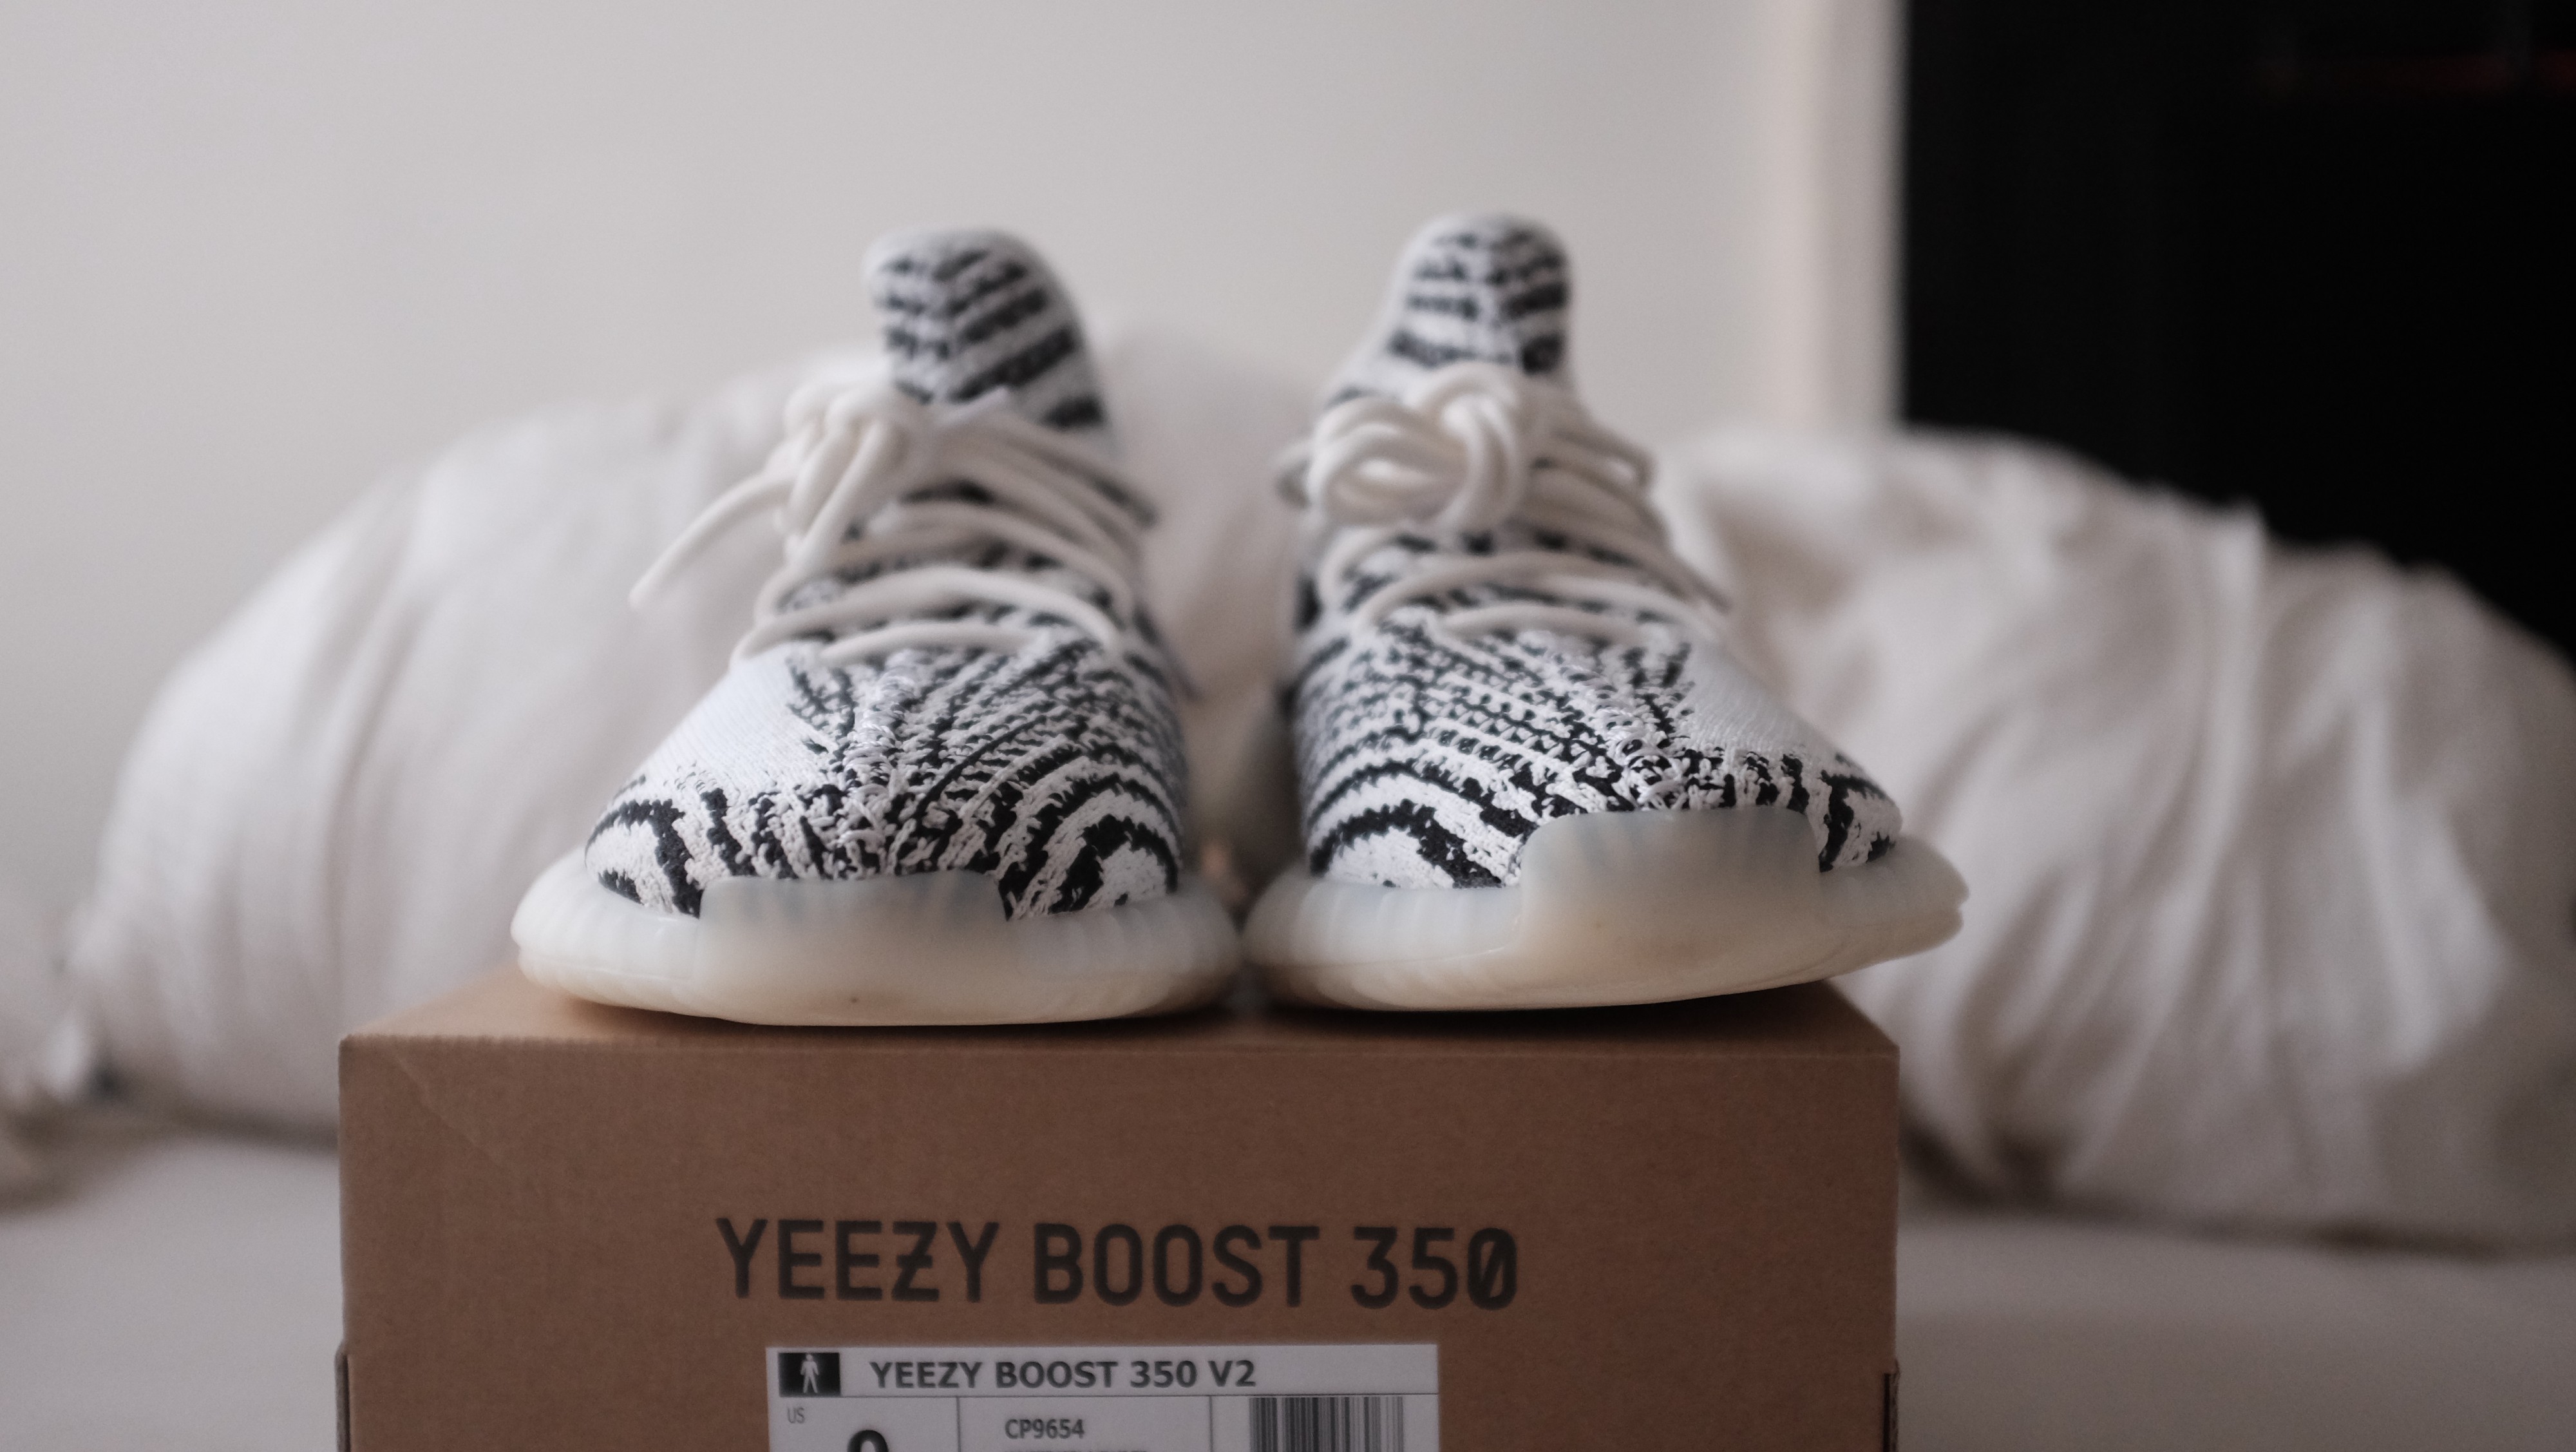
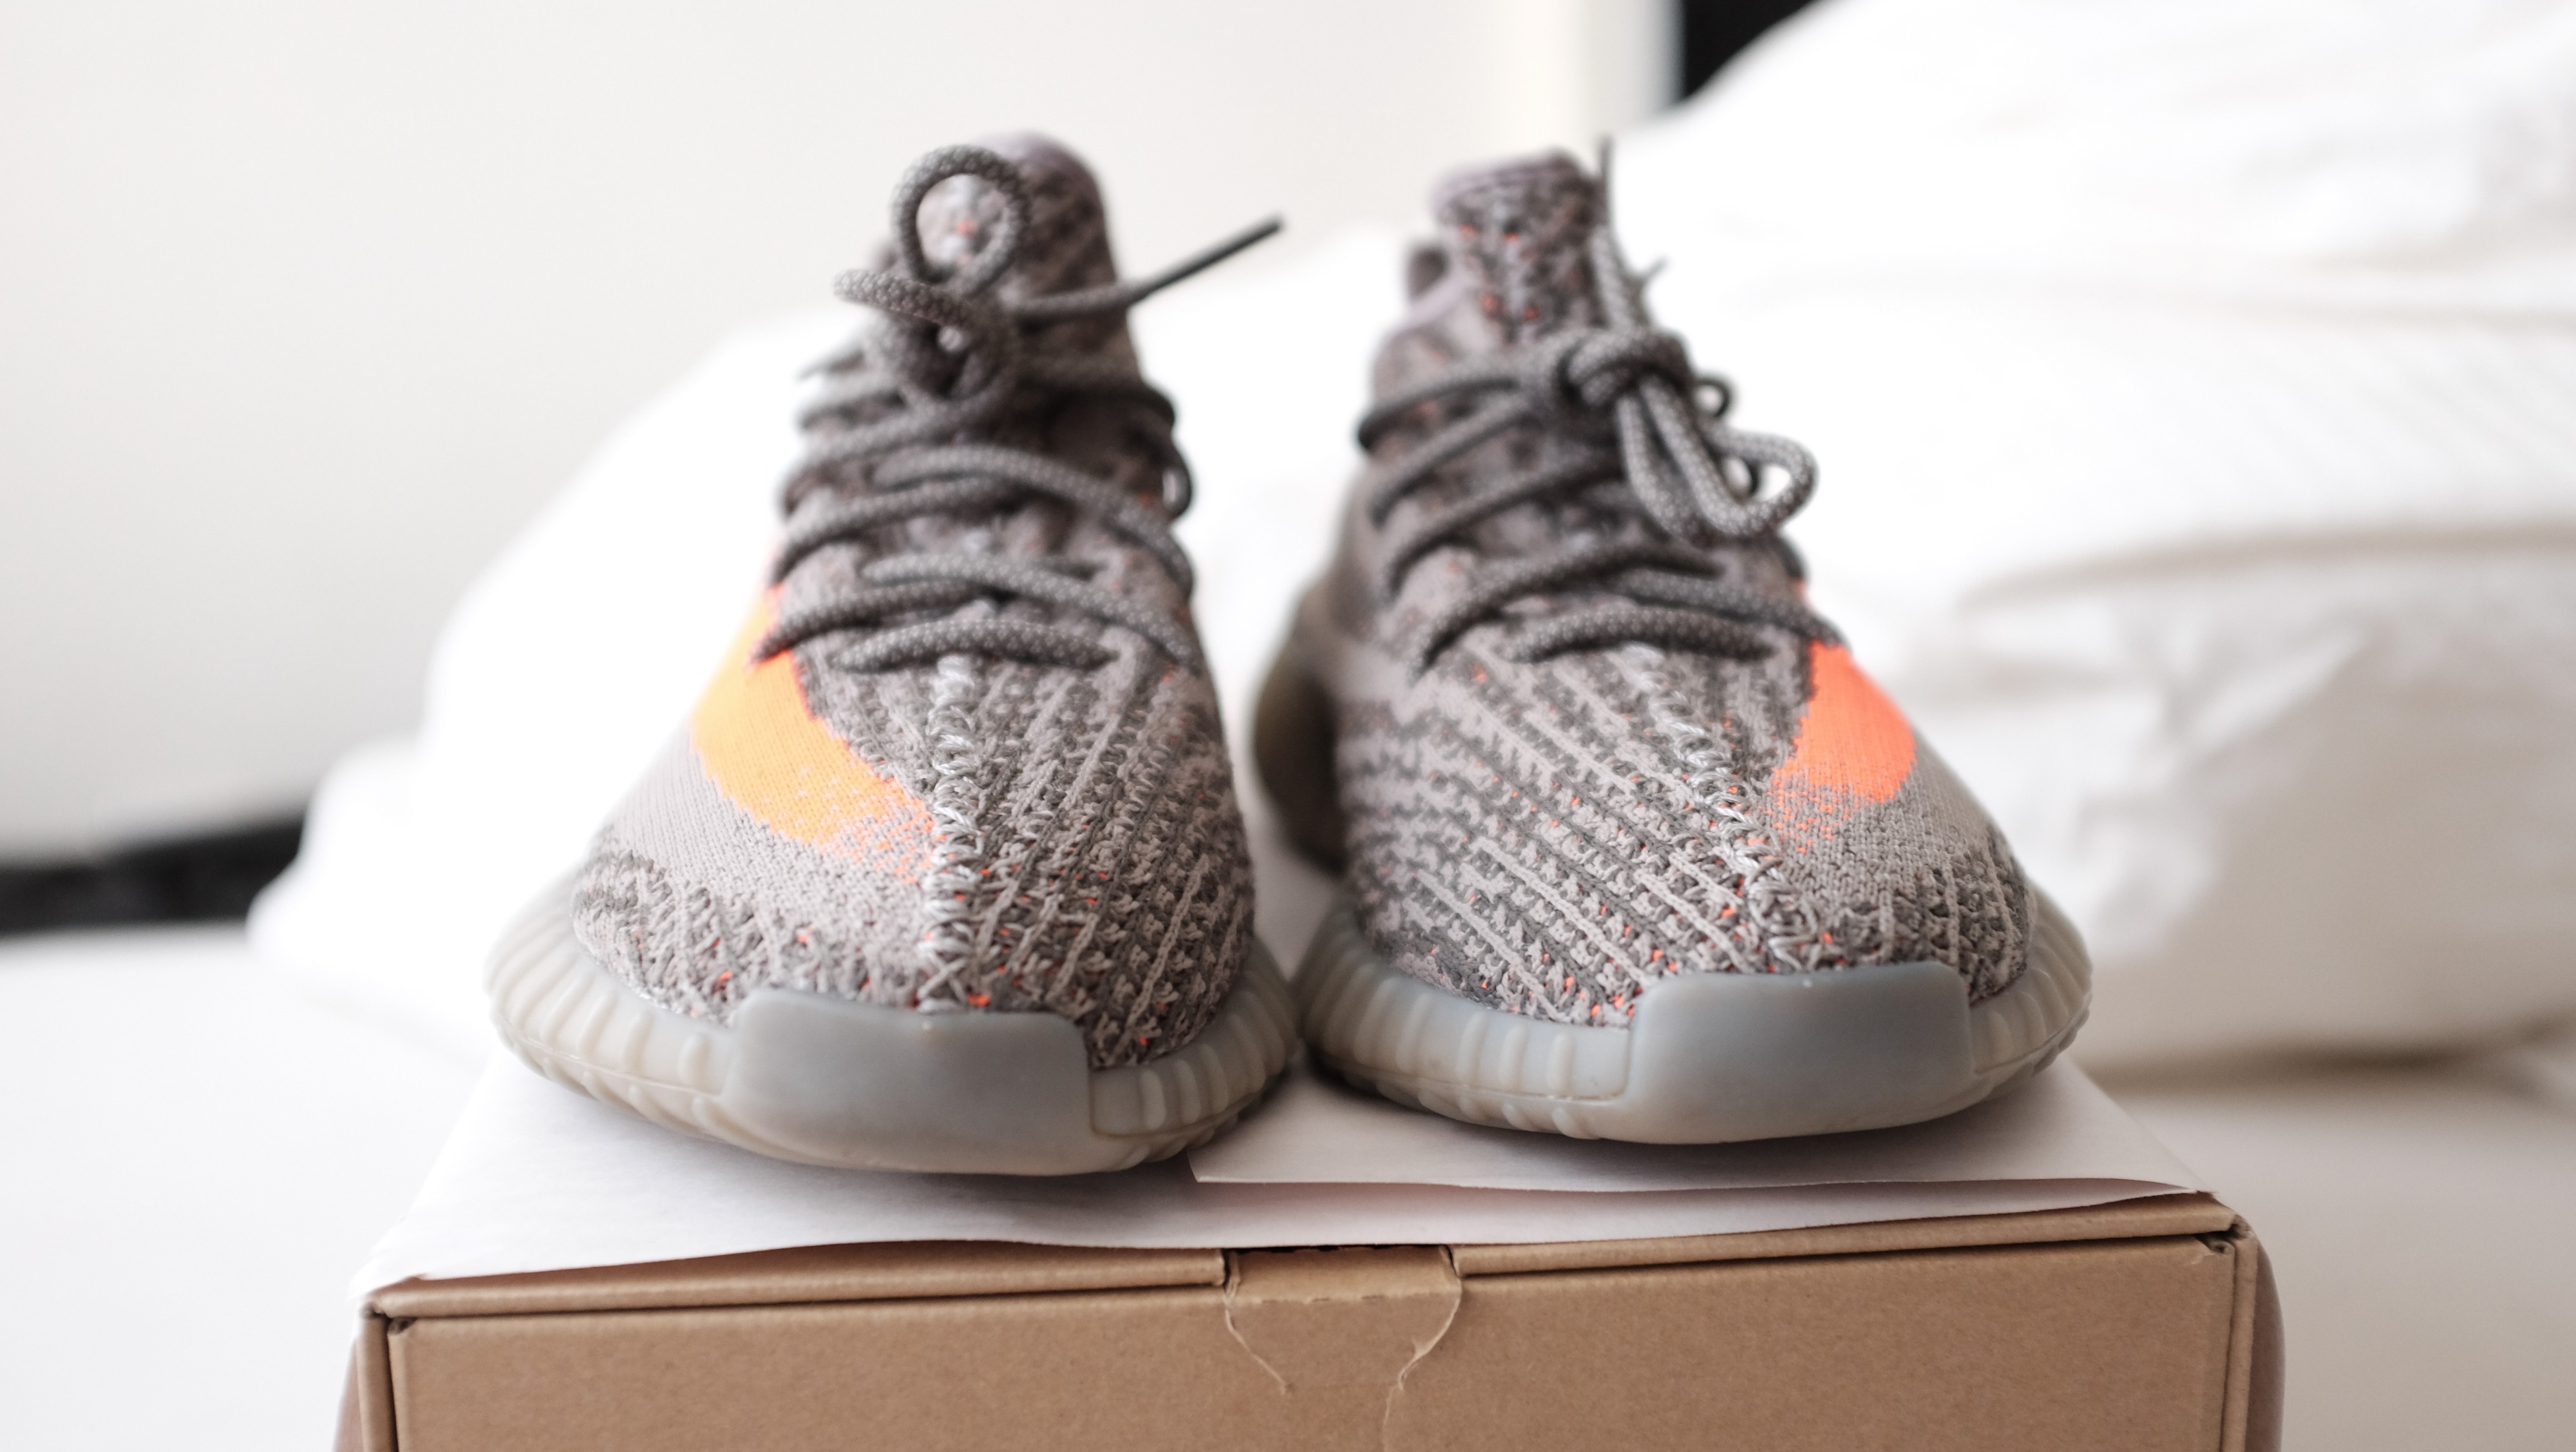
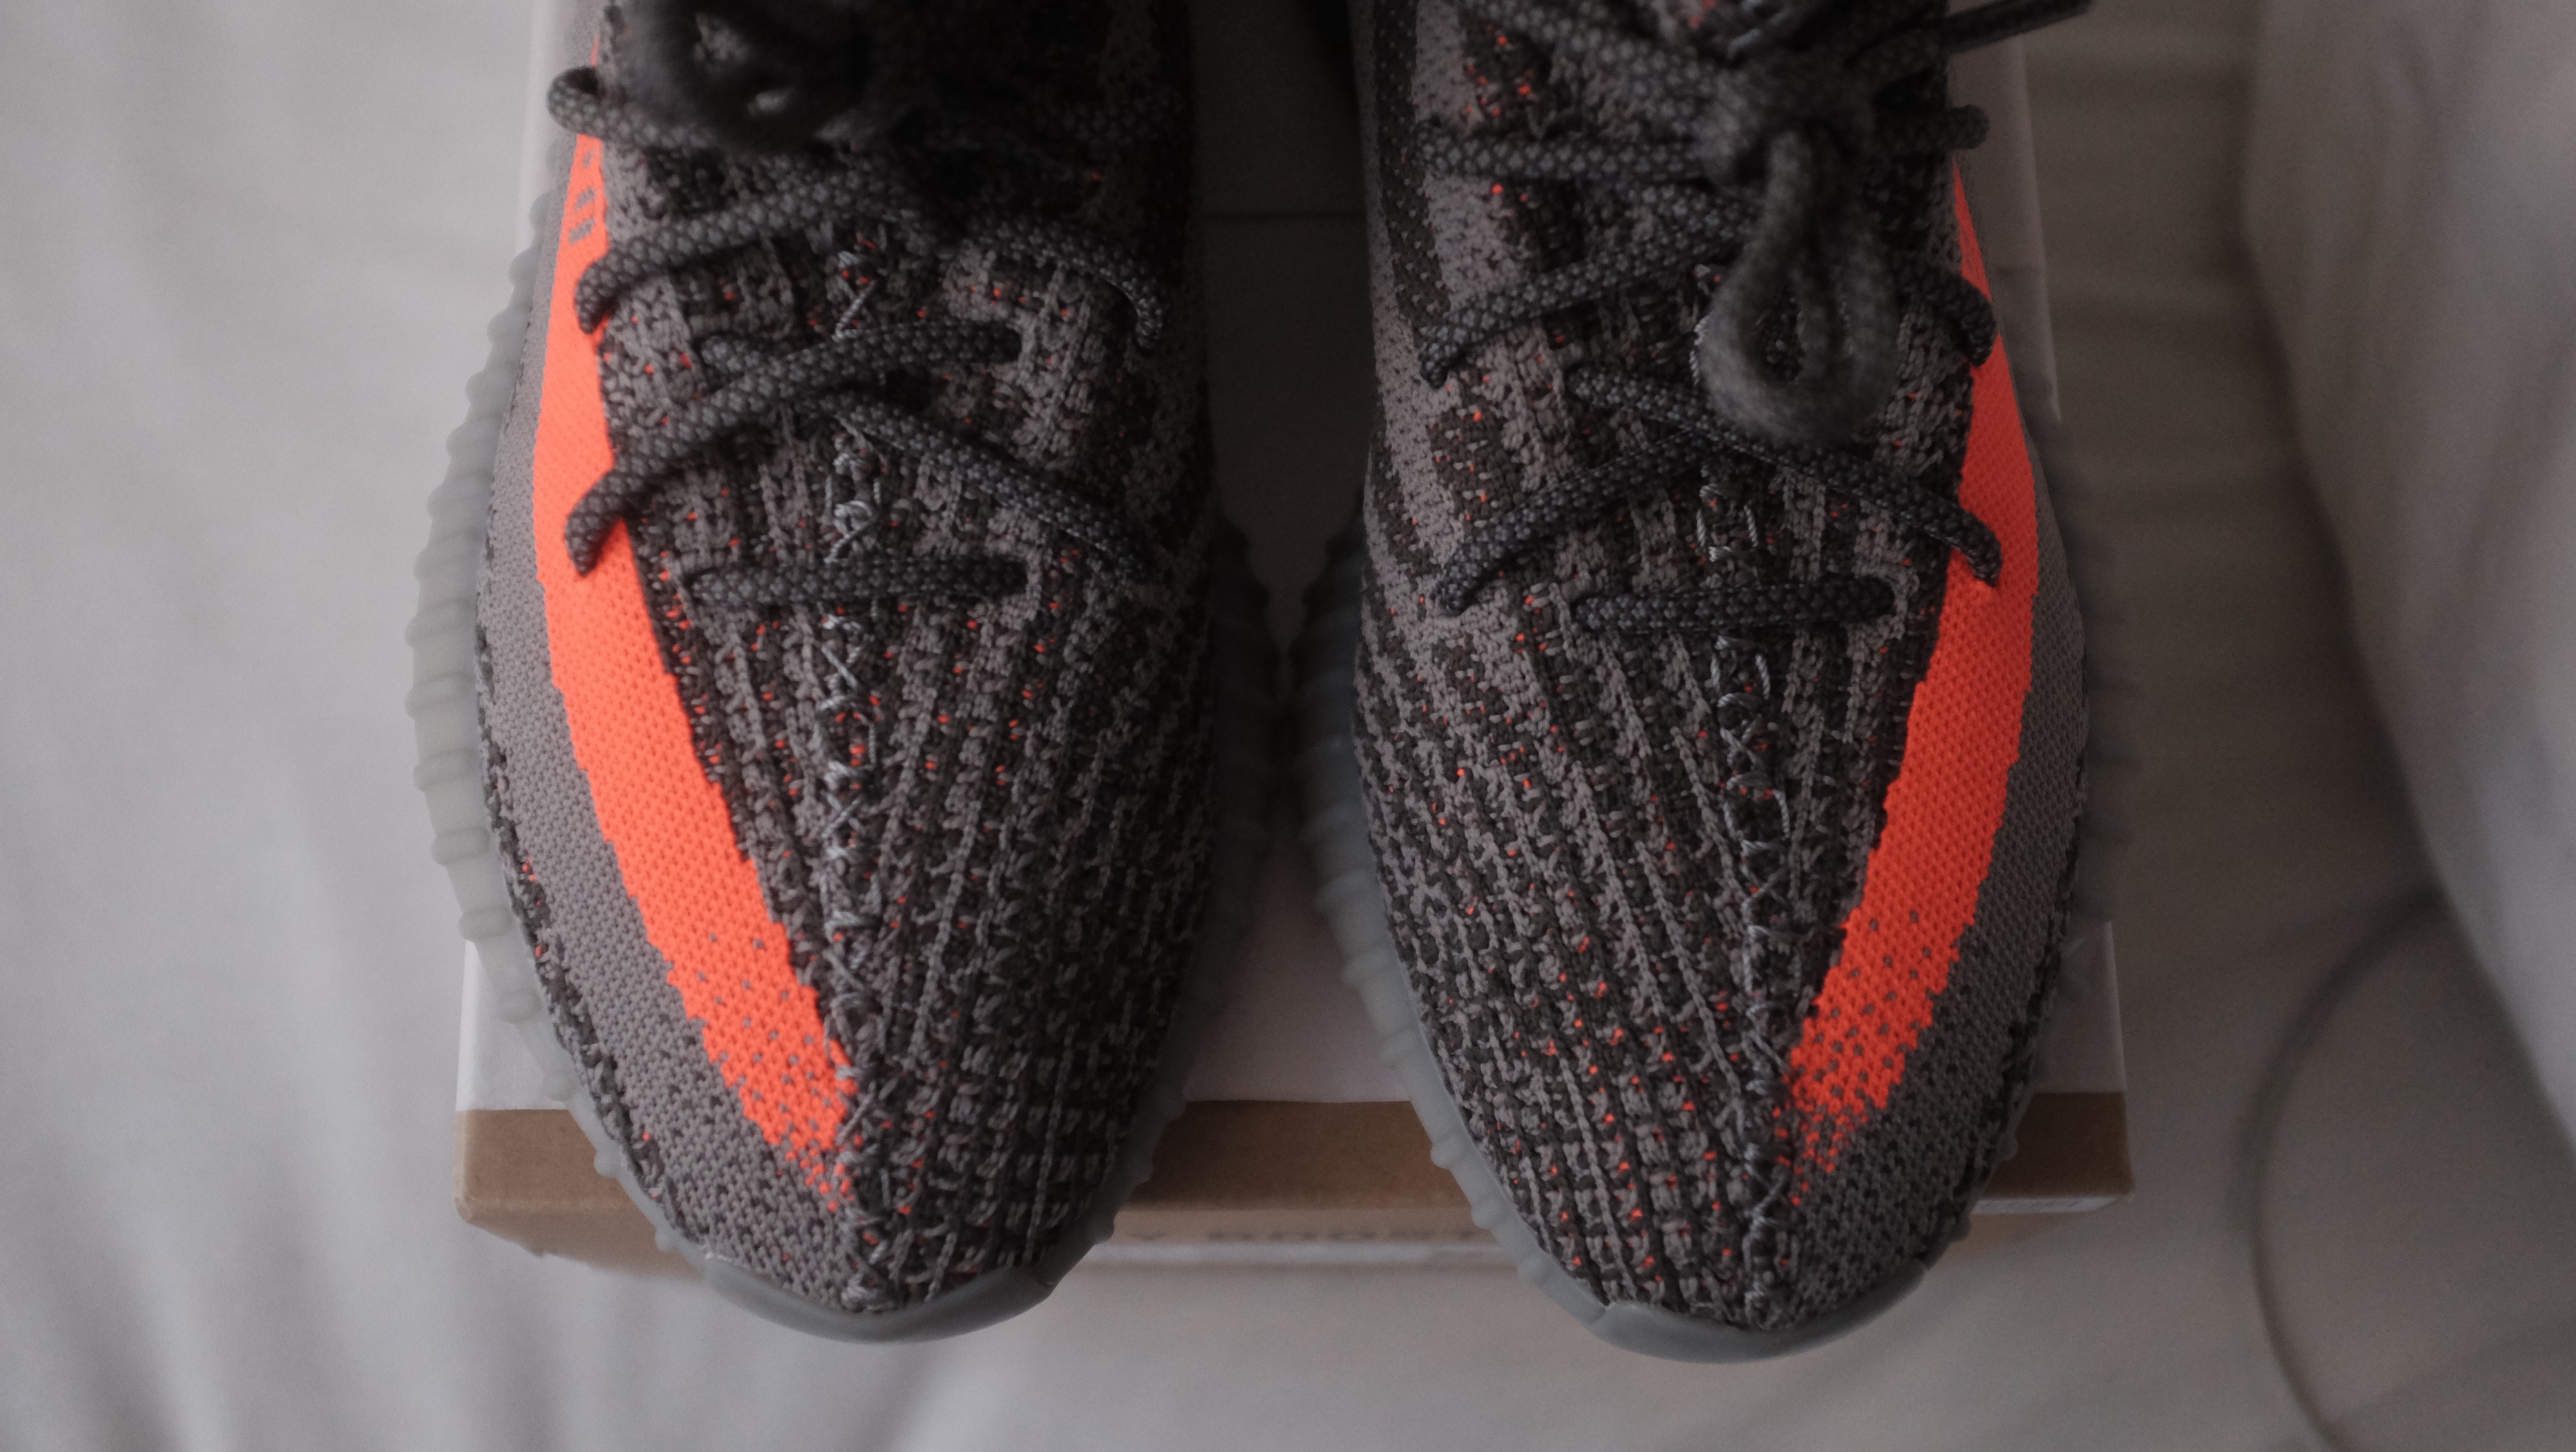
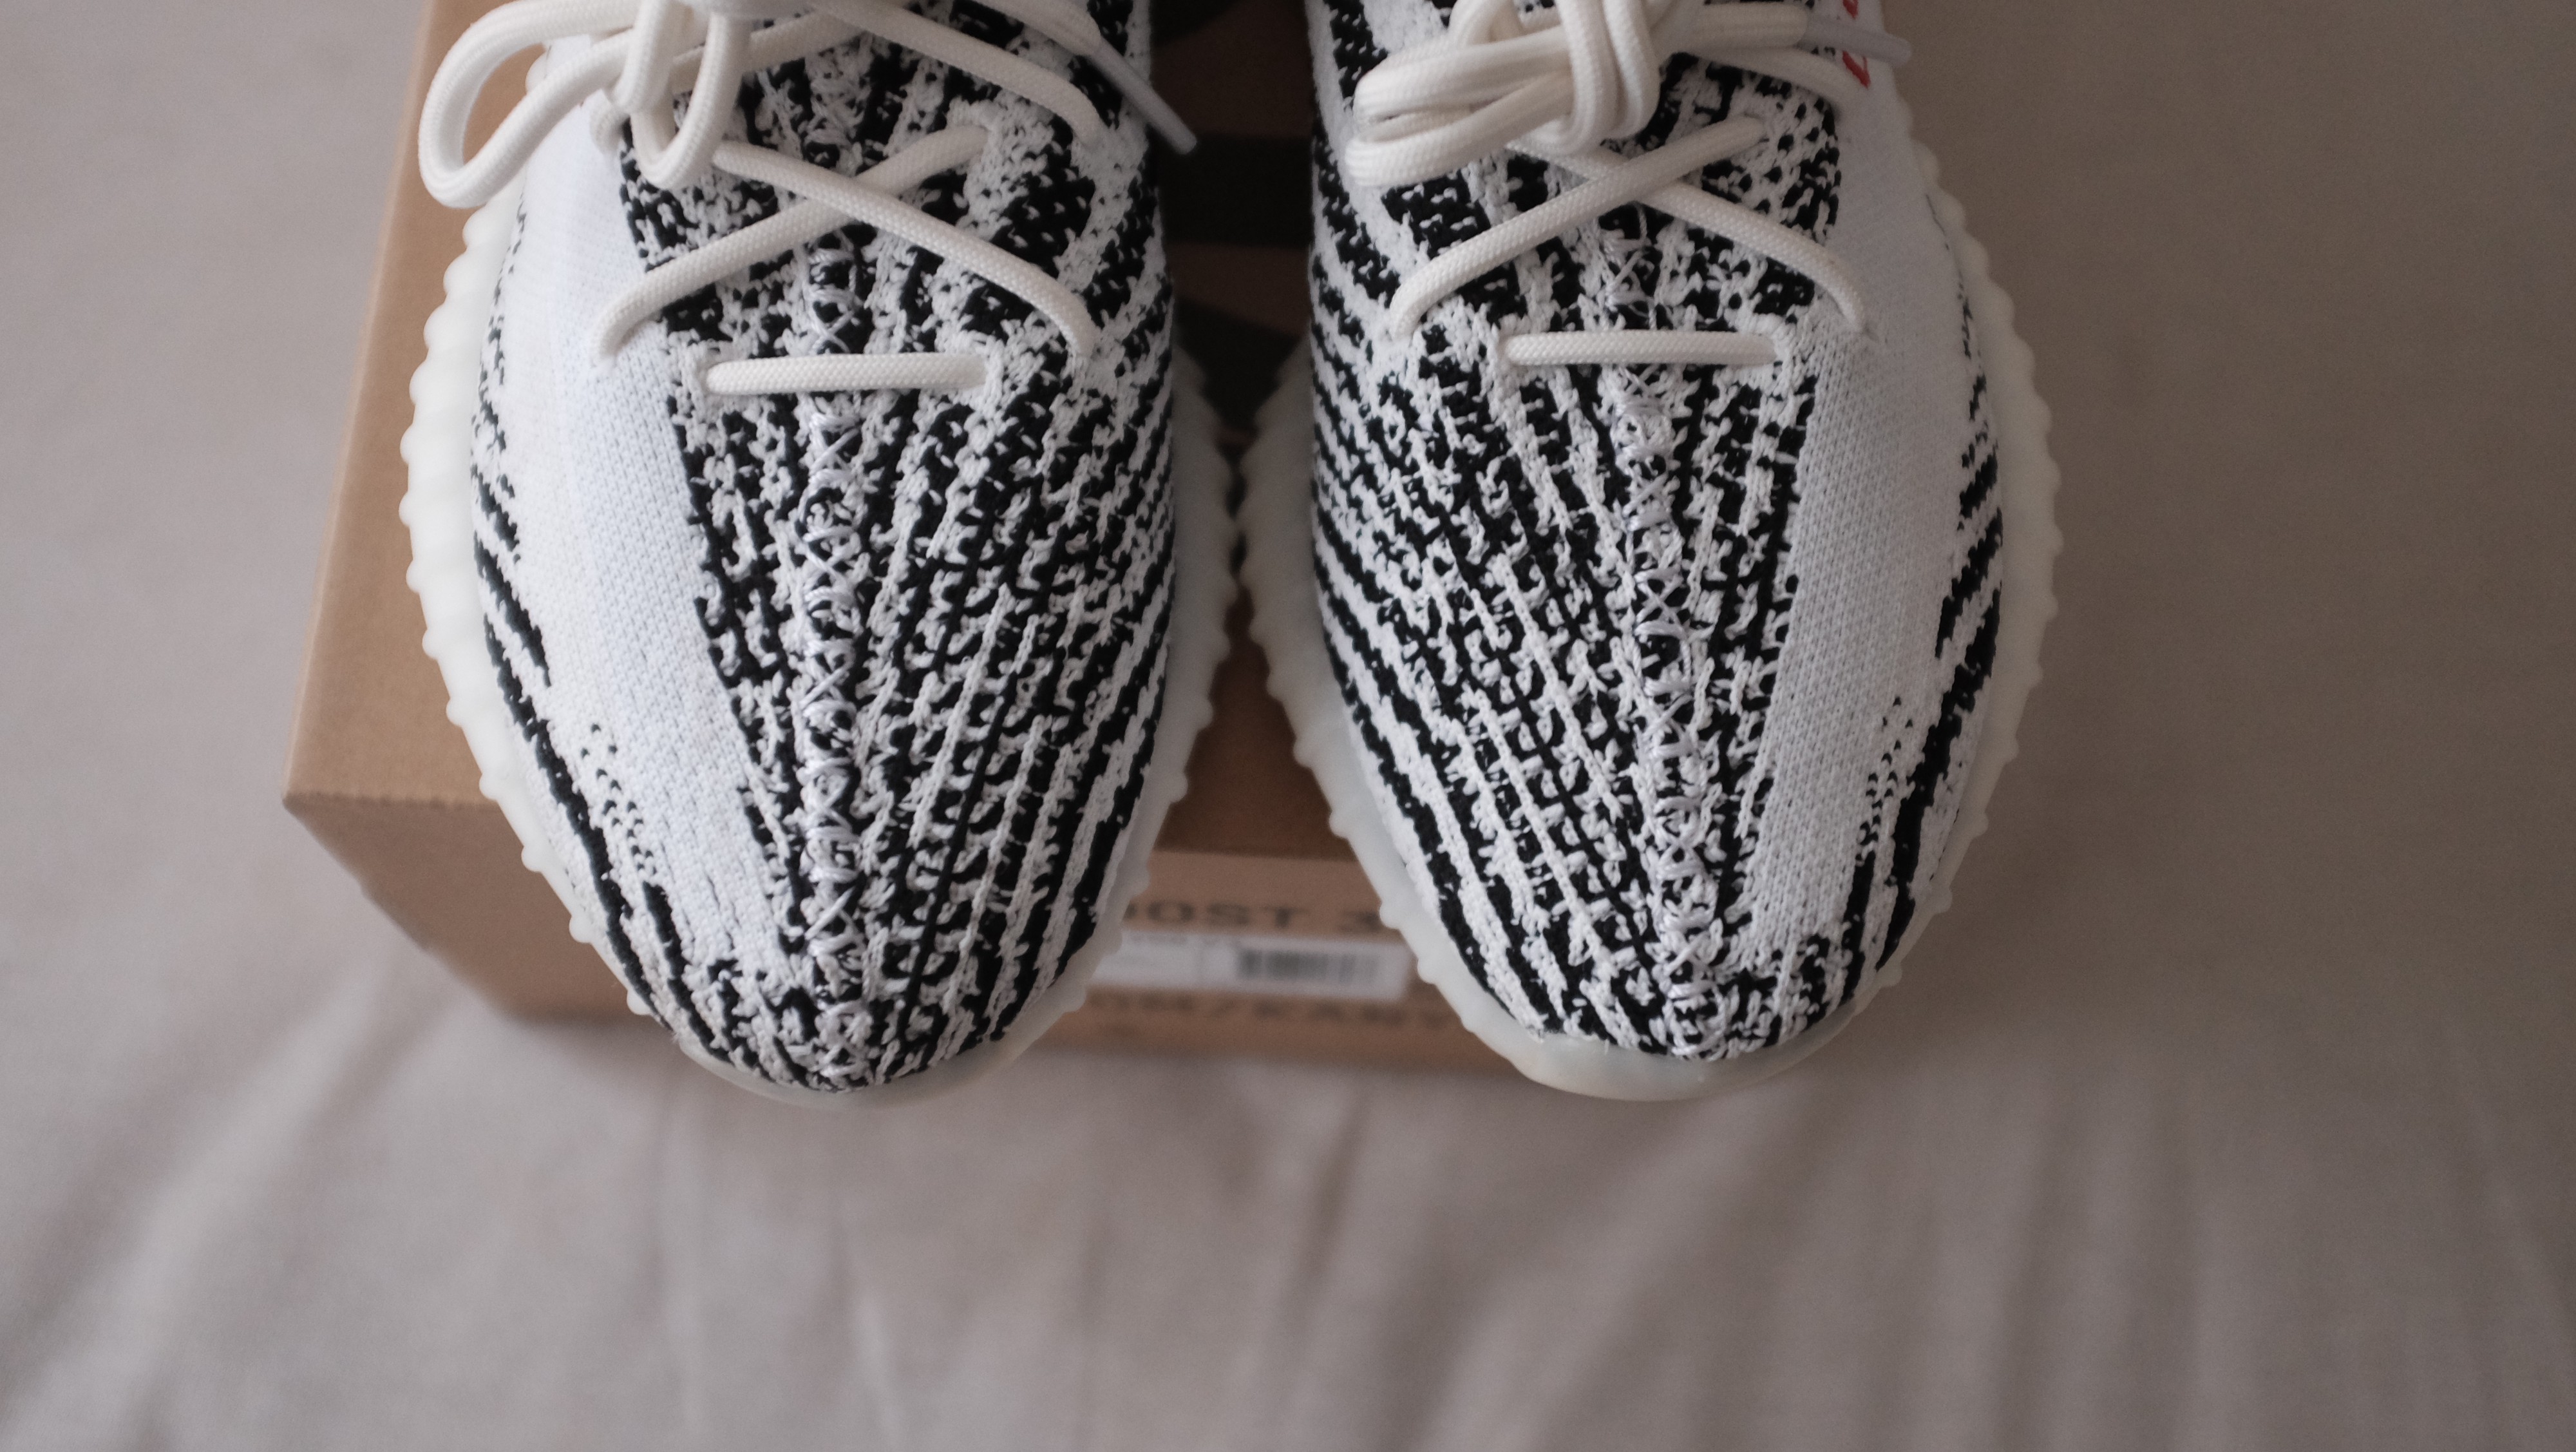
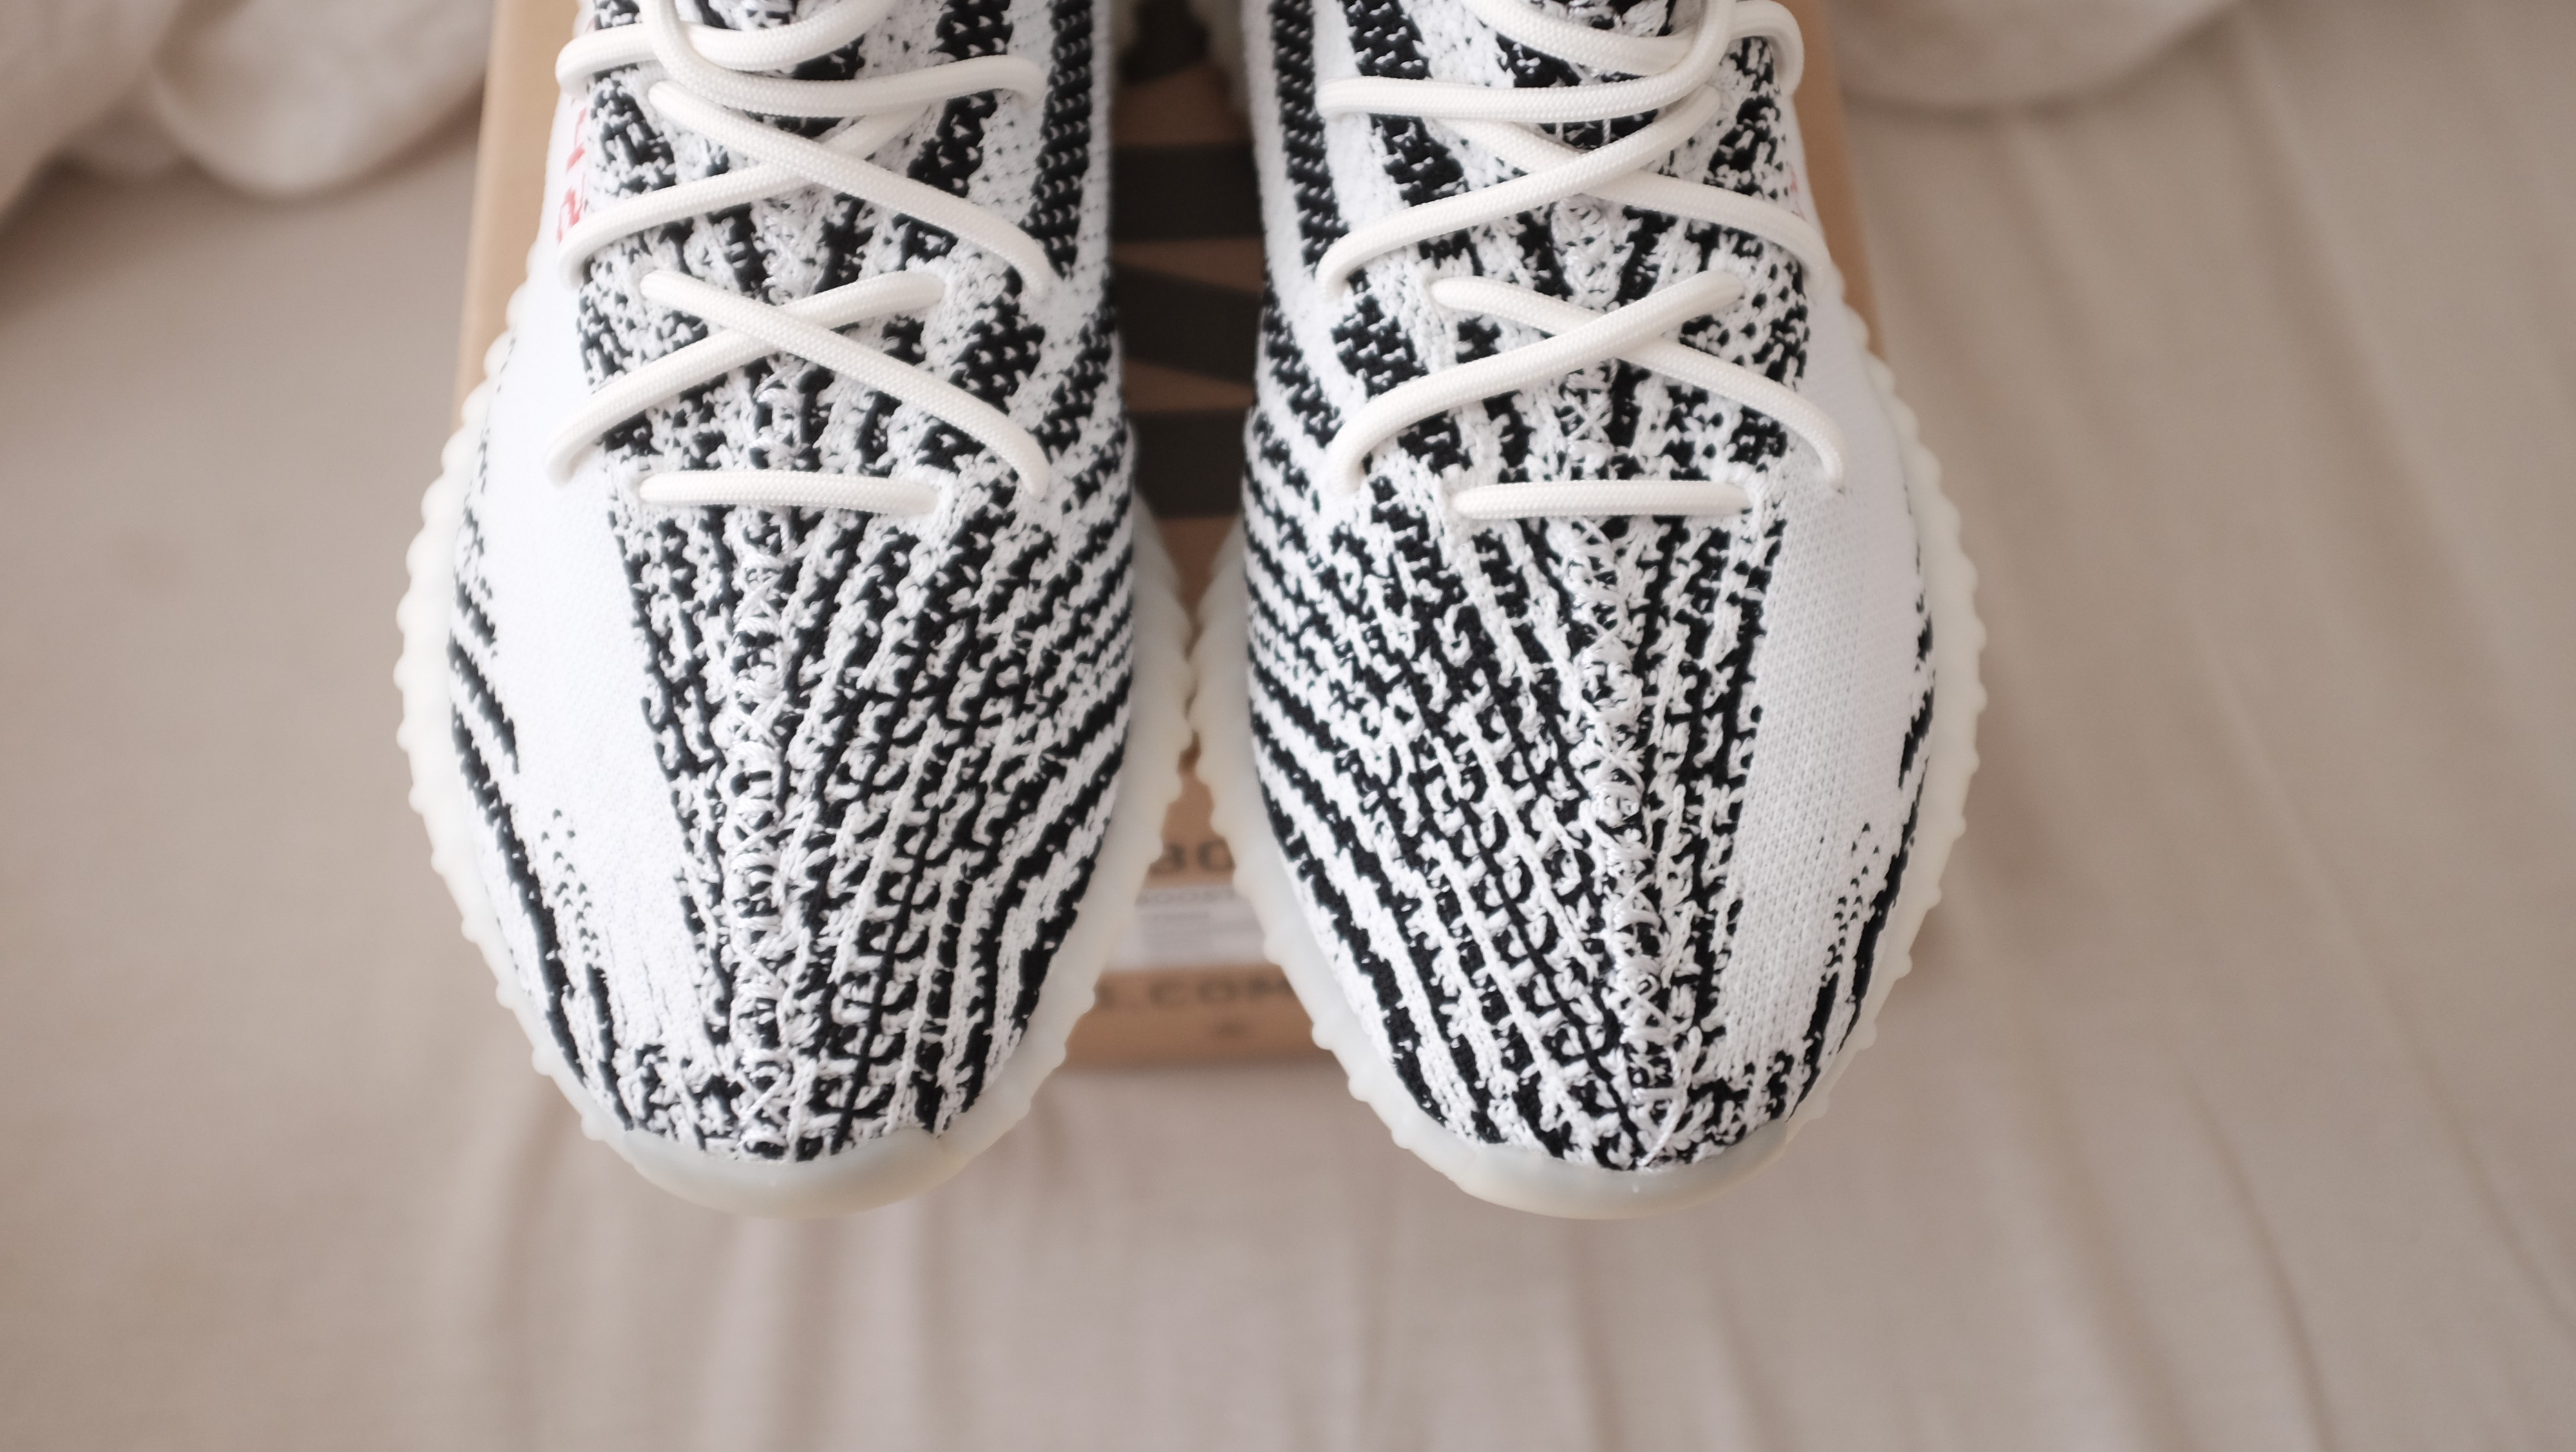
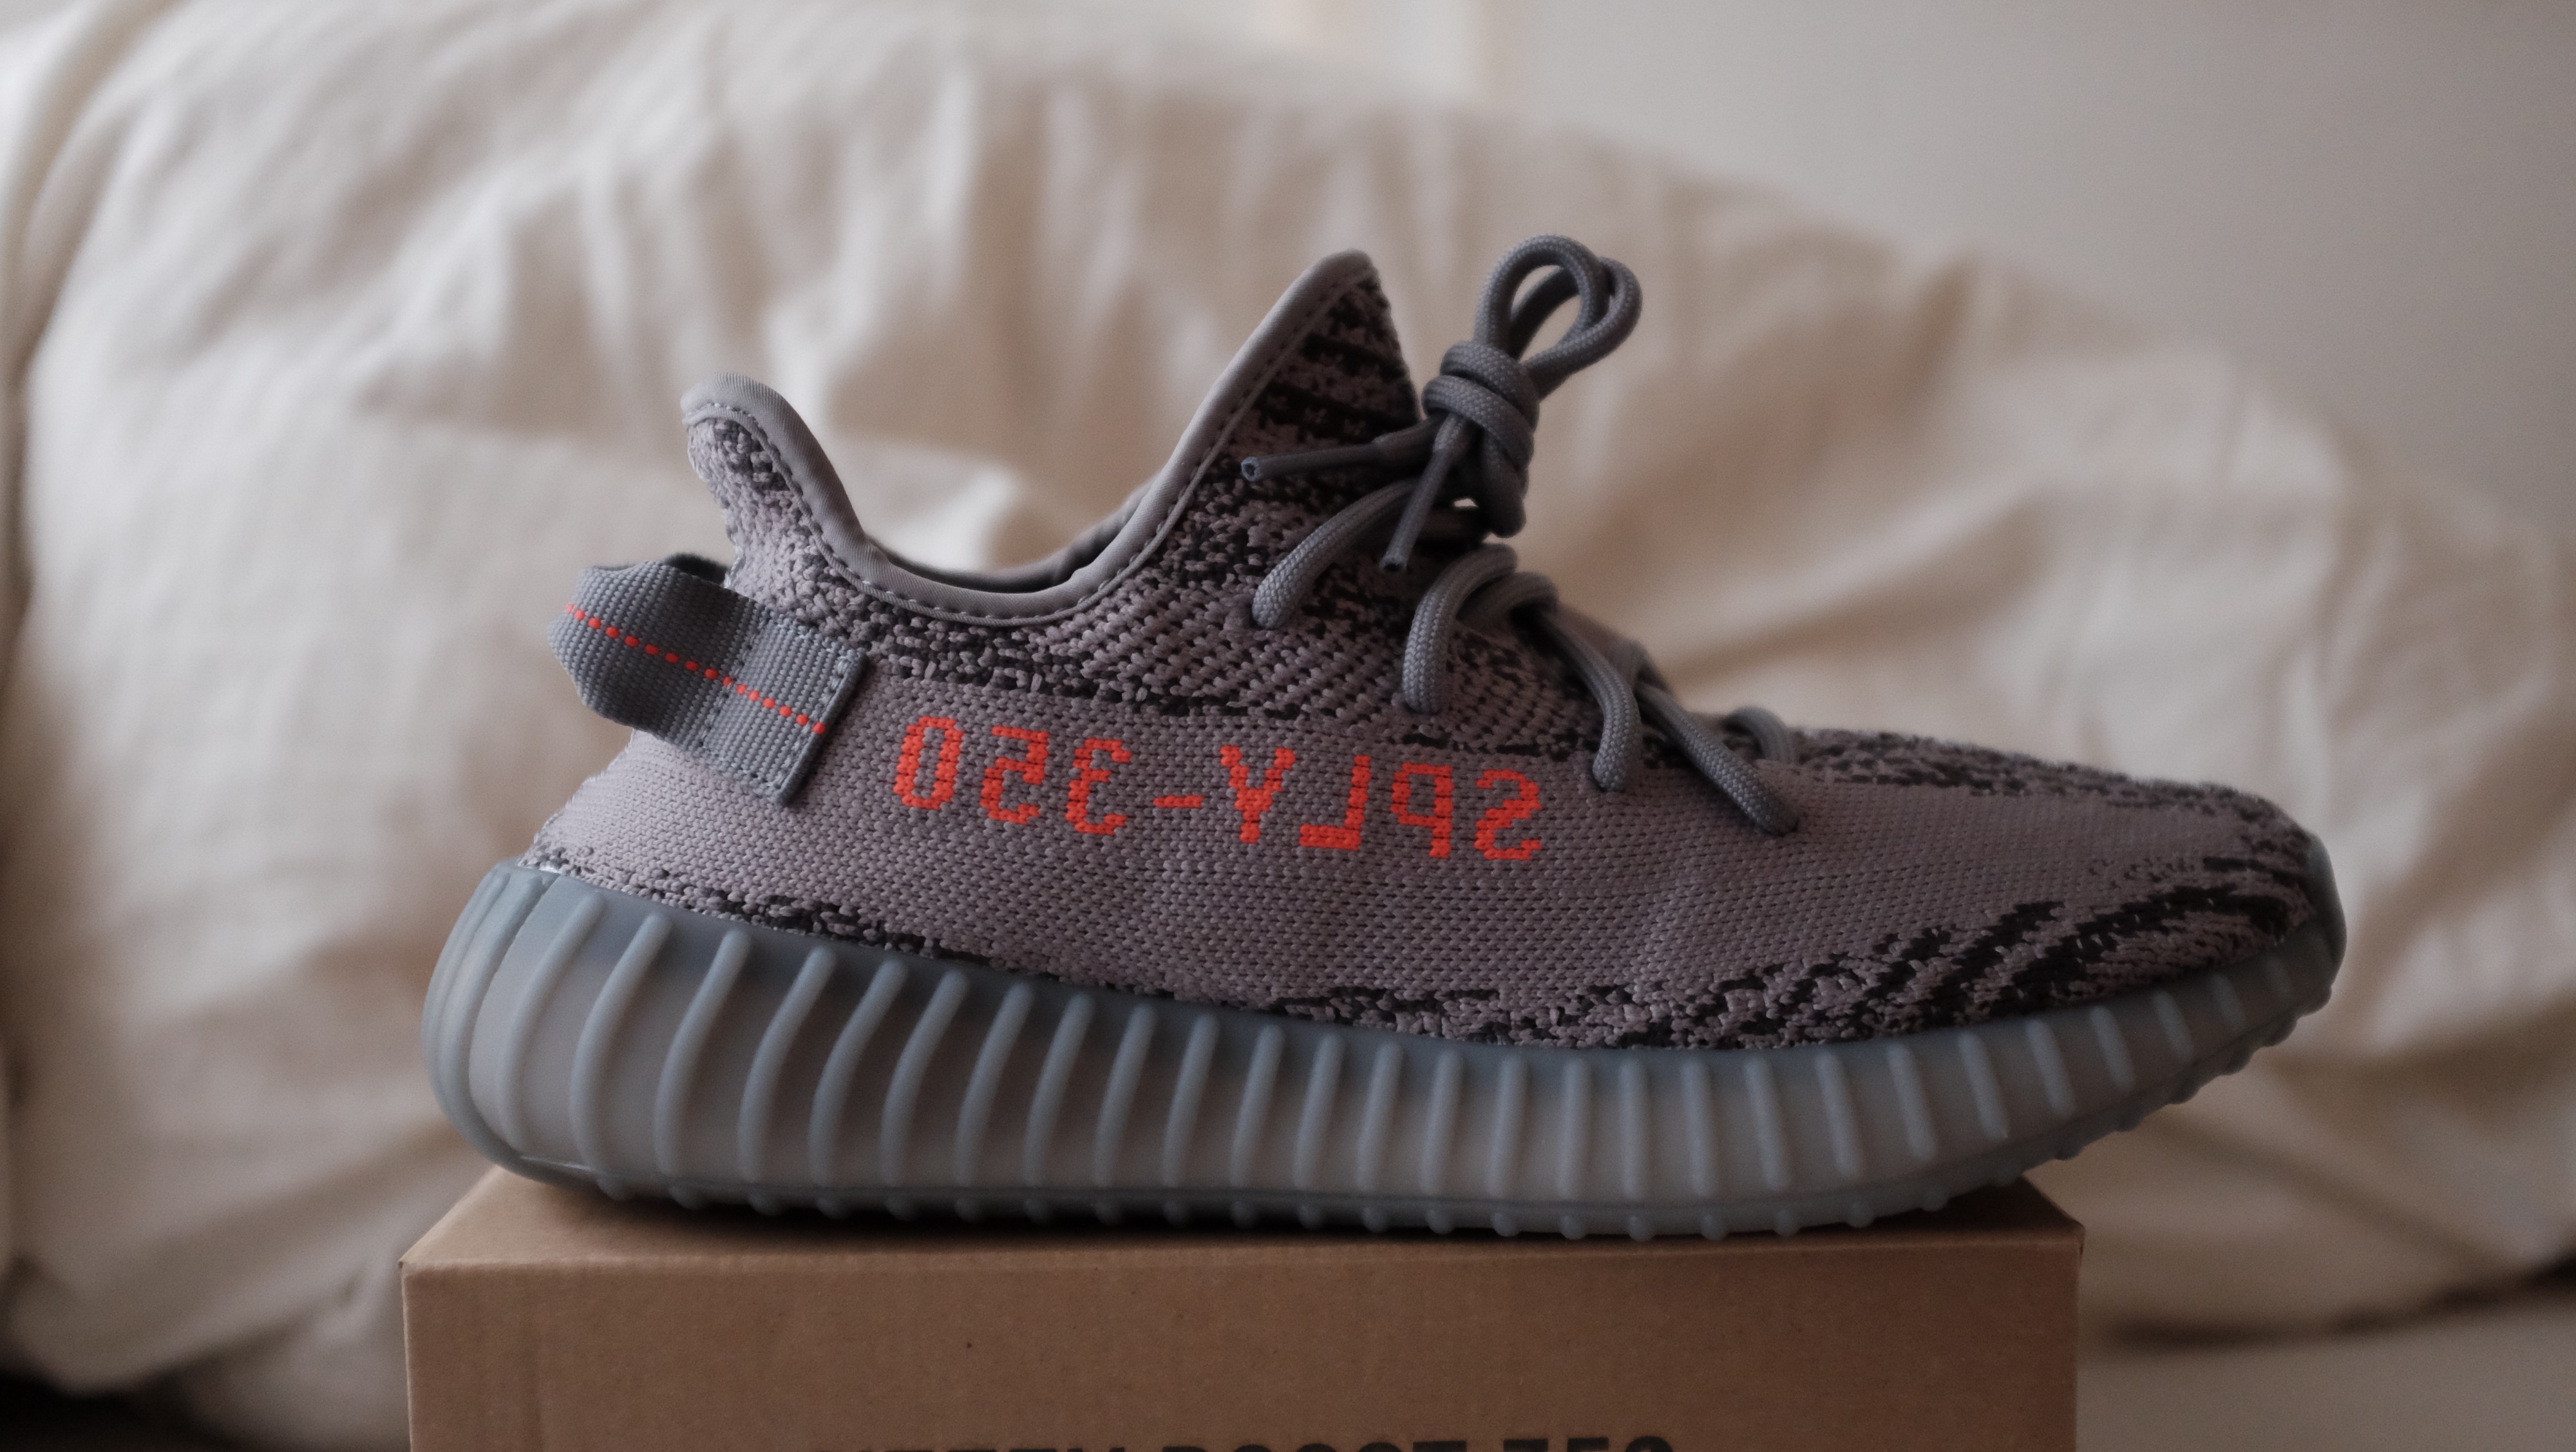
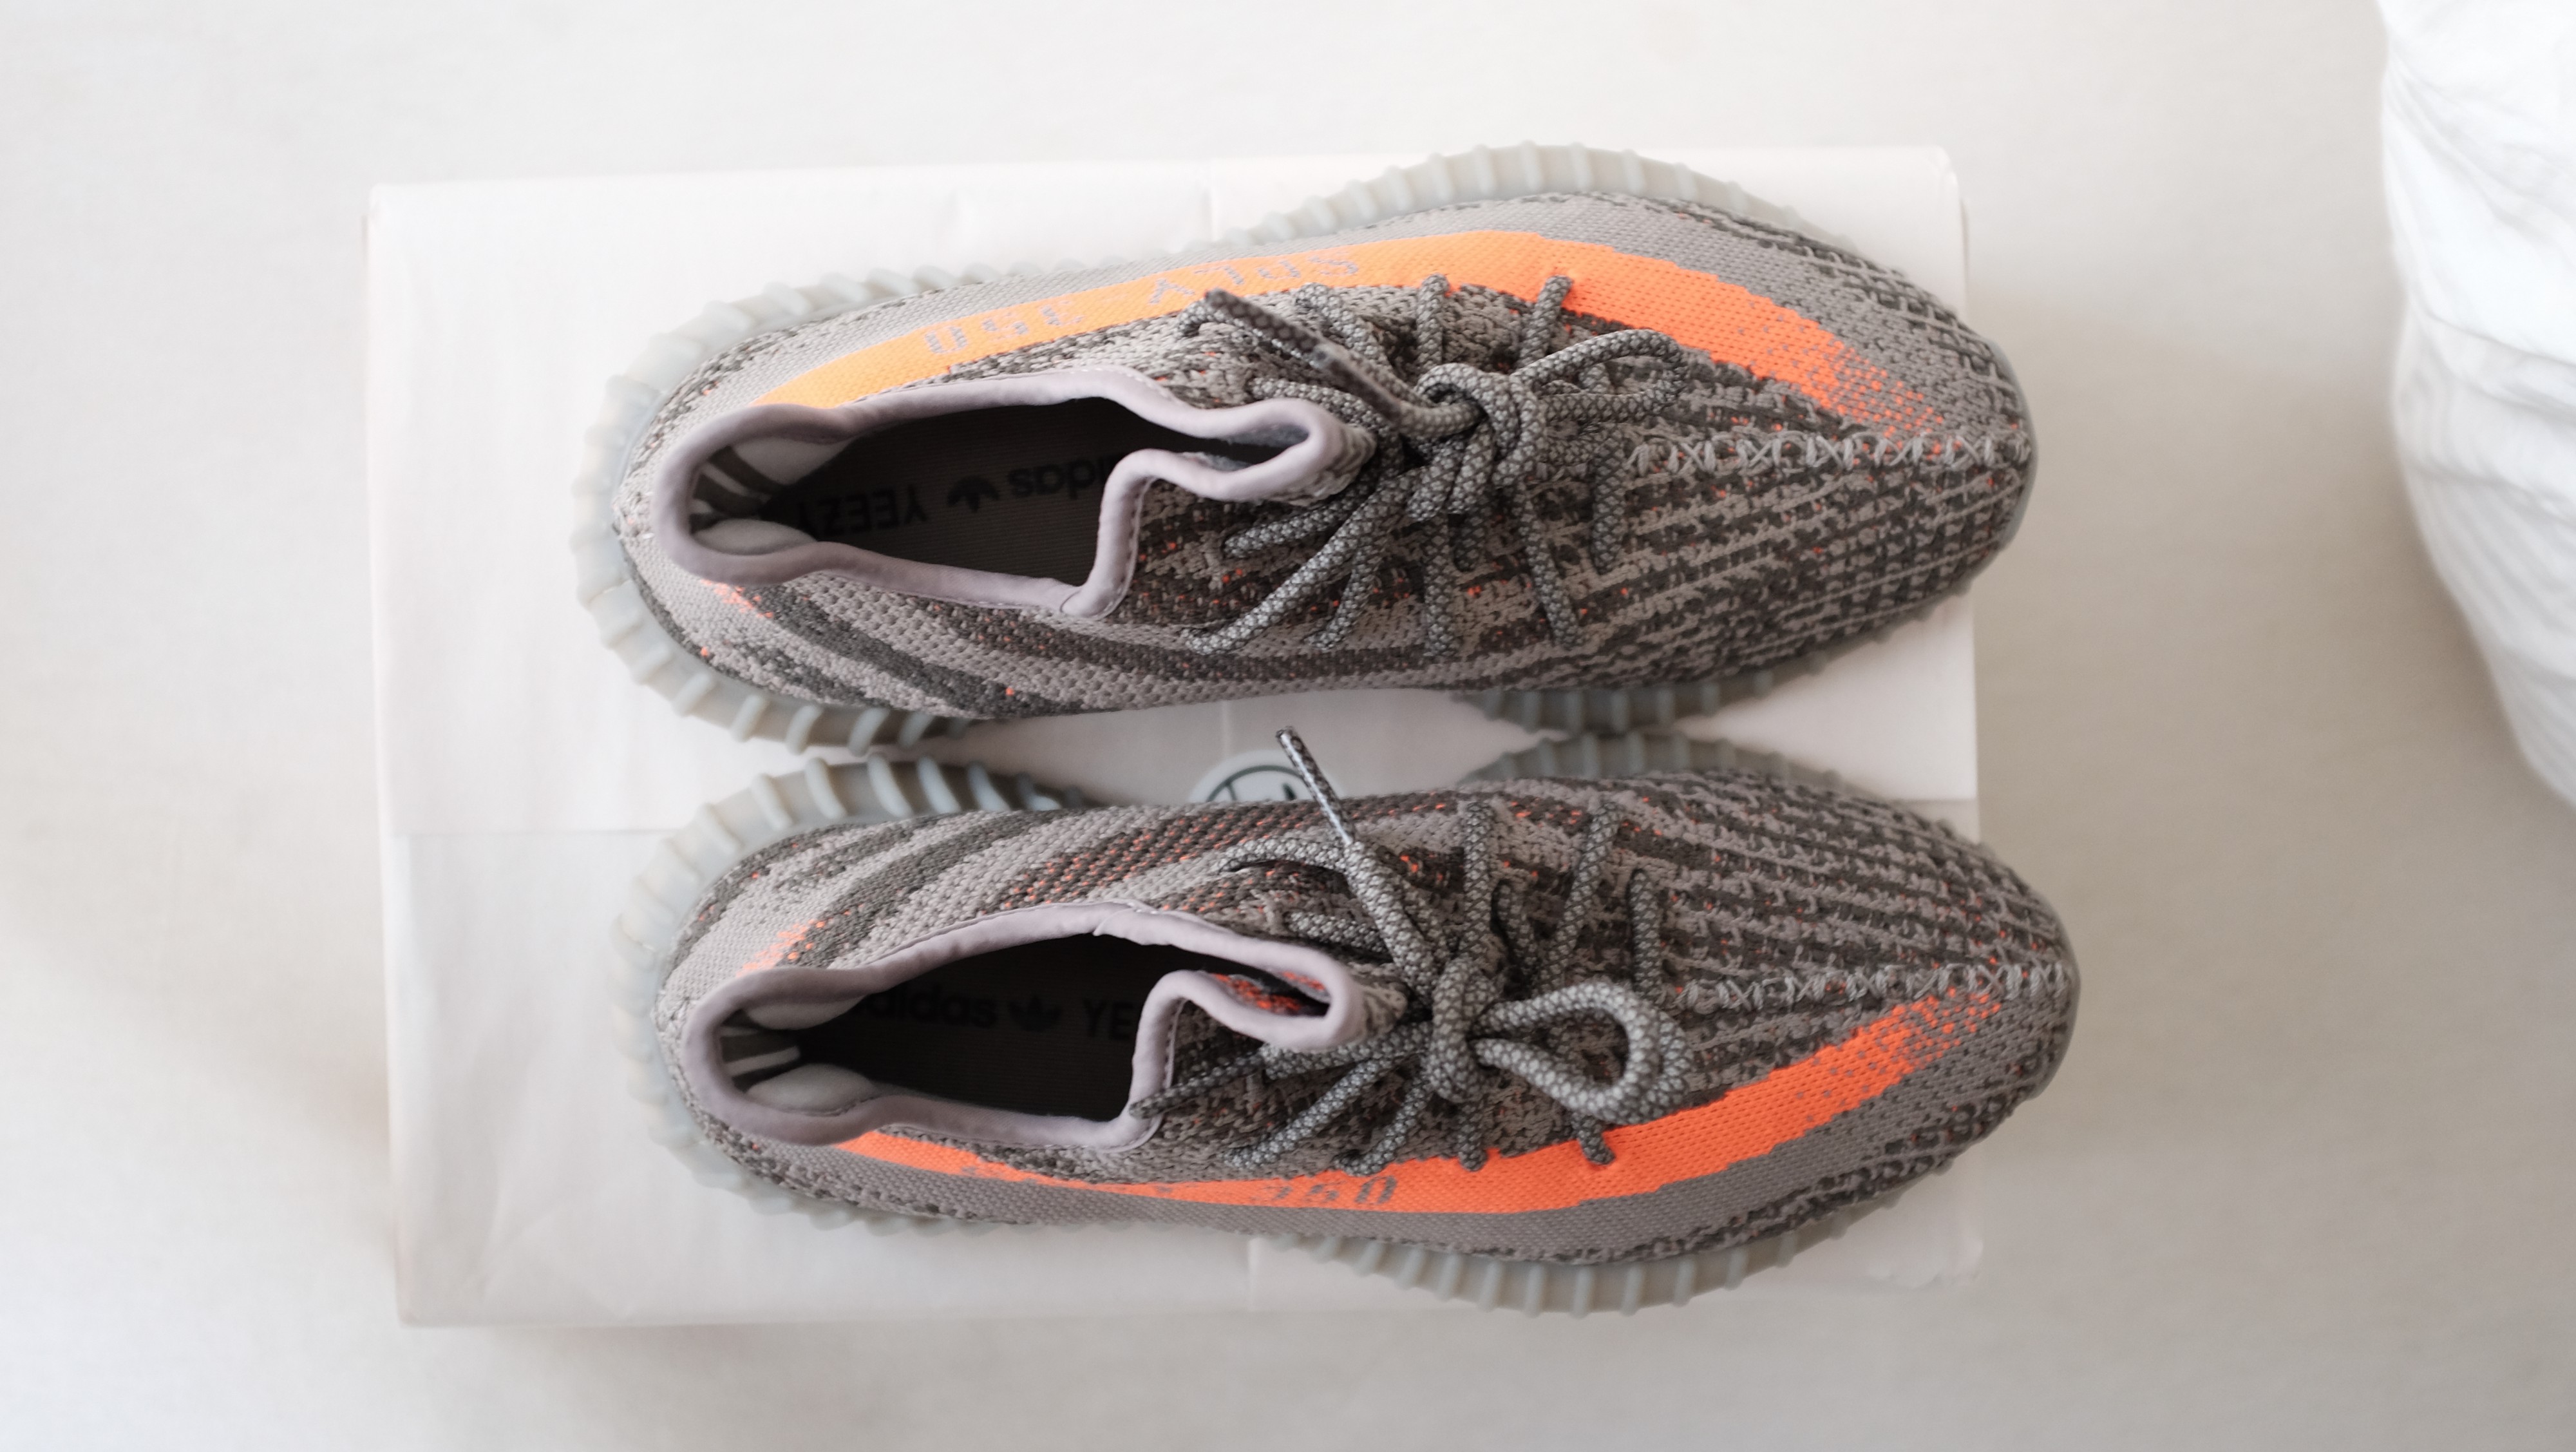
Toe Box/Stripe Fade
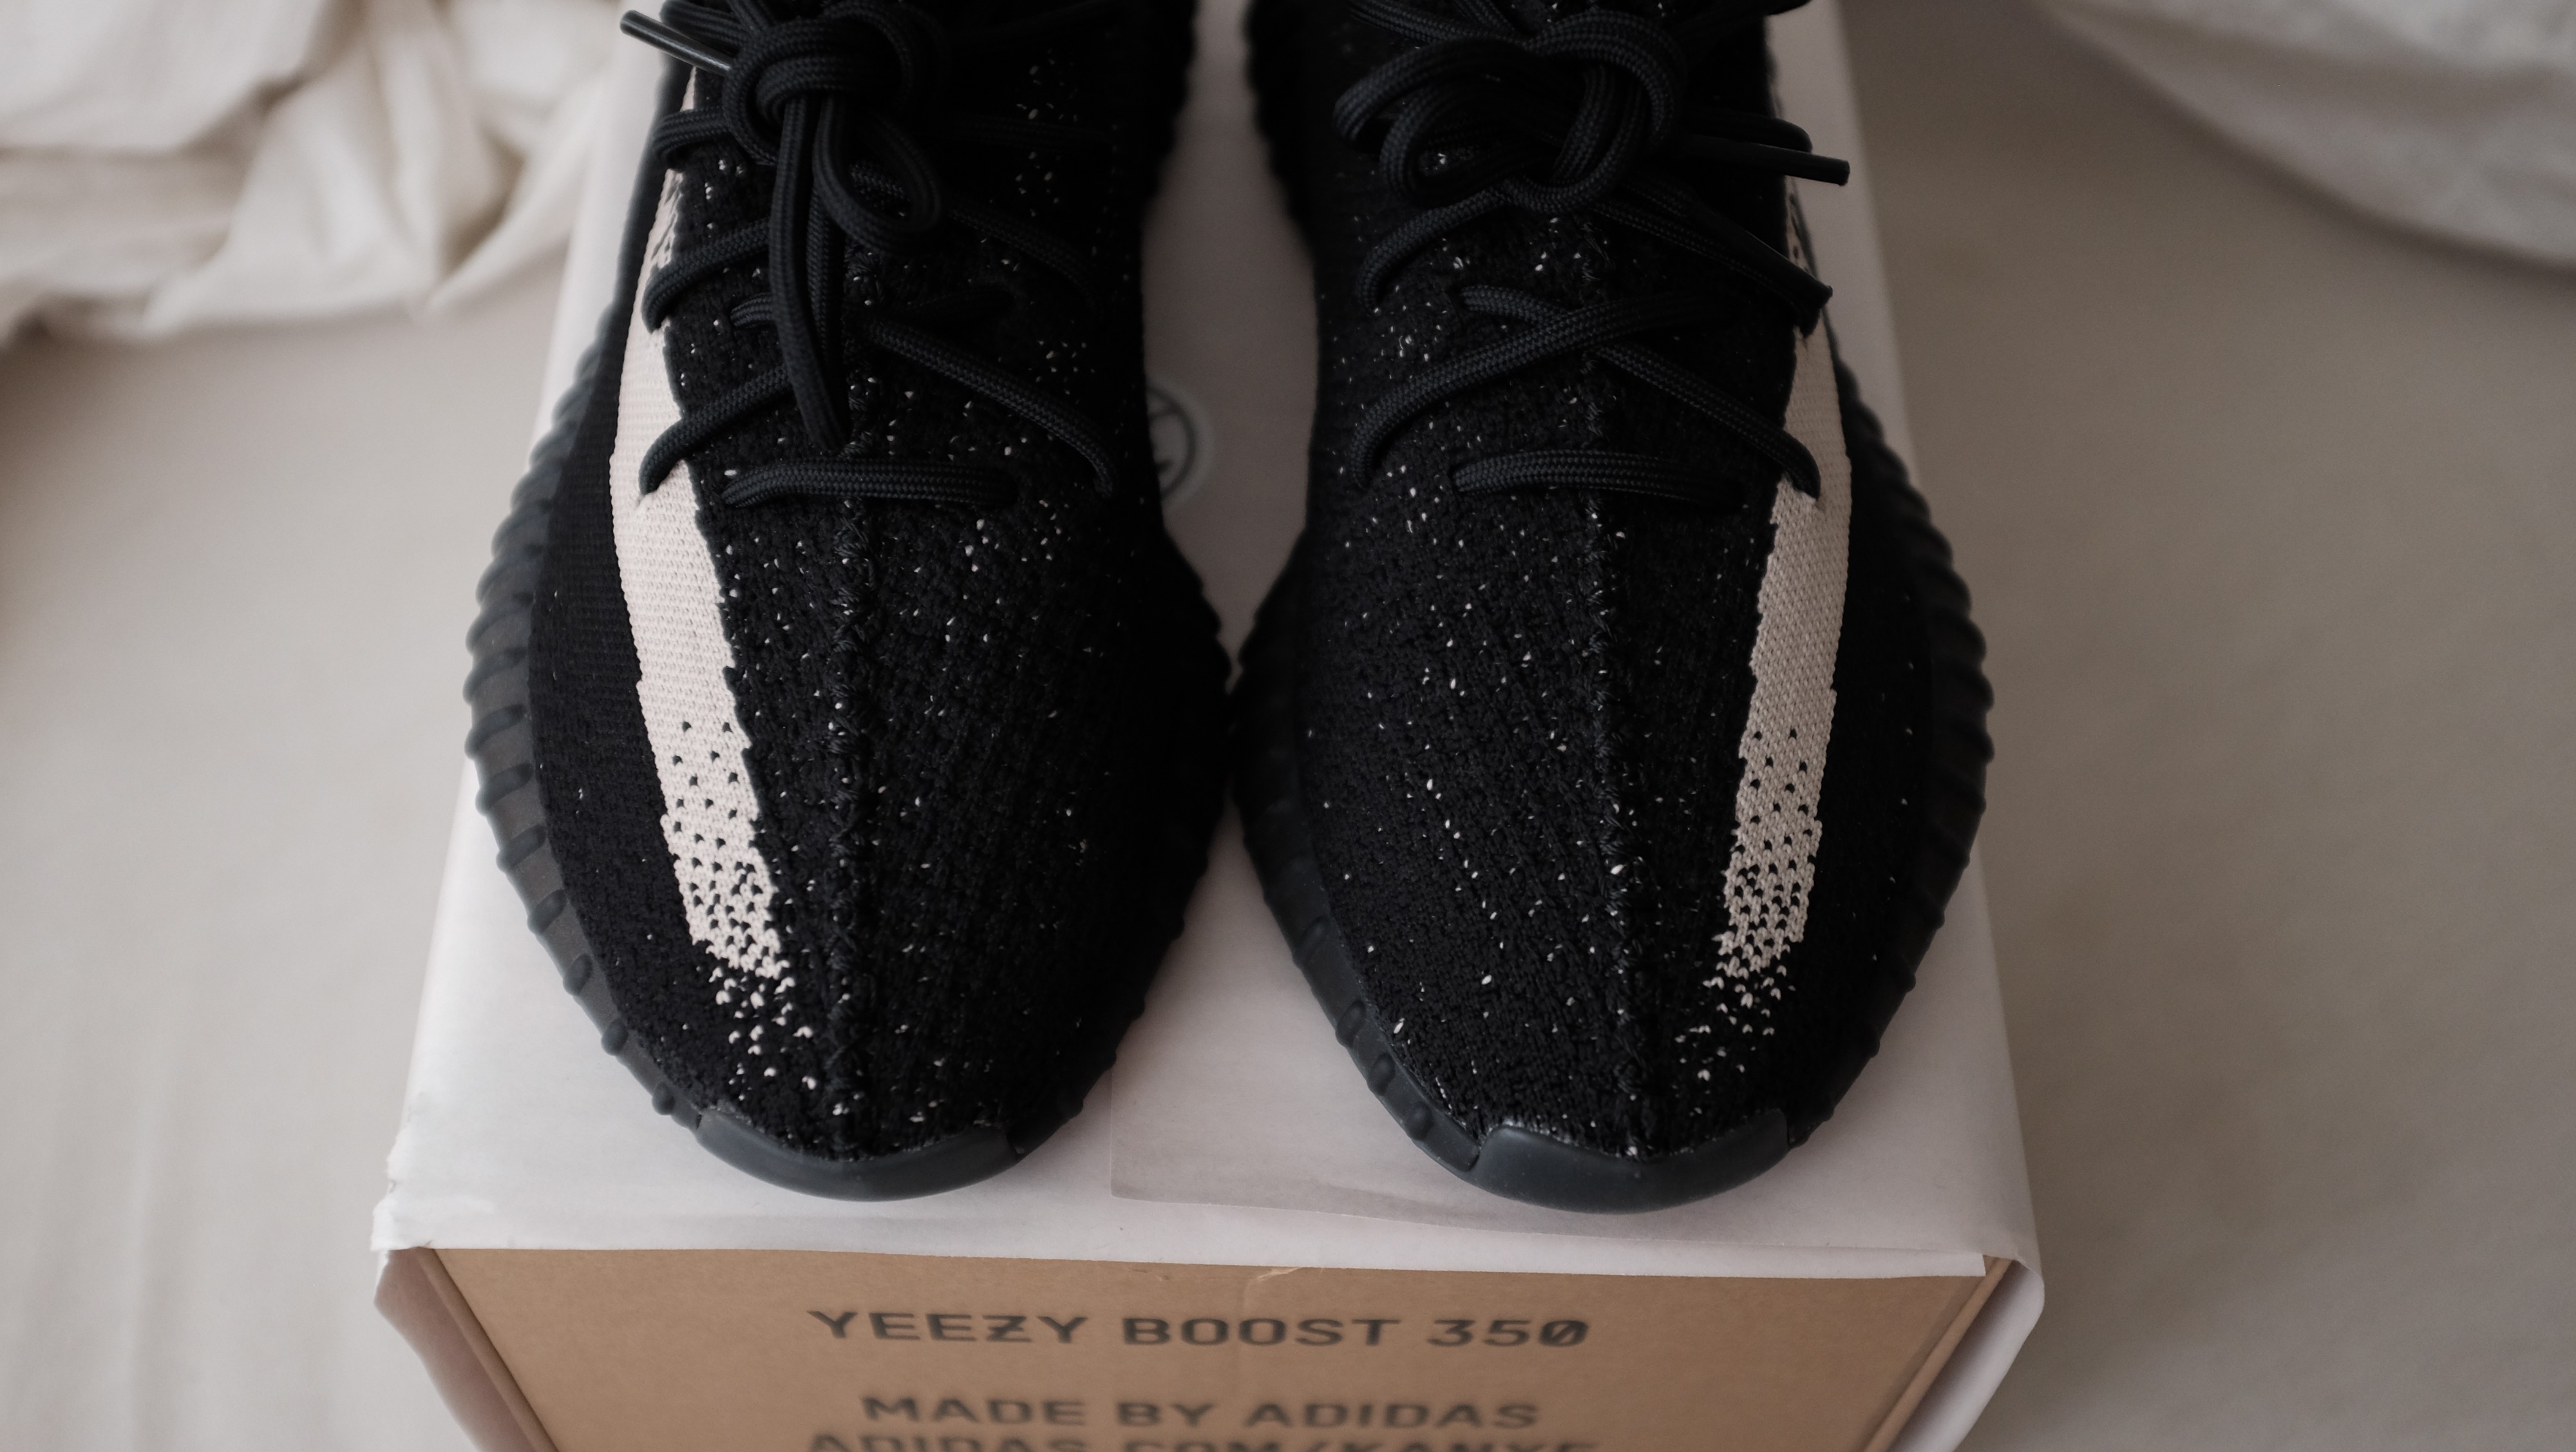
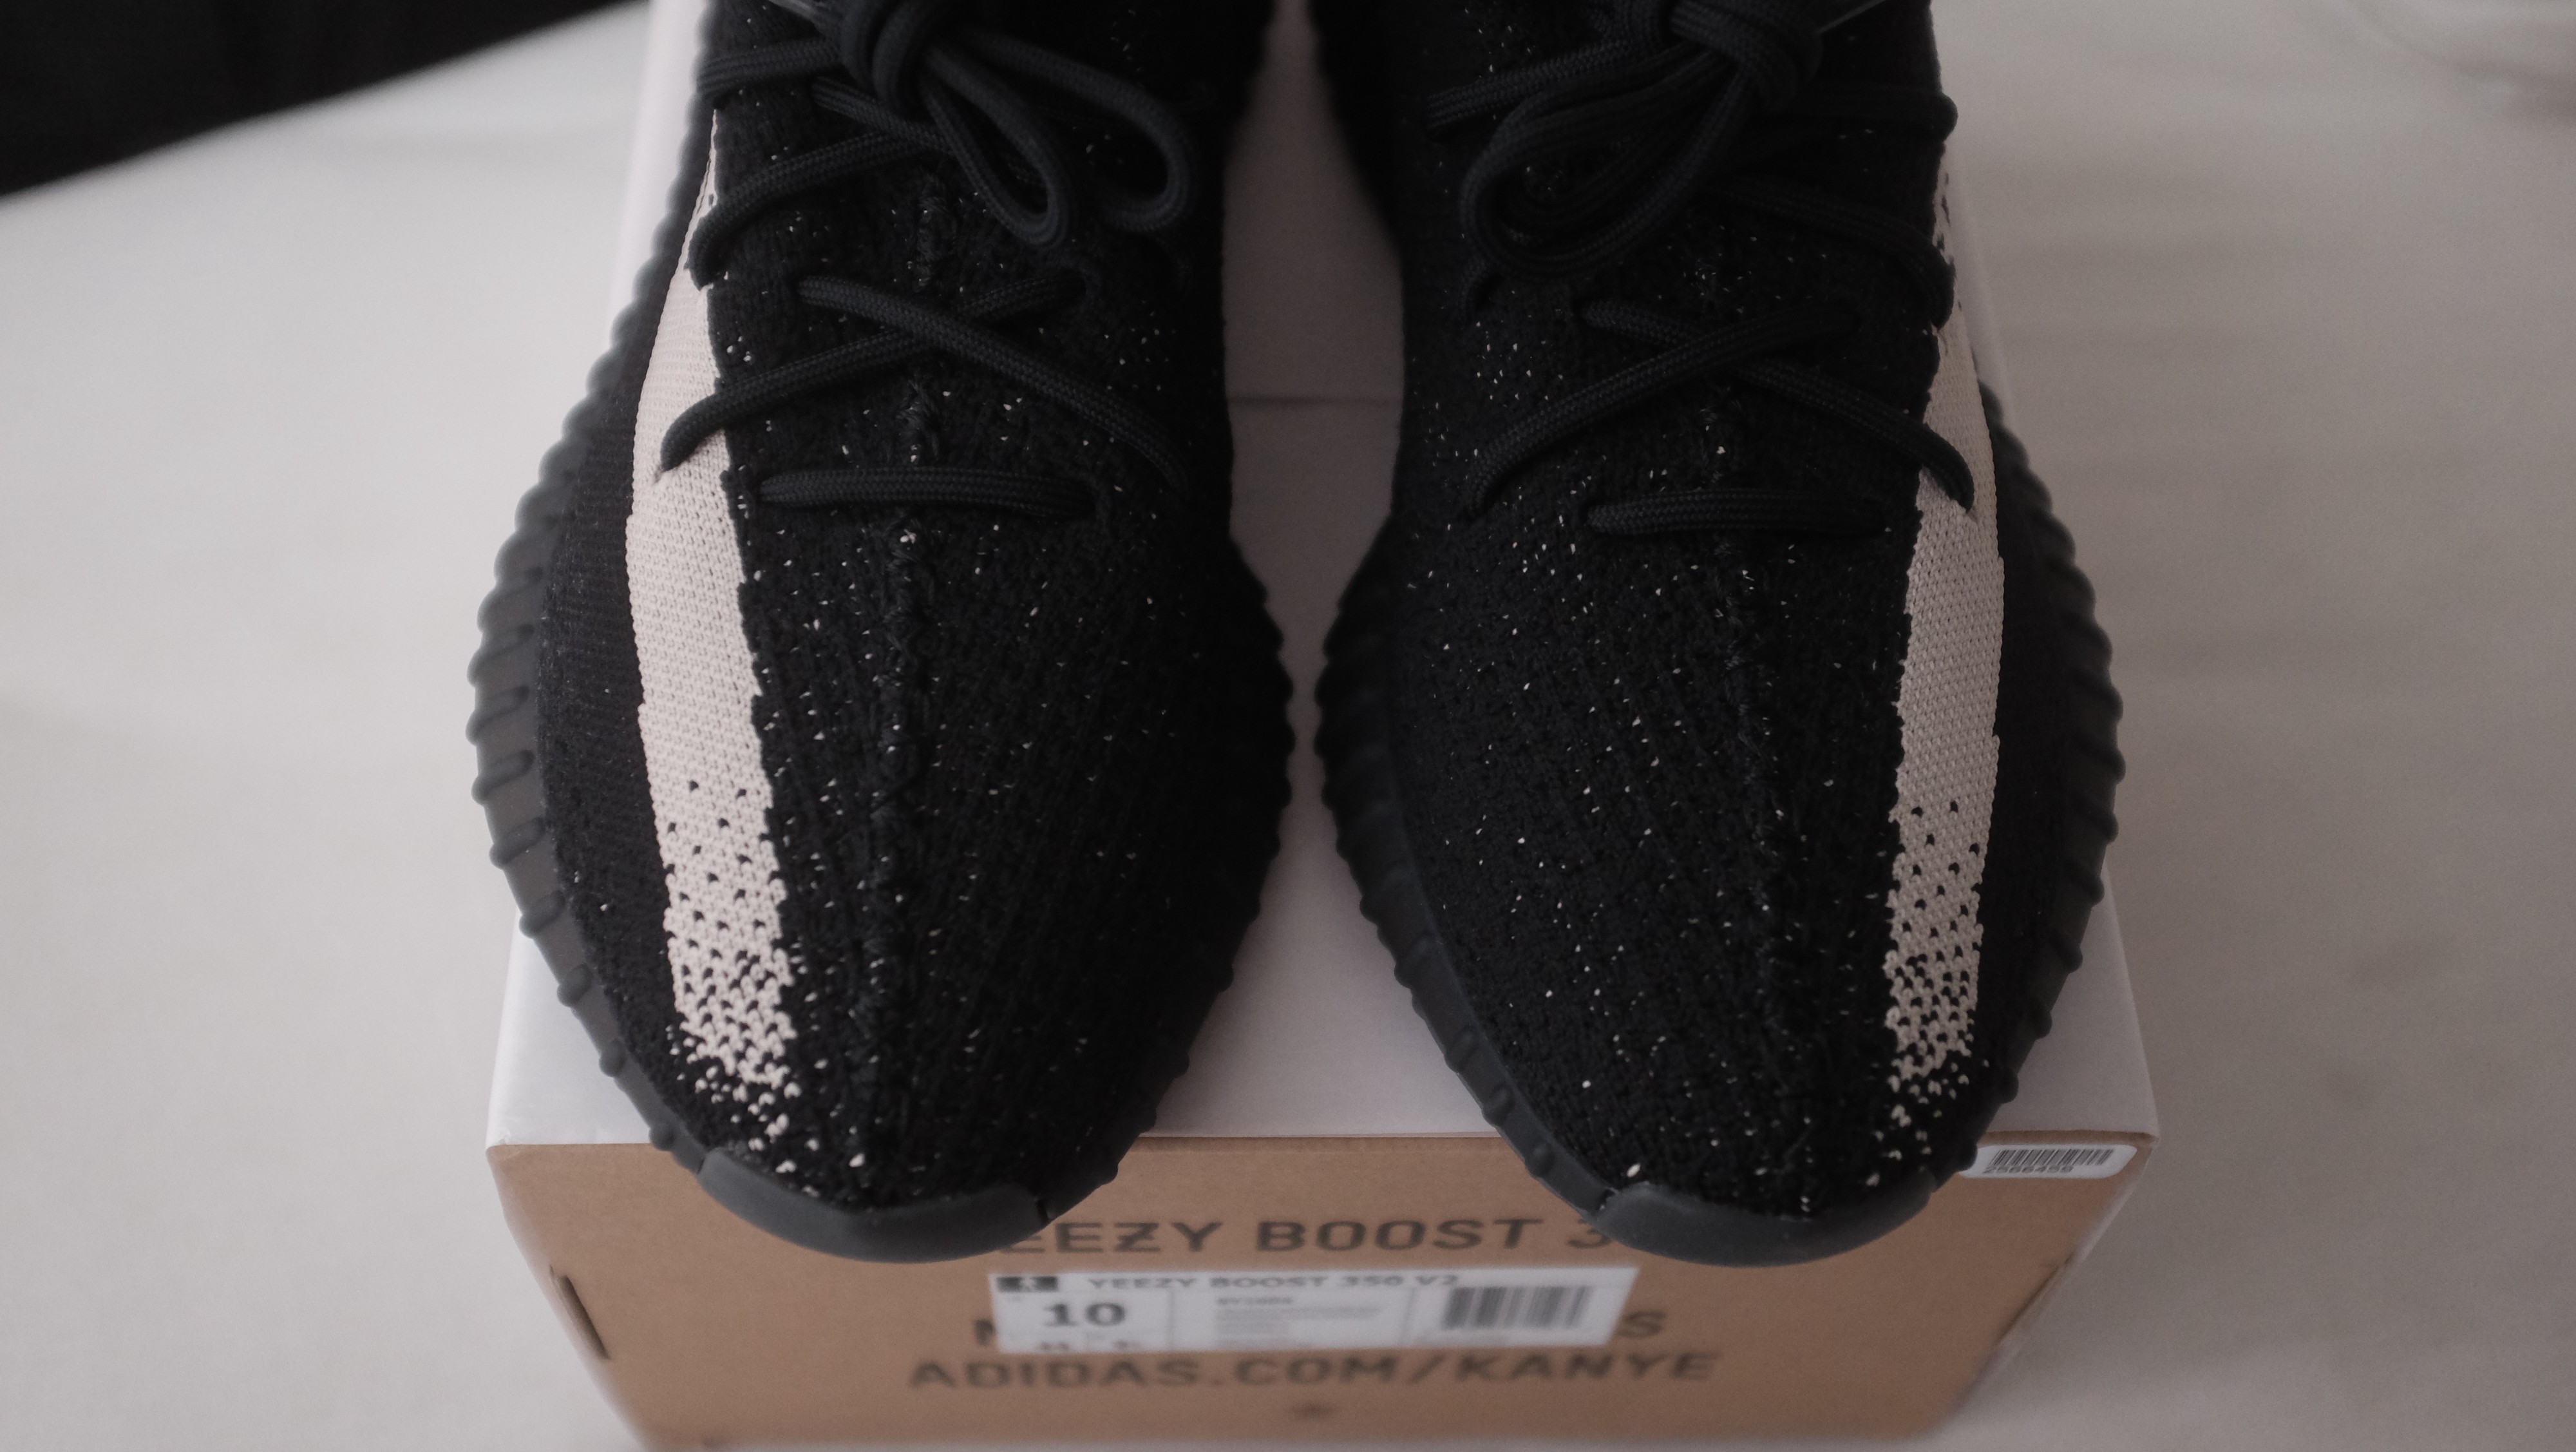 Left sz 9, Right sz 10
Every size will have a particular toe box fade that will be the same for that particular size. Note how sz 9 and 10 have different patterns. The stars or fade pattern should almost go in a slight curve towards the middle stitching. The stripe should be fairly close to the middle stitching, curving very slightly at the 2nd lace running toward the middle stitching.
Since each size has their own particular toe box fade pattern, I would suggest comparing the authentic pair?s pattern to the shoe in question.
If you don?t have an authentic pair in hand, go to GOAT and look at their used sizes, you?ll be able to find your toe box pattern that way.
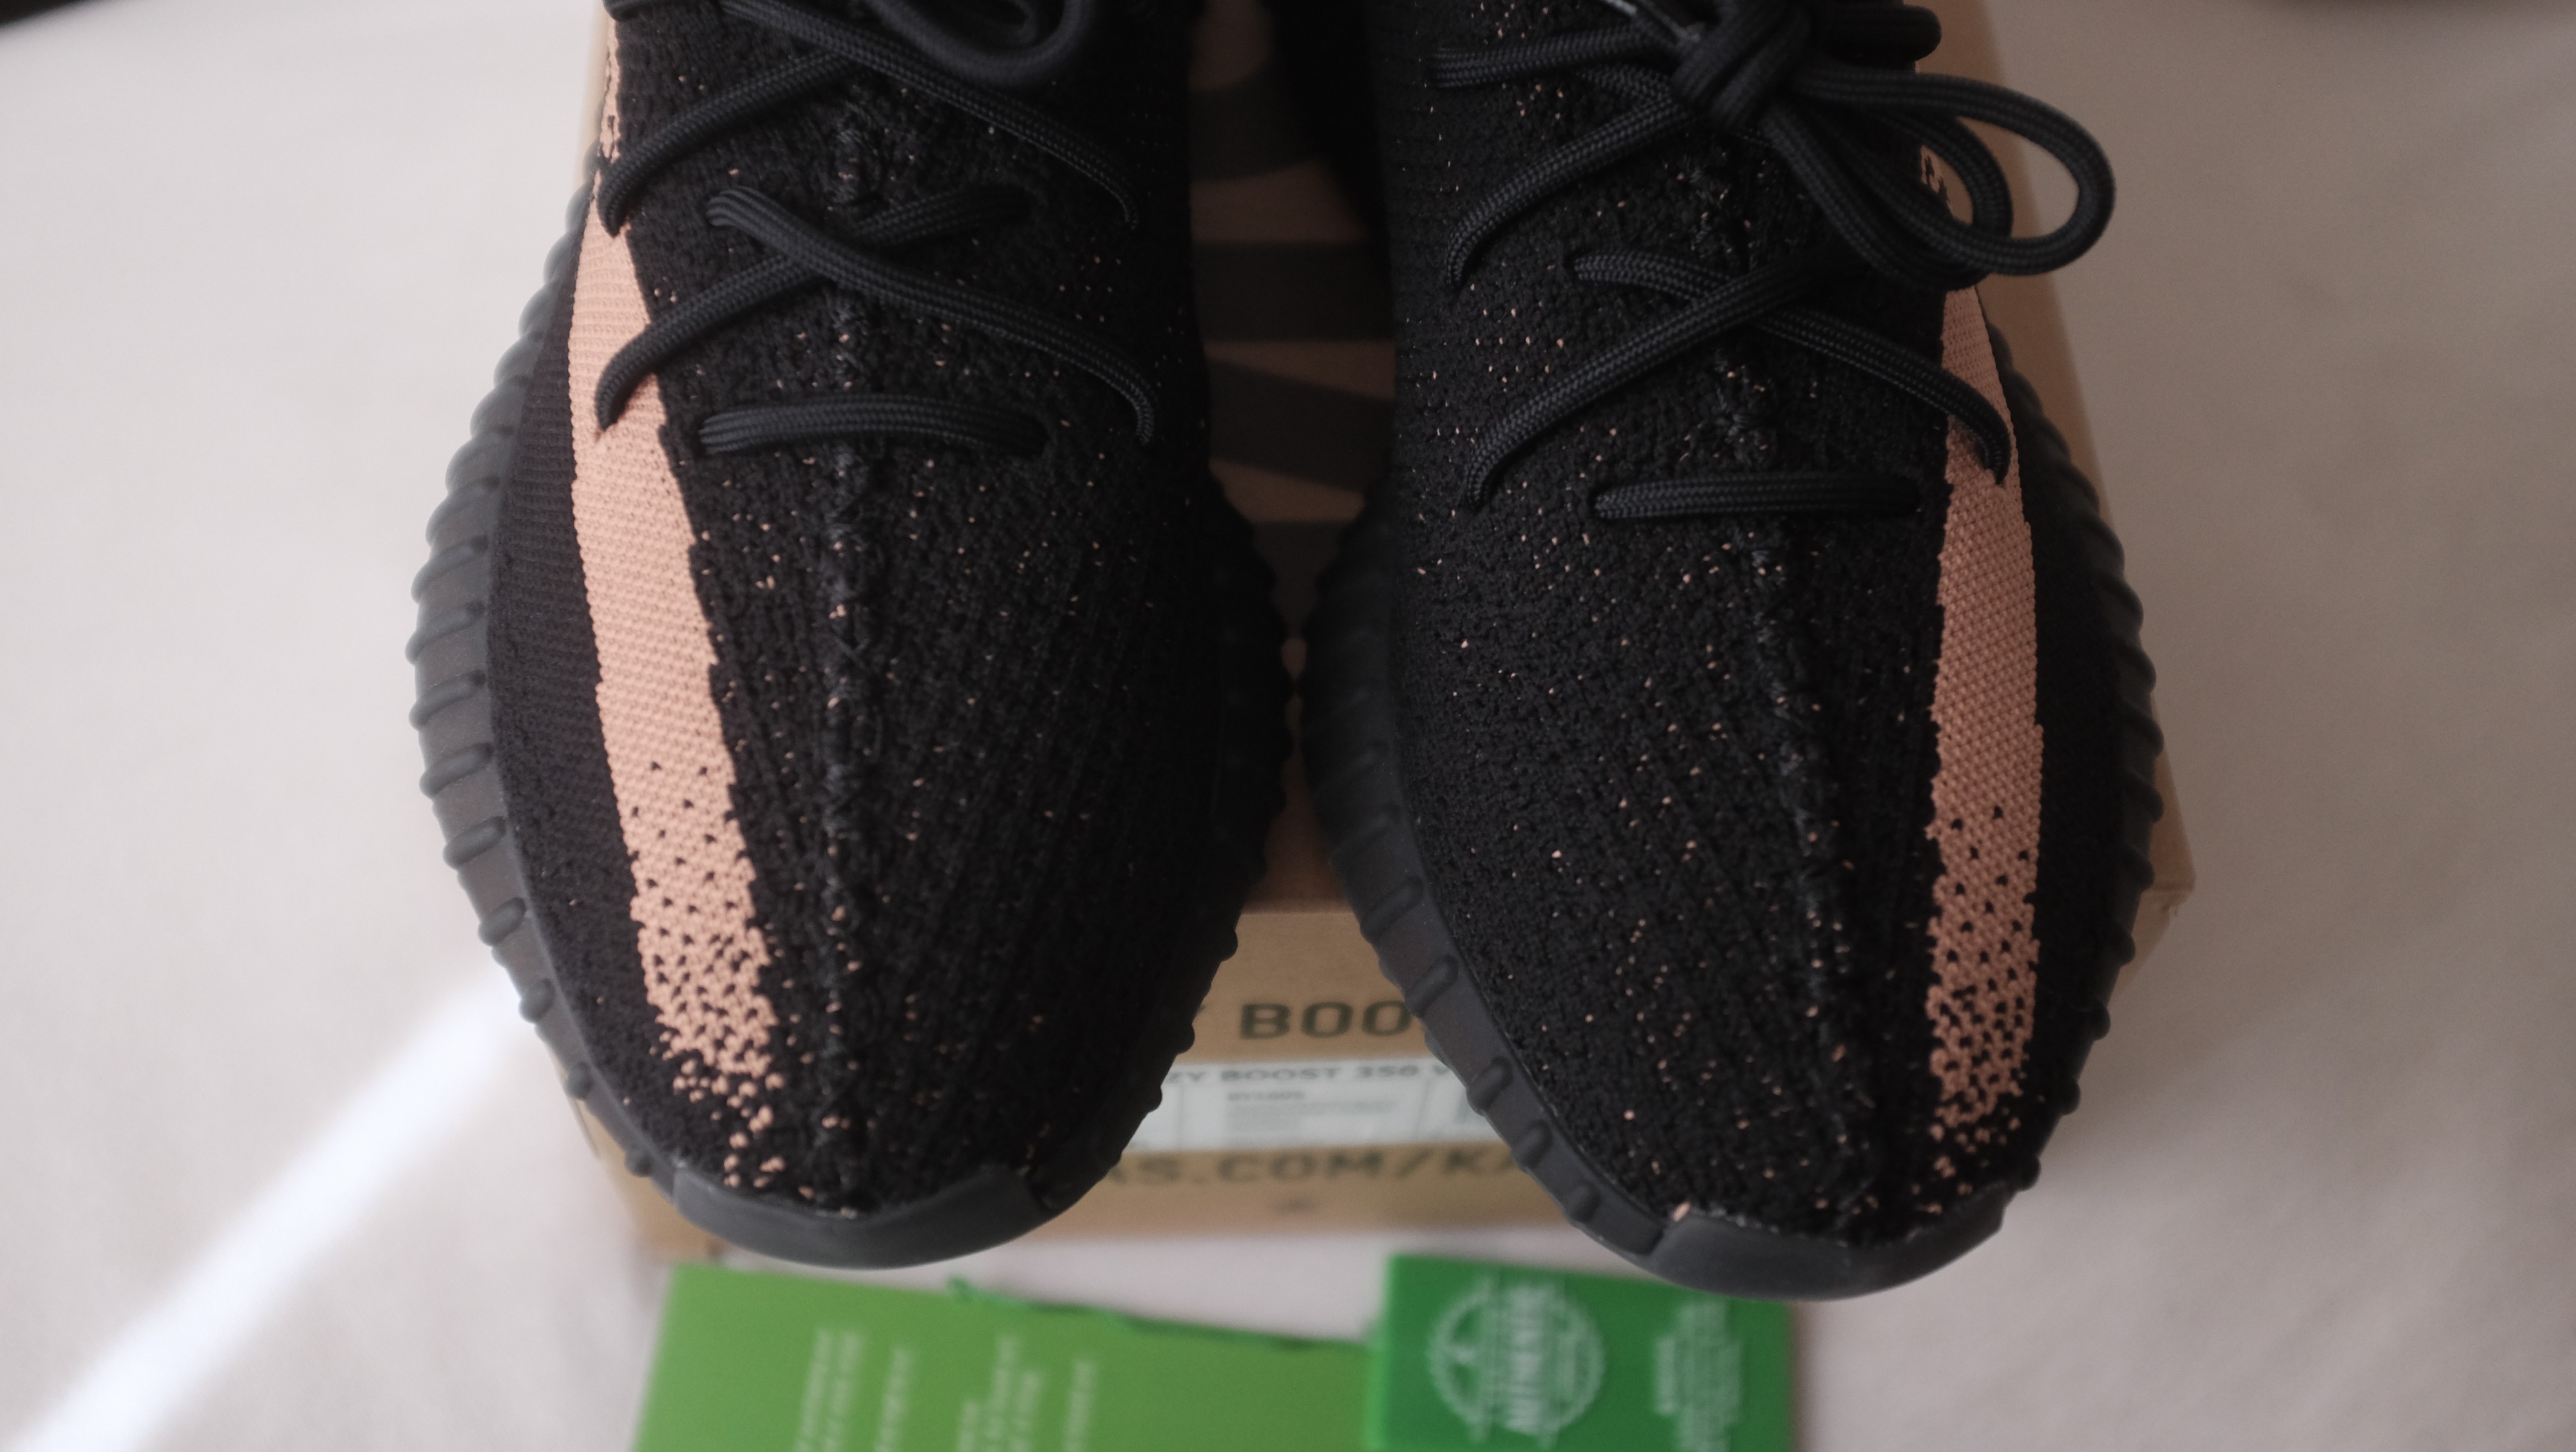 Left Copper sz 10, Right Oreo sz 10 // Notice how both my sz 10 have the same toe box pattern.
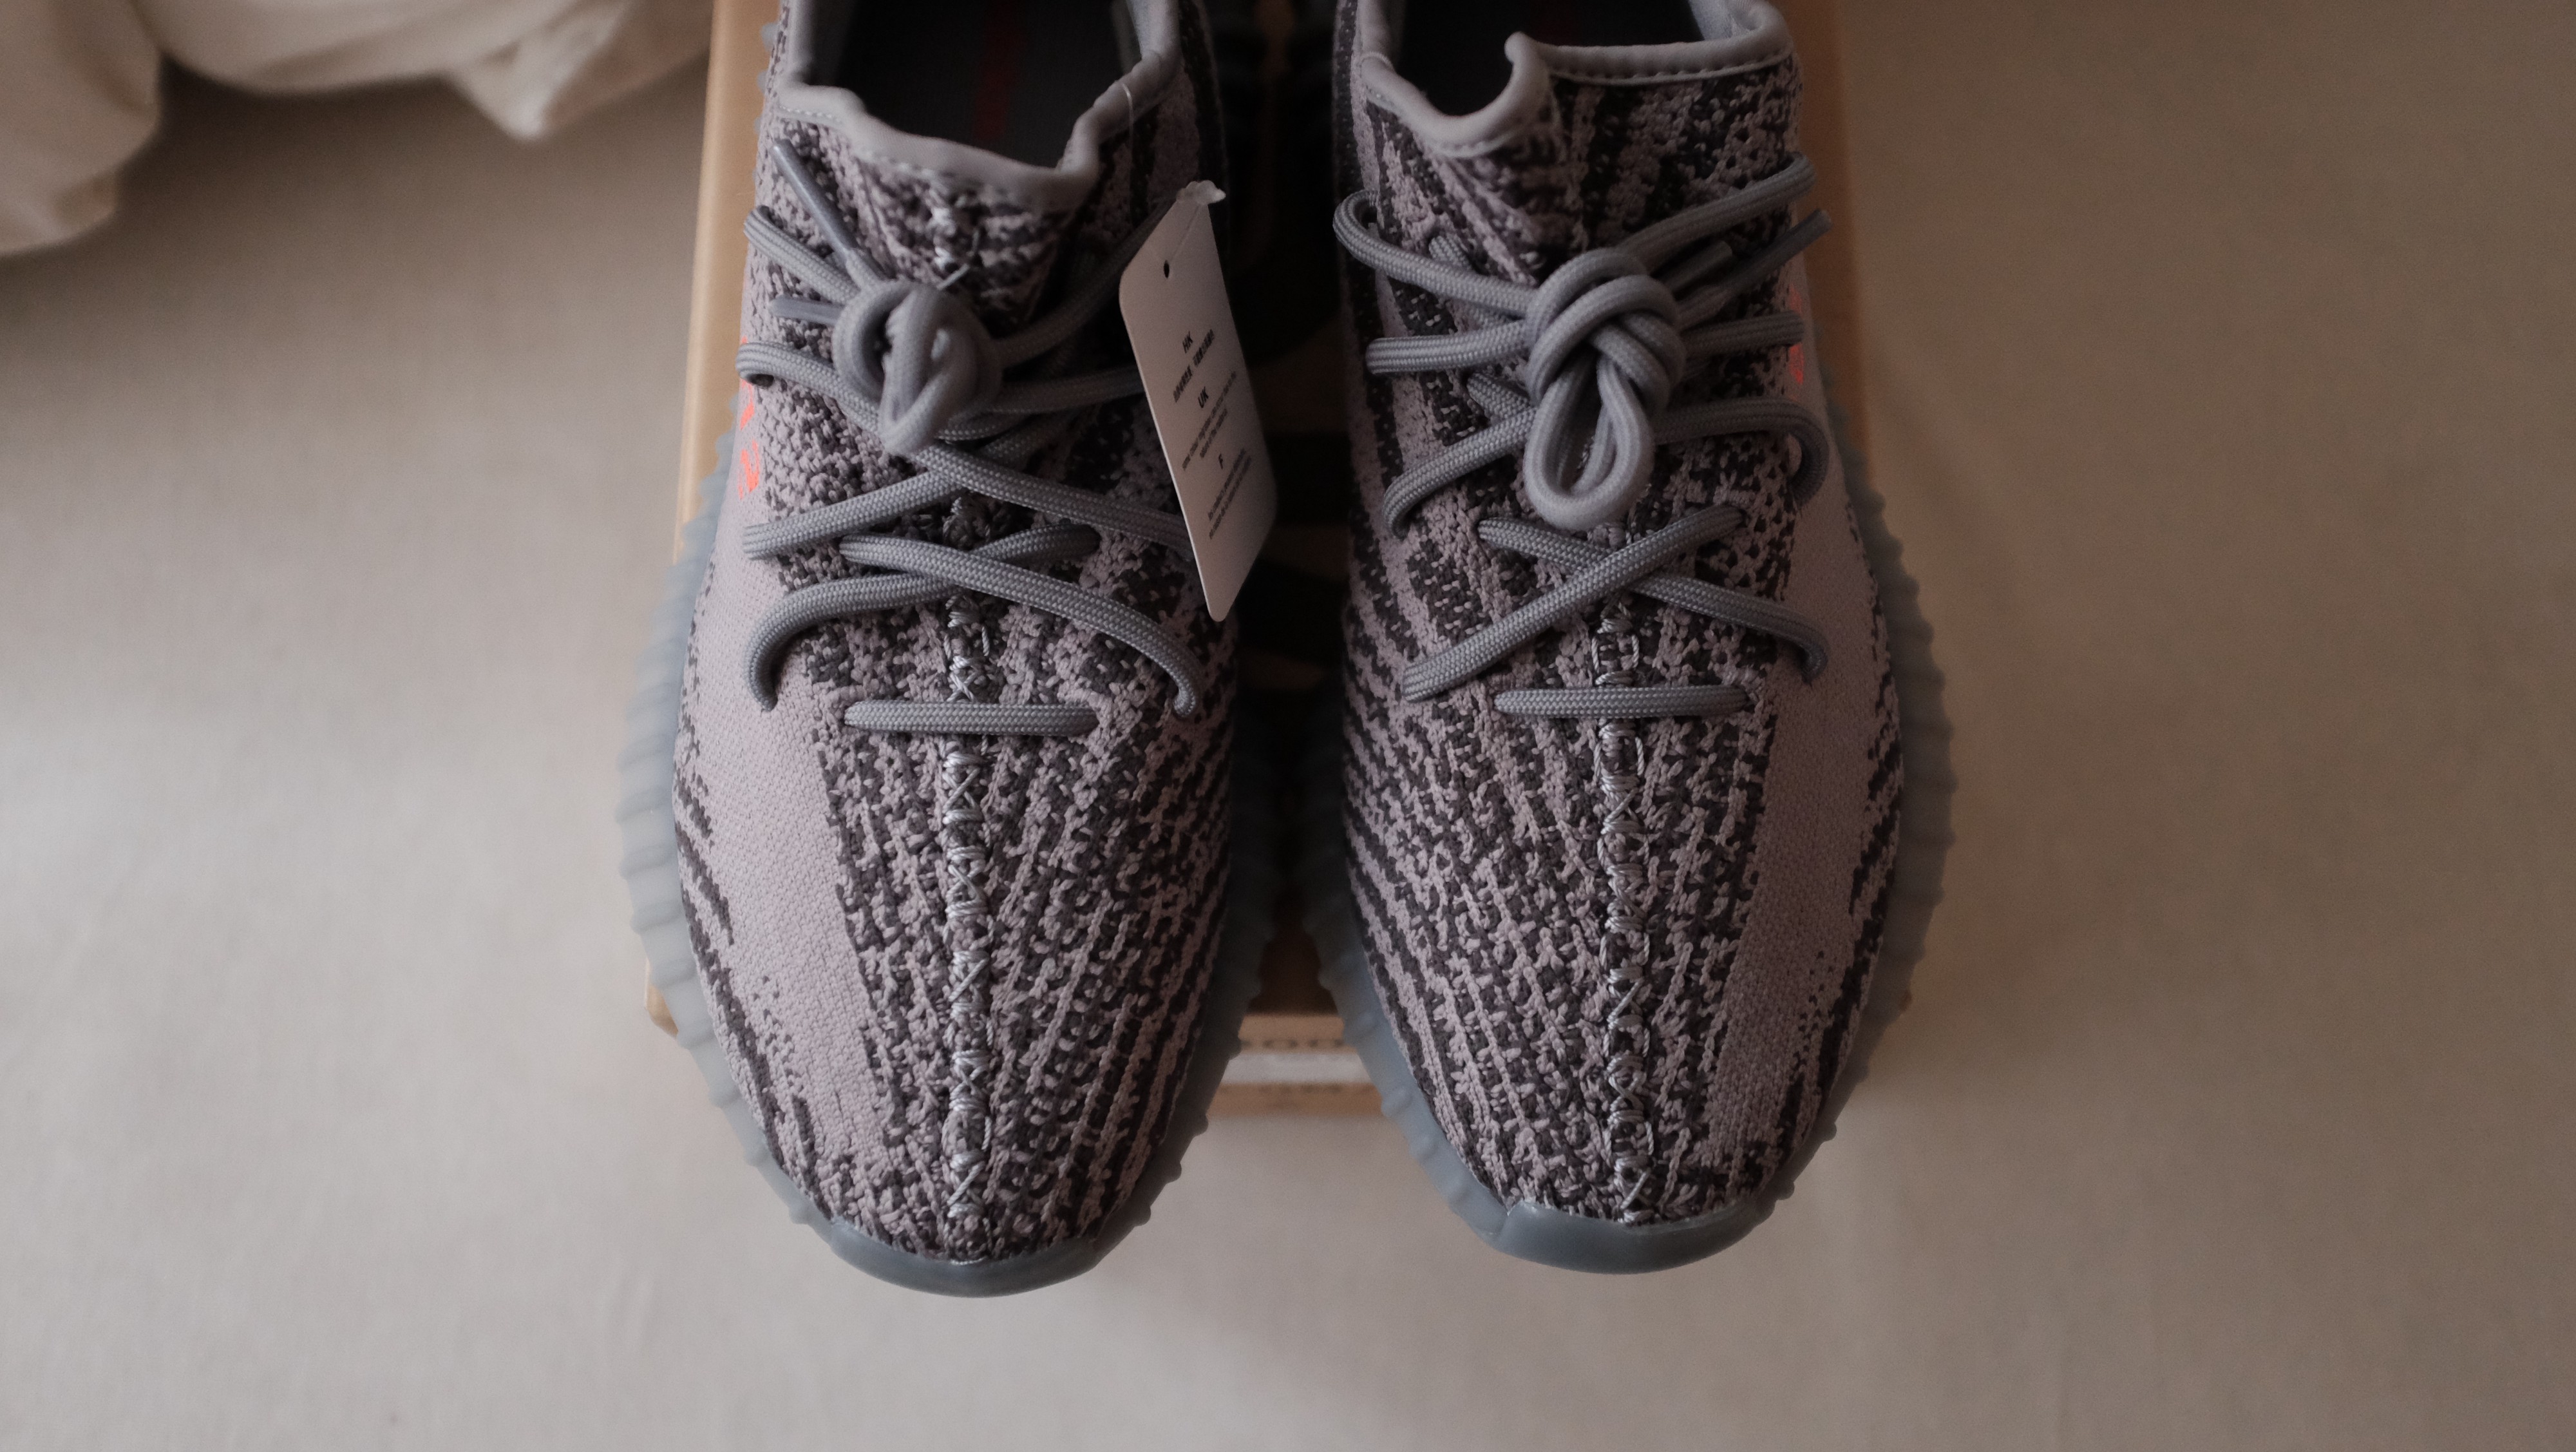
Beluga Stripe fade
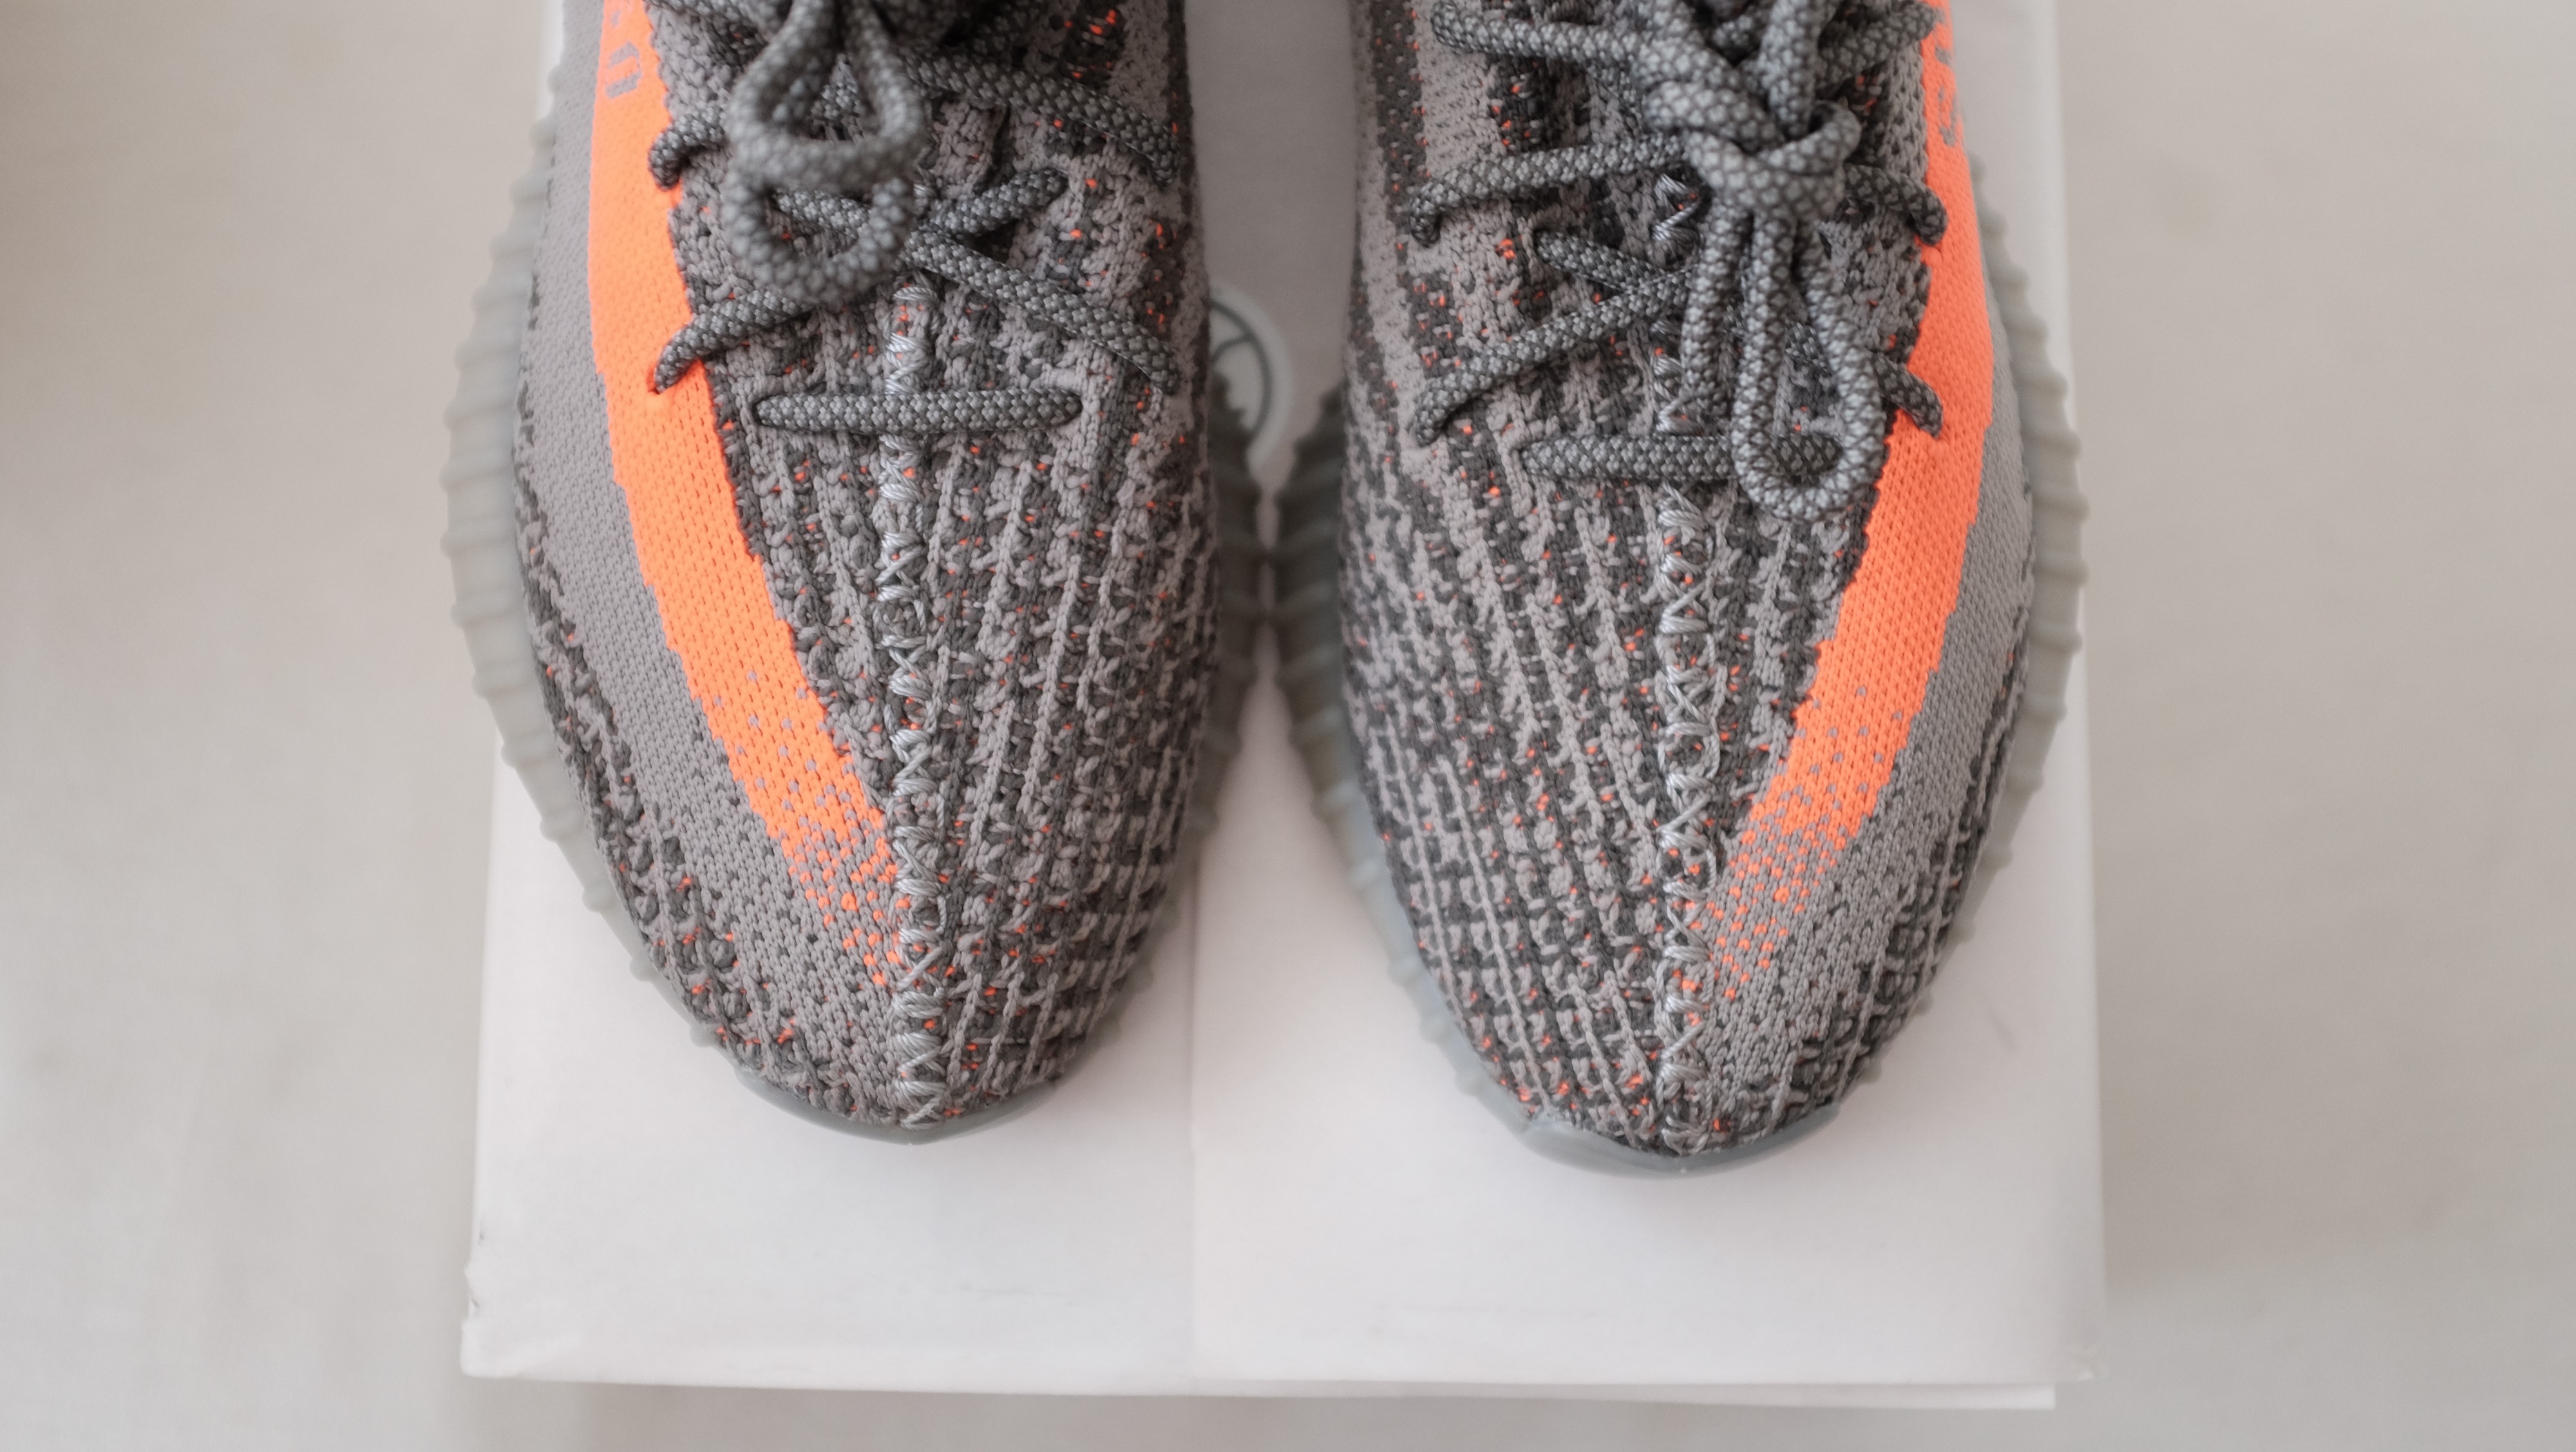 Left Beluga sz 10, Right Beluga sz 9
Same with Belugas- since each size has their own particular toe box fade pattern, I would suggest comparing the authentic pair?s pattern to the shoe in question.
If you don?t have an authentic pair in hand, go to GOAT and look at their used sizes, you?ll be able to find your toe box pattern that way.
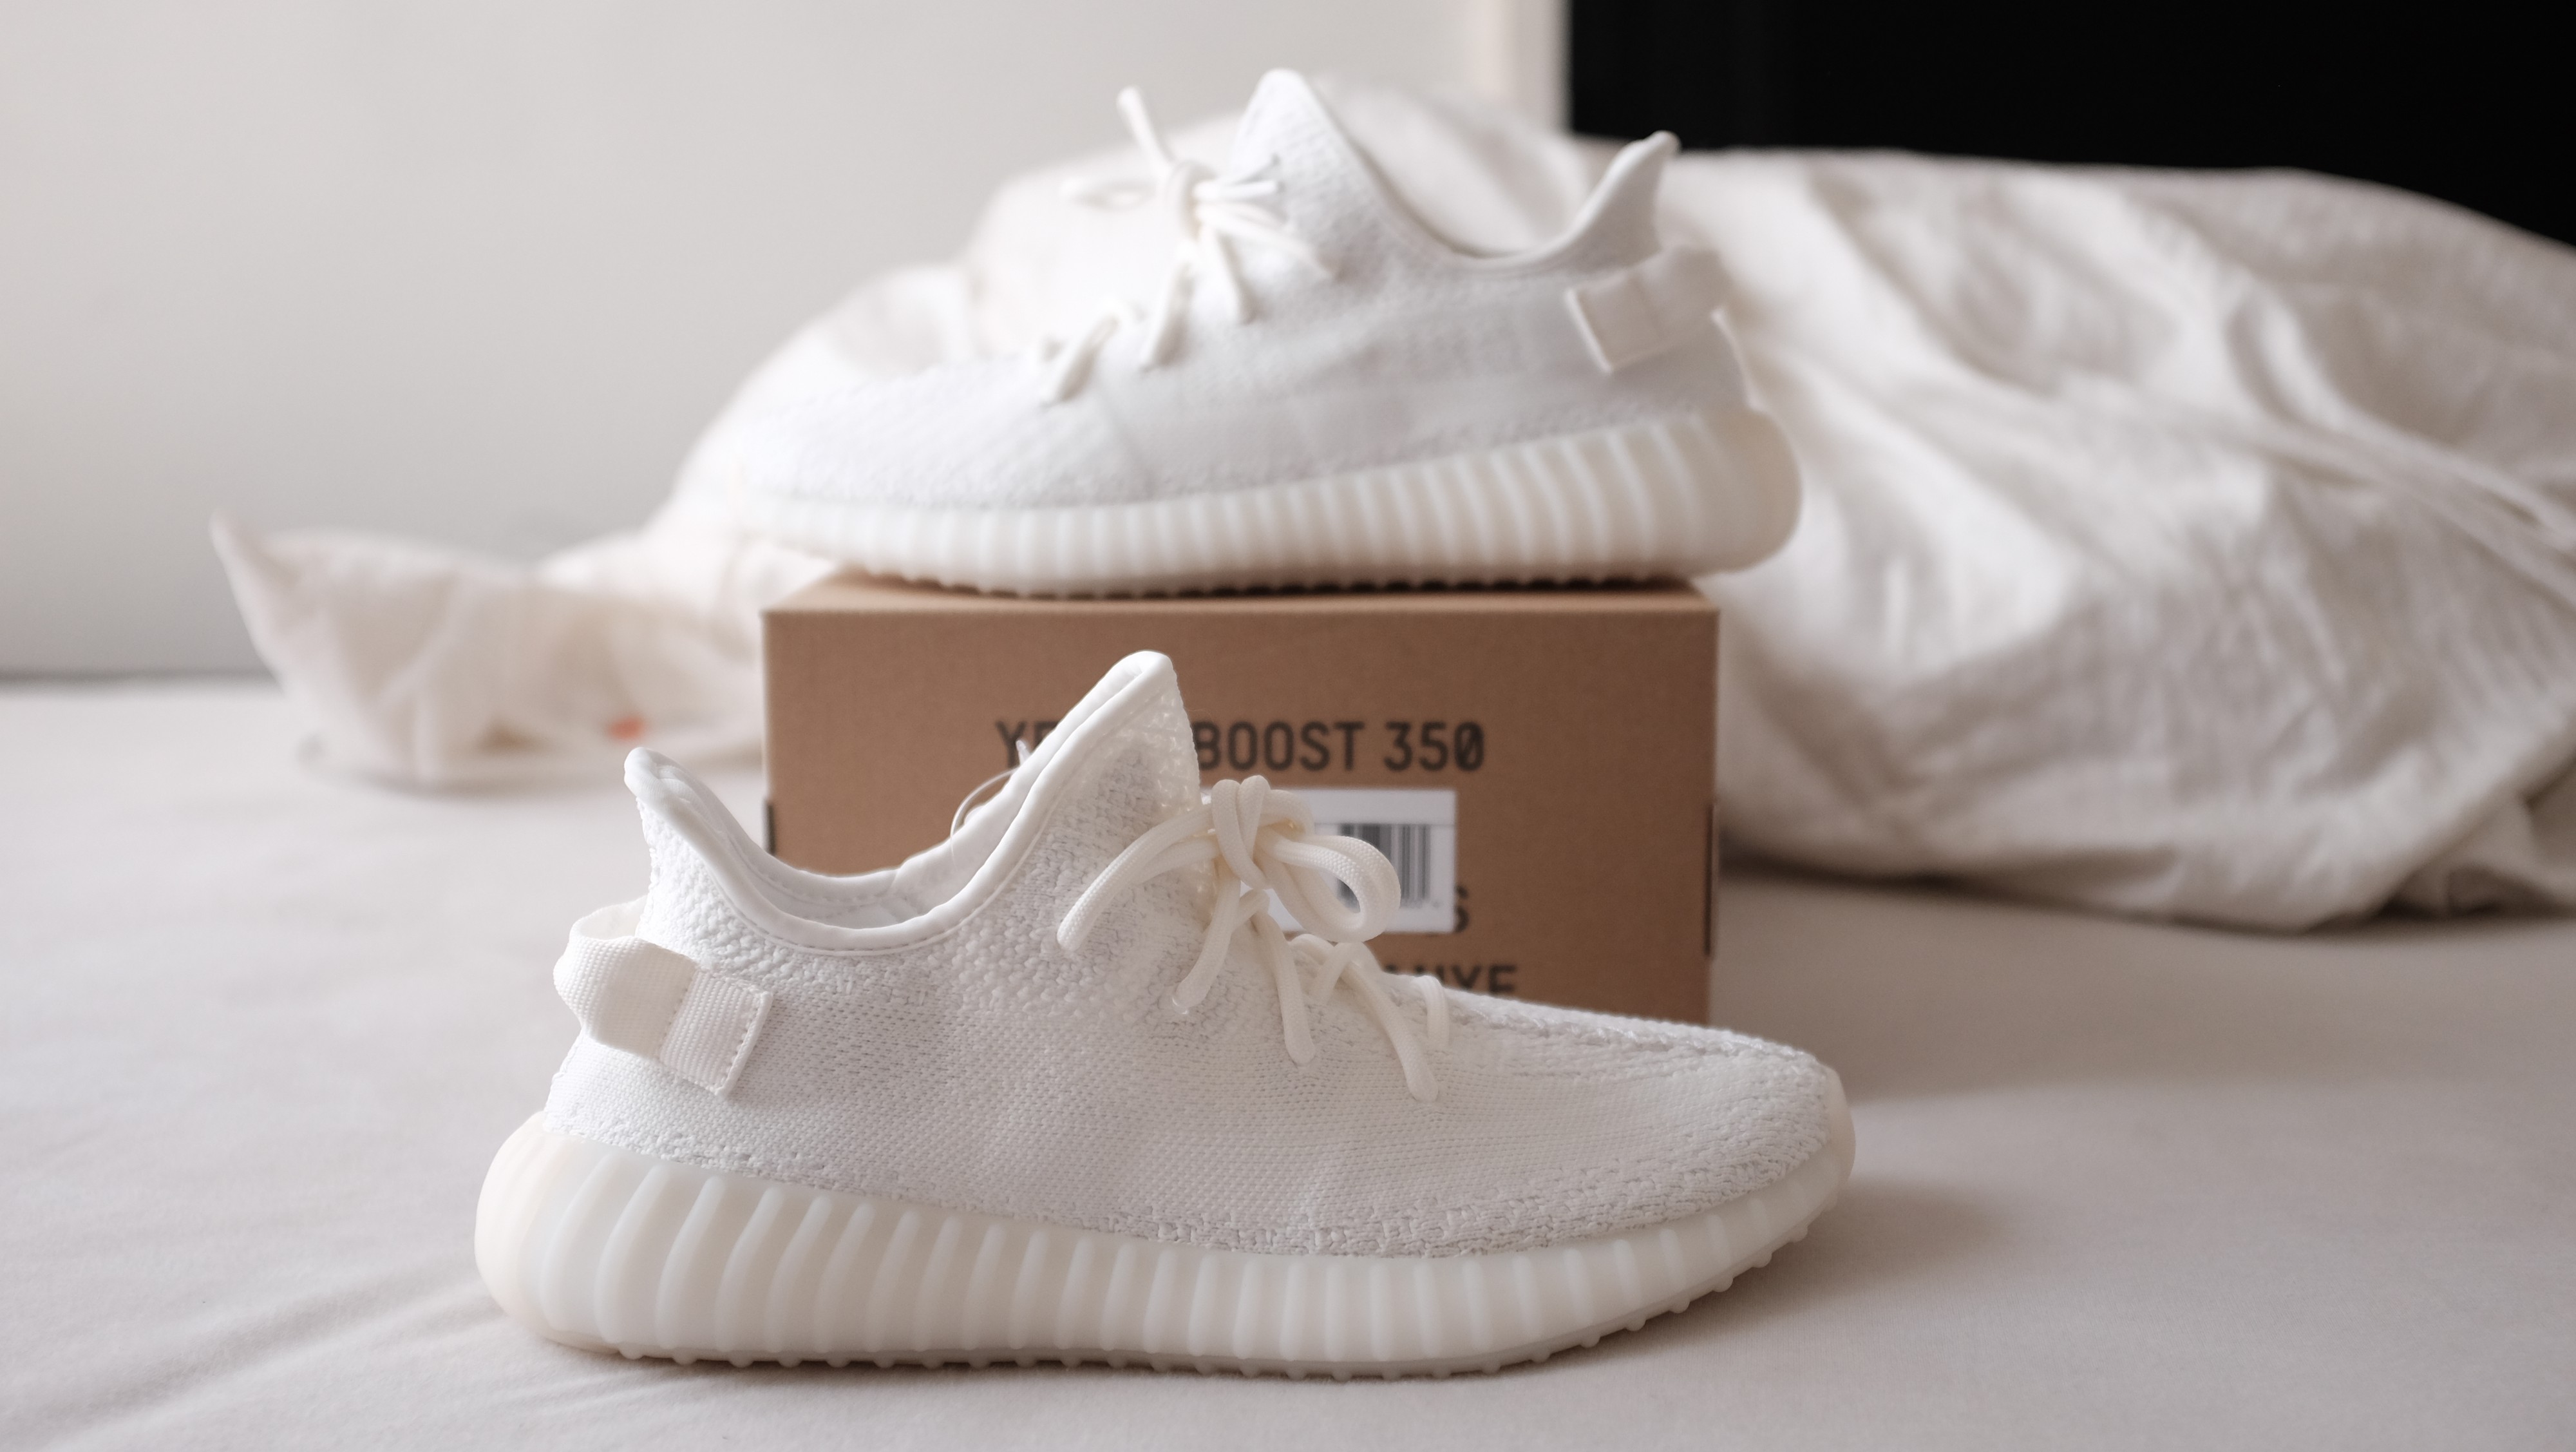
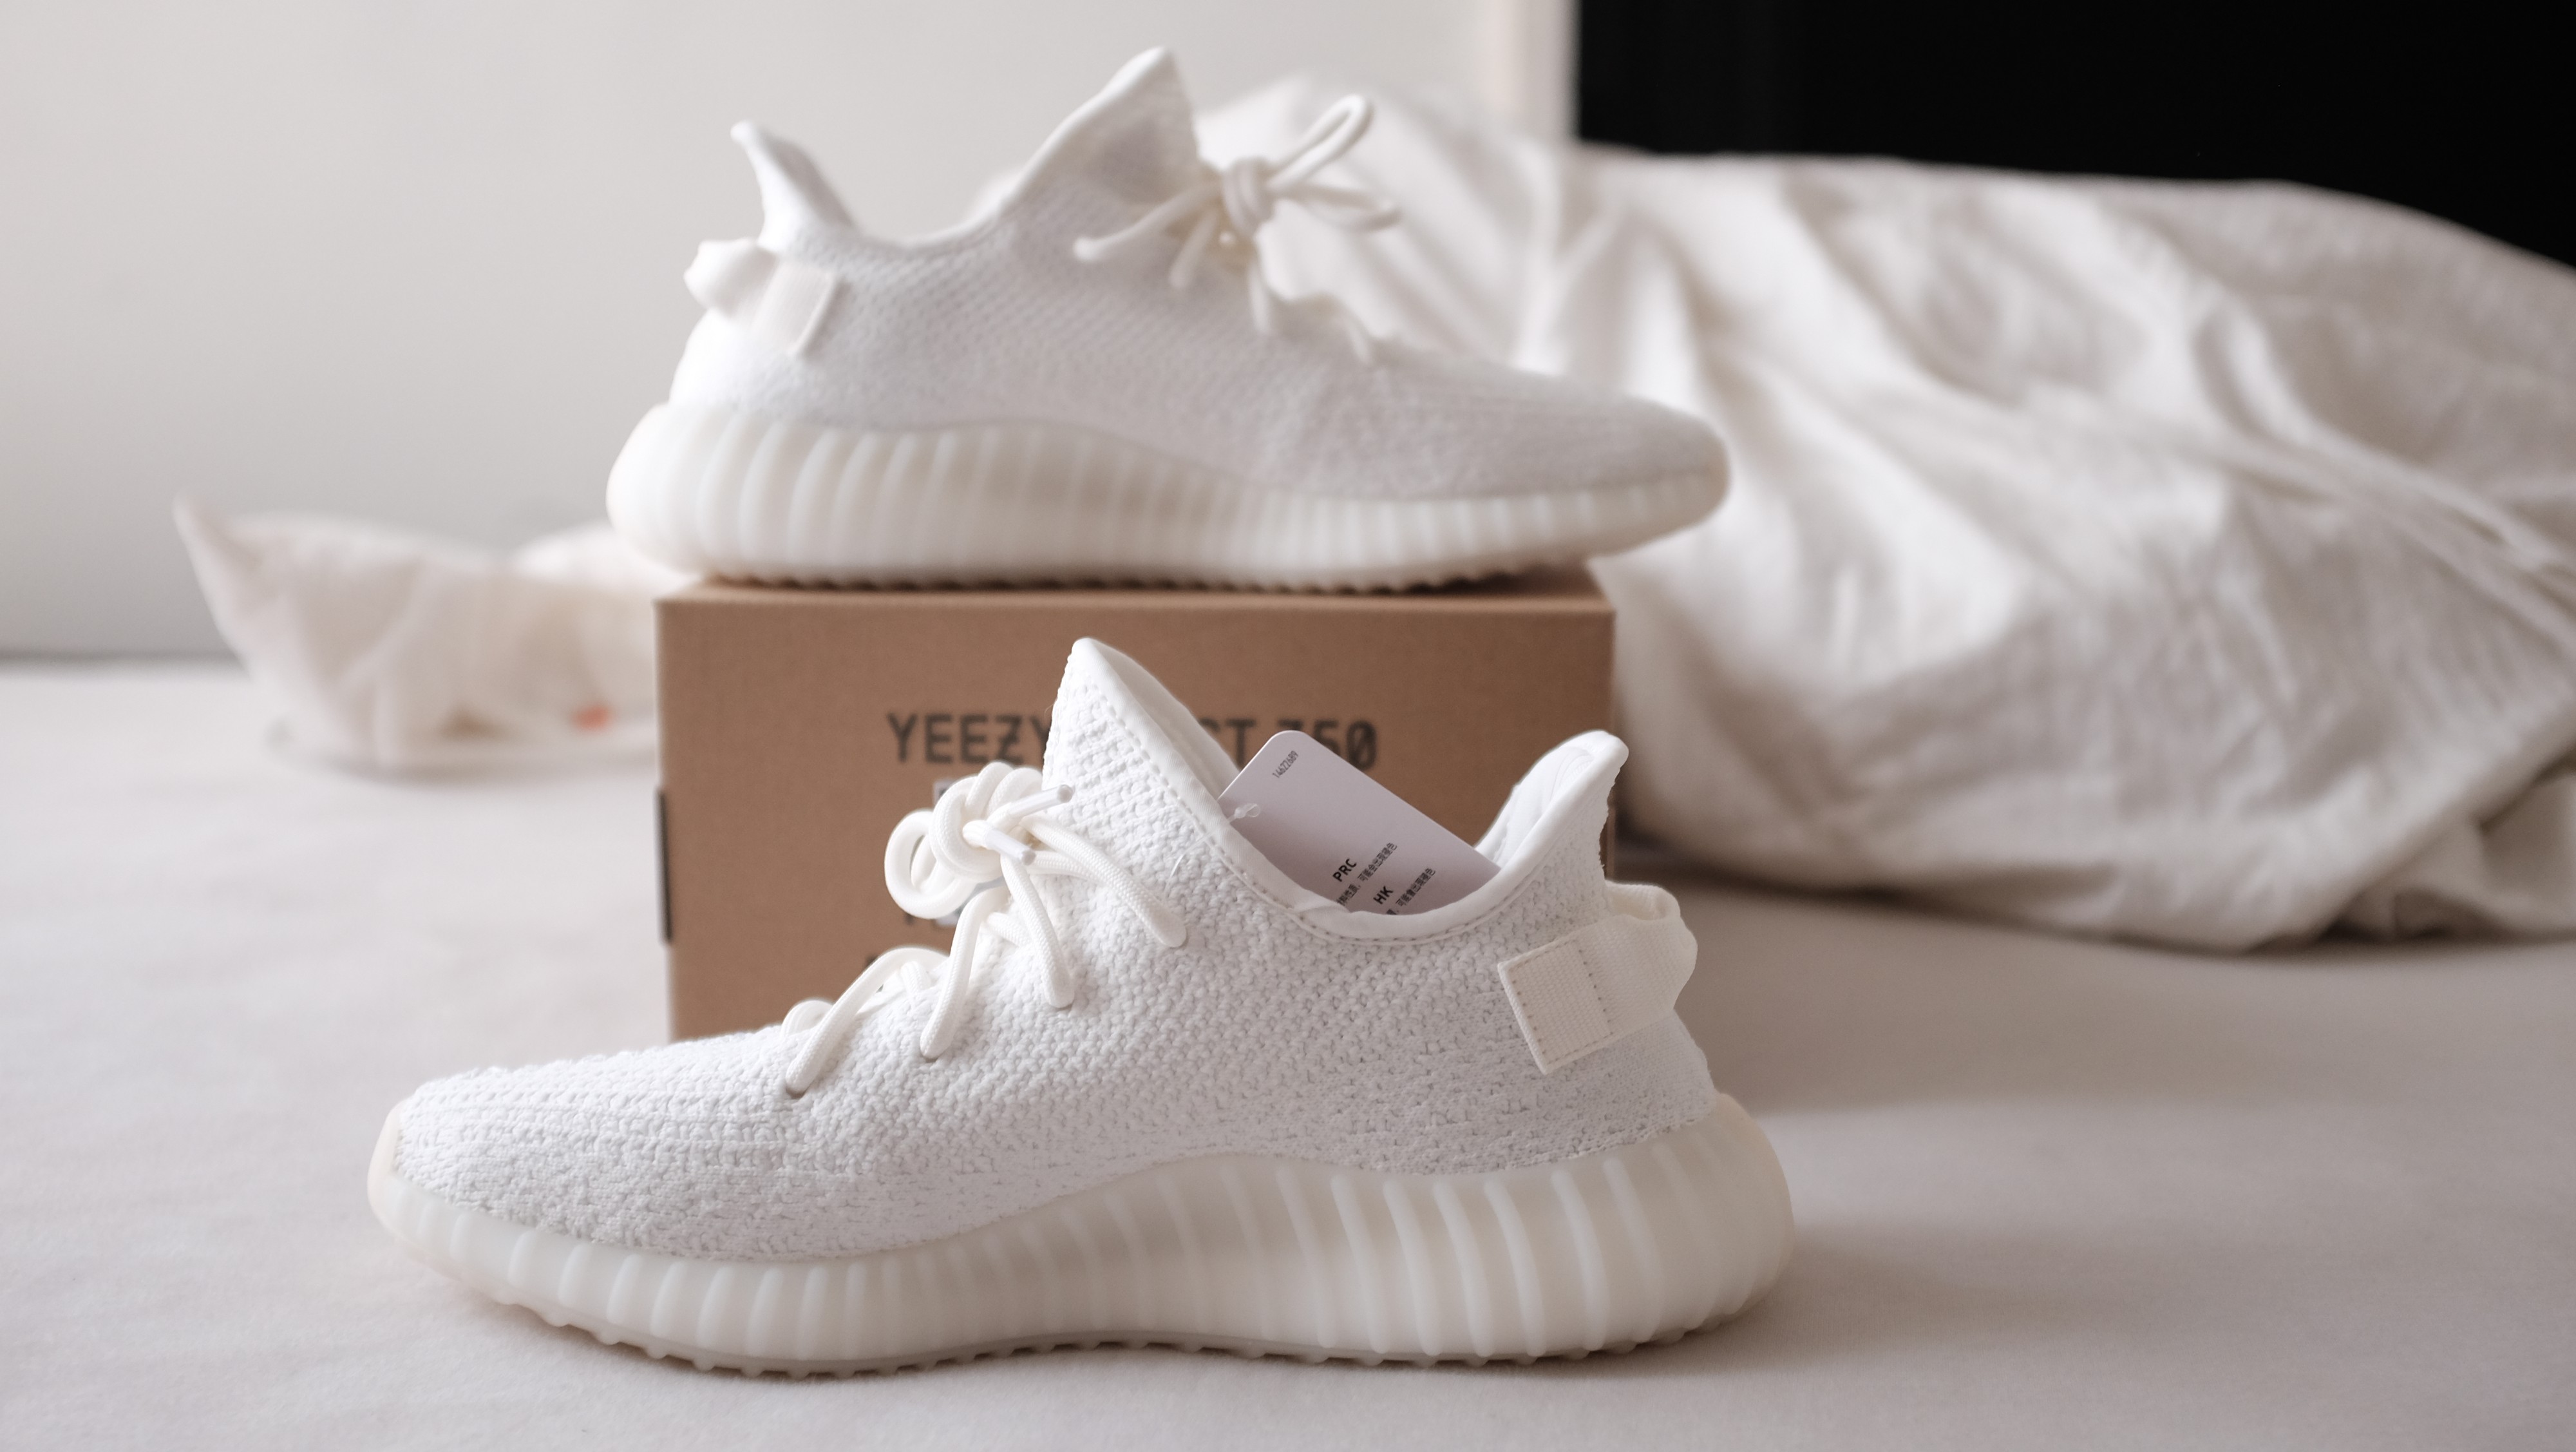
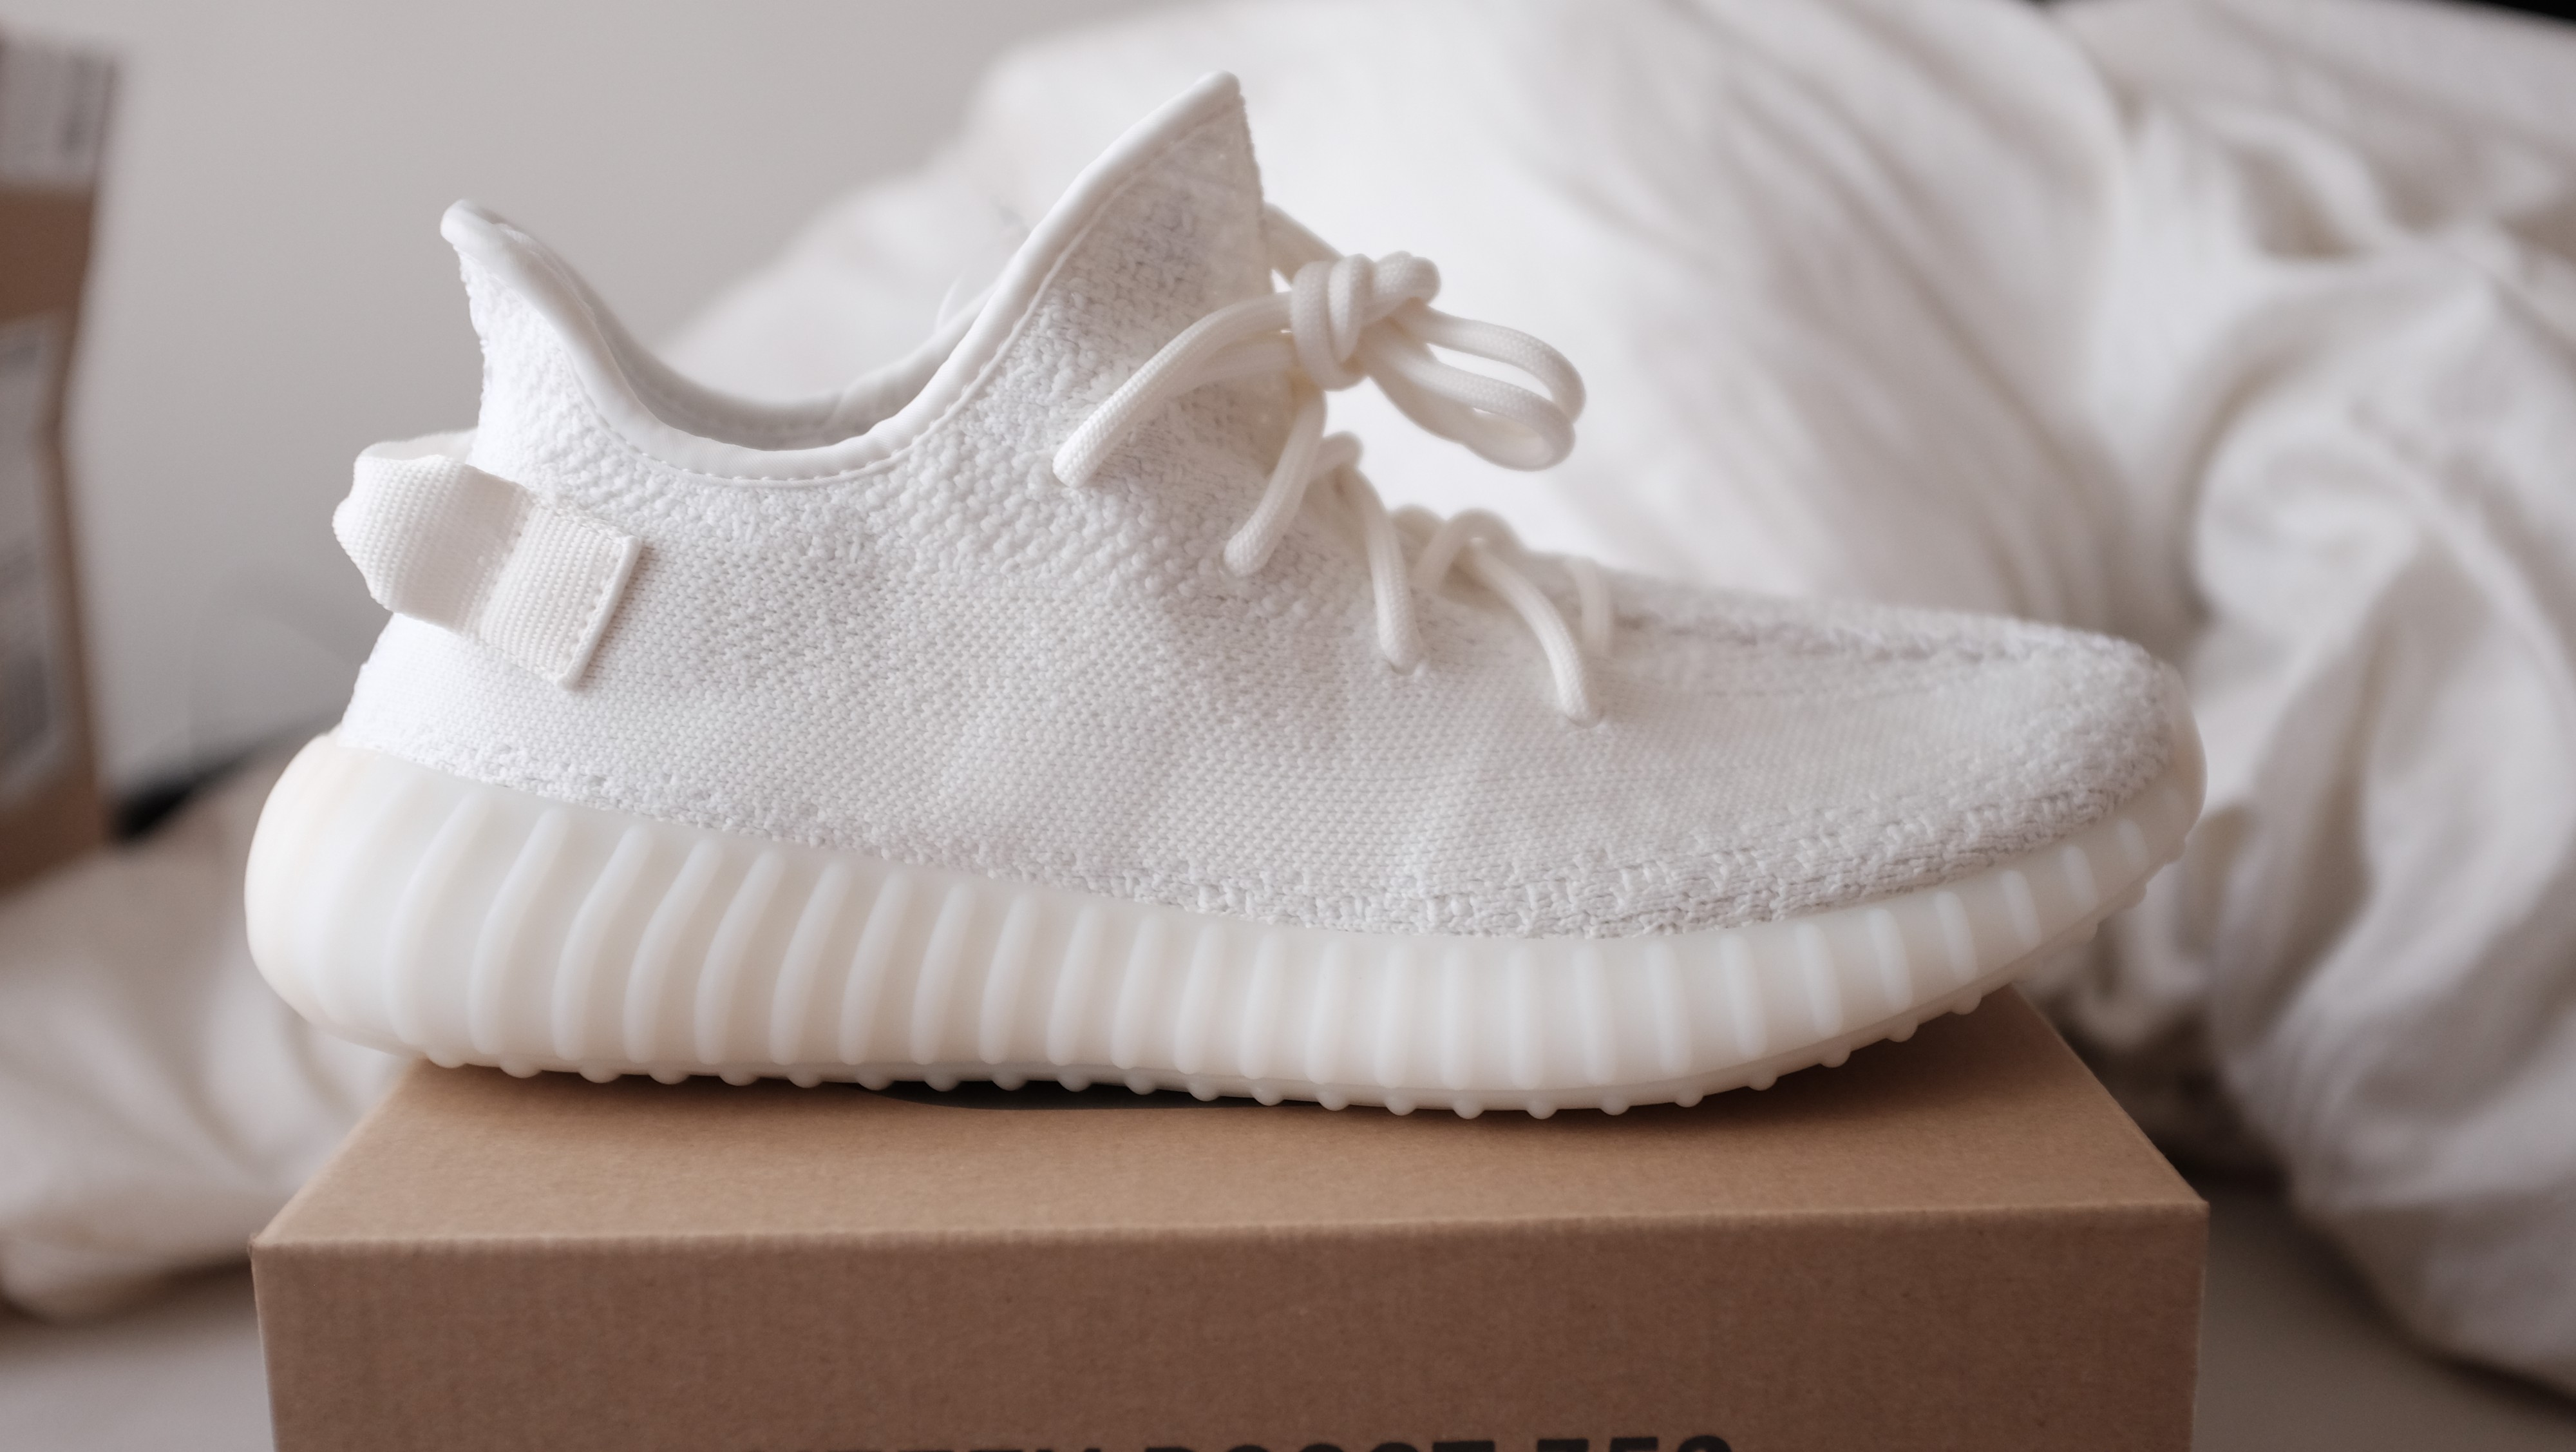
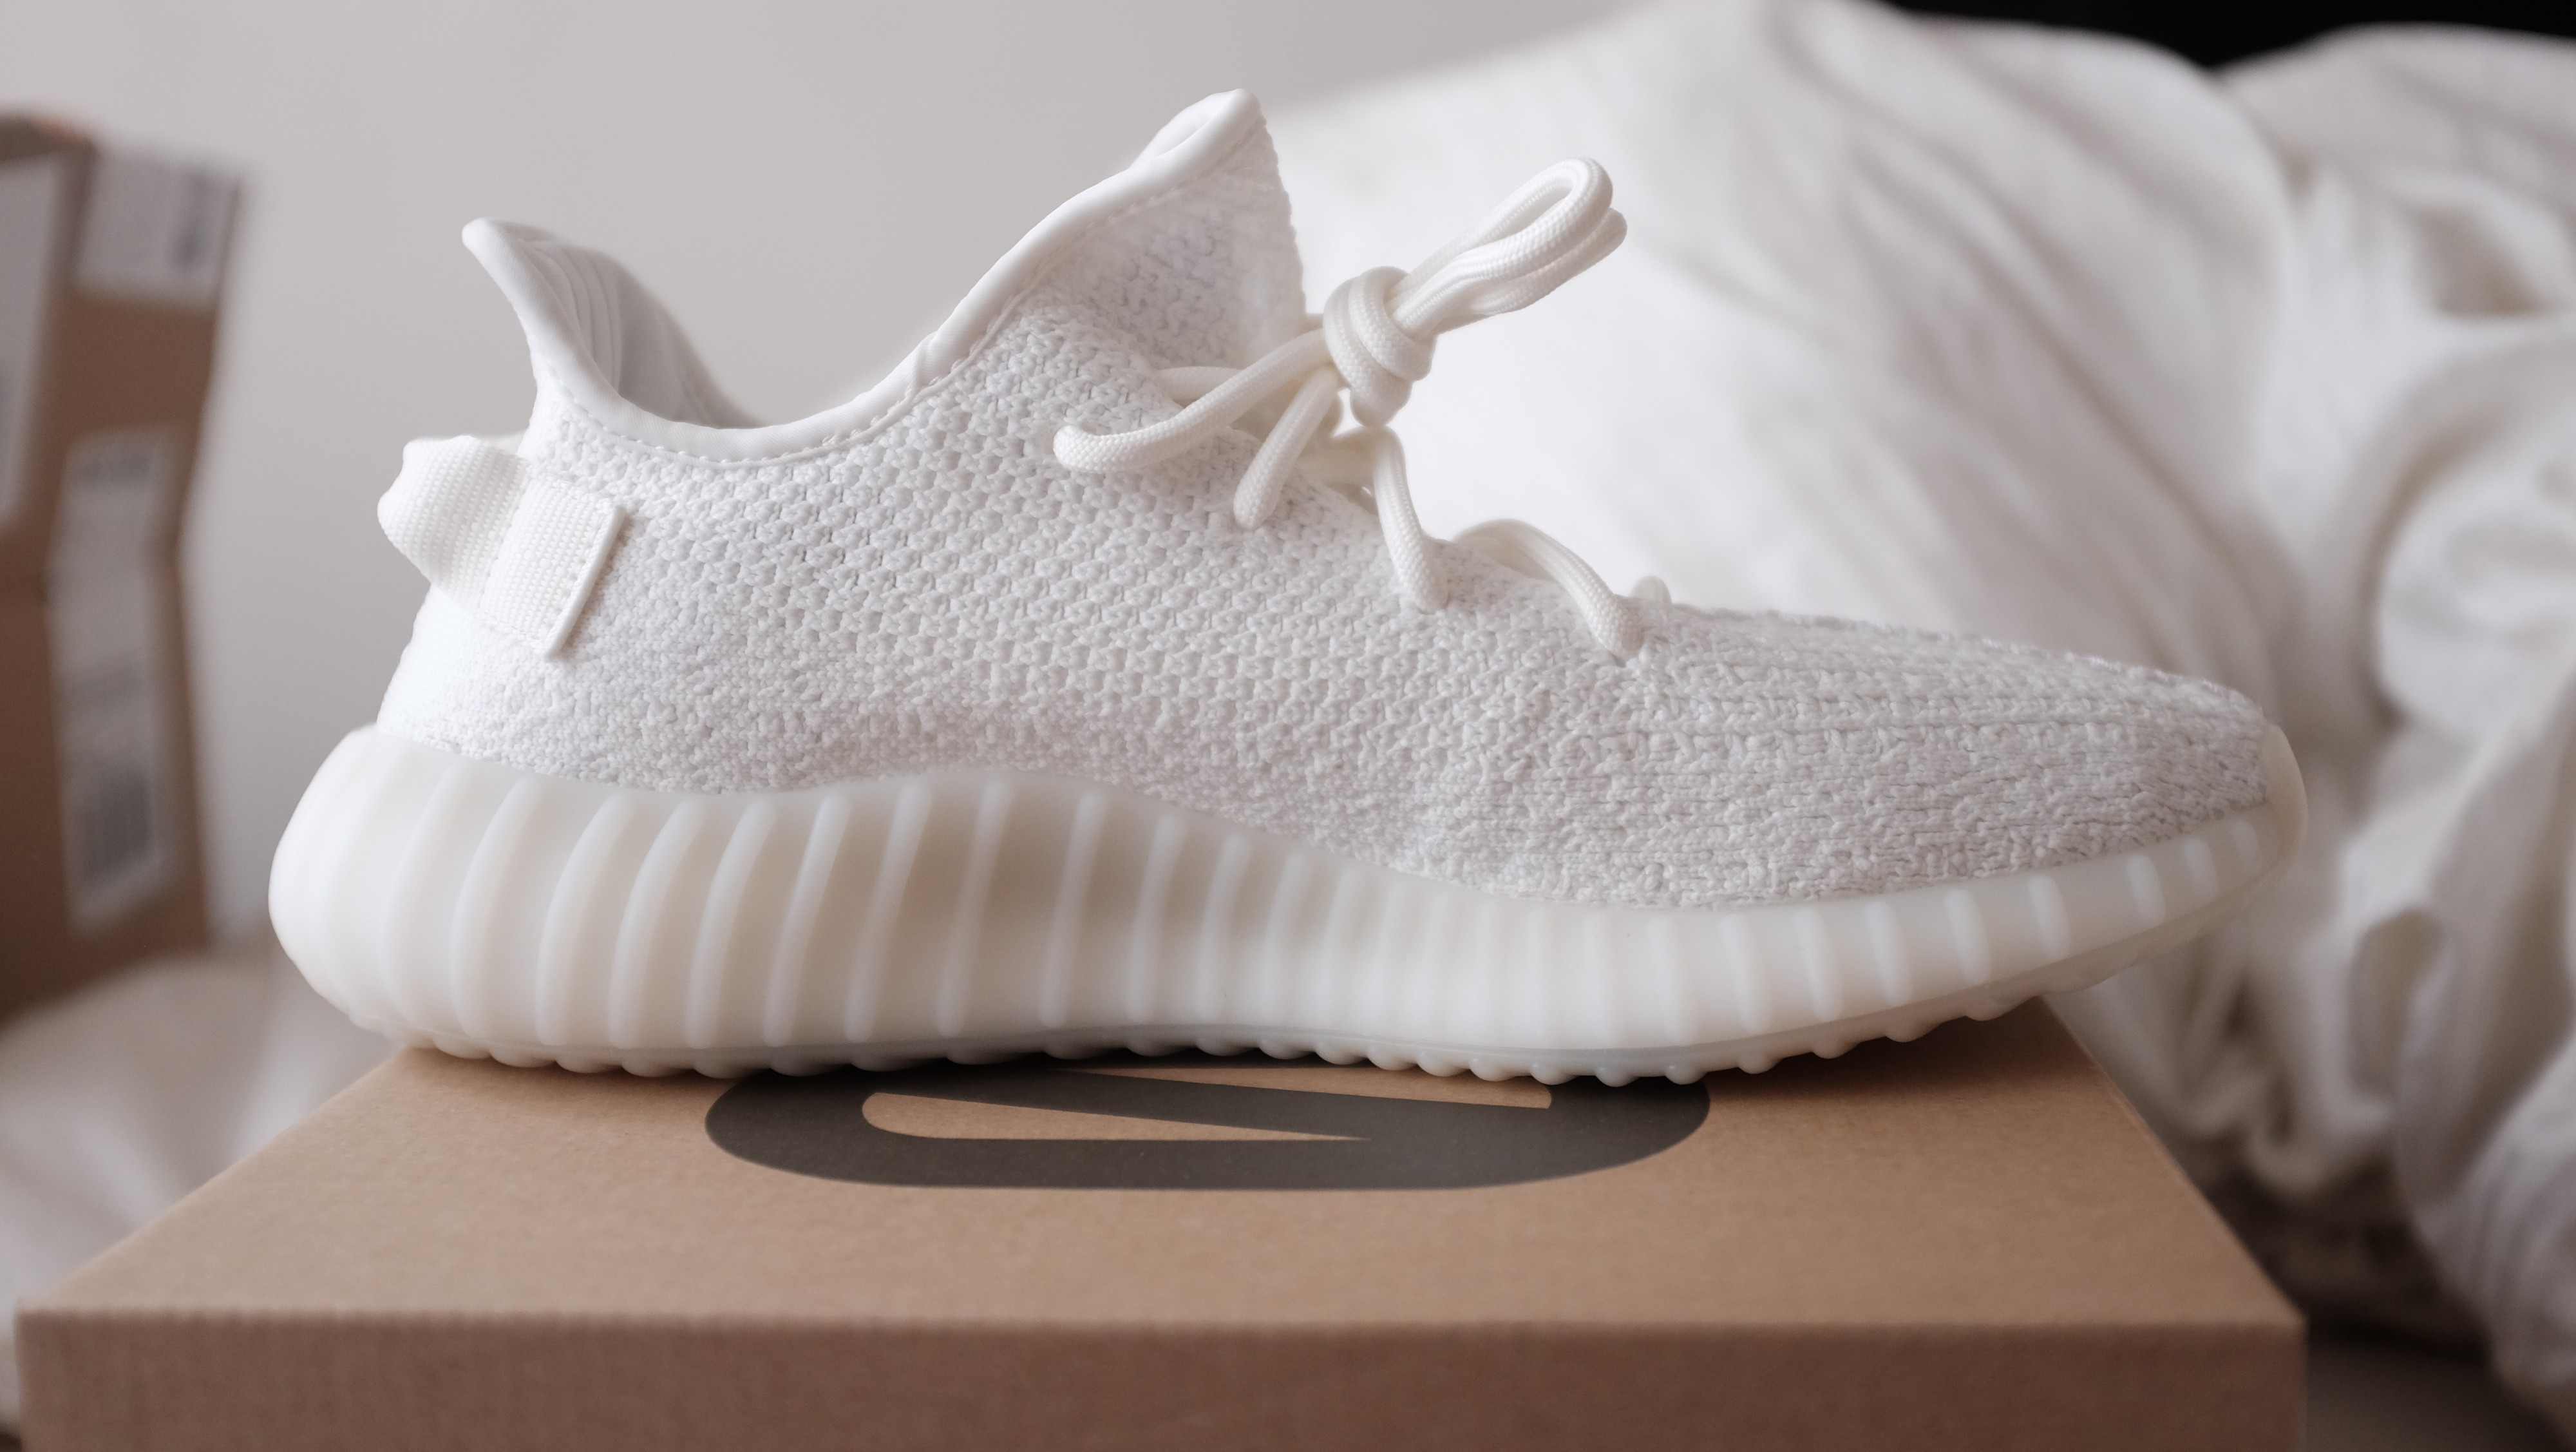
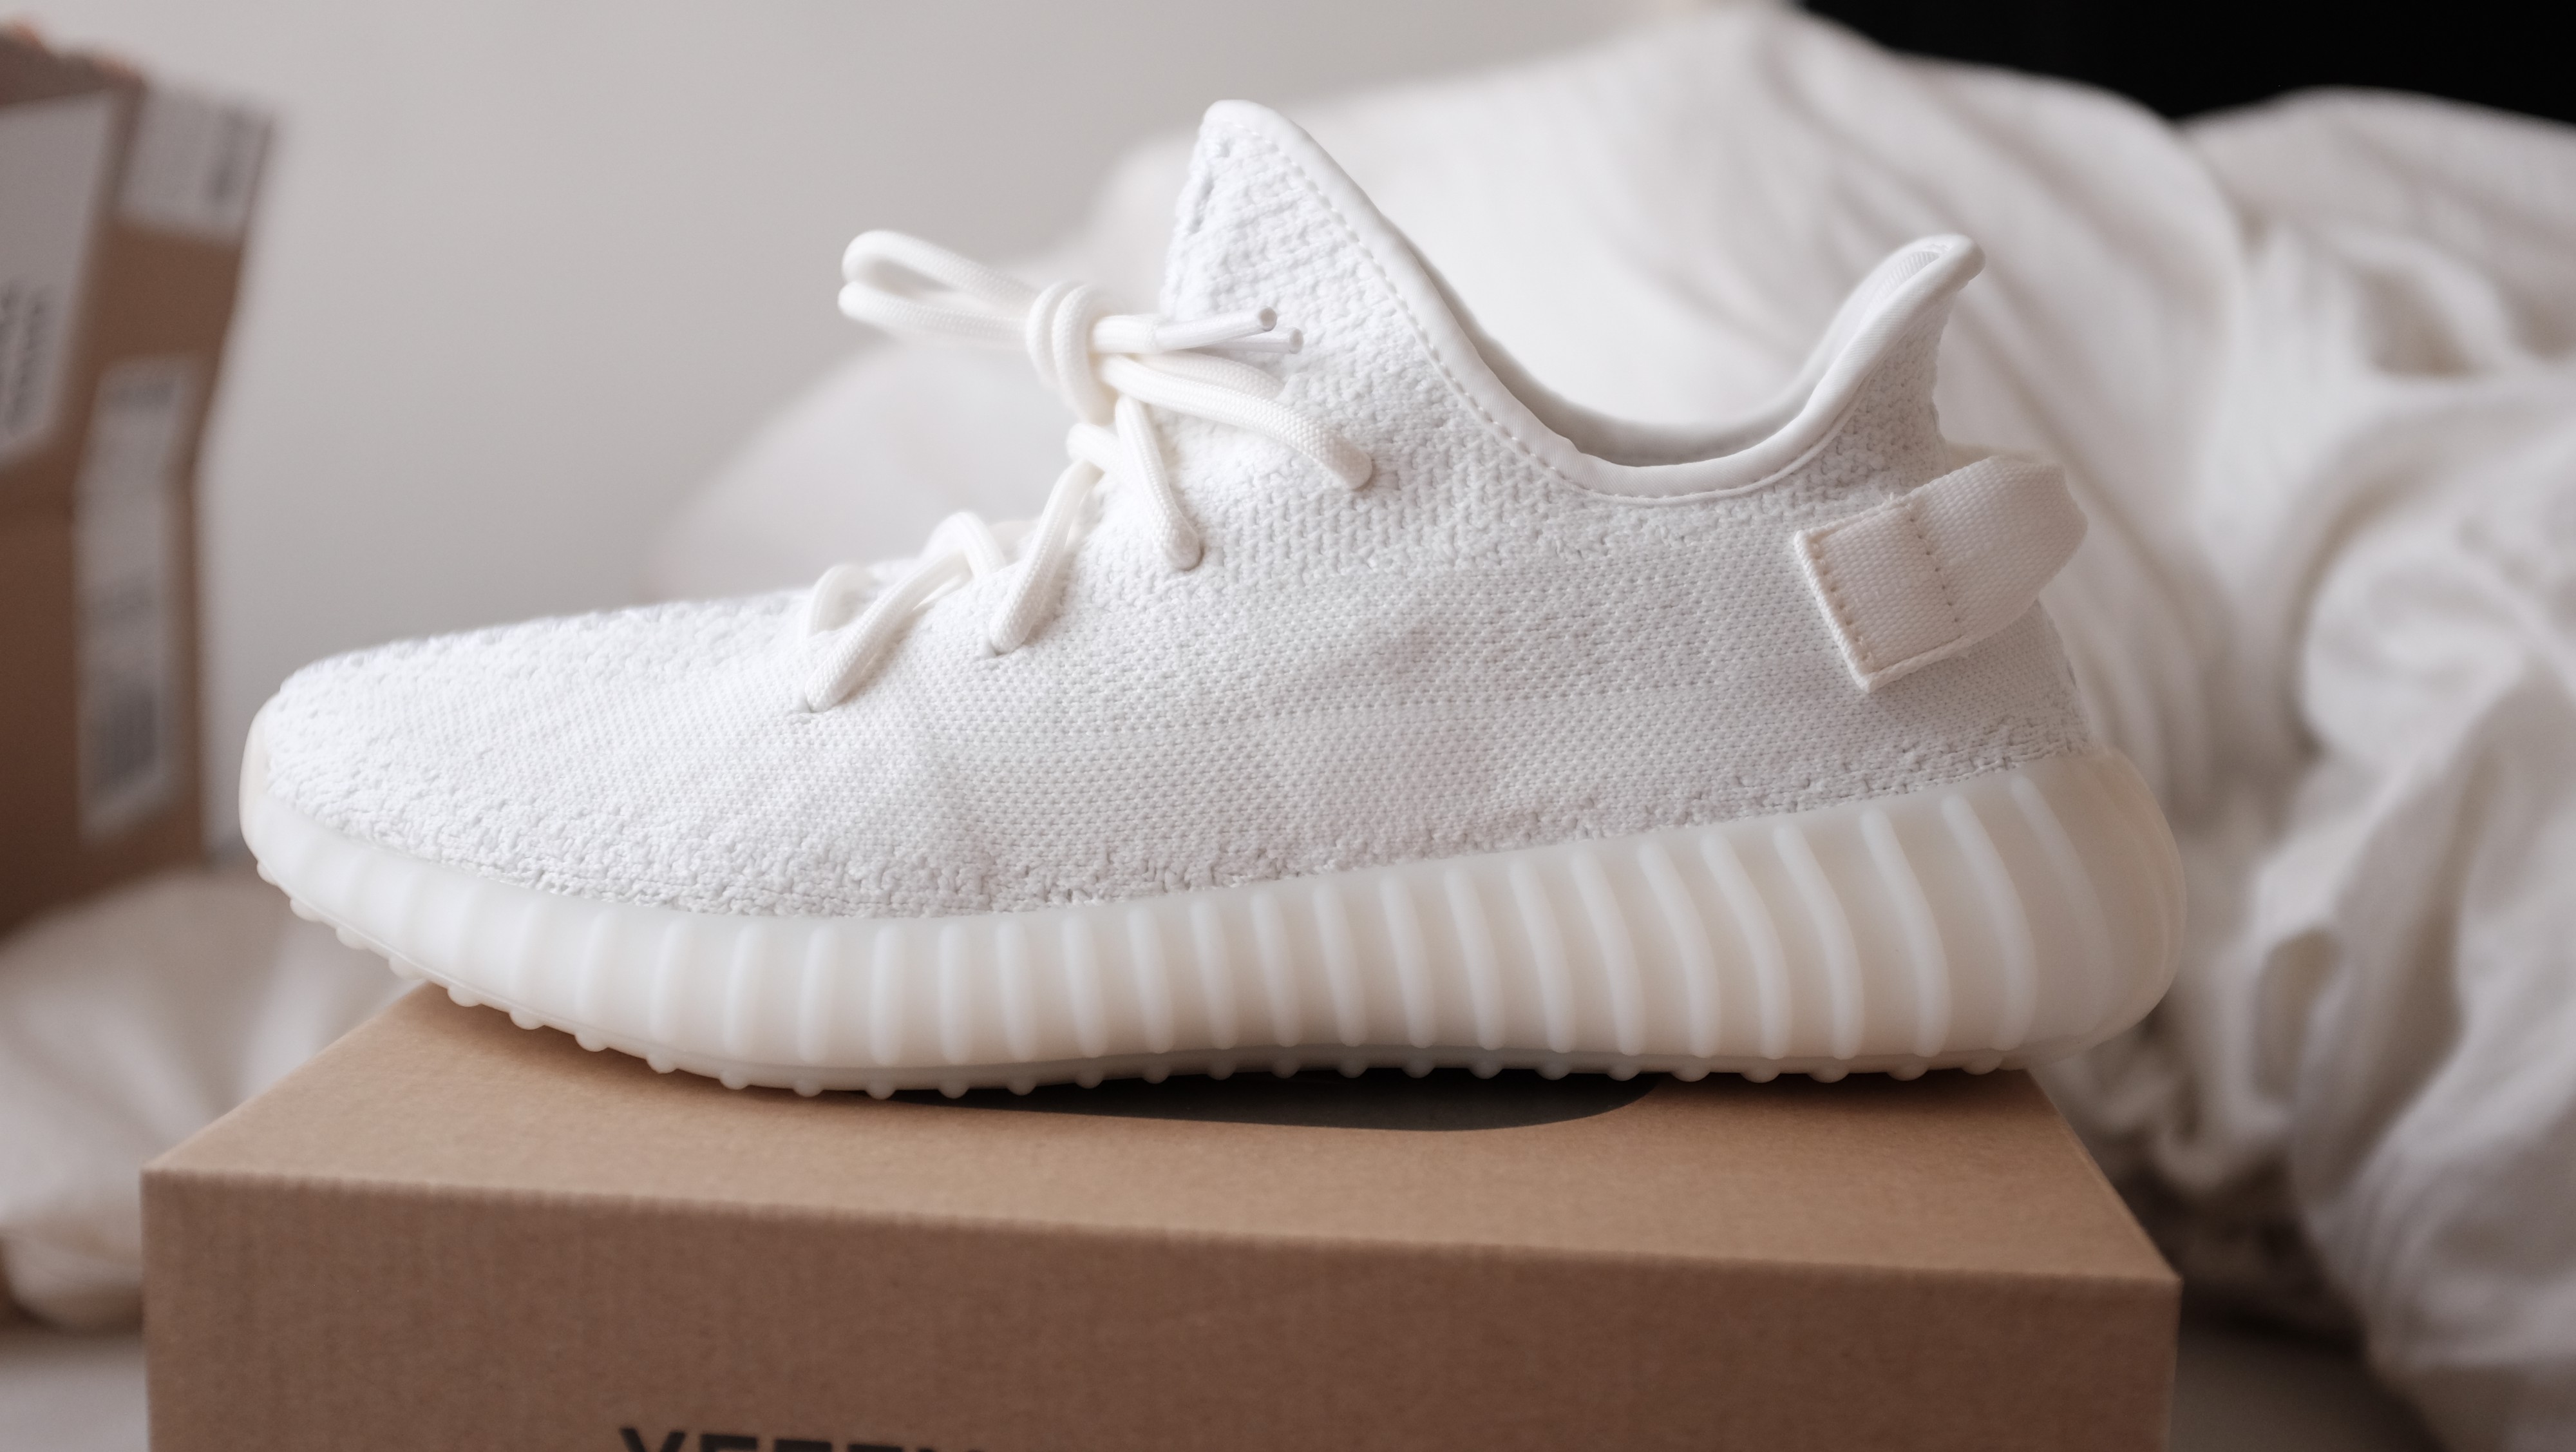
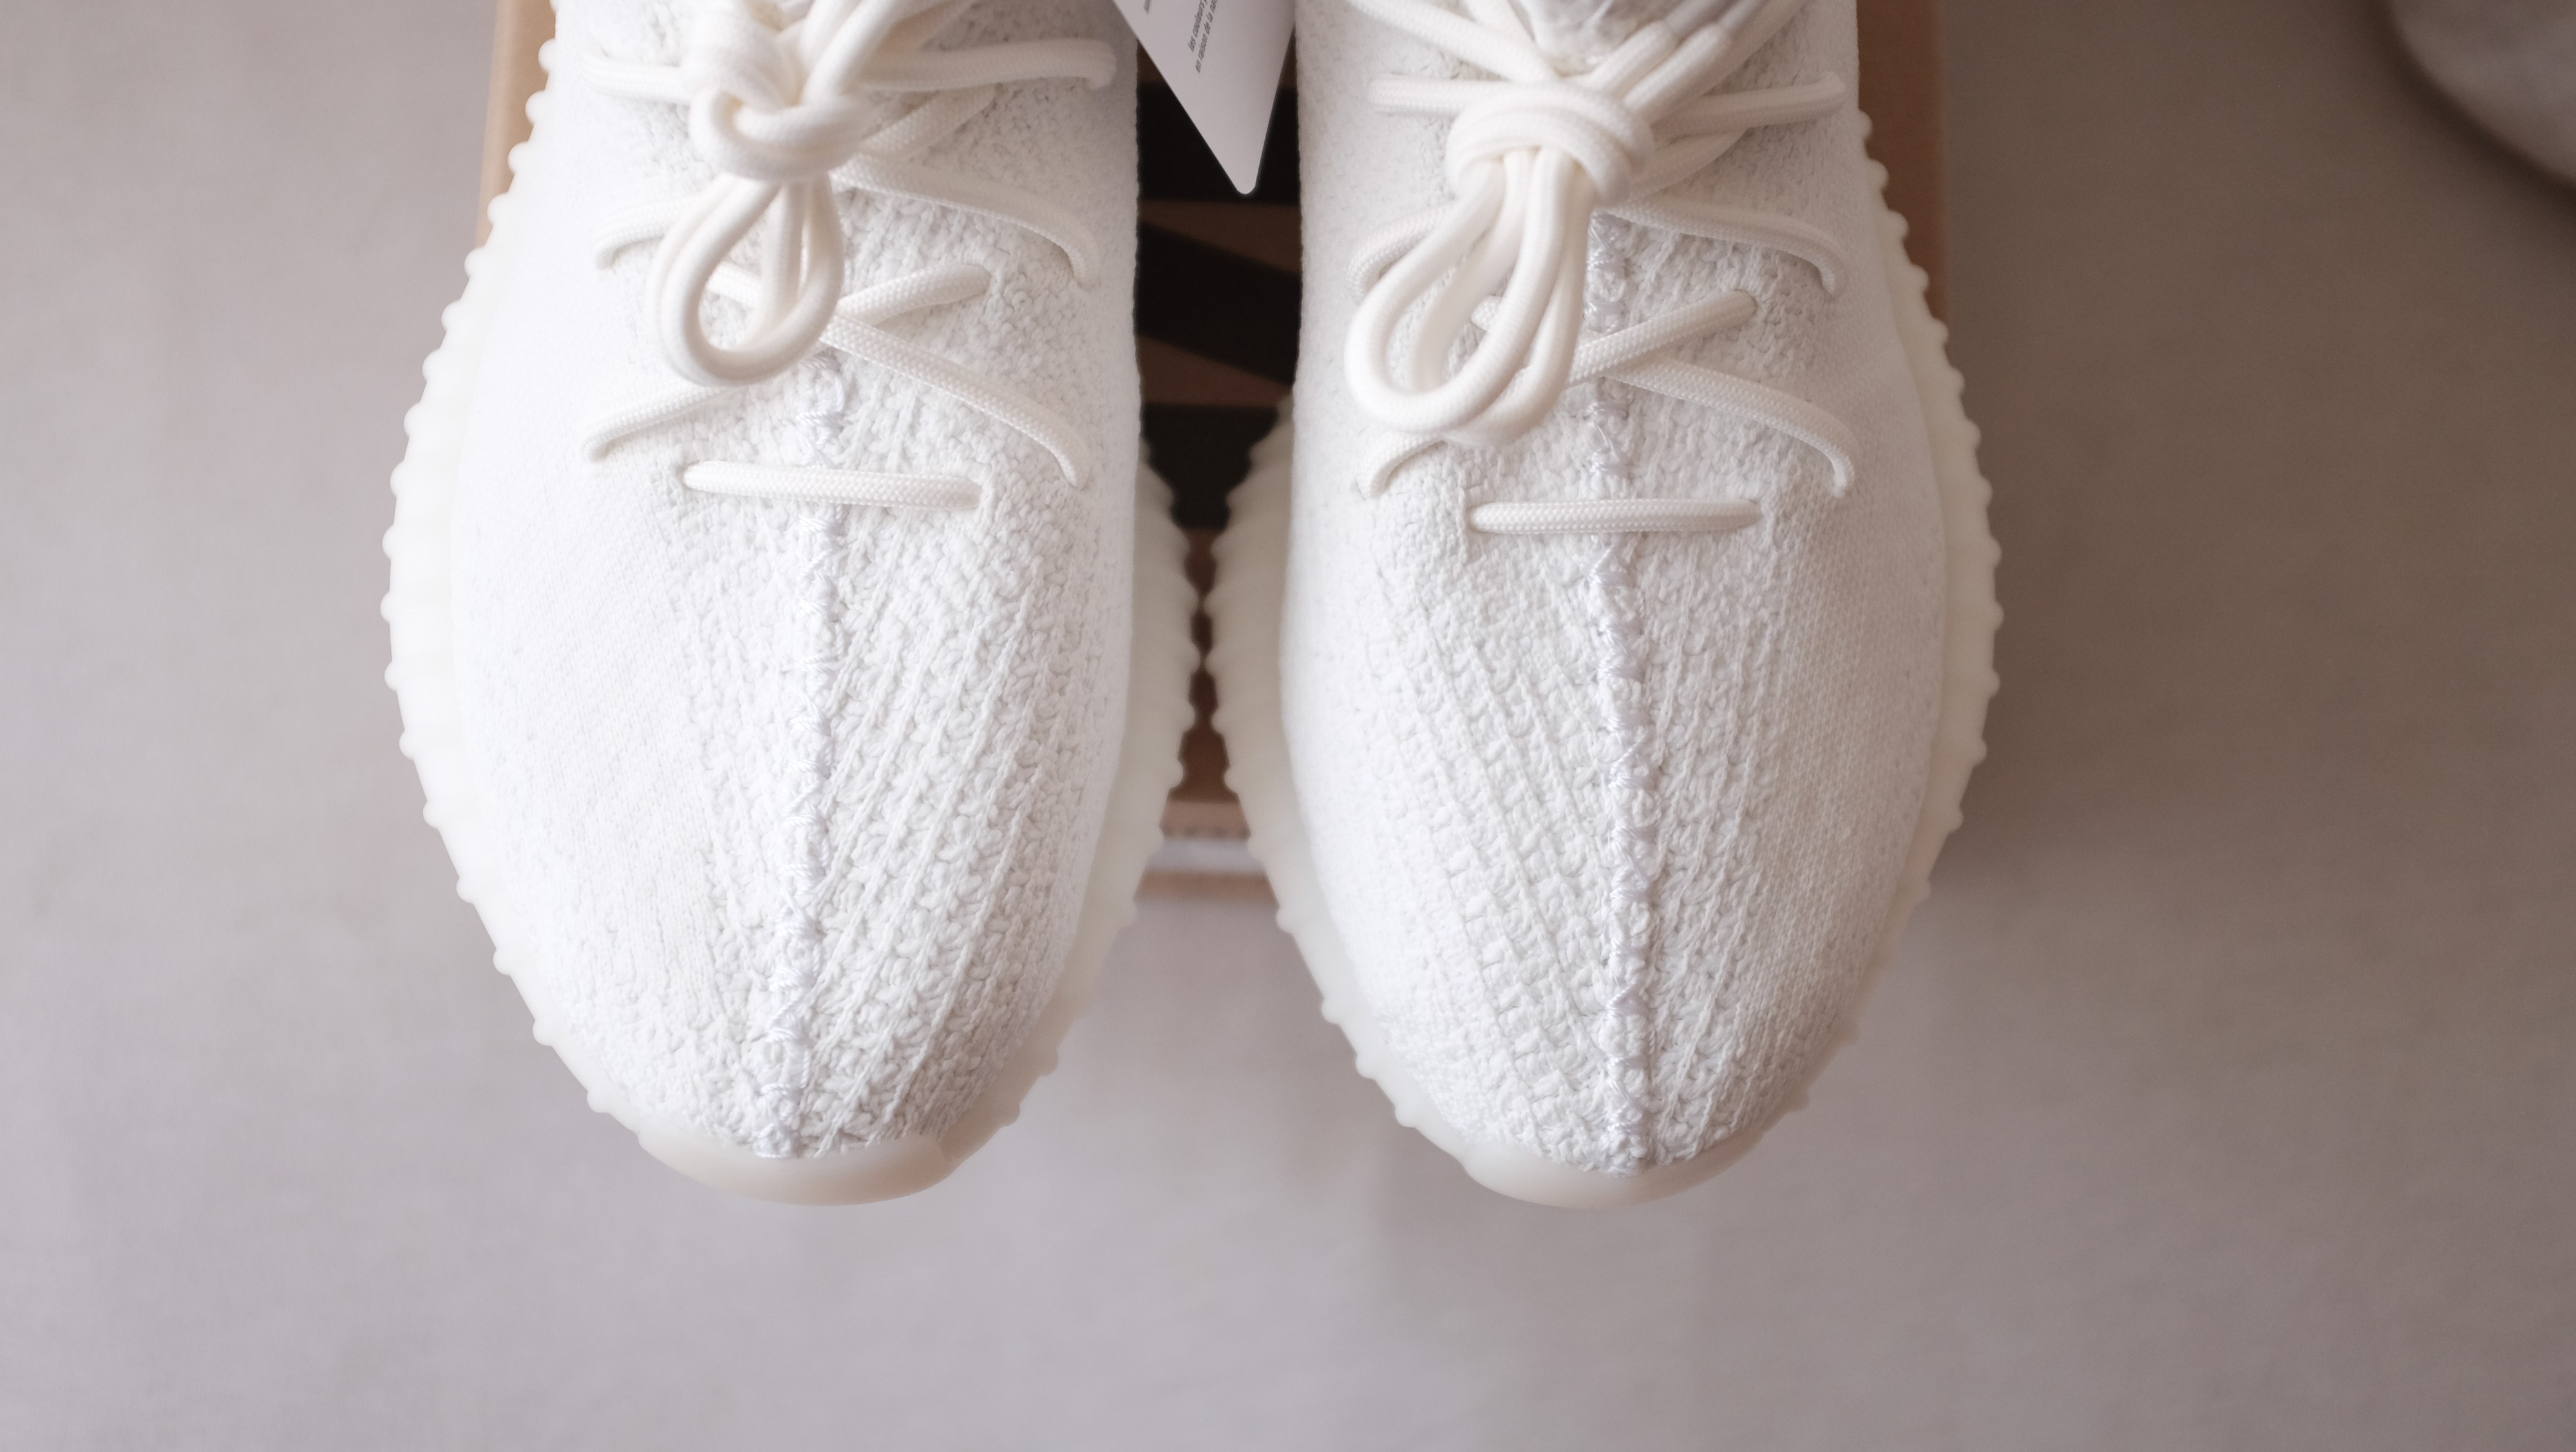 Cream V2 sz 9
For reference on Cream V2.
 Left Zebra OG V2 // Right Zebra Restock V2
For reference, both sz 9
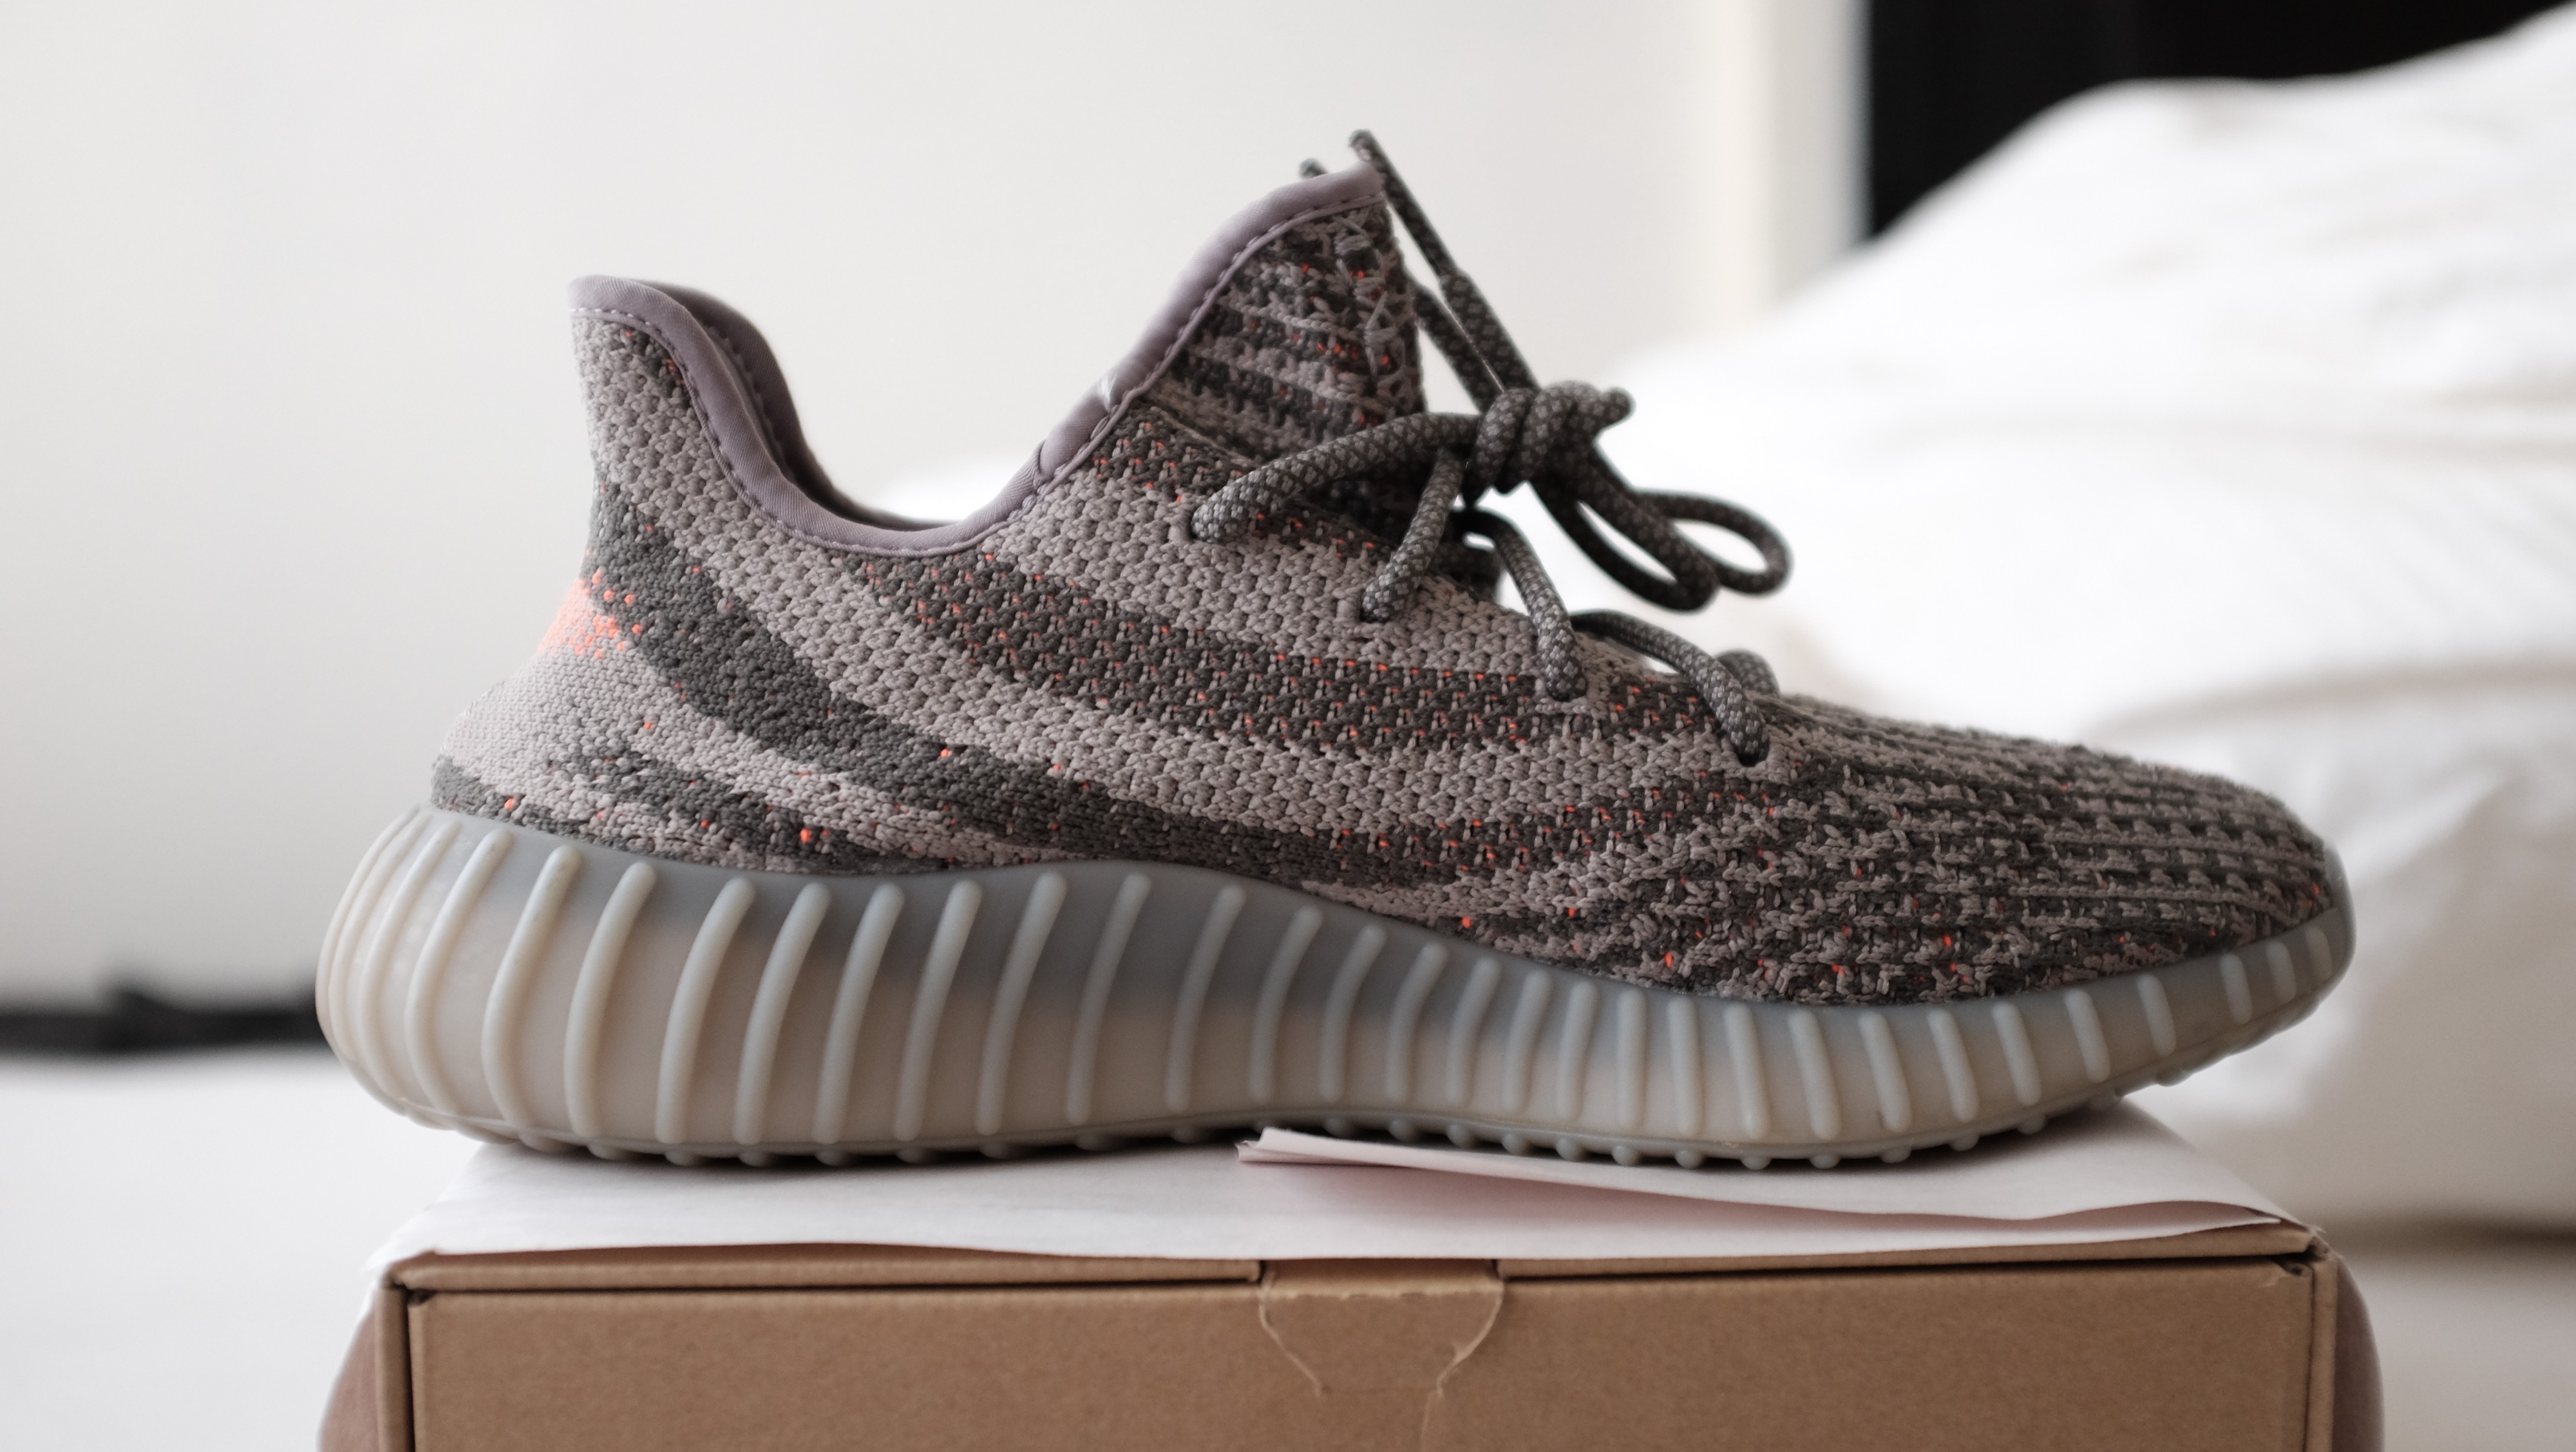
 Beluga 2.0 sz 8.5
Beluga 2.0 sz 8.5 for reference.
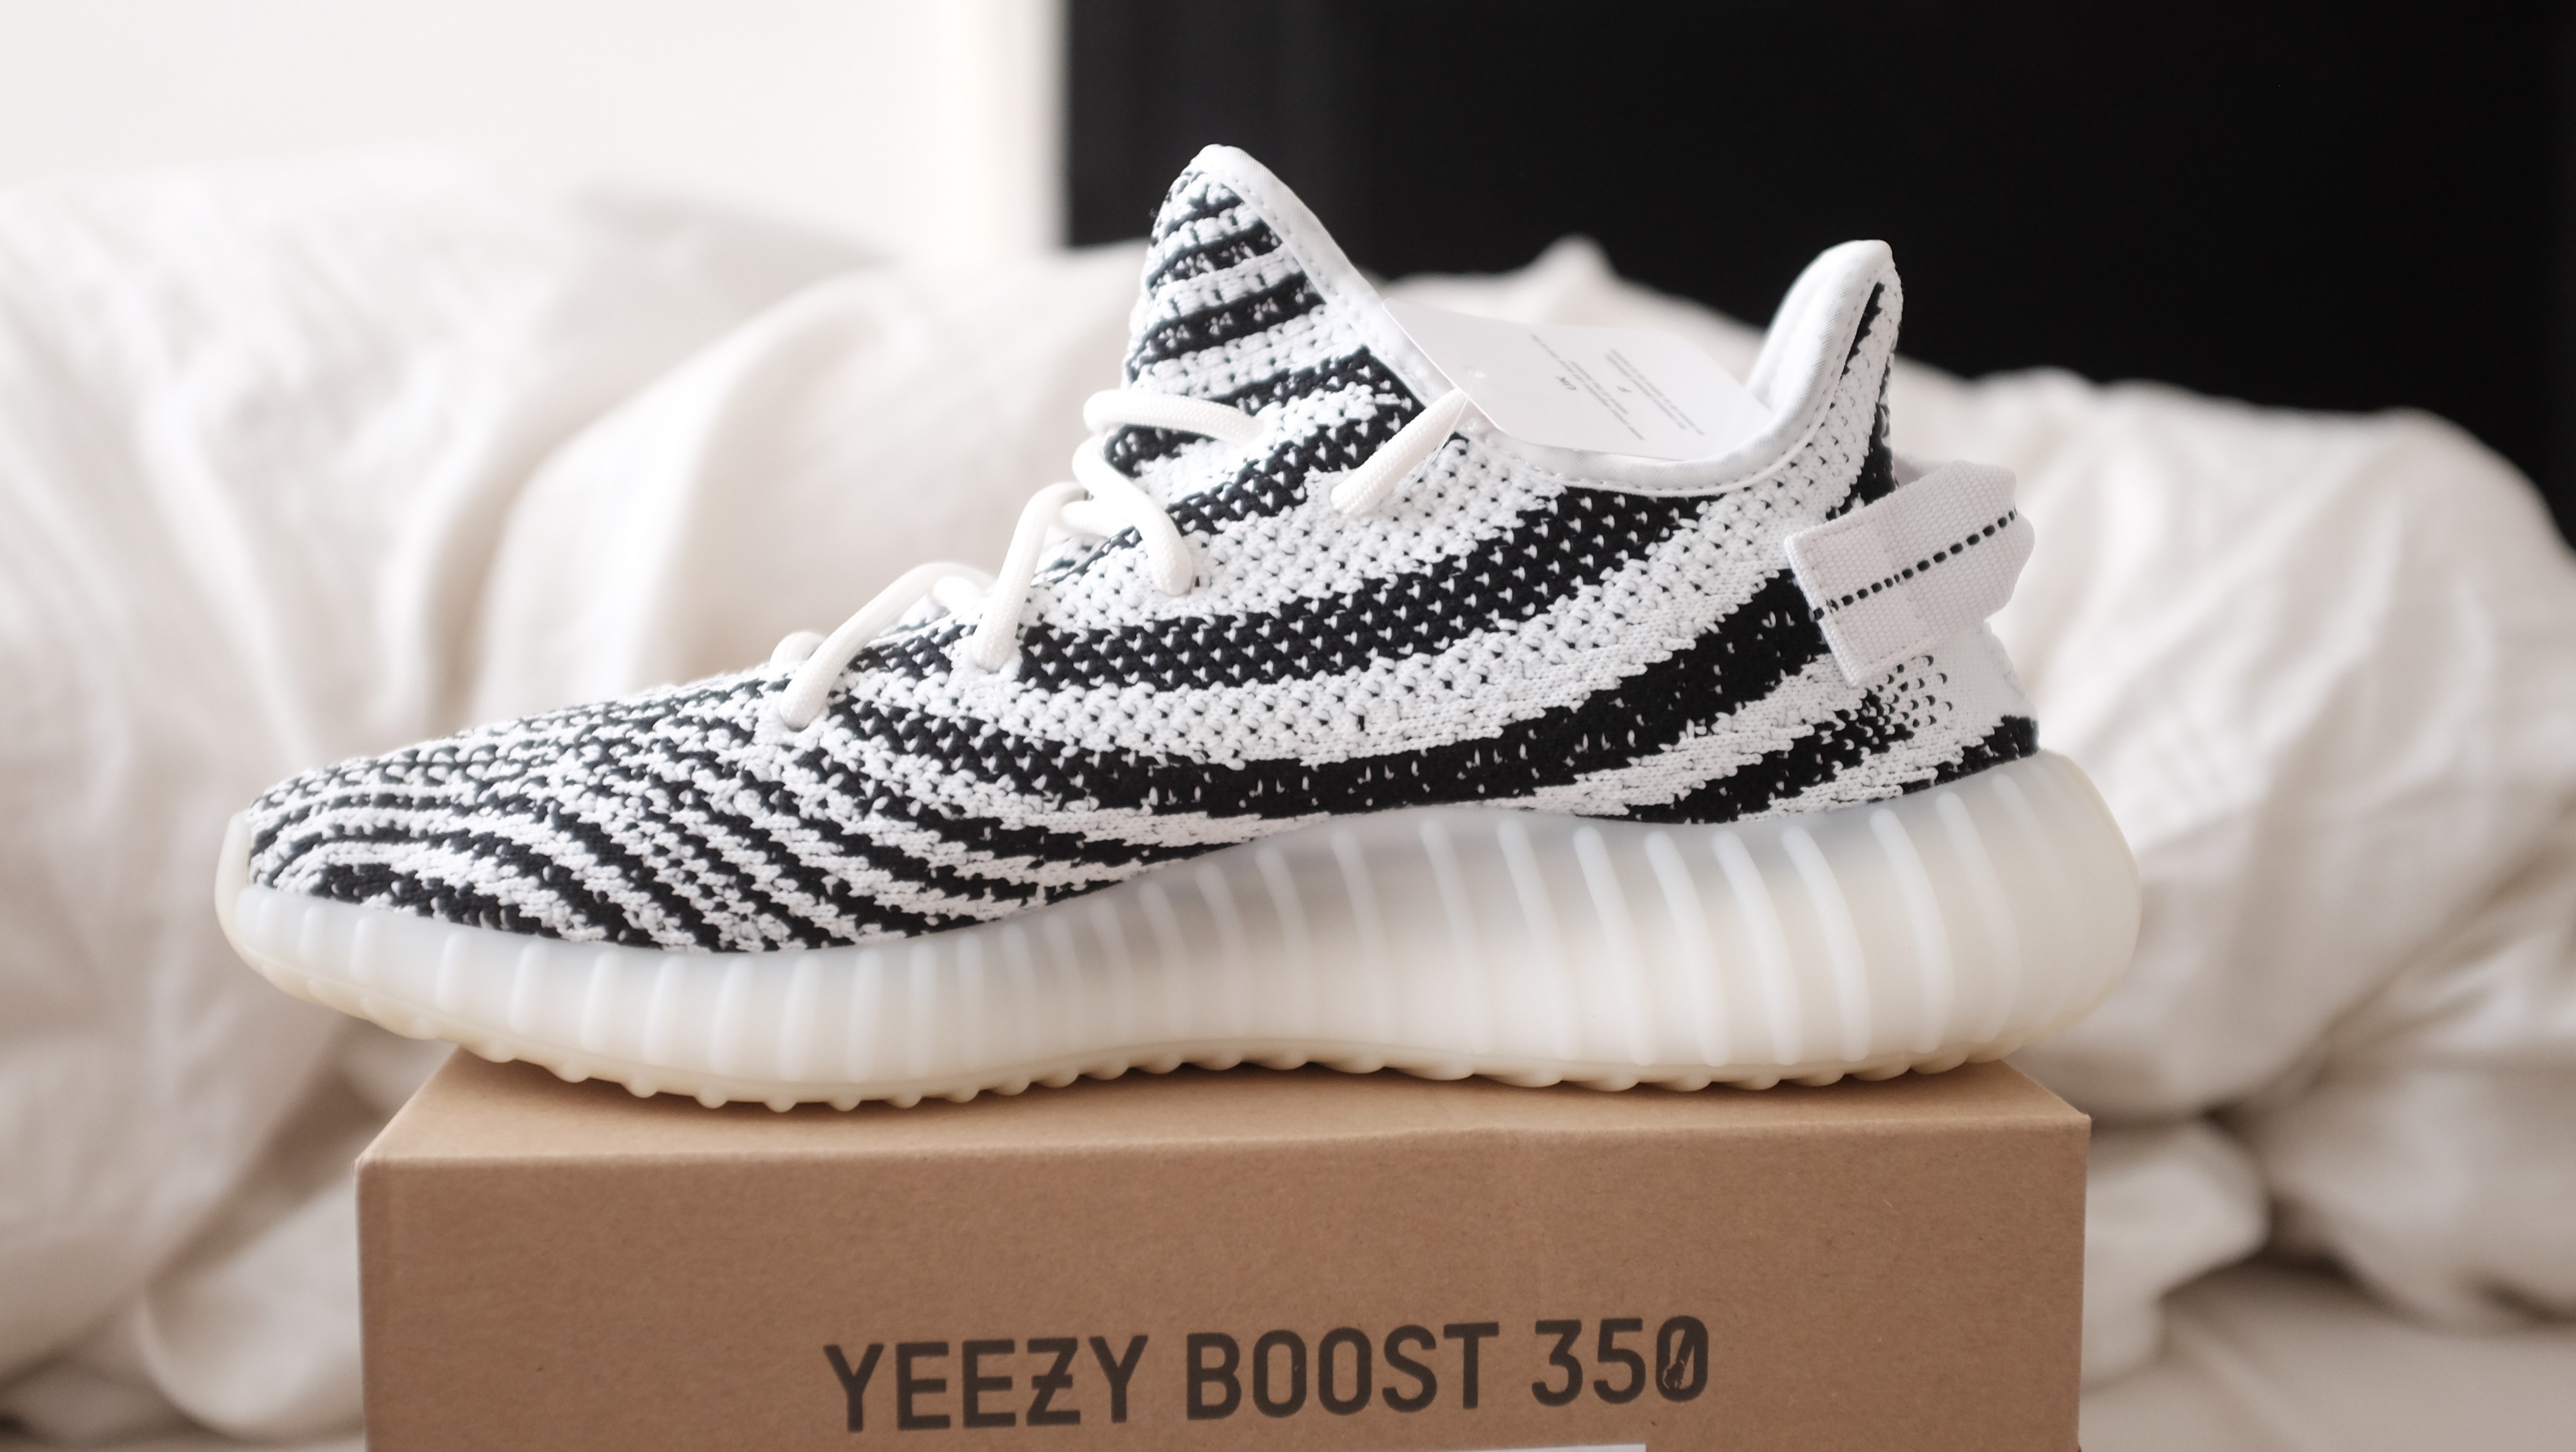
Zebra OG vs Restock Comparison
 Left Zebra Restock // Right Zebra OG
Pull tab placement is one of the main differences between the two releases. In my opinion the OG Zebra placement was the nicest but not the most practical placement for pull tab, with the OG pair, the pull tab wraps the heel perfectly leaving barely any room to actually use the pull tab functionally. But aesthetically I love it.
 Top Zebra OG // Bottom Zebra Restock
You?ll also notice the lettering on the Zebra Restock is a shade or two lighter than the OG. The sole is slightly more white on the Restock pair as well.
 Left Zebra OG // Right Zebra Restock
Toe box wise they?re the same.
 Left Zebra OG // Right Zebra Restock
The heel is a shade or two more yellow on the Restock Zebras.
Left Zebra OG // Right Zebra Restock
Main thing to focus on is production date being different and the small dot above the adidas scan code is different as well between the two models.
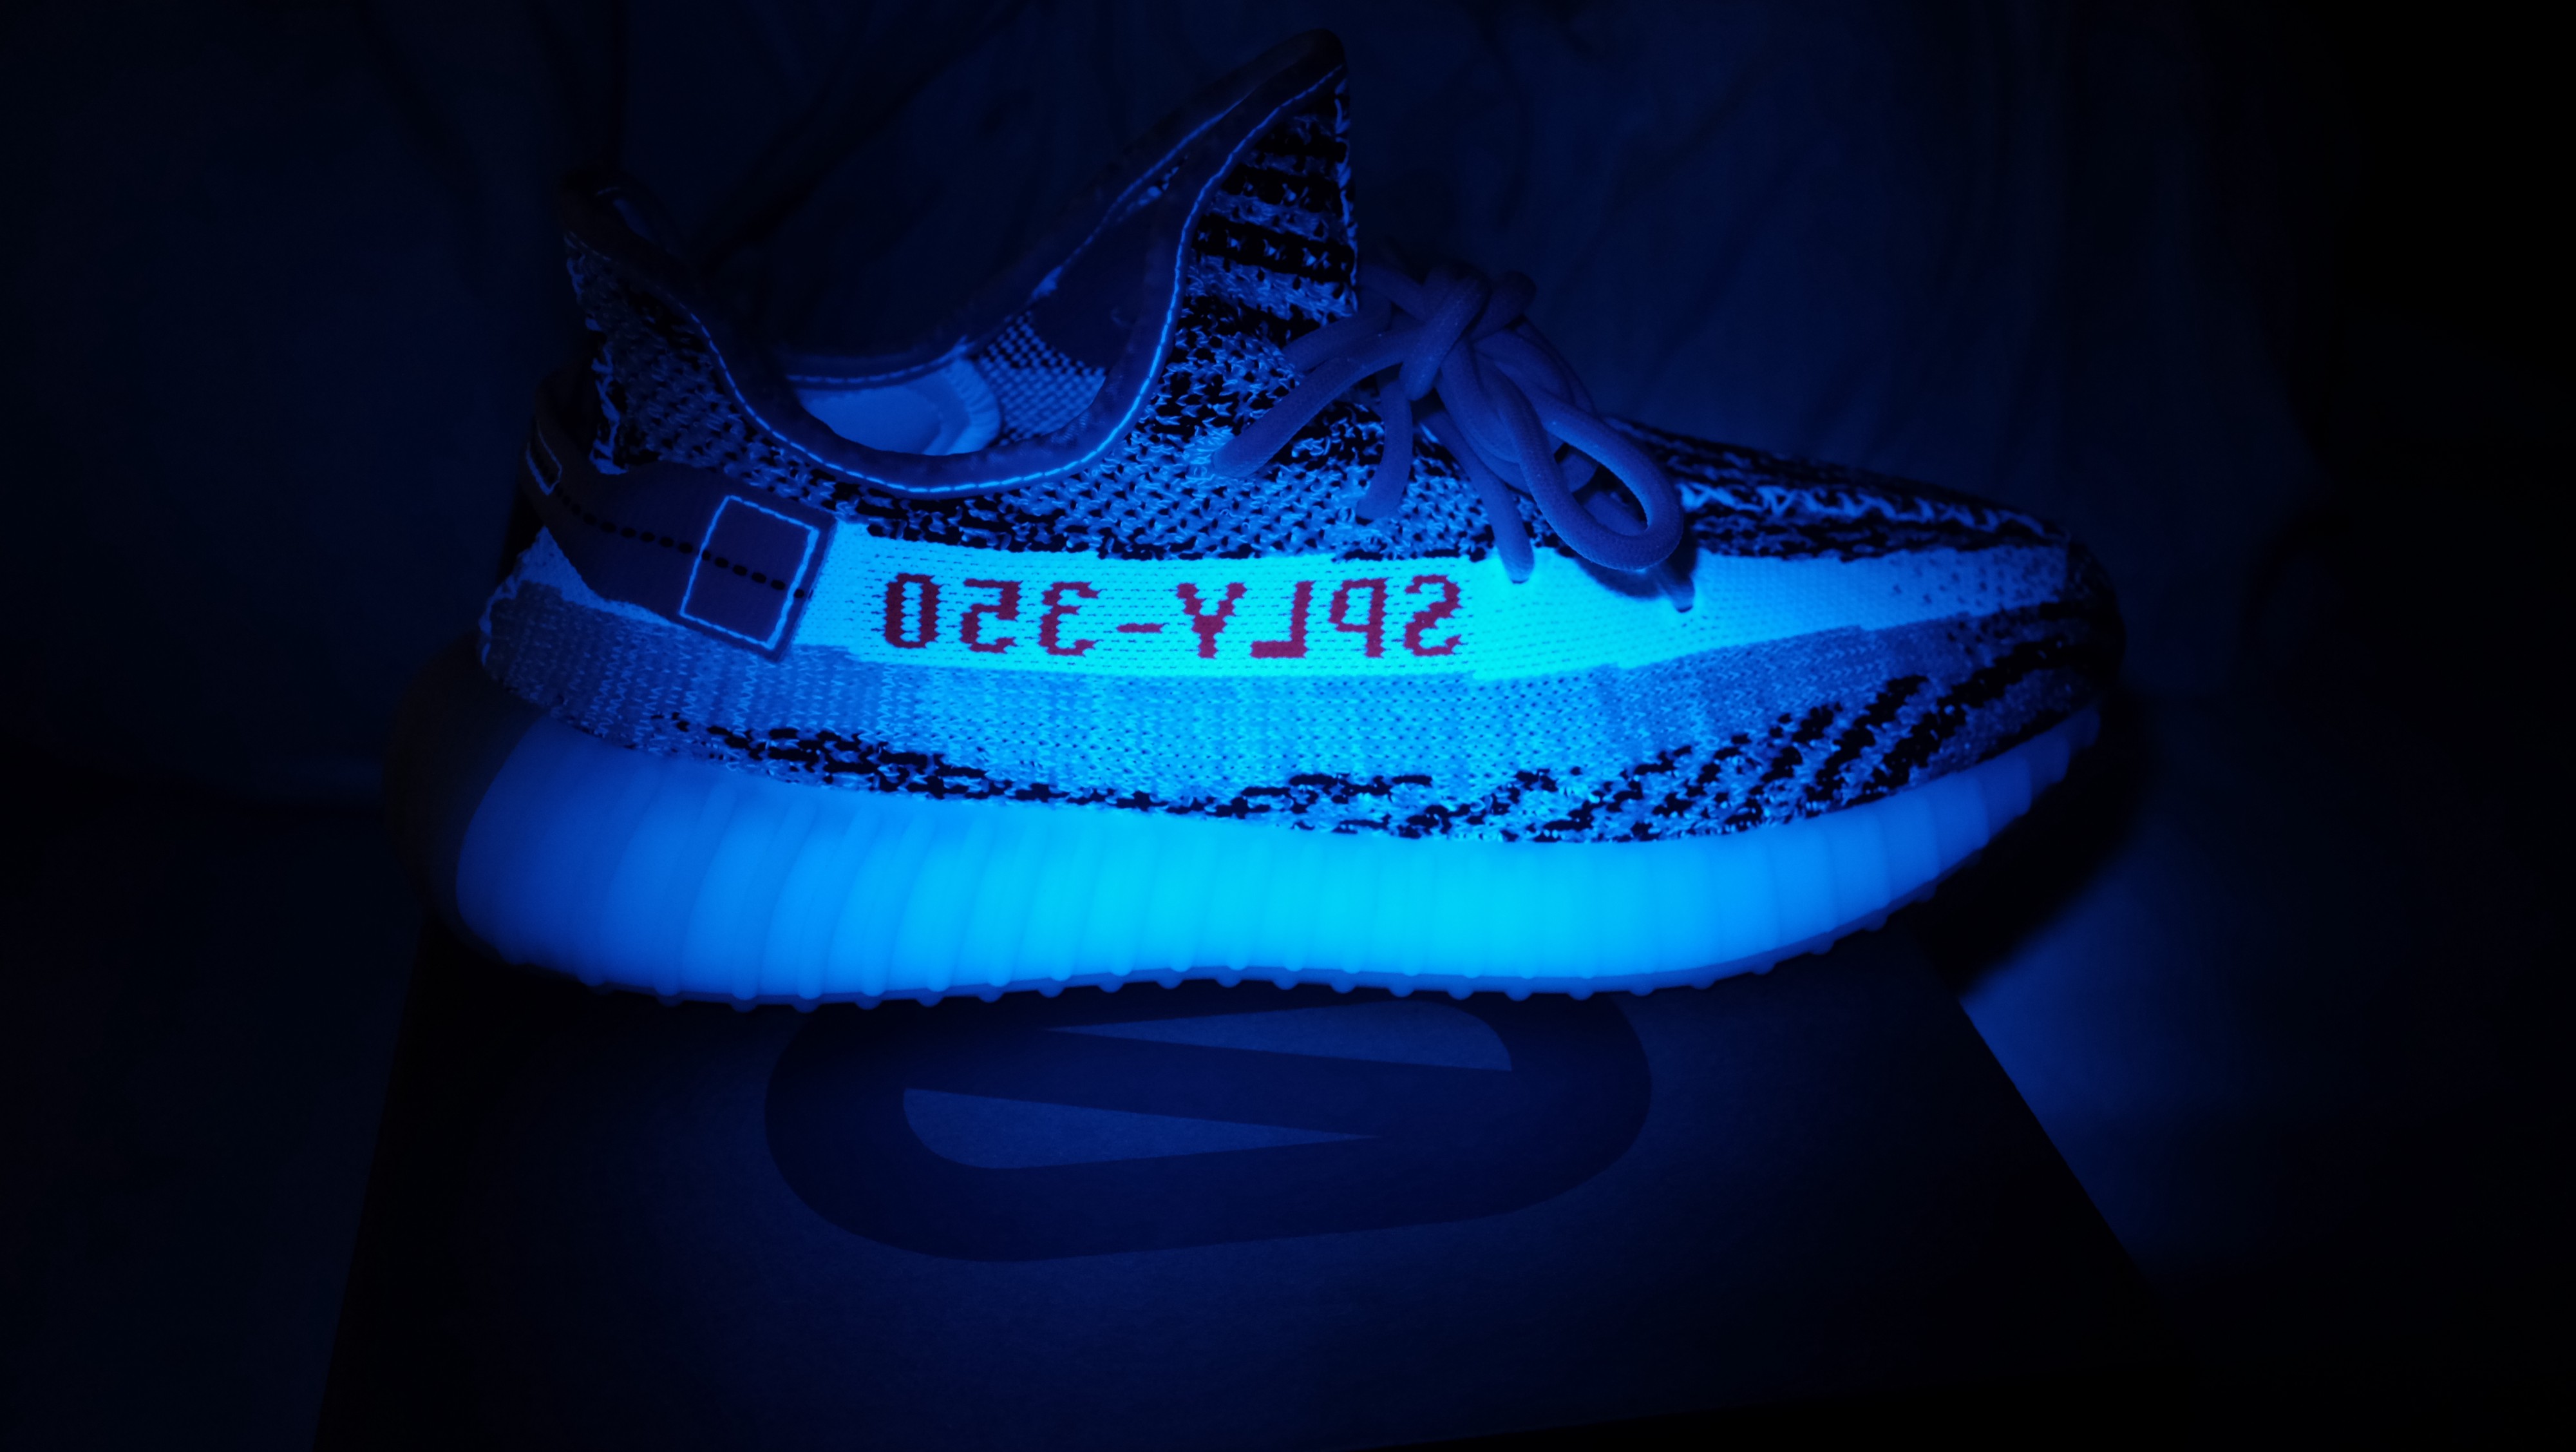
Zebra OG // Zebra Restock UV Light
These photos apply to both Zebra OG and Zebra Restock.
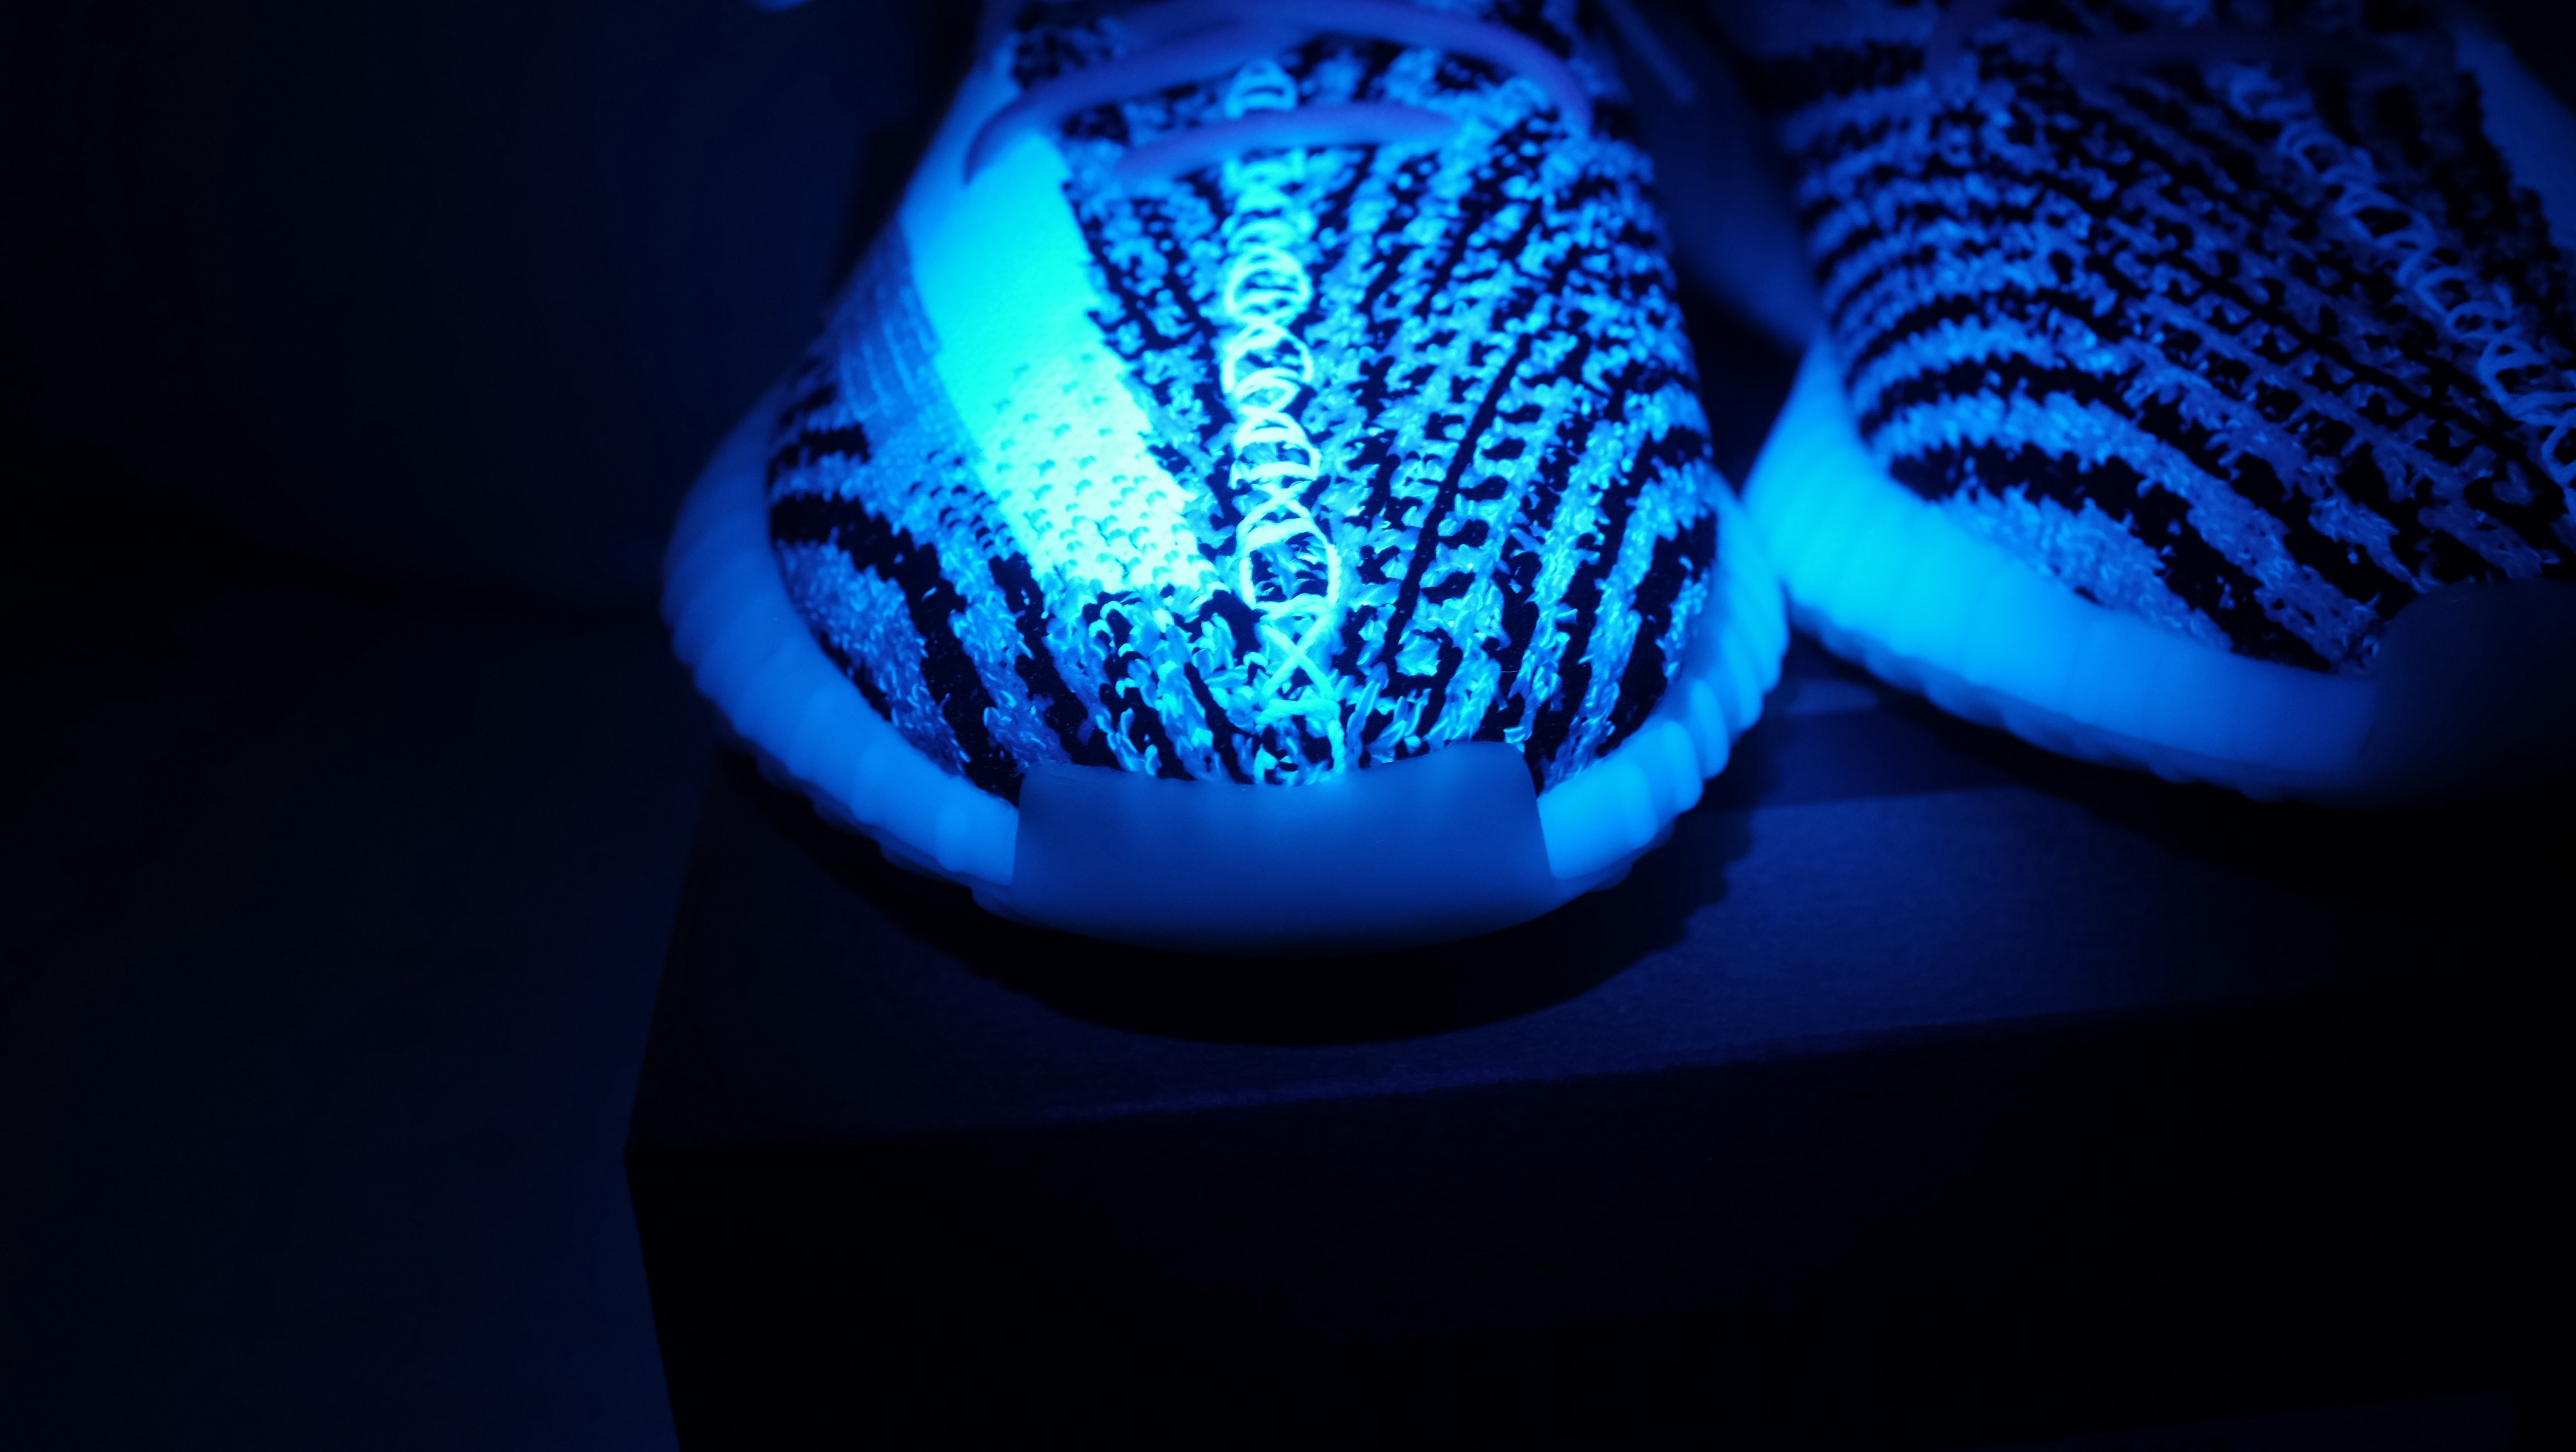
Always check to see if the toe box is milky
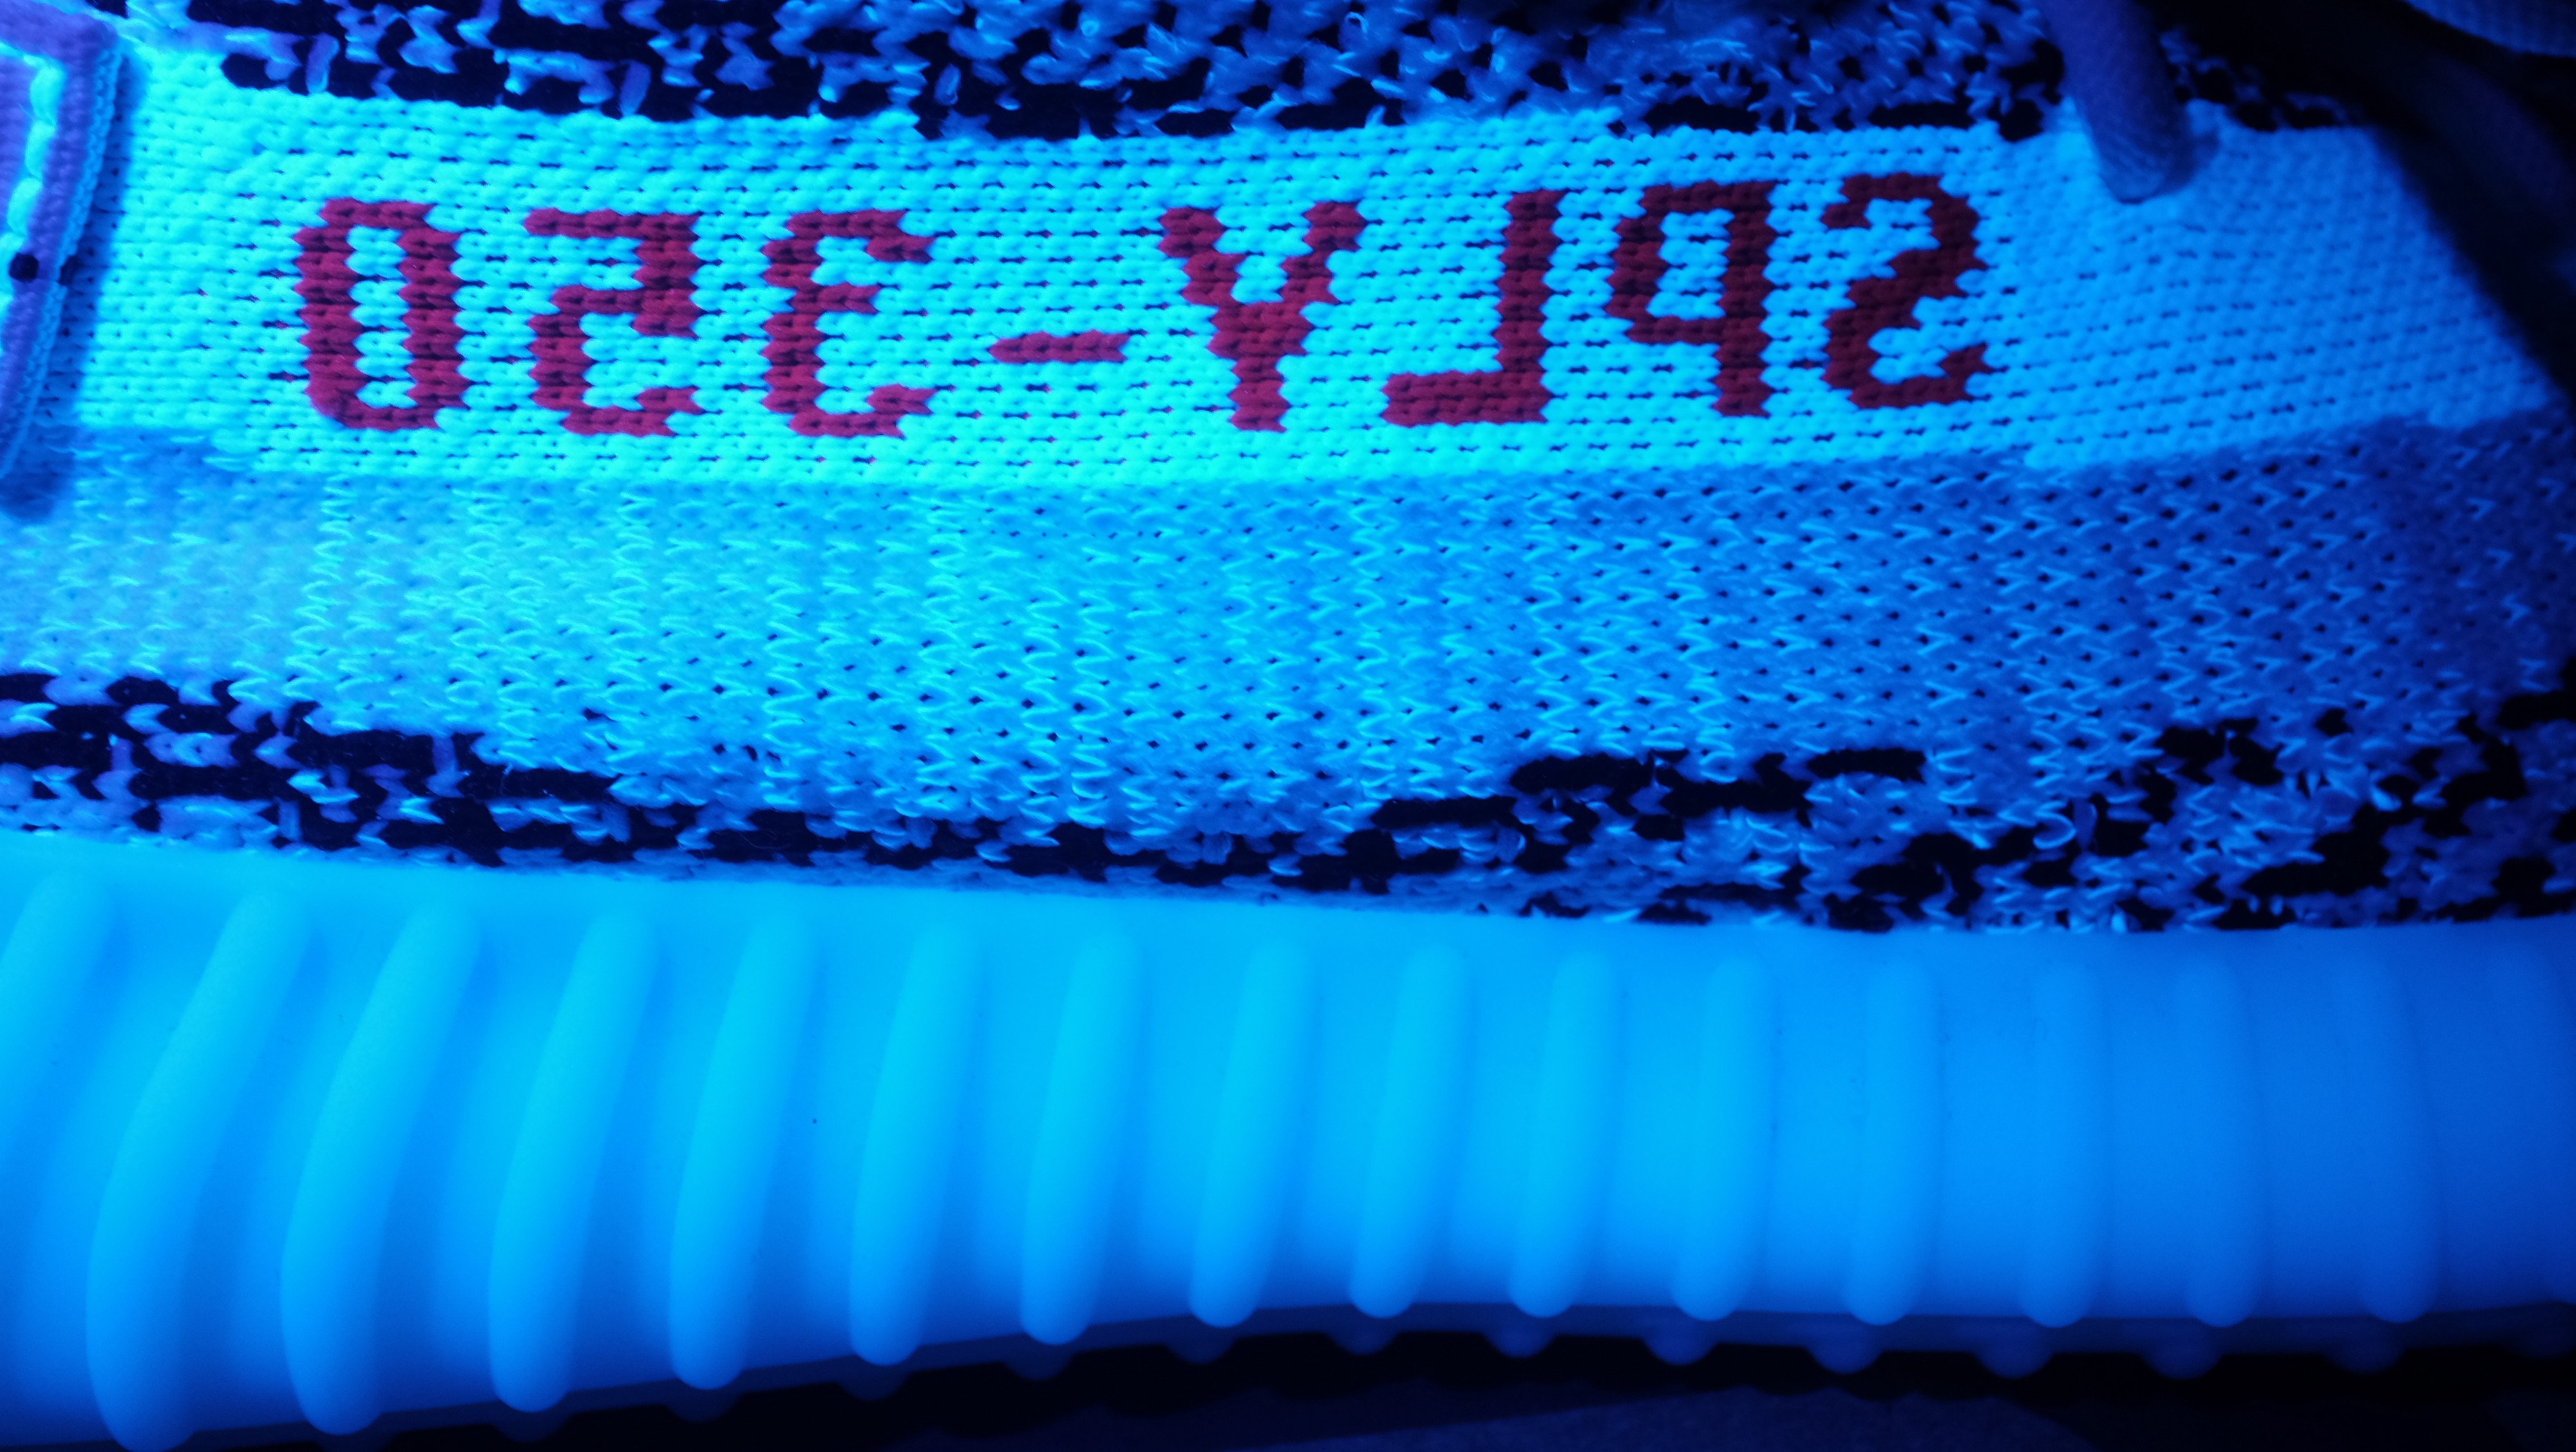
You should see the > pattern stripe clearly
Stitching around sock liner is clean and straight.
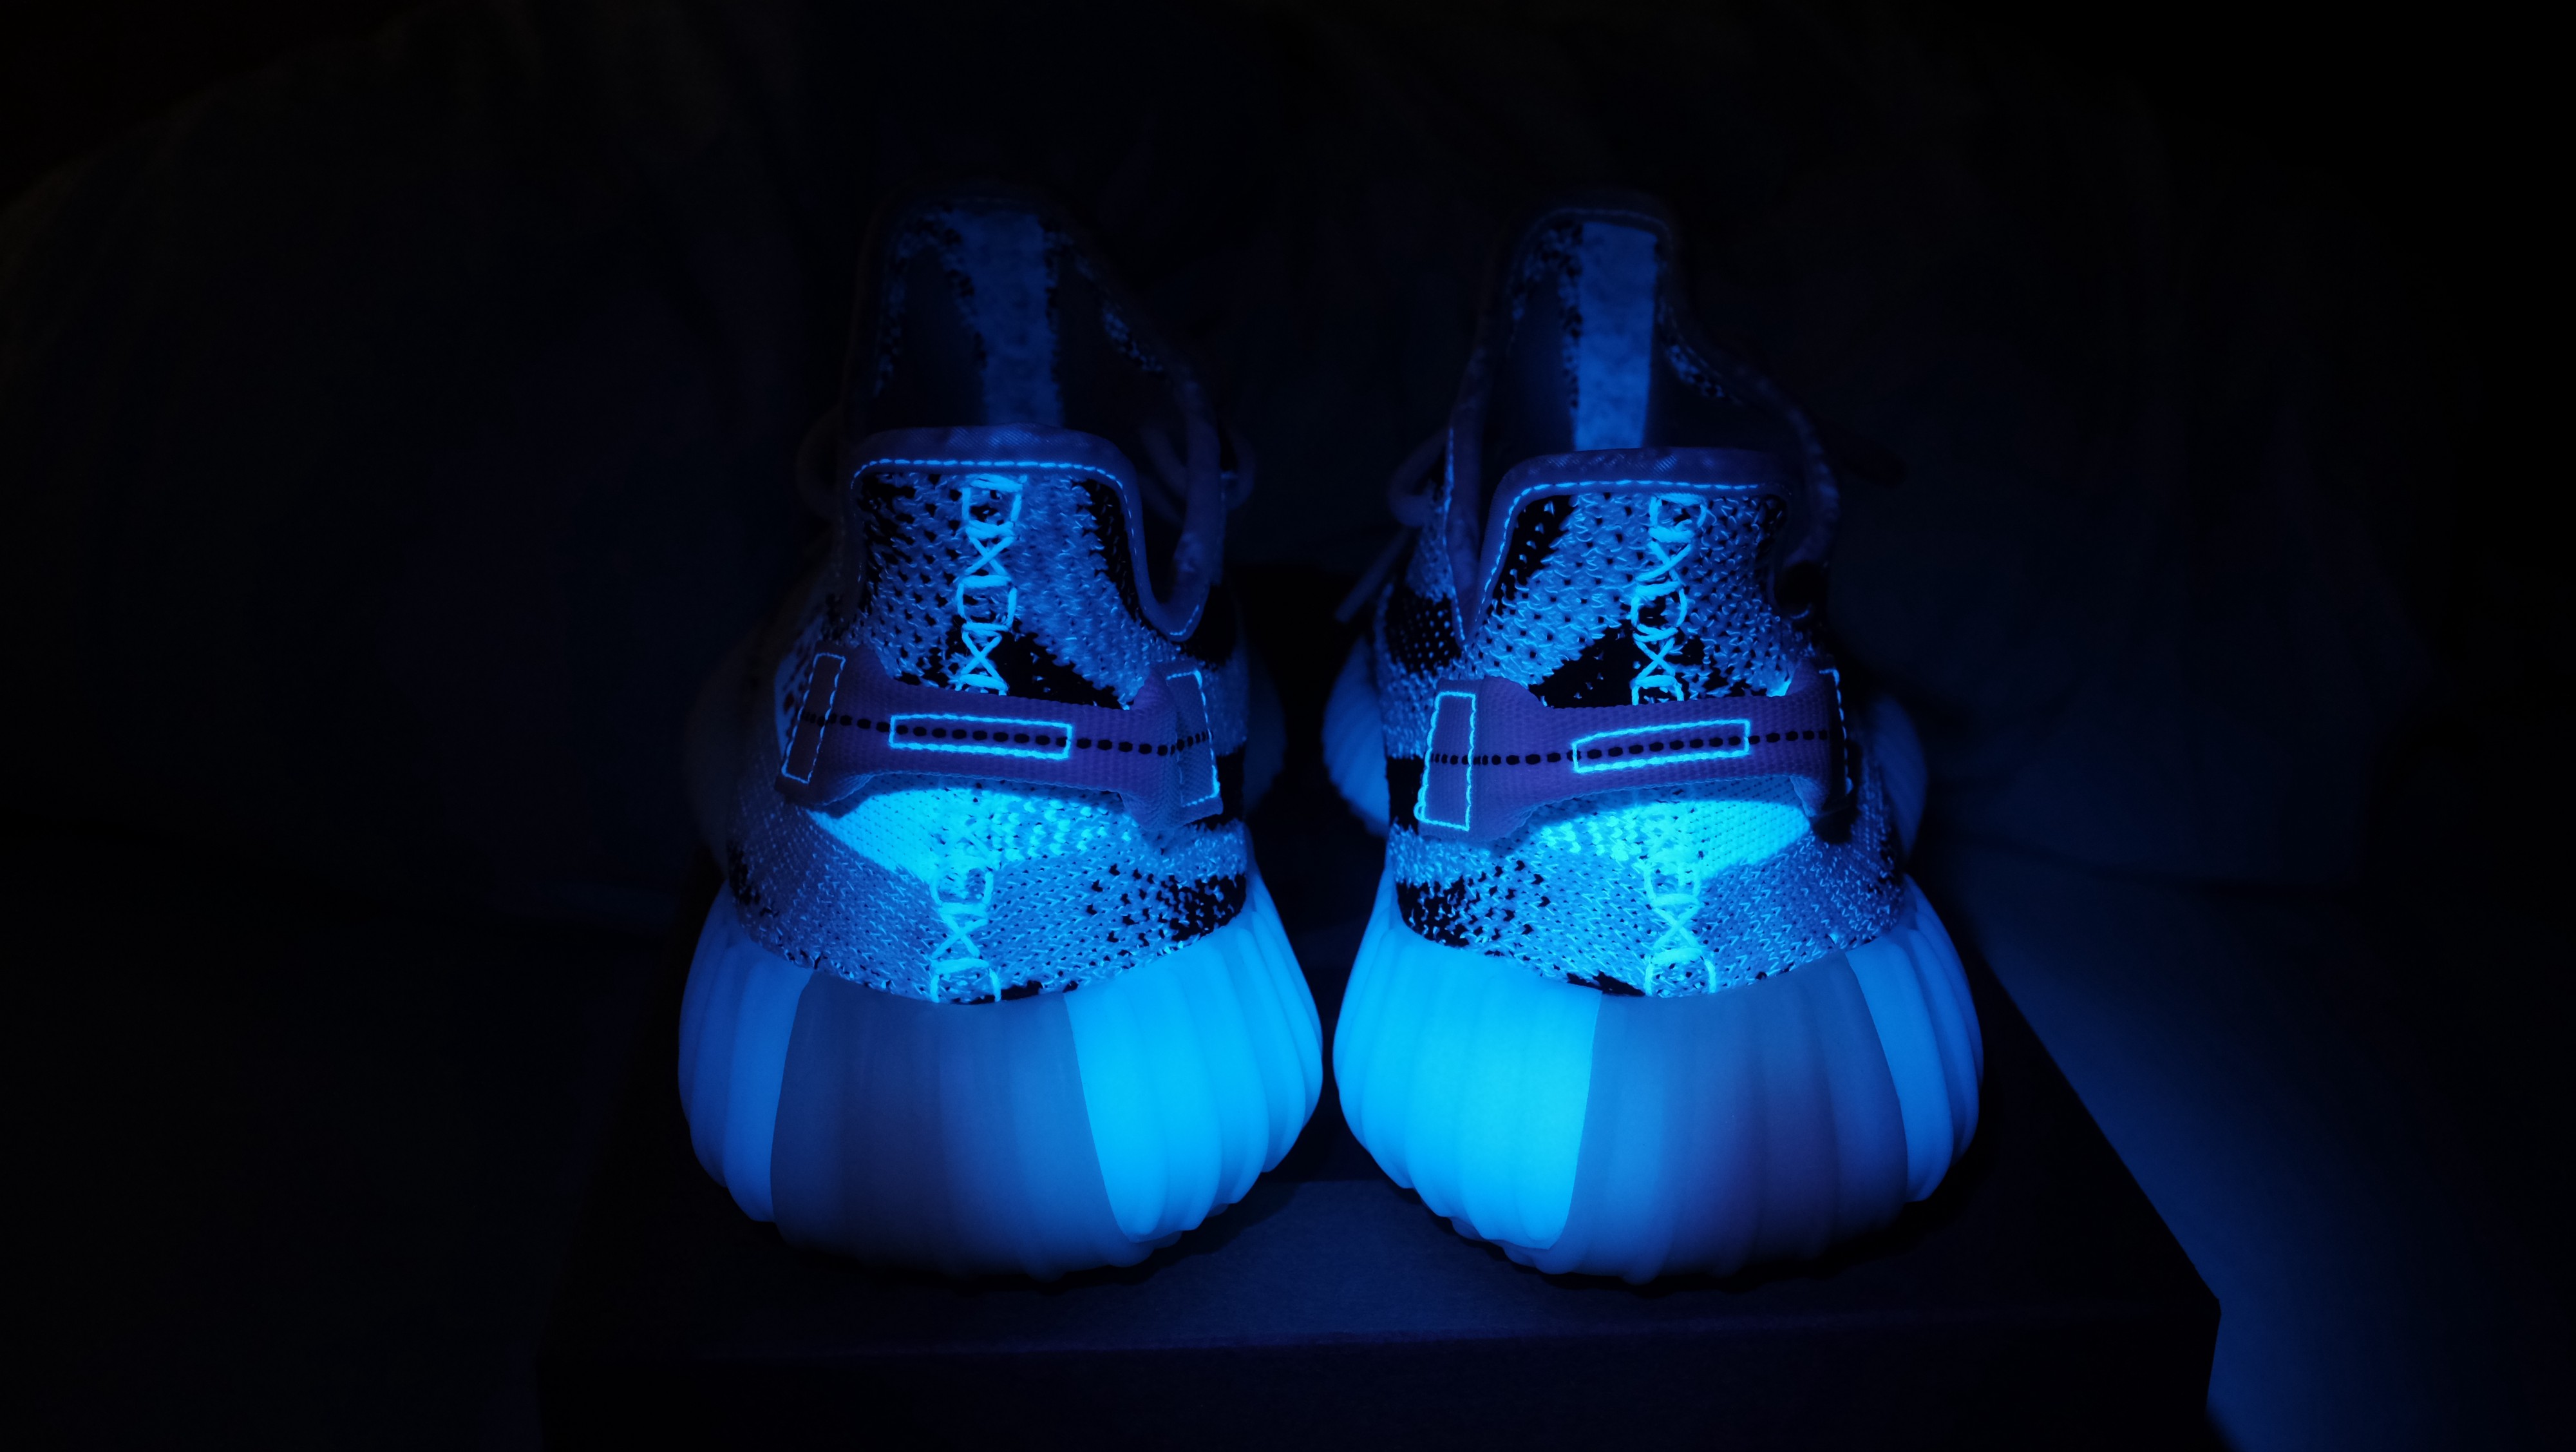
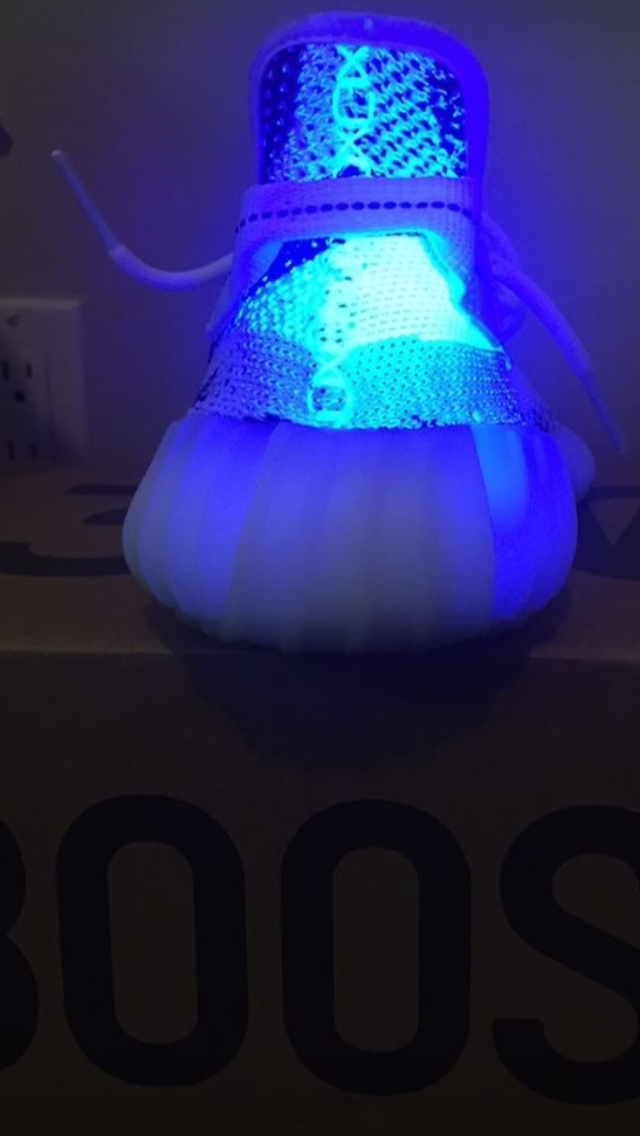
Zebra OG & Zebra Restock (specifically the ones with the production date of 3/17) pull tab and sock liner lights up
Zebra Restock with the production date of 2/17 does not have the sock liner and pull tab illuminating. (Photo cred: Aston Marcus)
 Toe box, reps won?t light up between all the small details like retails.
Zebra OG, 3 stripes & cloth on footbed do not light up. Boost and stitching does light up.
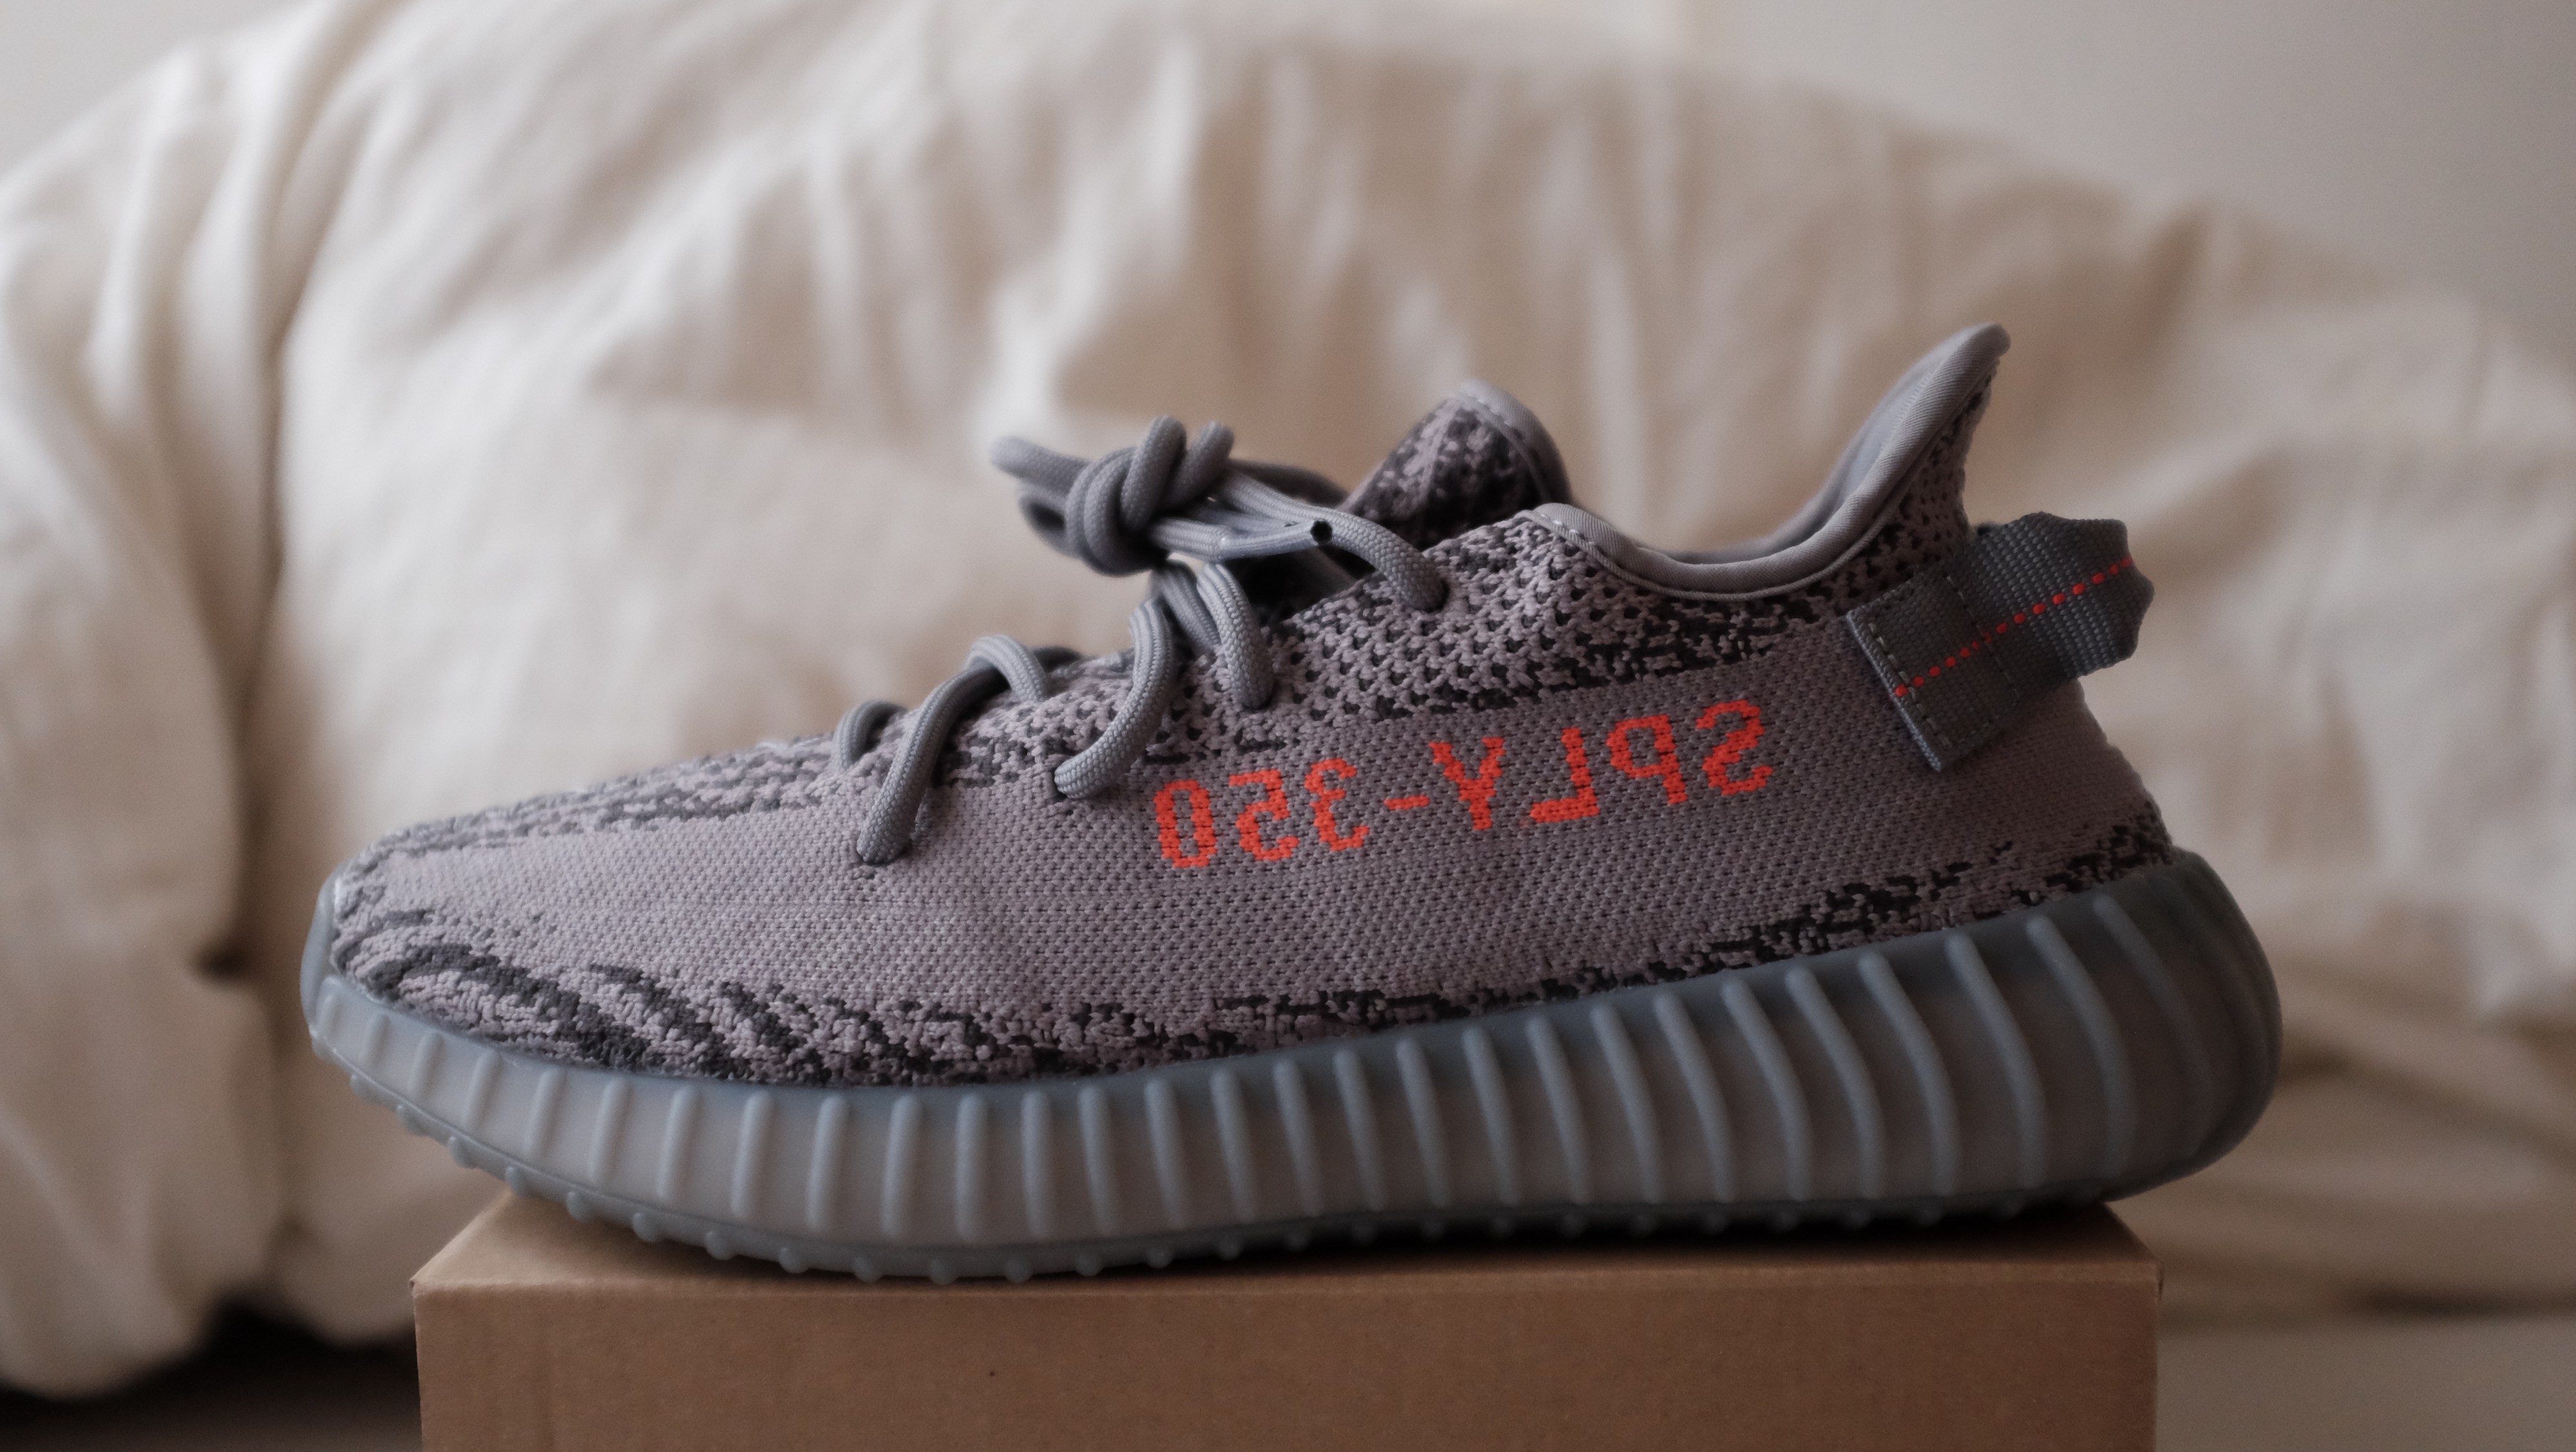
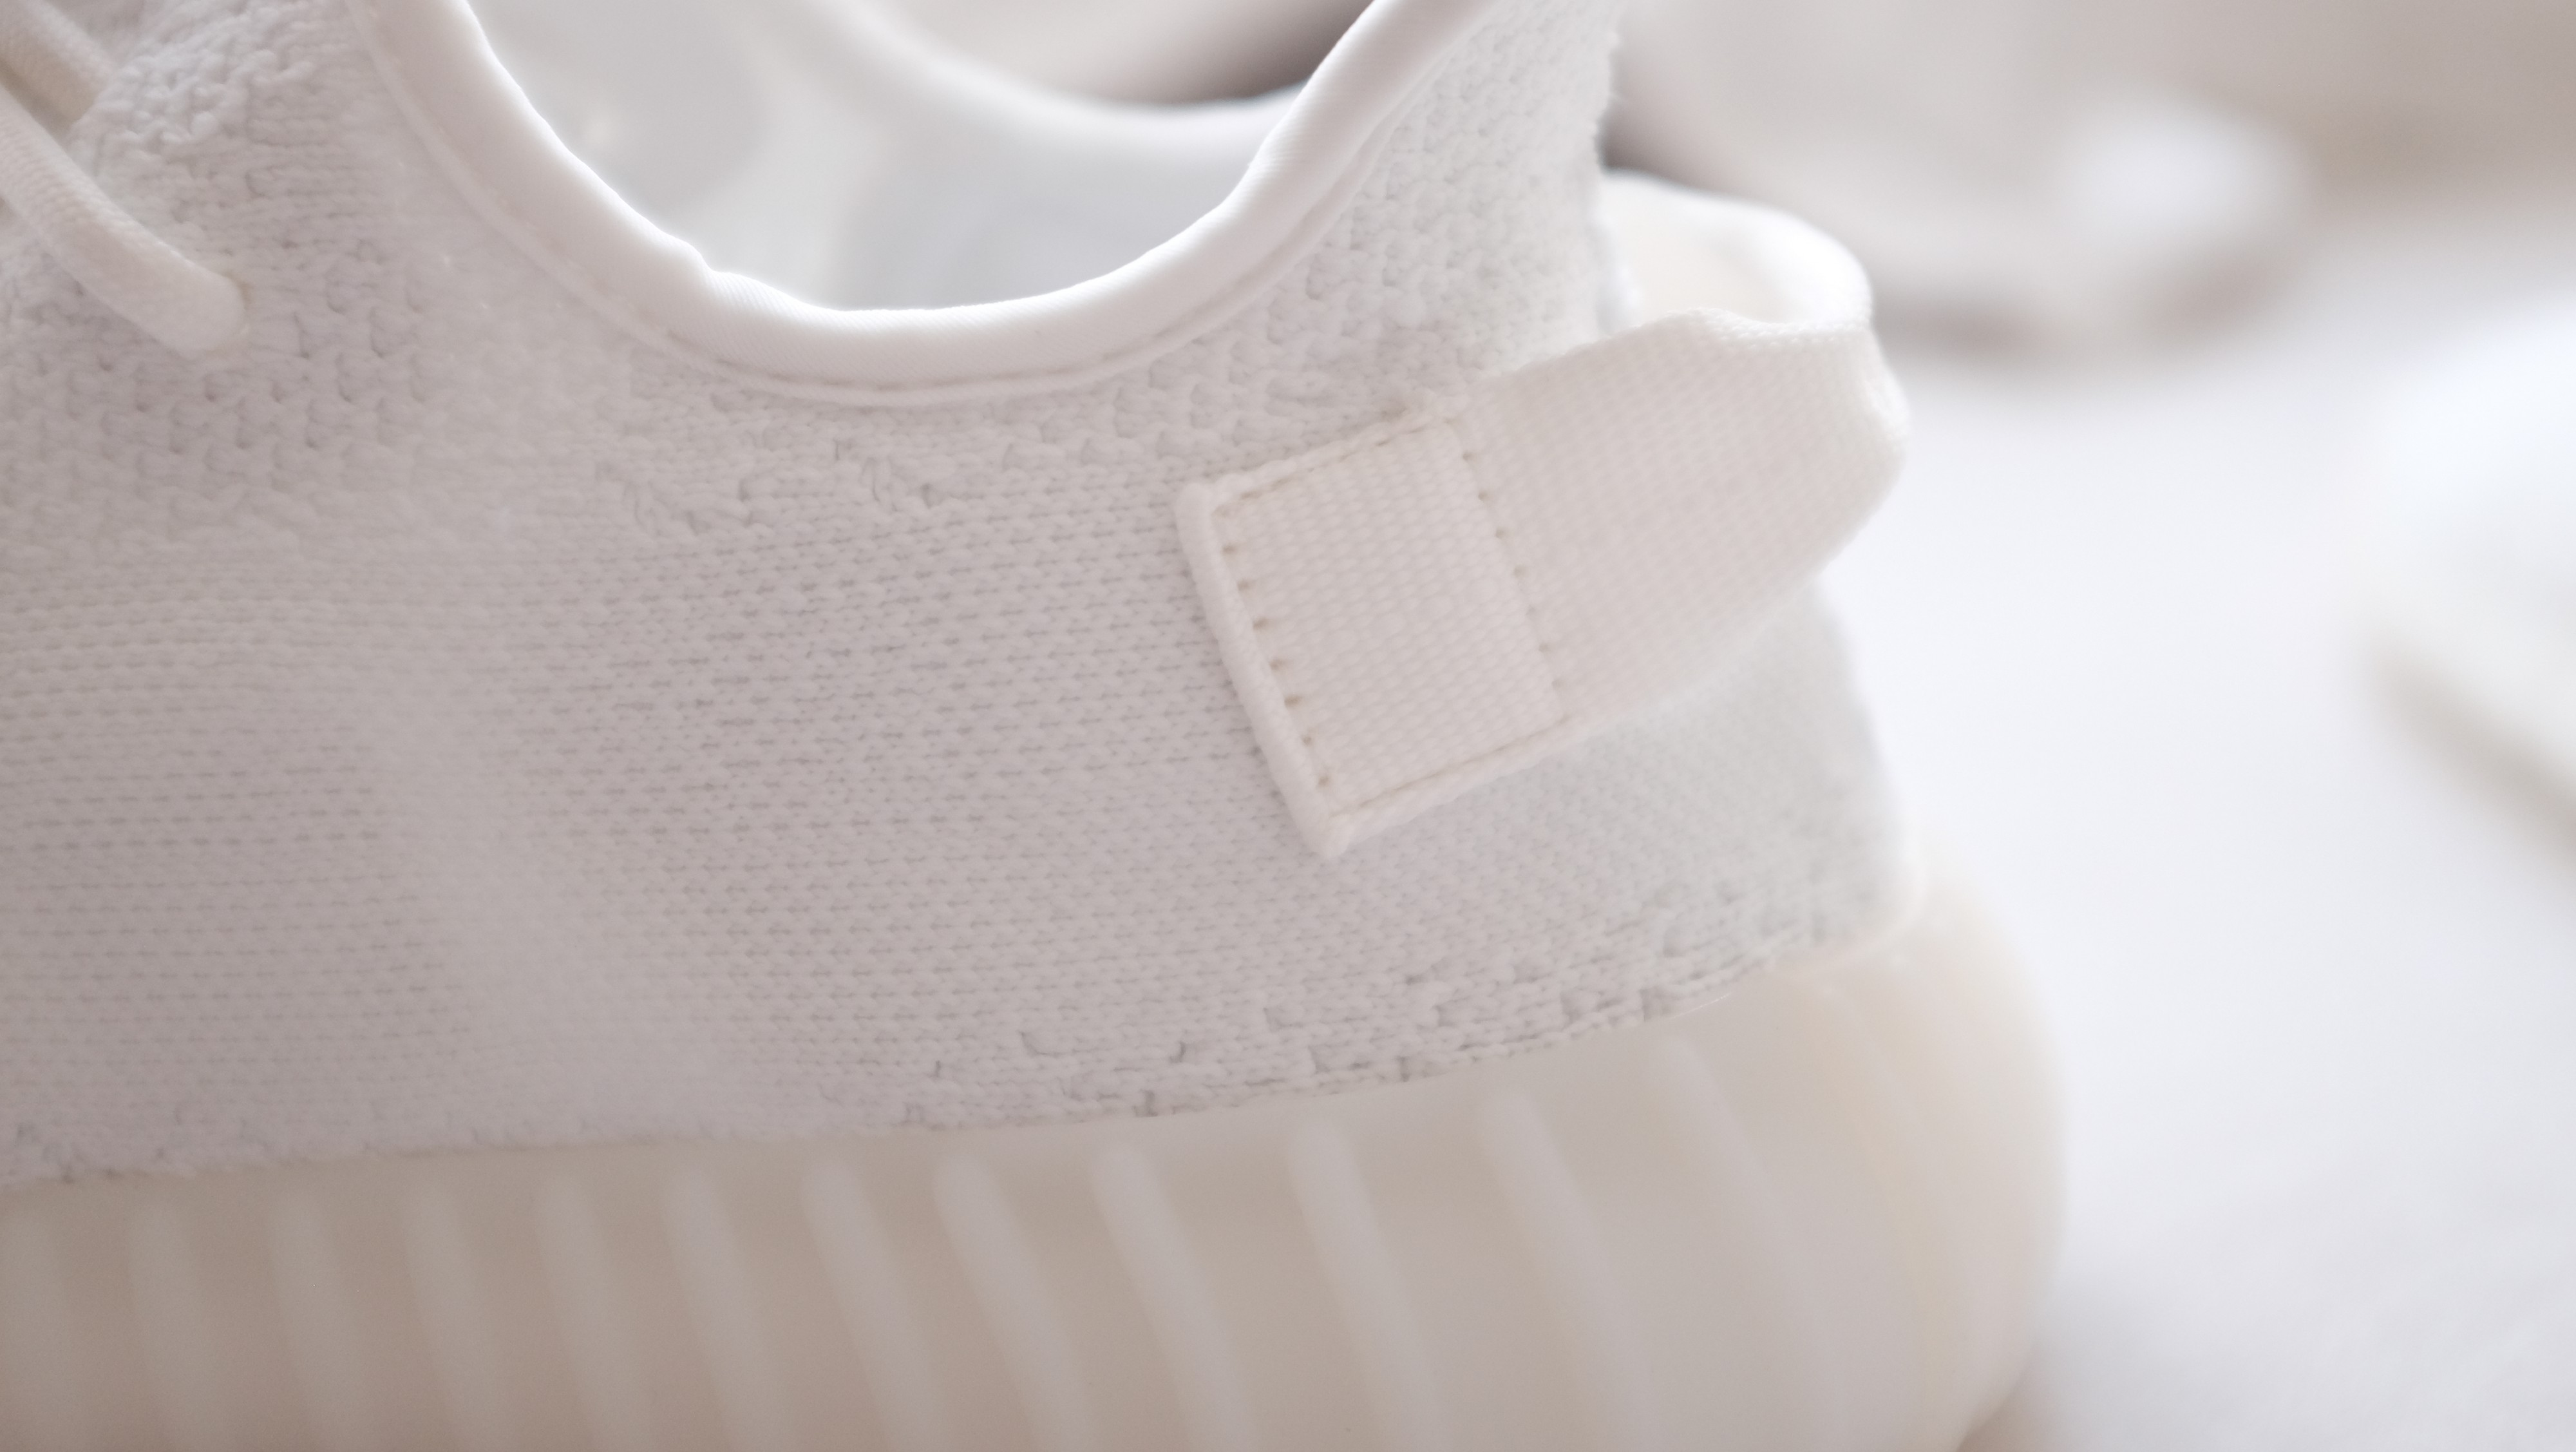
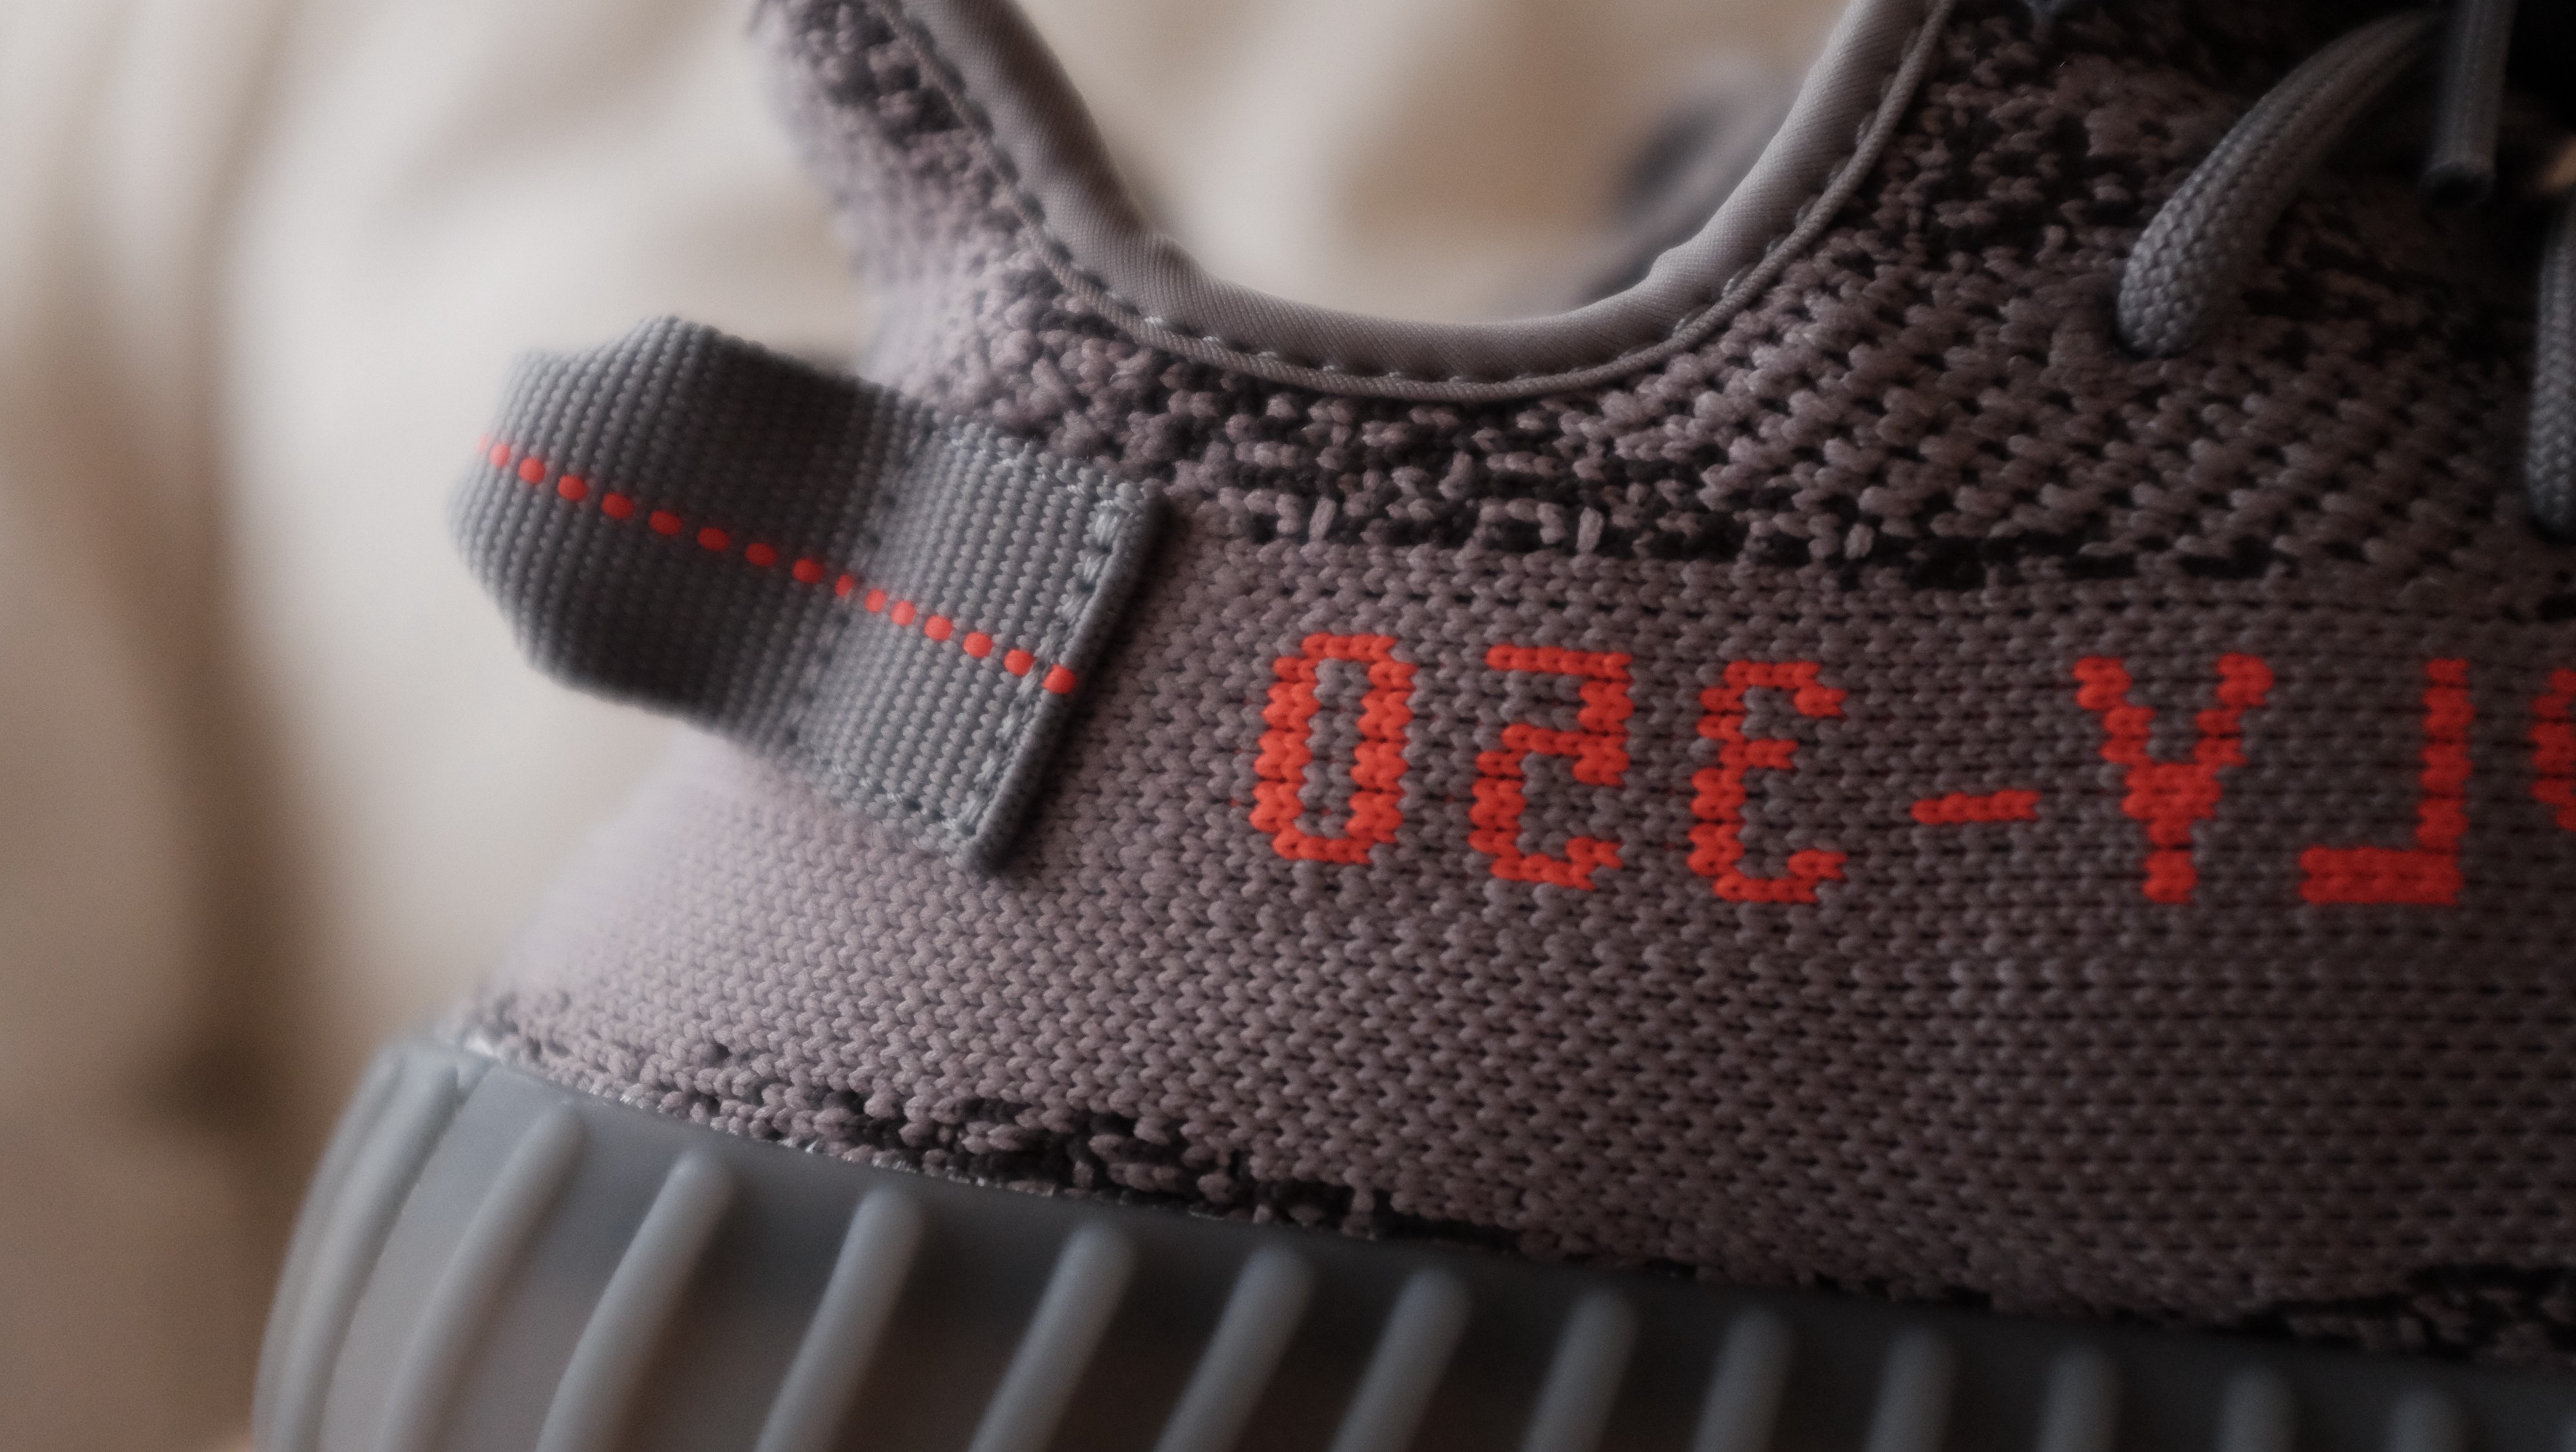
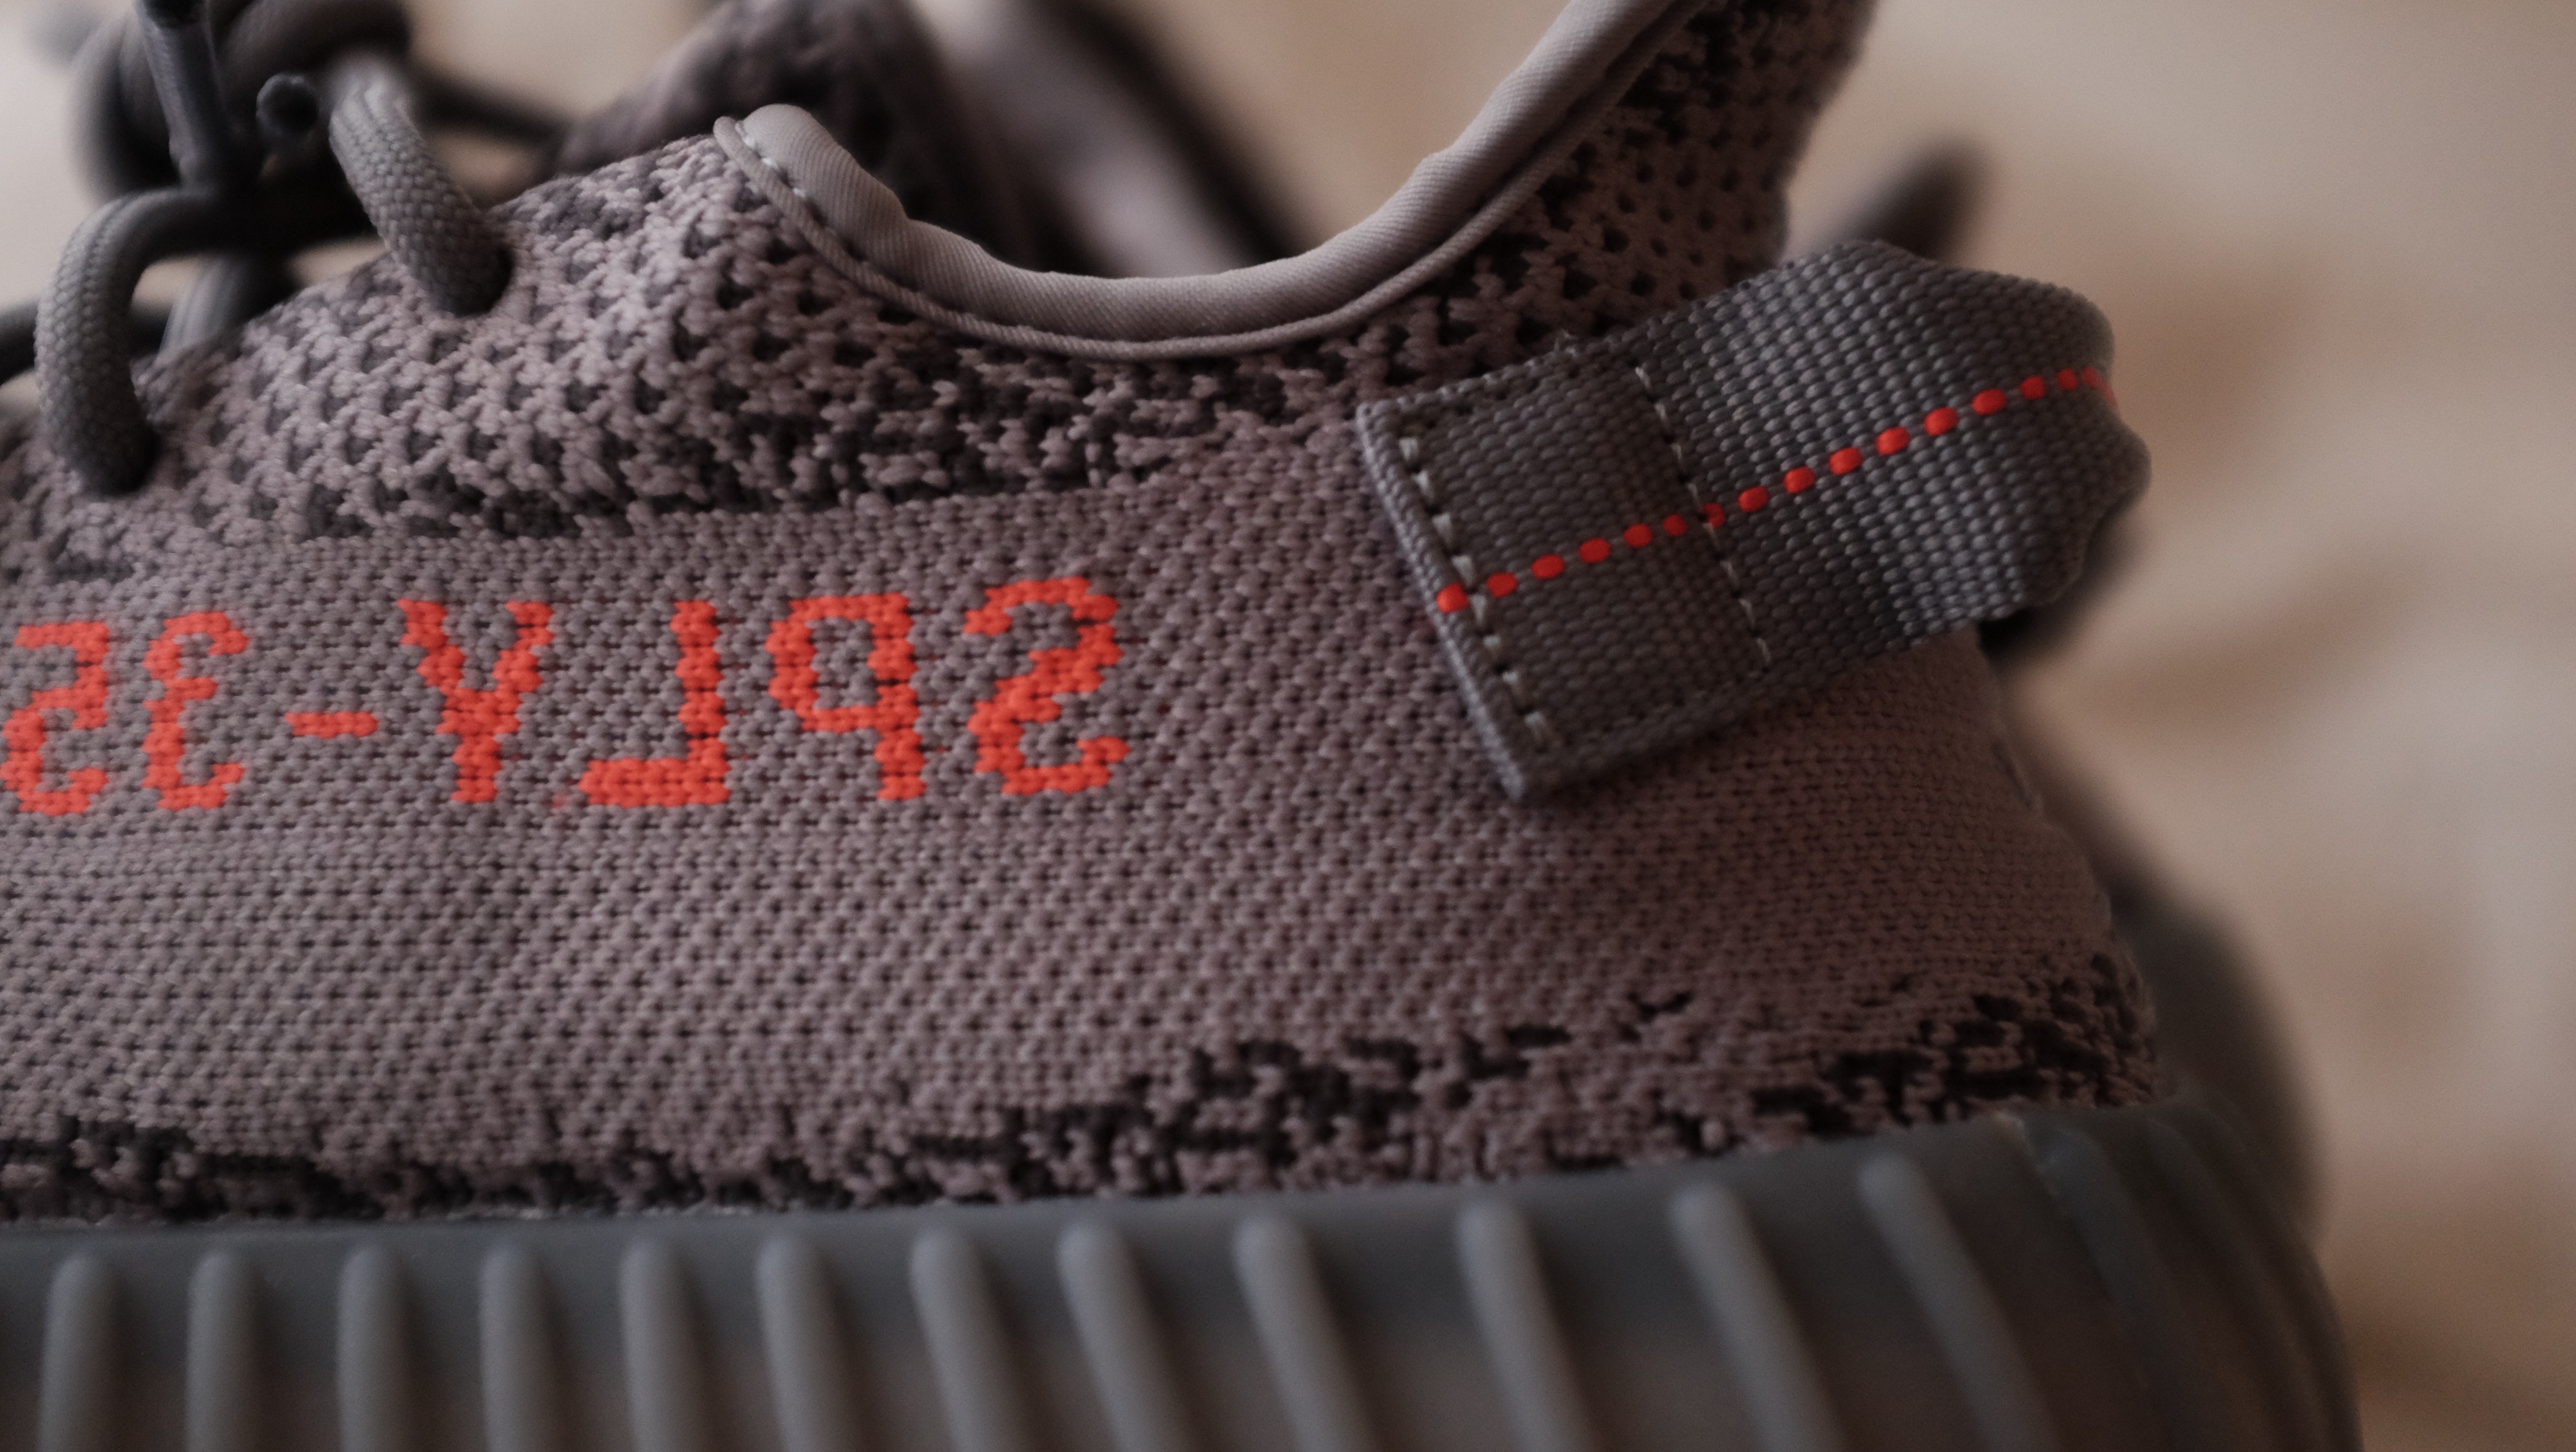
BELUGA indentation on SPLY 350
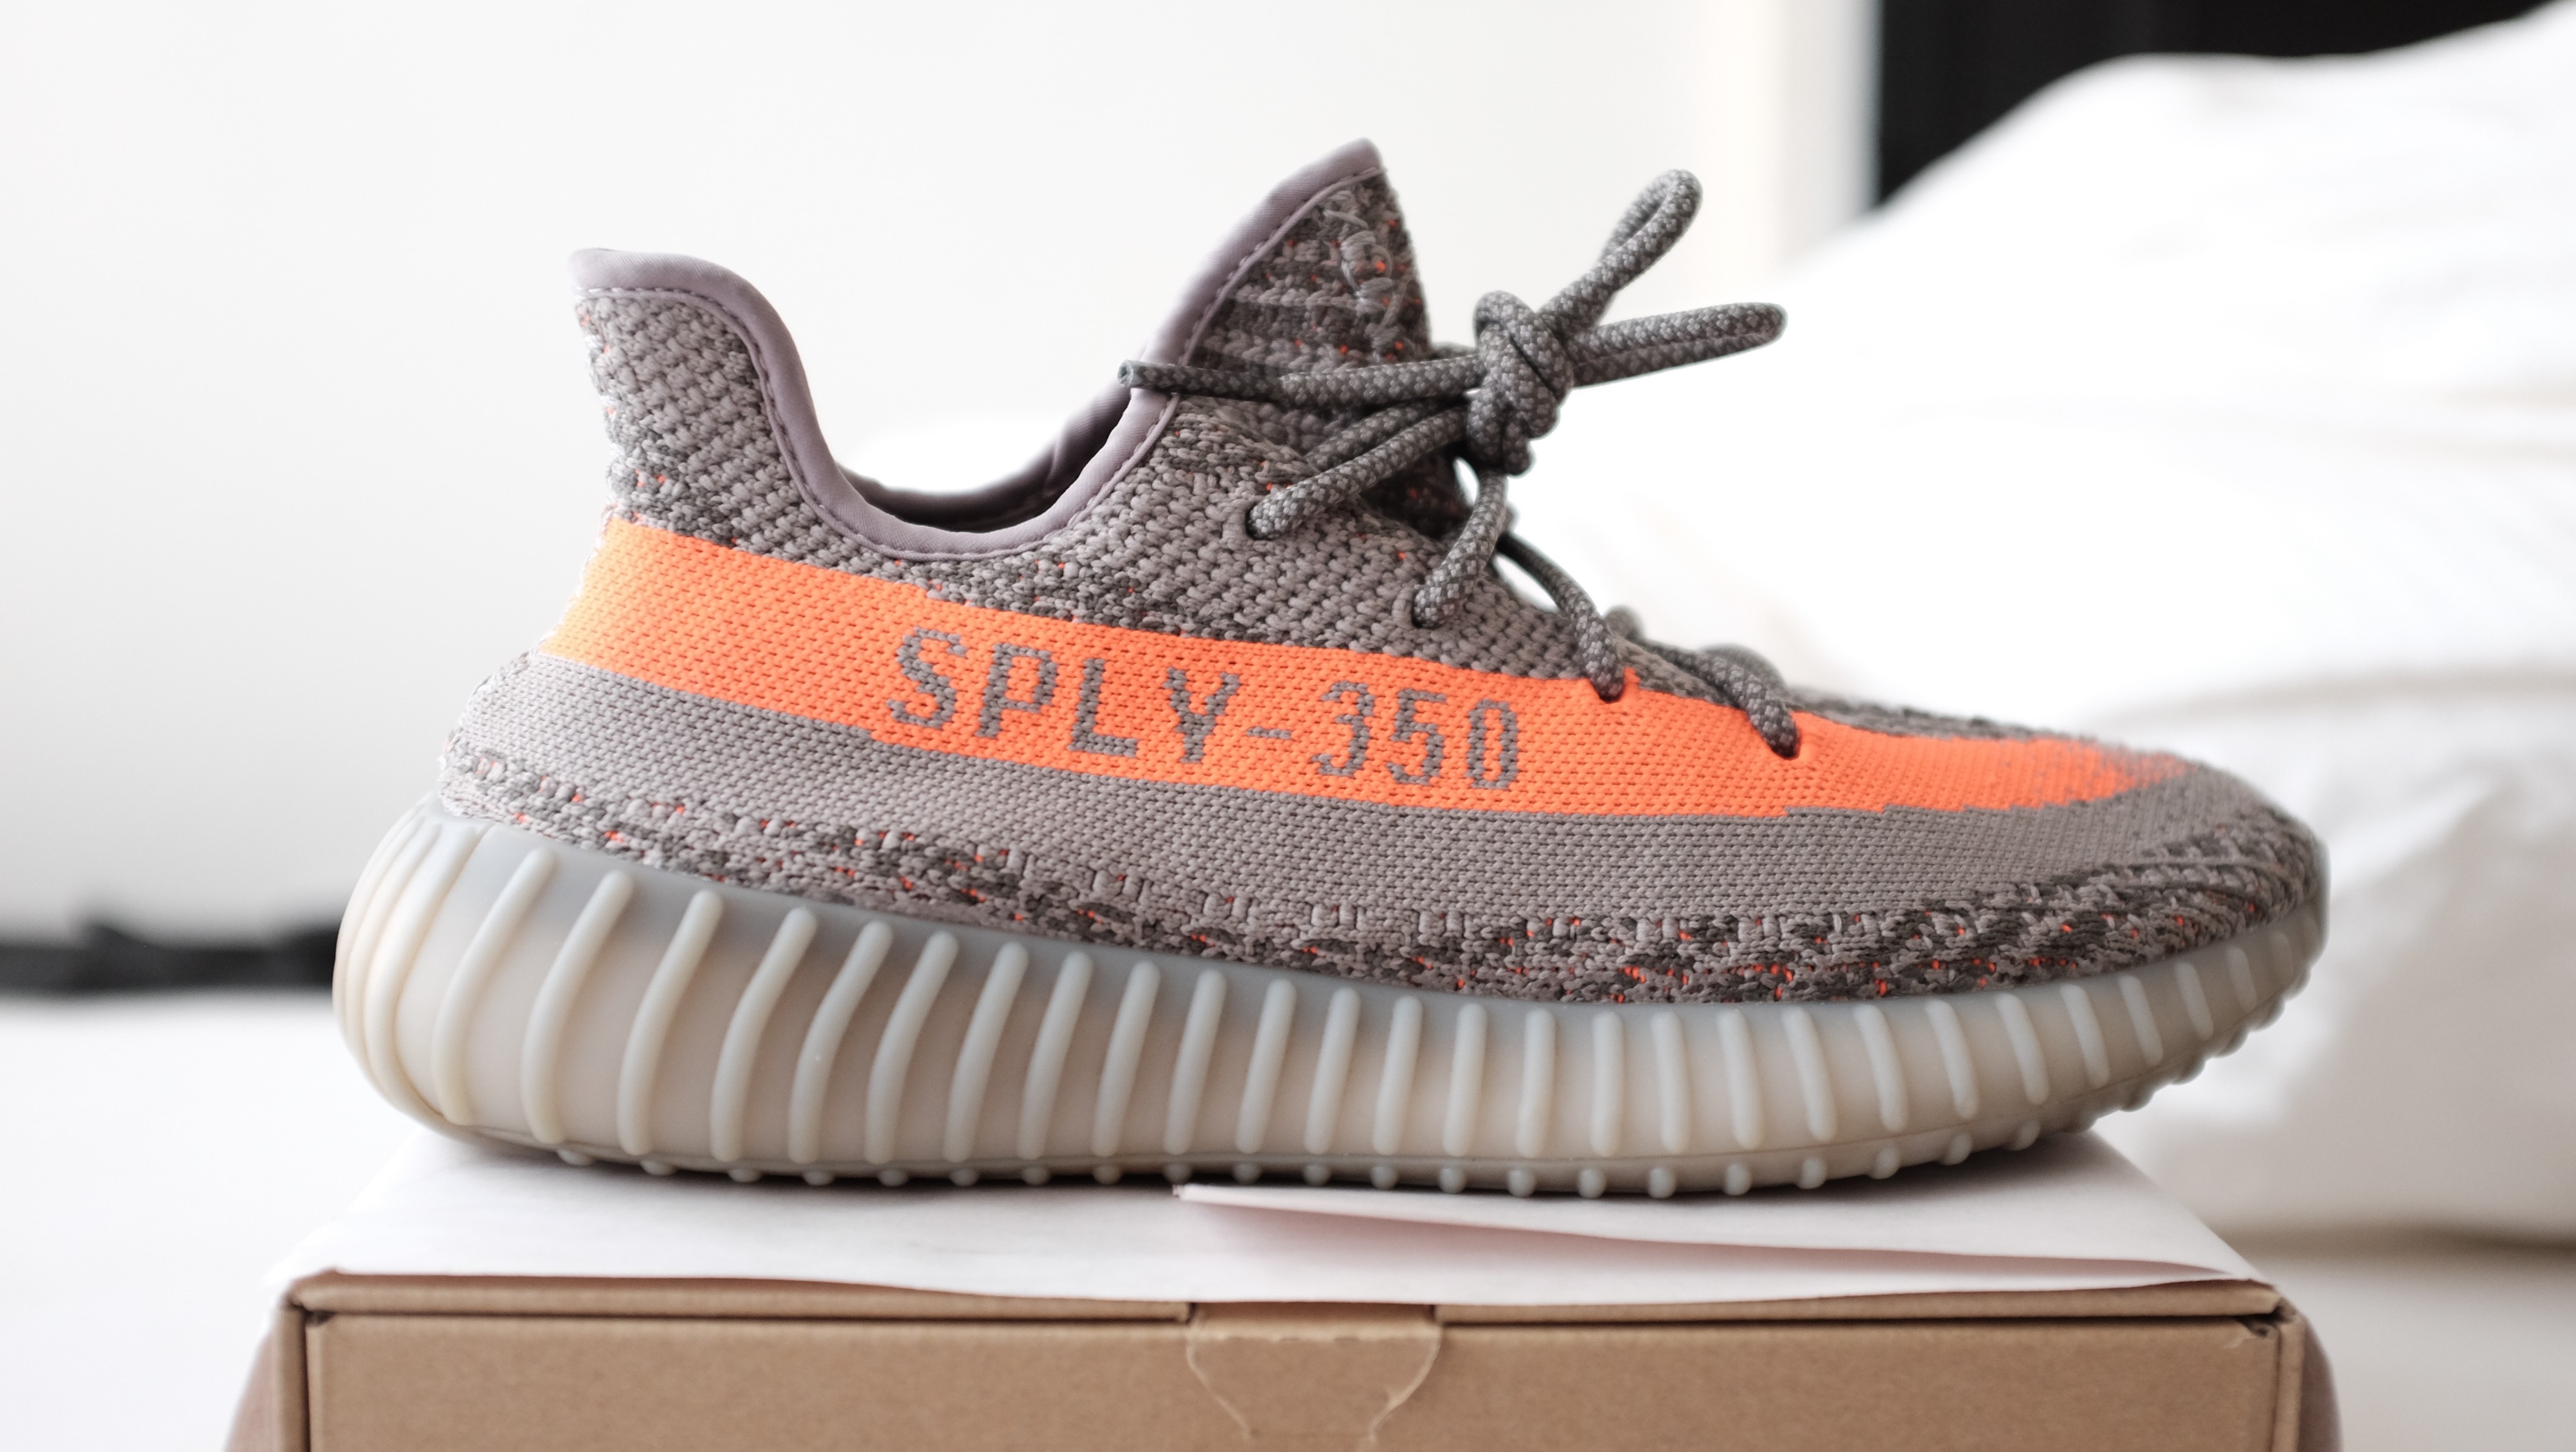
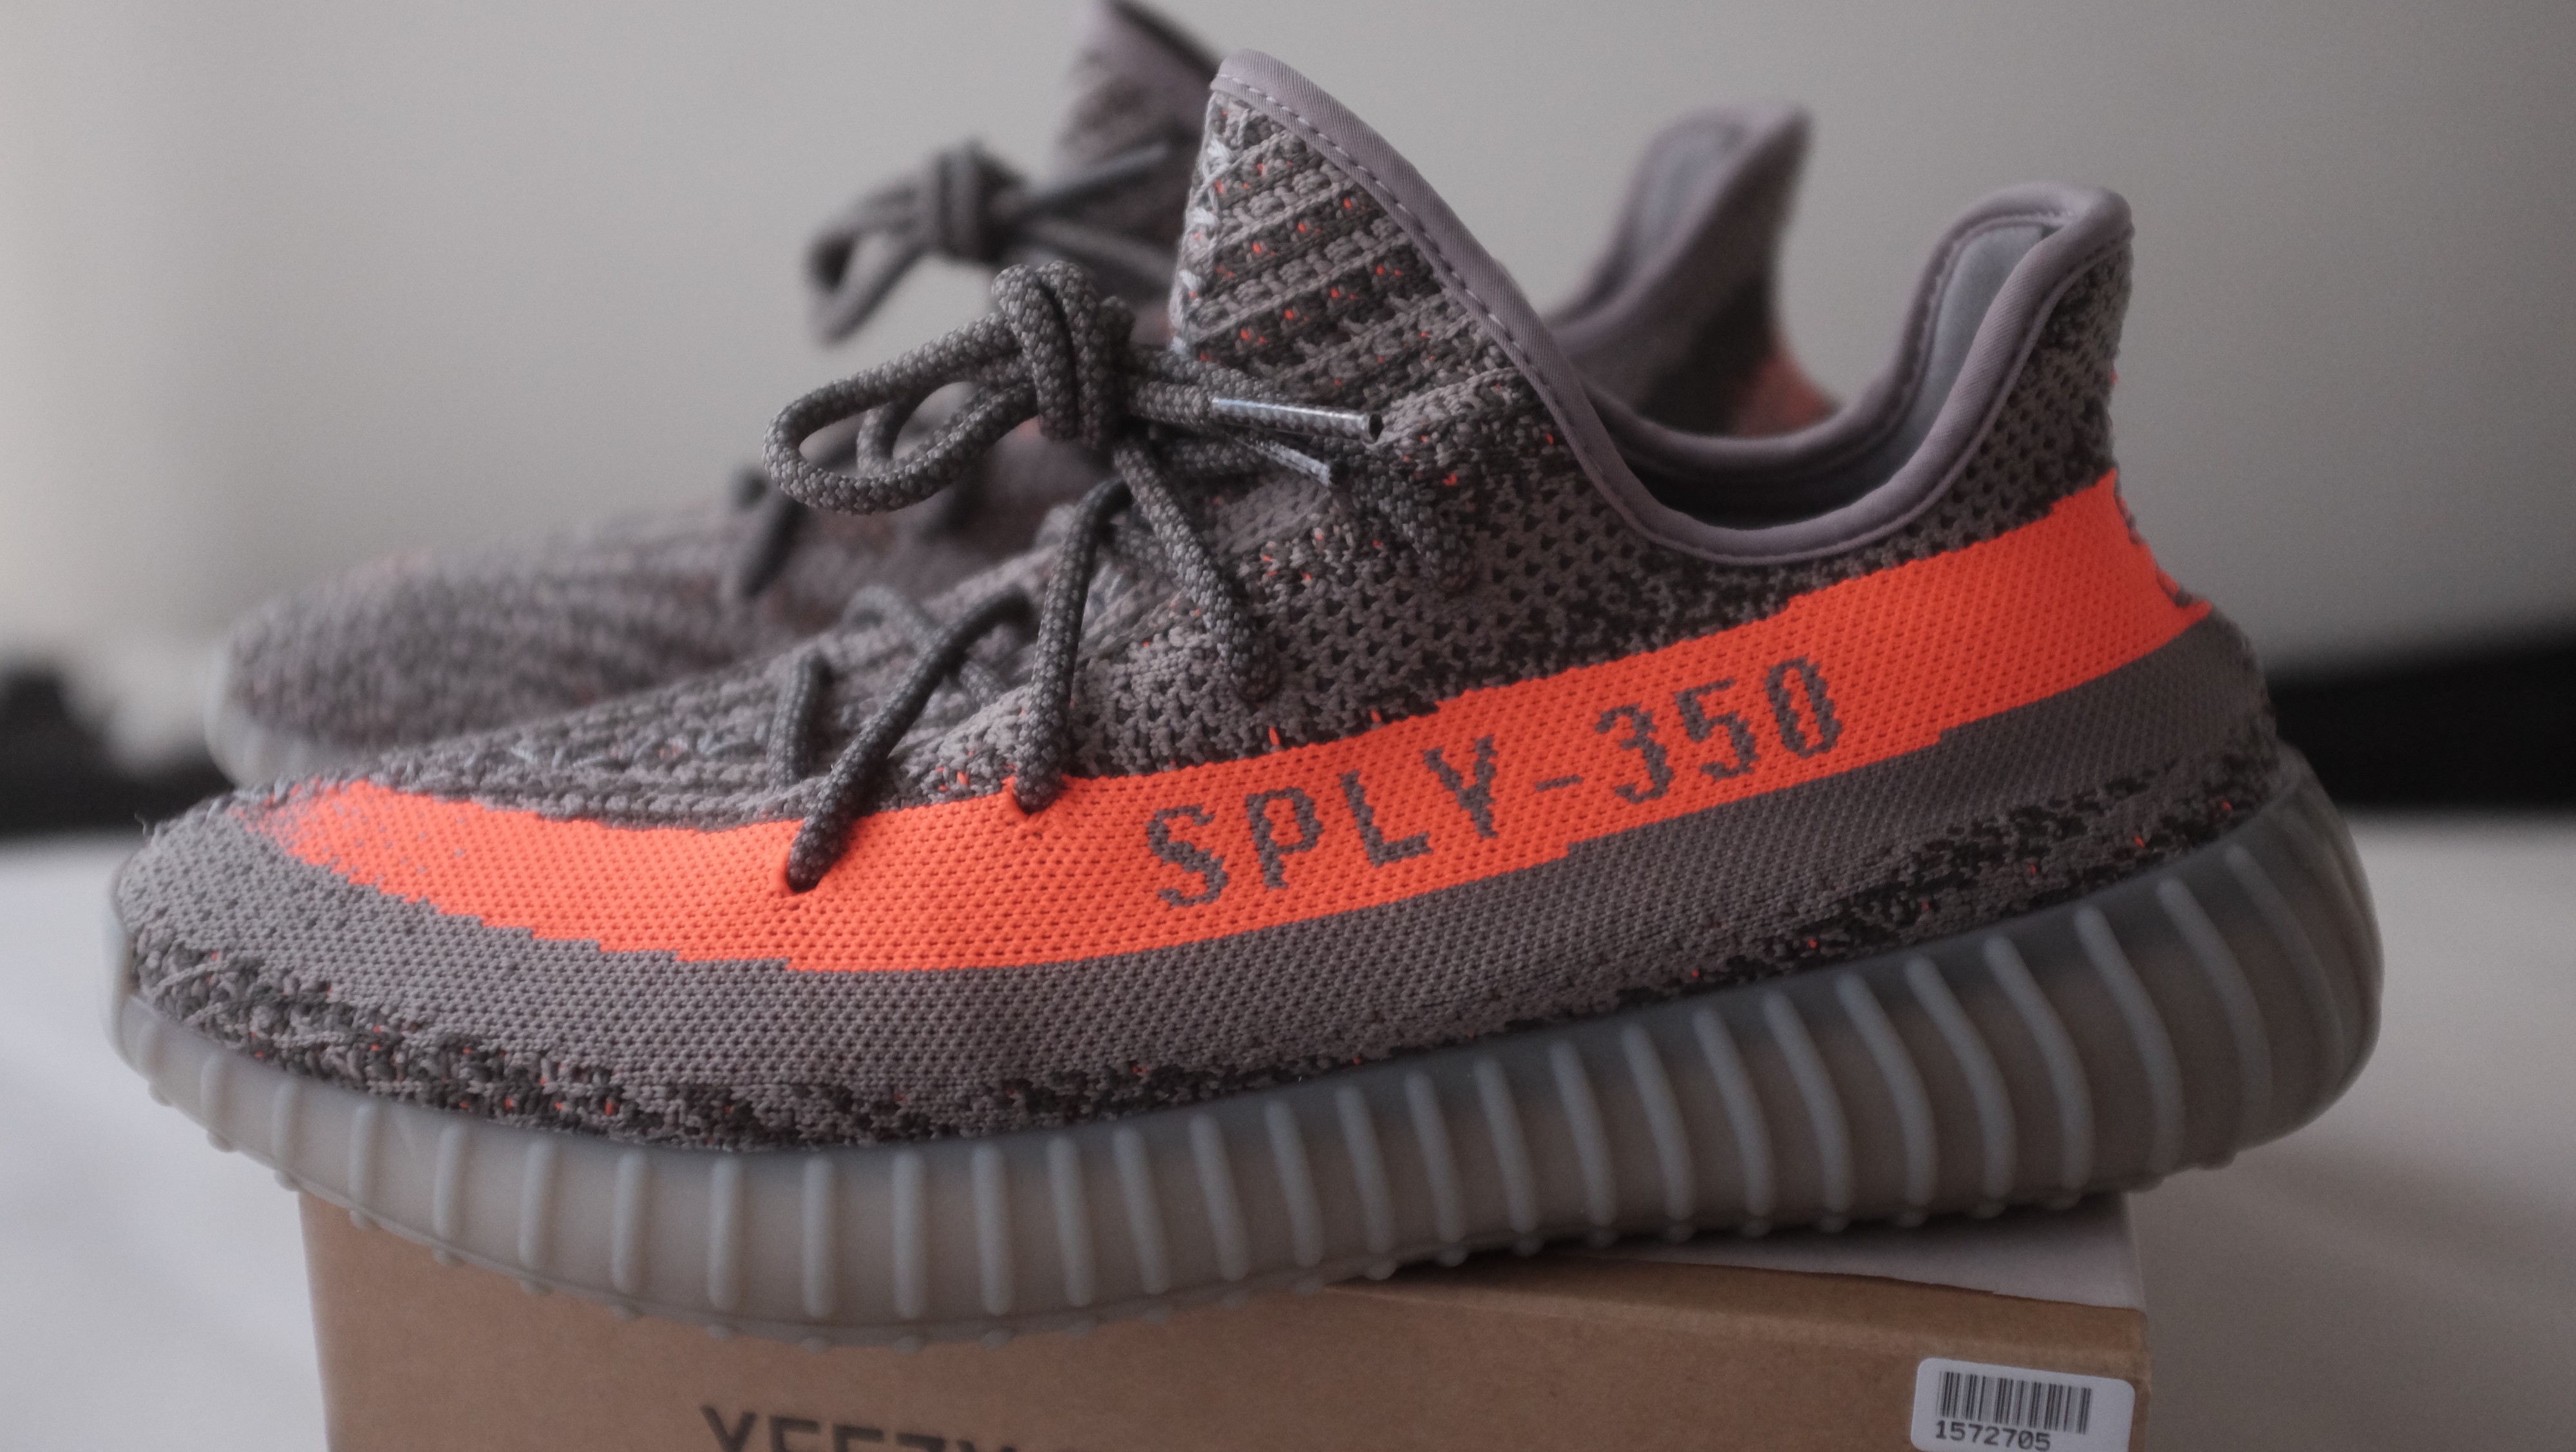 Left Beluga sz 10, Right Beluga sz 9 // Note the indentation after the SPLY-350. On Beluga sizes 9.5 and below the indentation is immediately after the SPLY-350. On Beluga sizes 10 and up the indentation is further back.
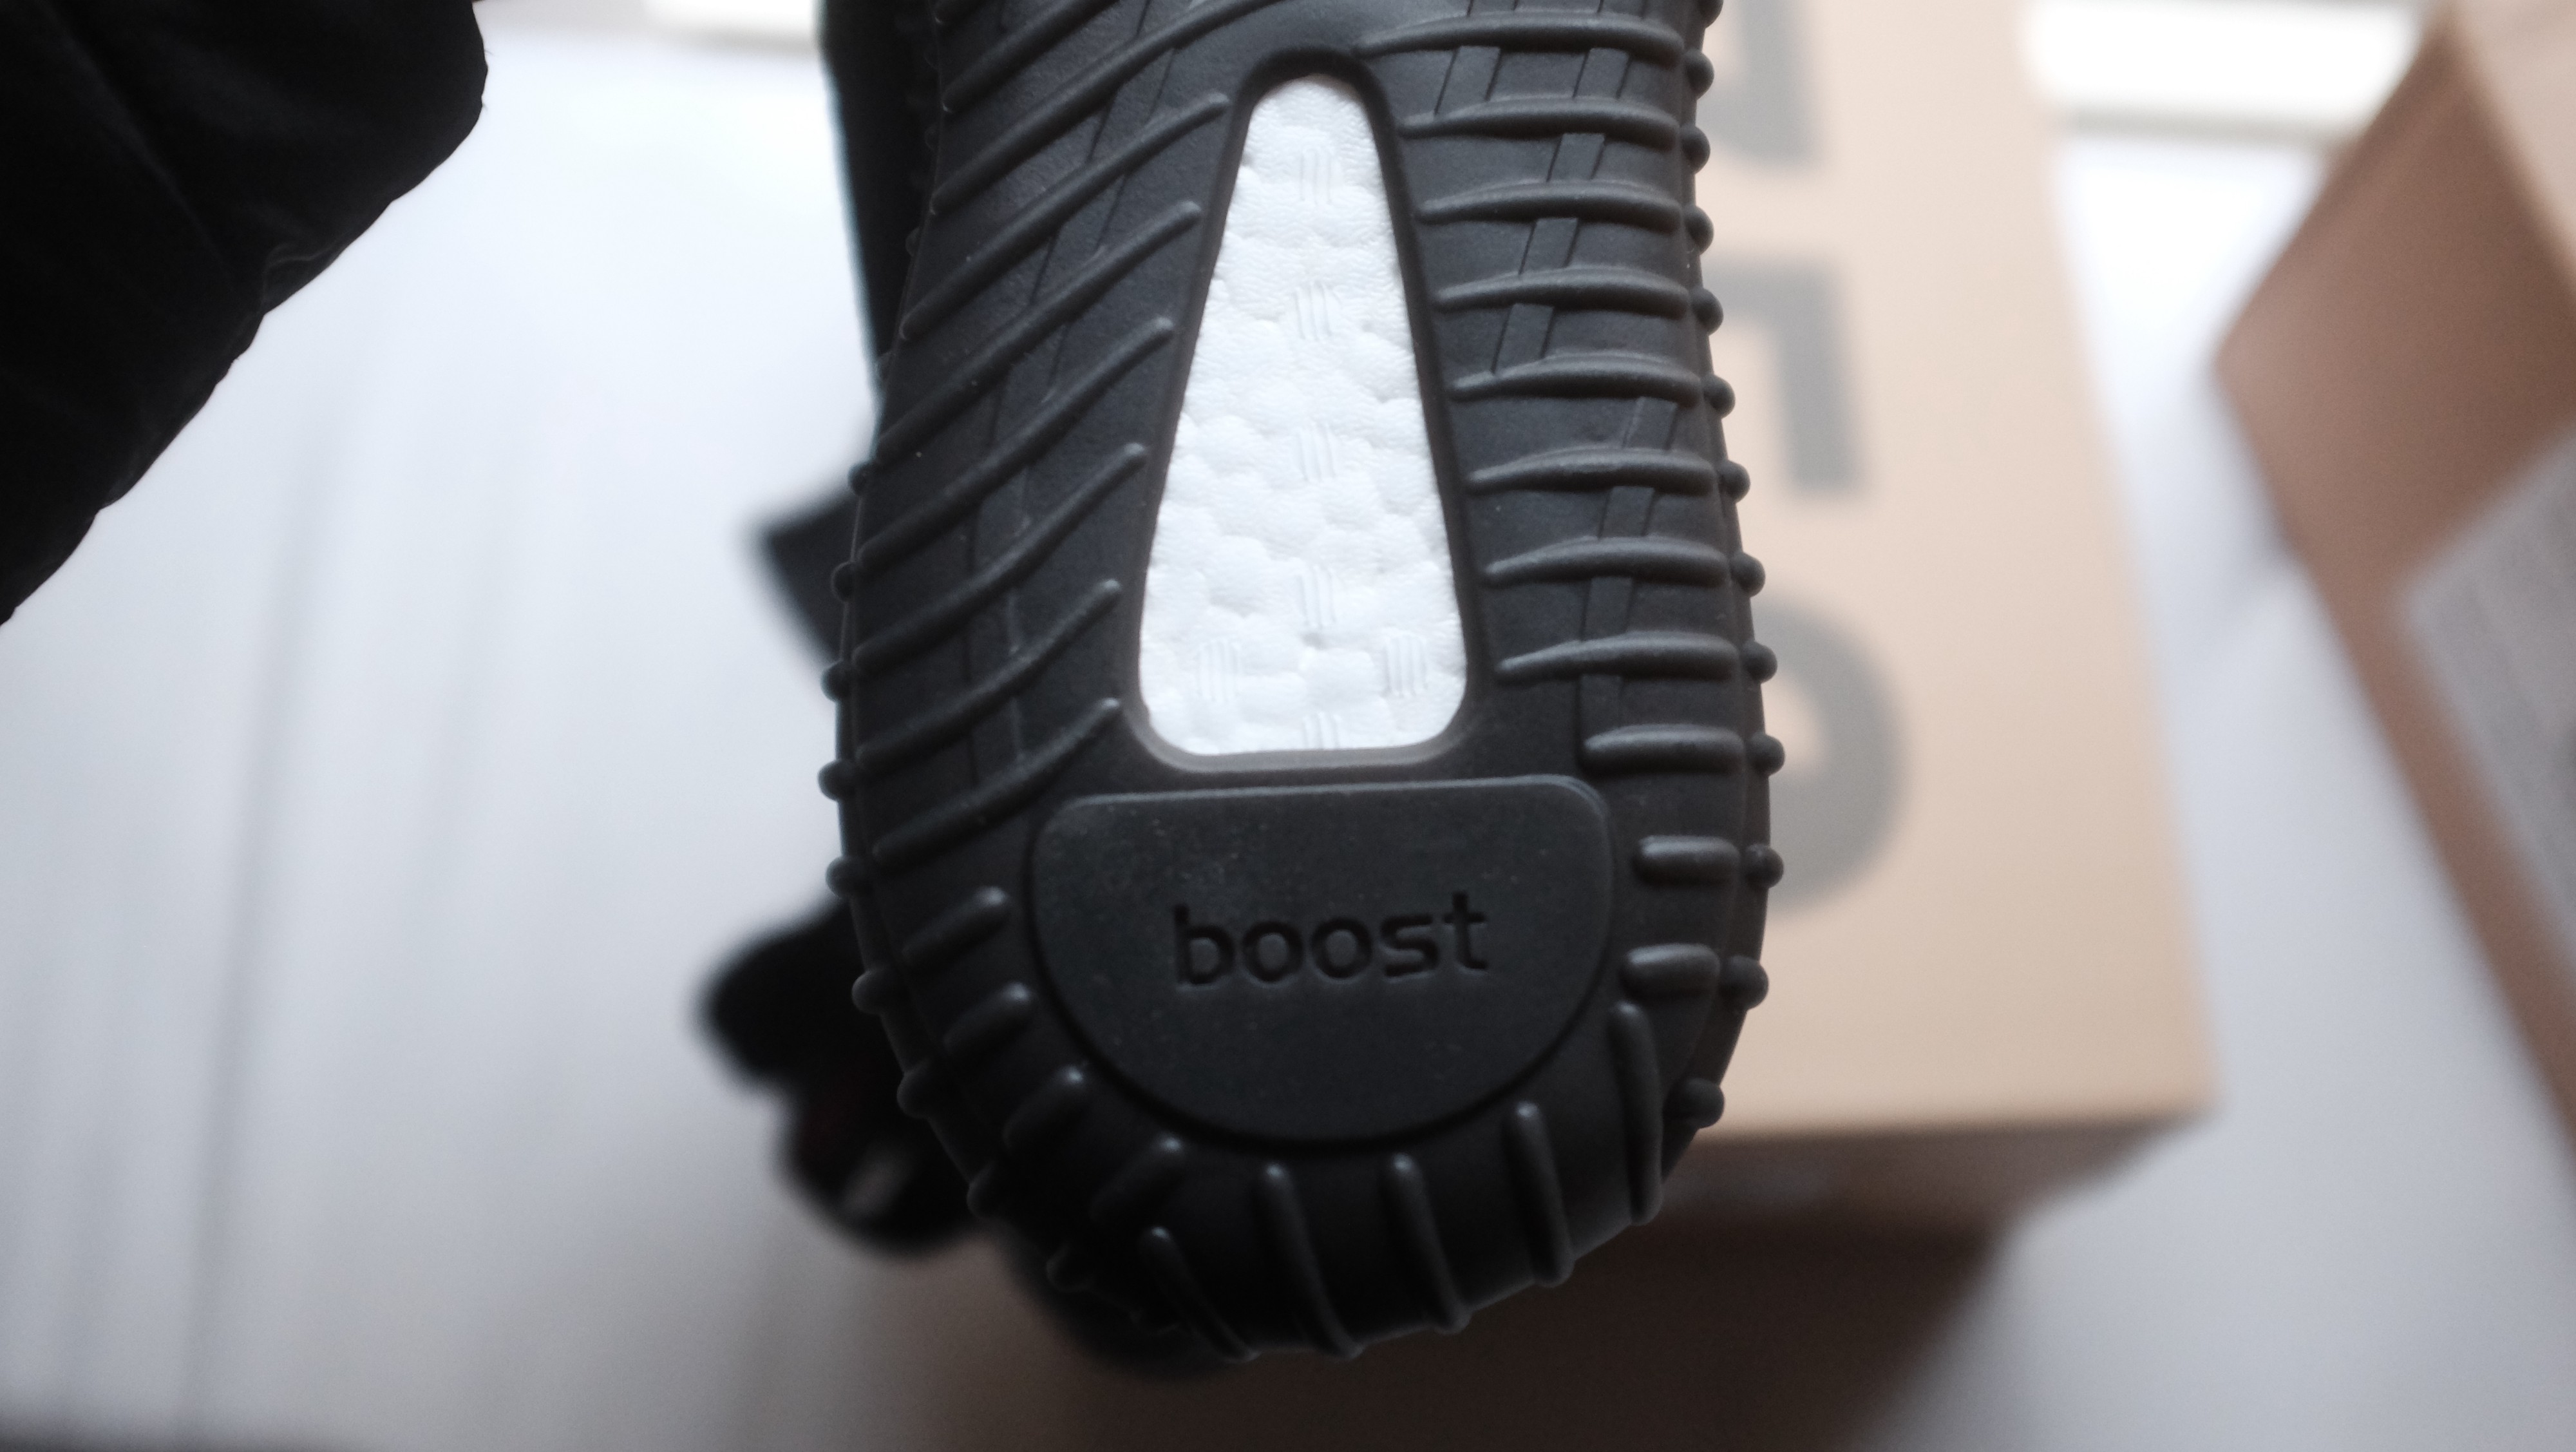
BOOST
It?s why we love Yeezys particularly the V2?s ? and why I can?t get enough of them. V2 Boost is different from V1. In fact, I would say the V2 silhouette in general is far more comfortable in comparison to V1. To the touch it should feel very smooth and soft, many describe the sensation like marshmallows. On your feet, you can understand why these are so sought after, hands down one of the most, if not the most comfortable shoes in our era.
You?ll notice the ?three stripe dot pattern? is the same on all V2.
 Left Beluga 2.0 // Right Zebra Restock sz 9
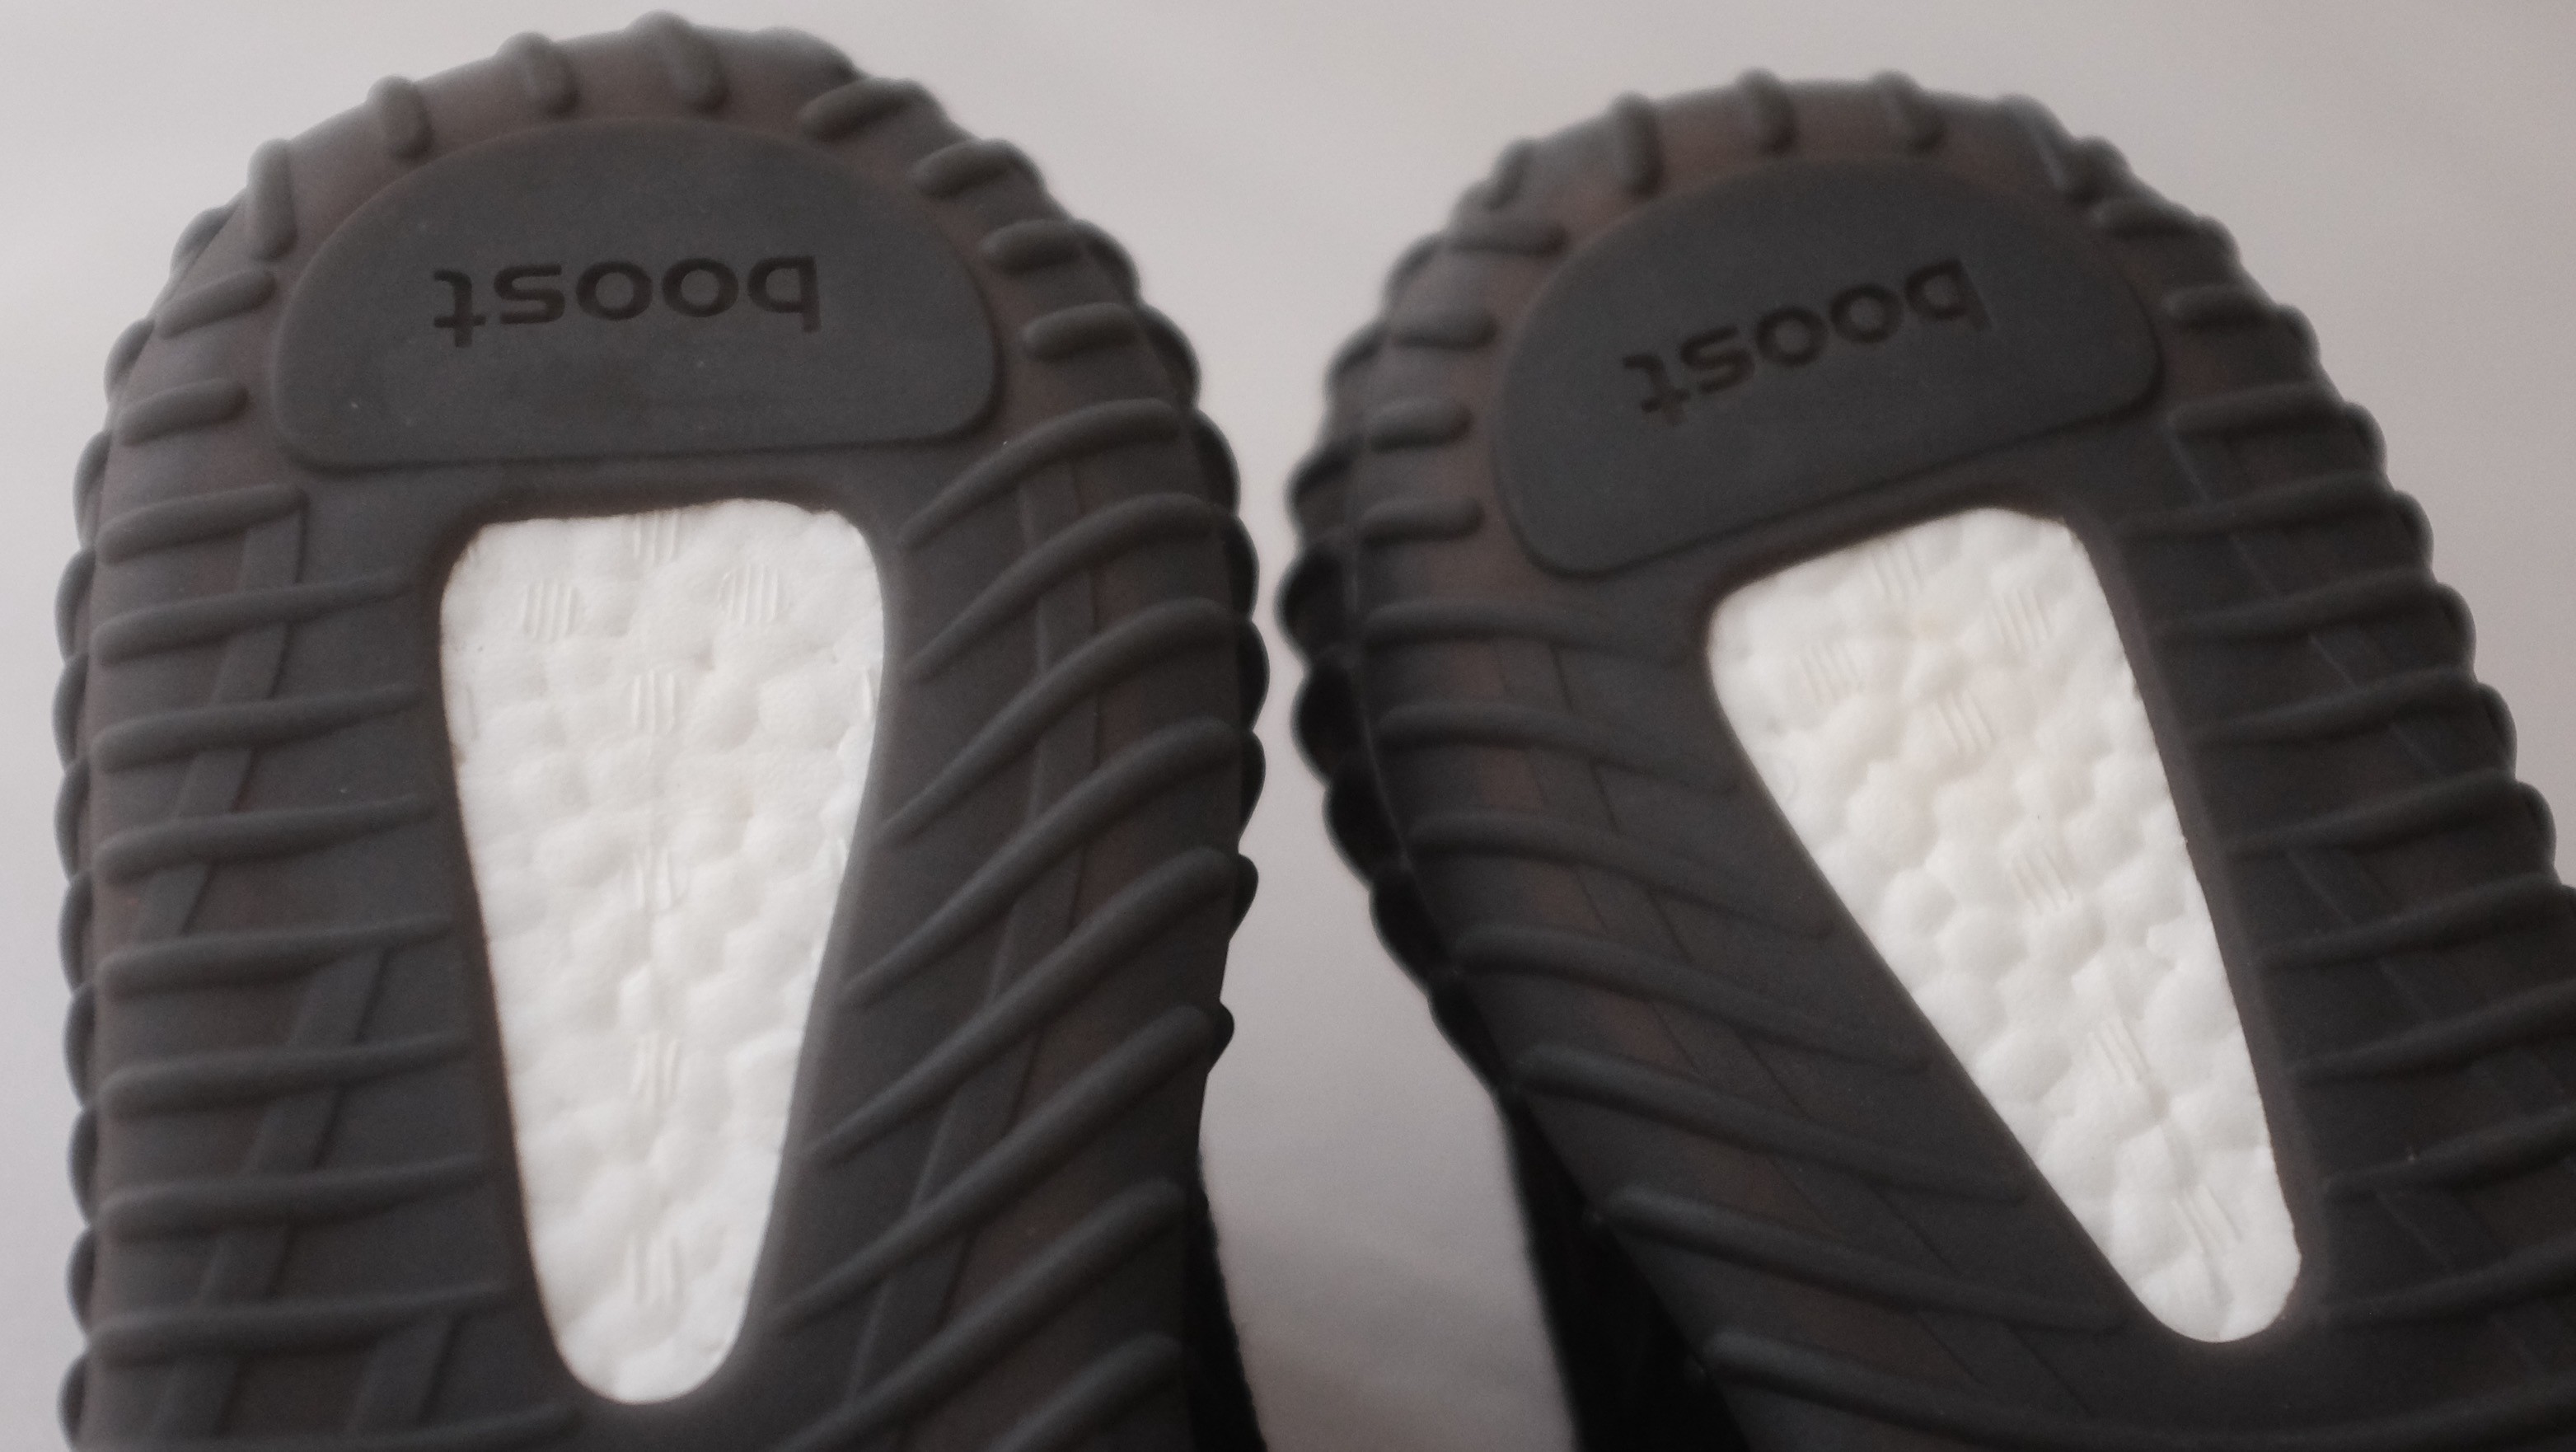
 Left Oreo sz 10, Right Copper sz 10
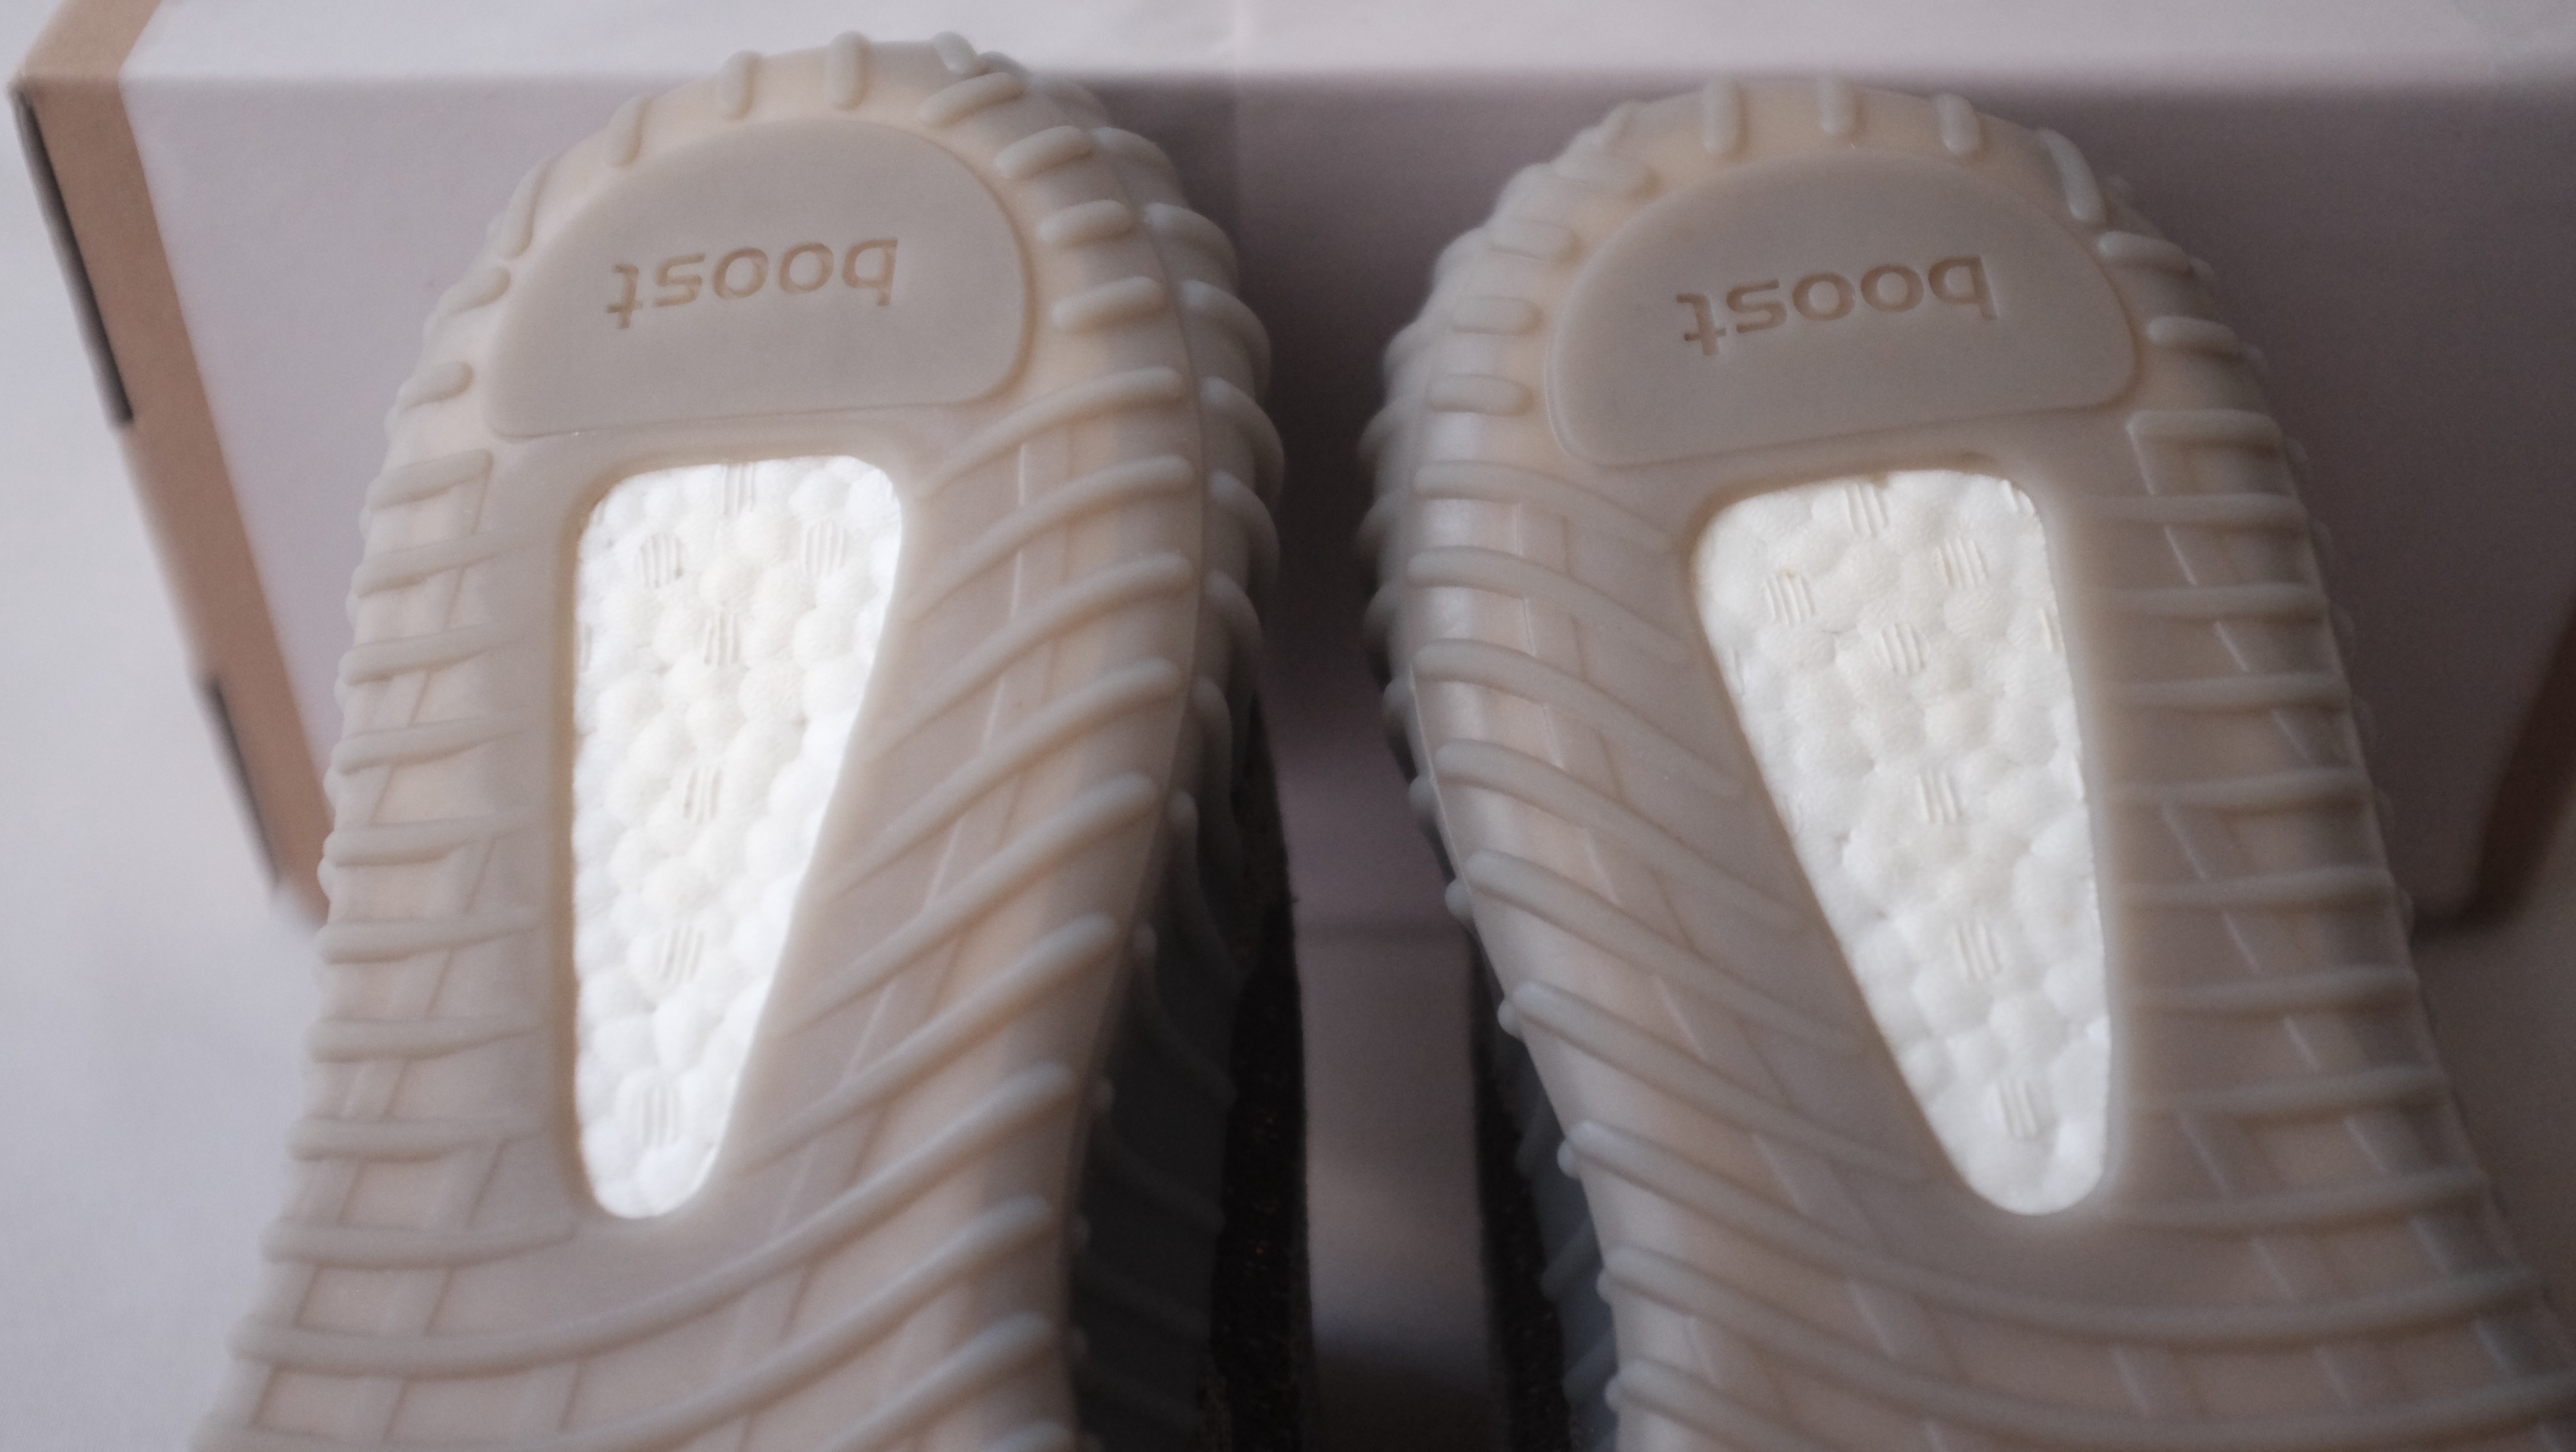 Beluga sz 10
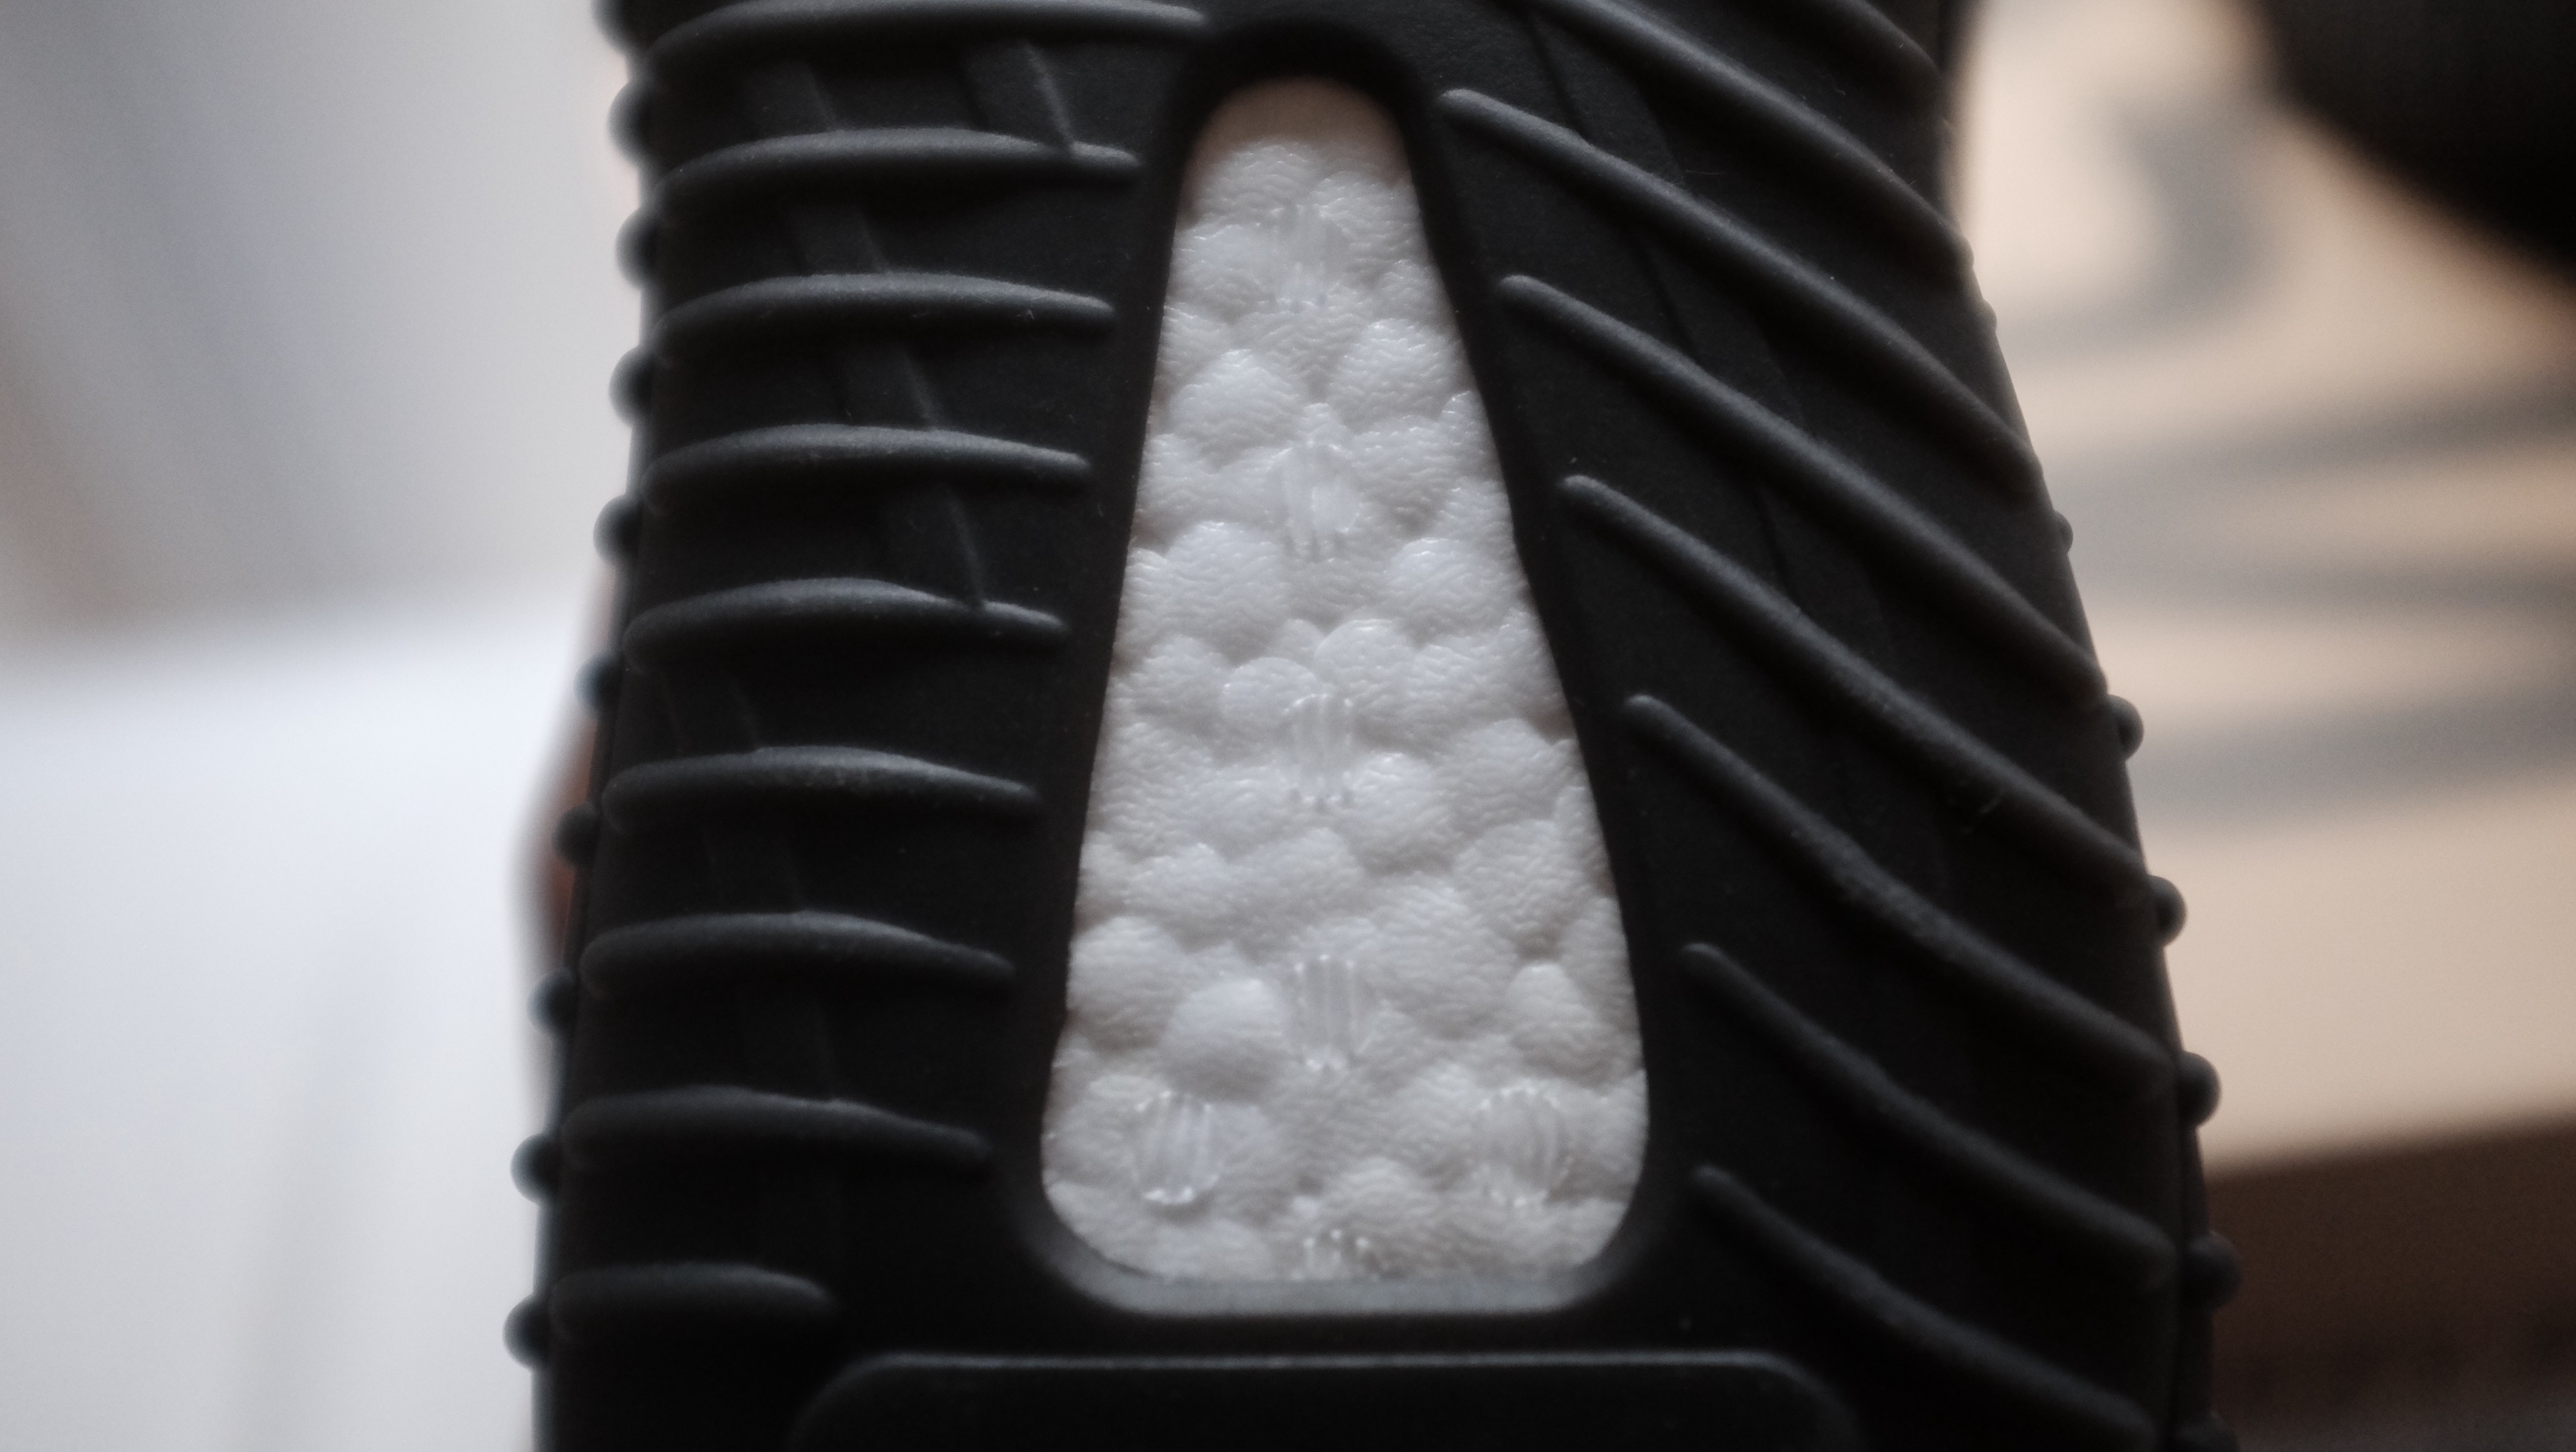 Bred sz 7.5
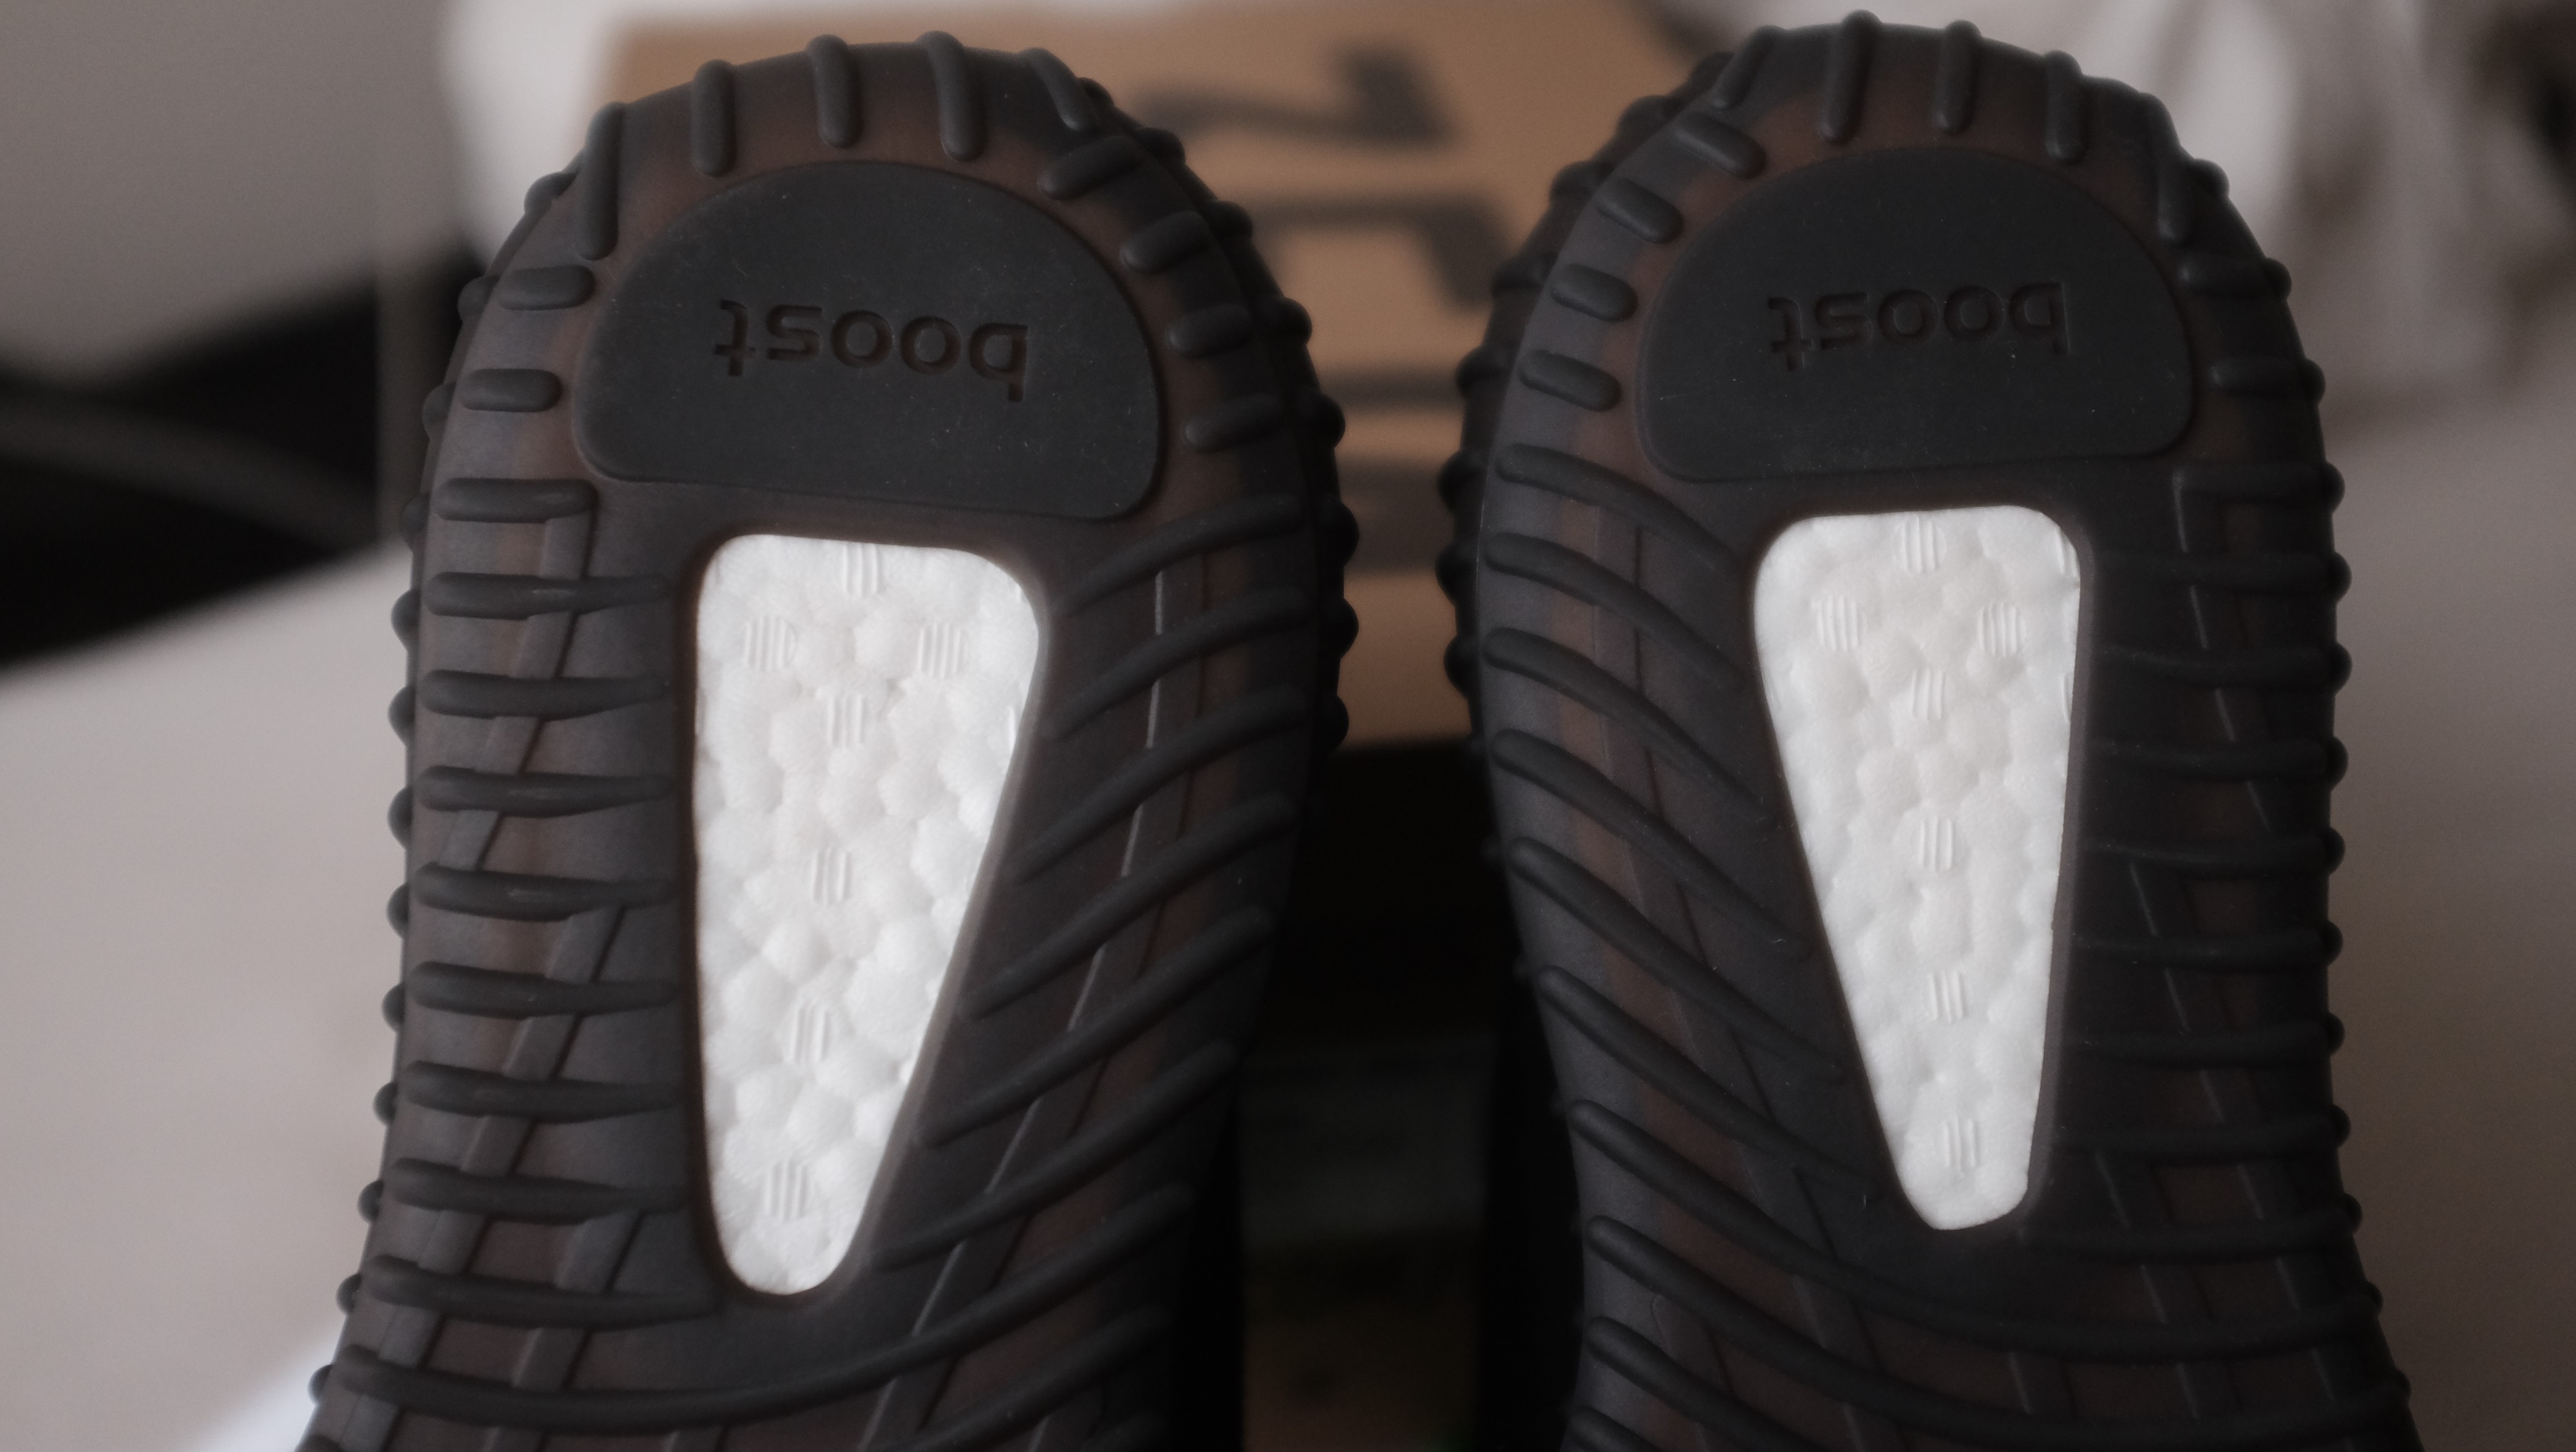
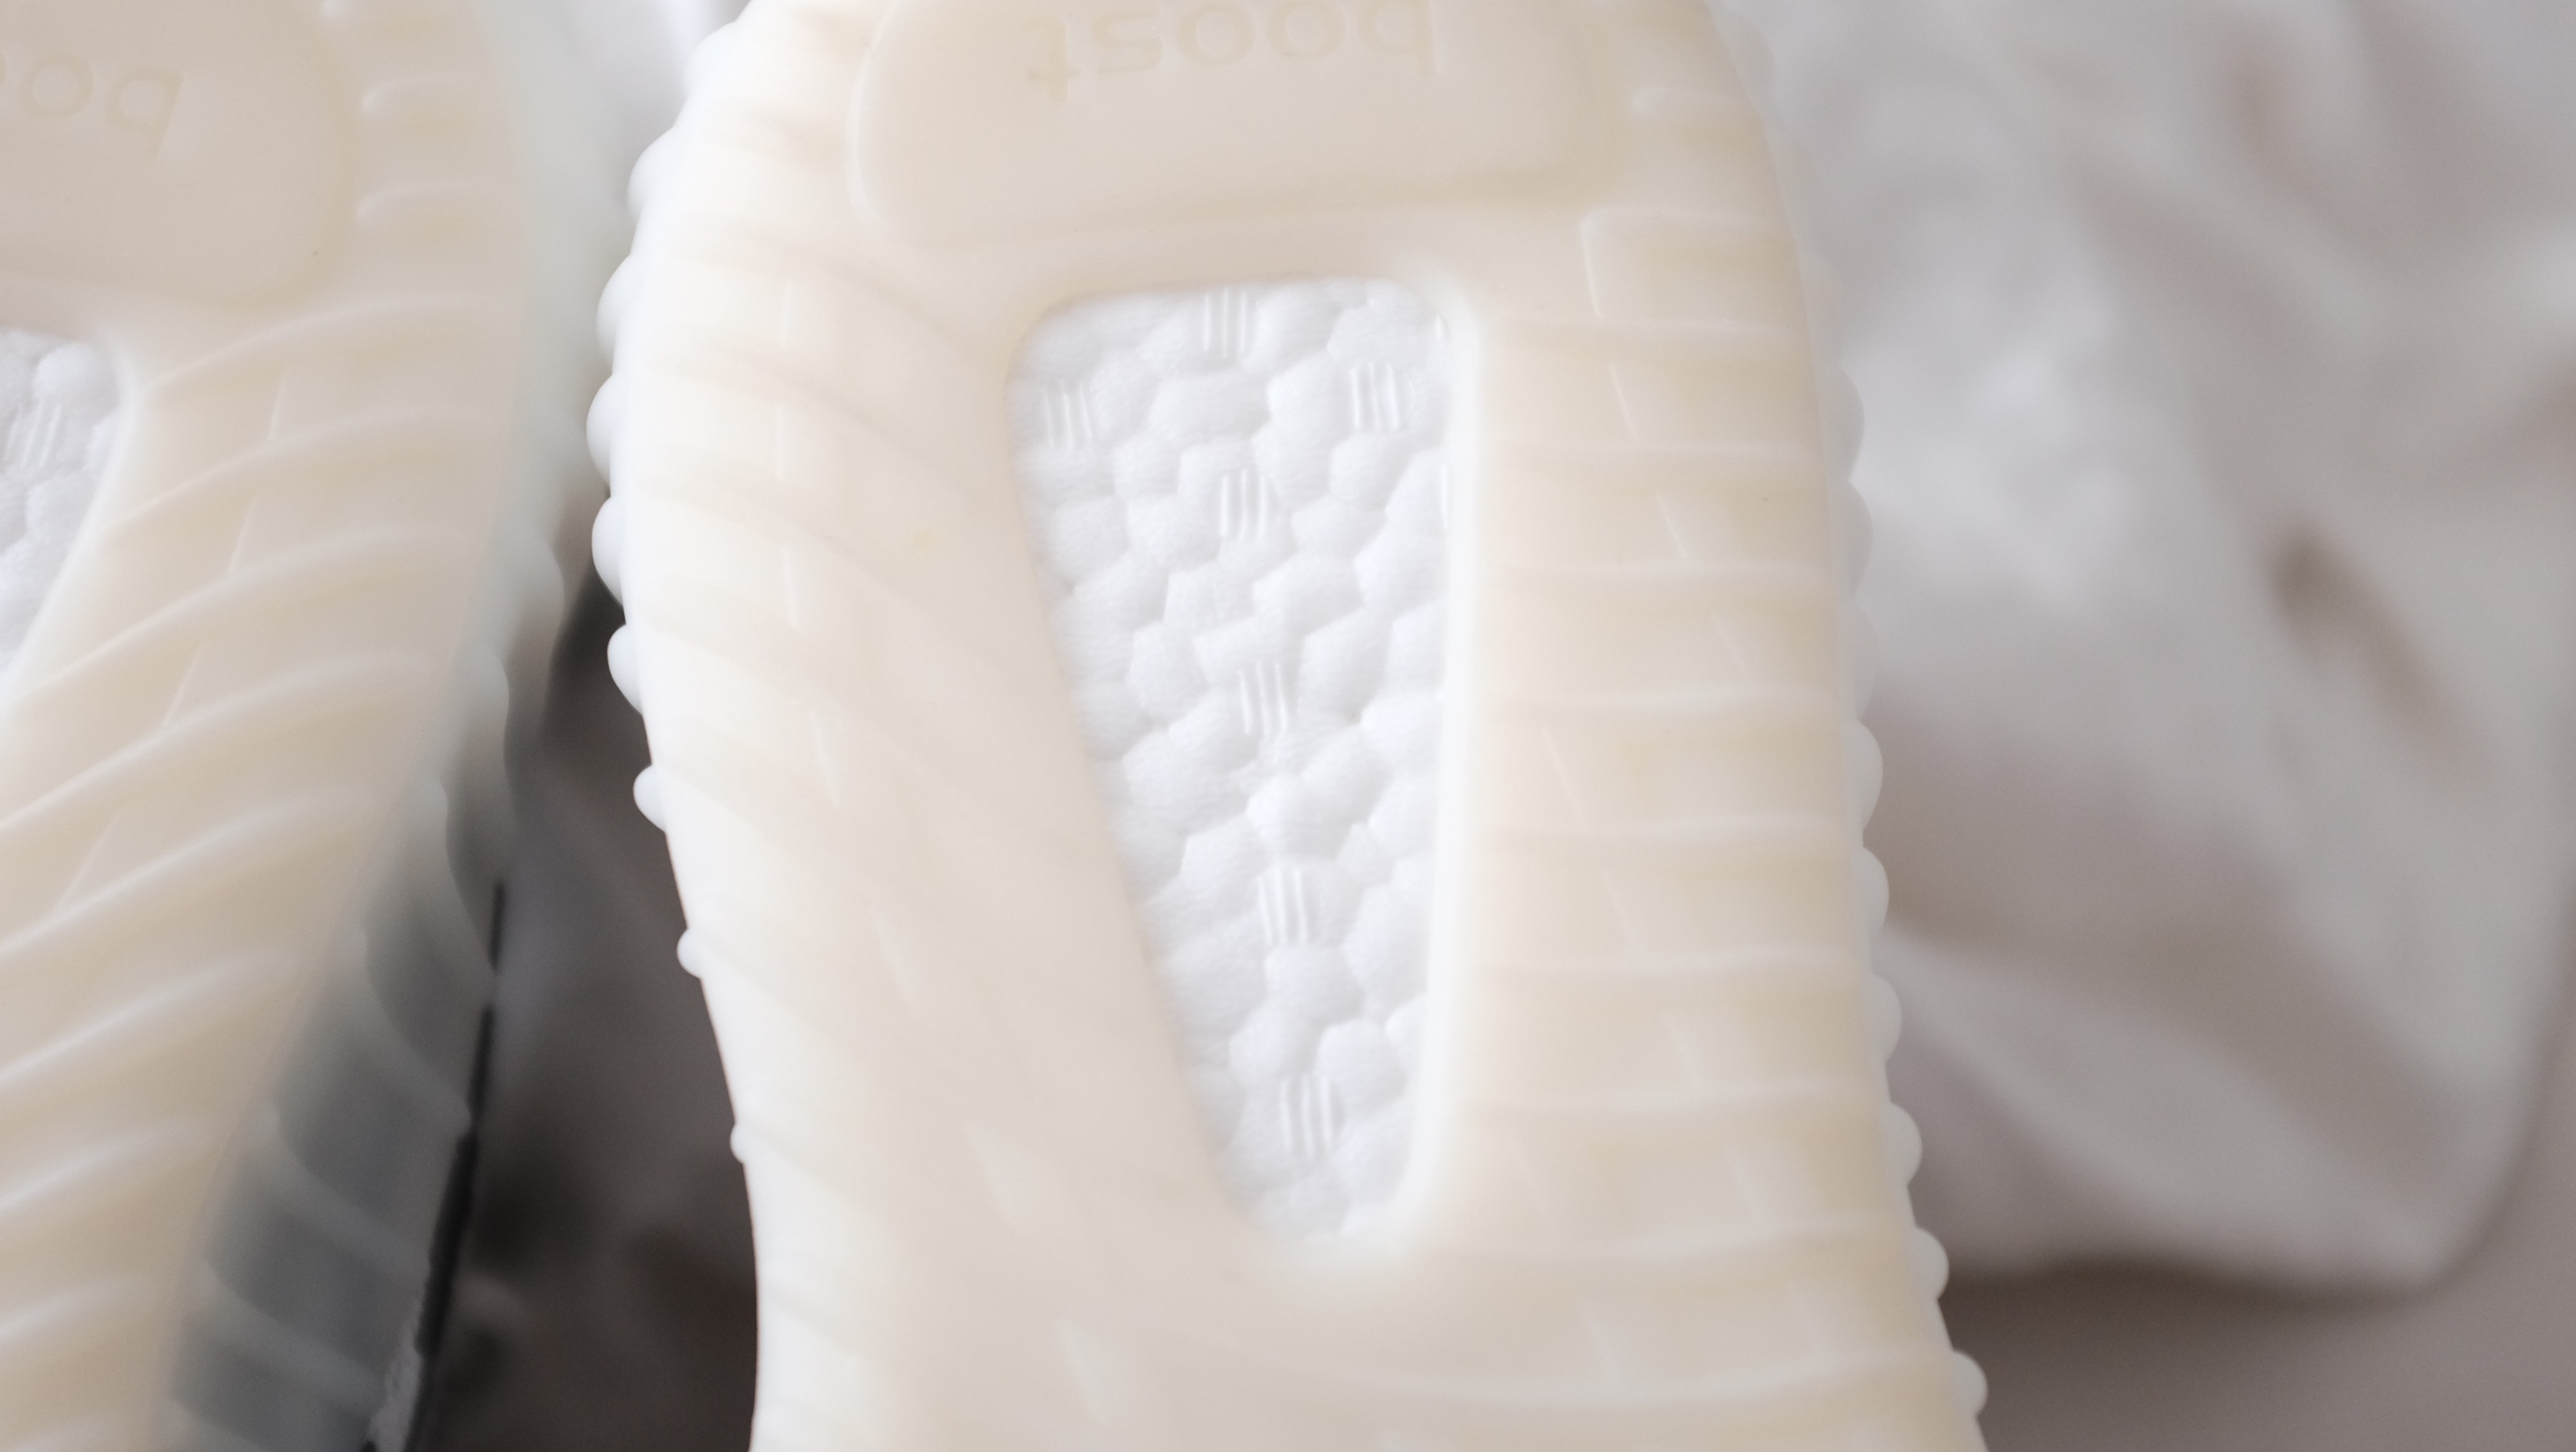 Zebra OG V2 Boost
Notice that you can almost see what I would call Boost ?Fingerprints? (tiny dots inside the boost pellets), unlike the V1?s where the ?Fingerprints? were far more defined and very prominent. The Boost on the V2?s should be soft and responsive when pressing into it. It?s a particular feeling, once you?ve felt the real thing it?s hard to forget.
Variation on Newly released V2 Boost
I?ve never seen variation on Boost Pattern and the Boost itself, till the Cream V2 released, many have been saying their Boost Pattern is way off and the Boost itself looks squashed. My sz 9 does have these differences. I have four more pairs coming in 6, 7, 8, and 9.5 so I?ll be able to update you all if the Boost Pattern/Boost is inconsistent between all sizes. This could also be a result of production at such a high volume. The numbers were never officially released but many have confirmed that this particular model had the most production out of all the V2?s so far.

 Cream V2 sz 9 Boost pattern and Boost is different from previous models.
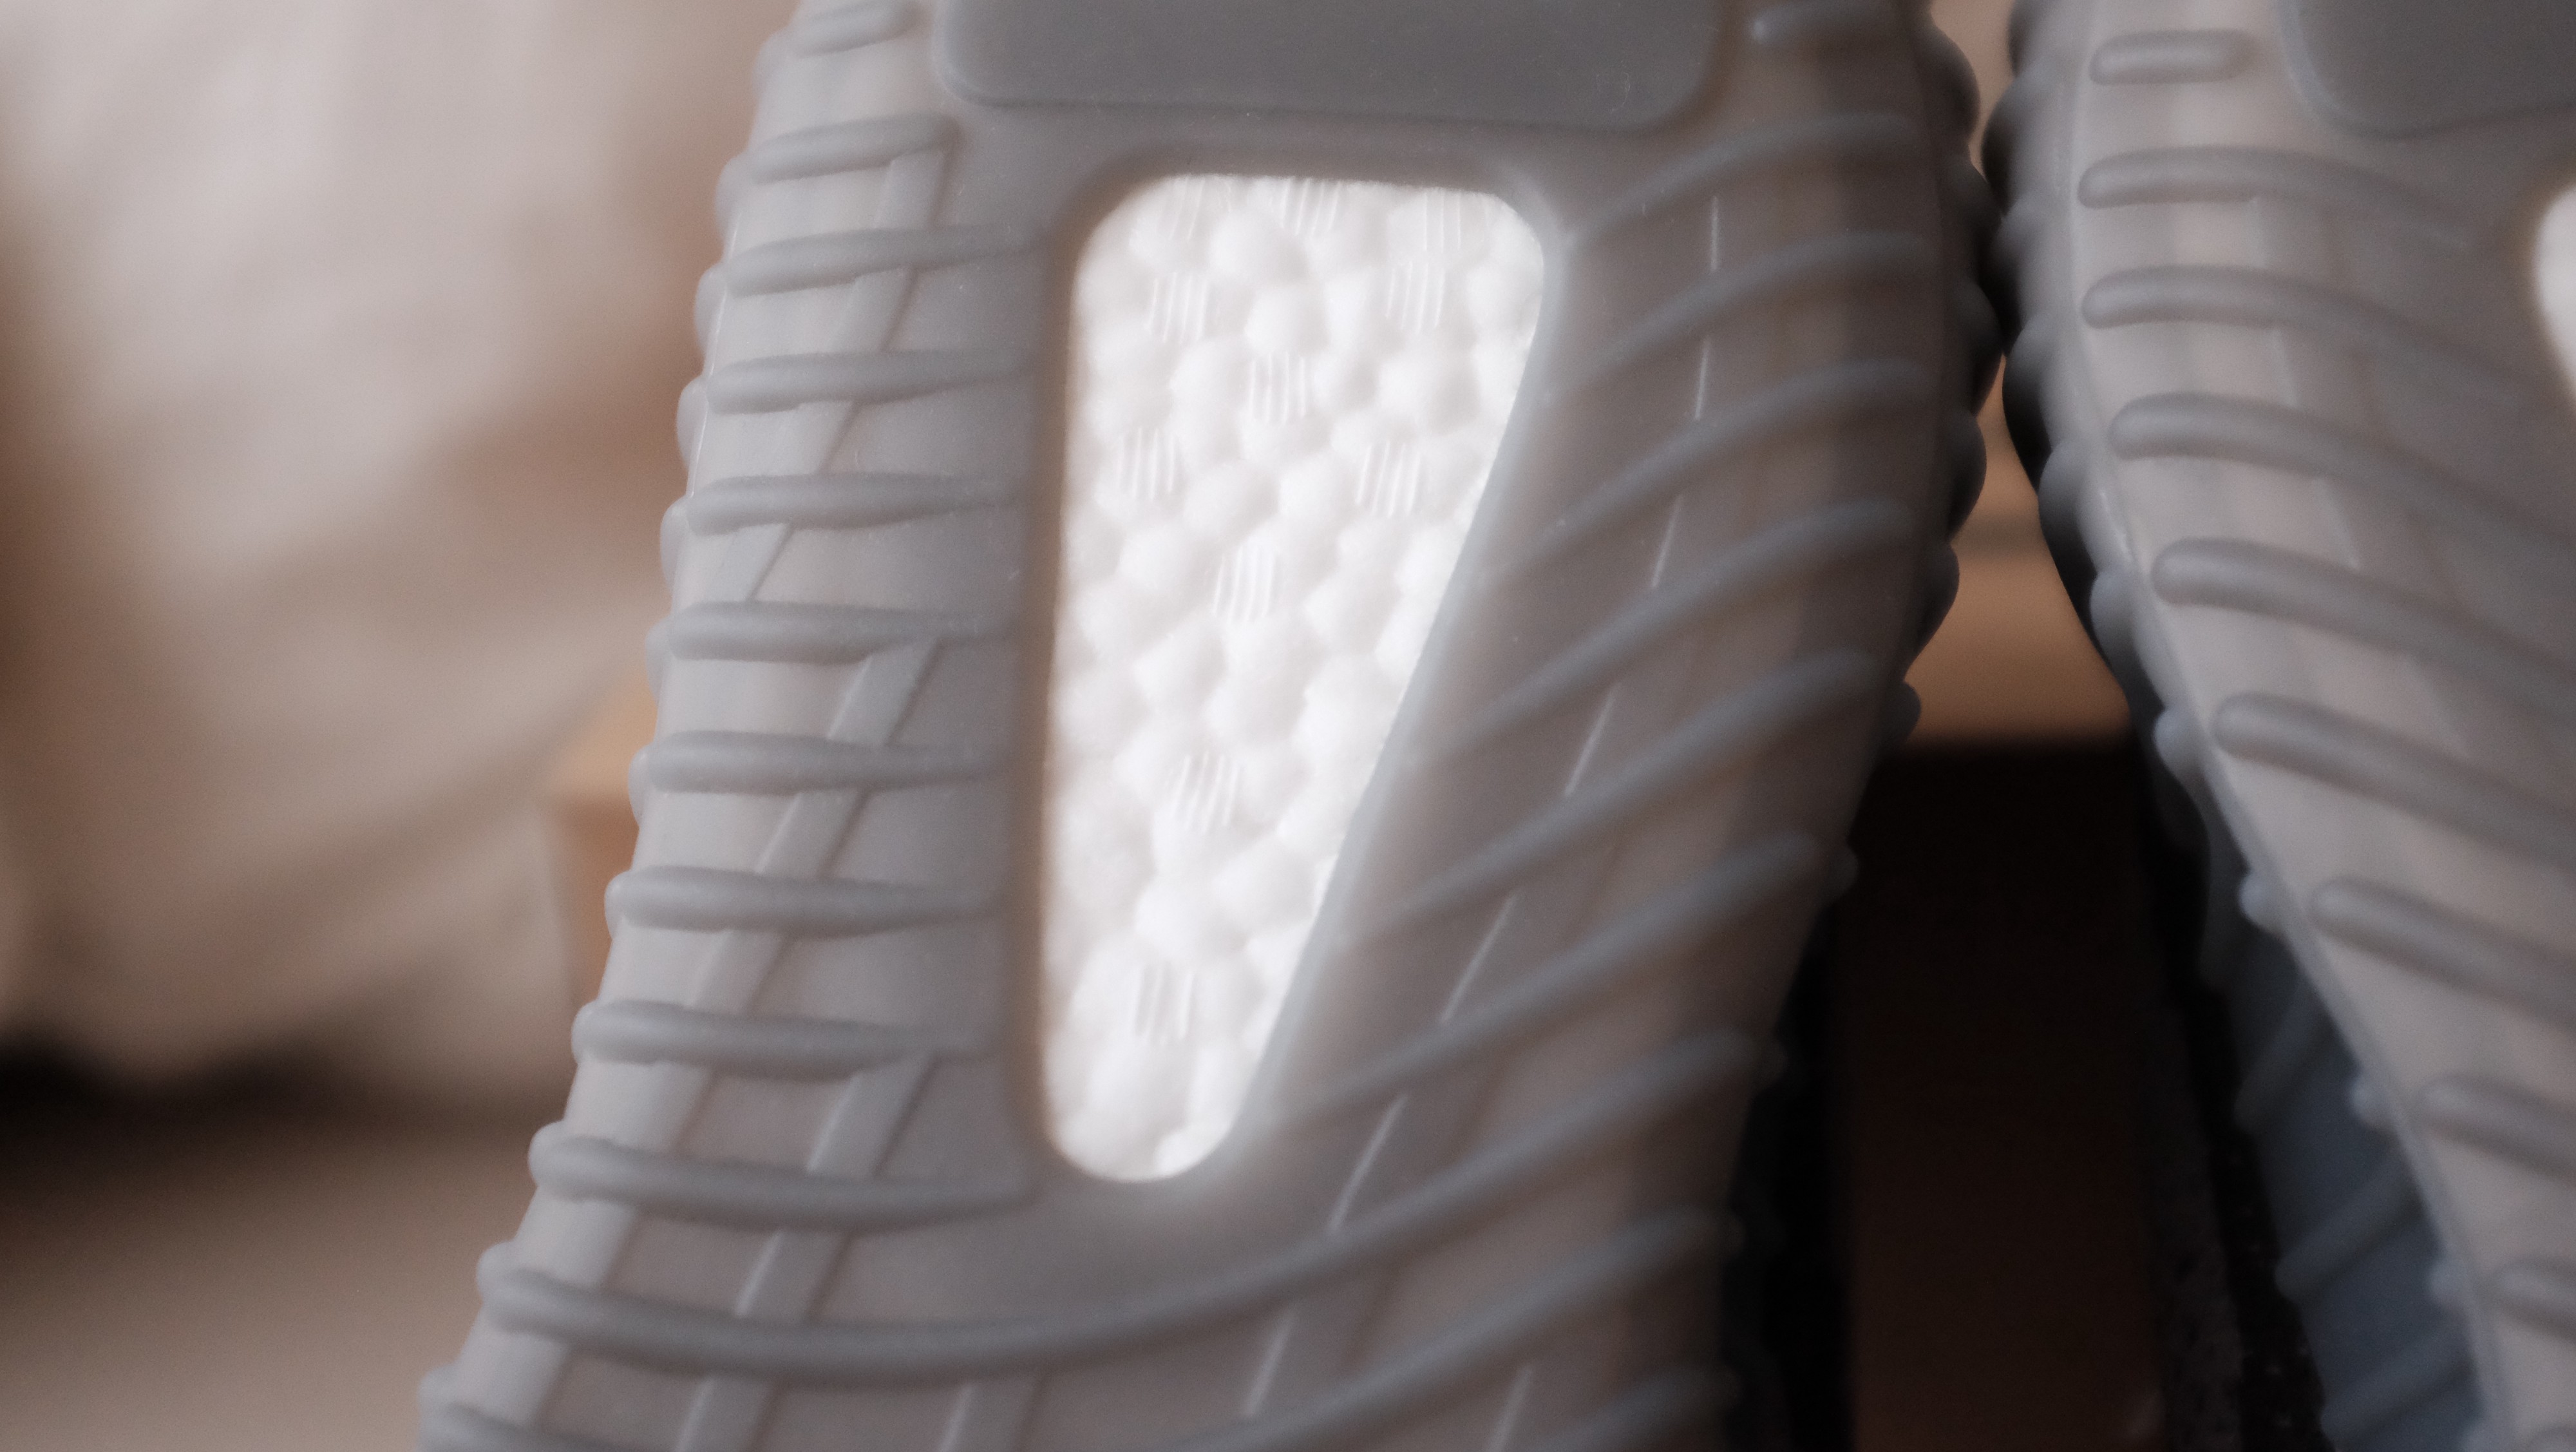
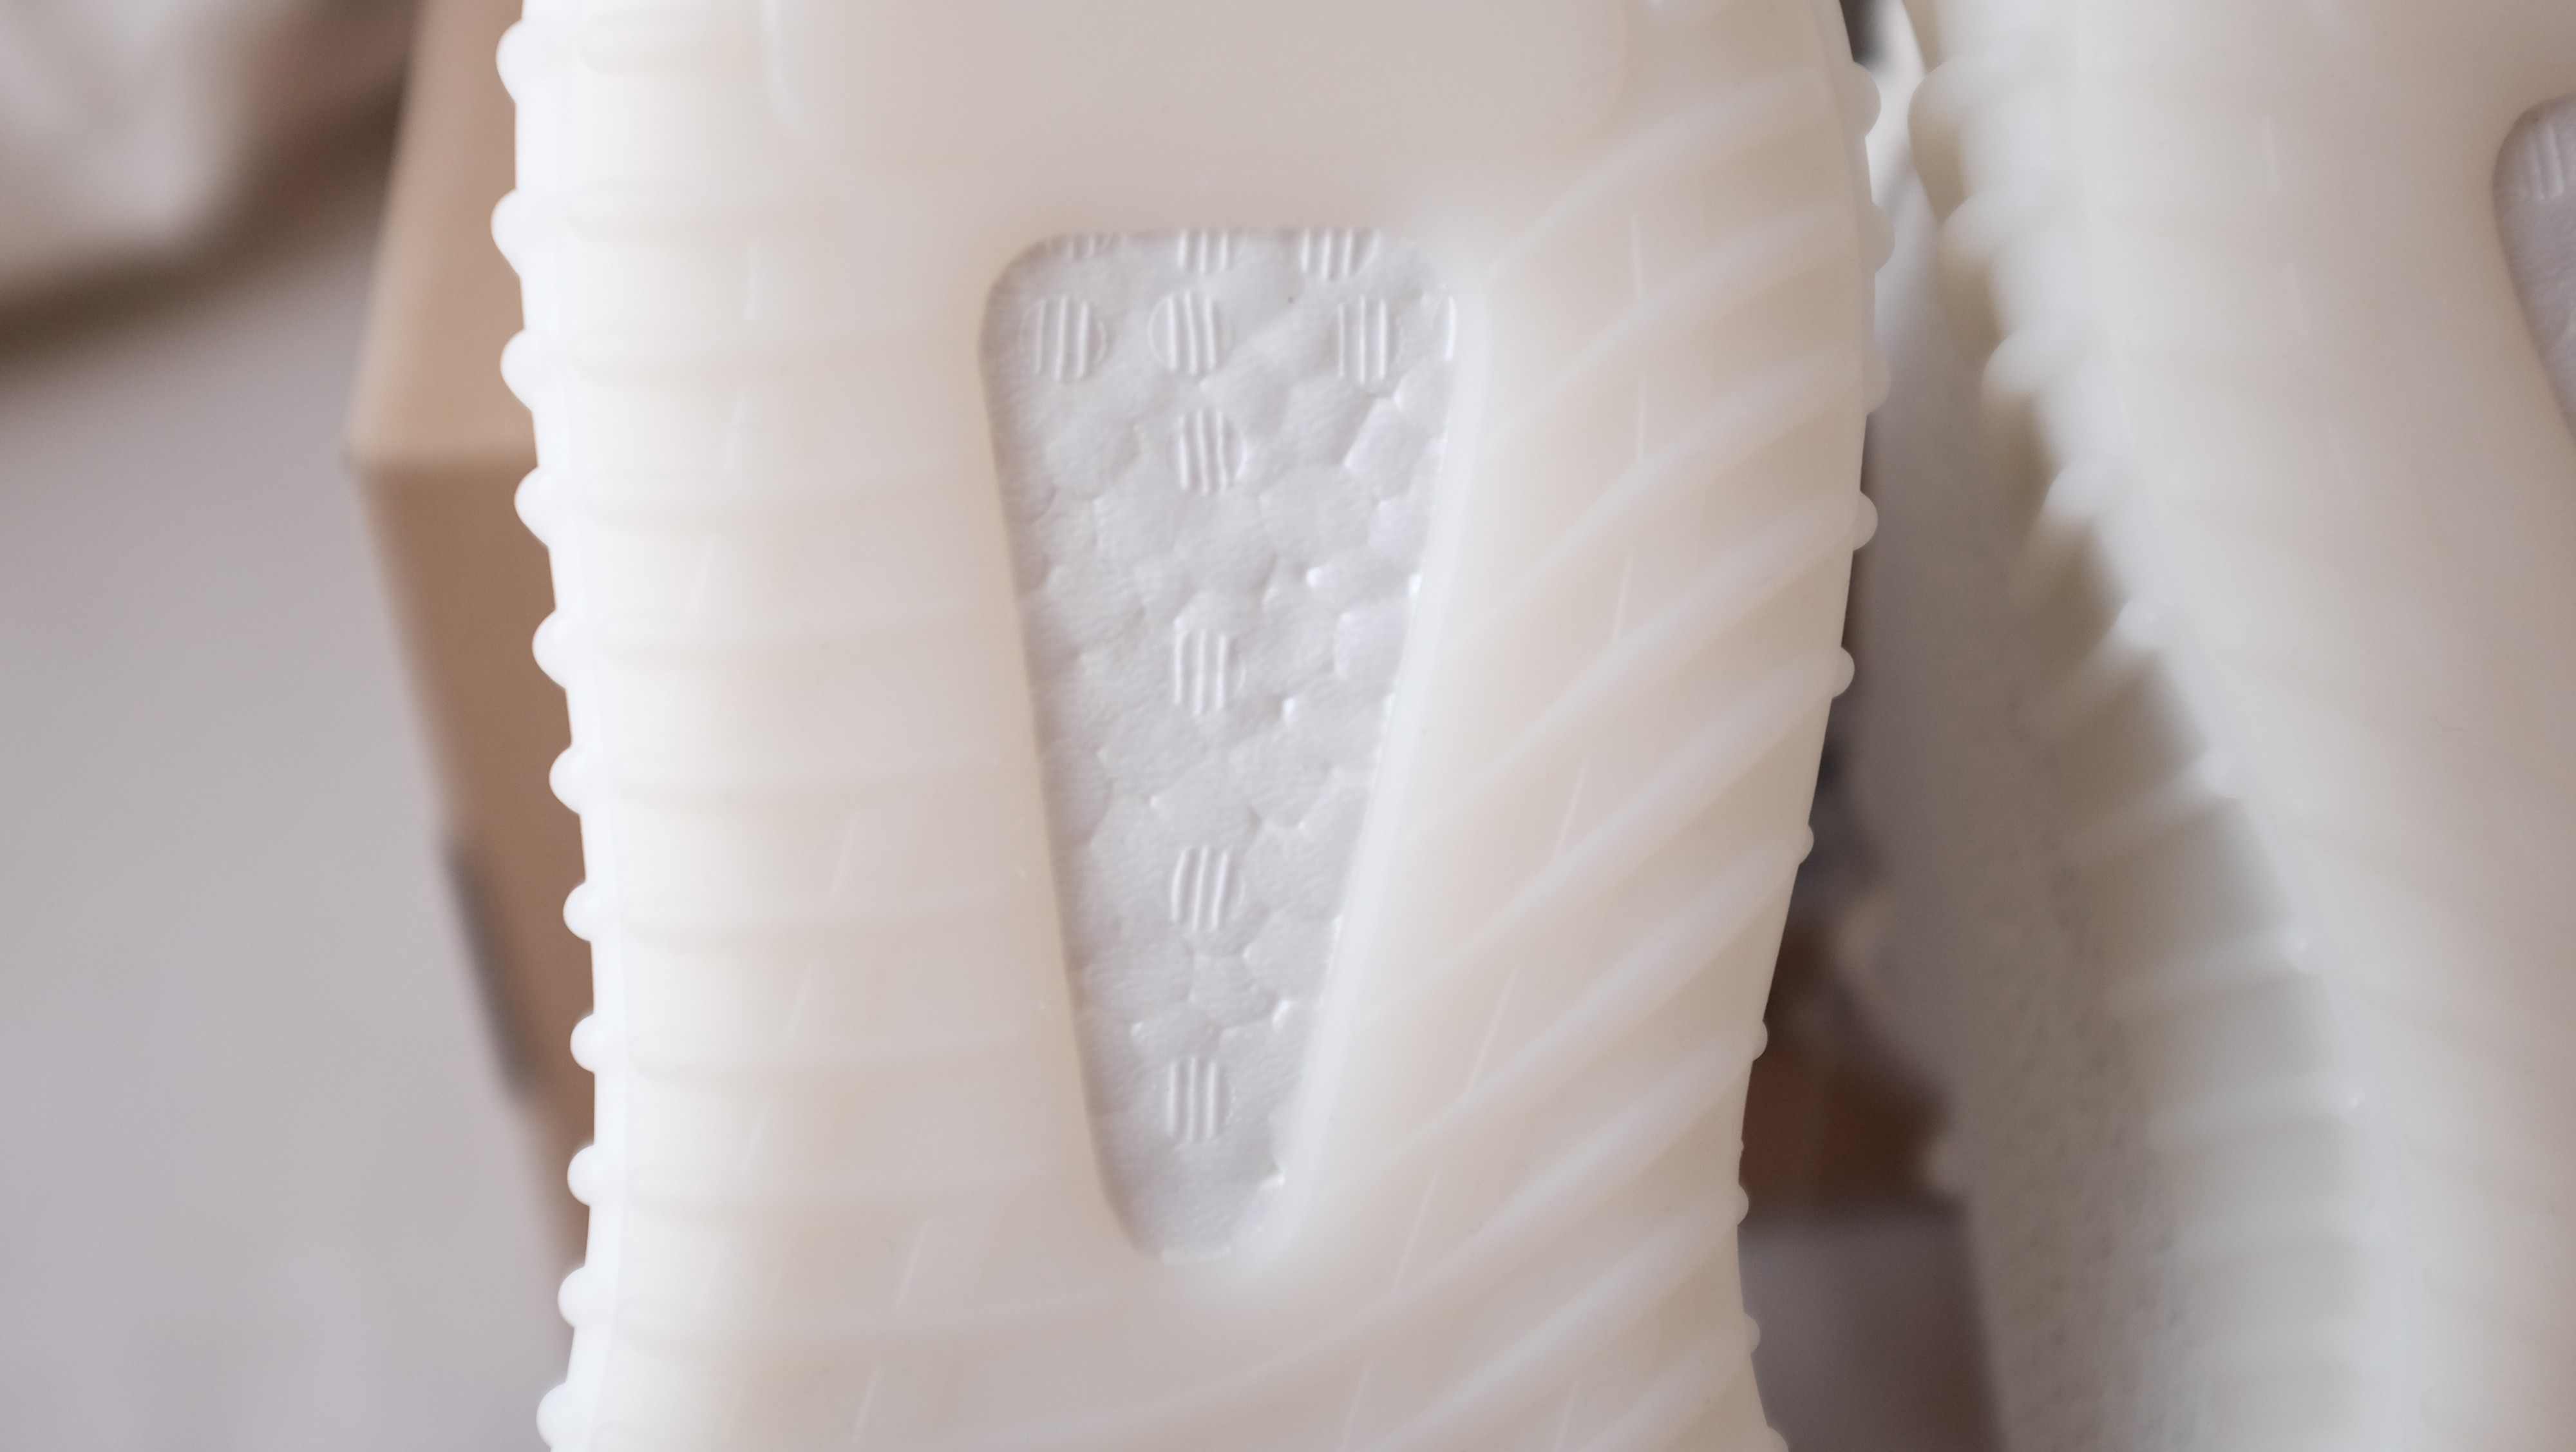
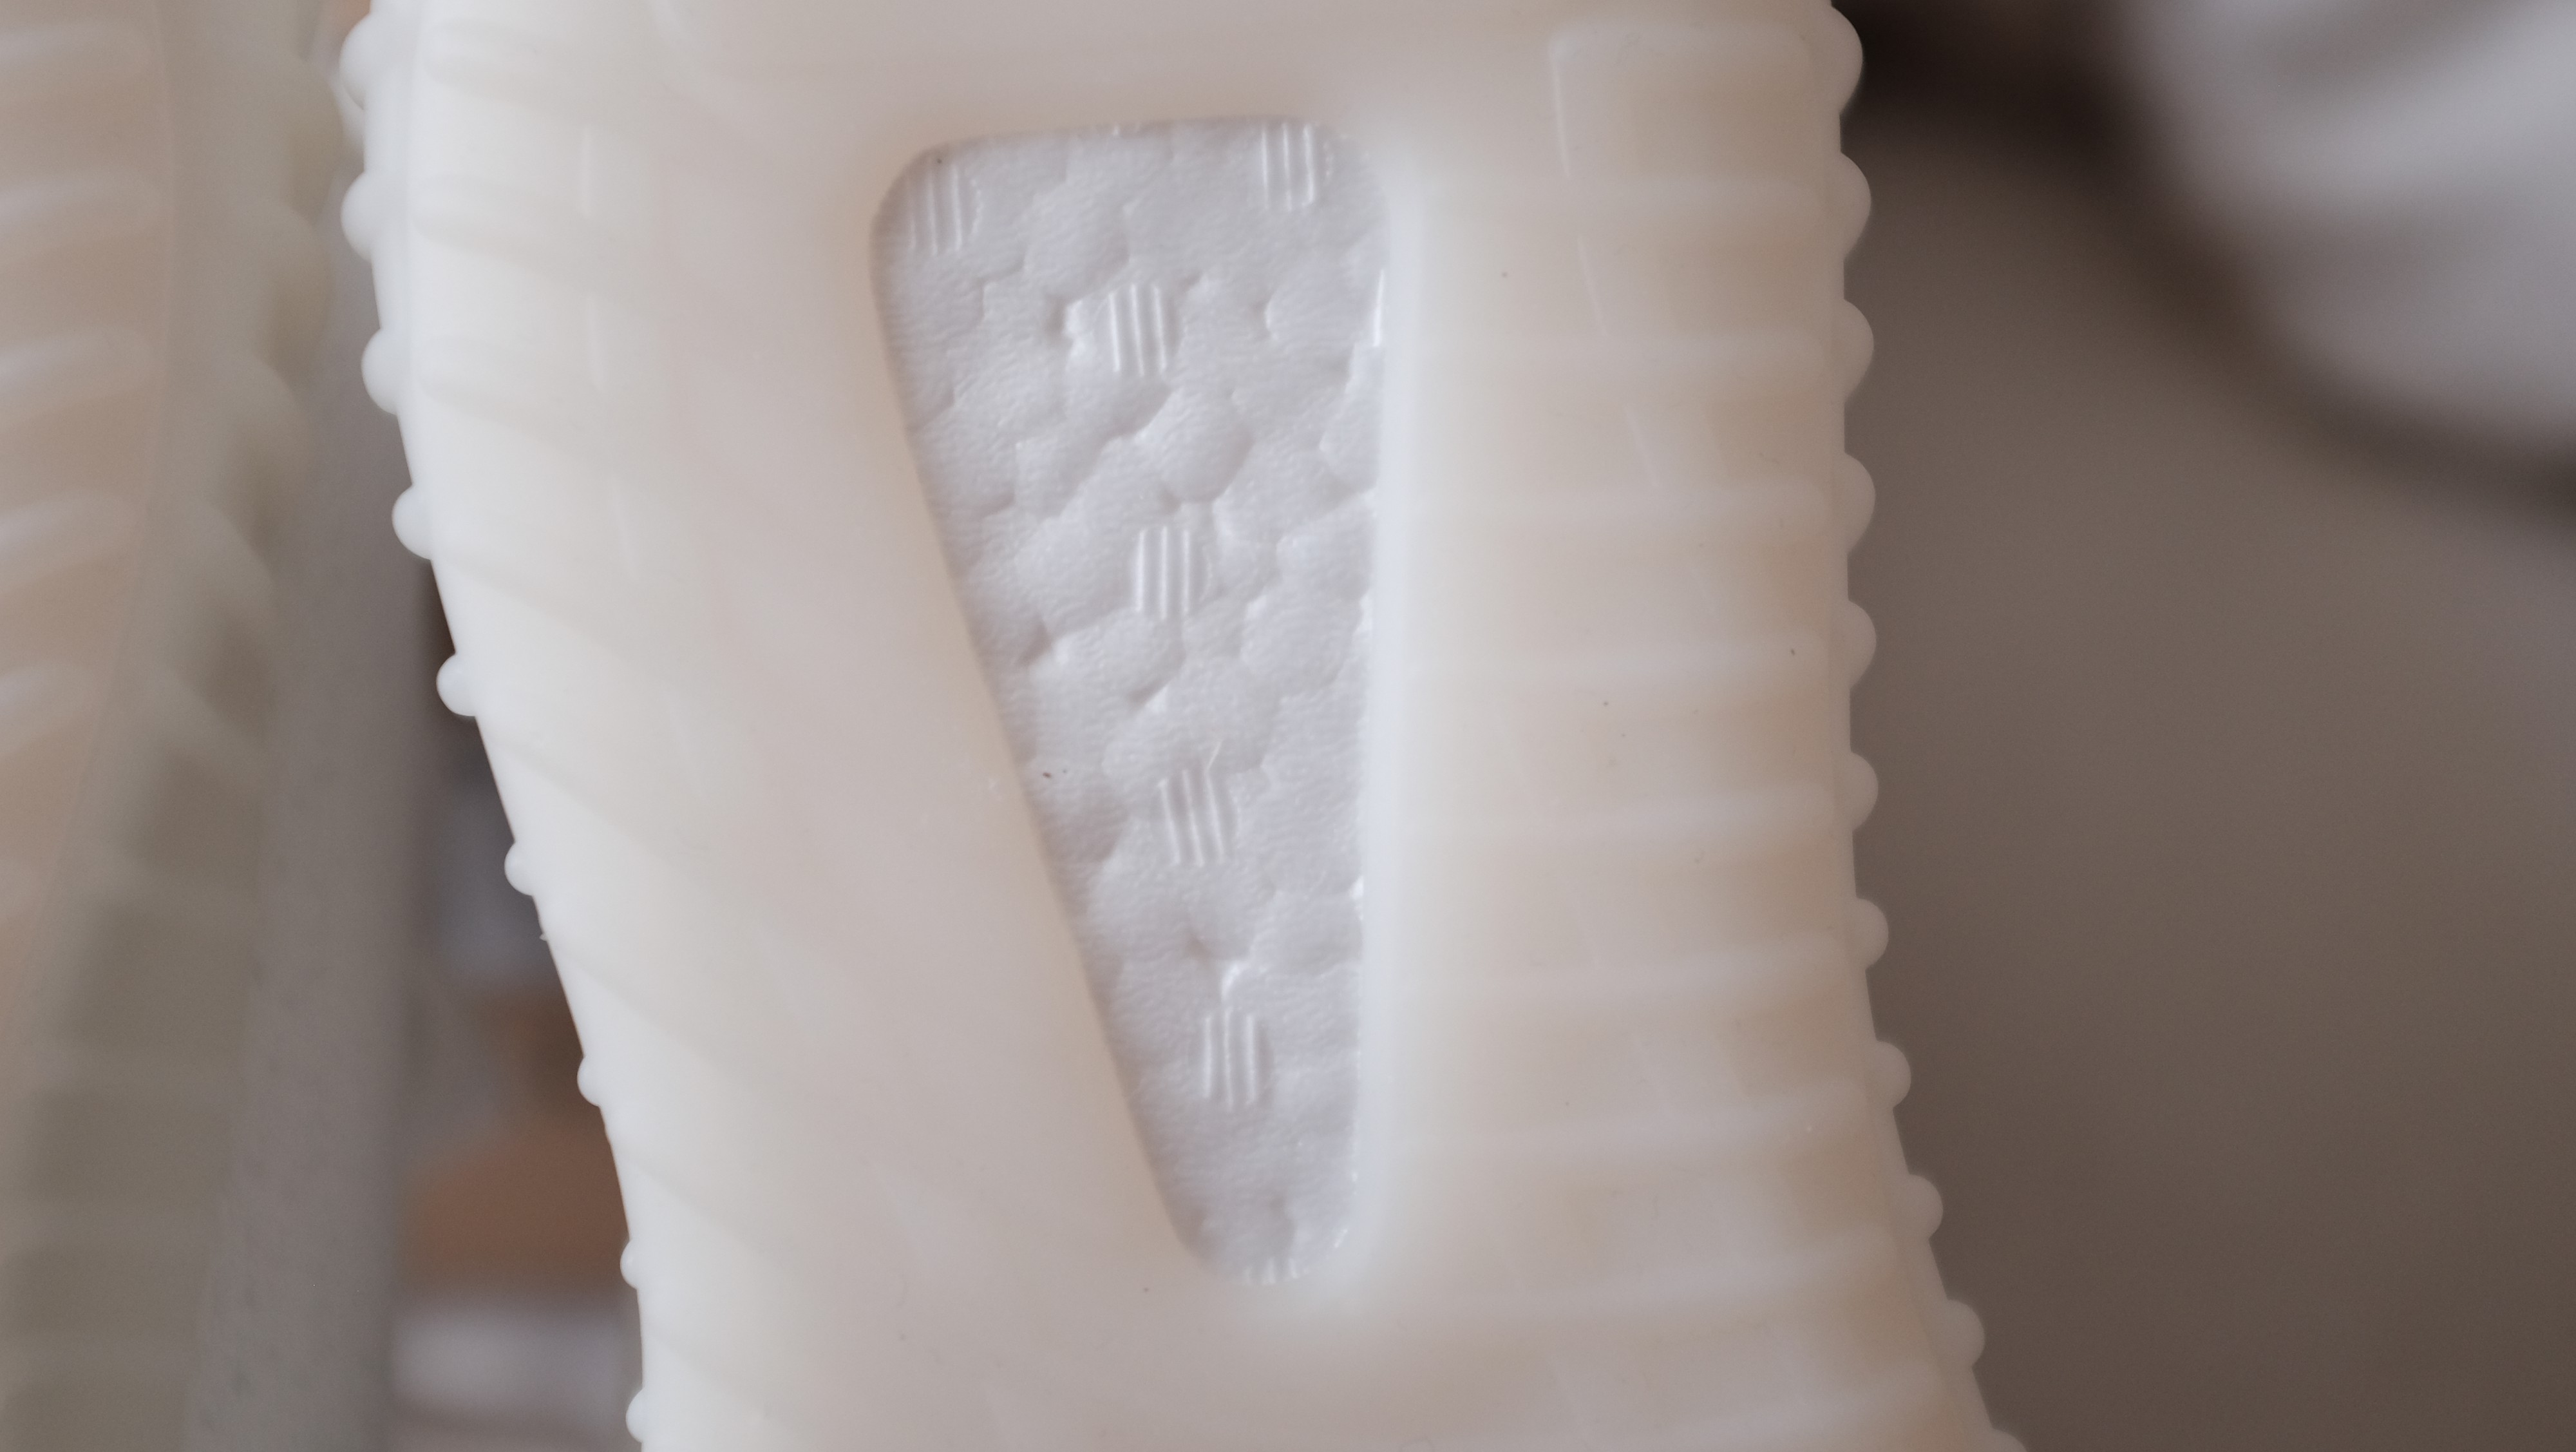
 Beluga 2.0 Boot pattern on sz 8.5
The Dark Side
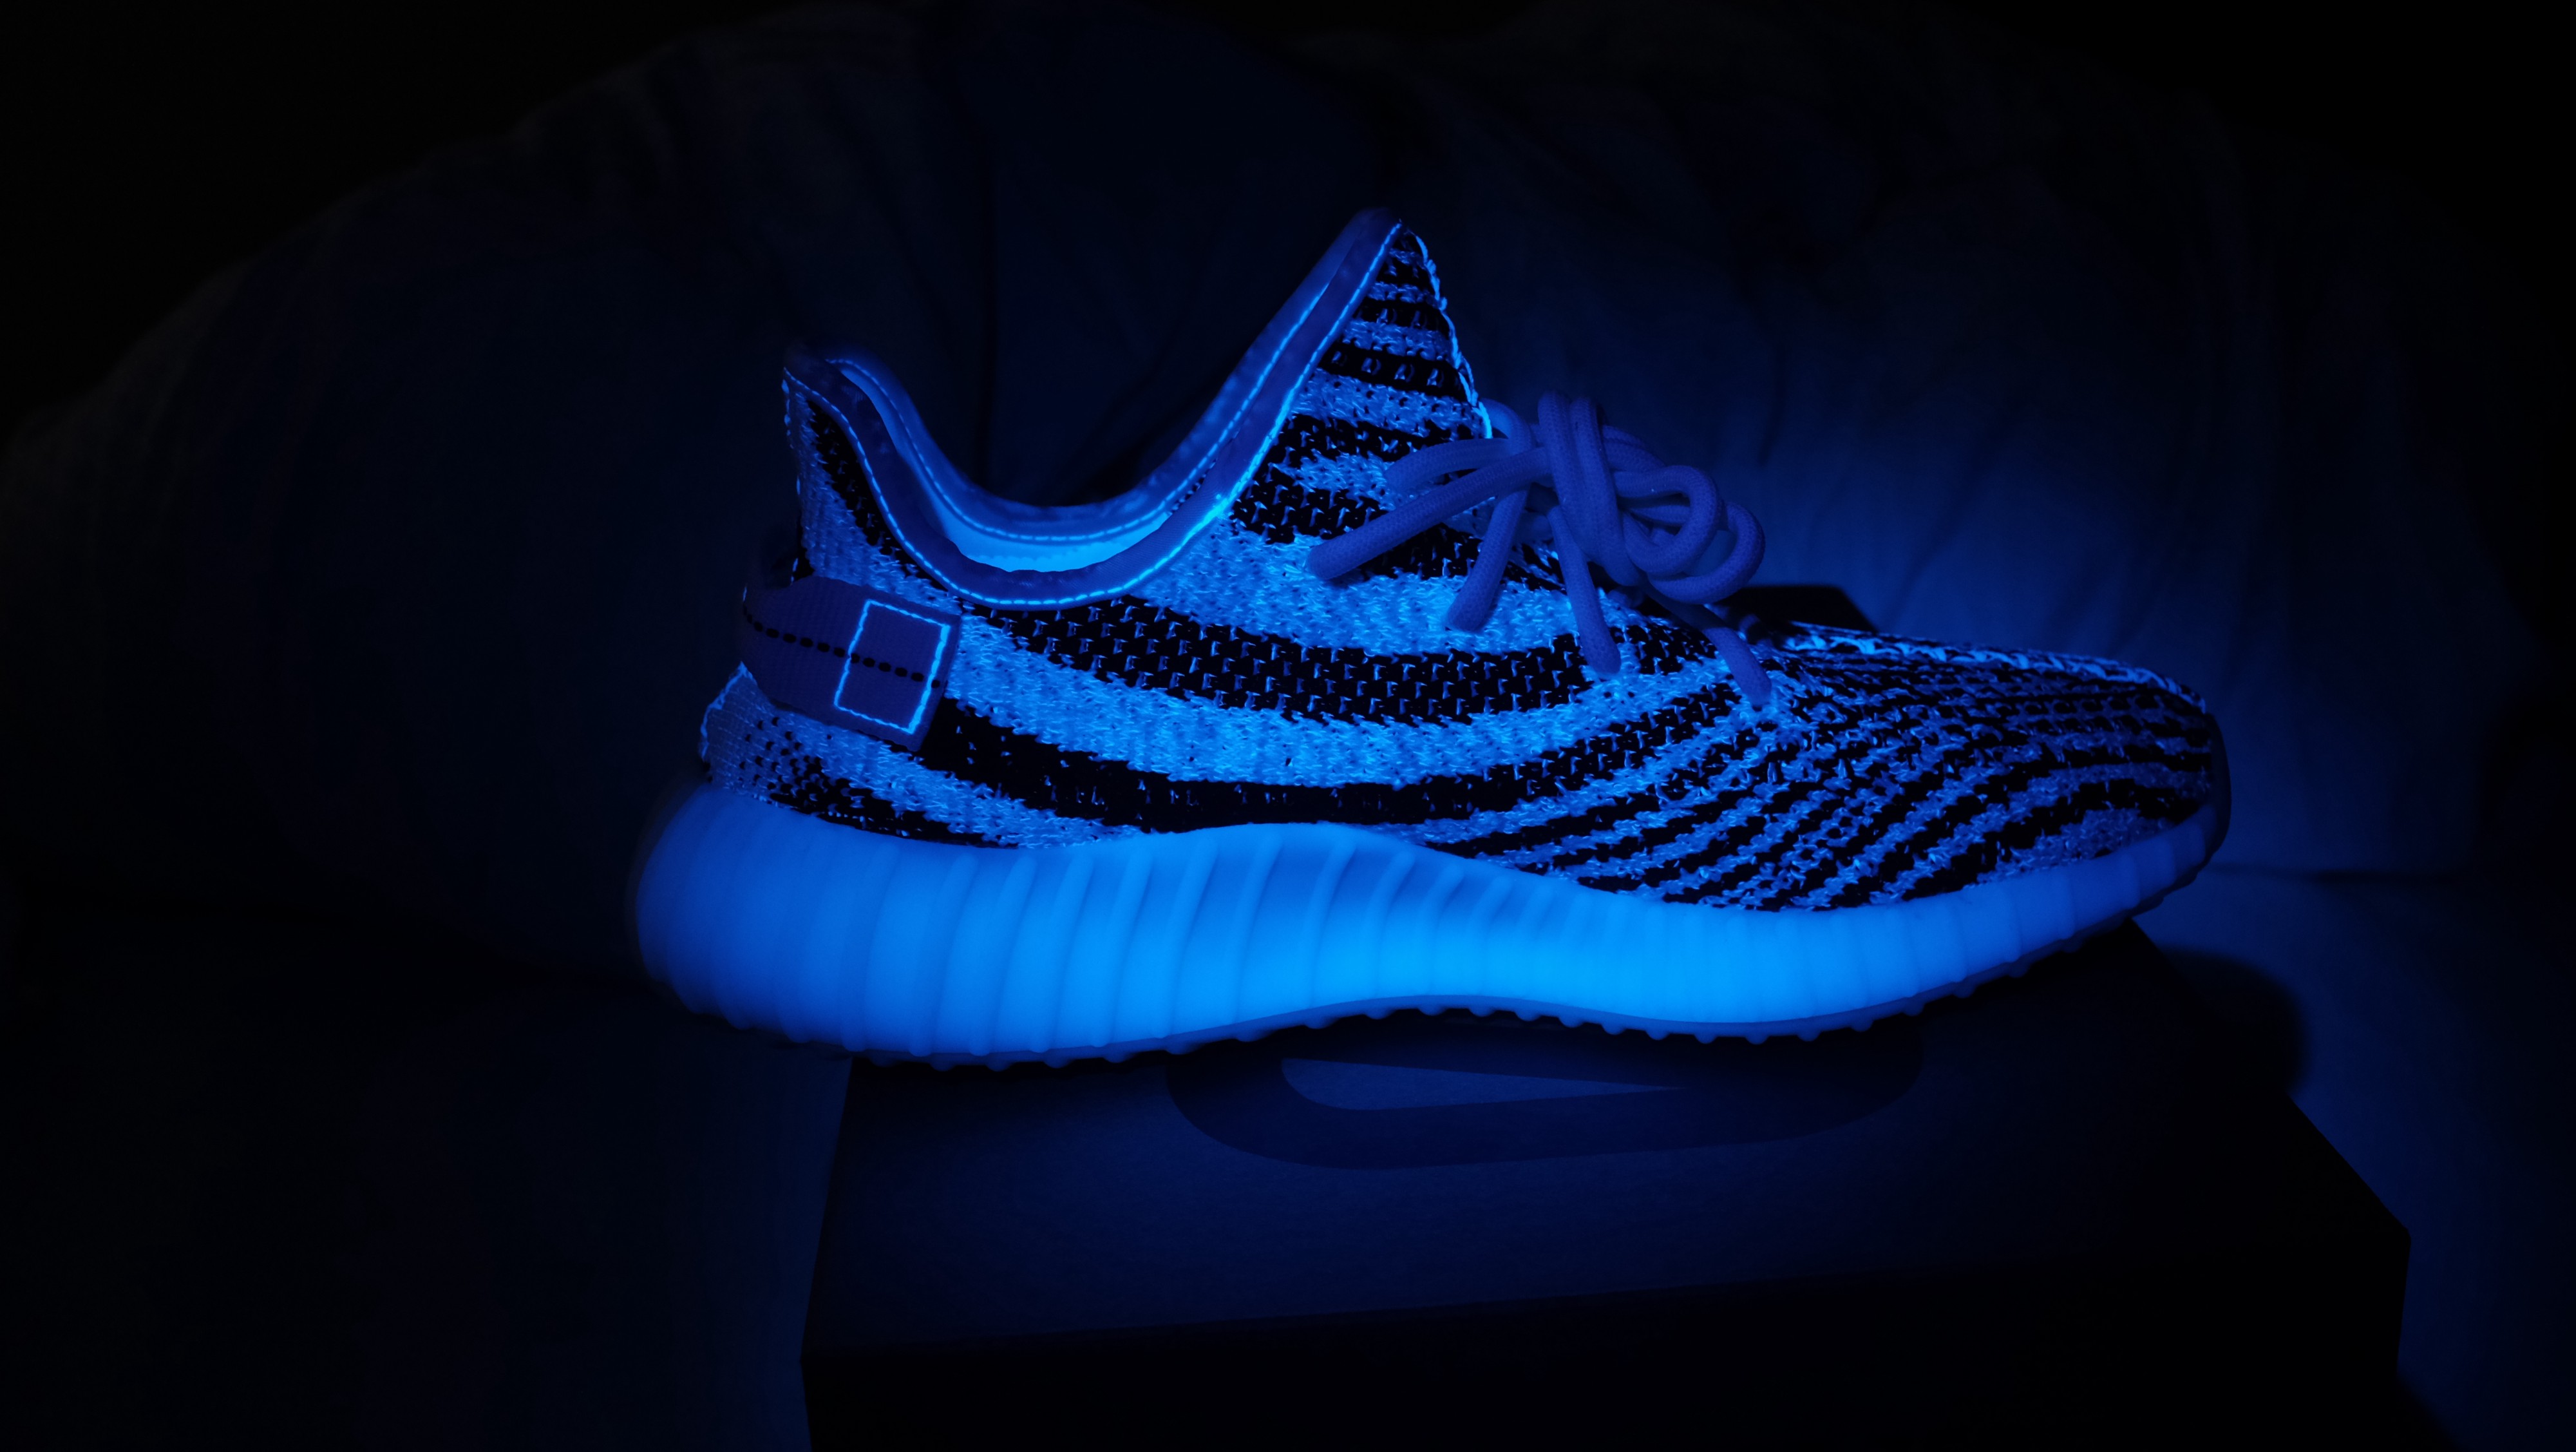
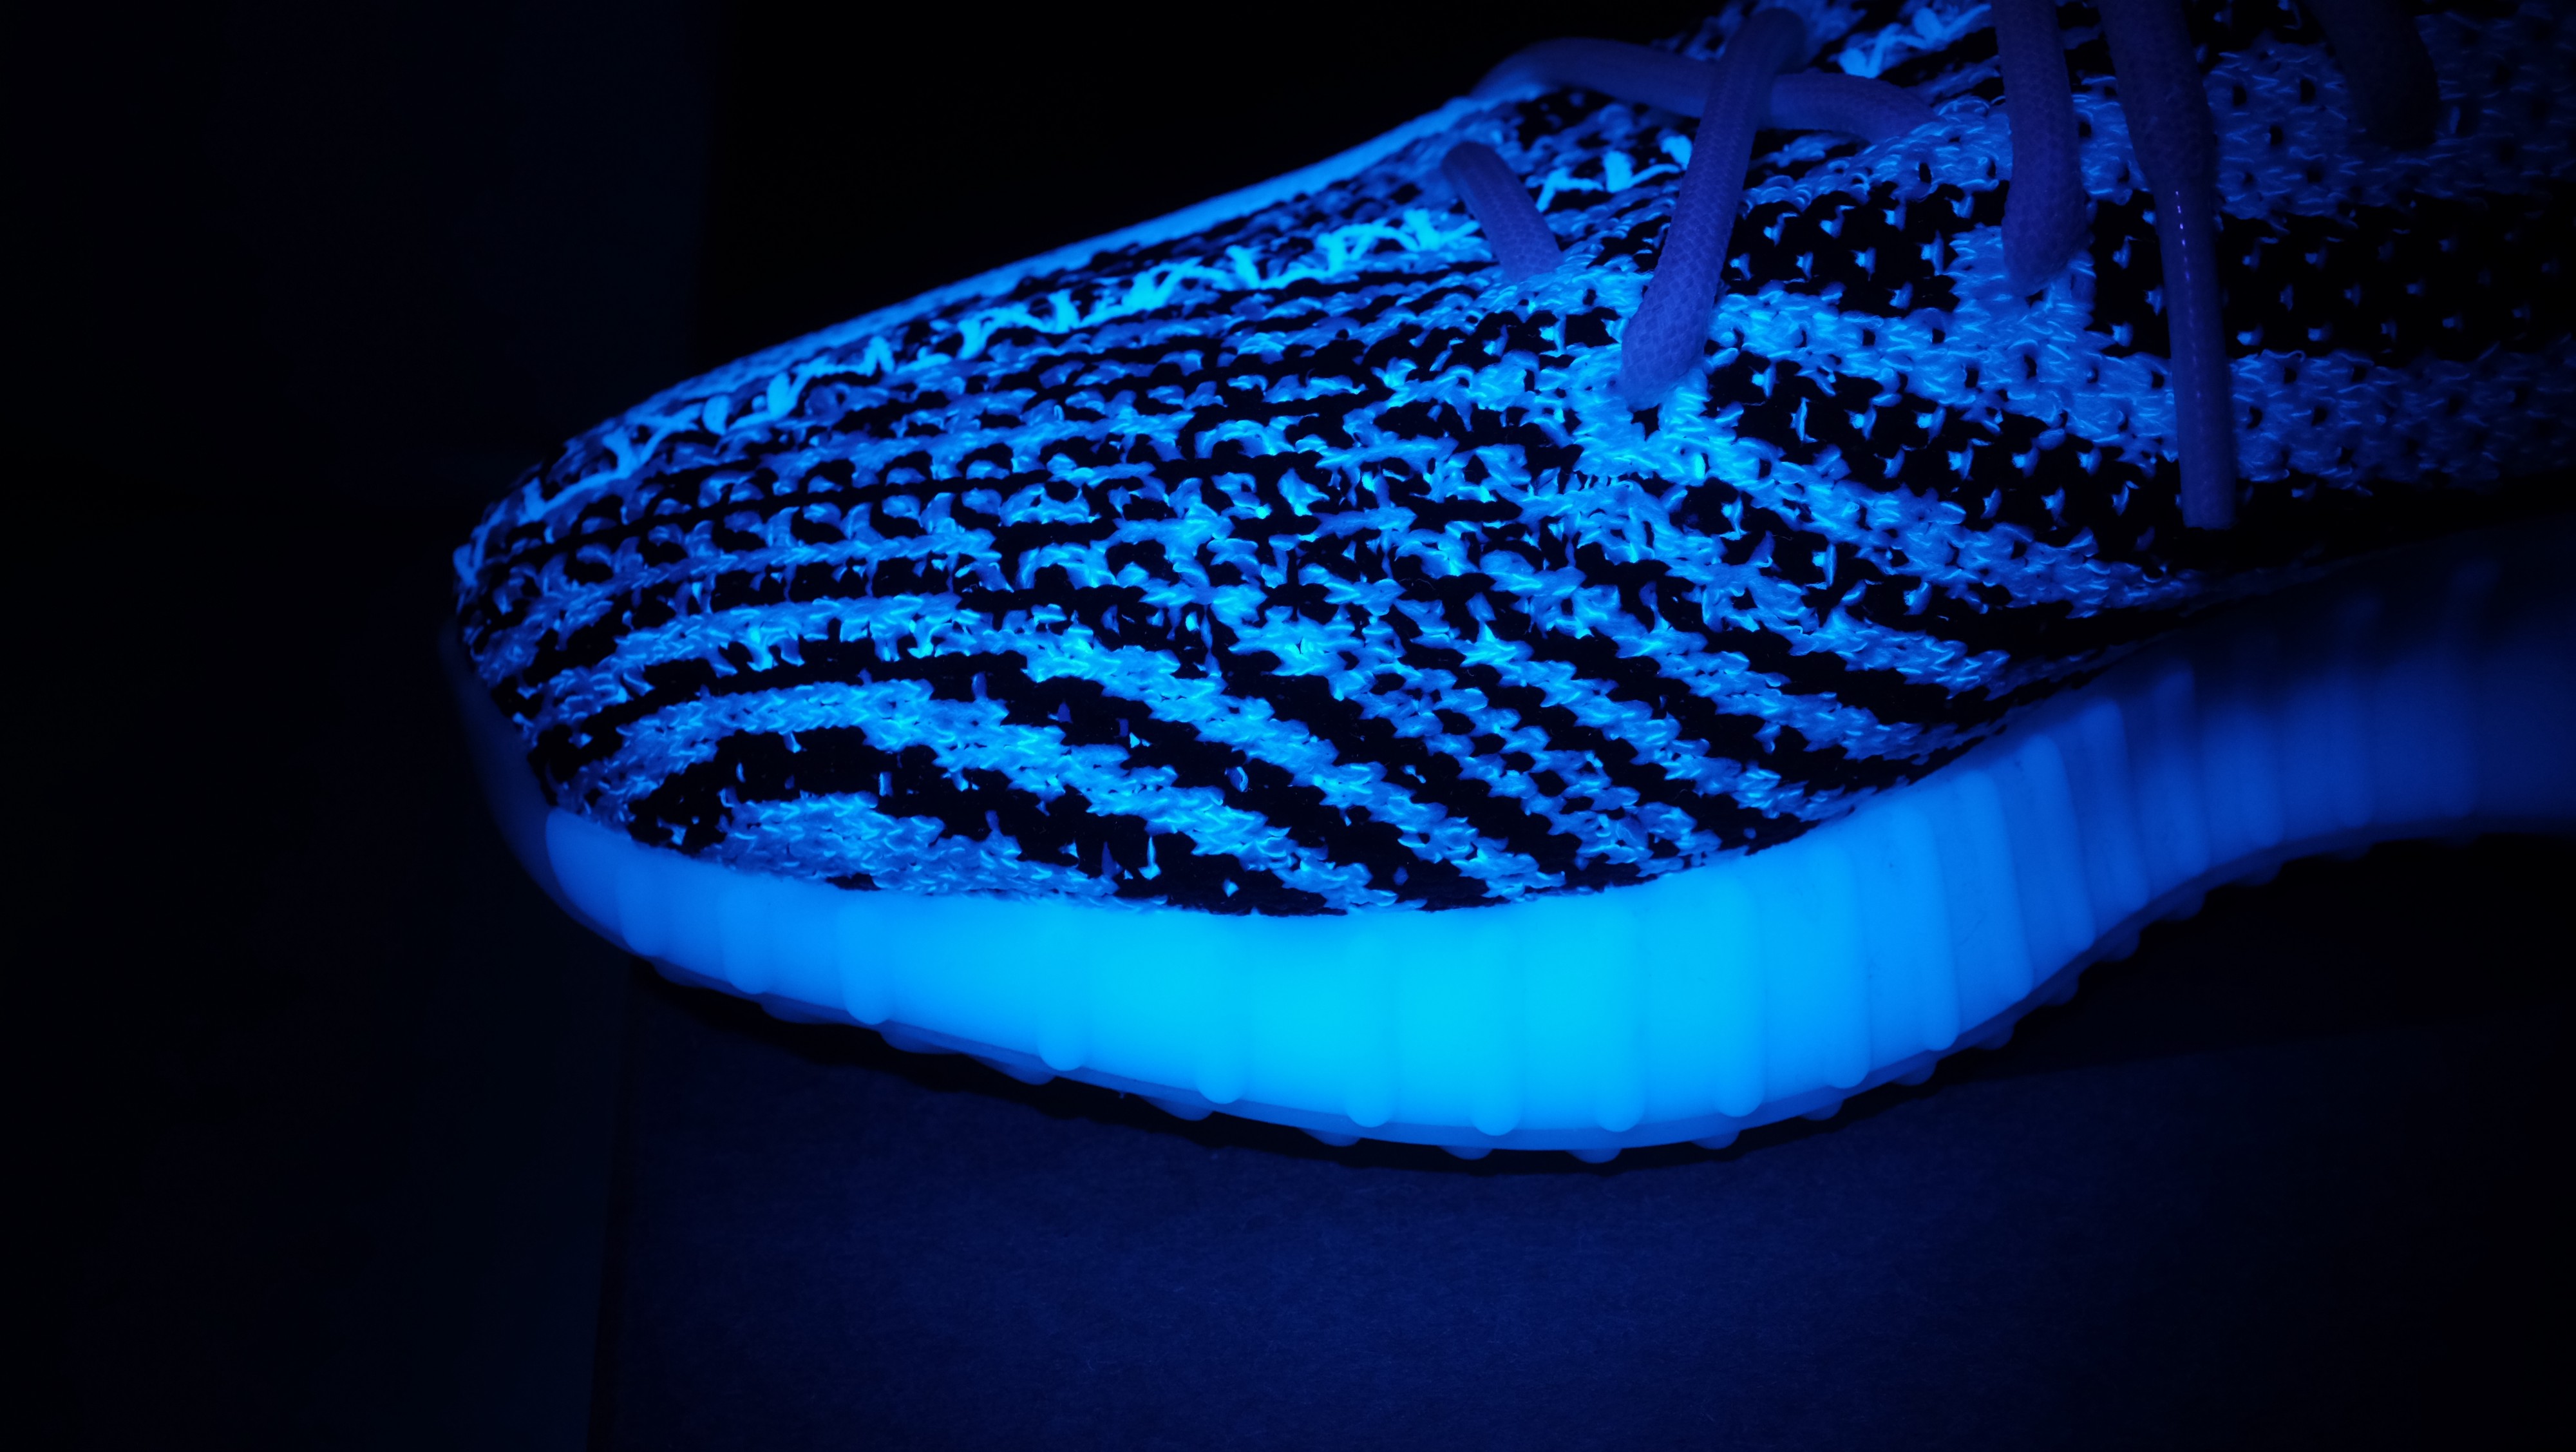
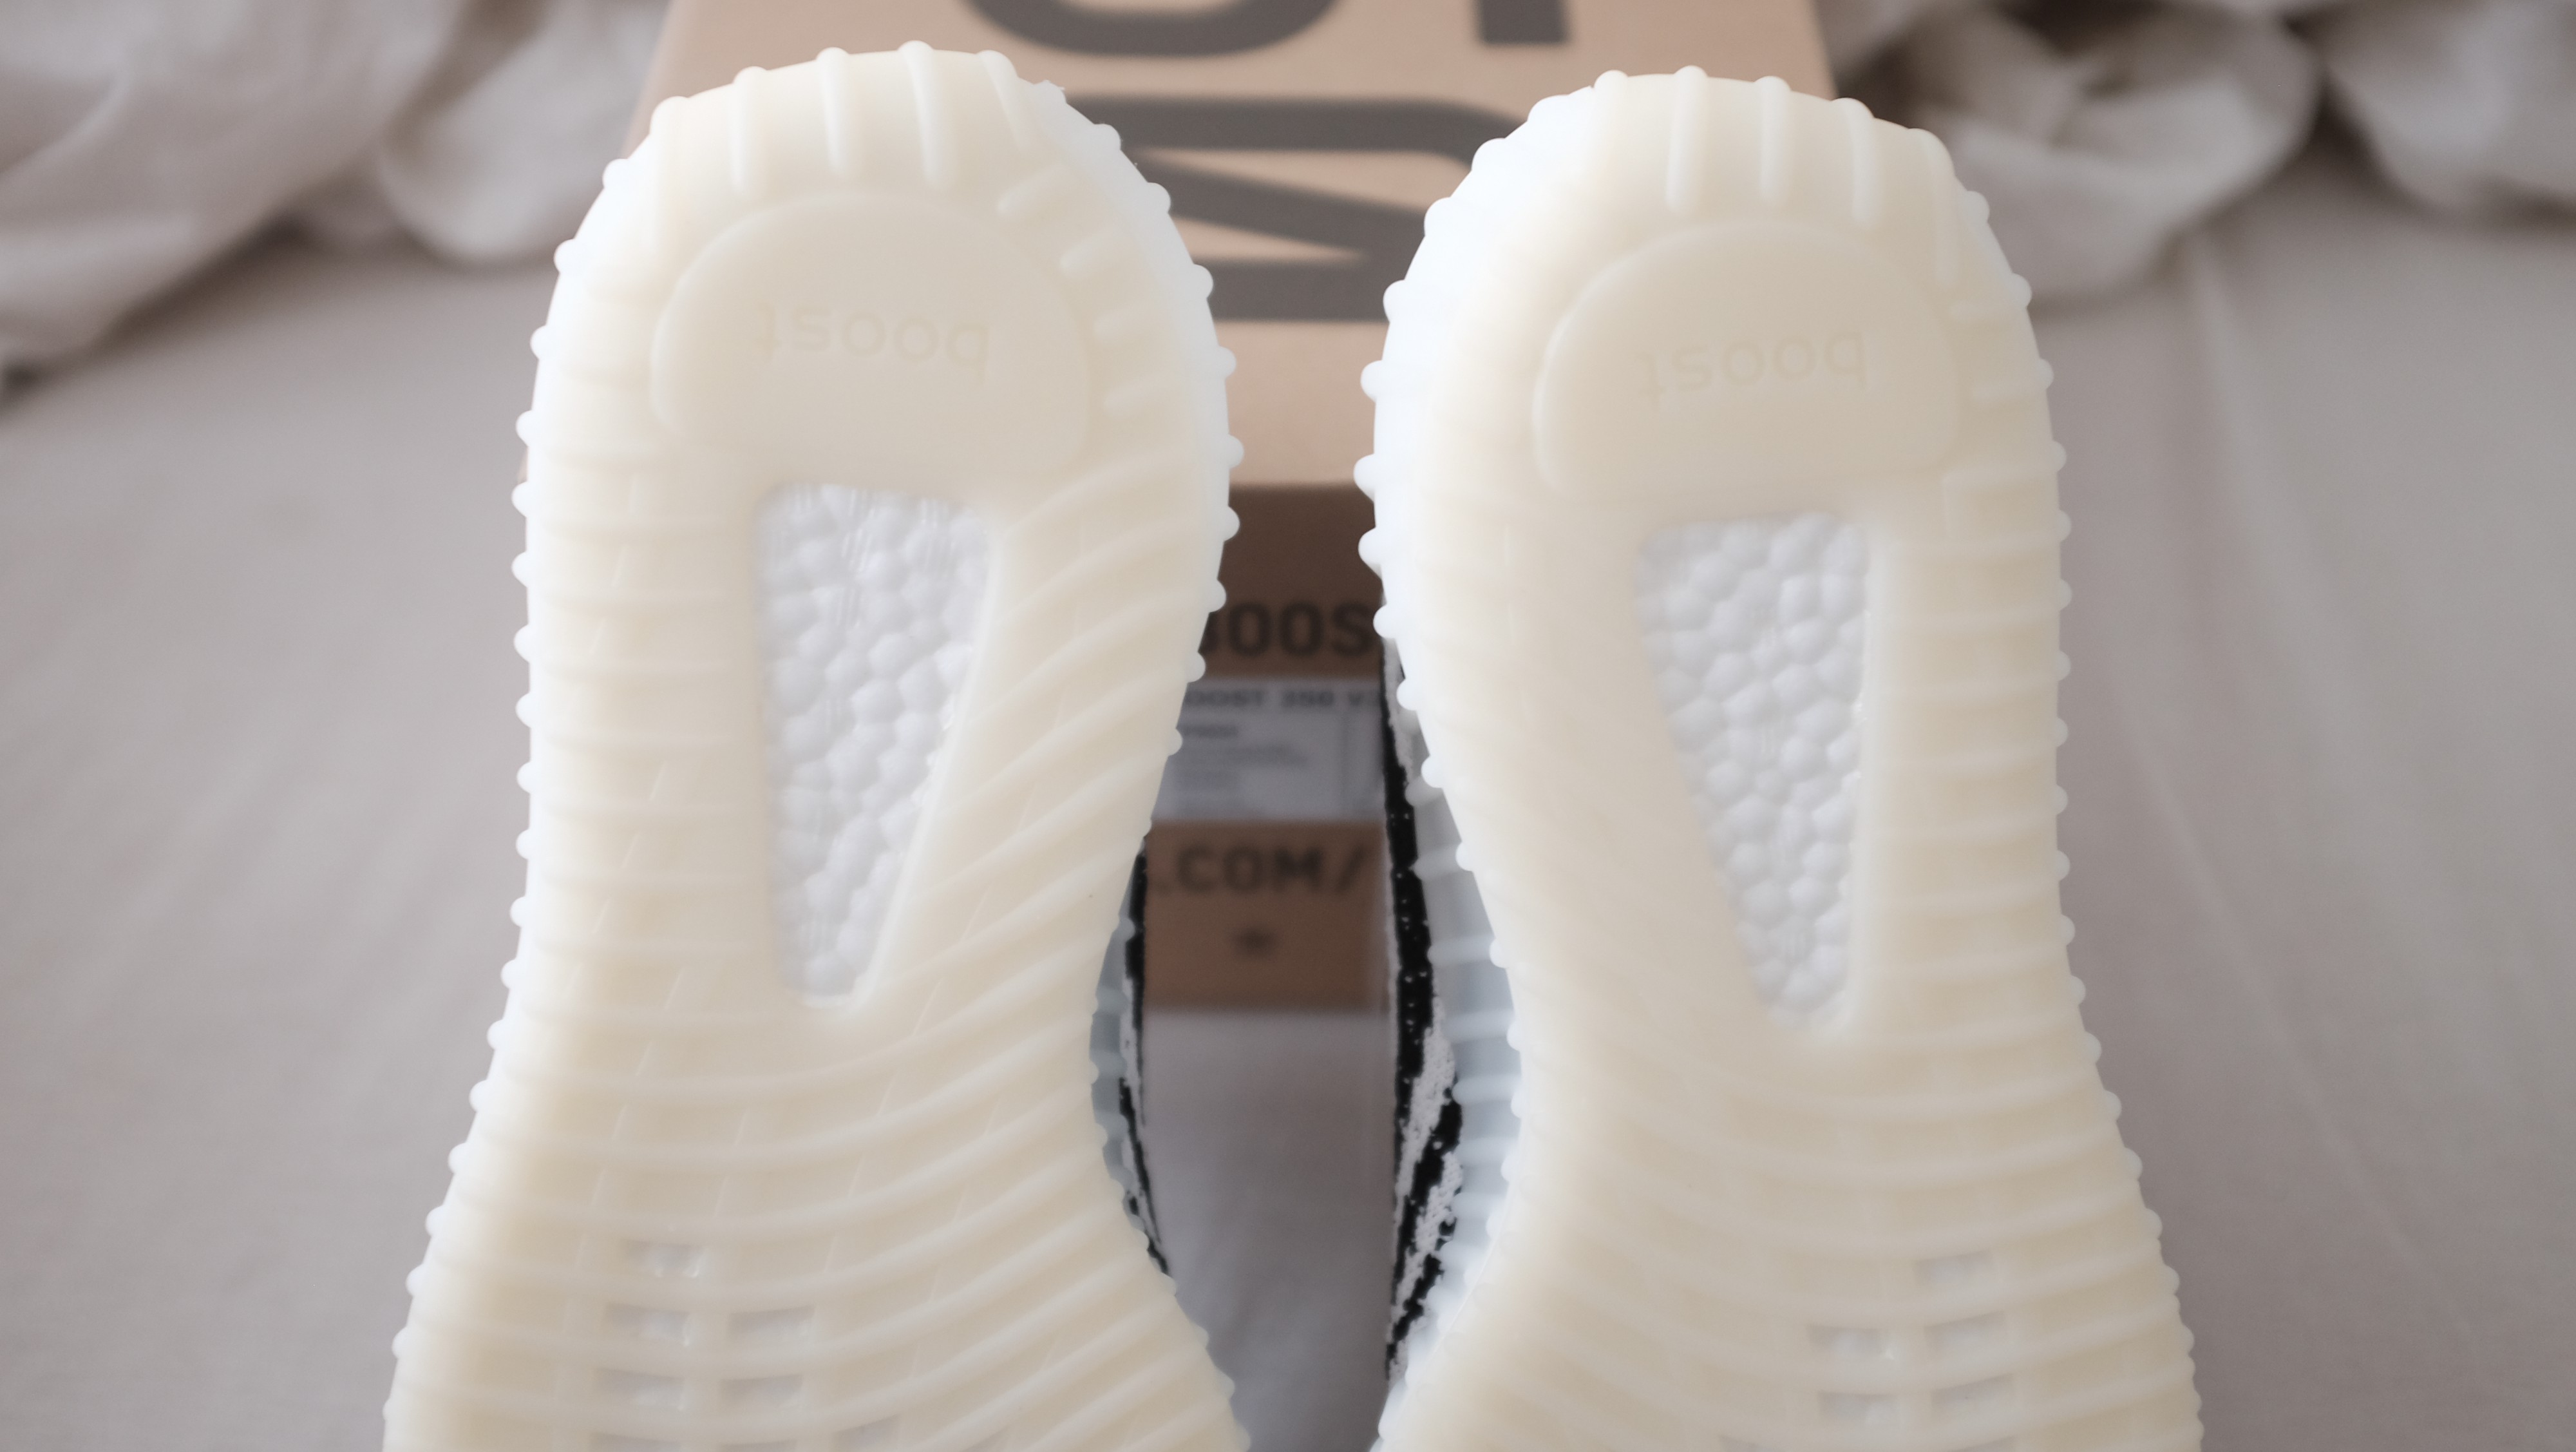
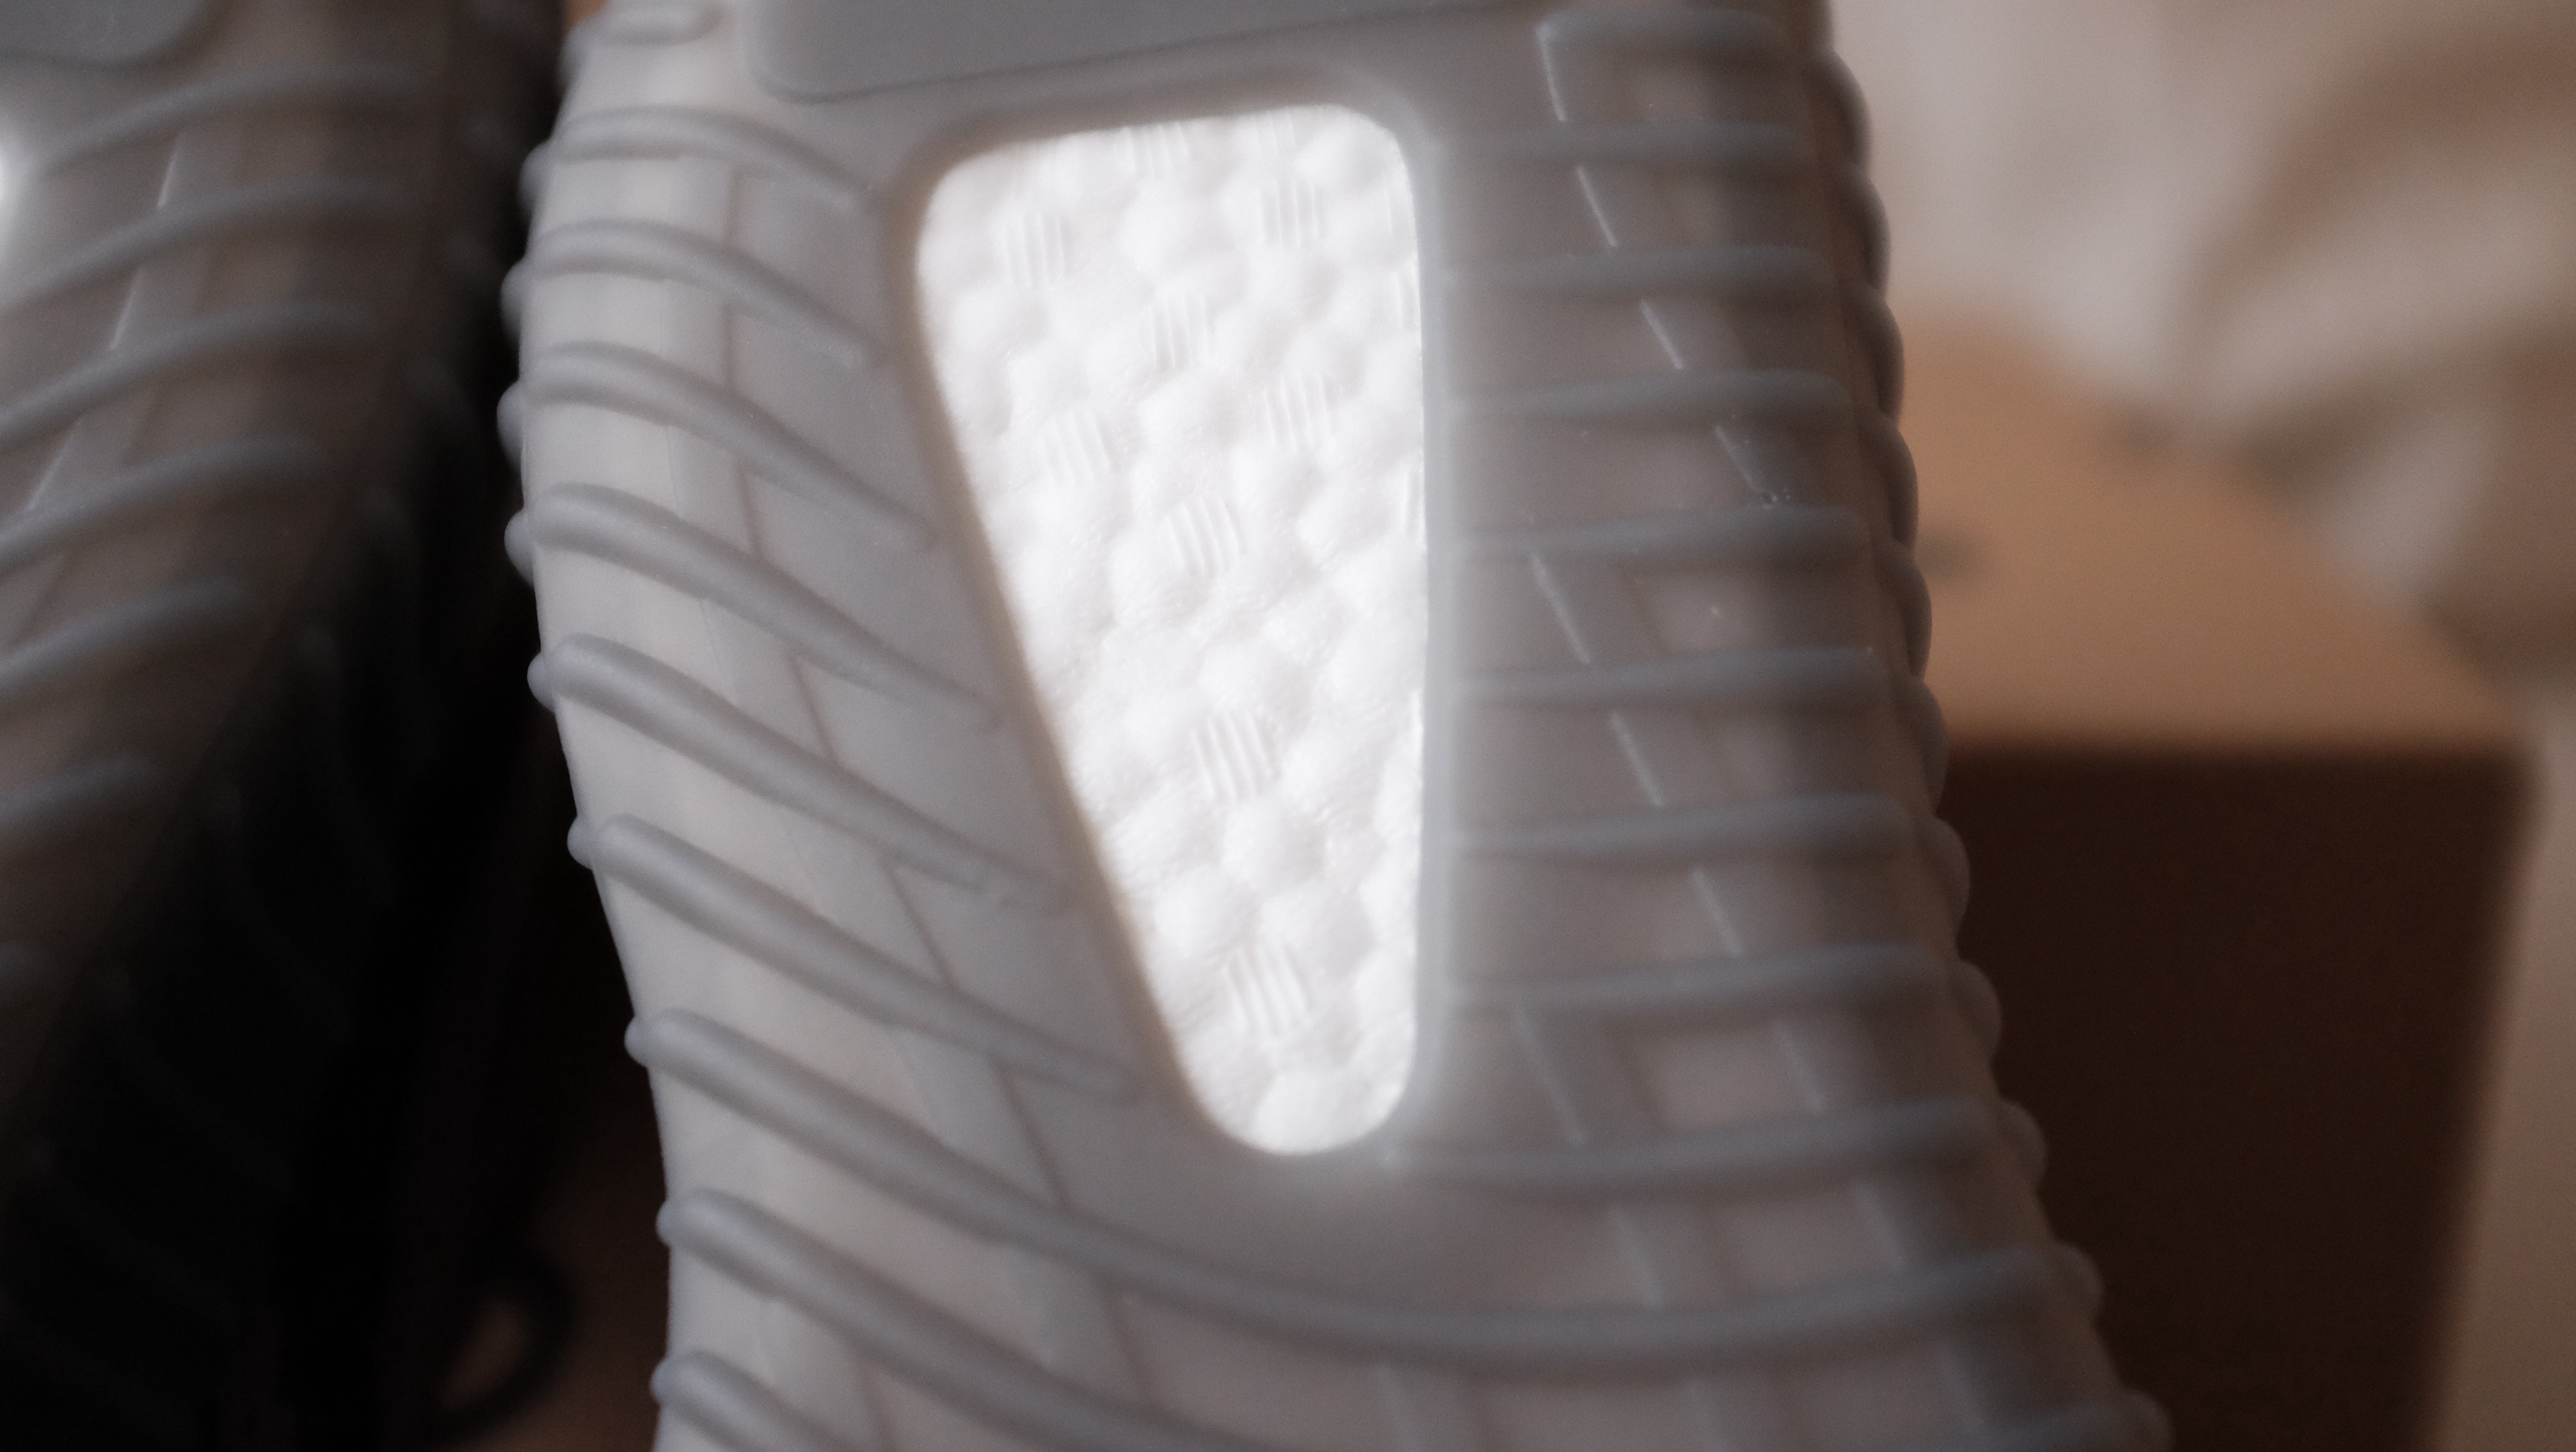
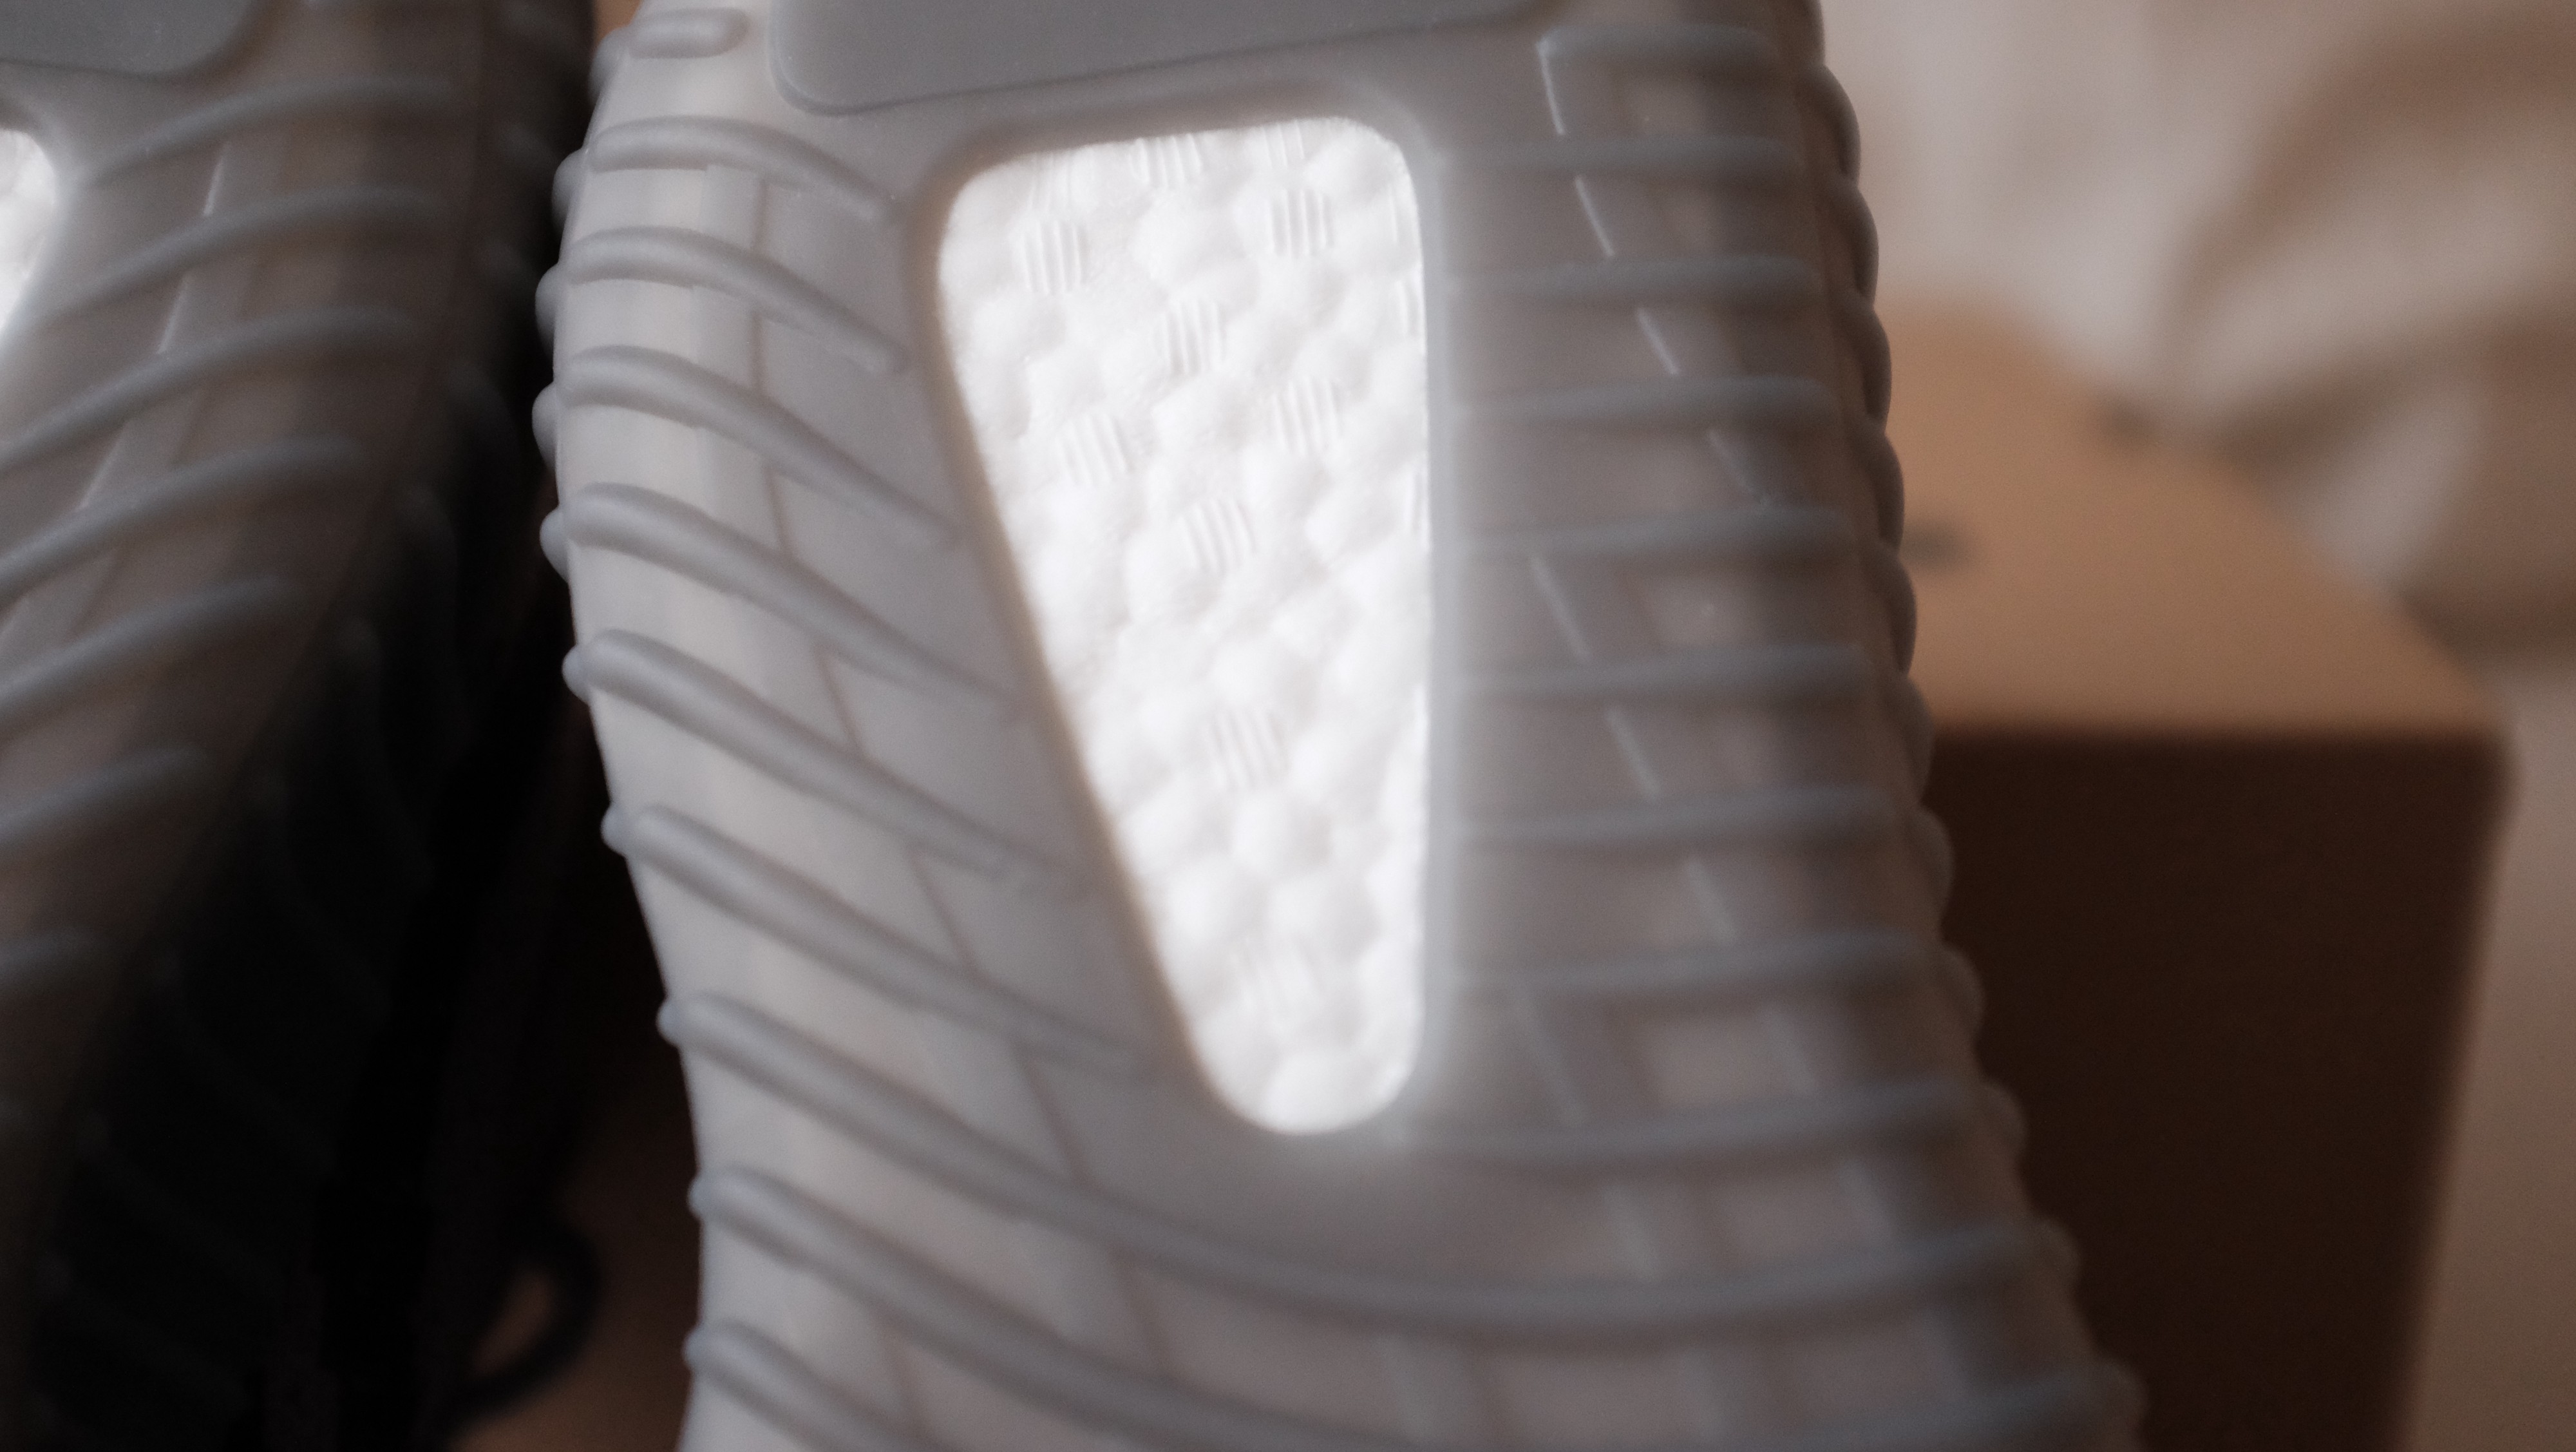
I call this the Light Test, this works on all V2?s and any shoes with Boost in them, even Ultraboost. I used my iPhone for this test, but you can use any flashlight as well. The color the light omits is irrelevant as that has to do with the color temperature of your light source.
 Light should pass through freely, it should illuminate everything.
 It?s harder to see in these pictures, but you can almost even see the Boost ?Fingerprints? as well.
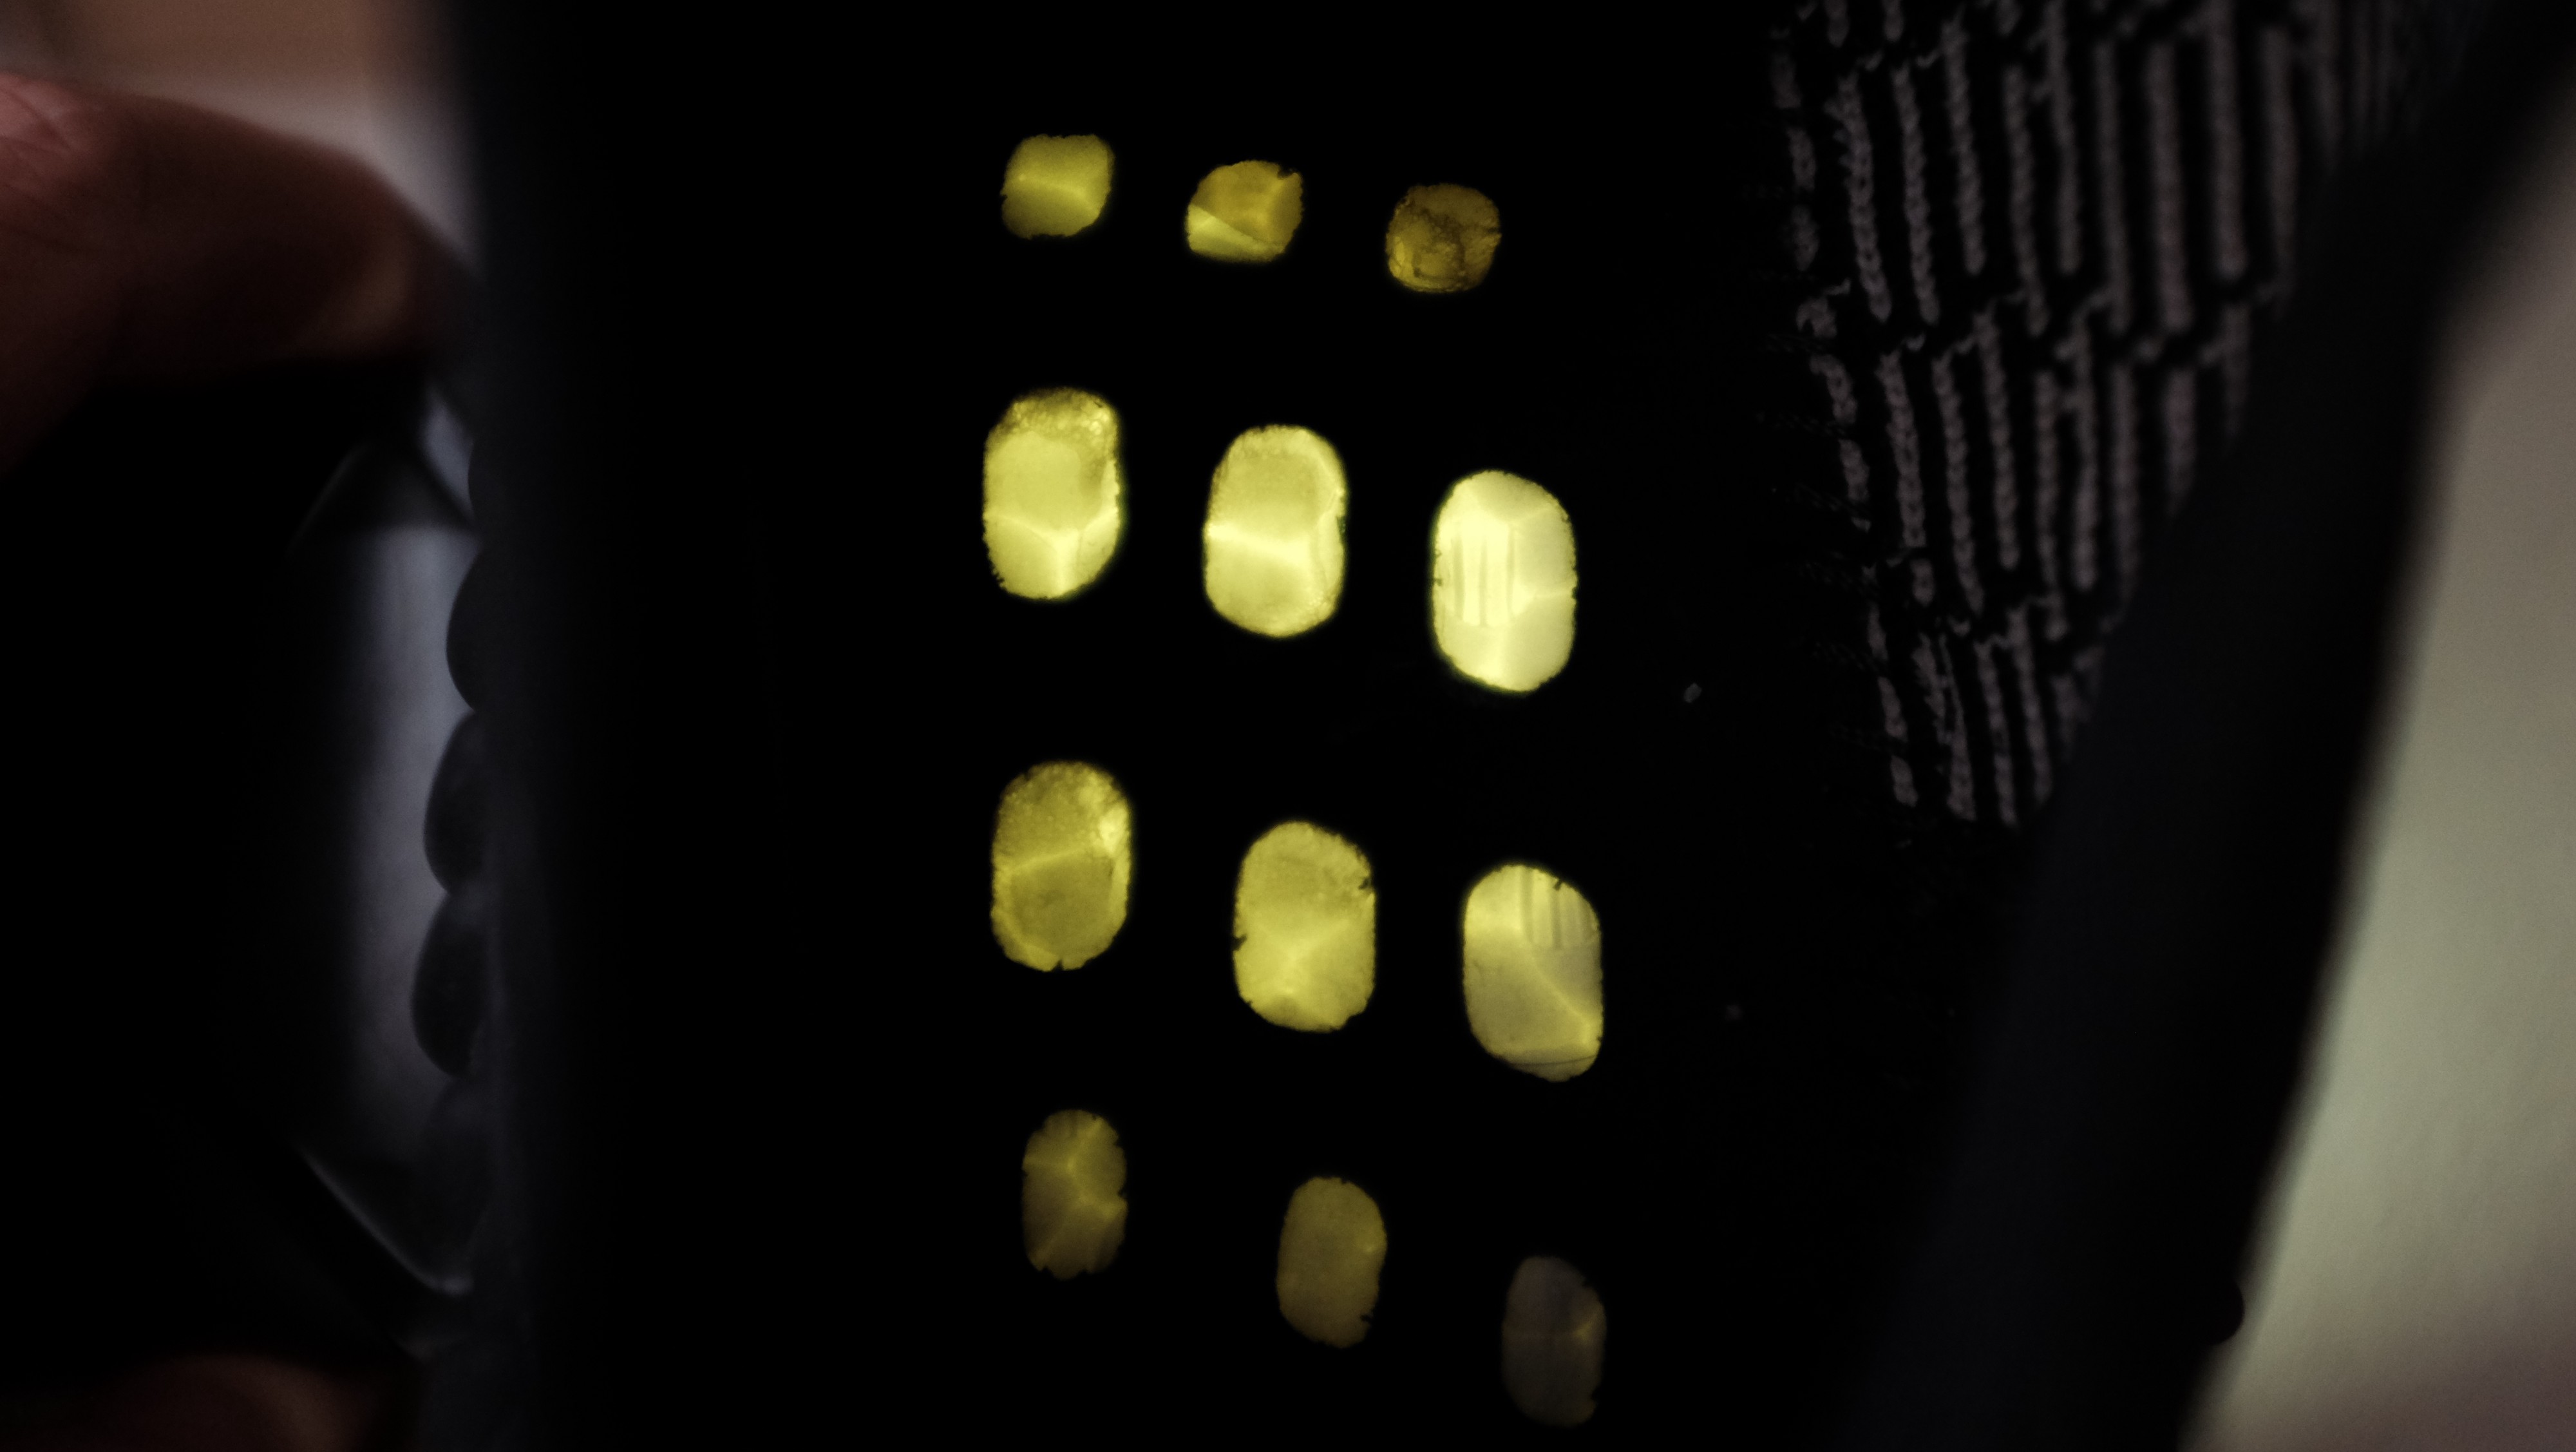
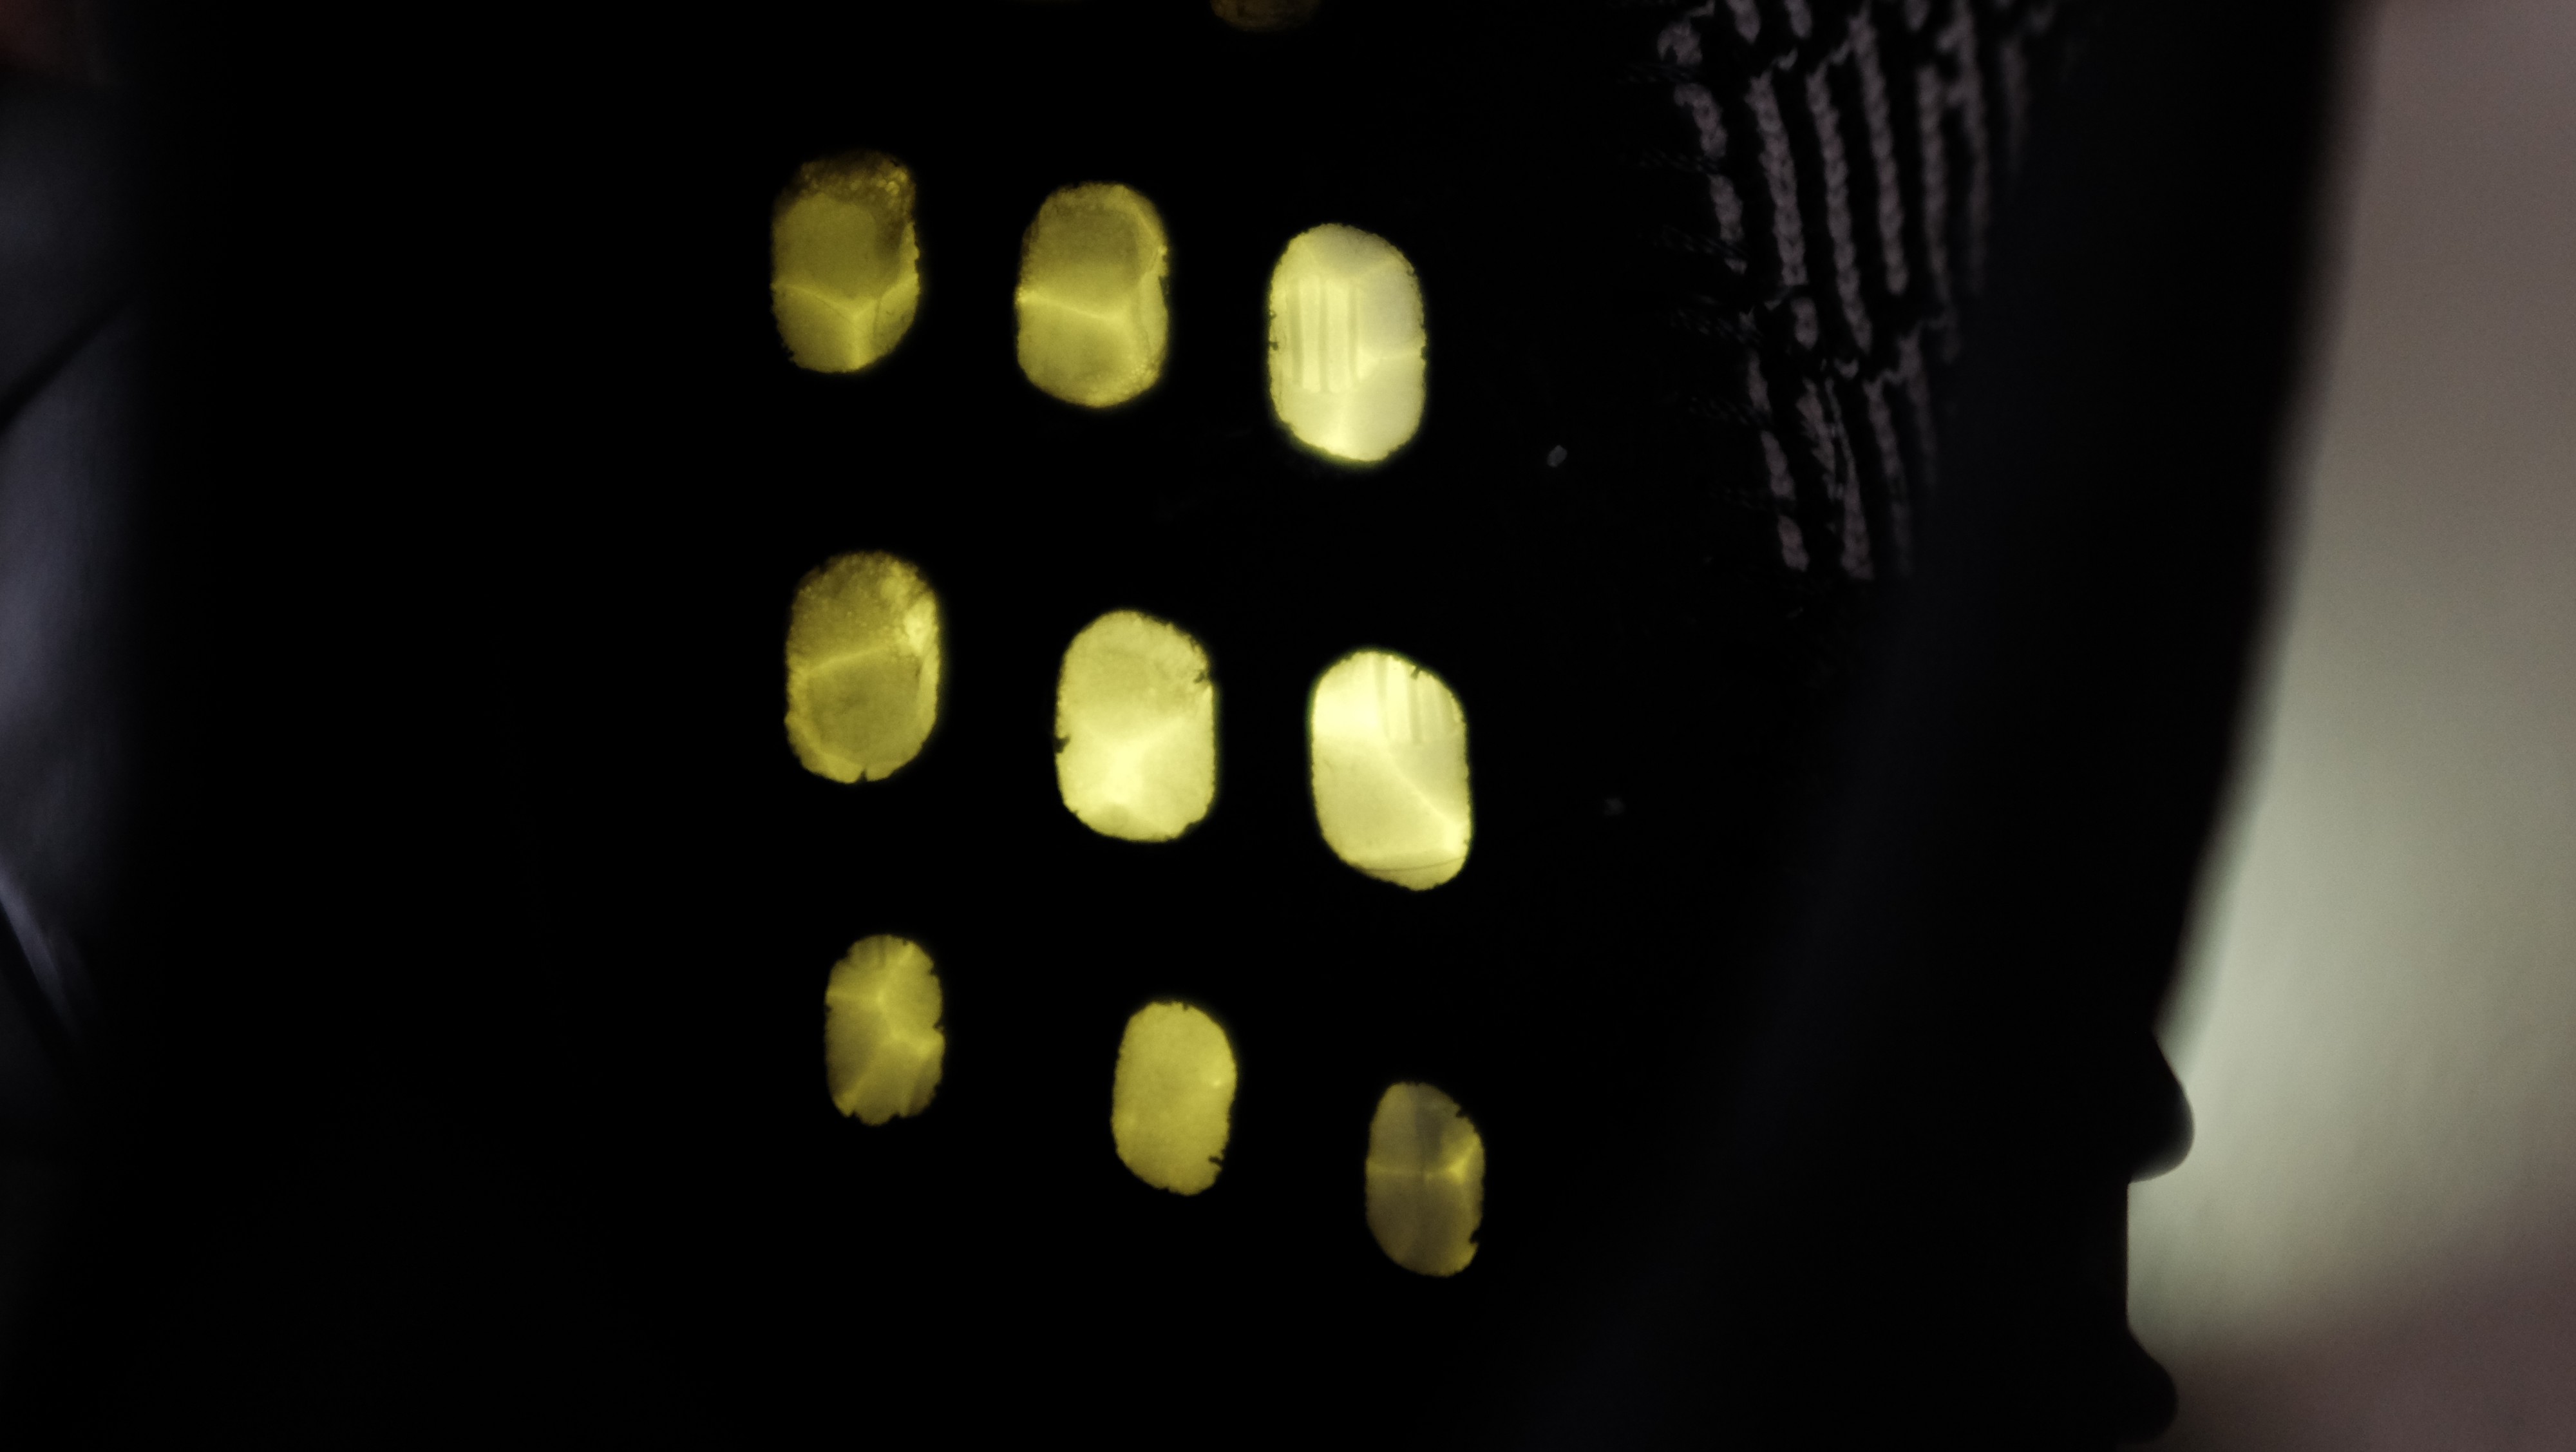
Fakes will not be able to illuminate through the boost, it?ll only illuminate through the cracks/surroundings of the boost pellets. Light does not pass freely through the boost in fakes.
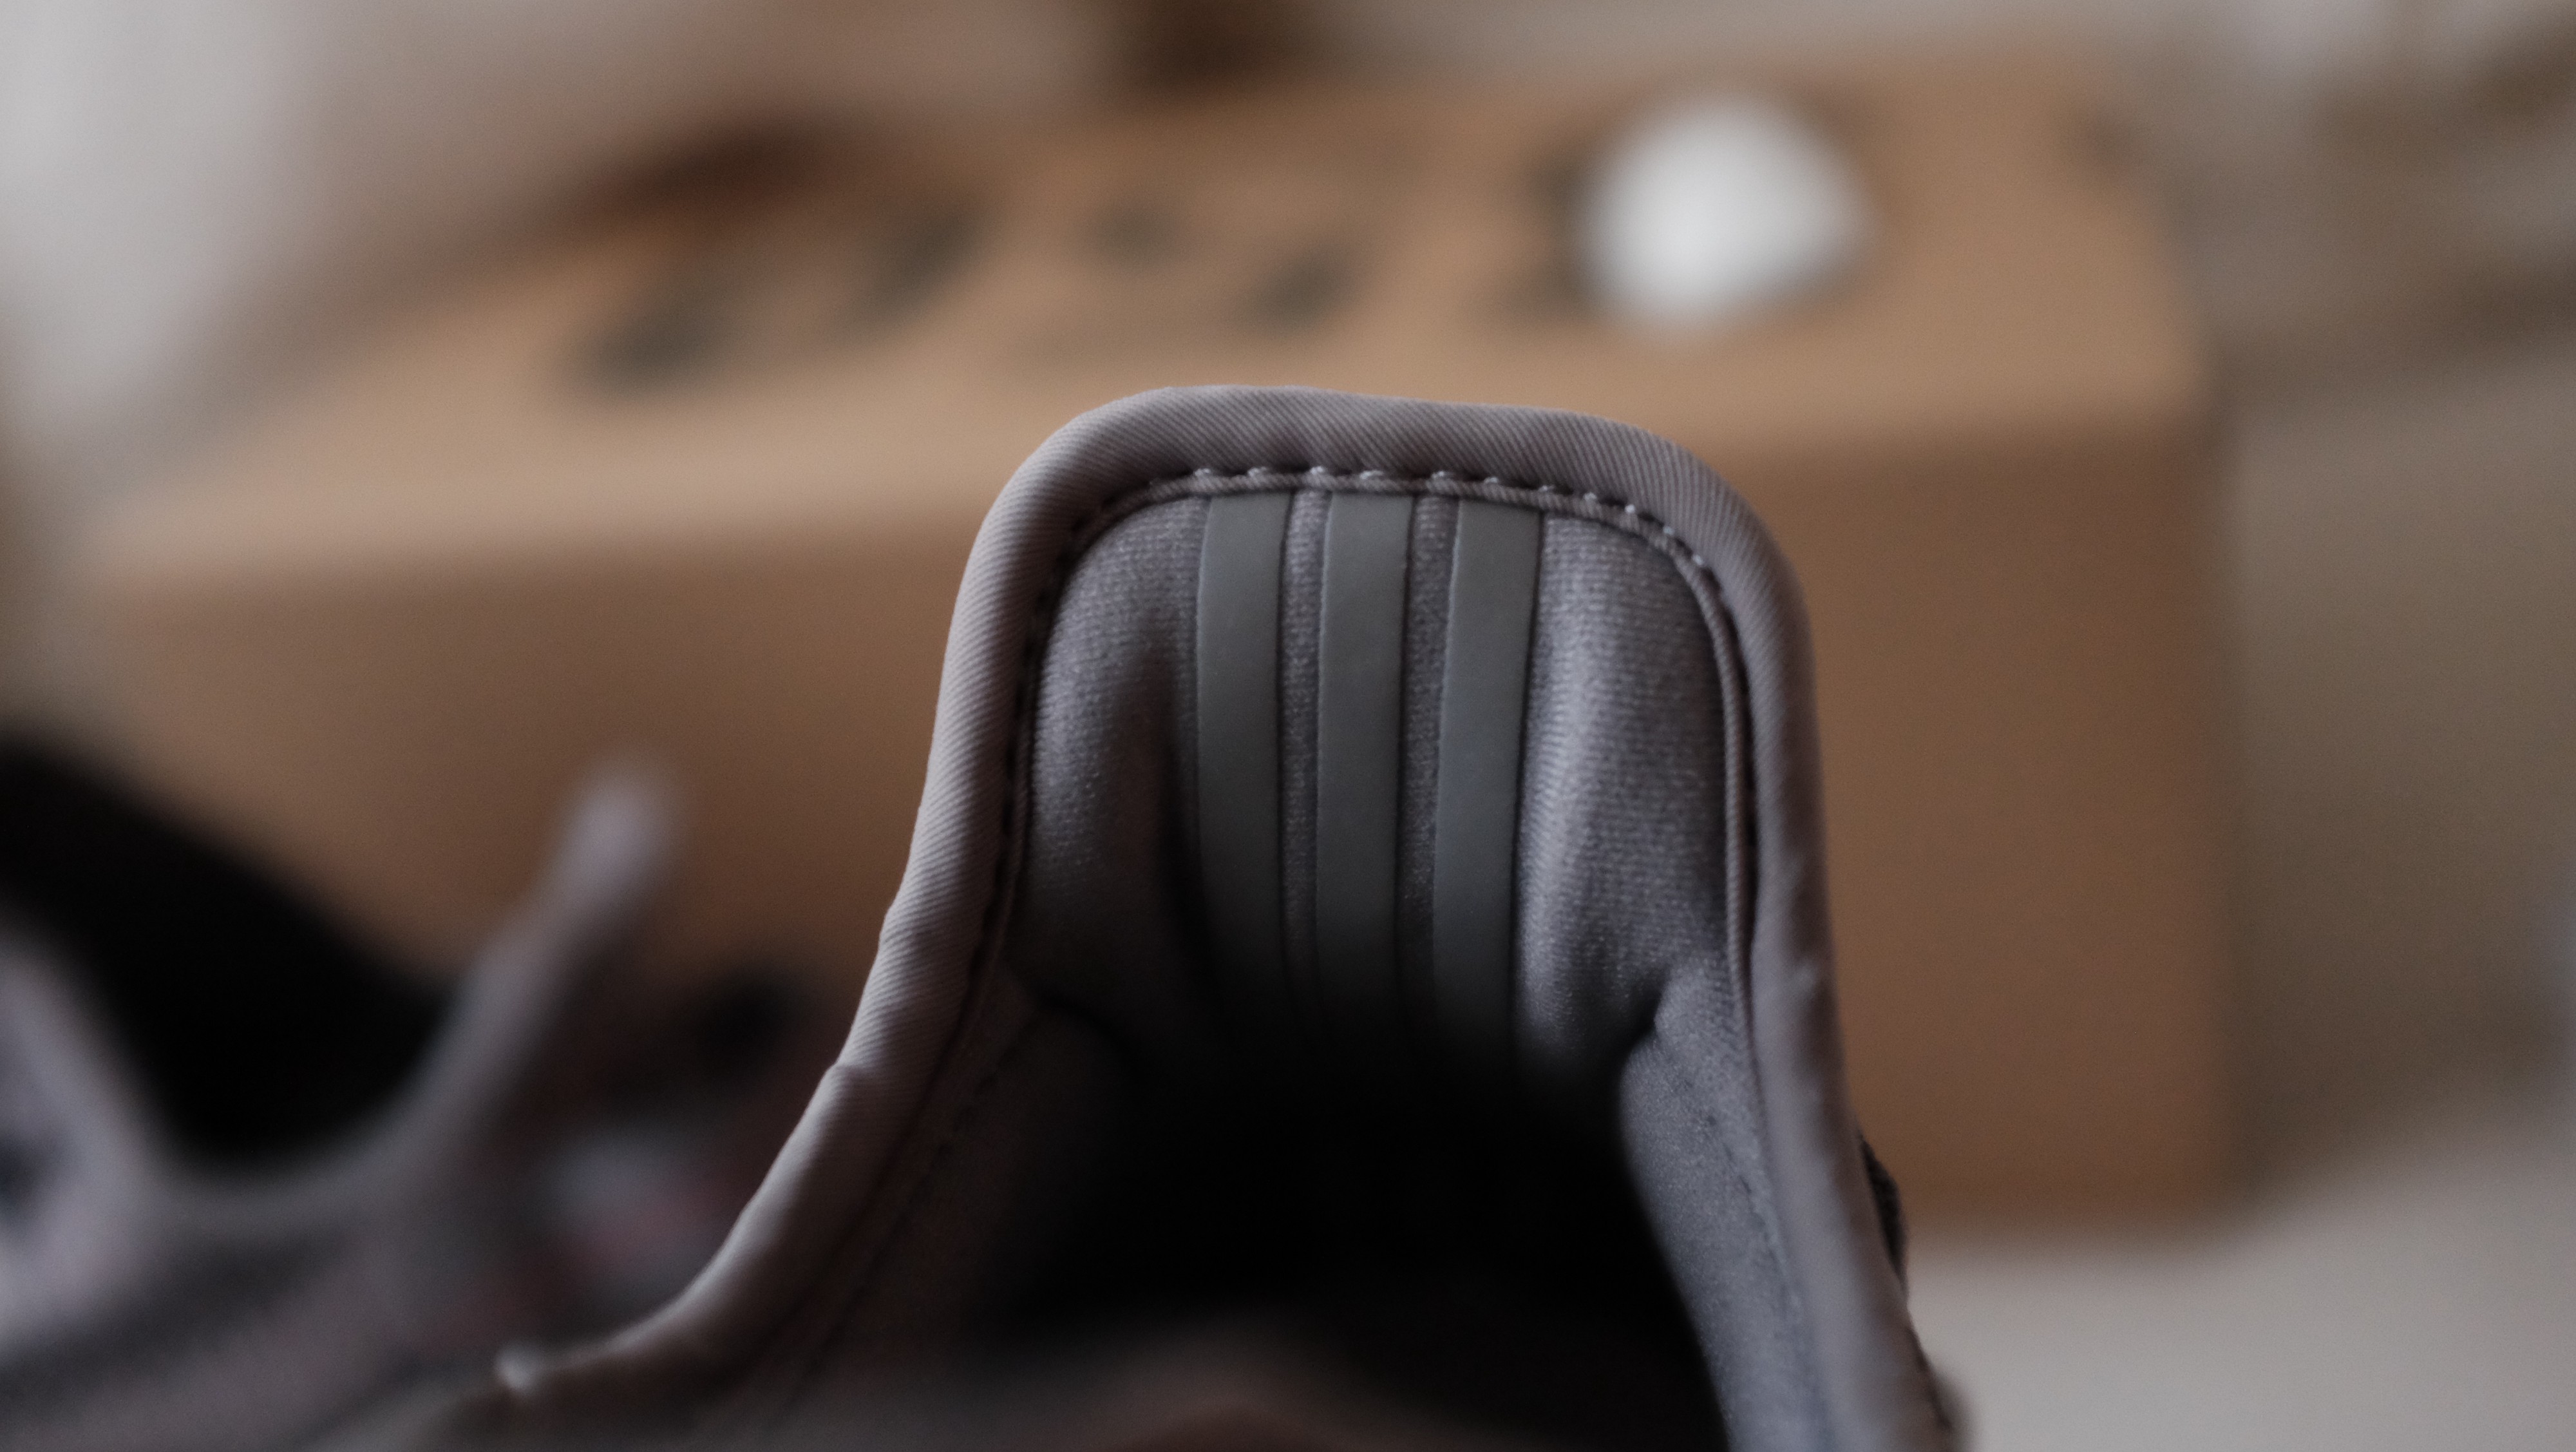
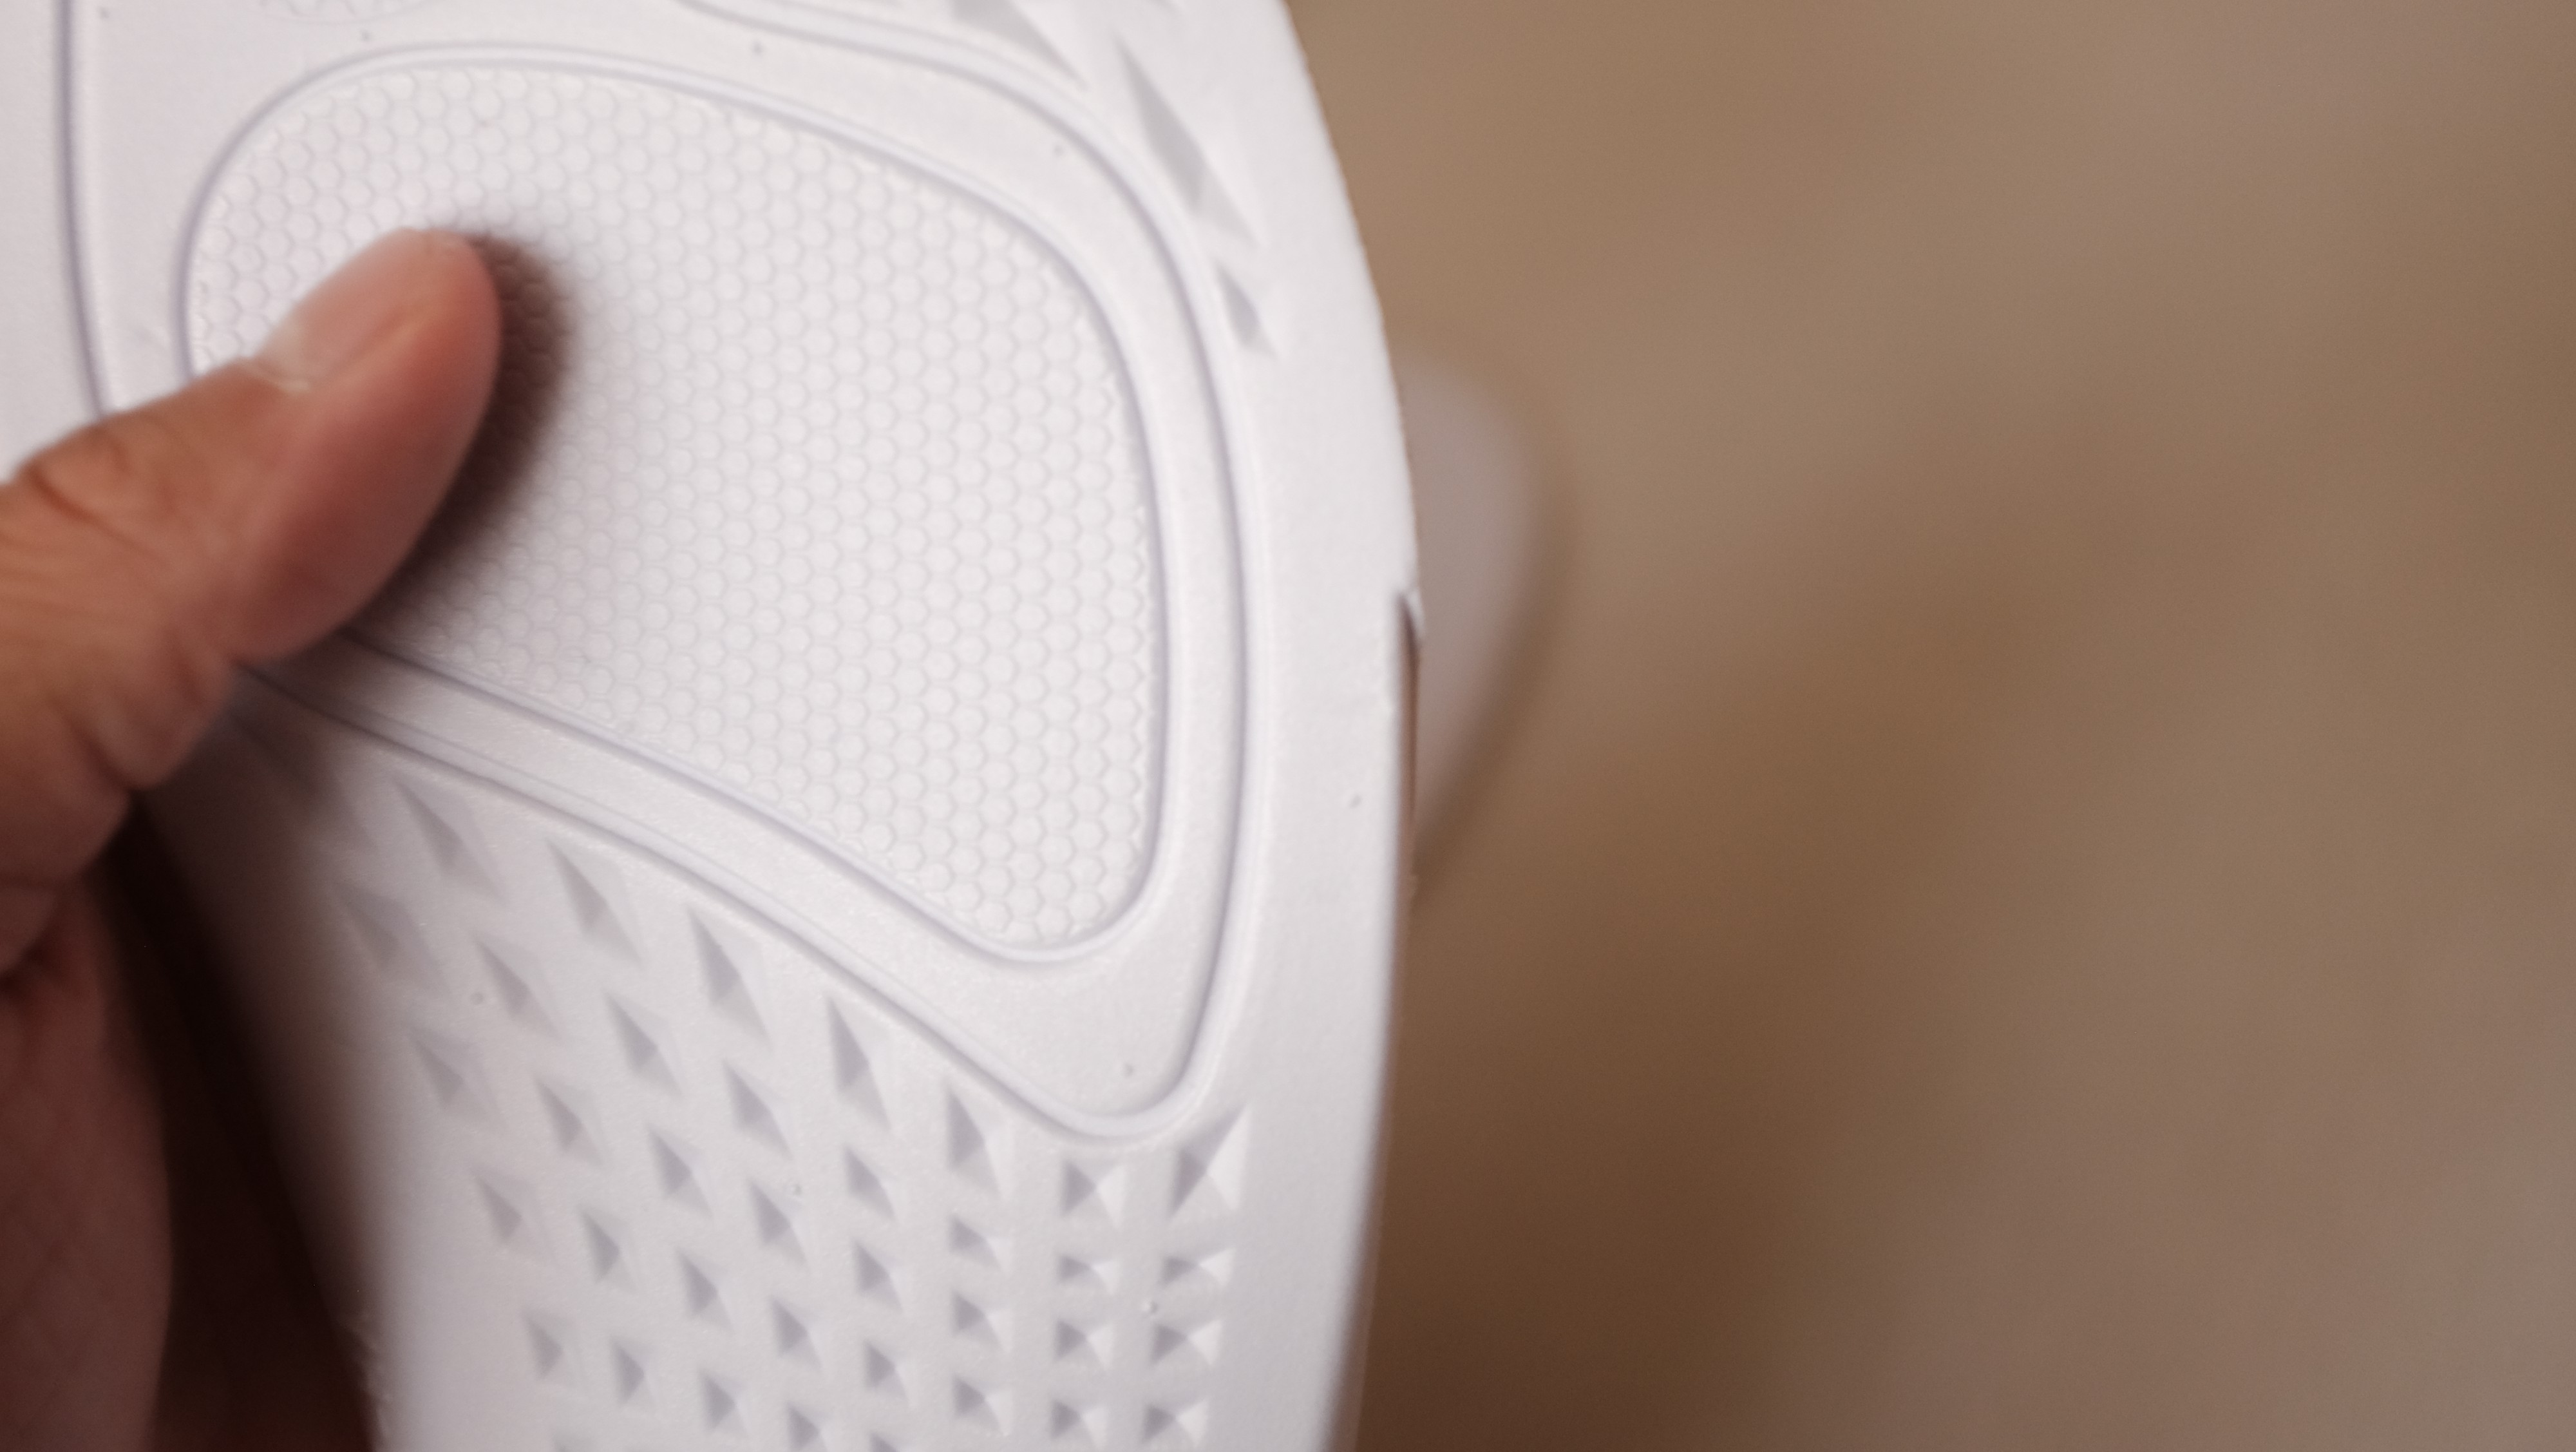
Support Your Ankles
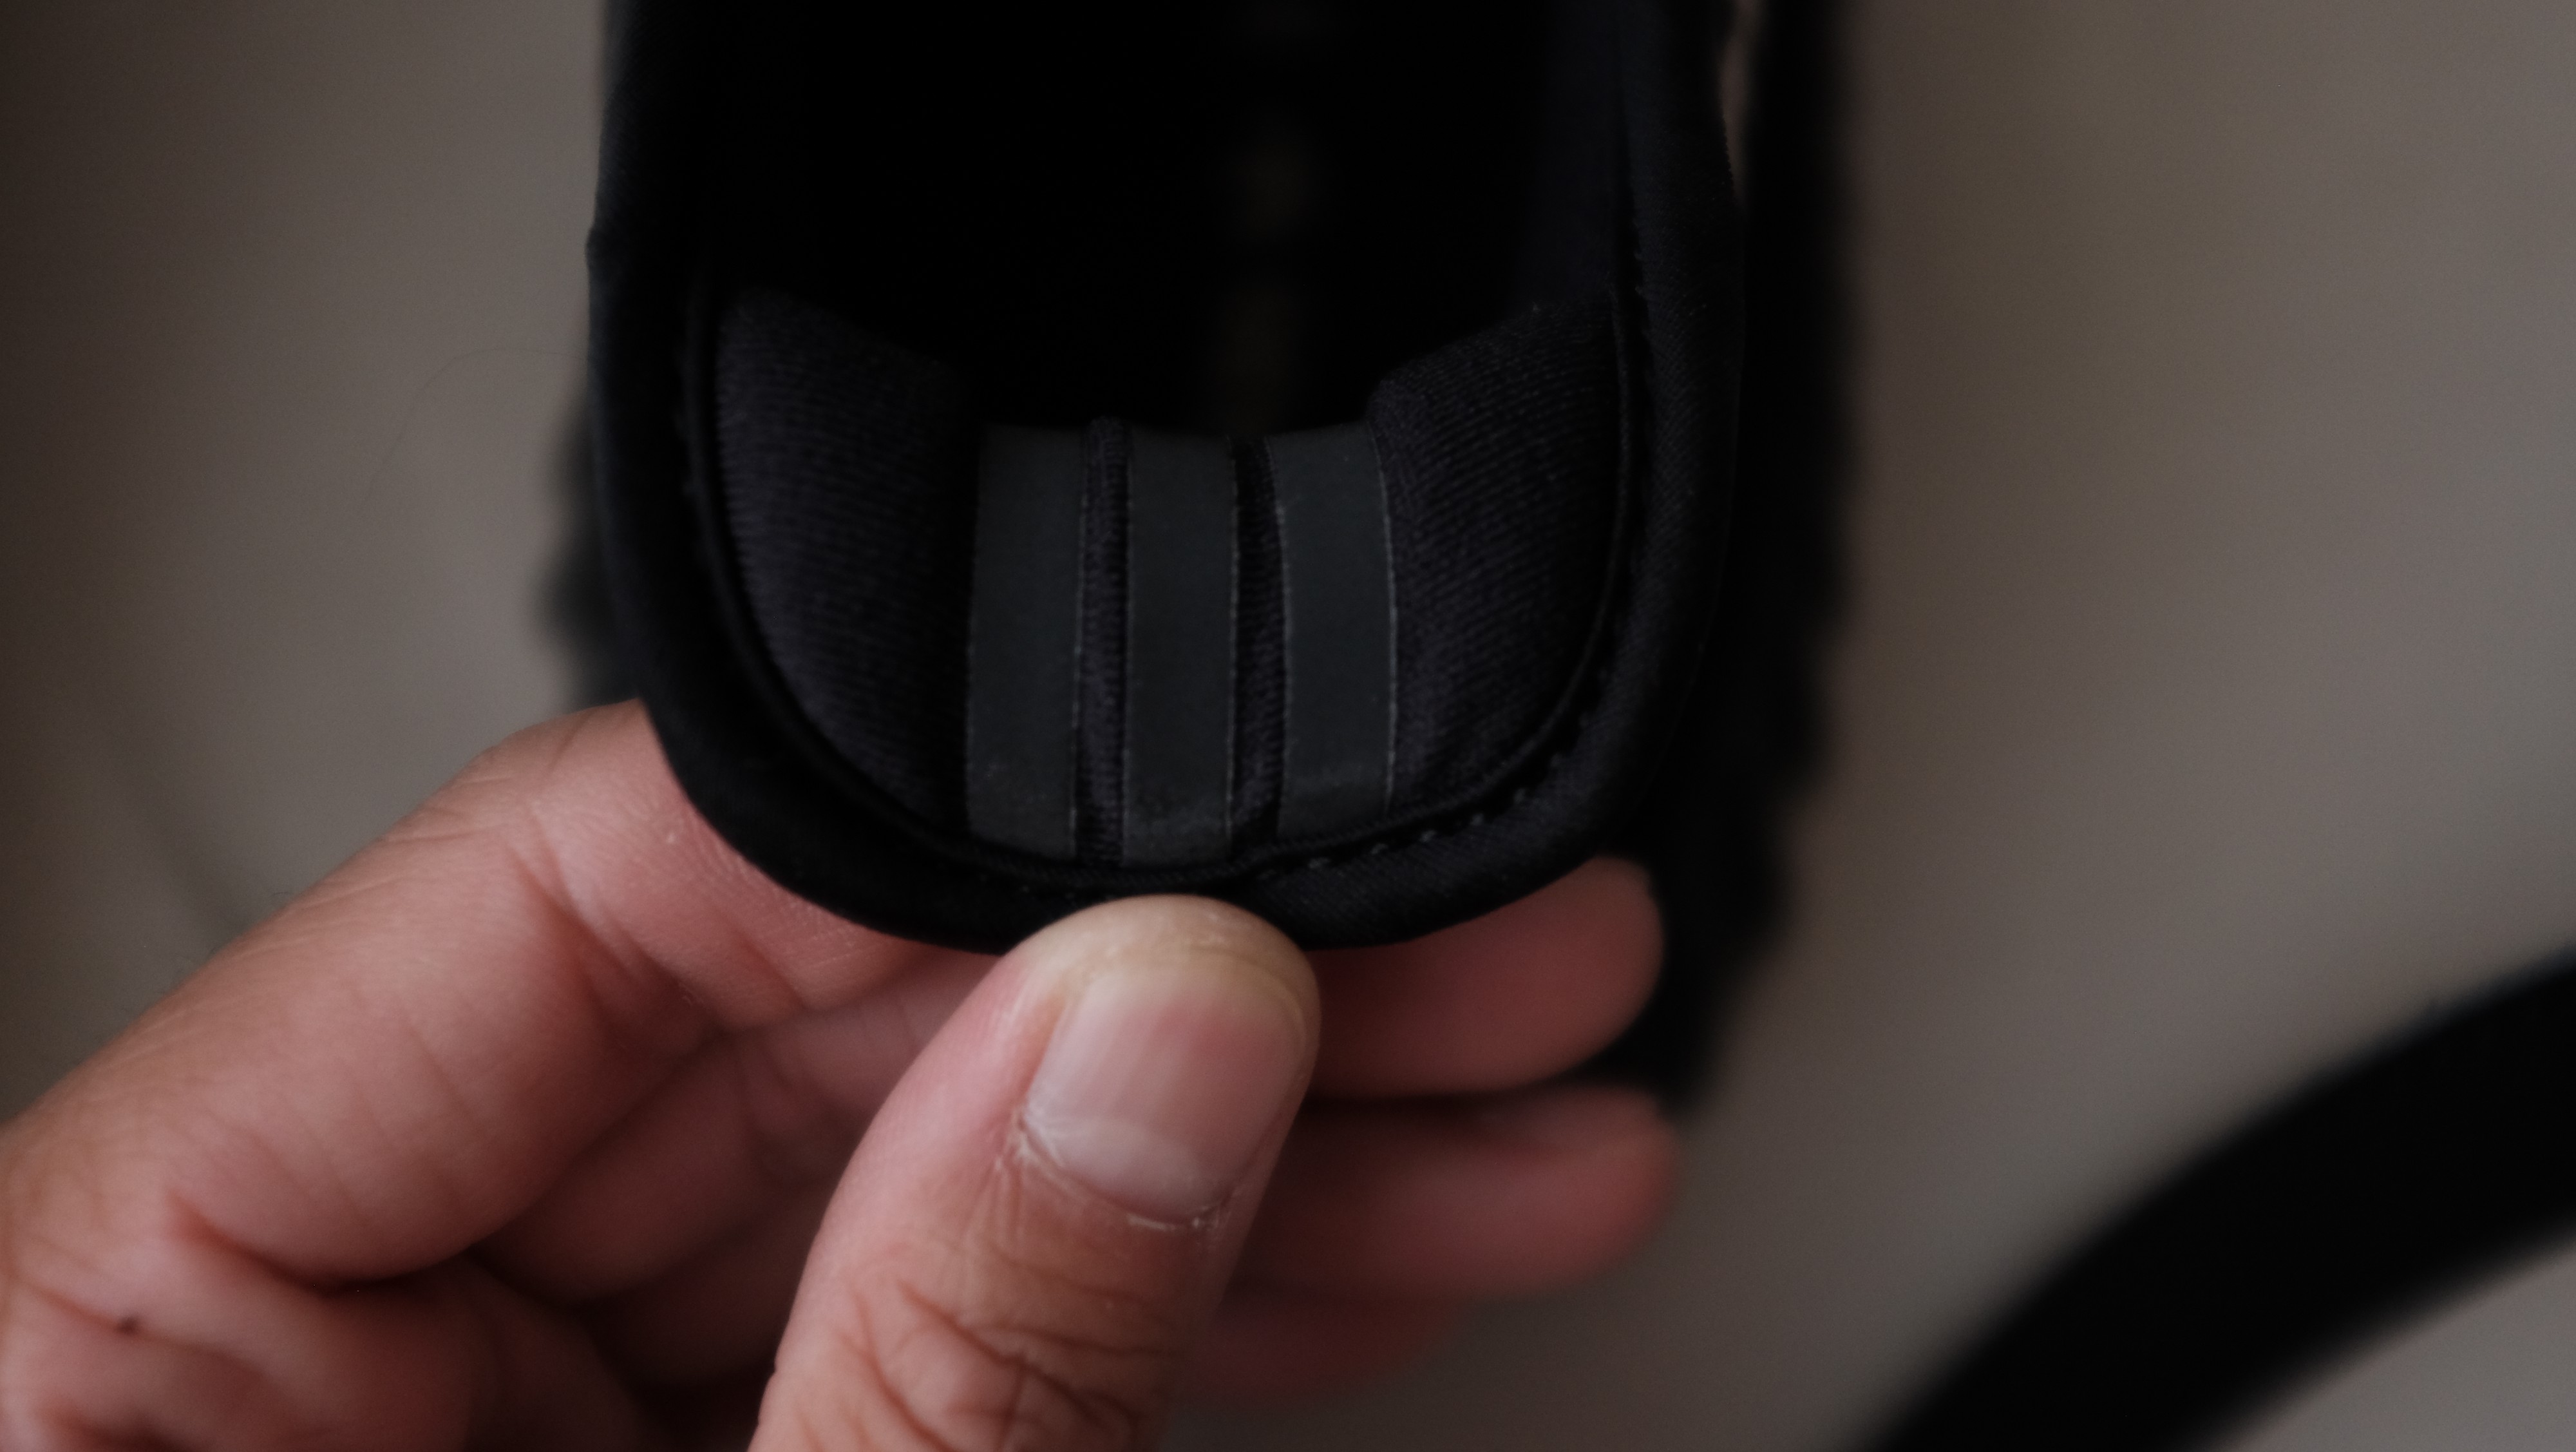
One of the important improvements they made in the V2?s is the heel support. Here is a simple test to do and makes it easy to call out fakes.
 With one finger pull back the back tab of your V2
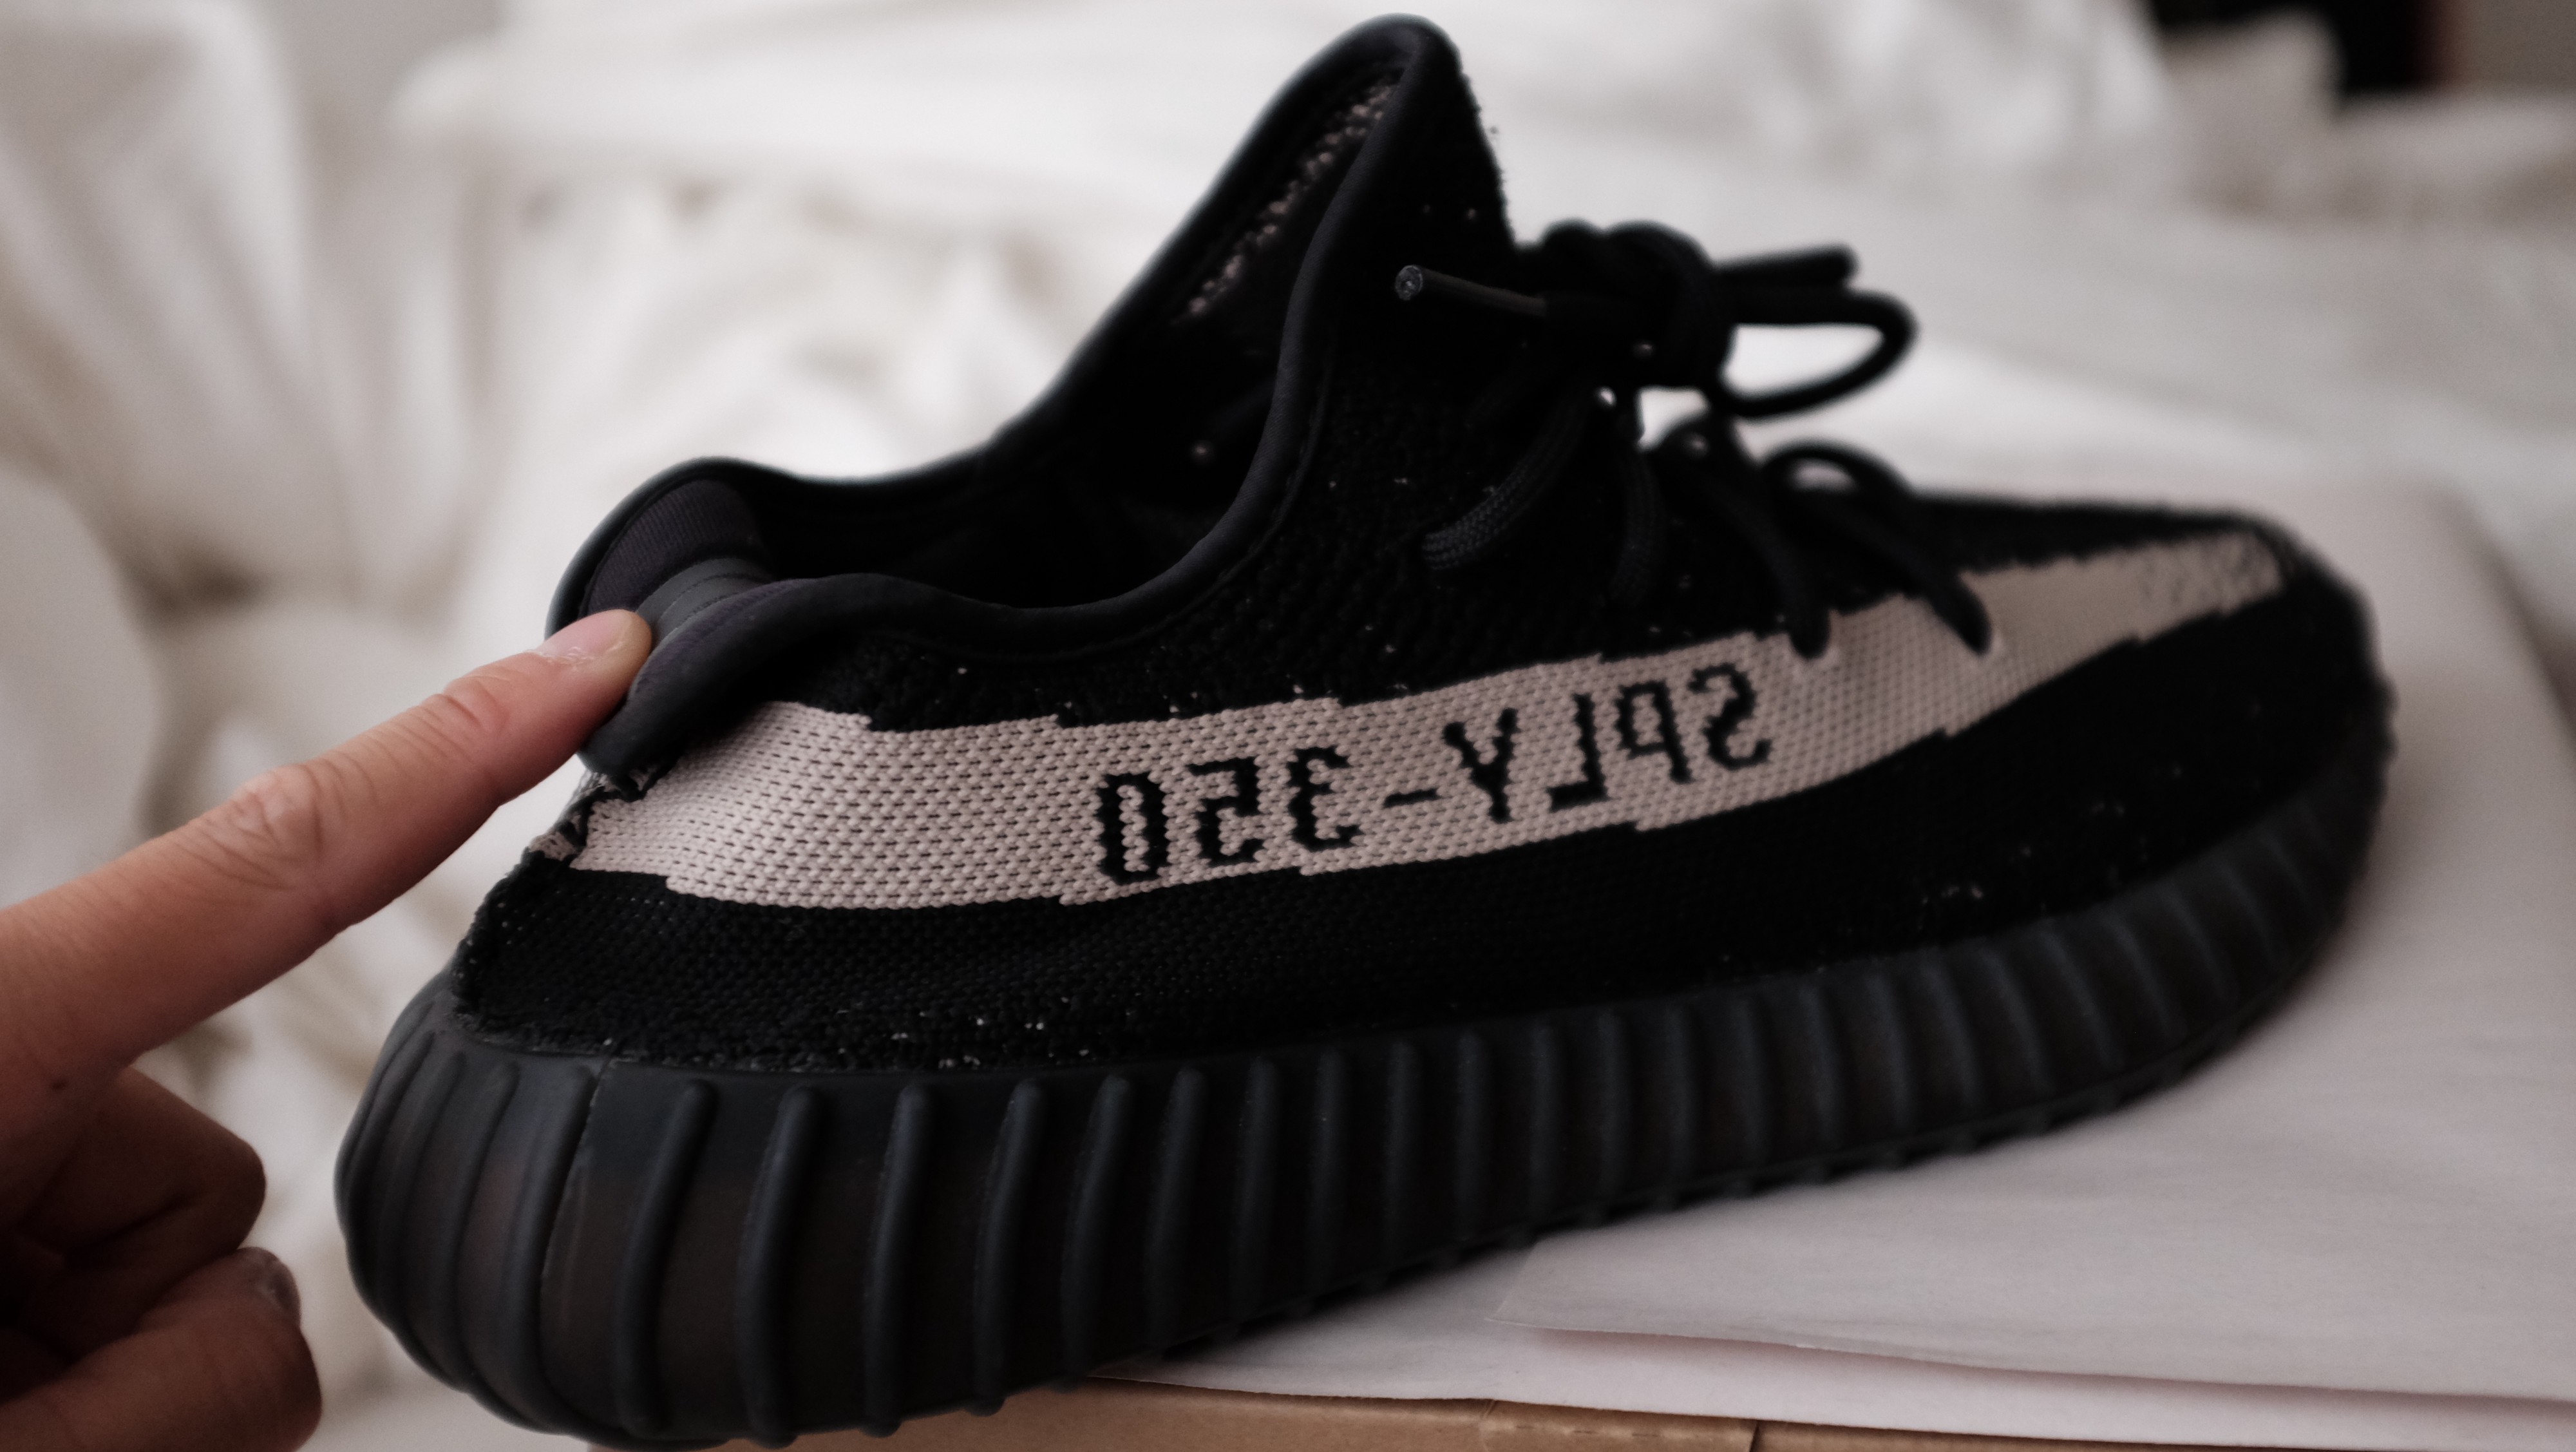 If you keep going you?ll notice your heel support does not collapse, and will hold up through this pressure. Fakes collapse with ease.
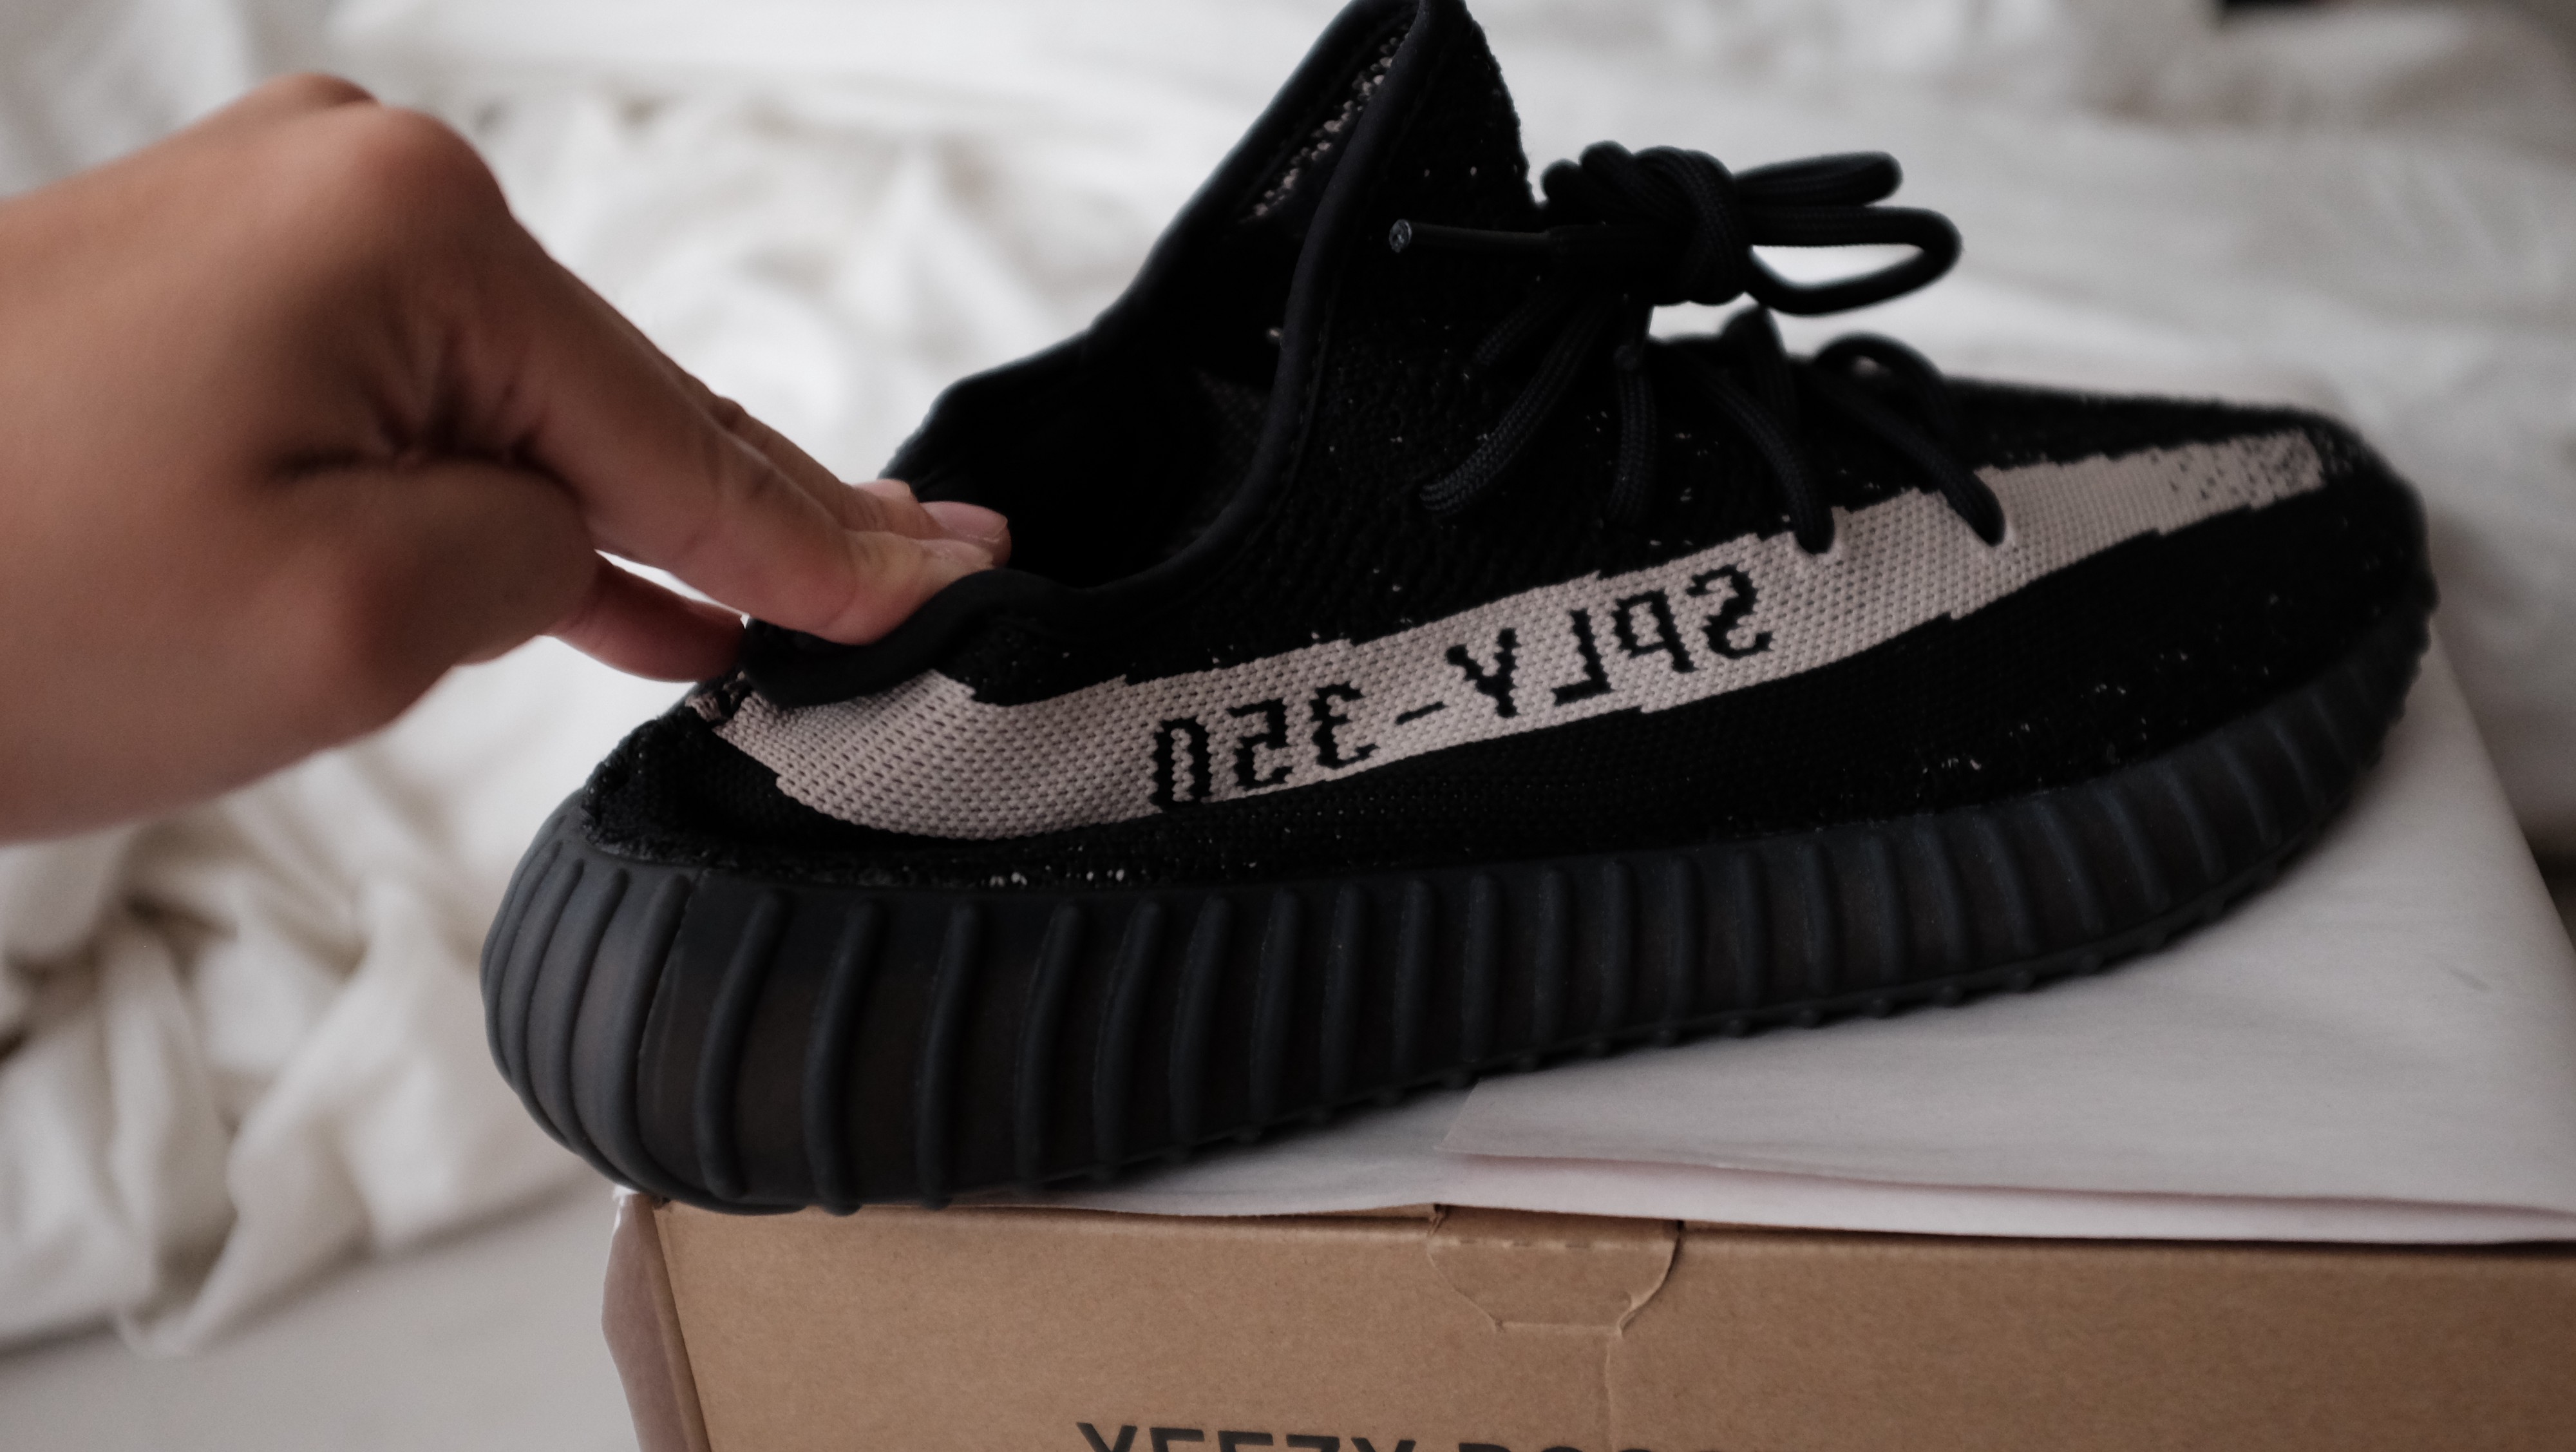 I would need to use my whole hand to push down for the heel to even collapse the retail pair.
BUYING USED
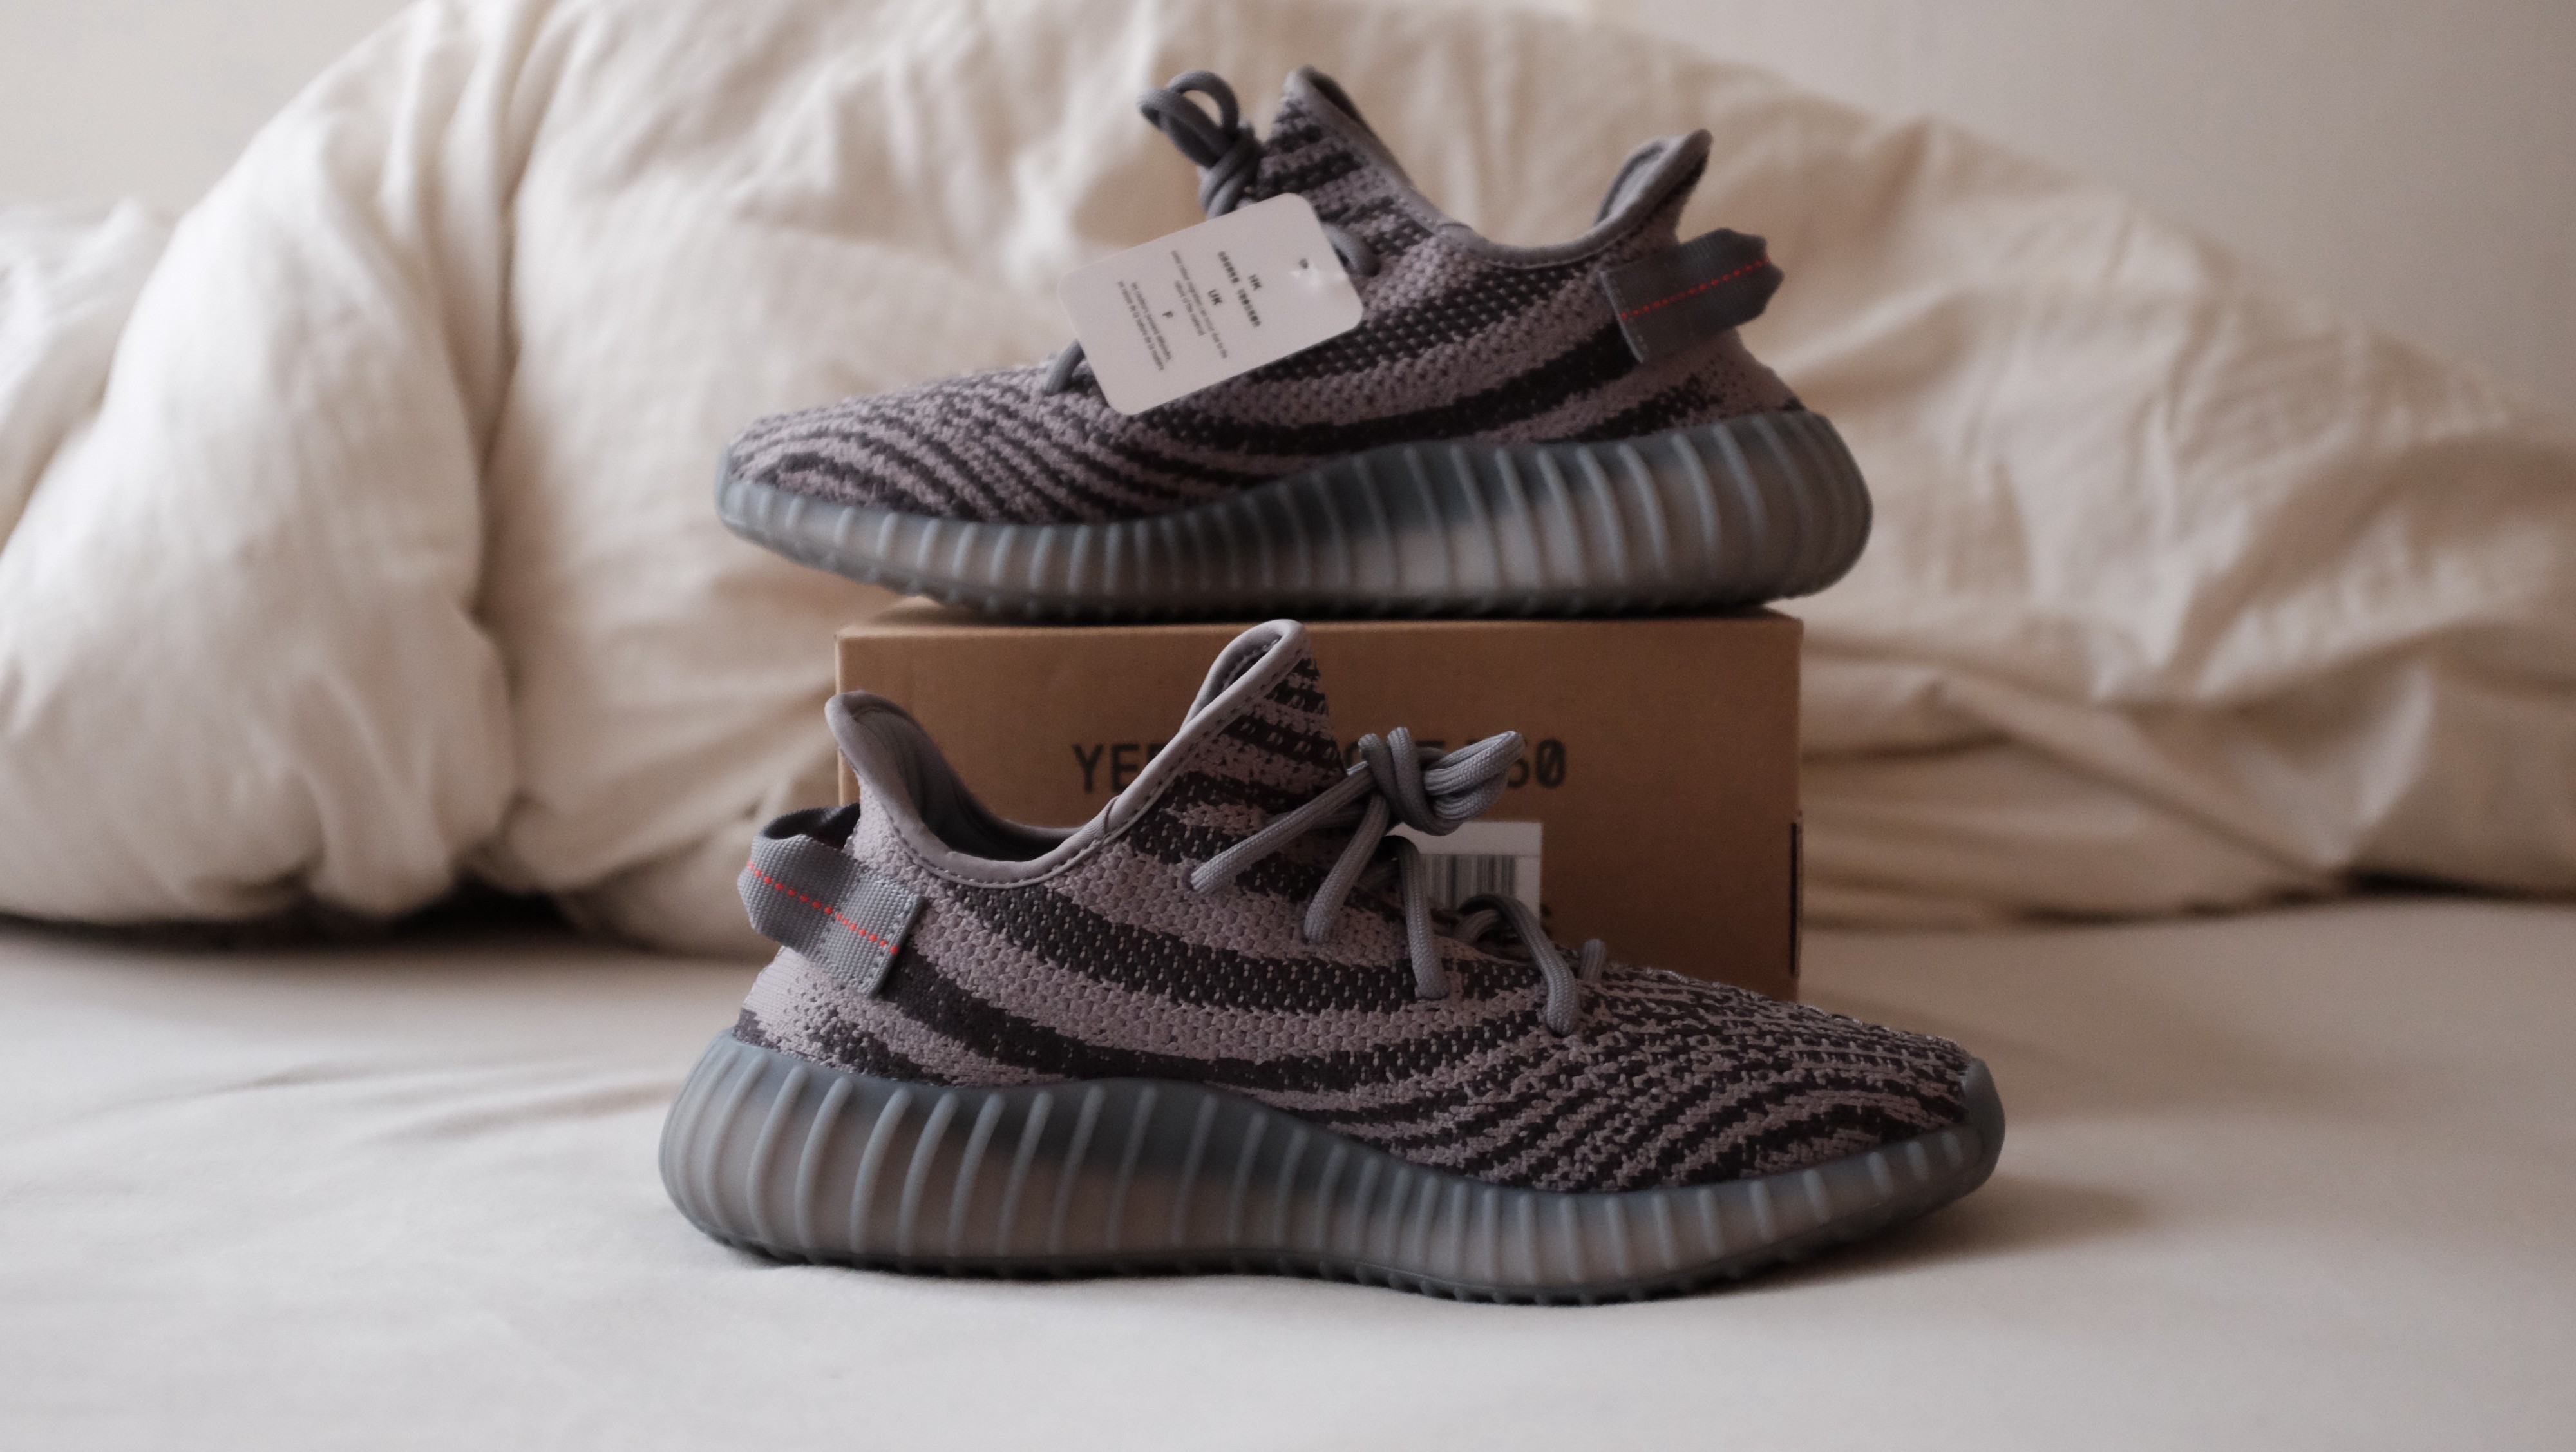
Keep in mind if you are buying used, the shape can start to change. These shoes were made to form to your foot, so if the previous owner had a wide and big foot, the prime knit does stretch and could create a slight baggy effect, and the back heel could become wider and lose some of the narrowness of the pyramid shape it once had.
 Beluga sz 9 used
Boost can become harder to tell when dirt and yellowing starts to occur. Be sure to have the Seller clean the Boost so you can clearly see the Boost.
As with anything, be careful.
I?ve heard stories of bait and switch, always double check your shoes when you get them.
Generally speaking Paypal is your friend from a buyer standpoint.
And with that I hope everyone that reads this LC Guide can better help determine for themselves if their pair is legit.
Feel free to email: [email protected] for any LC inquiries as well.
Tune in next week for the In Person LC Guide video & how I got 4 pairs off ADC for the cream V2 release.
If you own Zebras, and want to help out the community send over some photos and I can add them to this Guide.
REFERENCES
Below are photo references of various Retail V2, to help with comparing.
Beluga 2.0 sz 8.5

OREO sz 9
OREO sz 10

COPPER sz 10

BELUGA sz 10

BELUGA sz 9
Cream sz 9
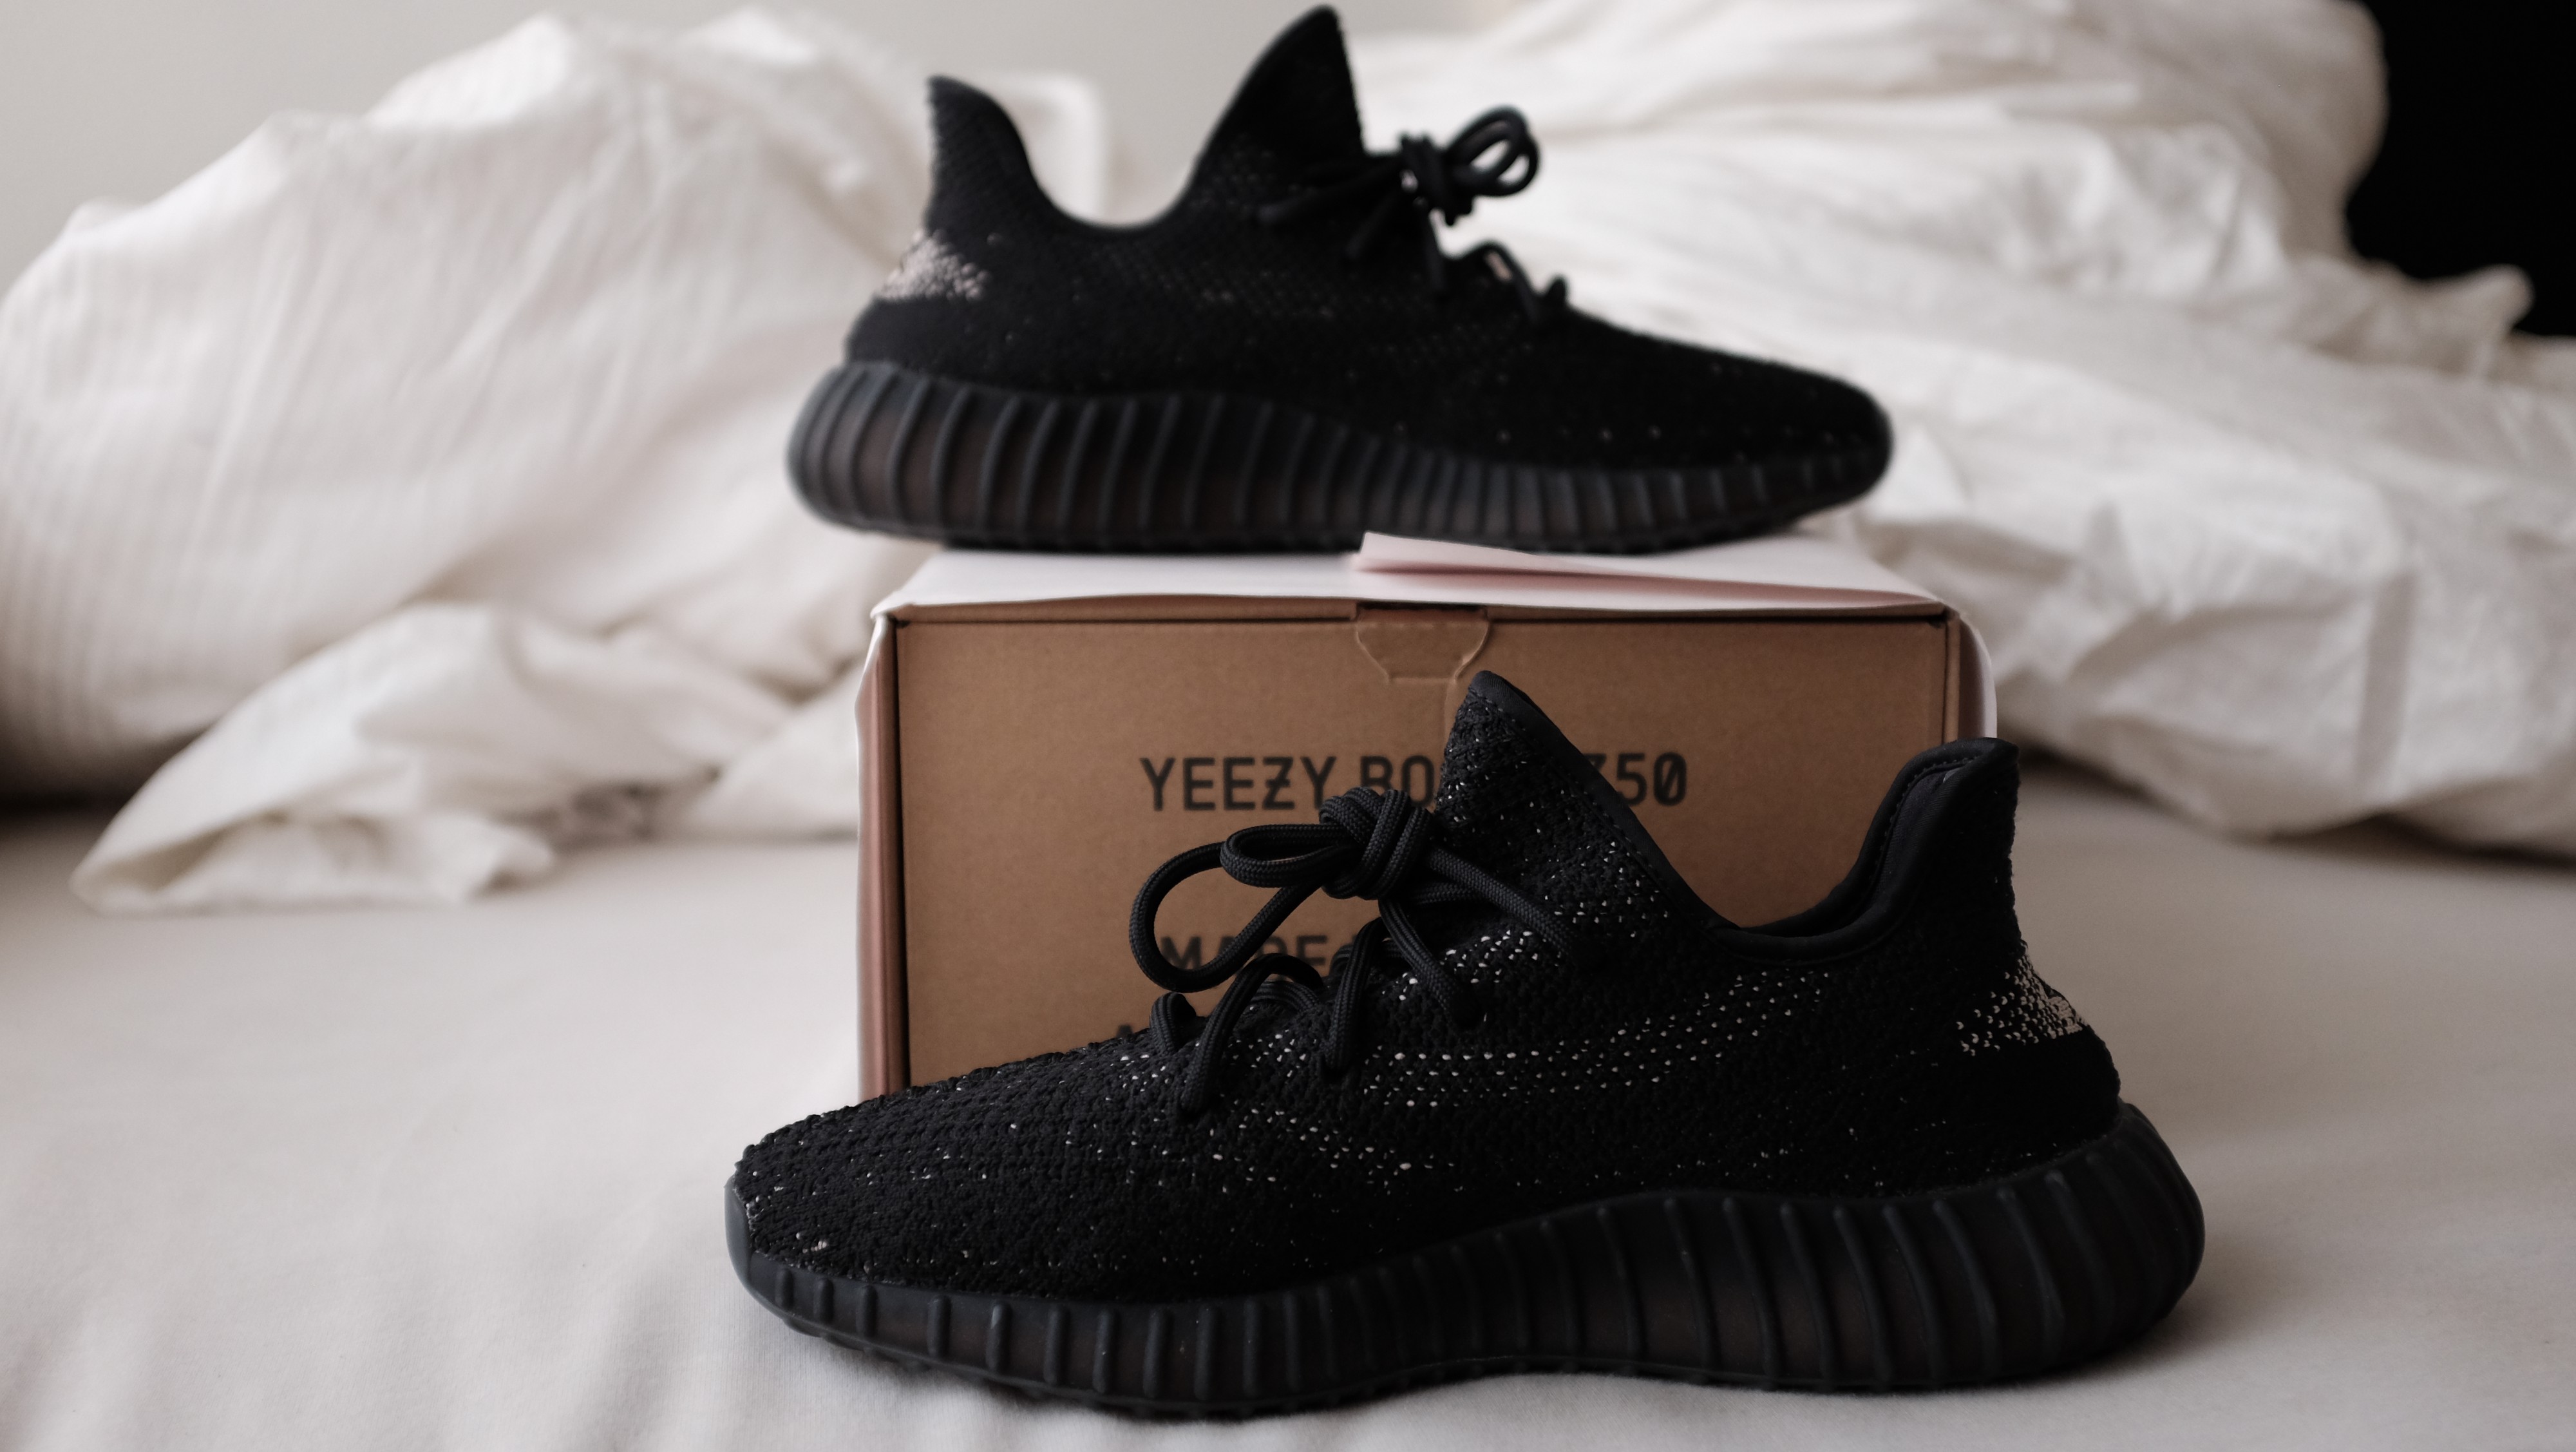
BRED sz 7.5
BRED sz 9.5