The Raspberry Pi isn?t necessarily the best choice for creating a fast and efficient Network Attached Storage (NAS) as any external disk will be attached using USB 2.0 and, at least until the recent arrival of the new Raspberry Pi 3, Model B+, the Pi was limited to 100Mbps over Ethernet.
However, if you intend to use it as a personal server you won?t be dealing with large volumes of traffic, so it can easily be ?good enough? to use as reliable, and perhaps critically, really rather cheap network storage device. Which is why one of the most frequent uses of the Raspberry Pi is to create a NAS. Despite the obvious downsides of low network throughput.
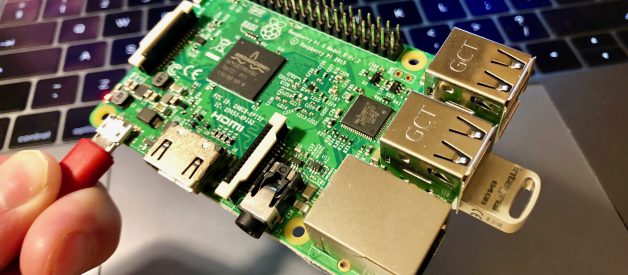
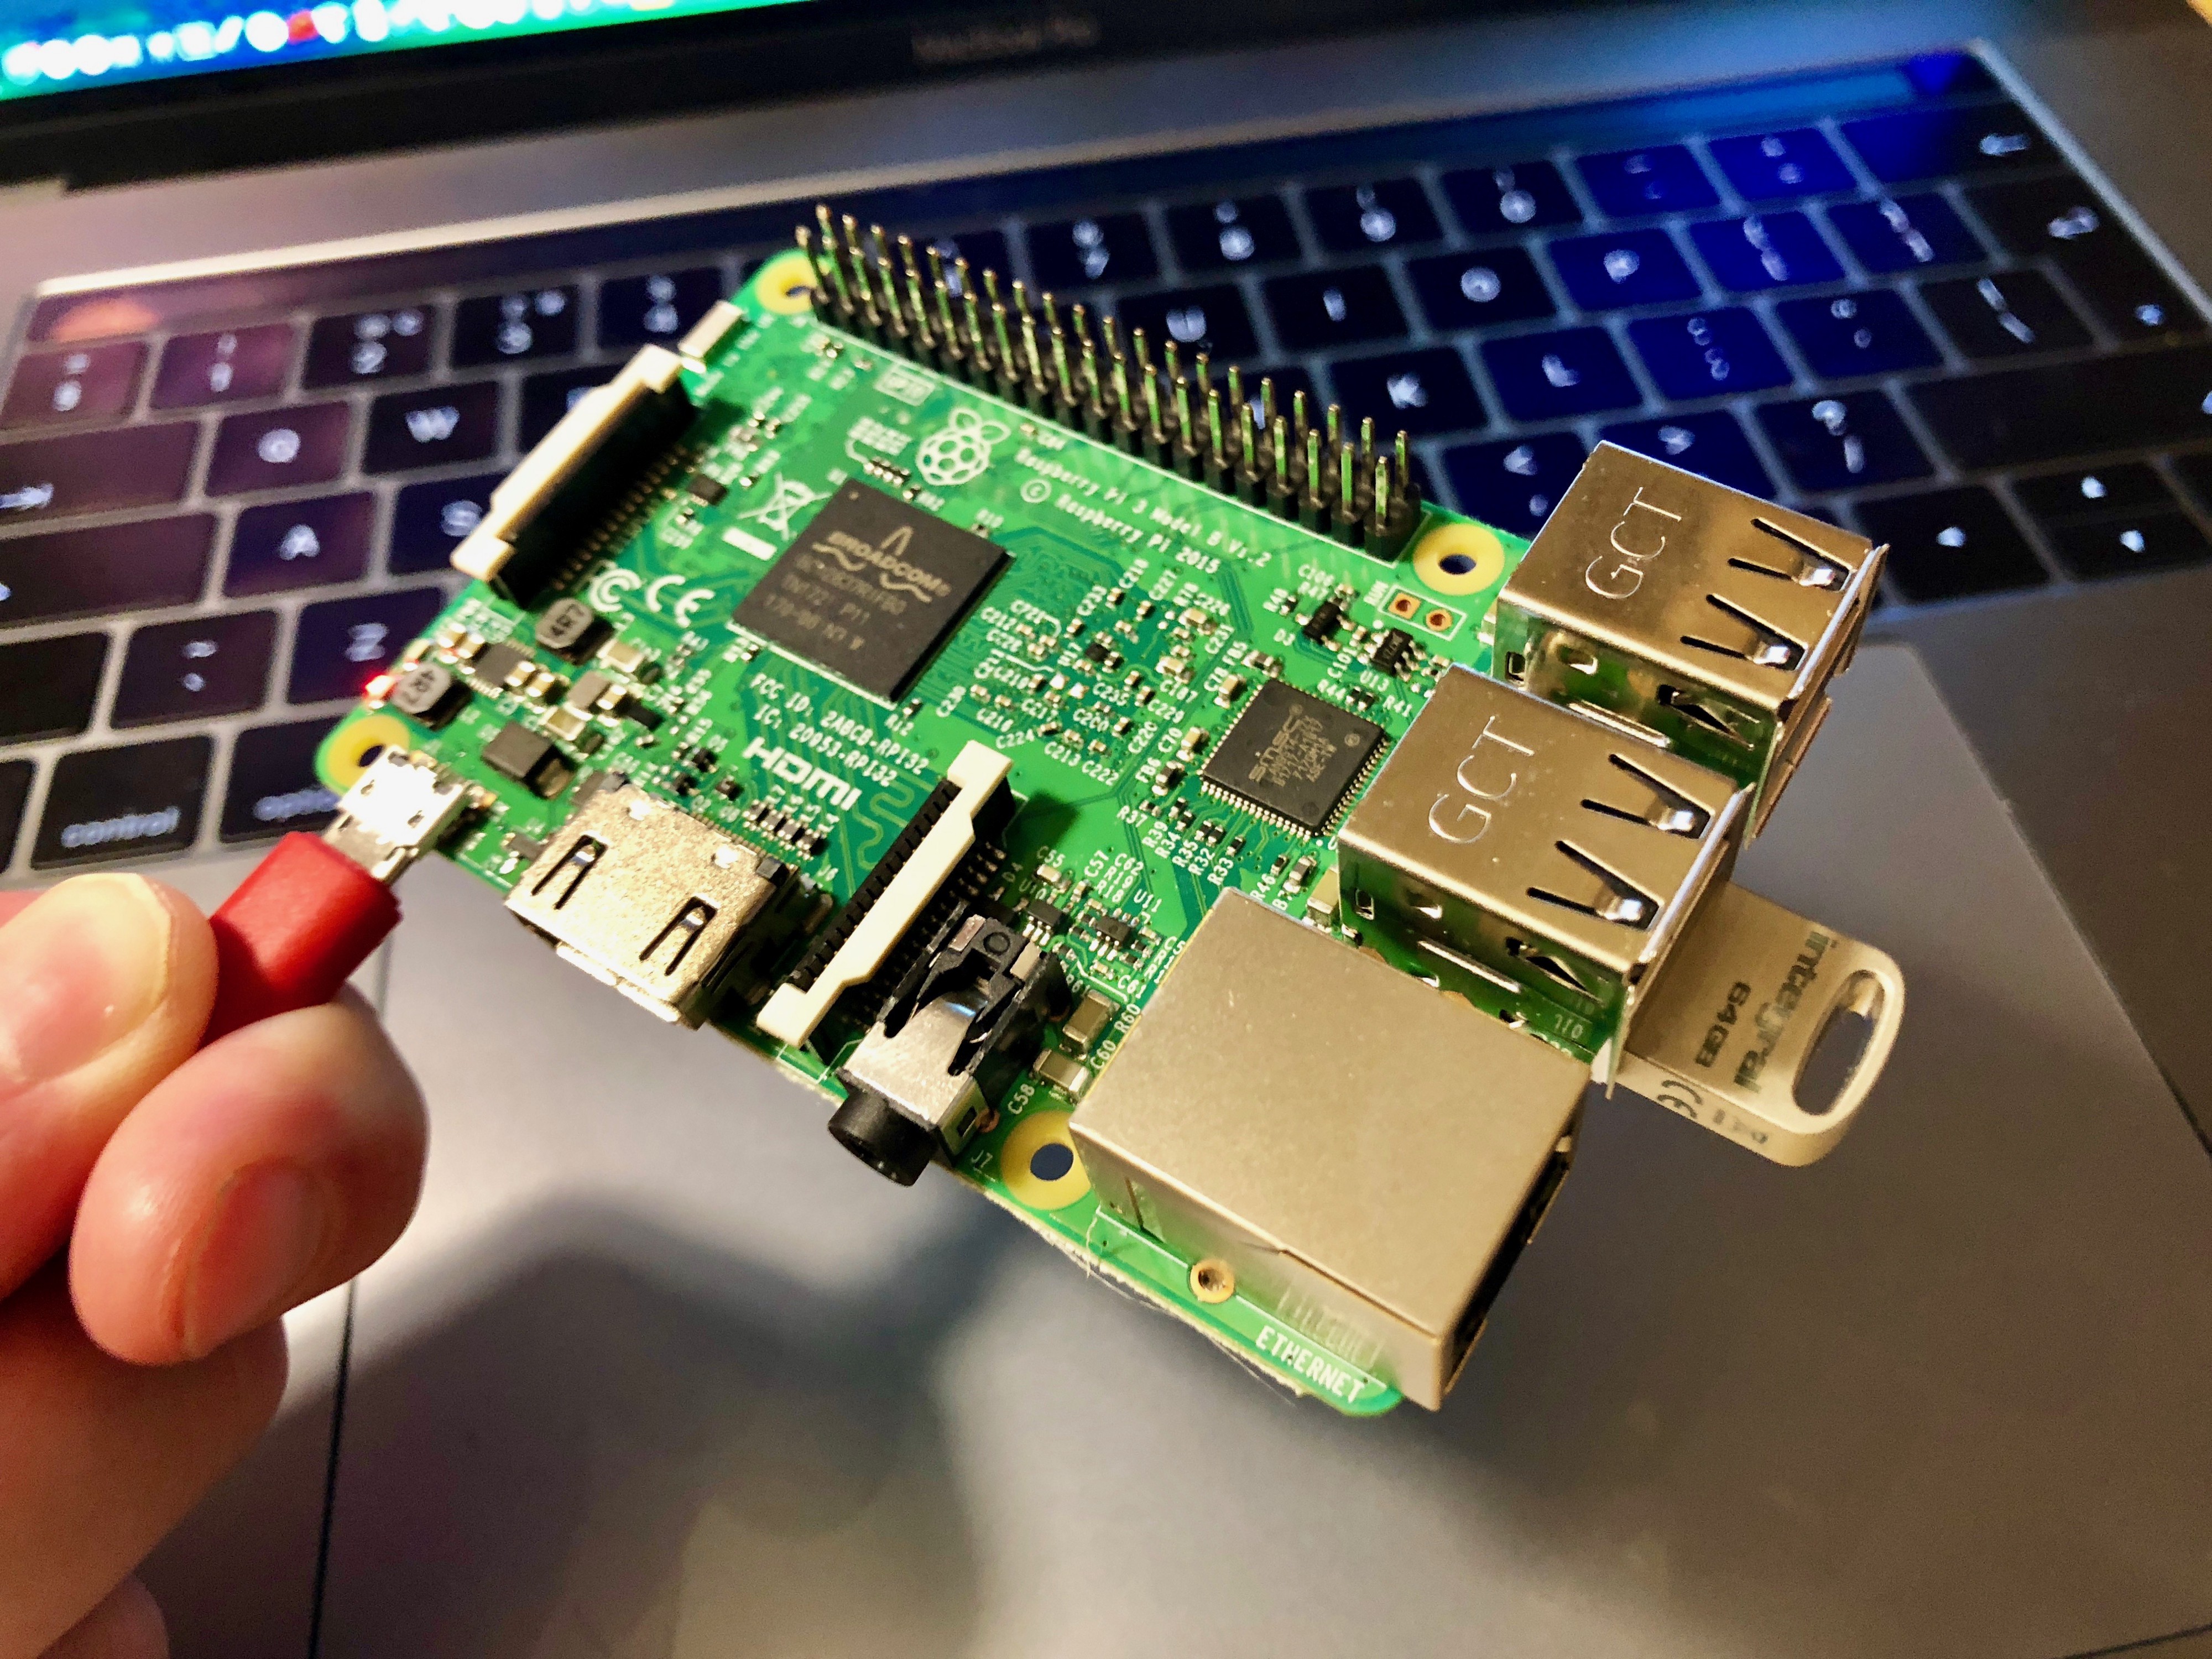 64GB USB Flash Drive and Raspberry Pi 3.
There are a number of ways you can go about it, however the biggest choice you?re going to have to make is how you want to share your storage across the network. There are three main choices here, NFS, AFS, and SMB, and which you choose depends on how and where you?re intending to access the NAS from, so we?ll walk through all three.
Go ahead and download the latest SD Card image of Raspbian, and walk through the normal set up steps for your Raspberry Pi. Afterwards, remember to change the default password for the ?pi? account to something other than ?raspberry,? and make sure everything is up to date.
$ sudo apt-get update$ sudo apt-get upgrade
Once you have your board configured and working we can get started.
Choosing a Disk
The first thing we need do is grab a disk. You can either use a standard external hard drive, or a USB flash drive. However if you want to use an external USB hard drive, considering the power constrains on the Raspberry Pi, you might want to opt for one that has a separate mains connection rather than one that takes its power from its USB connection. You can now pick a main?s powered 4TB external drive up for under 100 (that?s around $150).
Formatting your Disk
While it is pretty much never the most optimal choice, you should still probably format your external disk using the ubiquitous FAT32 format. It?s old, rather slow, and imposes a maximum file size of only 4GB. However it?s still the easiest way to get cross-platform support between Linux, Windows, and Mac. If you ever want to unplug the drive from your new Raspberry Pi NAS system, it?ll make things a lot easier if the drive is FAT32 formatted.
If you?re on a Mac you can use the Disk Utility application to format the external disk. Go ahead and plug in your disk and open Disk Utility.
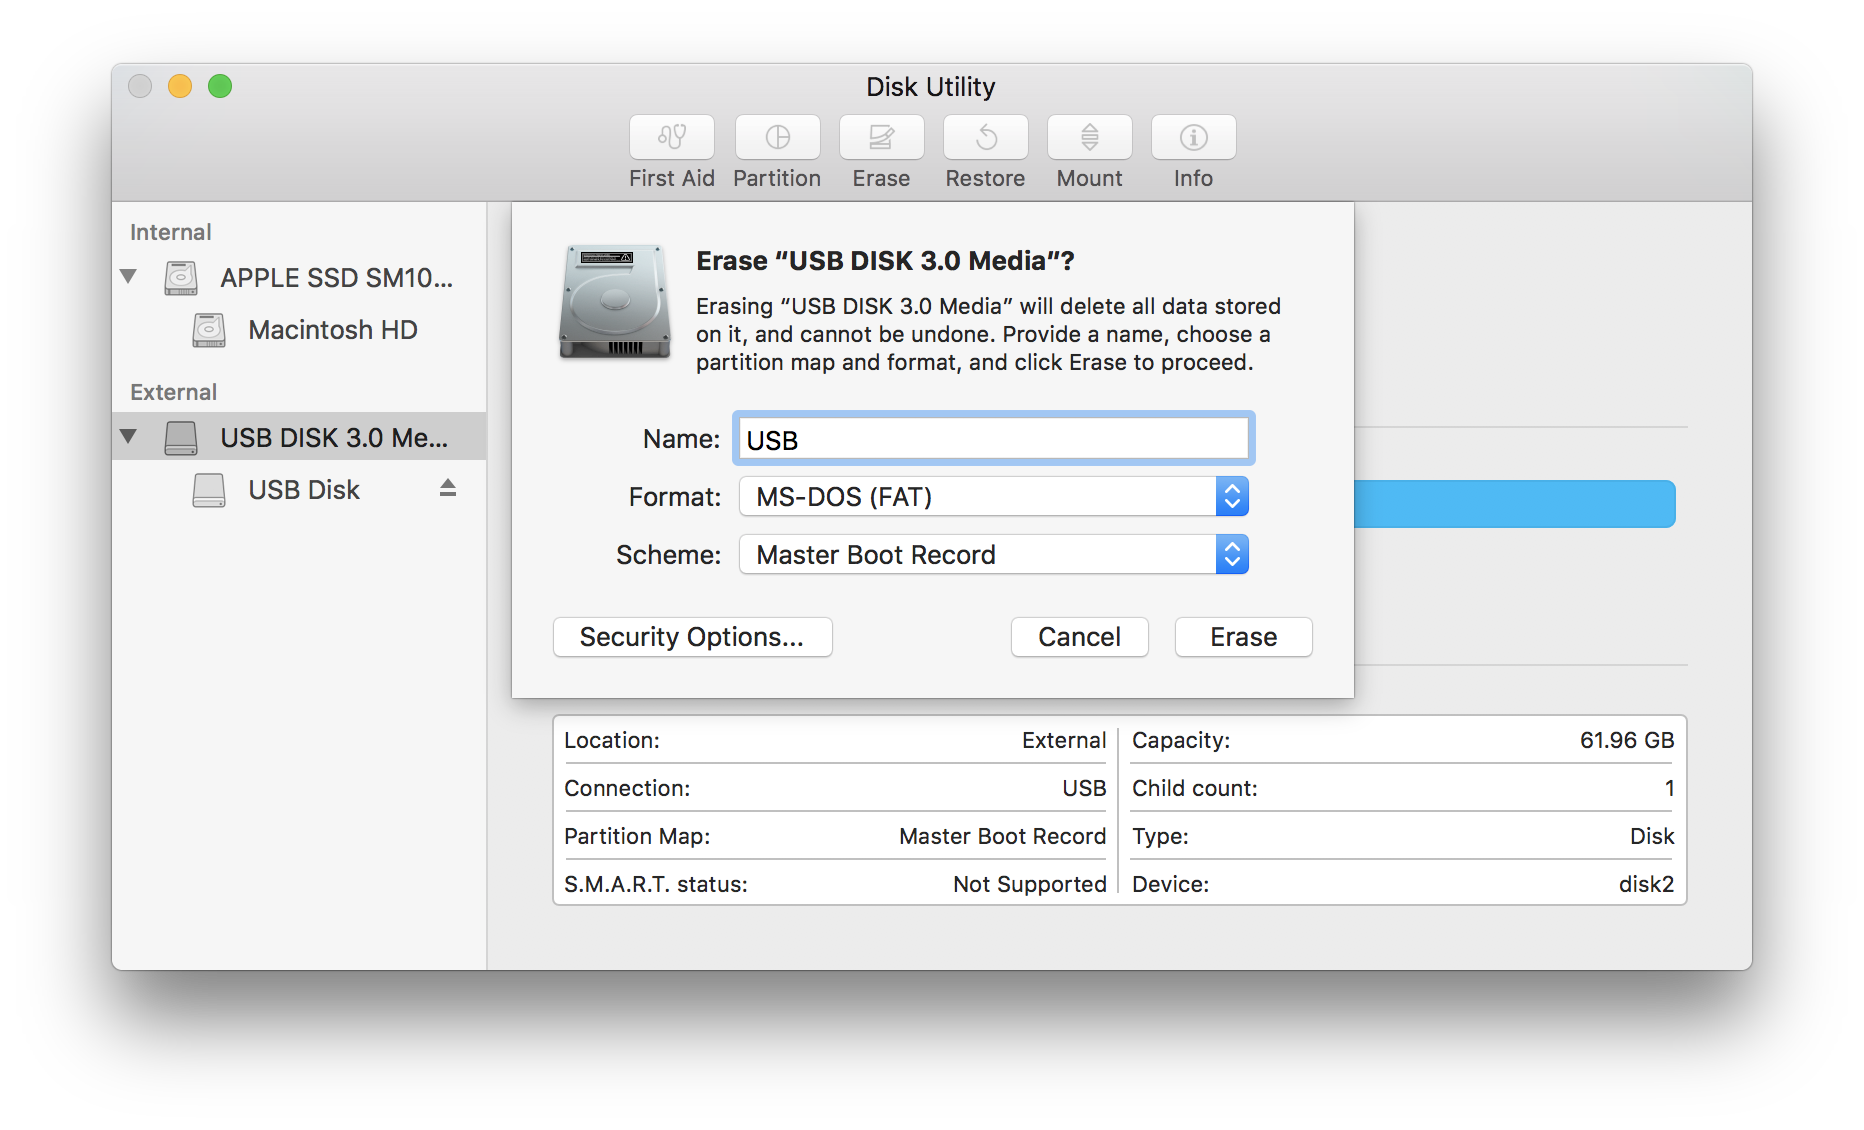 Formatting your USB disk using Disk Utility.
Select the External disk and then click on the ?Erase? button in the menu bar and name your disk ?USB,? selecting ?MS-DOS (FAT)? for the format, and ?Master Boot Record? for the scheme. Hit the ?Erase? button at the bottom right of the dialog pane.
If you?re using Windows formatting the disk is only a little bit more complicated. While if you don?t have a Mac or Windows laptop to hand, or you just feel like it, you can also format the disk directly from your Raspberry Pi, although you may first need to install the dosfstools package.
Go ahead and plug in your external drive, and type the following.
$ sudo apt-get install dosfstools$ sudo mkfs.vfat /dev/sda1 -n USB
Although be aware that if the disk is already formatted it might automatically be mounted by (more recent) versions of Raspbian, and you might have to unmount it before formatting.
$ sudo umount /dev/sda1
Mounting the Disk
I?m using a 64GB USB flash drive that I had sitting on my desk for this tutorial. But if you?re setting up a NAS for your own network I?d really recommend you pick up a real external disk, you?ll get much more storage for your money.
After plugging the flash drive into the Pi it?s fairly easy to mount,
$ sudo mkdir /mnt/usb$ sudo chown -R pi:pi /mnt/usb$ sudo mount /dev/sda1 /mnt/usb -o uid=pi,gid=pi
but if you want it to automatically mount on boot you?ll need to append the following to the /etc/fstab file,
/dev/sda1 /mnt/usb auto defaults,user 0 1
You can now leave the disk plugged into your Raspberry Pi and it?ll automatically mount when the board is rebooted. However right now the disk isn?t visible from the network, so let?s go ahead and change that.
Which Protocol to Choose?
As I mentioned earlier three main choices to make our disk visible on the network, NFS, AFS, and SMB. Which one you chose depends on how you?re going to use it.
If you?re going to use the disk from another Raspberry Pi, or some other machine running Linux, I?d recommend you use NFS. Alternatively, if you?re going to use the network disk from Windows, I?d firmly recommend you use SMB. However, if you?re on a Mac, and are only intending to use the disk from there, I?d recommend you use AFS. Finally then, if you want to access the disk from a mix of platforms, SMB is probably your best bet for interoperability.
Making the Disk Available Using NFS
You?ll need to install the NFS server software,
$ sudo apt-get install nfs-server
and then edit the /etc/exports file to add a list of IP addresses from which you want to be able to mount your disk.
Commonly, at least at home, you might want to be able to mount the disk anywhere on your local network. You can easily check the IP address for your Raspberry Pi using the ifconfig command.
$ ifconfiglo: flags=73<UP,LOOPBACK,RUNNING> mtu 65536inet 127.0.0.1 netmask 255.0.0.0inet6 ::1 prefixlen 128 scopeid 0x10<host>loop txqueuelen 1 (Local Loopback)RX packets 0 bytes 0 (0.0 B)RX errors 0 dropped 0 overruns 0 frame 0TX packets 0 bytes 0 (0.0 B)TX errors 0 dropped 0 overruns 0 carrier 0 collisions 0wlan0: flags=4163<UP,BROADCAST,RUNNING,MULTICAST> mtu 1500inet 192.168.1.225 netmask 255.255.255.0 broadcast 192.168.1.255inet6 fe80::c26a:aaf4:3595:6926 prefixlen 64 scopeid 0x20<link>ether b8:27:eb:80:66:34 txqueuelen 1000 (Ethernet)RX packets 2102 bytes 348152 (339.9 KiB)RX errors 0 dropped 19 overruns 0 frame 0TX packets 359 bytes 63099 (61.6 KiB)TX errors 0 dropped 0 overruns 0 carrier 0 collisions 0$
Here you can see that my Raspberry Pi is on my wireless, rather than wired, network and has an IP address of 192.168.1.225. We therefore would go ahead and edit the /etc/exports file as below,
# /etc/exports: the access control list for filesystems/mnt/usb 192.168.1.0/24(rw,sync)
Here we?re adding 192.168.1.0/24 which is short hand for ??all the IP addresses between 192.168.1.0 and 192.168.1.255.?
After doing that you?ll need to restart the RPC services,
$ sudo update-rc.d rpcbind enable && sudo update-rc.d nfs-common enable$ sudo reboot
After rebooting the Raspberry Pi the network drive should be available
Mounting the Disk from Another Raspberry Pi
You can go ahead and mount the NFS volume from another Raspberry Pi, or any other Linux machine, as follows,
$ sudo mkdir /mnt/nfs$ sudo chown -R pi:pi /mnt/nfs$ sudo mount 192.168.1.225:/mnt/usb /mnt/nfs
where 192.168.1.225 was the IP address of the first Raspberry Pi serving the disk.
Automatically Mounting the Disk from Another Raspberry Pi
If you want to you can also make this NFS volume automatically mount on your second Raspberry Pi when it boots.
Go ahead and install the NFS client software on your second Raspberry Pi,
$ sudo apt-get install nfs-common
and, if you haven?t already done so, create a mount point.
$ sudo mkdir /mnt/nfs$ sudo chown -R pi:pi /mnt/nfs
At this point you could pretty easily just edit the /etc/fstab file and add the disks. However that might prove problematic for various reasons, instead I?d advise you to install autofs.
$ sudo apt-get install autofs
Once installed, go ahead and edit the /etc/auto.master file adding,
/mnt/nfs /etc/auto.nfs
at the end. Then create the /etc/auto.nfs file, adding,
pi 192.168.1.225:/mnt/usb
where 192.168.1.225 is the IP address of the Raspberry Pi serving our disk. Afterwards, go ahead restart the autofs service.
$ sudo /etc/init.d/autofs restart.
If all goes well, at this point if you should be able to change directory to the /mnt/nfs/pi/ directory,
$ cd /mnt/nfs/pi
and when you do so the networked disk attached to the Raspberry Pi server should automatically mount itself. You can check this using the df command,
$ df -hFilesystem 1K-blocks Used Available Use% Mounted onrootfs 14984668 2513228 11812356 18% //dev/root 14984668 2513228 11812356 18% /devtmpfs 470416 0 470416 0% /devtmpfs 94944 232 94712 1% /runtmpfs 5120 0 5120 0% /run/locktmpfs 189880 0 189880 0% /run/shm/dev/mmcblk0p1 57288 19448 37840 34% /bootpi:/mnt/usb 60467008 64 60466944 1% /mnt/nfs/pi
to see whether it has been automatically mounted.
Making the Disk Available Using SMB
You?ll need to install the Samba server software,
$ sudo apt-get install samba samba-common-bin
Then go ahead and edit the /etc/samba/smb.conf file, appending the following to the end of the file.
[share]Comment = Shared FolderPath = /mnt/usbBrowseable = yesWriteable = Yesonly guest = nocreate mask = 0777directory mask = 0777Public = yesGuest ok = yes
This means that anyone will be able to read, write, and execute files in the share, either by logging in as a user, or as a guest. If you don?t want to allow guest users, omit the Guest ok = yes line.
Finally we?ll need to change the permissions of our /mnt/usb directory so that everyone, including the Samba user, can read and write to it.
$ chmod 1777 /mnt/usb
Afterwards, go ahead and restart the Samba daemon,
$ sudo /etc/init.d/samba restart
You should now be exporting the disk via SMB.
Mounting the Disk from Windows
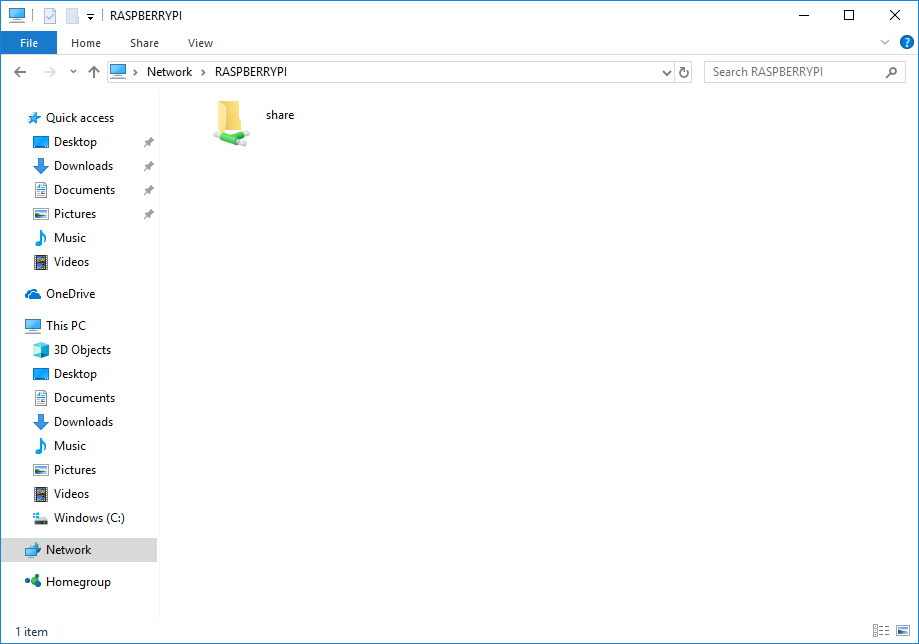
Go ahead and open up a File Explorer windows and click on ?Network? in the left hand panel. So long as network discovery is turned on you should see your local network environment, including our Raspberry Pi.
 Window?s File Explorer showing our network environment, and the Raspberry Pi.
Go ahead and double click on the Raspberry Pi icon to connect to our server.
 Window?s File Explorer showing our shared network drive.
From there, double click on the ?share? icon to open our network drive.
Automatically Mounting the Disk from Windows
Use Window?s File Explorer and navigate to our shared drive, then right click on the ?share? icon and select ?Map network drive.
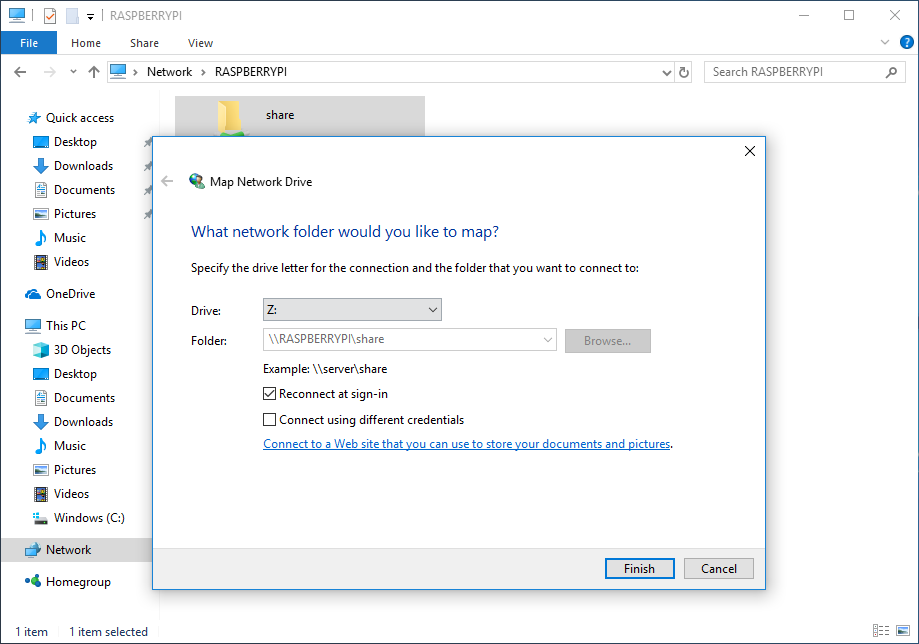 Adding a network drive using Window?s File Explorer.
Make sure ?Reconnect at sign-in? is checked, and click on the ?Finish? button.
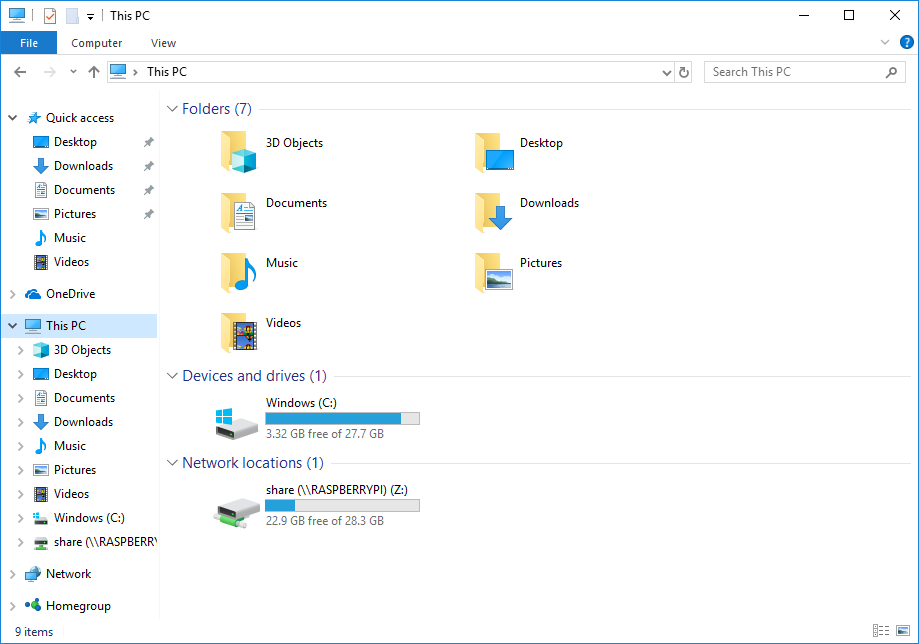 Our new Network Drive in Window?s File Explorer.
You should see the new drive appear in the left hand panel and, if you click on ?This PC? the new drive should be visible under ?Network locations.? The shared volume should now mount automatically every time you login to Windows.
Making the Disk Available Using AFS
If you?re using a Mac, and you?re only intending to access the shared network disk from Apple hardware, it?s probably a good idea to export the disk using Apple?s own AFS.
Doing this under a modern Raspbian is as easy as going ahead and installing the Netatalk package on your Raspberry Pi.
$ sudo apt-get install netatalk
Then you should edit the /etc/netatalk/AppleVolumes.default file to add the /mnt/usb disk to the list of exported file systems. The easiest way to do this is just to append it near the bottom after the entry for ~/.
# By default all users have access to their home directories.~/ “Home Directory”/mnt/usb “Network Disk”
If you want to you can also remove the entire for ~/ which will mean that the only disk exported is our external drive. Afterwards go ahead and restart the Netatalk daemon.
$ sudo /etc/init.d/netatalk restart
You should now be exporting the drive via AFS.
Mounting the Disk from your Mac
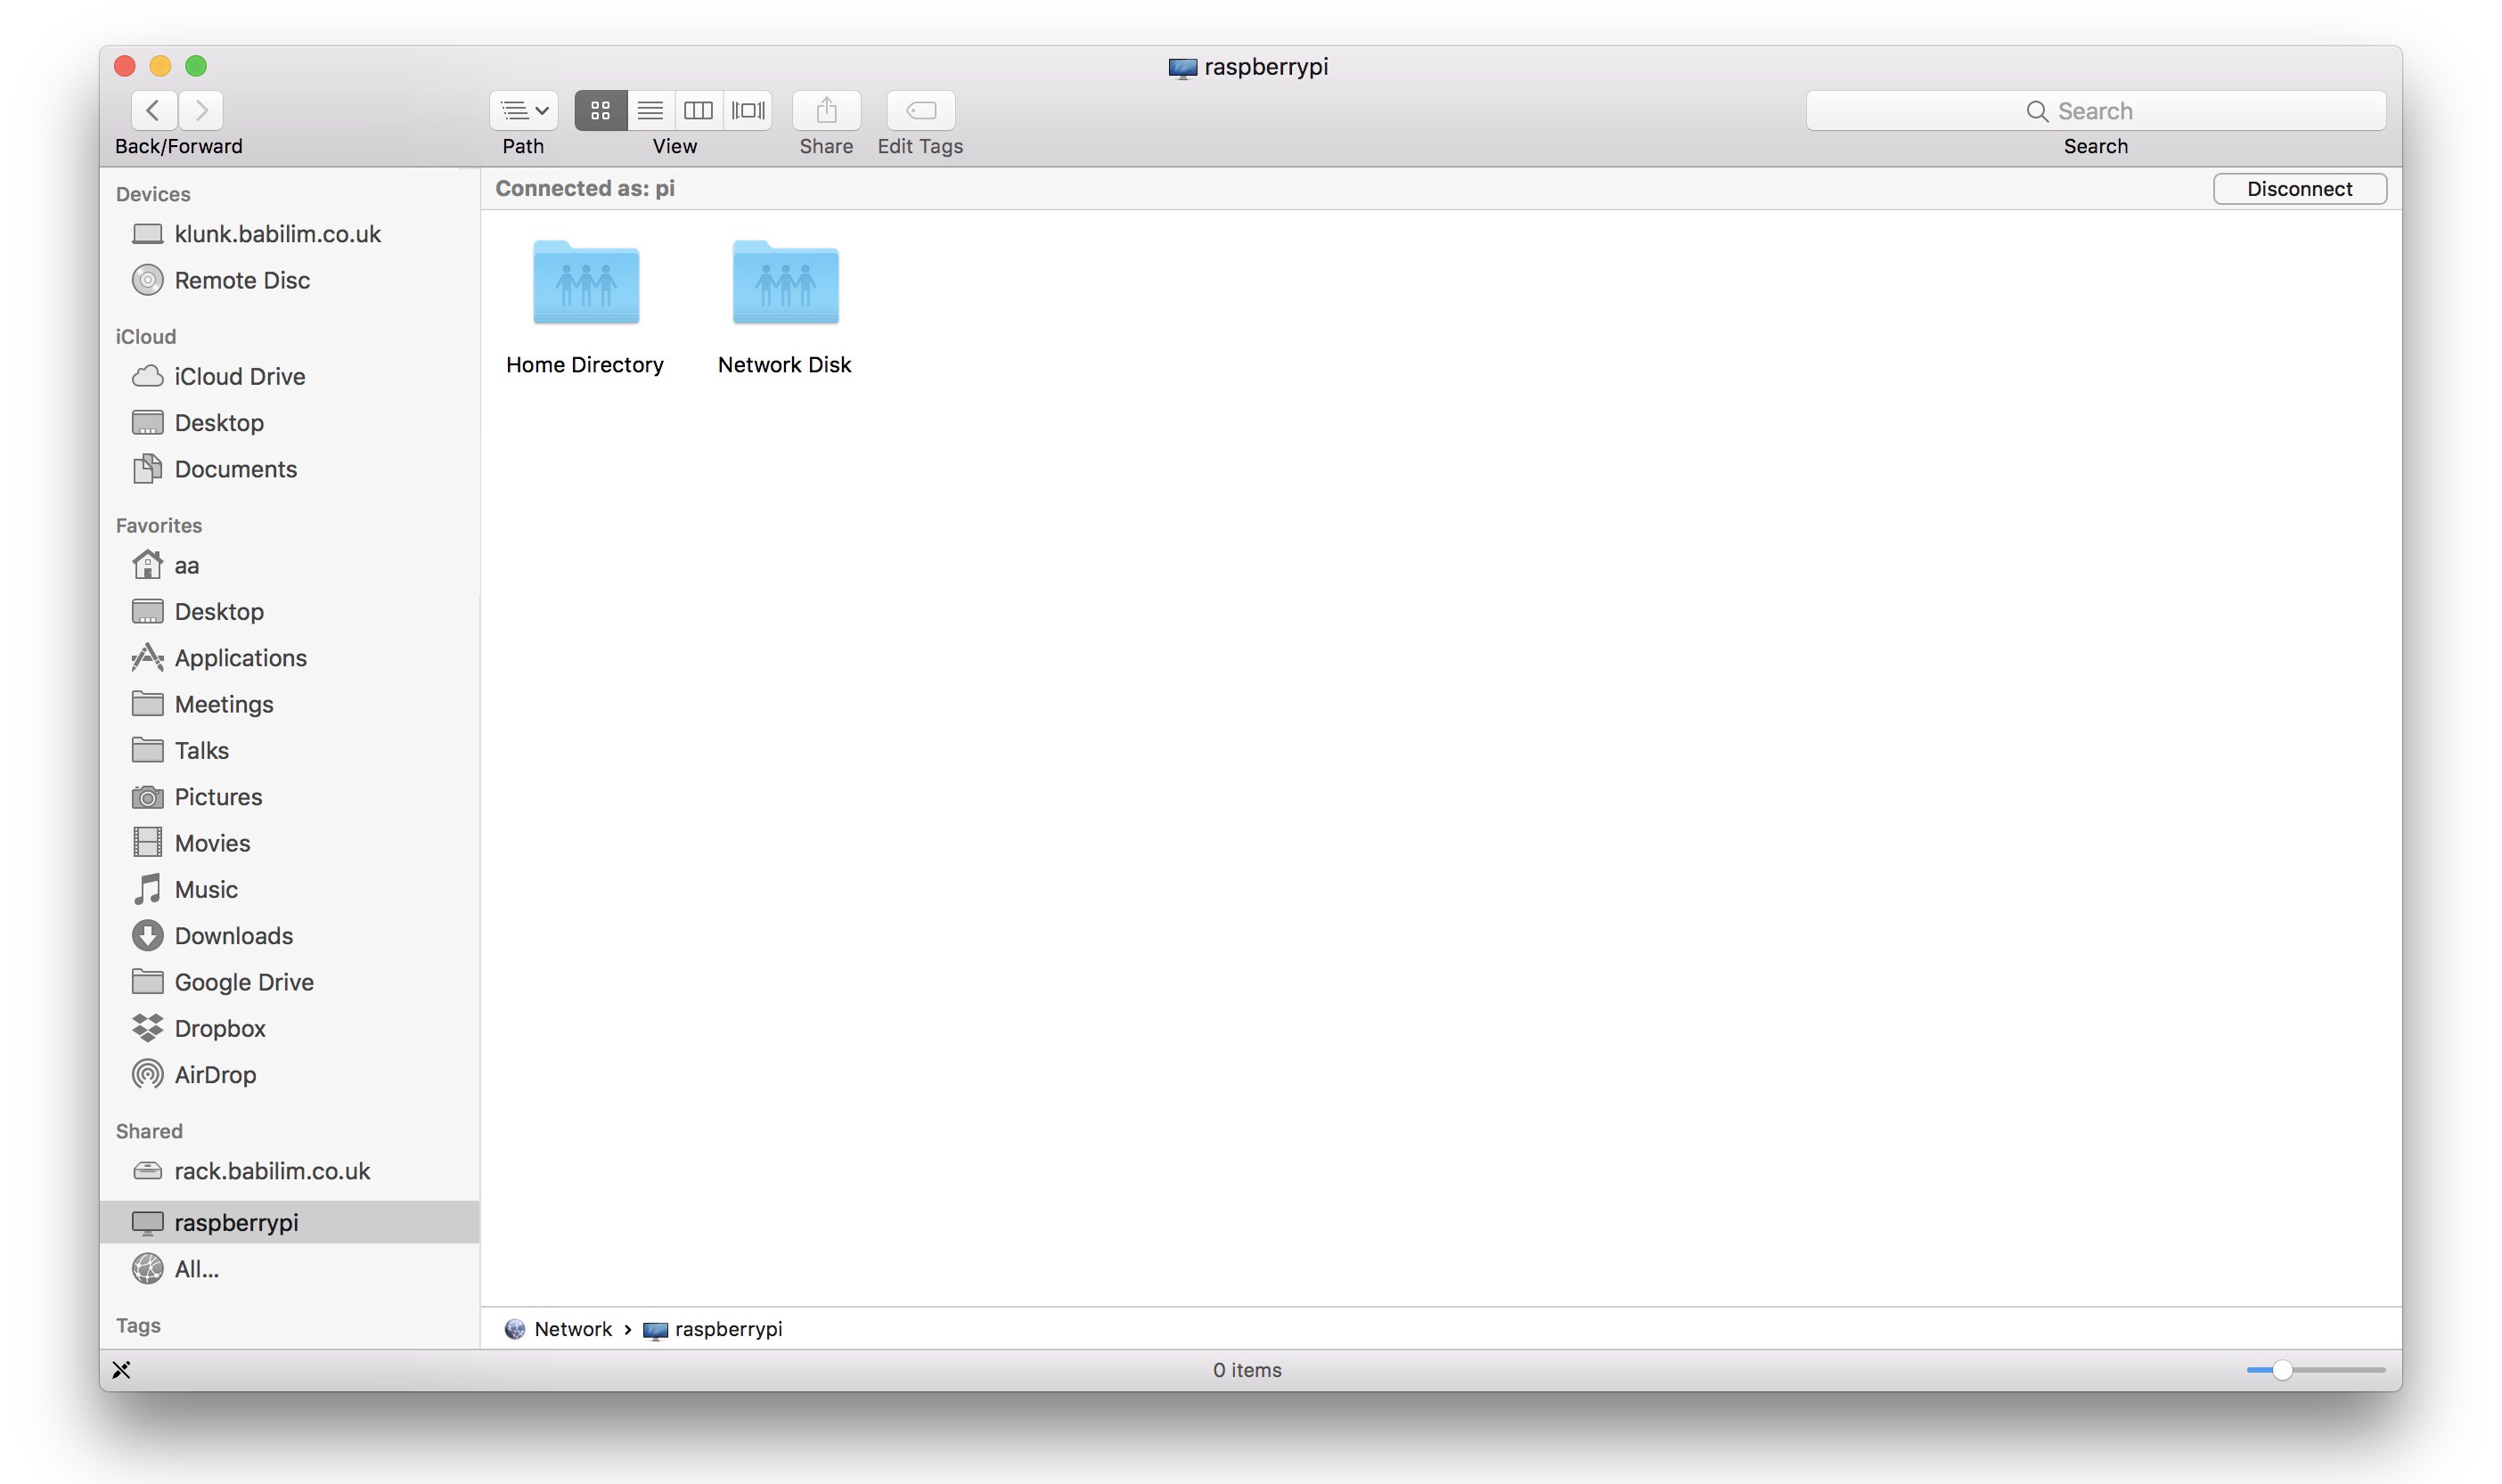
Going to your Mac your Raspberry Pi should now show up in the left-hand panel of the Finder. Click on it, and then the ?Connect As?? button.
 Connecting to the Raspberry Pi.
Go ahead and connect using the ?pi? user to authenticate yourself to the Raspberry Pi from Mac. Double clicking on the ?Network Disk? folder will mount it as an network volume.
After you mount the disks a drive icon for each exported volume will appear in the device?s Shared tab, and icons for the mounted volumes will appear on your desktop. To unmount the disks just click on the ?Disconnect? button in the Finder, or drag the shared disks to the Trash.
Automatically Mounting the Disk from your Mac
If you want the AFS volumes to mount automatically when you login to your Mac, manually mount the drive as before making sure that you tick the ?Remember this password in my keychain? option checkbox in the login dialog.
Then open up the System Preferences app, and navigate to the User & Groups tab and then to Login Item for your user account.
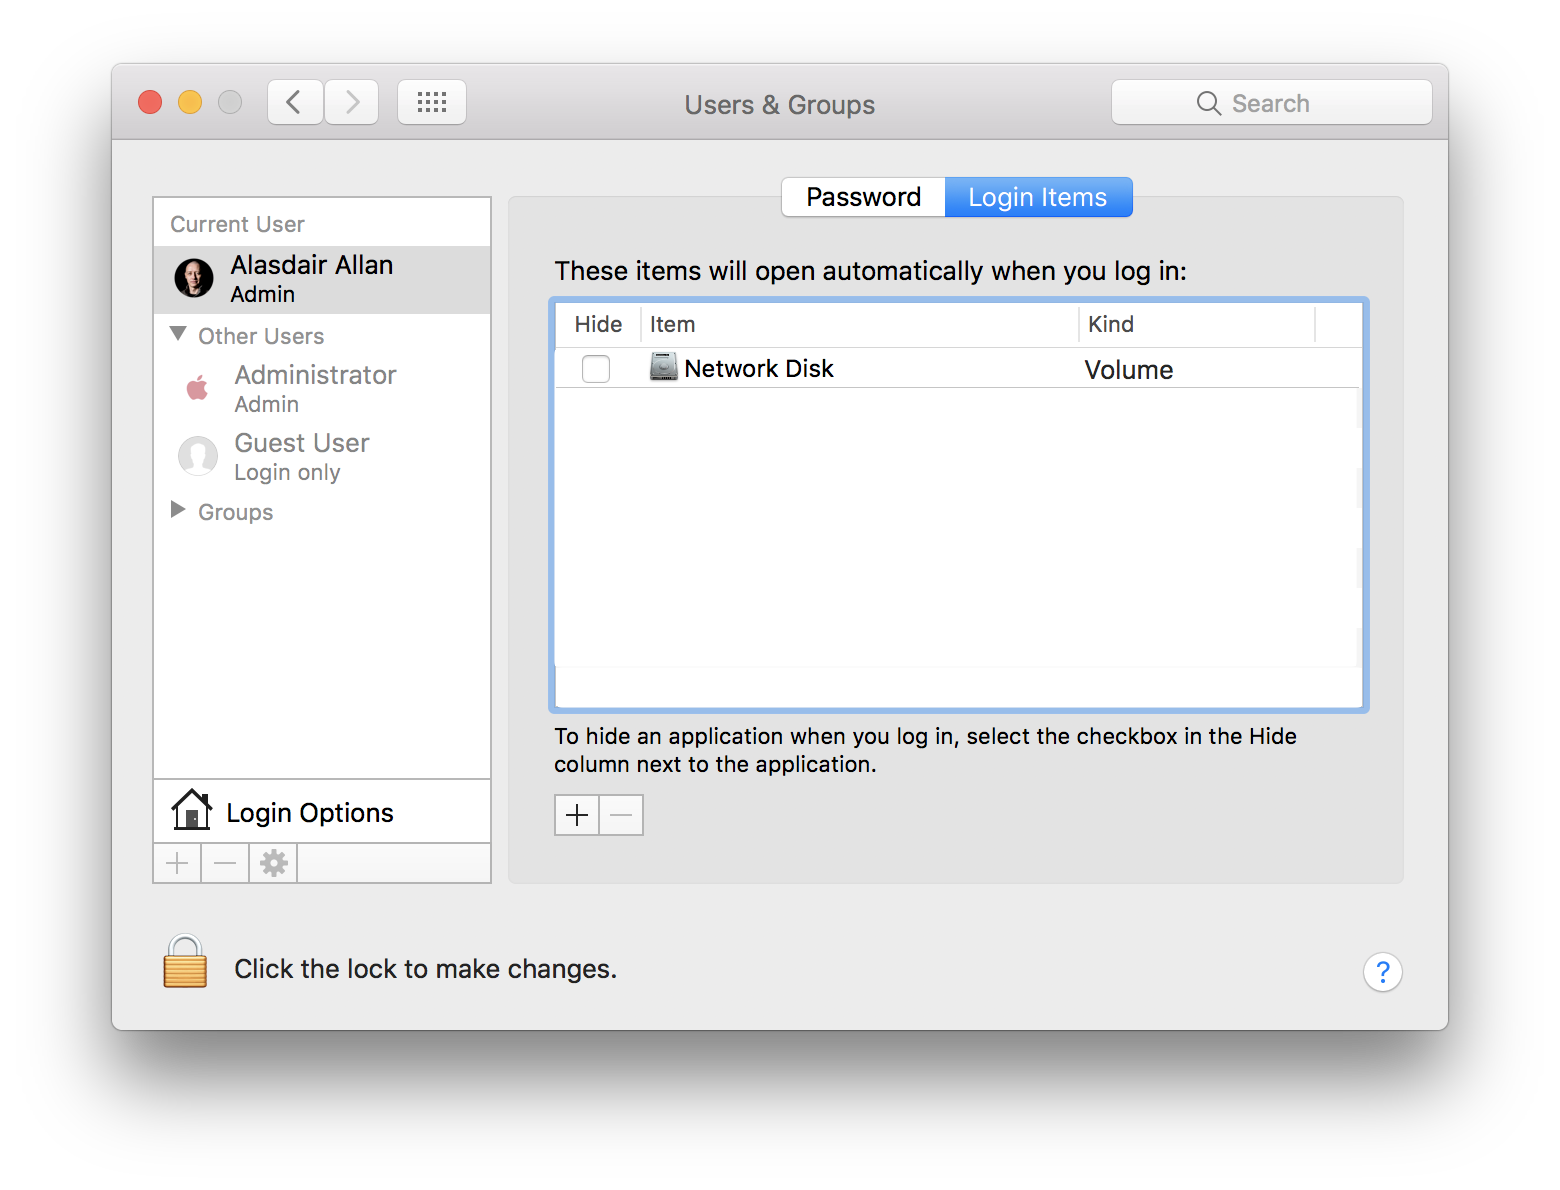 Adding the Network Disk to our Login Items.
The disk will now be automatically mounted when you login. However by default when a Mac connects to a network drive it opens a new Finder window to display the drive?s contents. As we don?t want this to happen, go ahead and tick the ?Hide? box after you add it to the Login Items list. This will mean that the drive mounts in the background without opening a Finder window.
Summary
While there?s nothing to stop you exporting the disk via all three of NFS, AFS, and SMB, that can get awfully messy. So I would really advise you to pick one protocol and stick with it, and if all has gone well you should have a working personal NAS at this point, although one without a lot of security. So be aware that these instructions aren?t intended for anything else than setting up a quick and dirty personal NAS, on a trusted home network. If you?re going to set up a shared disk on a public network, you should delve a bit deeper and add more authentication.

