What you?re getting into: A well-detailed guide to creating a basic vector graphic image using Affinity Designer. If you have a preferred alternative, you can use that, however, the guide will use Affinity Designer.
How is this for: This guide is simple enough for any level of experience.
How can I help: Share this article if you found it to be beneficial and potentially beneficial to someone else.
(Update 3/27/17): I have begun the process of creating a video course for providing a very clear and detailed break down of SVGs. I will cover explaining SVGs ?under the hood?, using Affinity Designer to create detailed vector graphics, animation with CSS, GreenSock, Mo.js, and Anime.js, as well as some practical applications of UX animations. You can book access here.
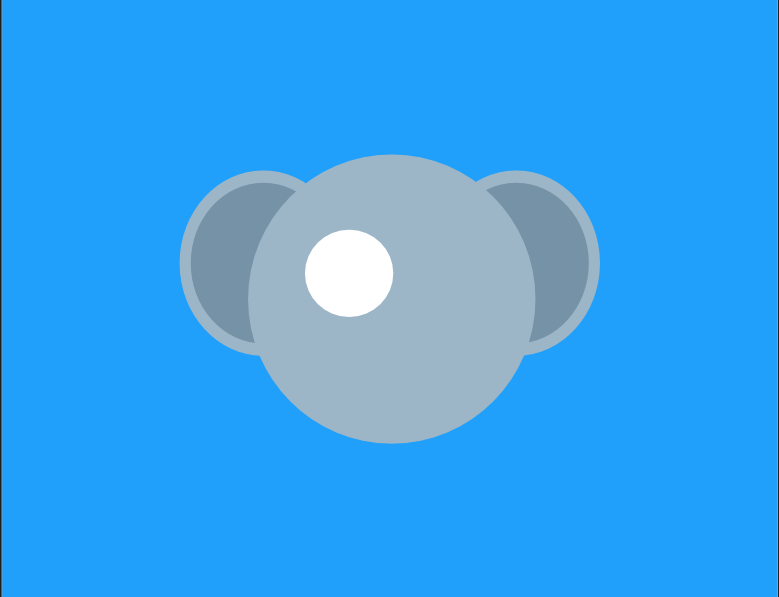
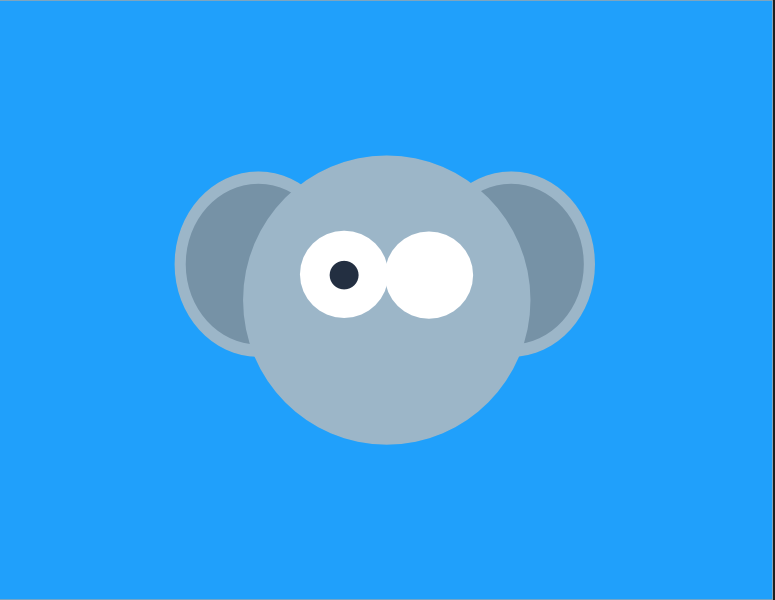
Final image we are making: https://dribbble.com/shots/3207280-Cute-Koala

Introduction
After graduating from college with a Bachelor?s degree in Computer Science, I quickly sunk into impostor syndrome when trying to make it as a developer.
In my education, I learned the basics of HTML, CSS, and PHP. This was enough to motivate me to desire a career path in web development, but it was not enough to have any skills that were marketable.
It was always about, ?does it work?? and not ?does it look good??.
When I graduated, I released that I was way behind in modern web development. I had no idea how to use JavaScript frameworks or make a modern website using something like Bootstrap.
I ended up taking an IT help desk job that drove me insane. I had the background in Computer Science and I wanted to be a web developer, but I had no idea how to put that background into real-world application.
One day, I discovered Inkscape probably for making flyers for work, but I?m not 100% certain. Anyways, Inkscape was a simple, free design tool for making vector graphics.
I initially thought it was cool that I could drag and drop shapes and try to make an image. During my lunch breaks, I would try making logos and other graphics.
Eventually, I became aware of Affinity Designer and Dribbble. These two things had the biggest impact on finally becoming a web developer.
No, that is not a typo. Those two things had a profound impact on overcoming the impostor syndrome that I sunk into after graduating school.
Affinity Designer is professional graphic design software specifically made for user interface and user experience design. At only $49.99, it is a cheaper alternative to Sketch and Illustrator.
Dribbble is a show and tell community for graphic designers. Designers can upload their work and you can like, comment, and grab the colors they used in their design.
I was able to use Dribbble to gather inspiration for making images using Affinity Designer. Specifically, I spent a lot of time look at designs other people had made and paying careful attention to the shapes and colors they used.
I soon discovered that making vector graphics, like the ones you see above, require 3 principles:
- Being clean
- Being simple
- Being bold
Those 3 things are a simple recipe to making legit vector graphics.
By clean, I mean that your design doesn?t have to be cluttered. This goes along with point 2, it can really be just a collection of simple shapes that you put together to form an image. Lastly, it just needs to be bold by having a smart use of color.
By making vector graphics following these 3 principles, I started to get very good. I was shocked. I was the kid who got C?s in art class, but somehow, vector graphics clicked.
Once I had discovered my new talent in vector graphics, I was able to go back to getting up to speed with web development. Specifically, I started to learn that I could really have marketable skills by being a frontend developer who had a specific emphasis on design.
Now, I have learned a few JavaScript frameworks and Bootstrap and I like to make fun, mini-apps such as this interactive developer desk:
The purpose of this lengthy introduction is to be of encouragement.
If you?re not interested in being a frontend developer of any sorts, then I hope this tutorial will encourage you that you can learn to make vector graphics without being previously good at art.
If you?re a developer and looking to get better with design, I hope this tutorial will get you going with vector graphics to learn design principles that can be applied to the web.
If you?re interested in being a frontend developer, then I hope this is the first step in that journey.
There are a ton of practical benefits to learning vector graphic design. You learn the 3 design principles I previously mentioned which can be transferred over to the web. You can start making pure CSS images and/or SVGs on the web and doing all sorts of cool stuff to make fun apps.
However, I want this tutorial to be the first step, making a simple vector graphic.
I will be using Affinity Designer. You may use whatever tool you?d like, but I have loved Affinity Designer and you can?t beat the price.
When you are ready, let?s get started by first examining what we will be making and breaking down how we will make it.
Note: if you prefer videos, you can watch the video for this tutorial
Breaking Down Our Image
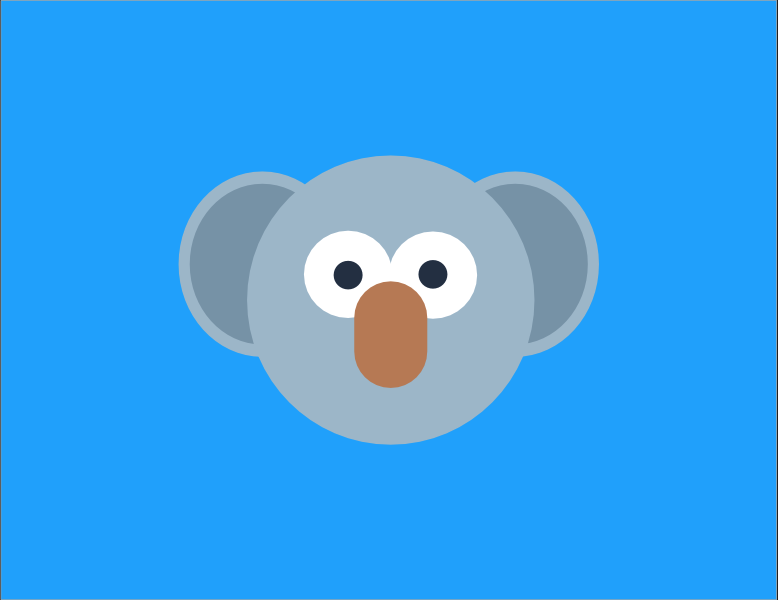
In this tutorial, we are going to be making a cute koala.
It may look complex, but it is really just a collection of simple shapes.
Let?s break this image down and then create the vector graphic.
Head
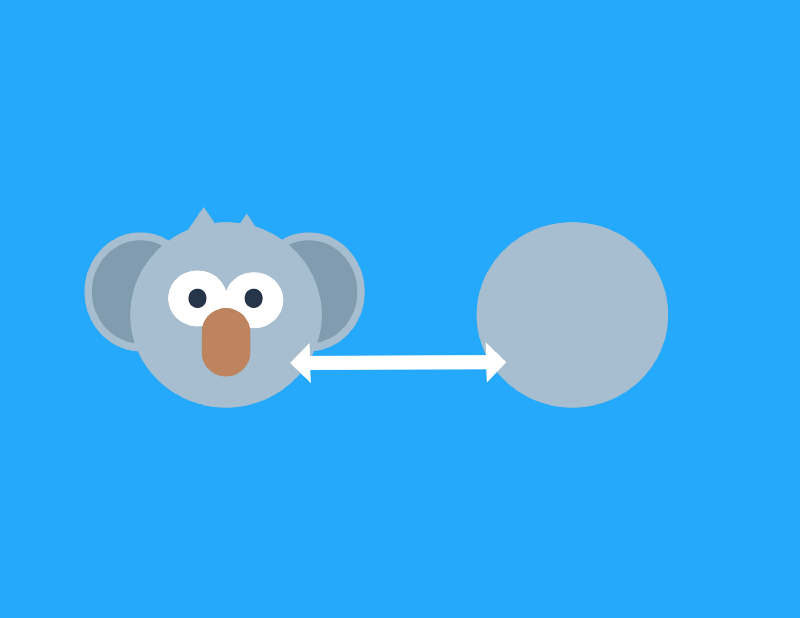
Our head will be a light-gray circle.
Ears
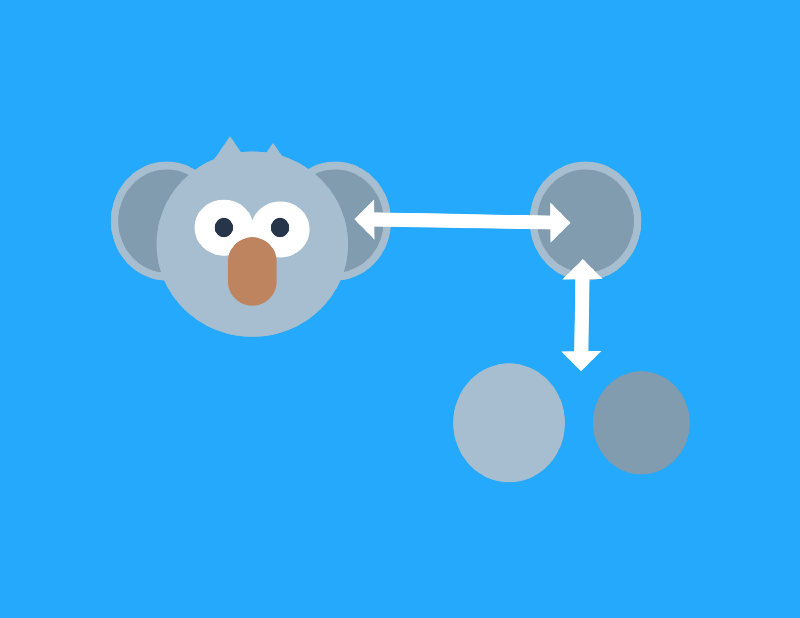
Our ears will each be two circles stacked on top of each other. We will have a larger light-gray circle on the bottom. Then, we stack a smaller dark-gray circle on top.
Also, notice that the ears are behind the head.
Eyes
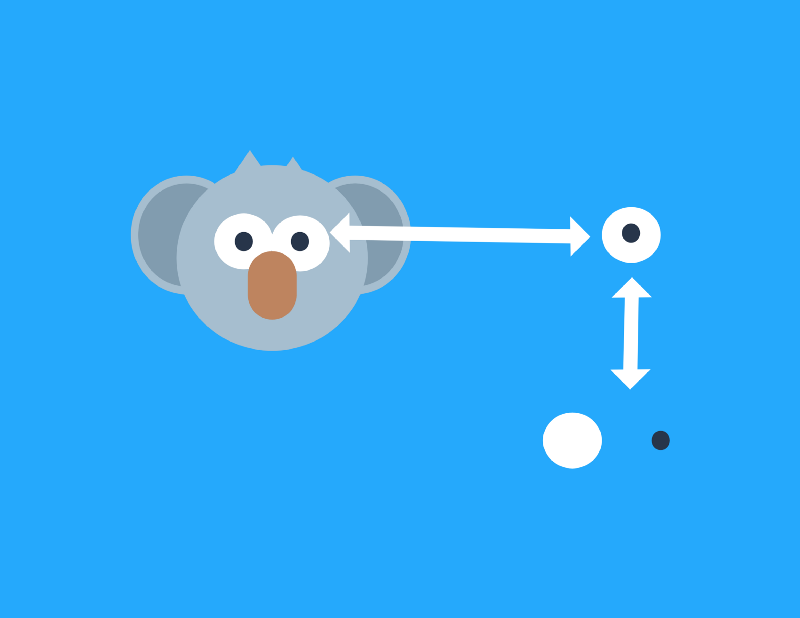
The eyes will again be two circles on top of each other. One will be a large white circle and one a small black circle. Each eye will be on top of the head.
Nose
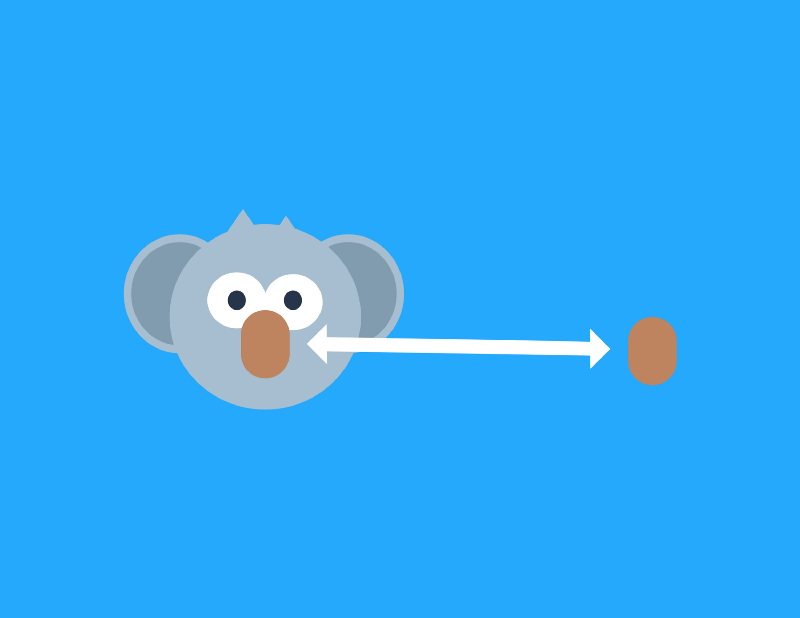
The nose will be a brown rounded-rectangle. It will set right on top of the eyes.
Hair
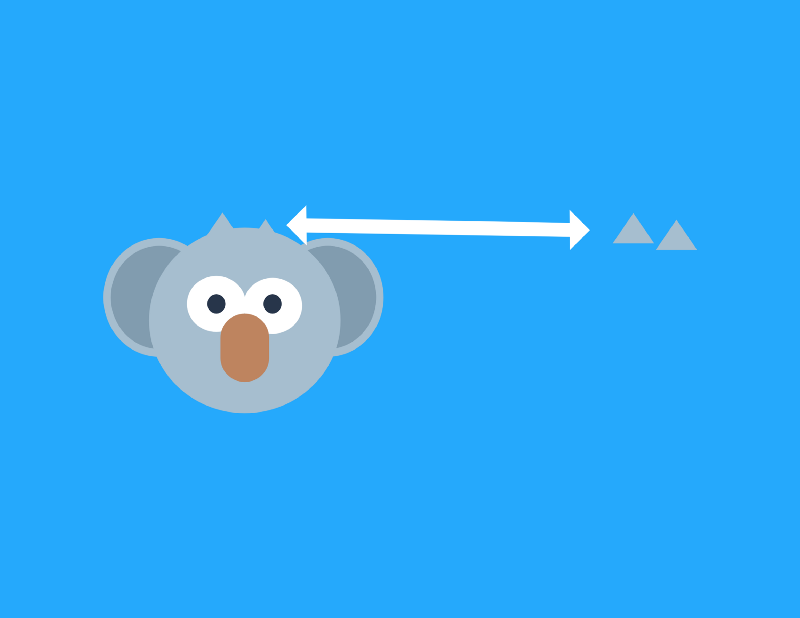
Our hair will be two light-gray triangles that sit at the top of the head.
That?s it! Pretty cool, right?
As you can tell, it is really just a few simple shapes but looks clean, cute, and bold!
Now, let?s make this vector graphic!
Setting Up the Scene
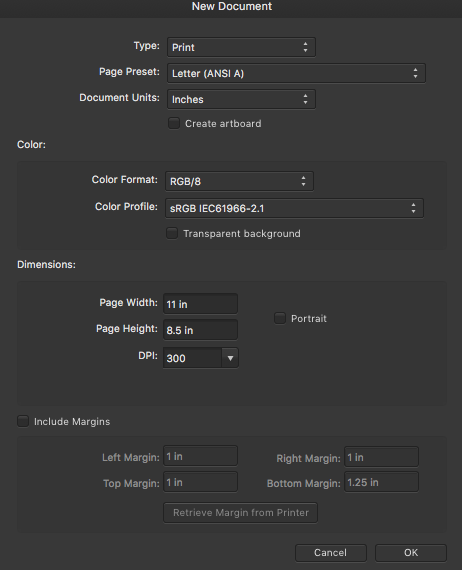
In Affinity Designer, we can go to File ? New
Then, just make sure Portrait is unchecked and hit Ok.
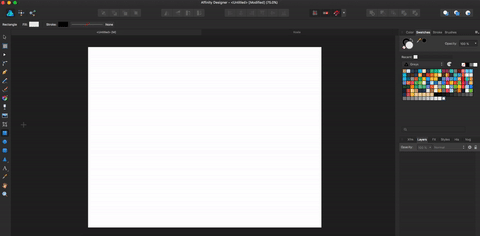
Next, we will click the square (rectangle tool) on the toolbar on the left-hand side and drag a square over our entire canvas:
Now, let?s change the color!
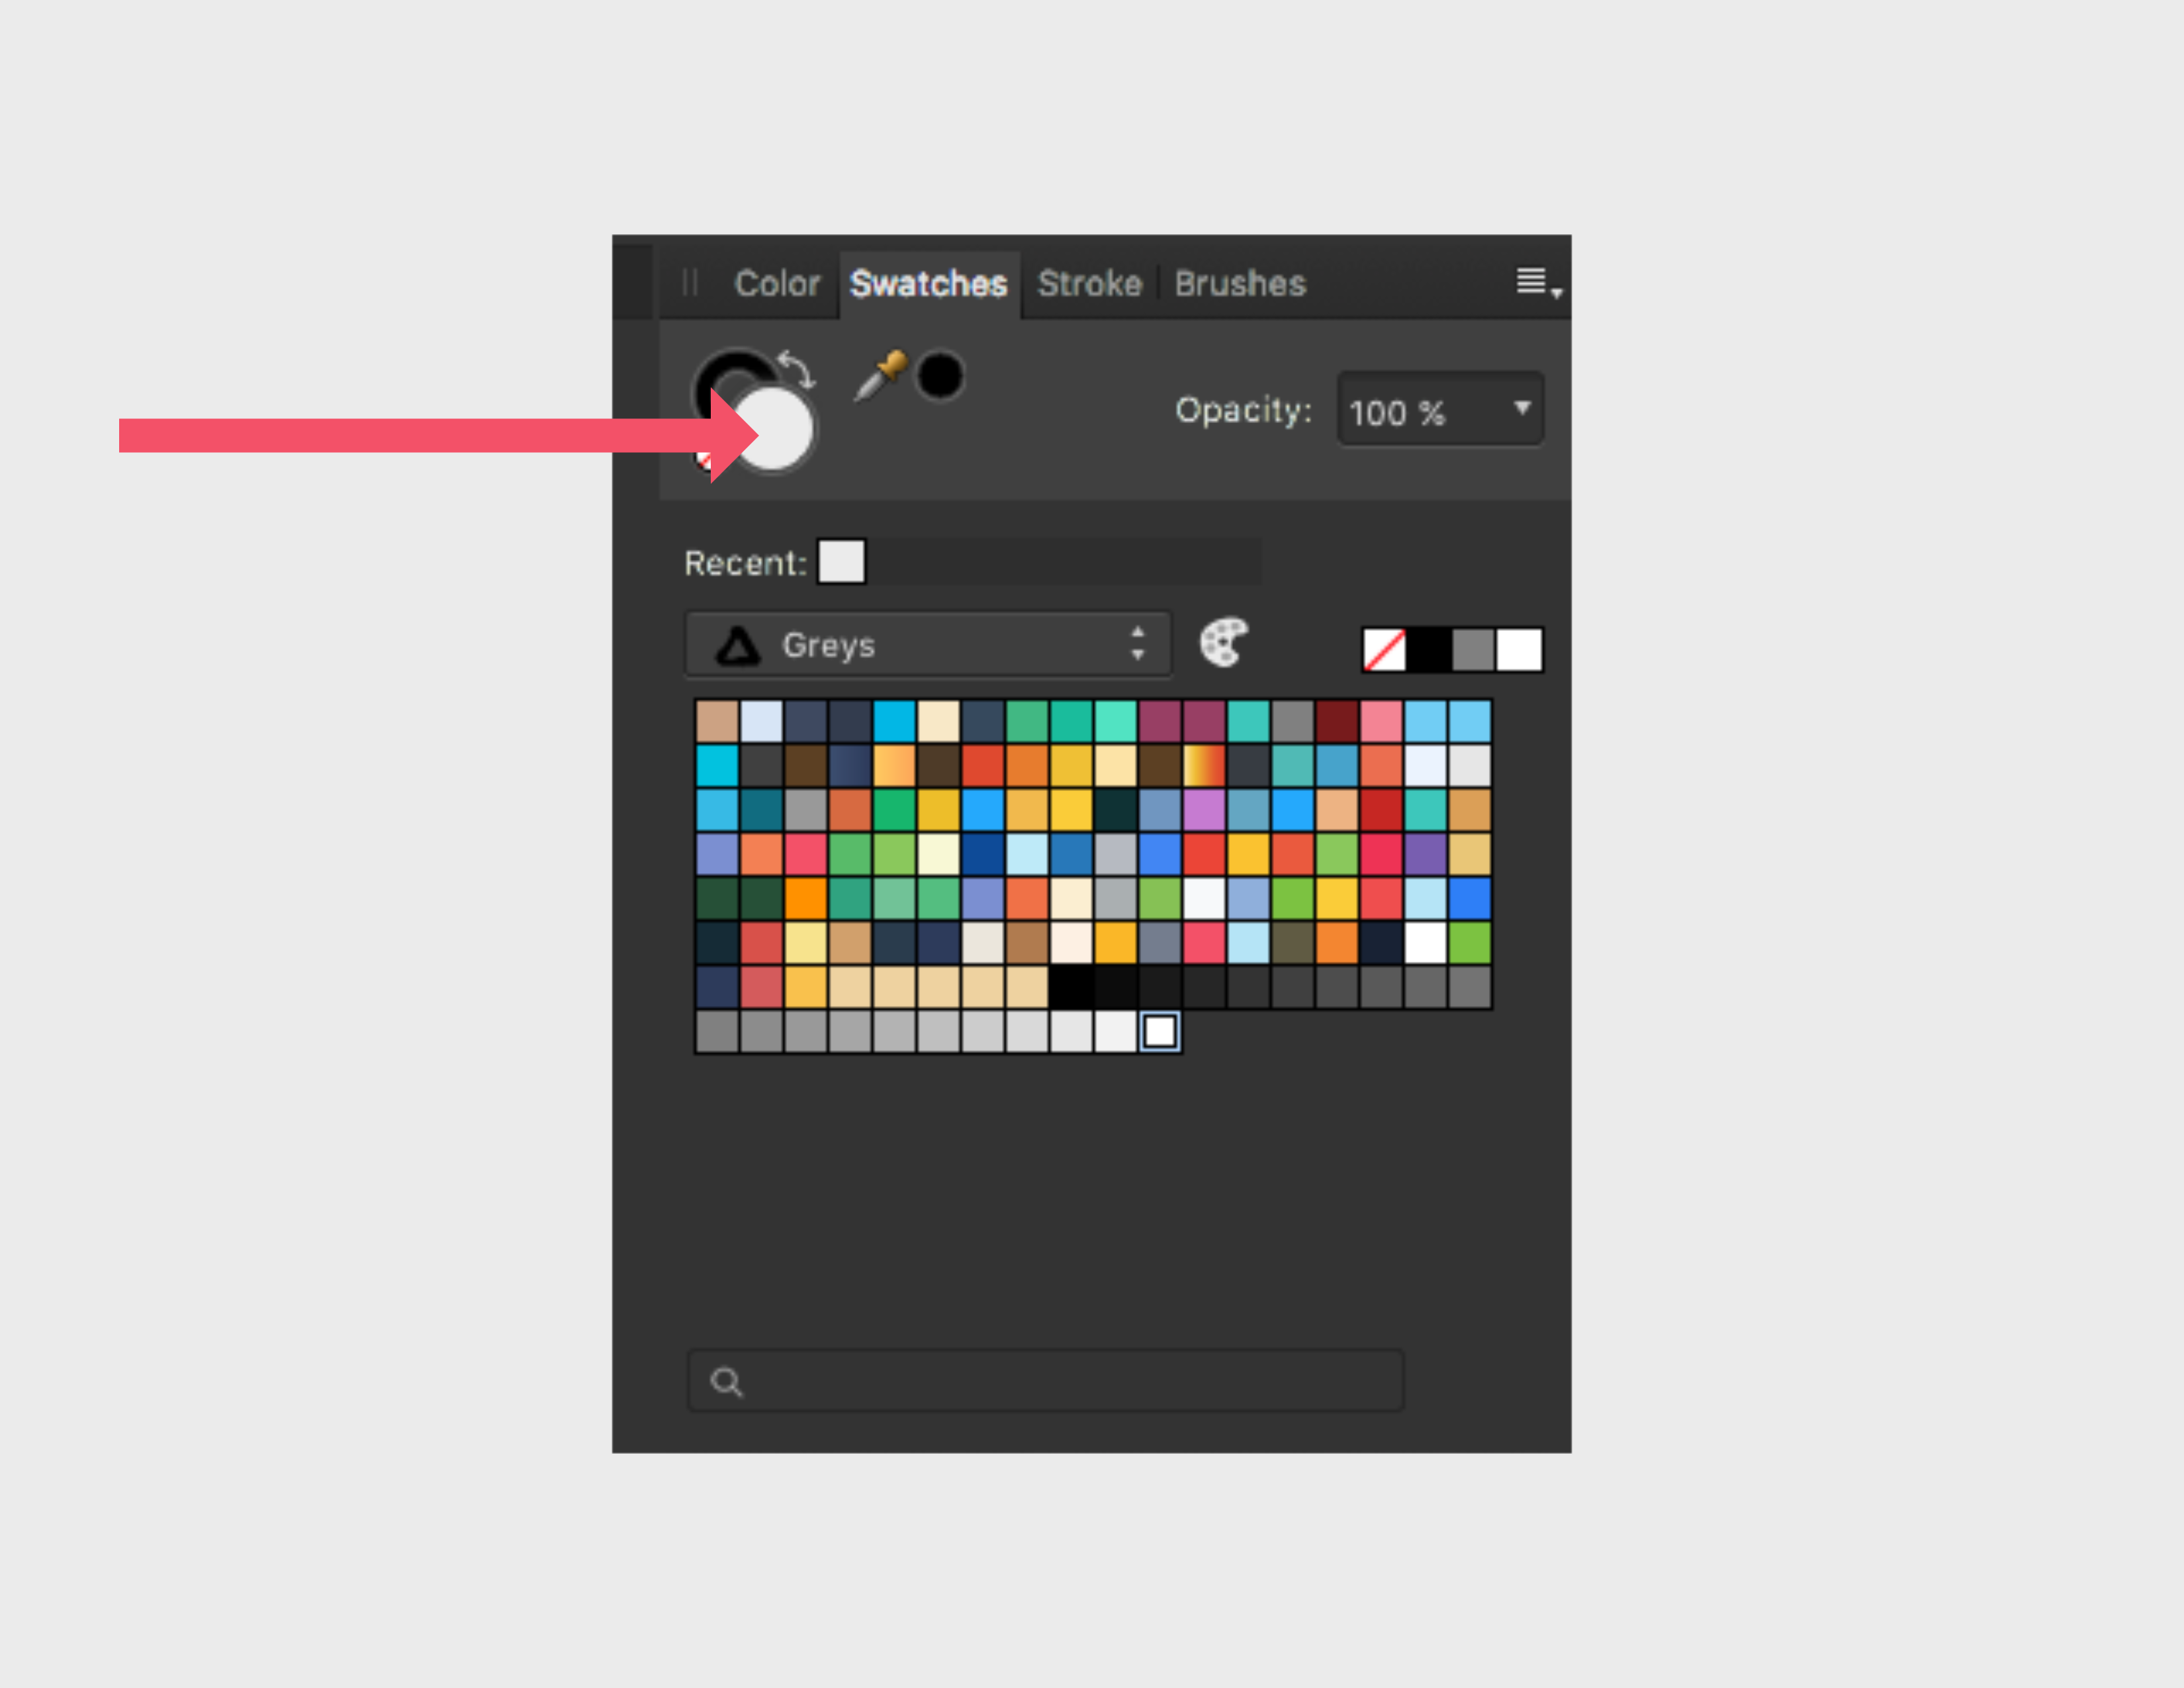
Click the tab Swatches on the right-hand side.
Double click the following circle:
You will get the following popup:
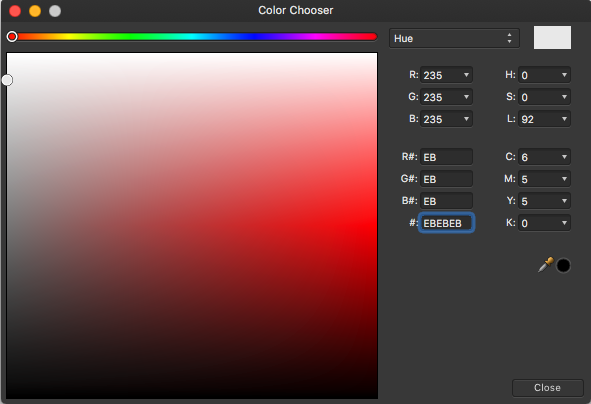
In the # field outlined in blue, we will put in the hex code for our blue background:
25A9FC
We should now have:

Cool! We have created our first shape and set the background for our koala image.
Going forward, all shapes will be created in a similar fashion by clicking the icon on the left-hand toolbar, dragging it out, and adding a color under swatches on the right-hand side.
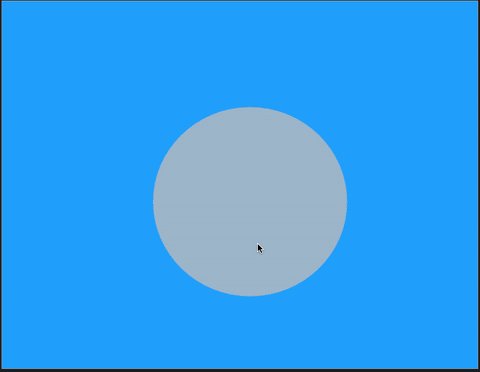
Head
Our head is just a light-gray circle. So first, we select the ellipse tool (circle) from the left-hand toolbar. We drag it out and give it the following color:
A6BECF
Here?s how it should work:
Now, if you haven?t noticed already, we Affinity Designer can automatically snap this in the center for us thanks to the snapping tool.
We should be able to just drag the circle until we get the green and red line like so:
Cool! Our head is complete!
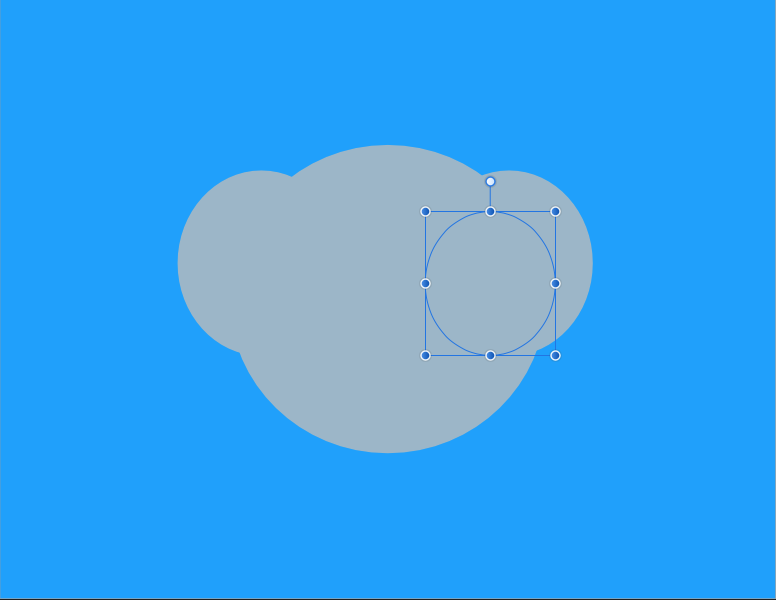
Ears
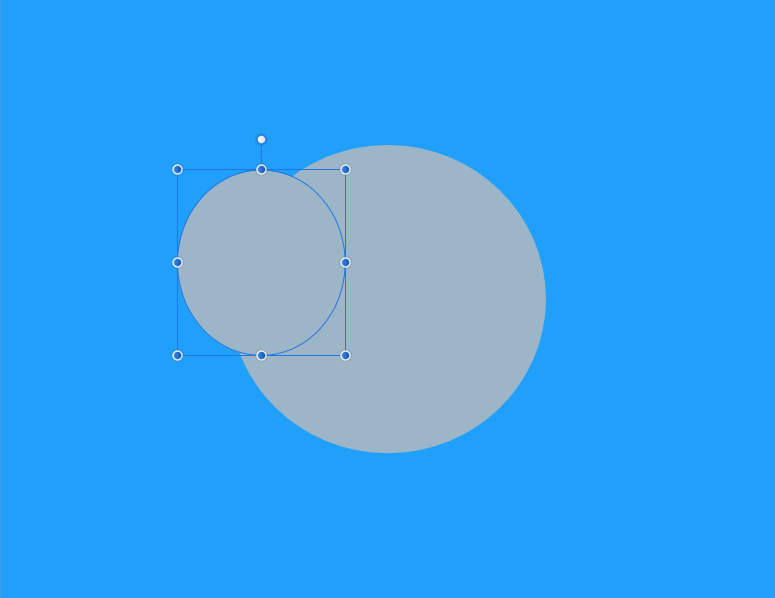
Our ears will be two circles on top of each other. We have two ways to approach this.
We could 1) Use the ellipse tool again and drag a circle or 2) We can duplicate or head and shrink it.
I?m going to go with option 2.
To duplicate a shape, just click on it and press (command + J) on Mac.
You can check this cheat sheet for Windows shortcuts.
There is also a cheat sheet for all Mac shortcuts.
Once the shape is duplicated, click on it and you can hold shift and drag until we get the correct size. By holding shift, it will retain the shape height/width ratio.
Then, click the circle in the center and drag it to it?s position using the move tool (top selection on the left-hand menu).
We want to place it so we get something like this:

Now, let?s just make it a tad thinner.
Now, we can duplicate this ear and click the duplicate shape in the center. Then, drag it to the right while holding shift. This will keep it at the same level.
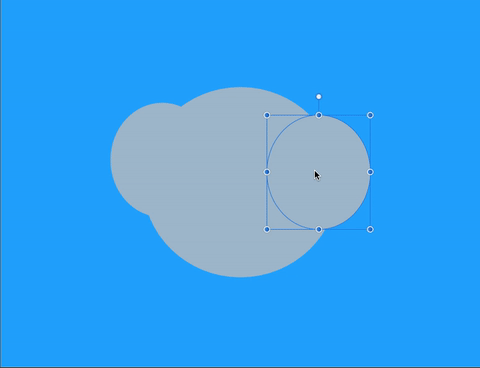
You might have to fiddle around until it is symmetrical, but when you are ready we will continue.
Next, we just need to duplicate both ears, change to a dark gray color, make it smaller, and then center it according to the outer ear.
Here is the hex code for our dark gray color:
819CAF
Again, we duplicate (command + J) for Mac users. Then, we drag from the corner while holding shift so we have a smaller circle with same height/width ratio.
Go under swatches and change the color to 819CAF.
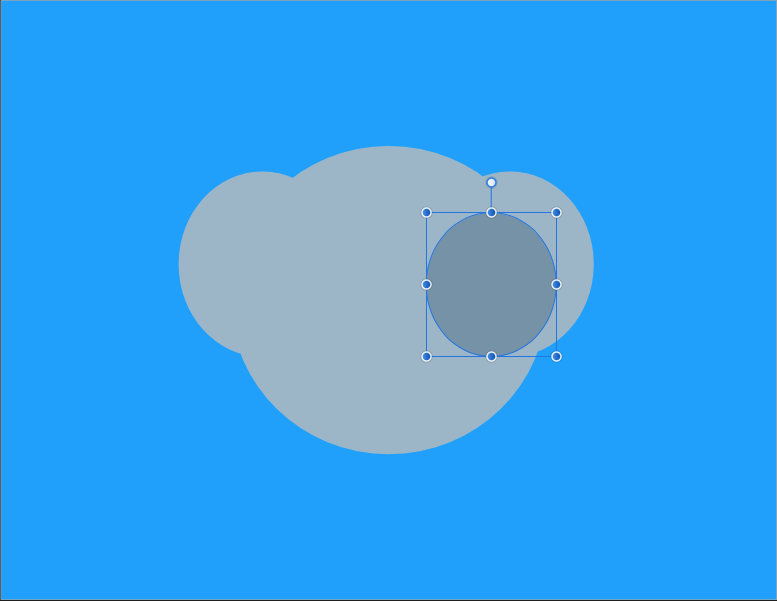
Now, we can snap this into the center.

Now, repeat these steps for the opposite ear, or even easier, you can just duplicate the dark-gray circle and drag to the center of the opposite ear and snap in.
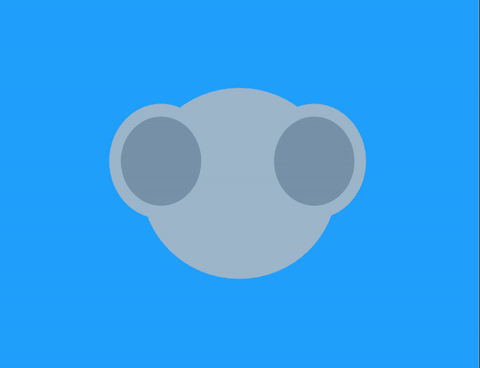
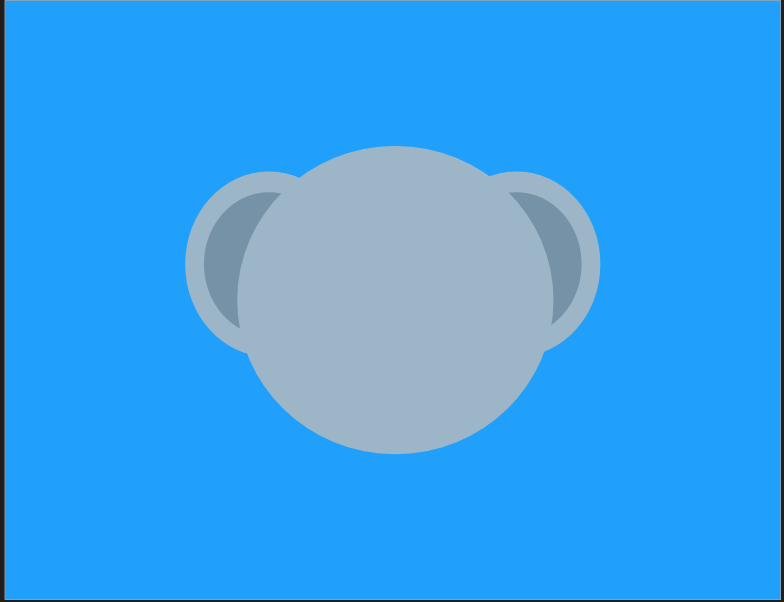
When this has been completed, you should have the following:
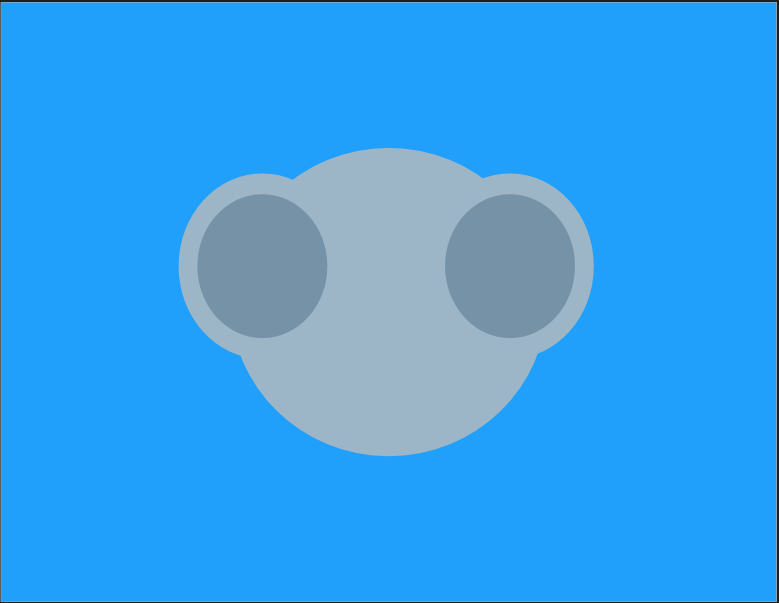
Remember, we want these ears behind our head. Therefore, we will group them and then move them down a layer.
To group them, you can just drag over them like so with the move tool:
Next, hit (command + G) for Mac users to group them. When they are grouped, we can move and layer them all at once instead of individually.
To move it down a layer, we just select the following:
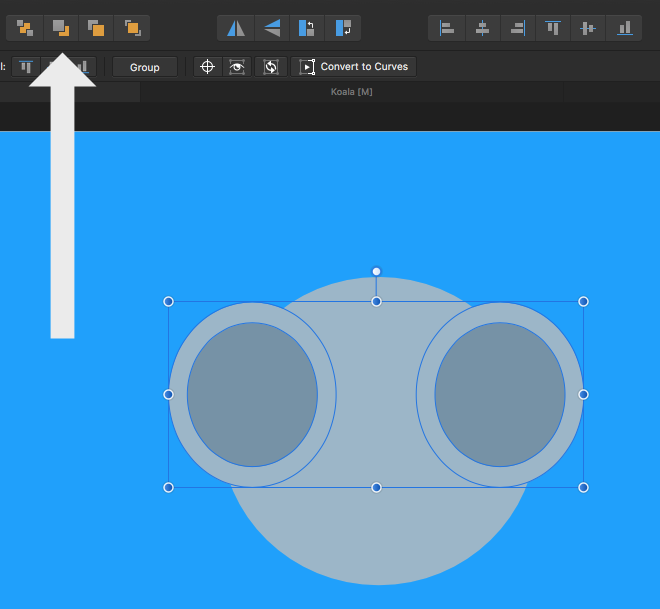
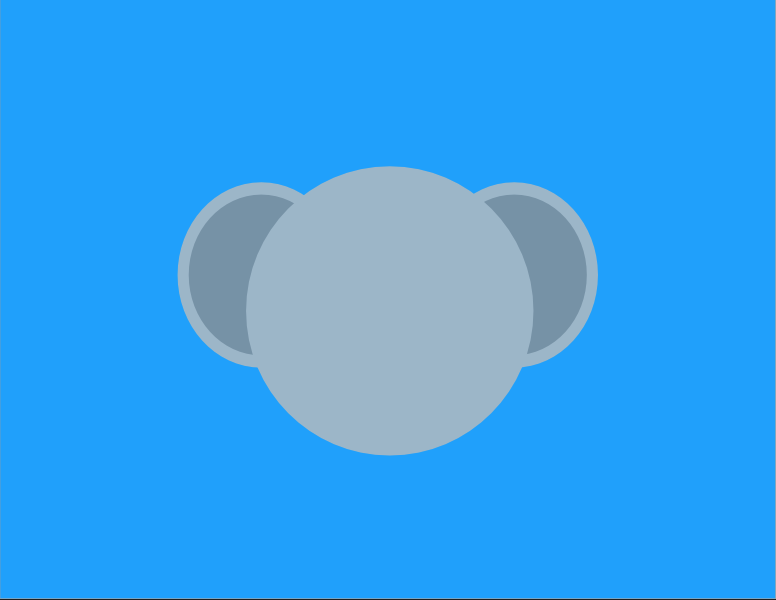
We should now have something similar to:
If you wanted to change the ears, you can click on the ears, ungroup them (command + shift + G) for Mac users, and move them forward. Then, you can reshape and resize, group, and move back again.
Here?s what I had after some fiddling around:
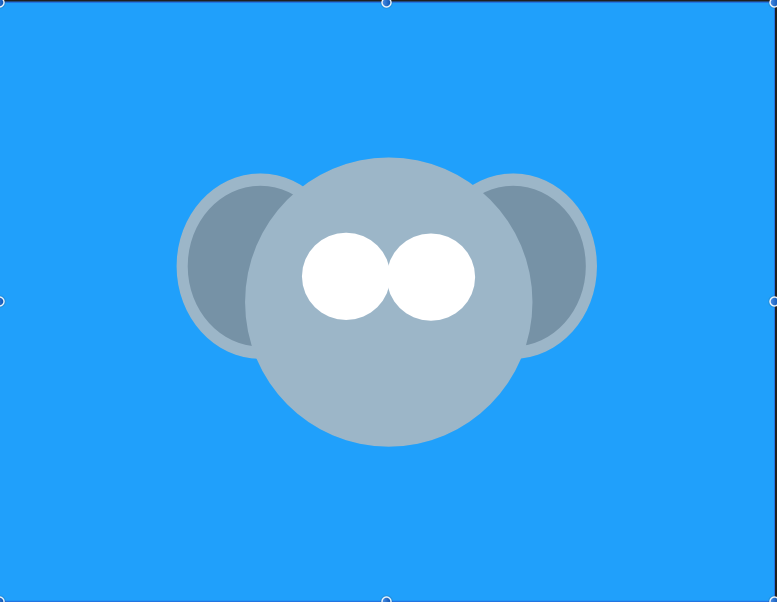
Eyes
The eyes will be very similar to the ears except for different colors, different sizes, and different position. However, the process is very much the same.
Try to see if you can create them yourself, here are the color hex codes:
//whiteFFFFFF//black or dark navy27354A
If you need some assistance, we need to use the ellipse tool (circle) from the left-hand menu and drag a circle with the size we need. Then under swatches, enter in the hex code FFFFFF.
For example:
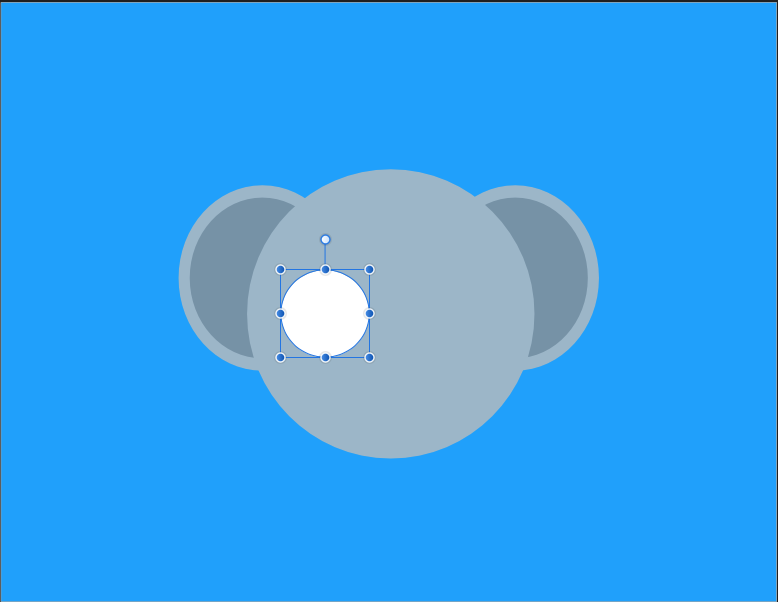
We can then use the move tool to position it where we want:
We can duplicate it, select the move tool, and drag it over while holding shift so we have:
Next, we can duplicate one eye and shrink it by dragging from the corner and holding shift.
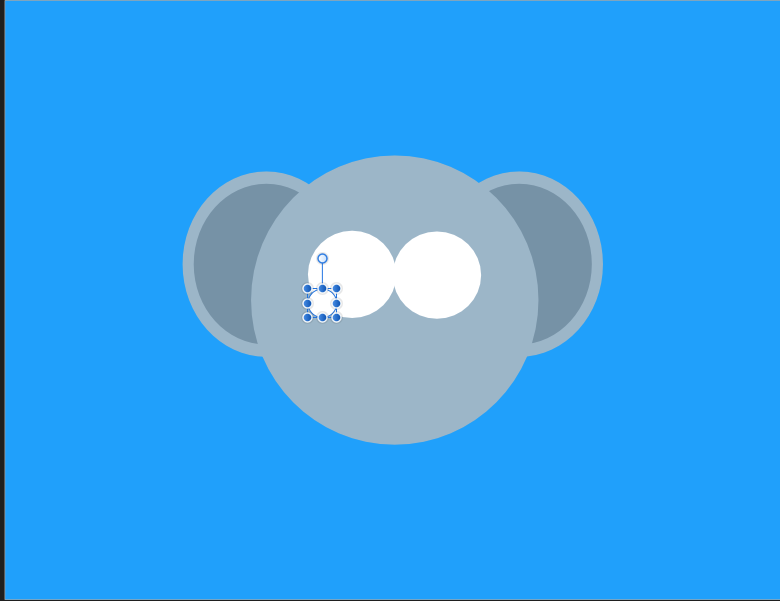
We give it the hex code of 27354A under swatches so we have:
Next, we can snap it in the center until we have:
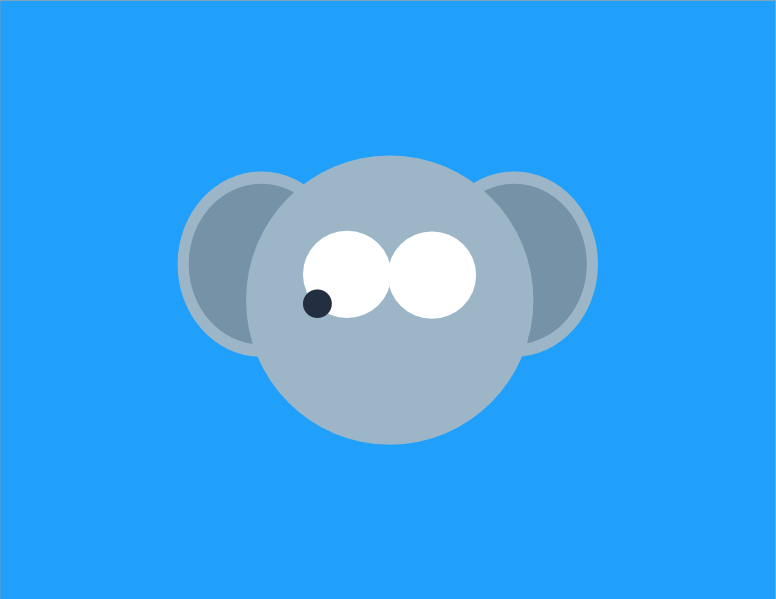
Then, we duplicate the black circle and move it to the other eye and snap it in the center so we have:
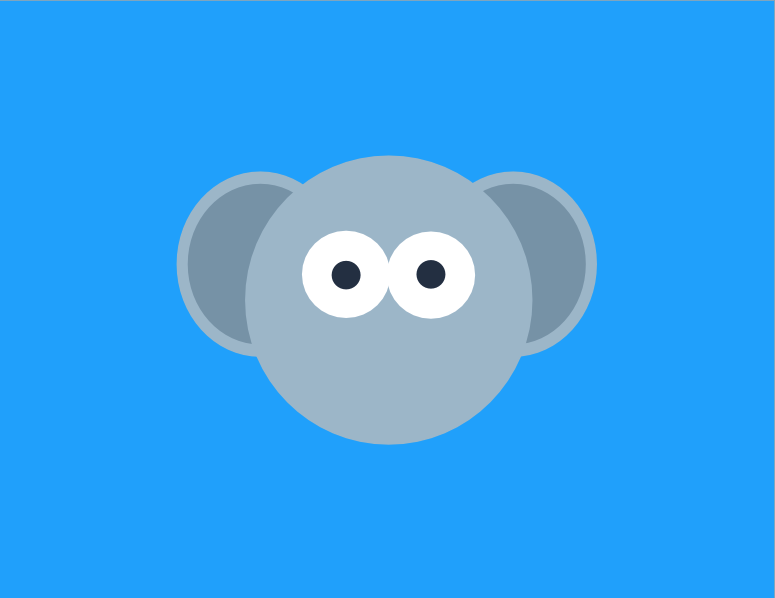
You may need to adjust the layers to get this right using the layers toolbar:
![]()
Alright, pretty sweet!
Nose
We should now grasp the basic use of making a vector graphic. Let?s finish our last two steps.
For our nose, we are going to use the rectangle tool on the left-hand side.
We want to drag out a rectangle that is long and narrow like so:
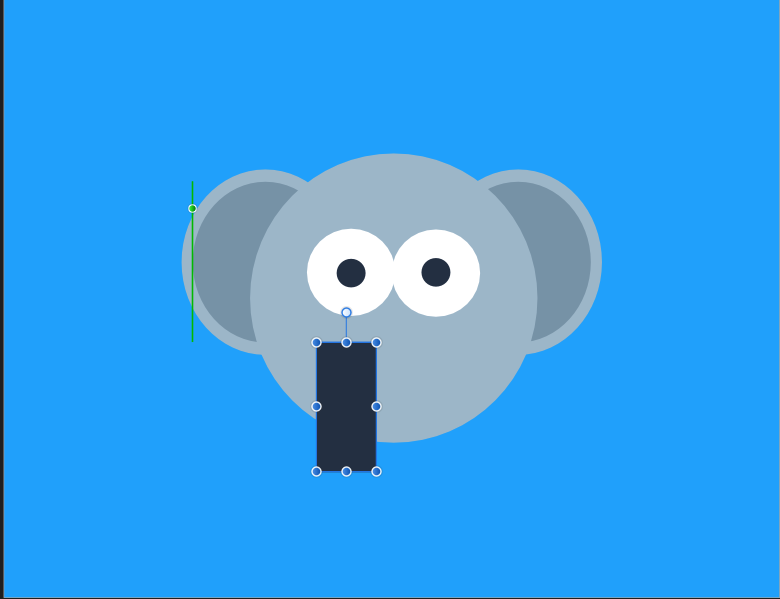
Let?s also place it horizontal centered but just below the pupils:
Now, we bring it to the top by clicking:
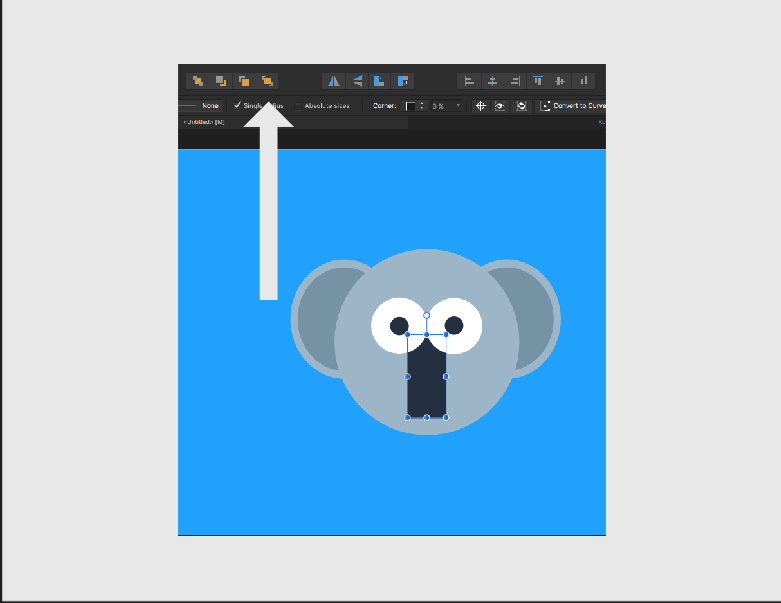
Then, we can use Corner Tool (4th option from the top of the left-hand menu) to round our rectangle like so:

Last but not least, let?s change the color to the following:
BE845F
We can then fiddle until we get it just right. I ended up with this:
Cool!
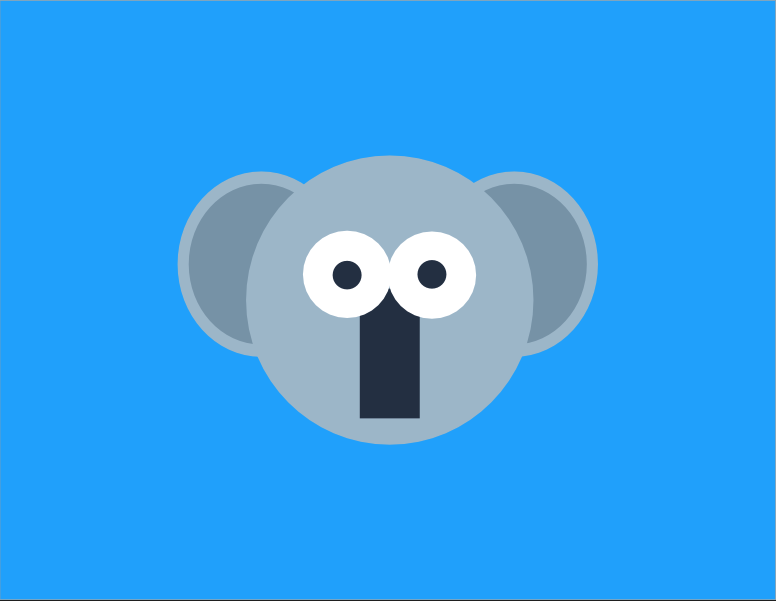
Hair
This is our final step!
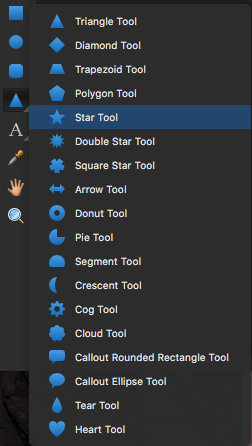
We just need to put two light-gray triangle on the top.
First, we can drag a triangle use the triangle tool. If you can?t see this by default, you need to click the bottom right triangle and select it from the following menu:
Now, let?s drag a small triangle and then move it where we need it.
Also, give it the light-gray color:
A6BECF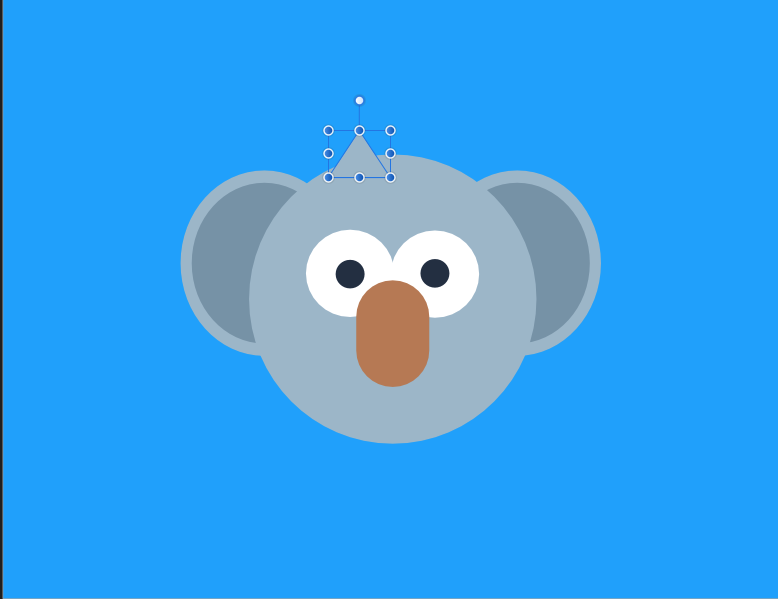
Then, we can duplicate this triangle, resize it (drag from corner and hold shift), and then move it over. We don?t want it center so it won?t be snapped.
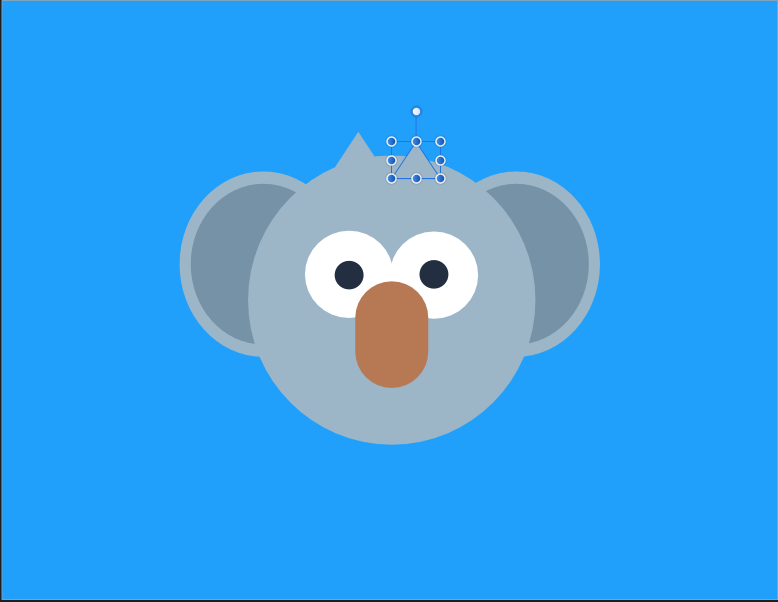
Our koala is now complete!
Future Work
Edit (2/22/17): A sequel to this guide has been released covering how to take vector graphics to the web.
(Update 3/27/17): I have begun the process of creating a video course for providing a very clear and detailed break down of SVGs. I will be going into extensive detail about making vector graphics and going through more complex examples. You can book access here.
I plan on writing this more, but for now, you can get some more practice.
You can first try making a similar elephant I made: https://dribbble.com/shots/3211789-Cute-Elephant
Then, you can try making a similar animal on your own. You can use Coolors to easily generate a color scheme.
Next, you can search Dribbble and try to break down existing designs into shapes and make something similar.
If you already know HTML & CSS, it might be helpful to do pure CSS images at the same time as learning vector graphics. They are very similar except for pure CSS images, CSS is your Affinity Designer. Check out my beginner?s guide to pure CSS Images.
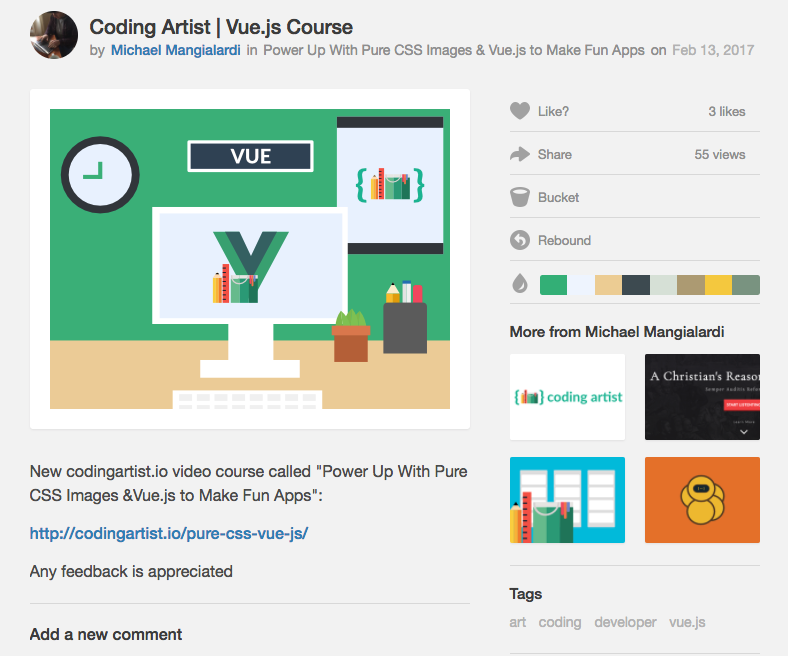
I am also currently working on making video courses through my platform called Coding Artist, which is intended for frontend developers who want to have an emphasis on design. I currently have a pure CSS images & Vue.js course but I have some other courses in the works which you can reserve a spot for now.
Any feedback is appreciated.
Cheers,Mike Mangialardi
