

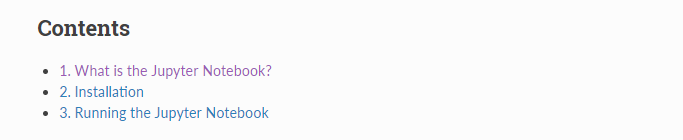
Jupyter Notebook (formerly, IPython Notebook) is an application, widely used in the Data Science domain, for creating and sharing documents that contain Live code, Equations, Visualizations, and Explanatory text. A server-client application that allows editing and running notebook documents via the web browser of our choice, it can be executed on a local desktop requiring no internet access, or installed on a remote server and accessed through the internet. It also has a Dashboard (Notebook Dashboard) and a control panel, displaying local files and allowing you to open notebook documents or shut down their kernels. Jupyter Notebook can also be run without any installation.
 Jupyter/IPython Notebook Official Quick Start Guide
Setting up Anaconda Distribution
The linked caption above directs to the Jupyter official webpage, which has an exhaustive step-by-step guide to installation. We will focus on getting Jupyter Notebook up and running through Anaconda Distribution from Continuum Analytics. The first task (for beginners and near beginners) will be to ensure that you properly uninstall any other Python IDEs (like PyCharm, Python IDLE, etc.) that may be on your computer (see the link at the end of this article for a guide to uninstalling). Also, you must ensure that these Python IDEs don?t have their PATH added in Environment Variables.
Once you have a clean system, the next step is to download Anaconda distribution (as this is a guide for beginners, we will avoid Miniconda). For this process, you need to be aware of 2 critical pieces of information about the Operating System on our computer: > Type (Windows/Macintosh/Linux), and > Architecture(32/64 bit). Another important thing to note is the variety of available packages: > Anaconda 2 (Download only if you are intending to use Python ? 2.7 ), and > Anaconda for Python 3 (Recommended (Allows creating virtual environments to use Python 2, if required).
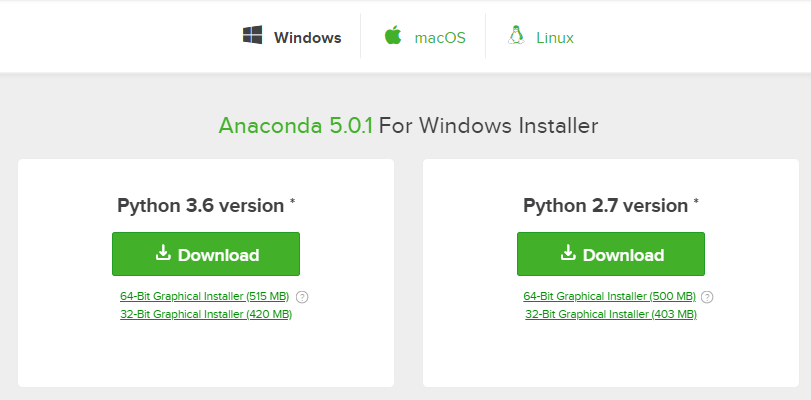 Image 1 | Anaconda for Python 3 Download Link [USE ME]
As you can see in Image 1, this is a large file (500+ MB) so it will take sometime to download, depending upon your internet connection speed. Please note: if you are trying to download it at your workplace, for example, and your corporate security settings do not allow you to download an executable file (i.e. you get admin or user permission errors), then you can instead download the zipped file which contains all the executable files. When the download is complete, start installation (it is recommended to right-click and initiate as an Administrator), bearing in mind that you may get prompts, such as the following:
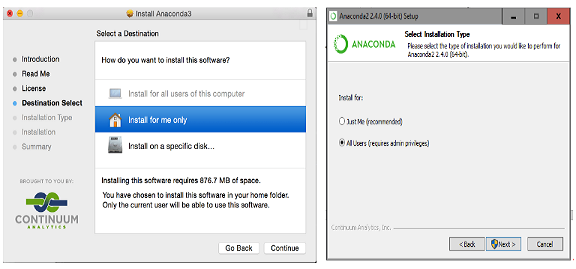 Image 2 | Mac + Windows | Select ?ALL USERS?
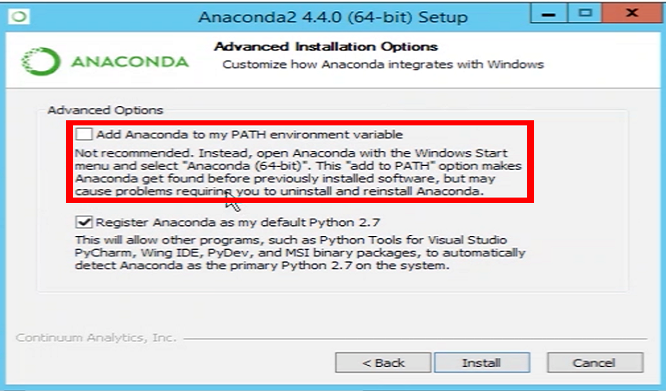 Image 3 | Select both the options to ?Add Anaconda to PATH Variable?, although Anaconda recommends otherwise.
As shown in image 3, ensure that the path to the folder where Anaconda is installed is added to your computer/system. Also, ensure that the Directory/Folder name has no spaces in it (not something like ?C:UsersMy Computer?). Now, when you execute your commands (e.g.- conda install numpy), the Windows Command Prompt (on PC) or Terminal (on Mac/Linux) recognizes the path of the Anaconda directory and accordingly installs the module (Numpy in our example). Later on this will fortify proper execution of commands like import numpy as np in our Jupyter Notebook (or even in Spyder) that we would always require in our Python script/code. Here is the Anaconda Quick Start Guide(for installation/running help) and Anaconda Cheat Sheet (List of navigating commands) in PDF format for assistance. There is also a list of common Q&As in their official documentation. Once you accept the default option to install Anaconda on the default path (as suggested), it will be installed in your user home directory:
- Windows 10: C:Users<your-username>Anaconda3
- MacOS: /Users/<your-username>/anaconda3
- Linux: /home/<your-username>/anaconda3
If you are unable to find Anaconda Navigator in your Search bar, visit the installation folder and head to Scripts. If you don?t find theanaconda-navigator.exe file there, this suggests you have not properly installed Anaconda and it is missing.
Launching Jupyter Notebook
Assuming you have successfully installed Anaconda, you now have easy access to some amazing Python development tools. An effortless way to access all these installed tools is through Anaconda Navigator, a desktop graphical user interface (GUI) included in the Anaconda distribution that lets you launch applications and easily manage conda packages, environments and channels without using the command-line interface.
To be on the safe side, you should restart your computer at this stage. Then use the search bar in your computer to launch the console. It takes some time to initiate for the first time, so be patient. A click on the Jupyter Notebook icon will open your notebook in the default web browser. Alternatively, if you are launching Jupyter Notebook for an environment within Anaconda Navigator, use the drop-down menu next to Applications on, and select that environment before launching Notebook.
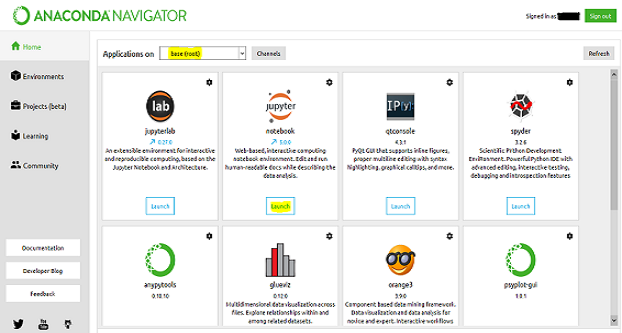 Image 4 | Anaconda Navigator GUI for (highlighted) Jupyter Notebook ?Launch? button
Let?s now focus on launching Jupyter Notebook via Command line. That also involves just one step: simply type and run jupyter notebook in your Windows Command Prompt or Terminal. This will print some information about the notebook server in your terminal, including the URL of the web application (by default, http://localhost:8888). Before you run this command, check you have the Anaconda directory PATH properly added to Environment Variables. If this path is not added you need to locate your Anaconda directory/file path and add it to Environment Variables, or it may fetch the error: ?jupyter is not recognized as an internal or external command?(Image 6). Also note that if you?re running this command from Anaconda Command Prompt(Powershell backed), you may notice two different file paths (as in Image 5) ? this is not a problem. If the launch is successful, the command prompt shall look like Image 5 and Jupyter notebook will open up (as in Image 7).
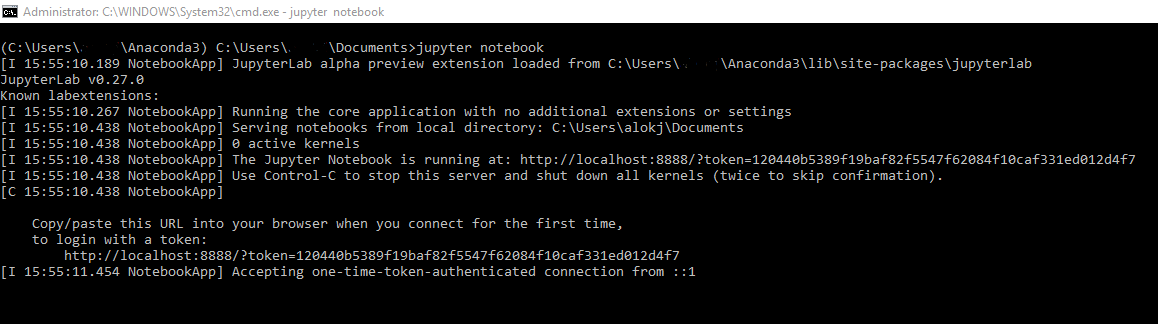 Image 5 | Anaconda Prompt to Launch Jupyter Notebook
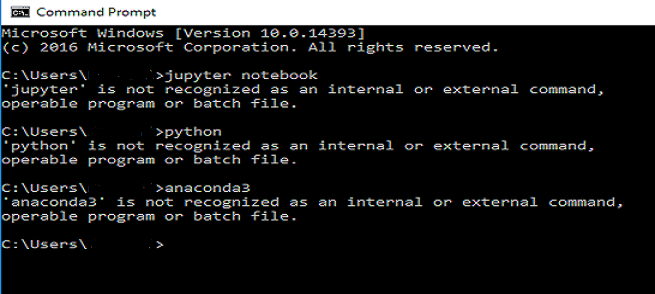 Image 6 | Win Command Prompt | Error: ?Jupyter? and ?Python? not recognized.
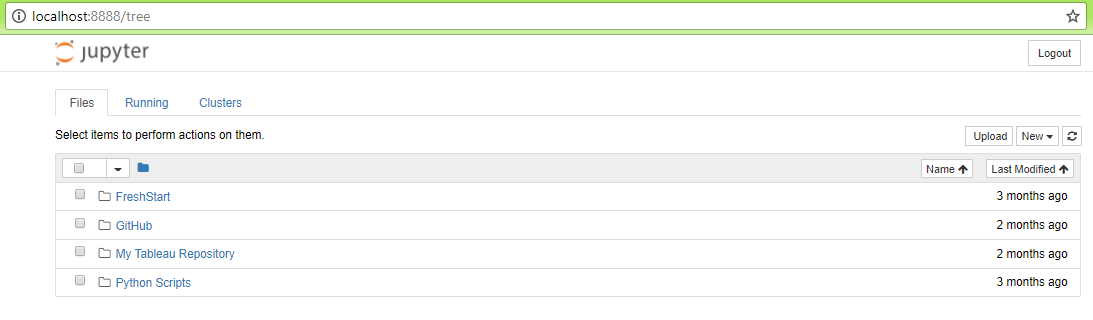 Image 7 | Jupyter Notebook Dashboard on default web browser
There may be a situation where you notice in the Command prompt or Terminal that the File Path (C:UsersmyusernameAnaconda3) is not correct. In that scenario you will have to navigate to the correct path (on Windows or on Macintosh). Later, if you find an issue while downloading/installing libraries (conda install numpy) within Anaconda where it outputs the error: conda-is-not-recognized-as-internal-or-external-command (as in Image 8), once again follow the procedure of altering the directory path.
If you wish to know where Jupyter isinstalled on your computer, you may run where jupyterin the Command prompt. If you wish to know which Python version is installed, run python or python -V or python –version. Sometimes, when trying to launch Notebook from Anaconda Navigator, it may fetch a blank page on your web browser. This indicates that the system is not able to read the jupyter-notebook.exe file that gets generated by Anaconda. In order to try to solve this, navigate to the localhost:8888 URL in your browser.
 Image 8 | Error: conda not recognized
How to navigate within Jupyter Notebook
Jupyter Notebook has a user-friendly Editor with a row of easy-to-use navigation/execution buttons on top (Image 9). These notebook documents are stored in the JSON plain text format, which makes them easy to share and provides for version control. They are also available from a publicly accessible URL and can be shared using Jupyter Notebook Viewer without requiring everyone to install Jupyter Notebook on their machines. These notebooks have a .ipynb extension (which can also be accessed via Enthought Canopy or IPython). Use the complete Notebook User?s manual for quick reference.
 Image 9 | Notebook Editor
Alternatively, you can also use keyboard shortcuts to access files and execute your Python scripts. Use the Jupyter Notebook Keyboard Shortcut Cheat sheet to refer to.
Now let?s talk about handling our Dashboard. The dashboard automatically detects all the .ipynb files in your directory but if your required files are in a separate directory, it also allows you to upload (has an UPLOAD button in the Dashboard) a file (Detailed view in Image 10). There is also a NEW button, which allows you to select a Python kernel () from the dropdown menu (Image 11). Some kernels shown here may not be present in your case ? options vary depending what is installed on your local server (Now you know why ?Python 2′ or ?R? isn?t visible with your installation).
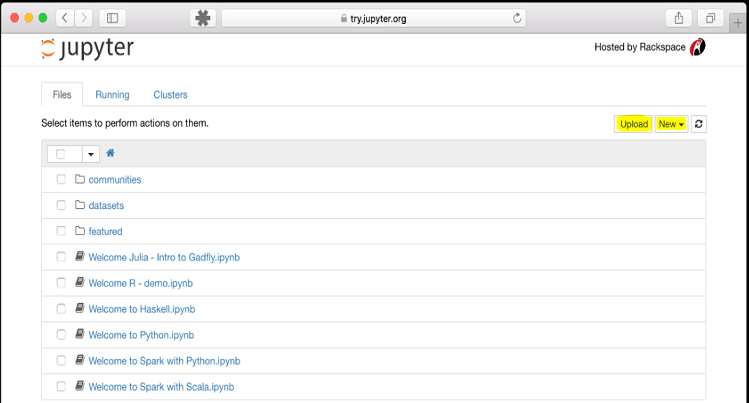 Image 10 | Detailed view of Jupyter Dashboard
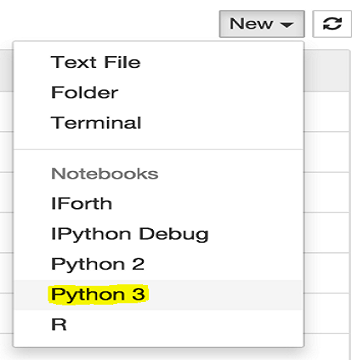 Image 11 | Jupyter ?New? Kernel
Notebooks and files can be uploaded to the current directory by dragging a notebook file onto the notebook list (Image 10) or by using the ?click here? text above the list. The notebook list shows green Running text and a green notebook icon next to running notebooks. These remain running until you shut them down ? closing the notebook?s page is not sufficient. To shutdown, delete, duplicate, or rename a notebook, check/tick the checkbox next to it and an array of controls will appear at the top of the notebook list (as in Image 12). You may also use a similar operations on directories and files. Lastly, to view all of your running notebooks along with their directories, click on the Running tab.
 Image 12 | Notebook File/Directory Operations
Common issues with Jupyter Notebook
The Jupyter Notebook team is made up of dedicated developers who consistently resolve their open issues. If you wish to take a look at open issues or report a new issue, visit their GitHub. As a beginner, it is your responsibility to check all the possible online resources, such as StackOverflow (currently 6000+ questions have been already answered), for existing solutions, before raising a new one.
Here are a few common/frequently asked Jupyter Notebook issues and their solutions:
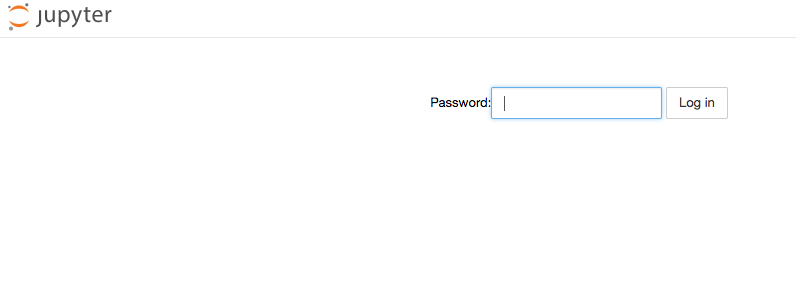 Image 13 | Error: Jupyter Notebook asking for a Password or Token
> Launch IPython notebook with selected browser
> Change IPython/Jupyter notebook working directory
> How to change the Jupyter start-up folder
> Jupyter Notebook suddenly started asking for Password or Token
> How to disable password request for a Jupyter notebook session?
> IOPub data rate exceeded when viewing image in Jupyter notebook
> How can I check if code is executed in the IPython notebook?
> Link Conda environment with Jupyter Notebook
> Error when executing `jupyter notebook` (No such file or directory)
> Conda environments not showing up in Jupyter Notebook
> Jupyter notebook not trusted
> How to uninstall Python IDLE from Mac and Windows? Anaconda uninstallation for Windows and Mac. PyCharm removal on Win and Mac.
> How to make Jupyter Notebook Matplotlib plot inline?
> How do I add Python 3 kernel to Jupyter?
> Jupyter Notebook timeout waiting for response in Chrome
> How do I increase cell width of Jupyter Notebook in my browser?
> Running jupyter via command line on Windows
> IPython notebook won?t read the configuration file
> ?ImportError: No module named? when trying to run Python script
As with any application, issues are unlimited and constantly changing, so covering them all in this brief article is impossible. If your issue is not among the few listed above, I will reiterate the solution process: Search in StackOverflow -> CheckGitHub for Open/Closed issues -> Check Community Forums -> Optional is Reddit/Quora -> Check with your mentor.
Finally, Python Anywhere is a useful resource that you may want to look at.
Thank you for your time!

