
Place a watermark on all of the videos on your YouTube Channel. When viewers hover over the graphic a Subscribe button appears.
 How To Add a Branded Watermark to Your YouTube Channel
How To Add a Brand Watermark to all videos on your YouTube Channel
This tutorial will show you how to place your logo or brand element watermark in the bottom-left corner (bottom-right if watching video) of your YouTube videos. When viewers hover their cursor over the watermark a ?Subscribe? with channel name appears. Viewers can click the button to subscribe to your YouTube Channel. ?
Step 1: Create the watermark graphic file (save as .png)Step 2: Upload the watermark to your YouTube Channel
(Video tutorial at the bottom if you want to skip the article and watch instead)
 Hover cursor over the watermark. Click Subscribe. ?
Note: The watermark is visible on YouTube desktop. Watermark does not appear on the mobile YouTube app. When viewer hovers cursor over watermark, a Subscribe button appears with channel name. Click button to subscribe to channel

Step 1: How To Make a Watermark Graphic
Design Tip: Keep your watermark simple. It will be very small and you do not want it to distract viewers.
- Use Photoshop, Canva or any graphic editor
- Aspect Ratio: 1:1 (Square)
- 150 x 150 pixels minimum size (72, 96, 150 ppi is fine)
- File Size: Under 1MB
- File Type: Save as .png
- Background: Transparent
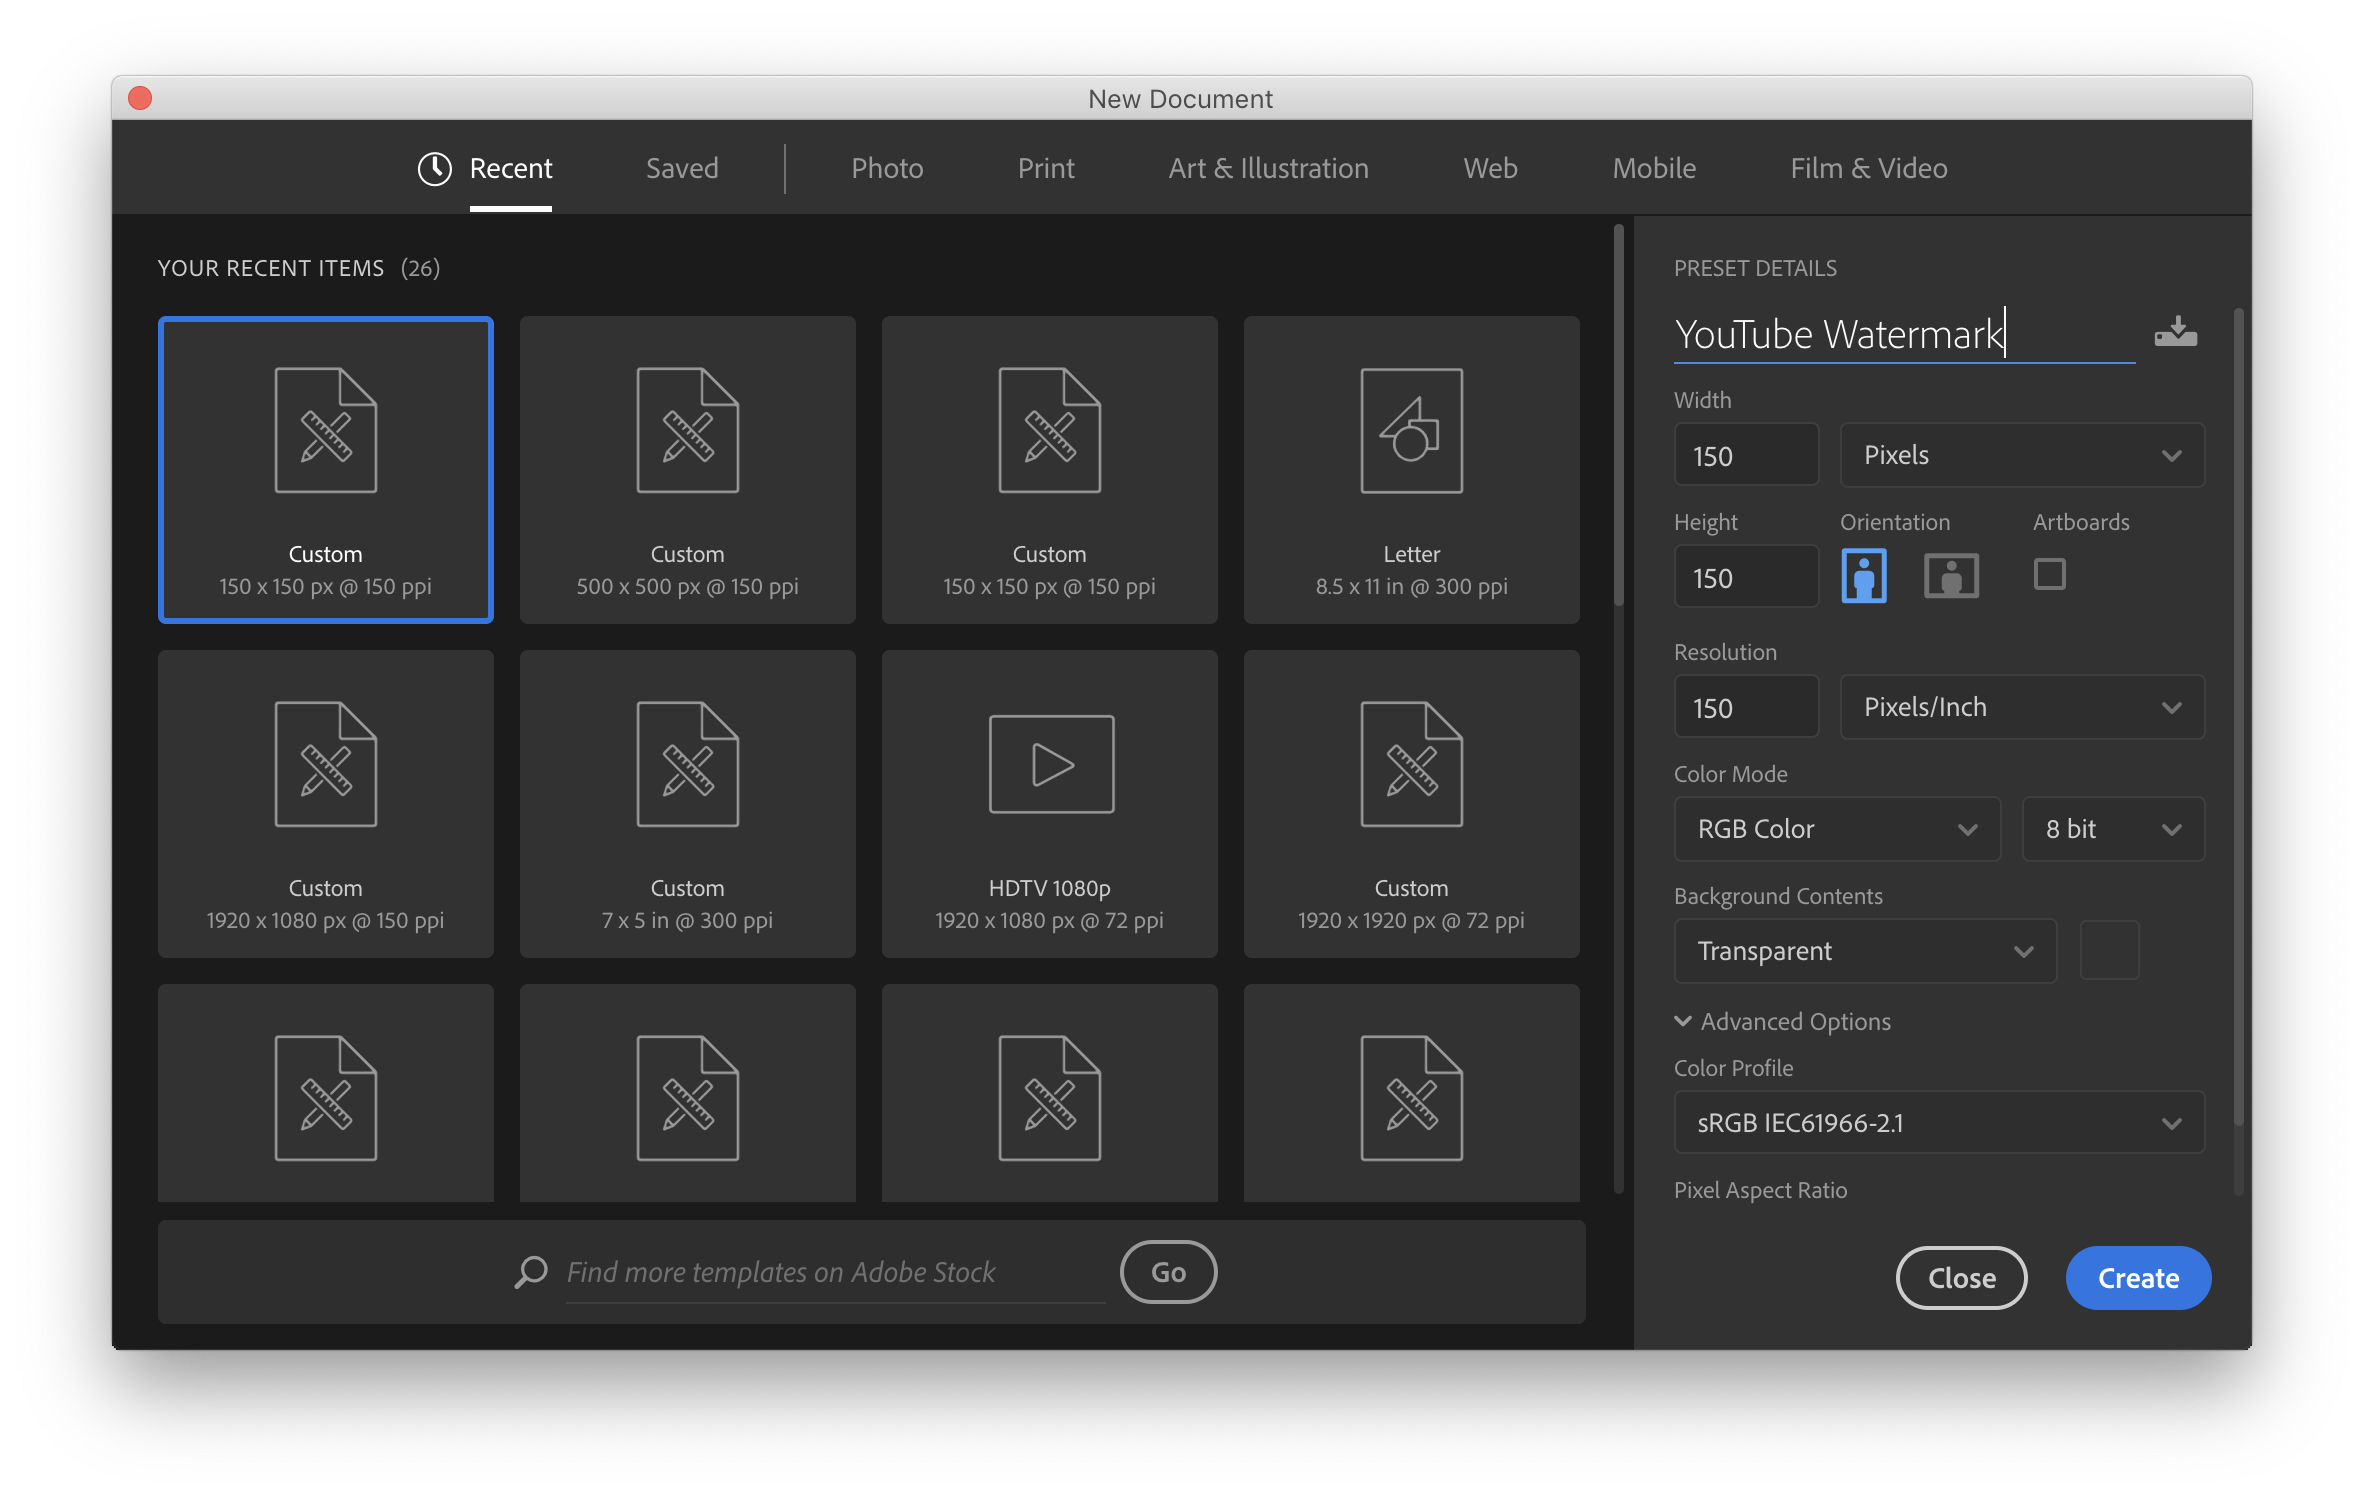 New Photoshop Document (150px X 150px)?Transparent Background
For my watermark, I used Photoshop and created a document at 150 x 150 pixels (150ppi) with a transparent background. I added a logo mark from my Adobe Creative Cloud library. Once the logo was centered on canvas, I went to File>Export As>Format (.png, transparent)>Export All
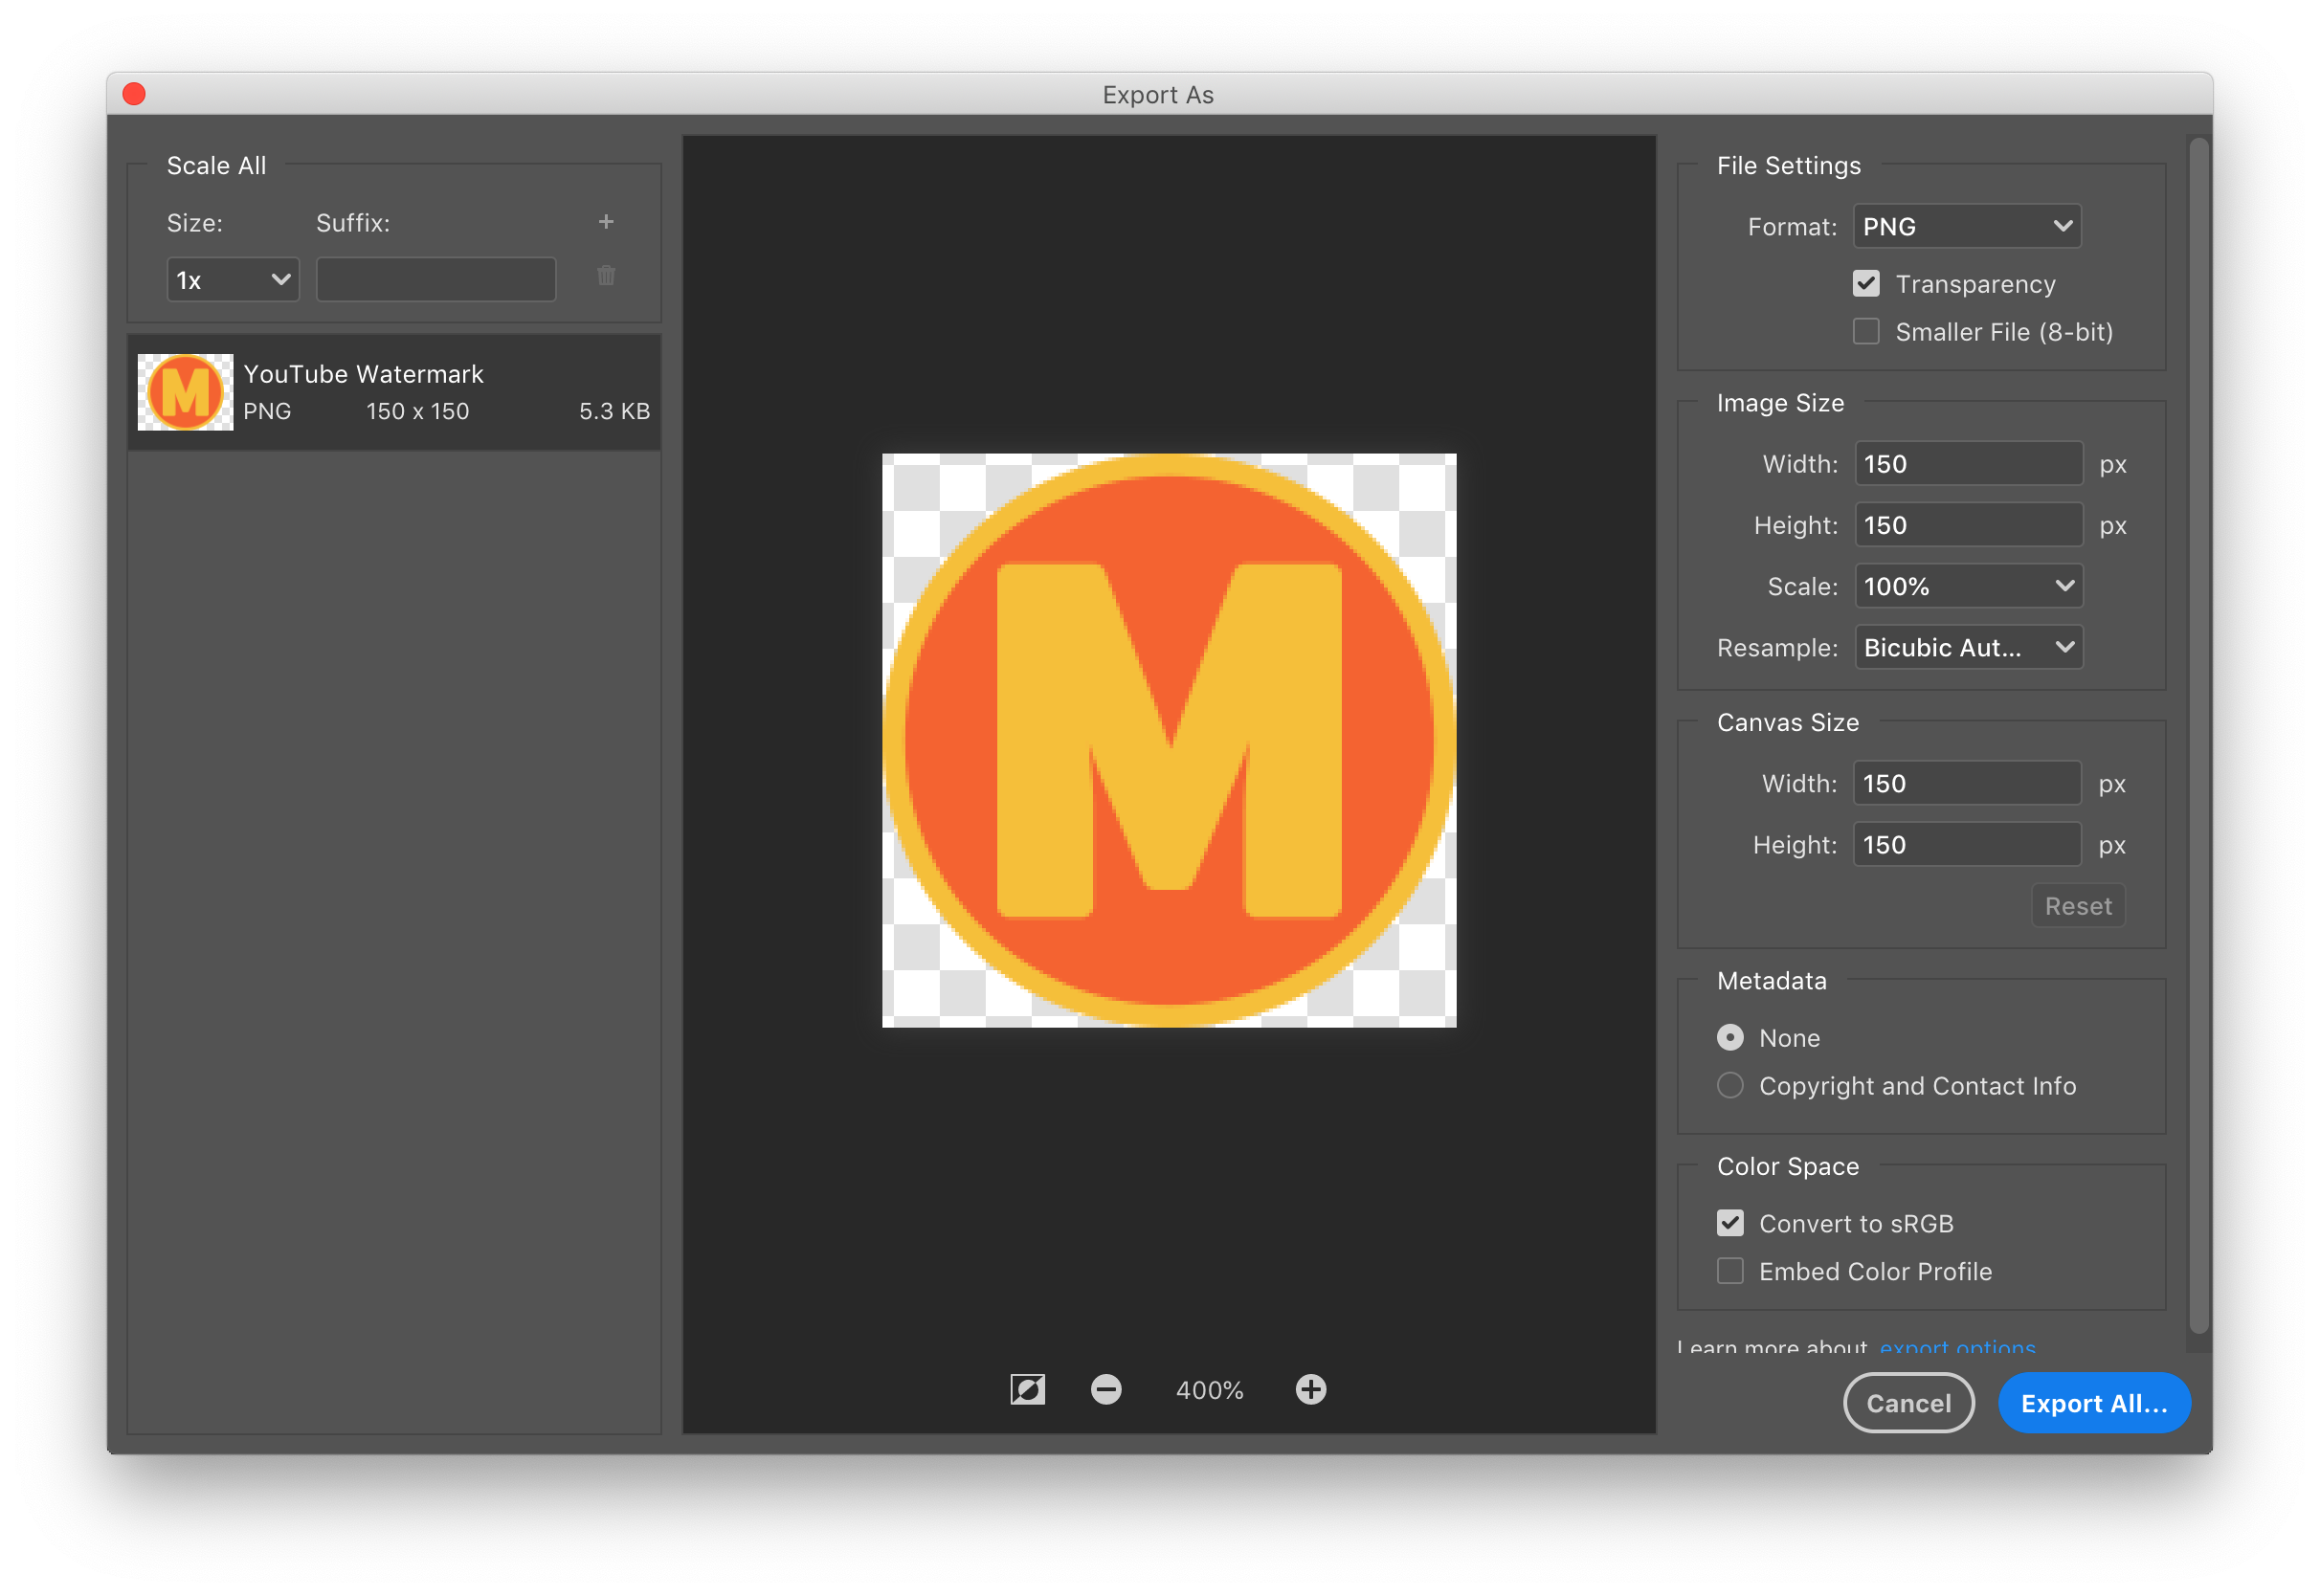 File> Export As> PNG> Export All
Step 2: How To Add Watermark to YouTube Channel
Watermark will appear on all videos on your channel and will be added to new videos you publish. You can remove or replace watermark anytime.
- Log in to your YouTube Channel
- Click on your Profile Pic in the top-right corner
- Click on ?YouTube Studio (beta)?
- Click on ?Settings? in the left sidebar
- Click on ?Channel?
- Click on ?Branding?
- Click ?Choose Image? to locate .png file on computer hard drive
- Click ?Open? to upload
- Select one of 3 options for watermark placementOption 1: End of Video (watermark visible for the last 15 seconds)Option 2: Start Time (choose when to start showing watermark)Option 3: Entire Video (watermark will appear throughout the video)
- Click ?Save? when done.
- Click Remove or Replace anytime to change or delete watermark.
Note: I selected ?Entire Video? so my watermark will be visible on all of my YouTube videos during the entire length of the video (my videos are typically under 3 minutes long).
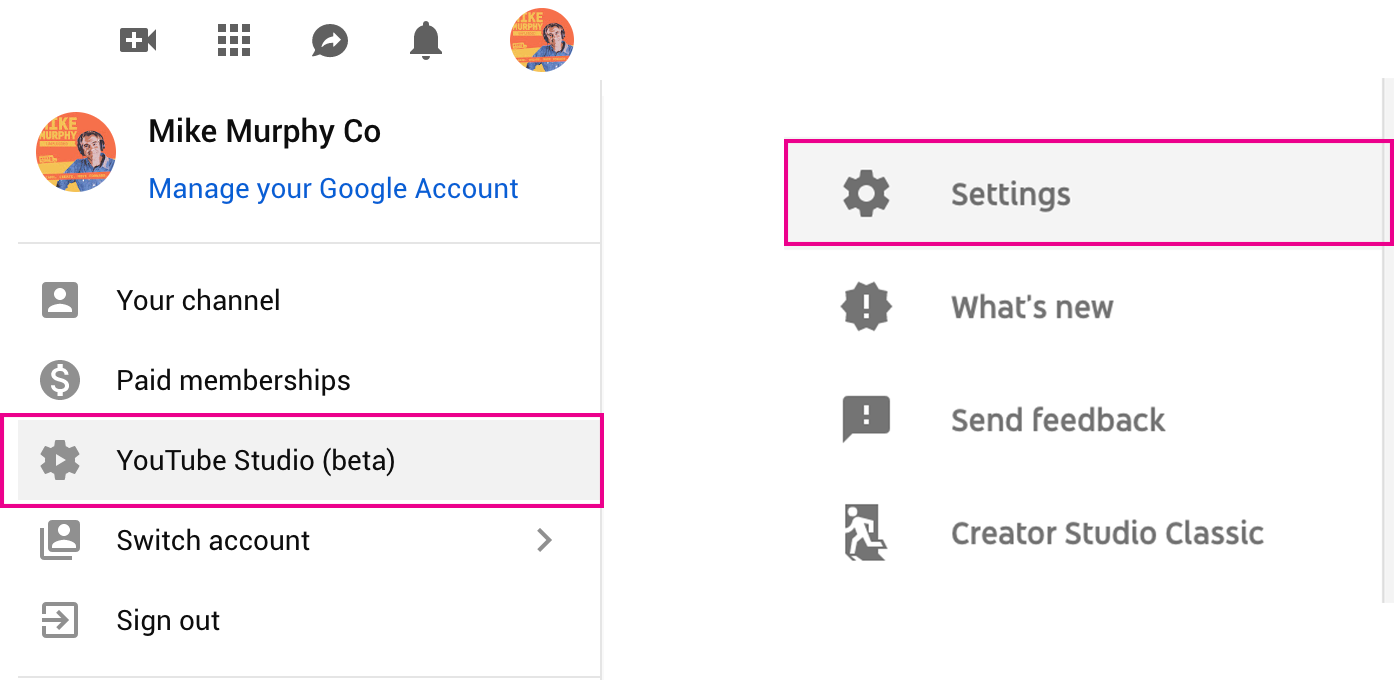 1. Click on Profile > YouTube Studio (beta) 2. Click on Settings
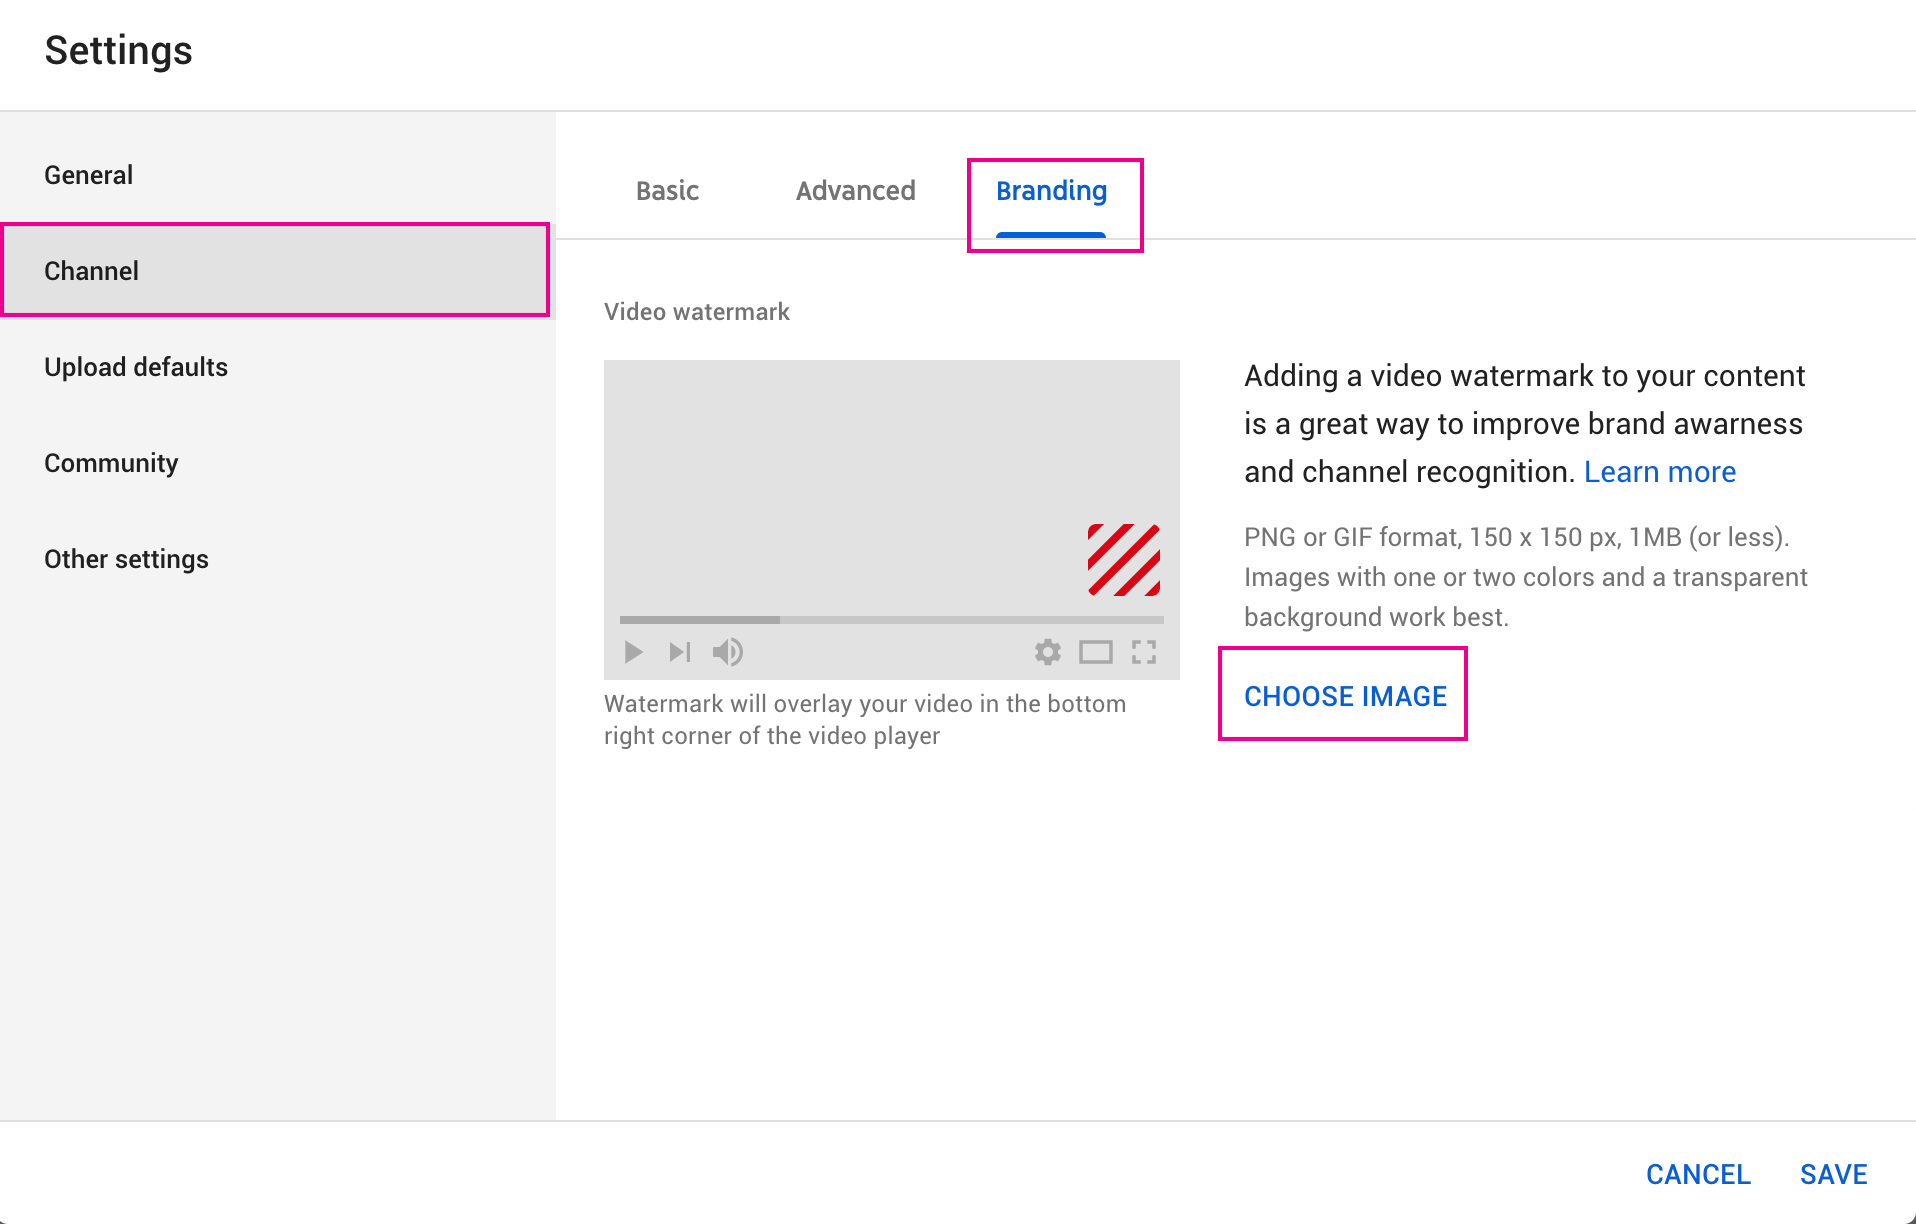 3. Click Channel 4. Click Branding 5. Click Choose Image
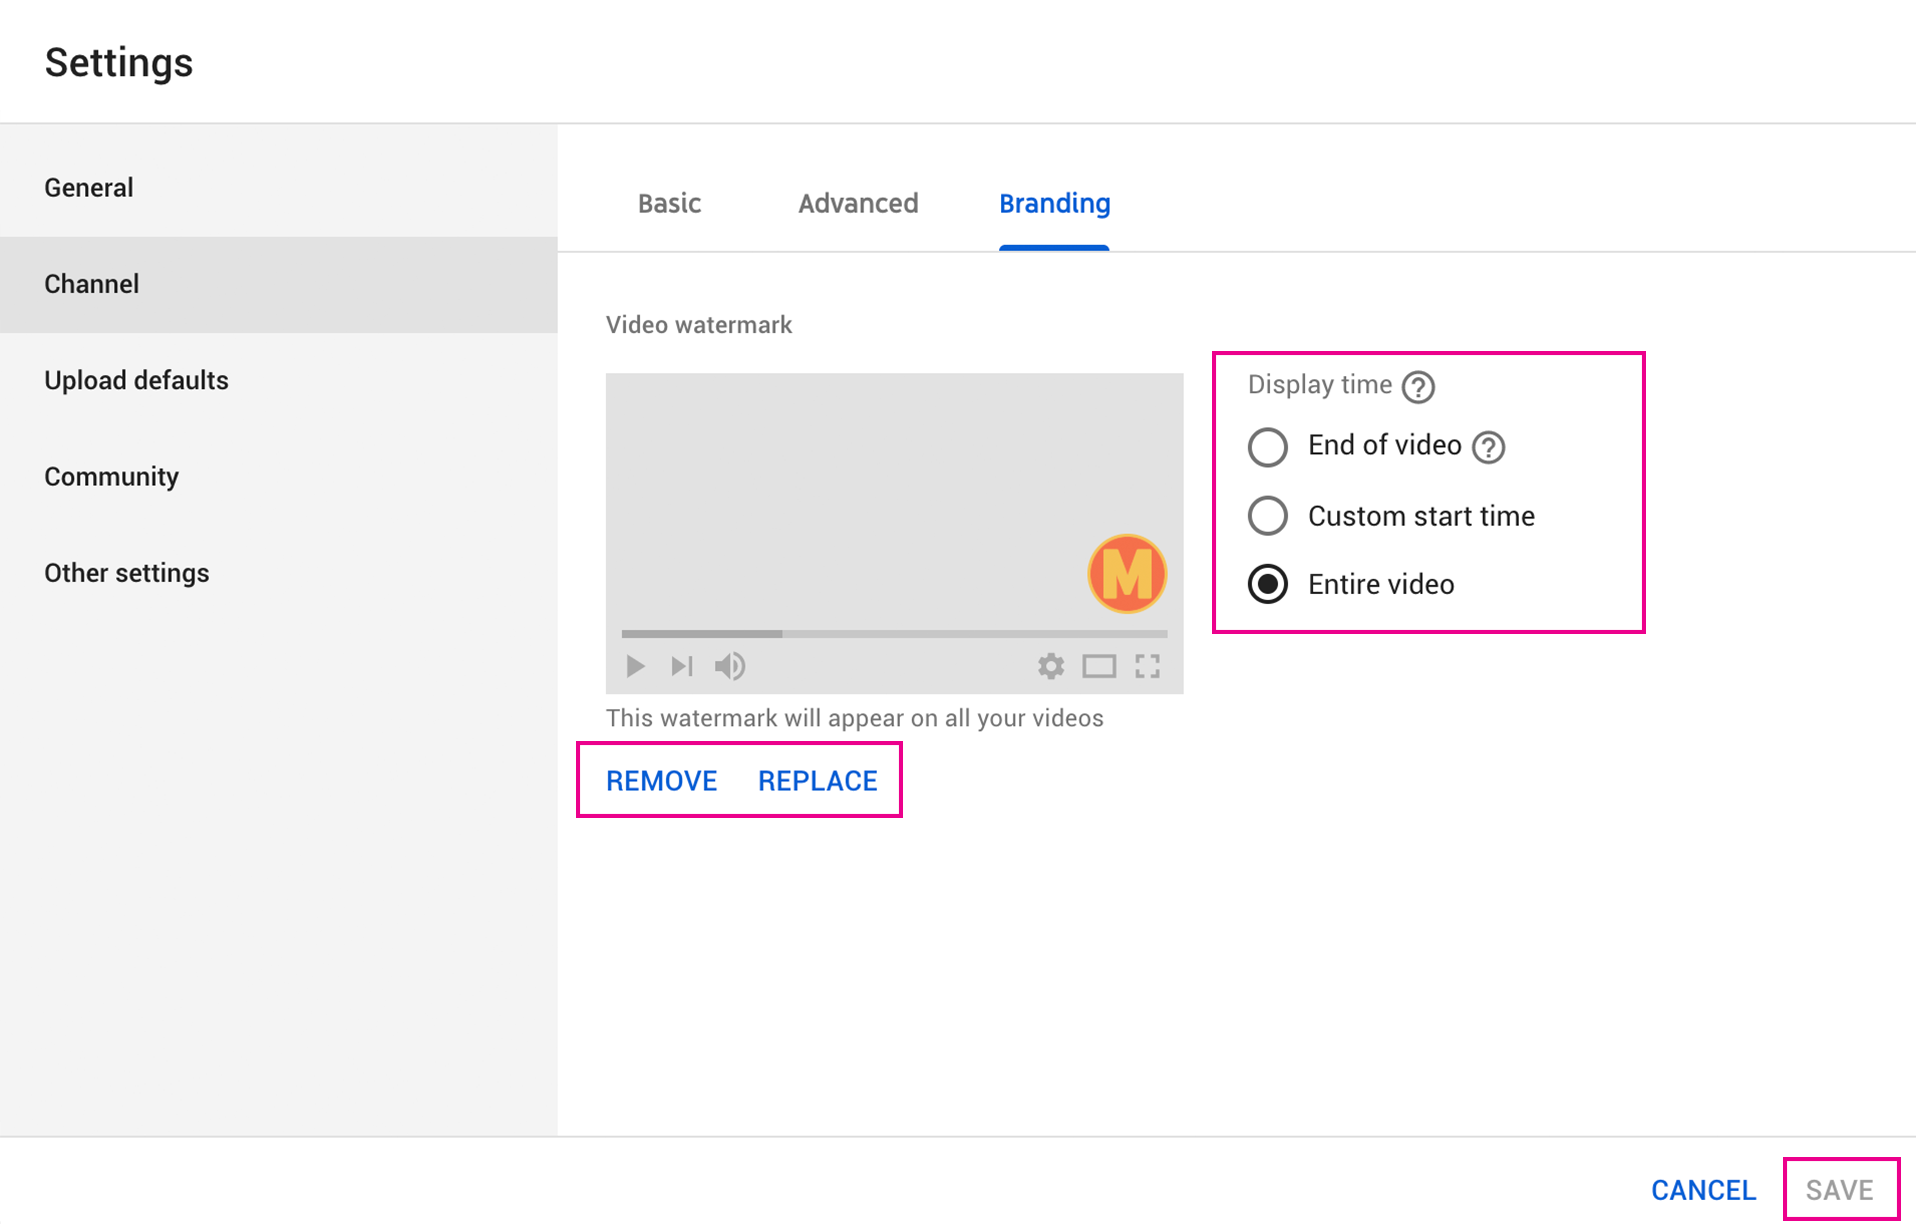 Select Display Time?Remove/Replace if necessary?Click Save to Add Watermark

